XWNB5221 - Network card / adapter NETGEAR - Free user manual and instructions
Find the device manual for free XWNB5221 NETGEAR in PDF.

| Product Type | Powerline Network Adapter |
| Model | XWNB5221 |
| Brand | NETGEAR |
| Data Transfer Rate | Up to 500 Mbps |
| Ports | 2 x 10/100/1000 Gigabit Ethernet |
| Power Supply | Integrated power plug, AC 100-240V |
| Dimensions (L x W x H) | Approx. 10.5 x 6.6 x 7.2 cm |
| Weight | Approx. 170 g |
| Wireless Standard | HomePlug AV |
| Security | 128-bit AES encryption with Push 'N' Pair button |
| Operating Temperature | 0°C to 40°C |
| Humidity | 10% to 90% non-condensing |
| LED Indicators | Power, Ethernet, Powerline status |
| Plug Type | EU, UK, US depending on region |
| Compatibility | All HomePlug AV compliant devices |
| Maintenance | Wipe with dry cloth; no liquids |
| Spare Parts | Not available separately; unit is sealed |
| Repairability | Not user-serviceable; contact support |
Frequently Asked Questions - XWNB5221 NETGEAR
User questions about XWNB5221 NETGEAR
0 question about this device. Answer the ones you know or ask your own.
Ask a new question about this device
Download the instructions for your Network card / adapter in PDF format for free! Find your manual XWNB5221 - NETGEAR and take your electronic device back in hand. On this page are published all the documents necessary for the use of your device. XWNB5221 by NETGEAR.
USER MANUAL XWNB5221 NETGEAR
natural_image
Two white wireless devices: a beige NETGEAR device and a white NETGEAR Essentials Edition device, both with ports and indicator lights (no visible text or symbols on the devices themselves).NETGEAR®
Package Contents
In some regions, a resource CD is included with your product.
natural_image
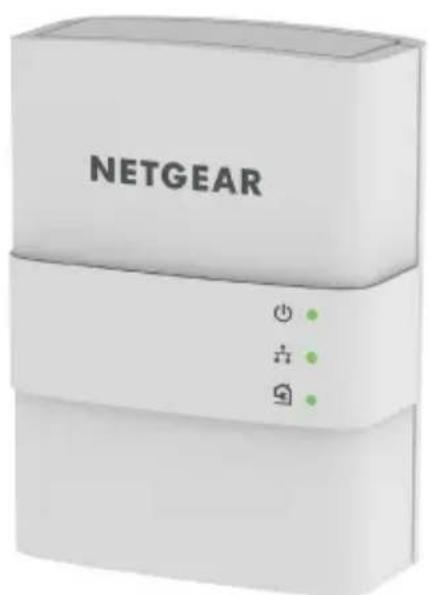
White NETGEAR device with indicator lights and power button (no readable text beyond brand name)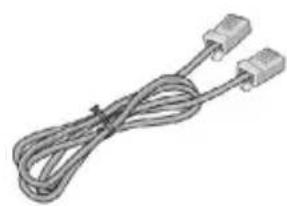
natural_image
Coiled electrical cable with two connectors (no text or symbols visible)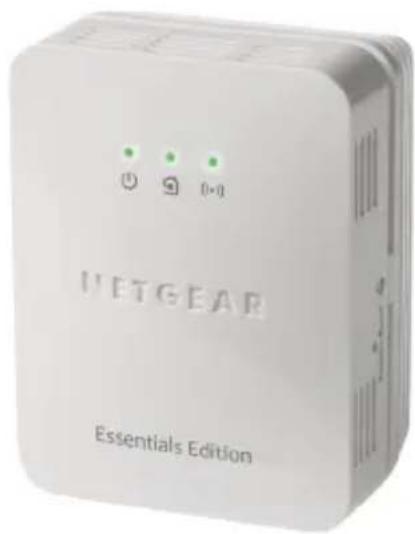
text_image
UETGEAR Essentials Edition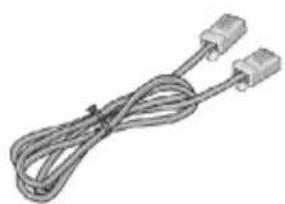
natural_image
Coiled electrical cable with two connectors (no text or symbols visible)Getting Started
Powerline networking solutions give you an alternative to Ethernet-only or wireless networks by extending your signal using the electrical wiring. Plug 2 or more compatible Powerline 500 devices into electrical outlets to create or extend your wired home network. In addition to Powerline 500 devices, you can add Homeplug AV-certified adapters, for a total of up to 16 devices. For a complete list of Homeplug AV-certified devices, visit www.homeplug.org/certified_products.
You can use the Pick A Plug feature to choose the best combination of outlets.
You can use the Security button on each Powerline device to secure the links between the Powerline devices.
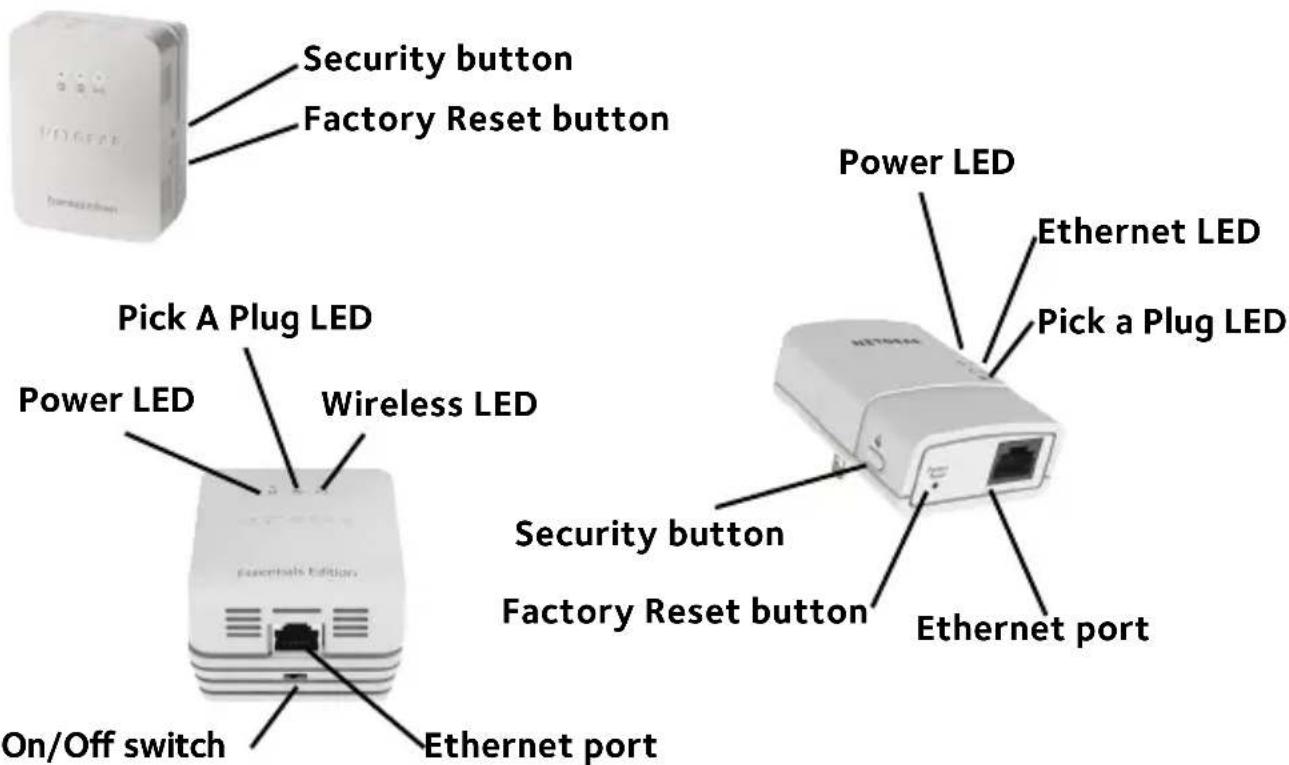
Meet Your Adapters
Before you install your adapters, familiarize yourself with the LEDs, buttons, and port.
Powerline 500 WiFi Access Point (XWN5021)
Powerline 500 Adapter (XAV5221)
text_image
Security button Factory Reset button Pick A Plug LED Power LED Wireless LED On/Off switch Ethernet port Security button Factory Reset button Ethernet port Power LED Ethernet LED Pick a Plug LEDPower LED Solid green. The electrical power is on.

Blinking amber. The adapter is in power saving mode.
Blinking green. The adapter is in the process of setting up security.
Off. The electrical power is off.
Wireless access points can take up to 30 seconds to power on.
Ethernet LED Solid. The Ethernet port is linked.

Off. The Ethernet port is not linked.
Pick A Plug LED The Pick A Plug feature lets you pick the electrical outlet with the strongest link rate, indicated by the color displayed by the LED:

Solid. The adapter is connected to a Powerline network.
• Green. Link rate > 80 Mbps (best)
- Amber. Link rate > 50 and < 80 Mbps (better)
• Red. Link rate < 50 Mbps (good)
Off. The adapter did not find any other compatible Powerline devices using the same encryption key.
Wireless LED Solid. The Powerline wireless access point is securely paired with the wireless network client.

Blinking. The Powerline wireless access point is pairing with the wireless network client.
Factory Reset button
Press the Factory Reset button for one second, then release it to return the Powerline adapter to its factory default settings.
Ethernet port Connect your computers, networking equipment, and other equipment that uses an Ethernet cable to your Powerline network.
On/Off switch Slide to turn the adapter off or on.
Security button Use the Security button to create a secure Powerline network. On your WiFi access point, use the Security button both to create a secure Powerline network and to let your wireless clients join the wireless network.
Warning: Do not press the Security button on the Powerline adapter until installation is complete and the adapters are communicating with each other (indicated by the blinking Pick A Plug LED). Pressing this button too soon can temporarily disable Powerline communication. If this occurs, use the Factory Reset button to return the Powerline adapter to its factory default settings.
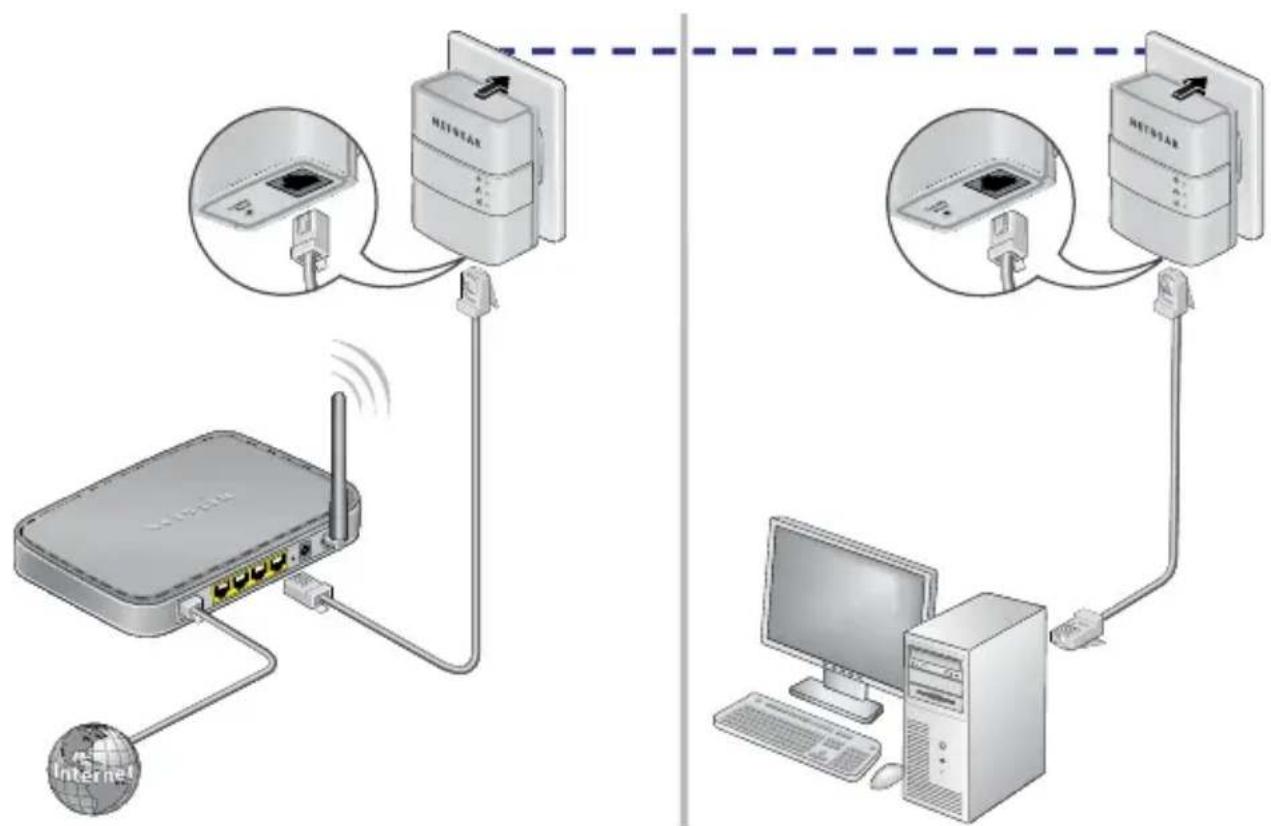
Install Your Adapters
Room 1 Room 2
flowchart
graph TD
    A["Internet"] --> B["Router"]
    B --> C["NETSTAR Server"]
    C --> D["Desktop Computer"]
    style A fill:#f9f,stroke:#333
    style B fill:#ccf,stroke:#333
    style C fill:#cfc,stroke:#333
    style D fill:#fcc,stroke:#333
Secure Your Network
To create a secure network:
- Plug in your adapters, including the WiFi access point adapter.
- Wait until the Pick A Plug LEDs are blinking.
- Press the Security button on one of the adapters for two seconds, then press the Security button on one of the other adapters in your existing network for two seconds.
Both buttons must be pressed within two minutes. - If you are installing additional adapters, repeat step 3 with one of the secure adapters and one of the adapters that is not yet secured.
Note: The Security button does not work in power saving mode (see Troubleshooting Tips on page 13).
Warning: Do not press the Security button on the Powerline adapter until installation is complete and the adapters are communicating with each other (indicated by the blinking Pick A Plug LED). Pressing this button too soon can temporarily disable Powerline communication. If this occurs, use the Factory Reset button to return the Powerline adapter to its factory default settings.
- Secure your WiFi access point. You can create a secure WiFi connection between your Powerline WiFi access point and your wireless devices in two ways: use NETGEAR genie or, for wireless devices that support it, WPS (Wi-Fi Protected Setup).
To secure the WiFi network using NETGEAR genie:
a. Download and install NETGEAR genie.
To download the version of genie for your computer, visit www.netgear.com/home/discover/apps/genie.aspx.
b. Temporarily connect your computer to the Ethernet port on the Powerline WiFi access point.
c. Run NETGEAR genie.
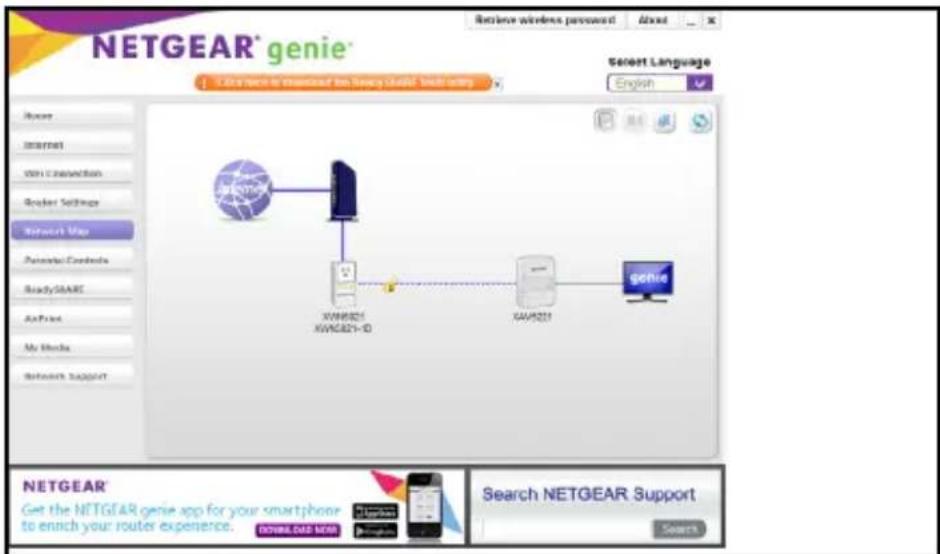
text_image
NETGEAR® genie™ Login screen to download the New York Guide® link story Select Language English Internet View Connection Reader Settings Network Map Parameters Contents ReadySHARE AppPrint My Media Network Support XW6821 XW6821-ID GAW821 Gene NETGEAR® Get the NETGEAR genie app for your smartphone to enrich your router experience. NETGEAR Genie App Search NETGEAR Support GETWEER GENIE Selectd. Right-click the Powerline WiFi access point's icon.
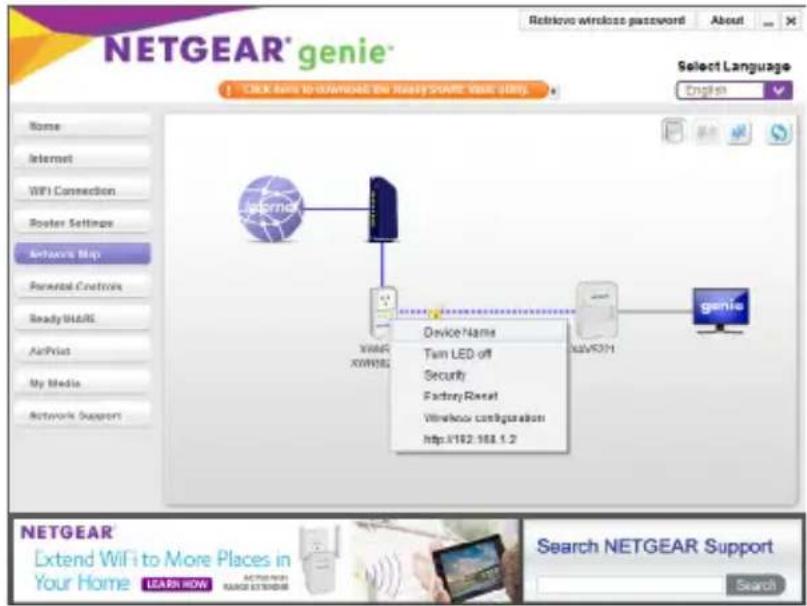
text_image
NETGEAR® genie® SELECT Language English Device Name Turn LED off Security Factory Reset Wireless configuration http://162.168.1.2 NETGEAR® Extend WiFi to More Places in Your Home LEARN HOW Search NETGEAR Support Searche. Select Wireless Configuration.
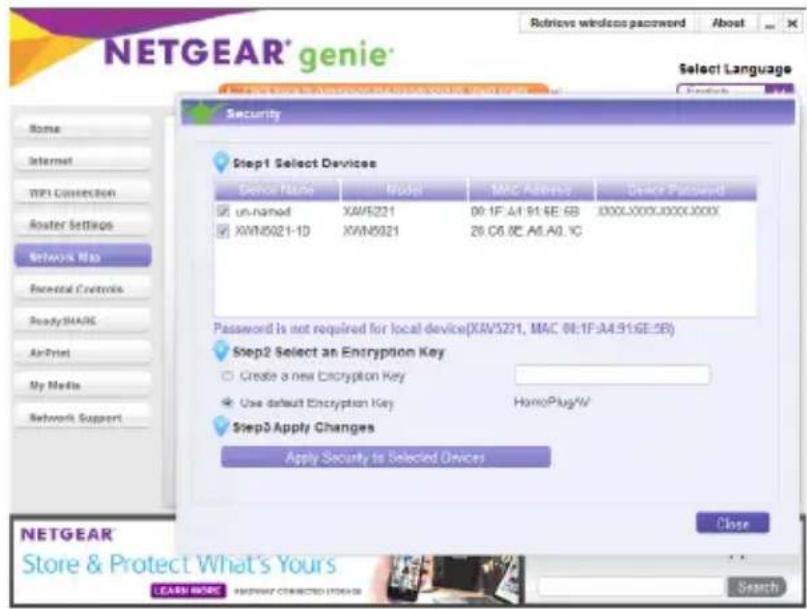
text_image
NETGEAR® genie® Retrieve wireless password About Select Language Home Internet MPI Connection Router Settings Network Map Parental Controls ReadySHARE AirPrint My Media Network Support Security Step1 Select Devices Delete Name Model MAC Address Distance Password un-named XAVS221 00:1F: A1:91:5E: 6B 300X:000X:000X:000X XWIN5021-1D XWIN5021 28.06.8C:A1.A0.1C Password is not required for local device(XAVS221, MAC 00:1F: A4:91:5E:5B) Step2 Select an Encryption Key Create a new Encryption Key Use default Encryption Key HomoPlugW Step3 Apply Changes Apply Security to Selected Devices Close NETGEAR® Store & Protect What's Yours LEARN MORE BUXWAY CONNECTED ITEMS Searchf. Enter the wireless settings.
To secure the WiFi network using WPS:
a. Press the WPS button on the wireless client.
b. Press and hold the Security button on the wireless access point for about two seconds and release it.
The Wireless LED blinks.
When the Wireless LED stops blinking, the wireless pairing is done, and the wireless device is securely connected to the Powerline WiFi access point.
Add Adapters
To add an adapter to a Powerline network with security set:
- Plug in and connect the new adapters.
- On any of the adapters that are already a part of the secure network, press and hold the Security button for two seconds.
- On the new adapter, press and hold the Security button for two seconds.
Both buttons must be pressed within two minutes.
Troubleshooting Tips
Power LED is off. Make sure that power is supplied to the electrical
outlet, and that the Powerline devices are not plugged into an extension cord, power strip, or surge protector.
Power LED is blinking amber.
Power saving mode occurs when the Ethernet LED is off. This can occur in the following circumstances:
• The Ethernet cable is unplugged.
- The device connected through the Ethernet cable is turned off.
- The adapter is idle for 10 minutes.
It returns to normal mode within two seconds after the Ethernet link is up.
Pick A Plug LED is off.
- If you set network security, make sure that all Power line devices are using the same encryption key. For more information, see the online user manual.
- Press the Factory Reset button on each device for one second to return the Powerline adapter to its factory default settings.
Pick A Plug LED is amber or red.
Move the Powerline device closer to the other Powerline devices.
Technical Support
Thank you for purchasing this NETGEAR product. After installing your device, locate the serial number on the label of your product and use it to register your product at https://my.netgear.com. You must register your product before you can use NETGEAR telephone support. NETGEAR recommends registering your product through the NETGEAR website.
For product updates and web support, visit http://support.netgear.com.
NETGEAR recommends that you use only the official NETGEAR support resources. You can get the user manual online at http://downloadcenter.netgear.com or through a link in the product's user interface.
Trademarks
© NETGEAR, Inc., NETGEAR and the NETGEAR Logo are trademarks of NETGEAR, Inc. Any non-NETGEAR trademarks are used for reference purposes only.
Compliance
For the current EU Declaration of Conformity, visit http://support.netgear.com/app/answers/detail/a_id/11621/.
For regulatory compliance information, visit http://www.netgear.com/about/regulatory/.
See the regulatory compliance document before connecting the power supply.

201-19263-01
May 2015
NETGEAR, Inc.
350 East Plumeria Drive San Jose, CA 95134, USA
