
Digistat DT10RF - Thermostat BOSCH - Free user manual and instructions
Find the device manual for free Digistat DT10RF BOSCH in PDF.


| Product Type | Programmable Radio Frequency Room Thermostat with Domestic Hot Water Programmer |
| Brand | Bosch (Worcester Bosch Group) |
| Model | Digistat DT10RF |
| Transmitter Dimensions | 137 x 96.5 x 31.3 mm |
| Power Supply (Receiver) | 24 V |
| Power Supply (Transmitter) | 3 V (2 x AA Alkaline batteries) |
| Radio Frequency | 433 MHz |
| Radio Signal Range | Up to 30 m typical (varies with building construction) |
| Temperature Control Range | 5°C to 32°C |
| Ambient Operating Temperature (Receiver) | 0°C to +50°C |
| Ambient Operating Temperature (Transmitter) | 0°C to +40°C |
| Humidity Range (Receiver) | 30% to 95% non-condensing |
| Humidity Range (Transmitter) | 25% to 90% non-condensing |
| Protection Class (Receiver) | IP24 |
| Protection Class (Transmitter) | IP30 |
| Clock Accuracy | Better than ±1 sec/day |
| Battery Life (Transmitter) | Approx. 2 years (alkaline) |
| Battery Backup (Time/Date) | 10 years min. |
| Shortest Switching Period | 1 minute |
| Central Heating Programs | 6 time/temperature events per day (24-hour) |
| Hot Water Pre-Heat Programs (Receiver) | 3 ON/OFF periods per day (weekday/weekend) |
| Pre-Set Programs | 3 (Program 1: Default, Program 2: Home for lunch, Program 3: Home Worker) |
| Special Features | Automatic daylight saving adjustment, holiday mode, keypad lock, temperature offset, intelligent delayed start, frost protection |
| Maintenance | Wipe with dry cloth; do not use polish or detergents |
| Included Accessories | Receiver unit, transmitter unit, wall plugs & screws, 2 x AA alkaline batteries, instruction manual |
Frequently Asked Questions - Digistat DT10RF BOSCH
User questions about Digistat DT10RF BOSCH
0 question about this device. Answer the ones you know or ask your own.
Ask a new question about this device
Download the instructions for your Thermostat in PDF format for free! Find your manual Digistat DT10RF - BOSCH and take your electronic device back in hand. On this page are published all the documents necessary for the use of your device. Digistat DT10RF by BOSCH.
USER MANUAL Digistat DT10RF BOSCH
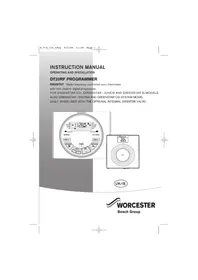
DIGISTAT - Radio frequency controlled programmable room thermostat
with domestic hot water programmer
FOR GREENSTAR CDi, GREENSTAR i JUNIOR AND GREENSTAR Si MODELS
ALSO GREENSTAR i SYSTEM AND GREENSTAR CDi SYSTEM MODELS
(ONLY WHEN USED WITH THE OPTIONAL INTEGRAL DIVERTER VALVE)

UK/IE

WORCESTER
Bosch Group

WORCESTER, BOSCH GROUP:
TECHNICAL 08705 266241
SERVICE 08457 256206
SPARES 01905 752571
LITERATURE 01905 752556
TRAINING 01905 752526
SALES 01905 752640
WEBSITE worcester-bosch.co.uk
PLEASE READ THESE INSTRUCTIONS CAREFULLY BEFORE STARTING
THESE INSTRUCTIONS ARE APPLICABLE TO THE WORCESTER BOSCH MODEL(S) STATED ON THE FRONT COVER OF THIS MANUAL ONLY AND MUST NOT BE USED WITH ANY OTHER MAKE OR MODEL
THESE INSTRUCTIONS APPLY IN THE UK ONLY AND SHOULD BE FOLLOWED EXCEPT FOR ANY STATUTORY OBLIGATION
IF YOU ARE IN ANY DOUBT CONTACT WORCESTER BOSCH TECHNICAL HELPLINE
THIS ACCESSORY MUST BE FITTED BY A COMPETENT PERSON. FAILURE TO COMPLY COULD LEAD TO PROSECUTION.
LEAVE THESE INSTRUCTIONS WITH THE USER OR AT THE APPLIANCE.
SYMBOLS

Domestic Hot Water

Radio Frequency (RF) Transmitter
PROTECT YOUR ENVIRONMENT

PROPER BATTERY RECYCLING
Electronic devices and batteries, rechargeable or not, should not be disposed of into ordinary household waste. Instead, they must be recycled properly to protect the environment and cut down the waste of precious resources. Your local waste management authority can supply details concerning the proper disposal of batteries.
ABBREVIATIONS
CH = Central Heating
DHW = Domestic Hot Water
RF = Radio Frequency
DLS = Daylight Saving
BST = British Summer Time
GMT = Greenwich Mean Time
C = Celsius (Centigrade)
IP = Ingress Protection
V = Volt
m = metre
mA = milliAmpere
DEFINITIONS (DLS/BST)
Summer time begins: Last Sunday in March at 1:00 am GMT (Clocks are put forward by 1 hour)
Summer time ends: Last Sunday in October at 2:00 am BST (Clocks are put back by 1 hour)
CONTENTS
TECHNICAL DATA 1
GENERAL INFORMATION 2
DIGISTAT OPERATING CONTROLS ....3
PRE-PROGRAMMED SETTINGS ....4
ADJUSTING TIME AND TEMPERATURE ....5
DIGISTAT / USER OPTIONS 7
RECEIVER 13
OPERATIONAL CONTROLS ....13
PRE-SET PROGRAMS ....15
PROGRAMMABLE SETTINGS ....16
RECEIVER INSTALLATION 22
DIGISTAT INSTALLATION....23
SETTING UP RF LINK 23
MOUNTING DIGISTAT 25
CHECK PREVIOUSLY INSTALLED UNITS .....26
CANCEL SIGNAL STRENGTH 27
DIGISTAT / INSTALLER OPTIONS .....28
BATTERY CHANGE ....30
MAINTENANCE....31
TECHNICAL DATA
| DESCRIPTION UNITS DT10RF Receiver | Digistat Transmitter | ||
| Dimensions mm -- 137 x 96.5 x 31.3 | |||
| Electrical supply V 24 3 | |||
| Radio frequency MHz 433 433 | |||
| Radio signal range The range may be affected by the composition / density and number of walls between the Digistat RF and receiver.30 metres typically, through two internal plasterboard walls and a ceiling.26 metres typically, through three internal plasterboard walls and a ceiling.17 metres typically, through two internal plasterboard walls a ceiling and one external cavity wall.These distances are provided for guidance only, many factors can affect the range of the transmitter, including metal pipework, appliances and even furniture. | |||
| Temperature range | °C | 5 to 32 | 5 to 32 |
| Ambient operating temperature | °C | 0 to +50 | 0 to +40 |
| Humidity operating range | % non condensing up to 45°C | 30 to 95 | 25 to 90 |
| Class of operation | II | -- | |
| Degrees of protection | IP | 24 | 30 |
| Accuracy at 25°C | sec/day | better than ±1 | - |
| Battery life (with alkaline batteries) | years | N/A | approx. 2 |
| Battery back up time and date | years min. | 10 | 10 |
| Shortest switching period | minutes | 1 | 1 |
| Hot water pre-heat settings | number | 3 ON / 3 OFF | -- |
| Central heating settings number -- | 6 | ||
| Hot water and Central heating programs | days | 7 | 1 |
EC Directives:
European Union Law Directive 2000/84/EC
Low Voltage Directive (2006/95/EC)
Electro-Magnetic Compatibility Directive (89/336/EEC)
EC Marking Directive (93/68/EEC)
STANDARD PACKAGE:
Programmable RF receiver
Remote RF transmitter
Screws (x2)
Wall Plugs (x2)
Instructions
Batteries (x2) AA Alkaline
GENERAL INFORMATION
PROGRAMMABLE THERMOSTATS
What is a programmable room thermostat?
A programmable room thermostat is both a programmer and a room thermostat. A programmer allows you to set 'On' and 'Off' time periods to suit your own lifestyle.
A room thermostat works by sensing the air temperature, switching on the heating when the air temperature falls below the thermostat setting, and switching it off once this set temperature has been reached.
So, a programmable room thermostat lets you choose what times you want the heating to be on, and what temperature it should reach while it is on. It will allow you to select different temperatures in your home at different times of the day (and days of the week) to meet your particular needs.
Turning a programmable room thermostat to a higher setting will not make the room heat up any faster. How quickly the room heats up depends on the design of the heating system, for example, the size of boiler and radiators.
Neither does the setting affect how quickly the room cools down.
Turning a programmable room thermostat to a lower setting will result in the room being controlled at a lower temperature, and saves energy.
The way to set and use your programmable room thermostat is to find the lowest temperature settings that you are comfortable with at the different times you have chosen, and then leave it alone to do its job.
The best way to do this is to set low temperatures first, say 18°C, and then turn them up by one degree each day until you are comfortable with the temperatures.
You won't have to adjust the thermostat further. Any adjustments above these settings may waste energy.
If your heating system is a boiler with radiators, there will usually be only one programmable room thermostat to control the whole house.
But you can have different temperatures in individual rooms by installing thermostatic radiator valves (TRVs) on individual radiators.
If you don't have TRVs, you should choose a temperature that is reasonable for the whole house. If you do have TRVs, you can choose a slightly higher setting to make sure that even the coldest room is comfortable, then prevent any overheating in other rooms by adjusting the TRVs.
Programmable room thermostats need a free flow of air to sense the temperature, so they must not be covered by curtains or blocked by furniture. Nearby fires, televisions, wall or table lamps may prevent the thermostat from working properly.
GENERAL INFORMATION
OPERATING CONTROLS
Digistat Programmable Thermostat
The Digistat Programmer has factory set programs for ON/OFF periods for central heating which are described on the following pages.
These factory installed settings can be used without any further programming.
Clock Setting
The Digistat Programmable Thermostat is fitted with a real-time clock, which is pre-set at the factory. You will not have to set the time.
A special feature of this real-time clock is to automatically update the time during the summer/winter time change removing the need to manually alter the clock.

NOTE: The temperature displayed is actual room temperature unless adjusting the + or - button when the set temperature is displayed. Once adjustment is complete and after a 5 second delay the display will return to the actual room temperature.
General Operation
With the unit in Auto mode (the small arrow to bottom of screen will point to Auto) the temperature can be changed for a short time by using the + or - buttons. Changing the temperature in this way will keep the Programmer set to your new temperature until the next pre-programmed event (at which time it will revert to programmed temperature). The temperature you are setting will flash on the screen. Once temperature is set, the unit will revert to showing the current temperature. The flame indicator will show on the screen if the heating is turned on.
DIGISTAT
PRE-PROGRAMMED SETTINGS
The Digistat Programmer
This is a 24-hour programmable thermostat product (the same program for every day of the week) which allows you to set up to 6 time and temperature events per day.
Pre-set Program 1
The following default settings are pre-programmed for your convenience:
Every day
As shown, at 06:30, the heating will come on to raise the temperature to 20°C. At 08:30, the temperature set point is dropped from 20°C down to 16°C, it stays at 16°C throughout the day, until 16:30 when the temperature increases to 21°C. The temperature then drops down to a night-set-back temperature of 7°C until 06:30 when the cycle repeats for the next day.
| Event 1 | 2 3 4 | 5 6 | ||||
| Time 0 | 6:30 0 | 8:30 1 | 2:00 1 | 4:00 1 | 6:30 2 | 22:30 |
| Temp. | 20 | 16 | 16 | 16 | 21 | 7 |

To switch the thermostat OFF:
Press the + and - simultaneously for 5 seconds until the OFF is displayed.
The thermostat and heating system will now be OFF unless the temperature in the controlled space falls below 7°C, the frost protection set point.
Please note this does not affect the operation of the domestic hot water where provided.
To switch ON the thermostat, press any key to return to auto mode.
PROGRAMMABLE SETTINGS
ADJUSTING TIMES & TEMPERATURES


Digistat Programmer - 24 hour operation
- With the product operating as normal in Auto mode, press > twice until the time display is flashing as shown.
- Use the + or - buttons to adjust the 1st time as required.
- When the time has been set, press > to confirm. The temperature display will now be flashing.
- Use the + or - button to adjust the required temperature.
NOTE: A small 1 in the lower half of the screen shows the time period being set. e.g., 1 = 1st period, 2 = 2nd period, etc.

- When the temperature has been set, press > to confirm and move to the next time and temperature periods to be adjusted, confirming changes by pressing the > button (max 6 time periods).

- To exit, press < or > until you return to auto mode with the bottom arrow pointing to auto (as shown).

To change temperature for a short period (Override):
- Press + or - buttons to adjust the set temperature. The set temperature will flash as shown.
PROGRAMMABLE SETTINGS
ADJUSTING TIMES & TEMPERATURES

Two chevrons indicate override mode.

- After 5 seconds the Digistat will start controlling at the selected set point but now displays actual room temperature. Two chevrons indicates override mode.
- To exit override press > once or wait until next change in the pre-set program (i.e. when period 5, in this case, becomes period 6).
To set a constant room temperature (Manual mode):
- Press < once, the display shows temperature flashing (e.g. 20° C).
- Press + or - buttons to adjust the temperature as required. The temperature will stop flashing after 5 seconds and start controlling at this temperature.
- Press > once, to return to auto mode.
To set holiday mode:
- Press < twice, the display shows time flashing.
Time periods between 1 to 23(Hr) hours and 1 to 199(d) days can be set.
- Press + or - buttons to adjust the countdown time as required.


Holiday mode indicator
DIGISTAT
USER OPTIONS


- Press > once to confirm, the display will show temperature flashing.
- Press + or - buttons to adjust temperature and press > to start holiday countdown time.
Alternatively after 10 seconds the temperature will stop flashing and holiday countdown time will start. Display shows countdown time and ambient room temperature.

Auto mode indicator
- To exit holiday mode press the once, to return to auto.


User Options
User Options (shown in table on page 8) can be accessed from Auto or Man by pressing < and > simultaneously for 3 seconds.
When you have accessed the User Options Menu press > to scroll through selectable options.
The settings for each option can be changed by pressing + or - as required.
Pressing > accepts the change and moves to the next option.
NOTE: To exit User Options press < and > simultaneously for 3 seconds.
Alternatively, not pressing any buttons for 2 minutes will cause the Programmer to return to Auto.
This figure opposite shows option "01 24" (24 hour clock).
Only options that have been accepted by pressing > will be changed.
DIGISTAT
USER OPTIONS
| Option | Description of Option Min Max Default | |||
| 01 Change clock 12h/24h 12 24 24 | ||||
| 02 Change pre-set program 1 3 1 | ||||
| 03 Change number of program events per day | 2,4 or 6 6 | |||
| 04 Switch on/off daylight saving time change | On | Off On | ||
| 05 Adjust date and time | Factory set | |||
| 06 | Change temperature offset °C | -5 | 5 | 0 |
| 07 | Restore pre-set program | On | Off | Off |
| 08 | Disable OFF function | On | Off | On |
| 09 | Access protection lock | On | Off | Off |

Option 01 Change from 24hr to 12hr clock.
- Enter user options by pressing < and > simultaneously for 3 seconds.
- Select option 01 by pressing > until 01 appears.
- Use + and - keys to select desired option setting, 12 = 12hr and 24 = 24hr.
Press > to accept change.

Option 02 Change to program 1, 2 or 3.
- Enter user options by pressing < and > simultaneously for 3 seconds.
- Select option 02 by pressing > until 02 appears.
- Use + and - keys to select desired program 1, 2 or 3. 1 = program 1, 2 = program 2, 3 = program 3 etc.
Press > to accept change.
Preset programs 2 and 3 are shown below:
Pre-set Program 2 (Home for lunch) 24 hours
| Event | 1 | 2 | 3 | 4 | 5 | 6 |
| Time | 6:30 | 8:30 | 12:00 | 14:00 | 16:30 | 22:30 |
| Temperature | 21 | 16 | 21 | 16 | 21 | 10 |
At 06:30 the heating raises the temperature to 21°C.
At 08:30, the temperature set point is dropped to 16°C, until 12:00 when the heating raises the temperature to 21°C. The temperature stays at 21°C until 14:00 when it drops to 16°C. At 16:30 the heating raises the temperature to 21°C where it stays until 22:30 when the temperature drops down to a night setback temperature of 10°C until 06:30 when the cycle repeats the next day.
Pre-set Program 3 (Home Worker) 24 hours
| Event 1 2 3 4 | 5 6 | |||||
| Time 6:00 8:30 | 12:00 14:00 | 17:30 | 22:30 | |||
| Temperature | 21 19 21 19 21 | 16 |
As you can see, at 06:00, the heating will come on to raise the temperature to 21°C.
At 08:30, the temperature set point is dropped to 19°C, it stays at 19°C until 12:00 when the heating comes on to raise the temperature to 21°C. The temperature stays at 21°C until 14:00 when it drops to 19°C. At 17:30 the heating comes on to raise the temperature to 21°C where it stays until 22:30 when the temperature drops down to a night setback temperature of 16°C until 06:00 when the cycle repeats the next day.
Option 03 How to change the number of program events per day.
- Enter user options by pressing < and > simultaneously for 3 seconds.
- Select option 03 by pressing > until 03 appears.
- Use + and - keys to select option.
2 = 2 time / temp events per day 4 = 4 time / temp events per day 6 = 6 time / temp events per day.
Press > to accept change.
Option 04 How to switch on/off the automatic summer / winter time change.
Twice a year the actual time is automatically changed to keep it in line with the summer / winter time change. Default setting is On. If you wish to disable / enable this feature:


- Enter user options by pressing < and > simultaneously for 3 seconds.
- Select option 04 by pressing > until 04 appears.
- Press - or + key to display Off or On as desired.
Press > to accept change.
DIGISTAT
USER OPTIONS


Date and time setting.
The DT10RF Programmer comes with a pre-set clock, which also automatically adjusts for daylight saving time changes. It is activated automatically on 1st installation. There should be no need to change these settings, however, should you wish to, it can be done in Option 05.
Option 05 How to adjust date and time.
- Enter user options by pressing < and > simultaneously for 3 seconds.
- Select option 05 by pressing > until 05 appears.
- To access the year, press > once and the year selection is displayed. Use the + or - key to select the required year and press > to accept the change. The month selection is now displayed.
- Use the + or - key to select the required month and press > to accept the change. The day selection is now displayed.
- Use the + or - key to select the required day and press > to accept the change. The time selection is now displayed.
- Use the + or - key to select the required time and press > to accept the change. Option 6 is now displayed.
DIGISTAT
USER OPTIONS

Option select

NOTE: Option 5 must be completed or at least "stepped through" using the > key before option 6 can be accessed.
Option 06: How to change temperature offset.
The temperature displayed on the thermostat may not match that of other temperature measuring devices in the controlled space, because of its location.
The displayed temperature may be offset to bring it in line with other devices.
- To adjust the temperature, enter the user options by pressing < and > simultaneously for 3 seconds.
- Select option 06 by pressing > until 06 appears.
- The temperature may be offset by +/- 5 degrees by pressing the + and - keys.
Press > to accept the desired change.
Option 07: How to restore the built-in time temperature programs.
NOTE: Switching this option on will delete any user changes to the preset programs.
- Enter the user options by pressing < and > simultaneously for 3 seconds.
- Select option 07 by pressing > until 07 appears.
- Use + and - keys to select desired option. Off = current programs retained. On = restore factory program settings.
Press > to select the desired change.
The option 07 display automatically reverts back to off.

Option select

Option select
Option 08: How to disable the OFF function.
- To disable the Off function, enter user options by pressing < and > simultaneously for 3 seconds.
- Select option 08 by pressing > until 08 appears.
- Use + or - keys to select Off.
Press > to accept change.
It is now not possible to switch the Digistat Off using the + and - keys as previously described.
To enable the Off function return to option 08 and select On. Press > to accept change.
DIGISTAT
USER OPTIONS

Option 09 How to lock the key pad - Access Protection Lock.
The access protection lock allows you to lock the Digistat Optimiser so that it cannot have any adjustments.
The default is Off mode allowing you to adjust the Digistat.
- To Lock the Digistat settings enter the user options by pressing < and > simultaneously for 3 seconds.
- Select option 09 by pressing > until 09 appears.
- Use + or - keys to select On.
Press > to accept.

Once the User Options Menu is exited all buttons will be locked.
- To switch off the Protection Lock enter the user options by pressing < and > simultaneously for 3 seconds.
- Change to Off.
Press > to accept.
Once the User Menu is exited all buttons will be free to adjust.
NOTE: To exit User Options press < and > simultaneously for 3 seconds.
Special Note:
The following only applies when the Intelligent delayed start feature is enabled.
Ask your installer for details
When the delay period is operating indicated by the flame symbol flashing, pressing any button returns the DT10RF Programmer to auto mode allowing normal button operation until the next time/temperature event, when it will resume the delay start mode or follows the Holiday, Manual, Override or Off modes as selected. Changes to the installer options and pre-set programmes must be made with the flame symbol not flashing
What is Intelligent delayed start.
The Intelligent Delayed Start is an energy saving feature which automatically reduces the warm up time for the heating system.
As the weather becomes milder, Intelligent Start will delay the heating start times so that the fuel is not wasted bringing the room up to temperature earlier than necessary.
NOTE: See page 28 for further information and set up details.
DT10RF RECEIVER
OPERATING CONTROLS
DT10RF Receiver Programmer
The Programmer has factory set programs for ON/OFF periods for hot water pre-heat, which are described on the following pages.
These factory installed settings can be used without any further programming.
This section also details how to program the DT10RF Receiver with new weekday and weekend times to suit your lifestyle requirements.
How to set the clock, time and date, is also given, but should not require adjustment as these are factory set.
A holiday function is also provided, where you can set the number of days that you are away on holiday.
The boiler will provide frost protection for those number of days.
After that set number of days the boiler will revert to the normal operating program, ready for your return


Hot Water:
- Press select button to choose
▶ off = constantly OFF ▶ timed = up to 3 ON and 3 OFF time periods as programmed ▶ once = ON from first ON until third OFF time period as programmed The default ON/OFF periods pre-programmed for hot water pre-heat are shown in the table opposite. ▶ on = constantly ON

- Press "advance" button:
ON = hot water pre-heat light on (hot water pre-heat stays on until next off time period)
OFF = hot water pre-heat light off (hot water pre-heat stays off until next on time period)
NOTE: Advance has no effect with the constantly on or off selected on the receiver.
DT10RF RECEIVER
PRE-SET PROGRAMS

1st 1st 2nd 2nd 3rd 3rd
NOTE: The ON/OFF periods pre-programmed for Hot Water pre-heat are shown in the table opposite.
The factory installed settings can be used without any further programming of the receiver.
The date and time are pre-programmed and should not require adjustment.
If you need to restore the factory pre-set program times then:
Press the + and - buttons together, for at least 3 seconds, to restore the default program times.
NOTE: Two ON/OFF periods can be used instead of three, by setting the second ON/OFF periods to 12:00 as shown in the default program table.
One ON/OFF period can be achieved by setting the second and third ON/OFF periods to the same time.
See RECEIVER PROGRAMMABLE SETTINGS if changes are required to the clock time or pre-programmed settings.
DT10RF RECEIVER
PROGRAMMABLE SETTINGS


![graph TD A["OK"] --> B["4"] B --> C["set?"] C --> D["6"] D --> E["7"] E --> F["OK"] F --> G["4"] G --> H["set?"] H --> I["6"] I --> J["7"] J --> K["OK"]](/content/2026/05/1039690/images/930666ede583b9f05c69ed766f87f1eca055b2909abe0632e48da1c458f935e8.jpg)


3rd HW OFF

SETTING MON - FRI
- Press set? until SET and PROG? are shown in the display. Press OK to select PROG to continue with programming.
- Press OK to select MON-FRI.
- Press OK to select ON time.
NOTE: Speed up the display by holding down the + or - buttons.
- Press + or - to change the ON time.
- Press set? to set the ON time and select the OFF time.
- Press + or - to change the OFF time.
- Press set? to set the OFF time and select the next ON time.
Repeat operations 4 to 7 to set the second and third ON/OFF times.
NOTE: After pressing set? for the third hot water pre-heat OFF time, the display shows SET MON... see next page.
DT10RF RECEIVER
PROGRAMMABLE SETTINGS
Setting individual weekdays:


NOTE: If you do not require individual weekday times, then press set? until SET SAT-SUN is displayed and continue on the next page.
If you do not wish to change the setting for the day displayed, then press set? until the first day you want to change is displayed.
- Press OK to select weekday.
![graph TD A["Start"] --> B{Set?} B -->|Yes| C["OK"] B -->|No| D["Set?"] C --> E["End"] D --> F["End"]](/content/2026/05/1039690/images/c38dfa6e583deb34b24a10f32cdc56c84bf0f8c10f5b10f68ec1525597914b57.jpg)


- Press OK to select first ON time. NOTE: Speed up the display by holding down the + or - buttons.
- Press + or - to change the ON time.
- Press set? to set the ON time and select the OFF time.
- Press + or - to change the OFF time.
- Press set? to set the OFF time and select the next ON time.
Repeat operations 3 to 6 to set the second and third ON/OFF times.
3rd HW OFF

NOTE: After pressing set? for the third OFF time, SET and the next weekday are displayed. After completing the steps above for FRI, the display shows SET SAT-SUN.
See next page...
DT10RF RECEIVER
PROGRAMMABLE SETTINGS


![graph TD A["Start"] --> B{2} B --> C["OK"] B --> D{2} D --> E["Set?"] E --> F{4} F --> G{OK} F --> H{4} H --> I["Set?"] I --> J{5} J --> K["End"]](/content/2026/05/1039690/images/af2d095499da949fb7d32e1ec9ec13df6bab43069a4899f8bcc0efb946831570.jpg)


Setting SAT - SUN:
- Press OK to select weekend.
NOTE: Speed up the display by holding down the + or - buttons.
- Press + or - to change the ON time.
- Press set? to set the ON time and select the OFF time.
- Press + or - to change the OFF time.
- Press set? to set the OFF time and select the next ON time.
Repeat operations 2 to 5 to set the second and third ON/OFF times.
NOTE: After pressing set? for the third OFF time, SET SAT are displayed.... If you do not require individual weekend times, then press set? until the normal display is resumed.
DT10RF RECEIVER
PROGRAMMABLE SETTINGS


![graph TD A["Start"] --> B{2} B --> C["OK"] B --> D{2} D --> E["End"] E --> F{4} F --> G{4} G --> H["End"] H --> I{5} I --> J{5} J --> K["End"] K --> L{5} L --> M["End"] M --> N{5} N --> O["End"]](/content/2026/05/1039690/images/ccf9065660b2d680668998e67f5c0949a22c216ecfb5d40f595775292ec71103.jpg)


Setting individual weekend days:
NOTE: If you do not require individual weekend times, then press set? until the normal display is shown.
If you do not wish to change the setting for SAT, then press set? until the normal display is shown.
- Press OK to select the day displayed. NOTE: Speed up the display by holding down the + or - buttons.
- Press + or - to change the ON time.
- Press set? to set the ON time and select the OFF time.
- Press + or - to change the OFF time.
- Press set? to set the OFF time and select the next ON time.
Repeat operations 2 to 5 to set the second and third ON/OFF times.
NOTE: After pressing set? for the third hot water pre-heat off time for SAT, the display will show SET SUN. Press OK to set SUN or press set? until the display returns to normal mode.
Holiday settings
- Press the set? button until SET and HDAY are displayed.
- Press OK, the display shows 00.
- Press + or - to set the number of days you require the system to be off.
- Press set? then HDAY is shown in the display and no demand for heating will be made from the programmer. The programmer will return to normal after the set number of days.
To cancel the Holiday setting and return to normal operation, press any button.
NOTE: The programmer counts each pass through midnight as a day.
For example, if you did not want heating from Saturday morning until Tuesday morning, set for three days.
DT10RF RECEIVER
PROGRAMMABLE SETTINGS


Setting the clock and time
- Press the set? button until SET and CLOCK are displayed.
- Press OK.
- Press + to switch between 24hr and 12hr display.
- Press set? to set the clock and the hours display flashes.
- Press + or - to set the correct hour.
NOTE: Speed up the display by holding down the + or · buttons.
- Press the set? button to accept the correct hour and minutes display flashes.
- Press + or - to set the correct minutes.
- Press the set? button to accept the correct minutes. Now SET and DATE will be displayed.
NOTE: If the day displayed is incorrect the date needs resetting. To change the date, refer to SETTING THE DATE on the next page. If you do not wish to change the date, press set? to return to the normal display.
Setting the date
NOTE: If the day displayed is incorrect, the date needs resetting as follows:


- Press the set? button until SET and DATE are displayed.
- Press the OK button once, the year will flash on the display.
- Press + or - to correct the year.


- Press the set? button and the month will flash on the display.
- Press + or - to correct the month.
- Press the set? button and the day will flash on the display.
- Press + or - to correct the day.


- Press the set button, the DLS and ON will flash on the display.
- Press + or - to set for ON or OFF


- Press set twice to return to the normal display.


NOTE: DLS = Day Light Saving time
DT10RF RECEIVER INSTALLATION

DANGER: 230 VOLTS DO NOT TOUCH THE ELECTRICAL COMPONENTS OR CIRCUITS
CAUTION: ISOLATE THE MAINS ELECTRICITY SUPPLY BEFORE STARTING ANY WORK AND OBSERVE ALL RELEVANT SAFETY PRECAUTIONS
OBSERVE ELECTRO-STATIC DISCHARGE PRECAUTIONS. DO NOT TOUCH THE PCB CIRCUIT
NOTE: THIS ACCESSORY MUST BE FITTED BY A COMPETENT PERSON. FAILURE TO COMPLY COULD LEAD TO PROSECUTION.
- Remove the boiler outer casing and control panel fascia to gain access to the heatronic control panel. Release the securing screws. Pull the cover panel upwards to remove. Grip the tab and pull upwards to disengage clips, pull forward to remove blanking plate or existing programmer.
- Align connector pins into the sockets on the PCB and push fully home. Feed the ribbon cable into the recess.
- Align the programmer and locate the clips, push into the slots then downwards to secure. Locate the cover panel in place and secure with the screw. Replace fascia cover and outer casing before switching on the electrical supply and boiler. Switch boiler on when completed. Refer to the User Instructions section for details of pre-set and setting programs.


DIGISTAT
INSTALLATION
DIGISTAT / DT10RF RECEIVER
SETTING UP THE RF LINK


Receiver set up:
After initial start up, the colon, CH and antenna symbols should be flashing on the display.
- Press the set? button 4 times
- Press the OK button once
- Press the set? button 4 times; Lrn and OFF should be displayed
- Press the + button so the display shows ON and a flashing antenna symbol. The learn mode is now ready to receive a signal from the transmitter during the next two minutes.

Transmitter set up:
- Take the Digistat Programmer unit and stand near the boiler.
- Remove the battery cover and fit the batteries.
Transmitter battery compartment


How to fit the batteries
Remove the battery cover using a coin. Insert 2 x 1.5V (AA) Alkaline batteries ensuring correct orientation. Replace the battery cover pressing fully home.

DT10RF PROGRAMMER INSTRUCTION MANUAL B 716 115 493a (02.2009)
OPERATING & INSTALLATION INSTRUCTIONS
DIGISTAT / DT10RF RECEIVER
SETTING UP THE RF LINK
DIGISTAT
INSTALLATION

| LED Indication | Chevrons | RF Strength |
| Green | 4 | Very strong |
| Amber | 3 | Strong |
| Red | 2 | Weak |
| None | 1 | Very weak |
- The symbols on the receiver will stop flashing and the display will show 'SSI, Antenna and ON'.
- Press 'SET' and the display will show 'SSI and Antenna'.
- After a few seconds the display will show '---'.
- Remove the batteries from the transmitter and wait for the display to fade. Press and hold the '+' button while re-inserting the batteries and keep the button depressed until the display shows 'rF'. The transmitter is now in constant transmission mode enabling it to be correctly positioned within the home.
- The receiver display will now show the 'learnt' transmitter code and the antenna' as well as the signal strength as indicated by the chevrons on the right hand side of the display.
- Place the transmitter in the desired final position and return to the boiler to check the receiver display. The ideal transmitter position will result in the receiver display showing 4 chevrons and the LED will be green. For siting advice please refer to "Positioning RF room thermostats" on page 25.
- If the LED is red or no LED is showing and the display indicates 1 or 2 chevrons, the transmitter will need to be re-positioned until the LED changes to amber or green and 3 or 4 chevrons are indicated on the display.
NOTE: If there is no LED and the display shows '-'', there is no signal being received at all from the transmitter. Transmission will resume once the transmitter is re-positioned in a part of the house where an amber or green LED and 3 or 4 chevrons are achieved.
- Once you are happy that, when in the desired location, the transmitter is sending a good signal to the receiver i.e. amber or green and 3 or 4 chevrons, the transmitter can be fixed to the wall.
DIGISTAT
INSTALLATION
DIGISTAT / DT10RF RECEIVER
MOUNTING THE DIGISTAT


To cancel signal strength mode:
- Remove the batteries from the transmitter to cancel the constant transmission.
- After a few seconds the receiver display will show '---'.
- Press 'OK' on the receiver display and the display will return to the time with the 'CH and Antenna' flashing.
- Re-insert the batteries into the transmitter and the RF link will be re-established.
Positioning RF room thermostats
The Digistat is a radio frequency device which is very flexible for positioning as there is no need for hard wiring to the appliance. The device should be mounted in an open area, no closer than 30cm from metal objects, including wall boxes.
Mount the Digistat on a wall which is not subject to direct sunlight or draughts, preferably on an inside wall, 1.5 metres above the floor. The Digistat must also not be directly influenced by radiators or other appliances giving off heat.
Mounting the digistat
- Remove the front cover using a flat screwdriver and separate from back plate.
- Fix the back plate directly onto the wall using suitable wall plugs and screws.
TO CHECK PREVIOUSLY INSTALLED UNIT
DIGISTAT
INSTALLATION


- Replace the front cover by locating in position and pushing fully onto the back cover.
To check signal strength on previously installed and paired units :
- Press the 'set' button 4 times.
- Press 'OK' once.
- Press the 'set' button 5 times. The display will show 'SSI and OFF'.
- Press the '+' button so that the display shows 'SSI, Antenna and ON'.
- Press the 'set' button so the display shows 'SSI and Antenna'.
- After a few seconds the display will show '---'.
- Remove the batteries from the transmitter and wait until the display has faded away.


- Press and hold the '+' button on the transmitter while re-inserting the batteries and keep the button depressed until the display shows 'rF'.
DIGISTAT
INSTALLATION

LED indicator shows different colour depending on signal strength (see table right)
DIGISTAT / DT10RF RECEIVER
TO CHECK PREVIOUSLY INSTALLED UNIT
- Check the receiver LED and chevrons to determine the signal strength now being received.
| LED Indication | Chevrons | RF Strength |
| Green | 4 | Very strong |
| Amber | 3 | Strong |
| Red | 2 | Weak |
| None | 1 | Very weak |


To cancel signal strength mode:
- Remove the batteries from the transmitter to cancel the constant transmission.
- After a few seconds the receiver display will show
- Press 'OK' on the receiver display and the display will return to the time with the 'CH and Antenna' flashing.
- Re-insert the batteries into the transmitter and the RF link will be re-established.
During normal operation
The LED on the receiver will flash red, approximately every 5 minutes. This denotes that a radio signal is being received from the transmitter.
DIGISTAT
INSTALLER OPTIONS


| Installer Options | Function Select | Option | Default | |
| 02 Fre | eze protection On Off Cn | |||
Installer Options
- If you wish to change any of the Installer Options as shown in the table below, enter the Installer Option Menu from Auto mode by pressing: < and + simultaneously for 5 seconds.
Pressing < and + again for 5 seconds will exit the Menu and return to Auto mode.
Once the Installer Options screen has been selected, the < and > buttons allow you to scroll through the Menu (shown below). The + and - allow you to change values.
Once a value has been changed pressing > before exiting the Menu will save the new setting. (The figure shows Option 02 OFF).
Option 02 - Freeze Protection
Freeze protection will switch on the heating if the room temperature falls to 5°C and will then control the temperature at 7°C even if the Digistat is in OFF mode.
The Freeze Protection default is ON.
To switch off the Freeze Protection mode enter the Installer Options Menu (Refer to Installer Options 02) and change to OFF. Press > to accept.
| Installer Options | Function Select | Option | Default | |
| 04 Low | Set Point C 5 High | Limit | 5 | |
| 05 High | Set Point C Low | Limit | 32 32 | |
| Installer Options | Function Select | Option | Default | |
| 06 Delayed Start (Energy saving feature | On | Off Of | ||
Option 04 & 05 - Low and High Limit set points.
The user temperature set points defaults are High 32°C and Low 5°C, to change these limits enter the Installer Options Menu (Refer to Installer Options 04 & 05).
Option 06 - Intelligent Delayed Start (Energy saving feature).
The Intelligent Delayed Start is an energy saving feature which automatically reduces the warm up time for the heating system.
DIGISTAT
INSTALLER OPTIONS
If enabled, the start time should be set an hour earlier than the time you want the property to reach the set temperature.
Intelligent Start will delay that start time, by an amount that it has calculated based on the actual and set temperature.
As the weather becomes milder, the start time is delayed, so that fuel is not wasted bringing the room up to temperature earlier than necessary.
The Digistat calculates approximately 10 minutes to raise the temperature by 1° C, up to a maximum of 6° C.
Note:
Intelligent Delayed Start only applies in Auto mode. Intelligent Delayed Start default is in OFF mode. To switch ON Intelligent Delayed Start enter the Installer Options Menu (see Installer Options 06).
Note:
The Intelligent Delayed start option is not suitable for underfloor application. Ensure Installer option 06 is set to OFF before final commissioning for underfloor application.
Special Note:
If the Intelligent delayed start feature is enabled, (Off changed to On in Installer option 06), please inform the end user of this feature.
The following special note has been added to the user instruction to explain the adjustment requirement:
When the delay period is operating indicated by the flame symbol flashing, pressing any button returns the Digistat to auto mode allowing normal button operation until the next time/ temperature event, when it will resume the delay start mode or follows the Holiday, Manual, Override or Off modes as selected.
Changes to the installer options and pre-set programmes must be made with the flame symbol not flashing.
| Installer Options | Function Select | Option | Default | |
| 10 System protection On Off | Off | |||
Option 10 - System Protection
In some heating systems there may be a requirement to protect the system by operating it once a day, for a given period.
DIGISTAT
BATTERY CHANGE
| Installer Options | Function Select Option | Default | ||
| 11 System protection time (Mins) | 1 | 5 | 3 | |
If system protection is selected, the system will be operated for a period as shown in system protection time (mins).
System protection time is every day at 10:00 am.
System protection default is OFF.
To enable the system protection mode, enter the Installer Options Menu (Refer to Installer Option 10).
Option 11 - System Protection time (mins).
System protection time can be set between 1 and 5 minutes (default 3 minutes).
To change this once a day on time, enter the Installer Options Menu (Refer to Installer Option 11).

How do I know when to change the batteries?
When the batteries start to run low, a battery icon will flash in the display to indicate "low battery". During this time, the Digistat will function normally.
Replace with 2 x 1.5V (AA) Alkaline batteries.
When the battery icon alone is shown in the display, the batteries are completely exhausted and the Digistat will cease to function. Re-activate by replacing the batteries.
The RF link will automatically be re-established.


How to replace the batteries
Remove the battery cover using a coin. Replace the spent batteries with 2 x 1.5V (AA) Alkaline batteries ensuring correct orientation. Replace the battery cover pressing fully home.
DIGISTAT / DT10RF RECEIVER
MAINTENANCE
Digistat Programmer
Part number 8 716 114 461 0

Maintenance:
The Transmitter (Digistat Programmer or Optimising Programmer) requires no maintenance.
The outer casing can be wiped clean using a dry cloth. DO NOT use polish or detergents.
These units cannot be serviced.
Should the existing unit fail to function correctly, check:
▶ Receiver times and program settings are correct RF signal link is set up ▶ Transmitter batteries are the correct type, fitted correctly and are not exhausted.
Fit new batteries if in doubt.
DT10RF Receiver
Part Number: 8 716 106 667 0

WORCESTER
DT10RF PROGRAMMER INSTRUCTION MANUAL B 716 115 493a (02.2009)
OPERATING & INSTALLATION INSTRUCTIONS
8_716_115_493a
9/2/09
09:46
Page 36
CONTACT INFORMATION
WORCESTER, BOSCH GROUP:
TECHNICAL: 08705 266241
SERVICE: 08457 256206
SPARES: 01905 752571
LITERATURE: 01905 752556
TRAINING: 01905 752526
SALES: 01905 752640
WEBSITE: worcaster-bosch.co.uk
WEBSITE (EIRE): worcester-bosch.ie
Worcester, Bosch Group
Cotswold Way, Warndon, Worcester WR4 9SW.
Tel. 01905 754624 Fax. 01905 754619
worcester-bosch.co.uk
Worcester, Bosch Group is a brand name of Bosch Thermotechnology Ltd.
8 716 115 493a (02.2009) 06515056001 ISSB


- WORCESTER, BOSCH GROUP
- PLEASE READ THESE INSTRUCTIONS CAREFULLY BEFORE STARTING
- SYMBOLS
- PROTECT YOUR ENVIRONMENT
- PROPER BATTERY RECYCLING
- ABBREVIATIONS
- DEFINITIONS (DLS/BST)
- CONTENTS
- TECHNICAL DATA
- GENERAL INFORMATION
- PROGRAMMABLE THERMOSTATS
- WHAT IS A PROGRAMMABLE ROOM THERMOSTAT
- OPERATING CONTROLS
- DIGISTAT PROGRAMMABLE THERMOSTAT
- CLOCK SETTING
- GENERAL OPERATION
- DIGISTAT
- PRE-PROGRAMMED SETTINGS
- THE DIGISTAT PROGRAMMER
- PRE-SET PROGRAM
- EVERY DAY
- TO SWITCH THE THERMOSTAT OFF
- PROGRAMMABLE SETTINGS
- ADJUSTING TIMES & TEMPERATURES
- DIGISTAT PROGRAMMER - 24 HOUR OPERATION
- TO CHANGE TEMPERATURE FOR A SHORT PERIOD (OVERRIDE)
- TO SET A CONSTANT ROOM TEMPERATURE (MANUAL MODE)
- TO SET HOLIDAY MODE
- USER OPTIONS
- NOTE: TO EXIT USER OPTIONS PRESS < AND > SIMULTANEOUSLY FOR 3 SECONDS
- OPTION 01 CHANGE FROM 24HR TO 12HR CLOCK
- OPTION 02 CHANGE TO PROGRAM 1, 2 OR
- OPTION 03 HOW TO CHANGE THE NUMBER OF PROGRAM EVENTS PER DAY
- OPTION 04 HOW TO SWITCH ON/OFF THE AUTOMATIC SUMMER / WINTER TIME CHANGE
- DATE AND TIME SETTING
- OPTION 05 HOW TO ADJUST DATE AND TIME
- NOTE: OPTION 5 MUST BE COMPLETED OR AT LEAST "STEPPED THROUGH" USING THE > KEY BEFORE OPTION 6 CAN BE ACCESSED
- OPTION 06: HOW TO CHANGE TEMPERATURE OFFSET
- OPTION 07: HOW TO RESTORE THE BUILT-IN TIME TEMPERATURE PROGRAMS
- PRESS > TO SELECT THE DESIRED CHANGE
- OPTION 08: HOW TO DISABLE THE OFF FUNCTION
- PRESS > TO ACCEPT CHANGE
- OPTION 09 HOW TO LOCK THE KEY PAD - ACCESS PROTECTION LOCK
- ONCE THE USER OPTIONS MENU IS EXITED ALL BUTTONS WILL BE LOCKED
- SPECIAL NOTE
- ASK YOUR INSTALLER FOR DETAILS
- WHAT IS INTELLIGENT DELAYED START
- DT10RF RECEIVER
- DT10RF RECEIVER PROGRAMMER
- HOT WATER
- PRE-SET PROGRAMS
- IF YOU NEED TO RESTORE THE FACTORY PRE-SET PROGRAM TIMES THEN
- SETTING MON - FRI
- SETTING INDIVIDUAL WEEKDAYS
- SETTING SAT - SUN
- SETTING INDIVIDUAL WEEKEND DAYS
- HOLIDAY SETTINGS
- SETTING THE CLOCK AND TIME
- SETTING THE DATE
- INSTALLATION
- DIGISTAT / DT10RF RECEIVER
- SETTING UP THE RF LINK
- RECEIVER SET UP
- TRANSMITTER SET UP
- TRANSMITTER BATTERY COMPARTMENT
- HOW TO FIT THE BATTERIES
- MOUNTING THE DIGISTAT
- TO CANCEL SIGNAL STRENGTH MODE
- POSITIONING RF ROOM THERMOSTATS
- TO CHECK PREVIOUSLY INSTALLED UNIT
- TO CHECK SIGNAL STRENGTH ON PREVIOUSLY INSTALLED AND PAIRED UNITS
- DURING NORMAL OPERATION
- INSTALLER OPTIONS
- OPTION 02 - FREEZE PROTECTION
- OPTION 04 & 05 - LOW AND HIGH LIMIT SET POINTS
- OPTION 06 - INTELLIGENT DELAYED START (ENERGY SAVING FEATURE)
- NOTE
- OPTION 10 - SYSTEM PROTECTION
- BATTERY CHANGE
- OPTION 11 - SYSTEM PROTECTION TIME (MINS)
- HOW DO I KNOW WHEN TO CHANGE THE BATTERIES
- REPLACE WITH 2 X 1.5V (AA) ALKALINE BATTERIES
- HOW TO REPLACE THE BATTERIES
- MAINTENANCE
- DIGISTAT PROGRAMMER
- WORCESTER
- CONTACT INFORMATION
Brand : BOSCH
Model : Digistat DT10RF
Category : Thermostat