
Heatronic 4000 - Thermostat BOSCH - Free user manual and instructions
Find the device manual for free Heatronic 4000 BOSCH in PDF.


| Product Type | Boiler Control Thermostat |
| Brand | Bosch |
| Model | Heatronic 4000 |
| Number of Boilers Controlled | Up to 4 |
| Boiler Types Compatible | Condensing, Non-condensing, Modulating, Single Stage, Two Stage, Dual Fuel |
| Fuel Support | Natural Gas (NG), LPG, Oil, Dual Fuel |
| Communication Protocols | BACnet IP, Modbus |
| Application Modes | Outdoor Temperature Reset, Fixed Setpoint, Dedicated DHW, EMS, Building Automation System (BAS) |
| Schedule Types | 24 Hour, 5-2, 5-11, 7 Day |
| Additional Features | DHW Priority, Boiler Rotation, Pump Exercising, Flow Monitoring, Flue Temperature Limiting, Boiler Mass Selection |
| Input Signals | 0-10 Vdc, 2-10 Vdc, 4-20 mA (via resistor), Dry Contact |
| Relay Outputs | Boiler Stages (up to 4), Primary Pumps, IDHW Pump, Auxiliary Relay (Damper or DHW Recirc) |
| Sensors Supported | Boiler Supply, Return, Outlet, Outdoor, DHW, Flue, Flow, Pressure |
| Display | LCD with status icons and menus |
| Power Supply | 24 VAC (class 2) |
| Enclosure | NEMA 1 (Indoor use) |
| Dimensions (approximate) | 10 x 6 x 2.5 inches |
| Weight (approximate) | 2 lbs |
| Warranty | 24 months from production date or 12 months from installation (whichever comes first) |
| Included Accessories | Universal Sensor, Outdoor Sensor |
| Replacement Parts | Universal Sensor (7738003451), Outdoor Sensor (7738003452), Enclosure Cover (7738003453), Terminal Plug Set (7738003454) |
Frequently Asked Questions - Heatronic 4000 BOSCH
User questions about Heatronic 4000 BOSCH
0 question about this device. Answer the ones you know or ask your own.
Ask a new question about this device
Download the instructions for your Thermostat in PDF format for free! Find your manual Heatronic 4000 - BOSCH and take your electronic device back in hand. On this page are published all the documents necessary for the use of your device. Heatronic 4000 by BOSCH.
USER MANUAL Heatronic 4000 BOSCH
Features
• Control and monitor up to 4 boilers, condensing, non-condensing, or a mix - BACnet® IP or Modbus® Compatible • Programmable Scheduling - DHW priority • Outdoor Temperature Reset - Compatible with modulating, single stage, two stage and dual fuel burners • Compatible with NG, LPG & Oil Burners - Programmed boiler default parameters
The Heatronic 4000 is designed to operate up to four boilers to accurately maintain a target water temperature. The Heatronic 4000 operates both condensing & non-condensing boilers that are either modulating, single stage two stage or dual fuel to provide a flexible, cost effective mixed boiler plant solution with better system performance.
The target water temperature is based on outdoor temperature reset or a fixed setpoint for space or process heating applications. Additional loads supplied by the Heatronic 4000 include domestic hot water heating. Boiler equal run-time rotation, stand-by primary pump operation & pump exercising all increase boiler plant reliability.
The Heatronic 4000 communicates with a Building Automation System (BAS) using BACnet® IP or Modbus® for remote monitoring & adjustment capability.

BACnet is a registered trademark of ASHRAE. ASHRAE does not endorse, approve or test products for compliance with ASHRAE standards. Compliance of listed products to the requirements of ASHRAE Standard 135 is the responsibility of BACnet International (BI). BTL is a registered trademark of BI.
4 boiler control, DHW, BACnet and Modbus
Heatronic 4000
IO Heatronic 4000 2014/04 en-us

BOSCH
Installation/Operating instructions (IO)
WARNING
To avoid serious personal injury or property damage:


- Read Manual and all product labels BEFORE using this product and follow all safety and use information. Failure to do so could result in personal injury or property damage.
- Do not use unless you know the safe and proper operation of equipment required for installation.
- It is the installer's responsibility to ensure that this product is safely installed according to all applicable codes and standards.
Table of Contents
Sequence of Operation 3
Boiler Setup 3
System Setup 6
Boiler Plant Operation 8
Dual Fuel Operation 10
Outdoor Temperature Reset Operation 10
Setpoint Operation 12
Energy Management System (EMS) Operation...... 12
Indirect Domestic Hot Water (IDHW) Operation ..... 13
Dedicated Domestic Hot Water (DDHW) Operation ... 16
Building Automation System (BAS) Operation.... 16
Pump Operation ....17
Setting the Schedule 19
Time Clock....20
Installation....21
Installation Location.... 21
Control Wiring 22
Sensor Installation & Wiring 25
EMS, Modbus® & BACnet® Connections 28
Testing the Sensor Wiring 29
Testing the Control Wiring 30
Control Settings....31
Access Level 31
DIP Switch Settings.... 31
User Interface....32
Display & Symbols....32
Navigating the Display.... 33
View Menu 33
Setup Menu 35
Source Menu 41
BAS Menu 43
Monitor Menu 45
Monitor Menu 46
Time Menu 48
Schedule Menu 49
Toolbox Menu 50
Manual Override 52
Troubleshooting 54
Error Messages 54
Technical Data 57
Limited Warranty 57
Appendix: Bosch / Buderus Boiler Model Default Table 58
Understanding Safety Information

This is a safety-alert symbol. The safety alert symbol is shown alone or used with a signal word (WARNING or CAUTION), a pictorial and/or a safety message to identify hazards.
When you see this symbol alone or with a signal word on your equipment or in this Manual, be alert to the potential for death or serious personal injury.
This pictorial alerts you to electricity, electrocution, and shock hazards.
WARNING
This symbol identifies hazards which, if not avoided, could result in death or serious injury.
CAUTION
This symbol identifies hazards which, if not avoided, could result in minor or moderate injury.
NOTICE
This symbol identifies practices, actions, or failure to act which could result in property damage or damage to the equipment.
WARNING
To avoid serious personal injury or property damage:


- Read Manual and all product labels BEFORE using this product and follow all safety and use information. Failure to do so could result in personal injury or property damage.
- Do not use unless you know the safe and proper operation of equipment required for installation.
- It is the installer's responsibility to ensure that this product is safely installed according to all applicable codes and standards.
Radio Frequency Interference
The installer must ensure that this control and its wiring are isolated and/or shielded from strong sources of electromagnetic noise. Conversely, this Class B digital apparatus complies with Part 15 of the FCC Rules and meets all requirements of the Canadian Interference-Causing Equipment Regulations. However, if this control does cause harmful interference to
radio or television reception, which is determined by turning the control off and on, the user is encouraged to try to correct the interference by re-orientating or relocating the receiving antenna, relocating the receiver with respect to this control, and/or connecting the control to a different circuit from that to which the receiver is connected.
Sequence of Operation
Boiler (Source (#) Menu) Setup and Operation
The Heatronic 4000 is able to operate up to four boilers as a heat source. Each boiler is independently configured allowing for maximum plant flexibility.
Boiler Enable
This setting selects whether the boiler is operational or not.
OFF
The boiler is disabled and will not be included in the plant operation.
AUTO
The boiler is enabled and will be included in the plant operation.
Copy Boiler 1
Many boiler installations will have multiple identical boilers. To reduce the number of settings required, certain settings of boiler 1 are copied to boiler 2 by setting the Boiler 2 Copy setting to Boil1. Copy settings are also available for boiler 3 and boiler 4.
OFF
The settings from boiler 1 are not copied. This allows for individual boiler settings.
Boil 1
The settings from boiler 1 are copied.
Bosch / Buderus Boiler
This setting selects whether the boiler is one of the pre-defined Bosch / Buderus boiler models.
YES
The boiler is one of the available Bosch / Buderus models. The Bosch / Buderus Model setting allows for selection of one of the pre-defined Bosch / Buderus models.
NO
The boiler is not one of the pre-defined Bosch / Buderus models.
Bosch / Buderus Boiler Model
When a Bosch / Buderus boiler model is selected, the control loads default values for the majority of the boiler settings. Some of the defaults can be adjusted while others are hard-coded. Refer to the Appendix on page 58 in this manual for a listing of the different Bosch / Buderus boiler models with their respective pre-defined default values.
Bosch / Buderus Fuel Type
Some of the Bosch / Buderus boiler models support multiple fuel options. This setting selects what fuel(s) the applicable Bosch / Buderus boiler model is to use. As with single fuel type Bosch / Buderus boiler models, the control loads defaults for the majority of the boiler settings.
GAS
The boiler fuel is gas.
OIL
The boiler fuel is oil.
DUAL
The boiler includes both gas and oil as a fuel type.
Boiler Type
The Heatronic 4000 has four different boiler types to choose from. Use the Boil TYPE setting to select one of the following:
MOD
The modulating output operates a modulating boiler by controlling the burner firing rate. The Stage 1 relay is also used to give a boiler enable to allow the modulating boiler to go through ignition sequence. The Stage 1 relay may not be required on all modulating boilers.
1STG
The Stage 1 relay operates a single, stage boiler by cycling the burner stage on & off.
2STG
The Stage 1 & Stage 2 relays operate a single, two stage boiler by cycling the burner stages on & off.
EMS
The modulating output operates a boiler that interprets an analog input signal as a target temperature. The EMS Temperature Minimum, EMS Temperature Maximum and, if applicable, Vdc Signal Minimum define the analog signal and temperature rails. The Stage 1 relay is also used to give a boiler enable to allow the EMS temperature boiler to go through ignition sequence. The Stage 1 relay may not be required on all EMS temperature boilers.
Condensing
This setting selects whether the boiler is condensing or non-condensing & defines what boiler group it is part of.
NO
The boiler is non-condensing and is part of the non-condensing boiler group.
YES
The boiler is condensing and is part of the condensing boiler group.
Modulating Type
The MOD TYPE setting selects the analog output signal used for modulating (MOD) and temperature (EMS) boiler types.
0-10
The modulating output is 0-10 V (dc).
4-20
The modulating output is 4-20 mA.
The 4-20 mA output can be converted to a 0 - 135 Ω output using a 0 - 135 Ω Converter 005. Refer to the Modulating Boiler Wiring section of the Control Wiring section.
Fire Delay
The Fire Delay sets the time it takes for the boiler to generate flame from the time the boiler turns on.
![graph TD A["Boiler Contact Closed"] --> B["Fire Delay"] B --> C["Burner On"] style A fill:#FFD700,stroke:#333 style B fill:#4CAF50,stroke:#333 style C fill:#FFA500,stroke:#333](/content/2026/05/1039689/images/e75719b40bc0e4280364a4b3181c165a797584fb6eb32e67f83f3aab2cad5688.jpg)
Modulation Delay
The MOD DELAY is the time that the boiler burner must hold the modulation of the boiler at a minimum before allowing it to modulate any further.
Boiler Mass
The Boil MASS setting selects the thermal mass characteristics of each boiler. Operation of the boiler can become unstable if the incorrect Boiler Mass setting is chosen. A key sign of unstable boiler operation is that the flame will continue to increase and then decrease in short periods of time. By choosing a lower boiler mass setting, the boiler response will become more stable.
LOW (GB Series)
The LO setting is selected if the boiler that is used has a low thermal mass. This means that the boiler has very small water content and has very little metal in the heat exchanger. A boiler that has a low thermal mass comes up to temperature quite rapidly when fired. This is typical of many copper fin-tube boilers.
The Low mass setting (LO) provides a fast response to the heating system.
MED
The MED setting is selected if the boiler that is used has a medium thermal mass. This means that the boiler either has a large water content and a low metal content or a low water content and a high metal content. This is typical of many modern residential cast iron boilers or steel tube boilers.
The Med mass setting provides a moderate response to the heating system.
HI (SB and G Series)
The HI setting is selected if the boiler that is used has a high thermal mass. This means that the boiler has both large water content and a large metal content. A boiler that has a high thermal mass is relatively slow in coming up to temperature. This is typical of many commercial cast iron and steel tube boilers.
The Hi mass setting provides a slow response to the heating system.
Low Fire and High Fire Boiler Output
In order to accommodate different boiler capacities in the same system, a low fire and high fire boiler output for each boiler can be set. This allows the control to properly operate the boilers using either sequential or parallel modulation. Each boiler typically has a rating plate that specifies the minimum and maximum output. This information is also available in the boiler manual.
The minimum and maximum boiler output is expressed in MBtu/h. 1 MBtu/h = 1,000 Btu / hour. The range is from 10 MBtu/h to 9,990 MBtu/h.
For example, if a boiler has a maximum output of 100,000 Btu / hr and a minimum output of 20,000 Btu / hr (turn down ratio of 5):
Maximum Boiler Output = 100,000 / 1,000 = 100 MBtu/h
Minimum Boiler Output = 20,000 / 1,000 = 20 MBtu/h
Motor Speed
The MOTOR SPD is the amount of time the boiler requires to go from 0% modulation to 100% modulation.
Gas valve actuating motors have a design time from fully closed to fully opened which can be found in the manufacturer's manual. The Motor Speed should be set to this time.
The Motor Speed setting for a Variable Frequency Drive (VFD) is the amount of time required to go from a stopped position to 100% fan speed. Since a VFD has a very quick response rate, it may be necessary to increase the Motor Speed setting in order to increase the stability of the boiler modulation.

Start Modulation
The START MOD setting is the lowest modulation output required to obtain proper ignition. Whenever boiler operation is required, the control outputs an analog signal corresponding to the Start Modulation setting & closes the boiler contact to turn on the burner. After the Fire Delay has elapsed & the burner is ignited, the control modulates the firing rate between the Minimum Modulation setting & the Maximum Modulation setting.
Minimum Modulation
The MIN MOD is the lowest signal the control can send to modulate the boiler. This operates the boiler at low fire. Use the MIN MOD setting in the Adjust Menu to select an appropriate boiler minimum modulation.
- Refer to the boiler manufacturer's literature to determine the minimum output voltage V (dc) or current (mA) that the boiler will successfully operate at.
For 0 to 10 V (dc):
Minimum Modulation =
(Boiler's Minimum Input Signal / 10 V (dc)) × 100%
For 4 to 20 mA:
Minimum Modulation =
Boiler's Minimum Input Signal - 4 mA/16 mA × 100 %
Example:
A boiler requires a 1.8 V (dc) signal to fire the boiler at low fire. The boiler can be modulated to 10 V (dc) where it reaches high fire.
Minimum Modulation = 1 . 8 V/10 V × 100 % = 18 %

Maximum Modulation
The Maximum Modulation is the highest signal the control can send to modulate the boiler. For boilers with electronic operators, the boiler's input signal range may not match the output signal range of the Heatronic 4000. Use the MAX MOD setting in the Source (#) Menu to select an appropriate boiler maximum modulation.
For 0 to 10 V (dc):
Maximum Modulation =
Boiler's Maximum Input Signal x 100%
10 V (dc)
For 4 to 20 mA:
Maximum Modulation =
Boiler's Maximum Input Signal - 4 mA/16 mA × 100 %
Example:
A boiler's input signal range is 0 to 9 V (dc). The Heatronic 4000 control has an output signal range of 0 to 10 V (dc).
Maximum Modulation = (9 V / 10 V) x 100% = 90%

EMS Signal Minimum
The EMS Signal Minimum is applicable for EMS temperature type boilers that operate based on a 0-10 Vdc analog input signal. This setting is to be set to the appropriate signal that is defined by the boiler's ignition control. This analog value corresponds to the temperature value set with the EMS Temperature Minimum setting.
EMS Temperature Minimum
The EMS Temperature Minimum is applicable for EMS temperature type boilers that interpret an analog value as a temperature. This setting is to be set to the appropriate temperature that is defined by the boiler's ignition control. For a 0-10 Vdc EMS boiler, this temperature value corresponds to the value set with the Vdc Signal Minimum setting. For a 4-20 mA EMS boiler, this temperature value corresponds to 4 mA.
EMS Temperature Maximum
The EMS Temperature Maximum is applicable for EMS temperature type boilers that interpret an analog value as a temperature. This setting is to be set to the appropriate temperature that is defined by the boiler's ignition control. For a 0-10 Vdc EMS boiler, this temperature value corresponds to 10 Vdc. For a 4-20 mA EMS boiler, this temperature value corresponds to 20 mA.
Maximum Boiler Outlet
The control has the capability for each boiler outlet temperature to be monitored and limited. The MAX OUT setting sets the maximum boiler outlet temperature. If the boiler outlet temperature reaches the boiler outlet maximum, the boiler is turned off. In order for the boiler to be able to be turned on again, the boiler outlet temperature must drop 10°F (6°C) below the boiler outlet maximum.
If MAX OUT is set to OFF, the control only monitors the boiler outlet temperature.
Boiler Pump Post Purge
This setting sets the amount of time the control operates the boiler pump after the boiler is turned off. This will purge heat out of the boiler, reducing stand-by losses, and also aid in reducing "kettling". The amount of time for the boiler pump post purge is adjustable between 10 seconds and 20:00 minutes. Auto is also available in which the control automatically determines the amount of time based on the boiler mass.
System Setup and Operation
Application Mode
There are five possible application modes that the Heatronic 4000 can be configured for including:
• Outdoor Temperature Reset (RSET) • Fixed Setpoint (SETP) • Dedicated Domestic Hot Water (DDHW) • Energy Management System (EMS) • Building Automation System (BAS)
Refer to the appropriate section of this brochure for a description of each of the application modes.
Boiler Minimum
The Boil MIN is the lowest temperature that the control is allowed to use as a boiler target temperature. During mild conditions, if the control calculates a boiler target temperature that is below the boiler minimum setting, the boiler target temperature is adjusted to at least the boiler minimum setting. MIN is displayed in the status field while viewing the boiler supply or target & when the boiler target is boiler minimum & the boiler supply is less than boiler minimum plus 5°F (2.5°C). Set the Boiler Minimum setting to the boiler manufacturer's recommended temperature.
Requirements: The Boil MIN is only applicable when at least one of the boilers is configured for non-condensing.

Boiler Maximum
The Boil MAX is the highest temperature that the control is allowed to use as a boiler target temperature. MAX is displayed in the status field viewing the boiler supply or target & when the boiler target is boiler maximum & the boiler supply is greater than boiler maximum minus 5°F (2.5°C). Set the boiler maximum setting below the boiler operator or aquastat temperature.

Boiler Differential
Both on/off (single stage & two stage) & modulating boilers are operated with a differential. In some cases, a modulating boiler must be operated with a differential at low fire. This indicates the load is smaller than the minimum modulation of the boiler. For modulating boilers, the differential no longer applies once operating the boiler above low fire.
The differential operates by turning on the boiler when the boiler supply water temperature is 1/2 of the differential below the boiler target temperature. As the boiler supply water temperature reaches 1/2 of the differential above the boiler target temperature, the boiler is shut off.
Manual Differential
Automatic Differential
Exercising
The control will exercise all pumps for 10 seconds every three days of inactivity to prevent seizure. To enable exercising, switch the Exercise / Off DIP to the Exercise position.
Boost
When the control changes from the UnOccupied mode to the Occupied mode, it enters into a boosting mode. In this mode, the supply water temperature to the system is raised above its normal values for a period of time to provide a faster recovery from the setback temperature of the building. The maximum length of the boost is selected using the BOOST setting in the Setup menu.
Typical settings for the boost function vary between 30 minutes and two hours for buildings that have a fast responding heating system. For buildings that have a slow responding heating system, a setting between four hours and eight hours is typical. After a boost time is selected, the setback timer must be adjusted to come out of setback some time in advance of the desired occupied time. This time in advance is normally the same as the BOOST setting.
If the building is not up to temperature at the correct time, the BOOST setting should be lengthened and the setback timer should be adjusted accordingly. If the building is up to temperature before the required time, the BOOST setting should be shortened and the setback timer should be adjusted accordingly. If the system is operating near its design conditions or if the supply water temperature is being limited by settings made in the control, the time required to bring the building up to temperature may be longer than expected.
Flow Monitoring
The control has the capability to monitor flow through the connection of a 4-20 mA style analog flow sensor. Use the Flow Sensor setting in the Setup menu to enable flow monitoring. The Flow Rate 4 mA and Flow Rate 20 mA settings are then used to set the minimum and maximum flow rates for the specific flow sensor being used. Flow is measured in either gallons per minute (gpm) or meters cubed per hour (m³/h). The units are adjustable through the FLOW UNIT setting in the Toolbox menu.
In addition to flow monitoring, the flow sensor can also be used to prove primary pump flow. Refer to the Pump Operation section of this brochure for additional details.
Flow Rate 4 mA
The Flow Rate 4 mA is applicable for flow monitoring and is based on the flow sensor being used. This setting sets the flow rate at 4 mA.
Flow Rate 20 mA
The Flow Rate 20 mA is applicable for flow monitoring and is based on the flow sensor being used. This setting sets the flow rate at 20 mA.
Energy Monitoring
The control has the capability to monitor Energy. The control requires the boiler supply, boiler return sensor and the flow sensor in order to calculate and display energy in either Therms (THRM) or Gigajoules (GJ). The units are adjustable through the TEMP UNIT setting in the Toolbox menu.
Pressure Monitoring
The control has the capability to monitor system pressure through the connection of a specific style of Vdc pressure transducer. Use the Pressure Sensor setting in the Setup menu to enable pressure monitoring. Pressure is measured in either psi or kPa. The units are adjustable through the PRESSURE UNIT setting in the Toolbox menu.
Flue Temperature Monitoring & Limiting
The control has the capability to measure and limit the common flue temperature. The FLUE MAX setting defines the operation of the common flue sensor. If the common flue temperature exceeds the FLUE MAX, the boiler plant is shut down. The boiler plant will not be allowed to operate until the vent temperature drops 10°F (6°C) below the FLUE MAX. If OFF is selected, the common flue temperature is only monitored.
Alert Dry Relay
The control has an Alert Dry relay that closes whenever a control or sensor error is detected, or when a warning or limiting condition is detected. When the alert dry contact closes, refer to the Error Messages section of this brochure to determine the cause of the alert and how to clear the error.
Boiler Alert
If no temperature increase is detected at the boiler supply sensor within this delay period, the Alert relay will close and the control will display the NO HEAT error message. To clear the error, press the CLEAR button while viewing the error message.
Boiler Plant Operation
The Heatronic 4000 is able to operate up to four boilers to maintain a boiler target temperature. Proportional, Integral and Derivative (PID) logic is used in order to satisfy the boiler target temperature for all plant configurations with the exception of Dedicated Domestic Hot Water (DDHW). Proportional (P) logic is used for DDHW. For proper operation of the boilers, the Heatronic 4000 must be the only control that determines when a boiler is to fire.
NOTICE
The boiler operator, or aquastat, remains in the burner circuit and acts as a secondary upper limit on the boiler temperature. The boiler aquastat temperature setting must be adjusted above the Heatronic 4000's boiler maximum setting in order to prevent short cycling of the burner.
Boiler Operation
Single Stage On/Off Boiler
Once a boiler is required to operate, the control turns on the Stage 1 relay. Once the control turns on the Stage 1 relay, it will display the "Boiler" icon and "100%" under the respective boiler output status in the display.
Two Stage On/Off Boiler
Once a boiler is required to operate, the control turns on the Stage 1 relay. Once the Fire Delay time plus the Stage Delay time has expired, the control can turn on the Stage 2 relay if it is required. Once the control turns on the Stage 1 relay, it will display the "Boiler" icon and "50%" under the respective boiler output status in the display. Once the control turns on the Stage 2 relay, it will display "100%".
Modulating Boiler
Once a boiler is required to operate, the control outputs an analog signal corresponding to the Start Modulation setting and then turns on the Stage 1 relay. Once the Fire Delay time has expired, the modulating output is adjusted to the Minimum Modulation setting. The control then holds the modulating output at the Minimum Modulation until the Minimum Modulation Delay time has elapsed. The control can then adjust the modulating output from the Minimum Modulation as required. Once the control turns on the Stage 1 relay, it will display the "Boiler" under the respective boiler output status in the display. The current firing rate is also displayed in the boiler output field.
EMS Boiler
Once a boiler is required to operate, the control outputs an appropriate analog signal corresponding to the boiler target temperature and then turns on the Stage 1 relay. Once the control turns on the Stage 1 relay, it will display the "Boiler" under the respective boiler output status in the display. The target water temperature is also displayed in the boiler output field.
Boiler Target Temperature
The Boil TARG temperature is determined by the application mode and the type of call received. The control displays the temperature that it is currently trying to maintain at the boiler supply sensor in the View menu. If the control does not presently have a requirement for heat, it does not show a boiler target temperature. Instead, "---" is displayed in the LCD.
Stage Delay
The STG DELAY is the minimum time delay between the firing of each boiler or boiler stage. After this delay has expired the control can fire the next boiler or boiler stage if it is required. This setting can be adjusted manually or set to an automatic setting. When the automatic setting is used, the control determines the best stage delay based on the operation of the system.
Modulation Mode
When using multiple modulating boilers, a selection must be made regarding the sequencing of the boilers. Two modulation mode settings are provided considering condensing and non-condensing boiler groups.
Modulation Mode is not available when the Application Mode is configured for Dedicated Domestic Hot Water (DDHW).
- MOD COND (Modulation Mode - Modulating, Condensing Boiler Group)
This setting is applicable for a group of at least two modulating, condensing boilers.
- MOD NC (Modulation Mode - Modulating, Non-Condensing Boiler Group)
This setting is applicable for a group of at least two modulating, non-condensing boilers.
Sequential Modulation (SEQ)
With Sequential Modulation, the control will turn on the fewest boilers possible to meet the load. The control will bring a boiler from its Minimum Modulation setting up to its Maximum Modulation setting before bringing on another boiler. When another boiler is turned on, the previous boiler will keep its output at full fire.

Parallel Modulation (PAR)
With Parallel Modulation, the control will turn on the most boilers possible to meet the load. The control will bring on the first boiler at Minimum Modulation and does not increase its modulation. If more boiler output is required, the second boiler will turn on at Minimum Modulation and does not increase its modulation. Additional boilers are turned on at their Minimum Modulation setting until all boilers are on. If still more boiler output is required, all boilers are modulated up in parallel until they reach their Maximum Modulation settings.

Staging Mode Setup
When using multiple two-stage boilers, a selection must be made regarding the staging order of the boilers. Two staging modes are provided considering condensing & non-condensing boiler groups.
• STG COND (Staging Mode - Two-Stage, Condensing Boiler Group)
This setting is applicable for a group of at least two, two-stage condensing boilers.
• STG NC (Staging Mode - Two-Stage Non-Condensing Boiler Group)
This setting is applicable for a group of at least two, two-stage non-condensing boilers.
Lo/Hi
If the Lo/Hi staging option is selected the control stages in sequence all of the stages in a single boiler. Once all of the stages are turned on, the control then stages in sequence all of the stages of the next boiler in the rotation sequence.
Lo/Lo
If the Lo/Lo staging option is selected, the control stages all of the Lo stage outputs in all of the boilers first. Once all of the boilers are operating on their Lo stages, the control then operates the second stage in each boiler in the same order.
Boiler Group Rotation
The control has two rotation settings including one for the condensing boiler group & another for the non-condensing boiler group.
- ROT COND (Rotation - Condensing Boiler Group)
This setting is applicable for a group of at least two, two-stage condensing boilers.
- ROT NC (Rotation - Non-Condensing Boiler Group)
This setting is applicable for a group of at least two, two-stage non-condensing boilers.
The Rotate feature changes the firing order of the boilers whenever one boiler accumulates 48 hours more run time than any other boiler. Rotation will be forced if any boiler accumulates 60 hours more run time. After each rotation, the boiler with the least running hours is the first to fire & the boiler with the most running hours is the last to fire. This function ensures that all of the boilers receive equal amounts of use. When the Rotation setting is set to Off, the firing sequence always begins with lowest boiler to the highest boiler.
![graph LR A["720 hours"] --> B["672 hours"] B --> C["672 hours"] C --> D["720 hours"]](/content/2026/05/1039689/images/b8530a91a42aac2b252b5f0dccc92a1f603b6001896942bbae16be20cc58781c.jpg)
To reset the rotation sequence, clear the Burner Run Time in the Monitor (#) Menu.
Boiler Run Time Monitoring
The running time of each boiler is logged in its respective Monitor (#) menu. To reset the running time, select the appropriate BURNER item in the Monitor (#) menu & select CLEAR until "0" is displayed.
Fixed Lead
When the boiler plant includes only one boiler group, either a condensing or a non-condensing group, a selection must be made regarding operation of the lead boiler.
ON
In some applications, it may be desirable to have the first boiler fire first at all times while the firing sequence of the remaining boilers is changed using Equal Run Time Rotation. This configuration is typical of installations where the boiler plant includes similar boilers but the first boiler is required to be the first to fire in order to establish sufficient draft for venting. With a fixed lead rotation, the lead boiler is always turned on first & turned off first. The Fixed Lead is always applied to the boiler 1 output.
OFF
The lead boiler is not fixed to operate first in the firing sequence. It is included in the rotation sequence with the other boilers.
Fixed Last
When the boiler plant includes only one boiler group, either a condensing or a non-condensing group, a selection must be made regarding operation of the last boiler.
ON
In some applications, it may be desirable to have the last boiler fire last at all times while the firing sequence of the remaining boilers is changed using Equal Run Time Rotation. This configuration is typical of installations where the boiler plant includes higher efficient boilers & a single lesser efficient boiler. The lesser efficient boiler is only desired to be operated when all other boilers in the plant are on & the load cannot be satisfied. With a fixed last rotation, the last boiler is the last to turn on & the first to turn off. The Fixed Last is always applied to the boiler 4 output.
OFF
The last boiler is not fixed to operate last in the firing sequence. It is included in the rotation sequence with the other boilers.
Condensing & Non-Condensing Boiler Groups
Operating a boiler plant that contains both condensing (high initial cost) & non-condensing (lower initial cost) boilers allows the boiler plant to achieve nearly the same operating efficiencies as operating all condensing boilers but at a much lower installed cost to the building owner. High system efficiency can be achieved as long as the condensing boilers are the first to operate in the firing sequence. During mild weather, the lead condensing boilers operate at lower boiler temperatures & achieve their peak boiler efficiencies while the non-condensing boilers are rarely operated. During very cold weather, the boiler target temperature is often above the boiler's condensation point & the condensing & non-condensing boilers operate together at roughly the same efficiency level.
When a condensing boiler is operating, it is desirable to operate the boilers without a boiler minimum temperature being applied to the boiler target. This allows the condensing boiler to operate at its maximum efficiency. When a non-condensing boiler is operating, a boiler minimum temperature should be applied to the boiler target to prevent damage to the non-condensing boiler's heat exchanger from sustained flue gas condensation.
The Heatronic 4000 supports operation of a condensing & a non-condensing boiler group. A condensing boiler group is created when at least one boiler is selected to be condensing & a non-condensing boiler group is created when at least one boiler is selected to be non-condensing. The condensing boiler group is always sequenced on first, followed by the non-condensing boiler group.
Dual Fuel Boiler Operation
The Heatronic 4000 supports the operation of dual fuel boilers. Dual fuel boiler functionality is only available with applicable Bosch / Buderus boiler models. The control allows for up to two dual fuel boilers with selection capability for Boiler 1 and Boiler 3.
If a dual fuel boiler is selected for boiler 1, the boiler 1 output is used to control the gas burner and the boiler 2 output is used to control the oil burner. Also, the boiler pump and, if applicable, boiler outlet sensor, are to be connected to boiler 1.
If a dual fuel boiler is selected for boiler 3, the boiler 3 output is used to control the gas burner and the boiler 4 output is used to control the oil burner. Also, the boiler pump and,
if applicable, boiler outlet sensor, are to be connected to boiler 3.
Fuel Switch
A fuel switch is required in order for the control to switch burner operation from gas to oil. Once the control registers a fuel switch, it will display FL SW in the status field. A fuel switch is provided by a dry contact or 24 V (ac) signal applied across the fuel switch terminals 9 & 10. The device that provides a fuel switch is typically a manual switch located on the boiler which selects what burner (gas or oil) becomes active.
If the fuel switch is not present, the gas burner is active and the oil burner is inactive. If the fuel switch is present, the oil burner is active and the gas burner is inactive.
Outdoor Temperature Reset Operation
Outdoor Temperature Reset is available by setting the Application Mode in the Setup Menu to RSET.
In a heating system, the rate of heat supplied to the building must equal the rate at which heat is lost. If the two rates are not equal, the building will either cool off or overheat.
The rate of building heat loss depends mostly on the outdoor temperature. Outdoor Reset allows a hot water heating system to increase the water temperature, adding heat to the building, as the outdoor temperature drops. The rate at which the water temperature is changed as a function of outdoor temperature is defined by the characterized heating curve.
Indirect Domestic Hot Water (IDHW) operation is available during outdoor temperature reset operation.
Central Heat (CH) Call
A CH Call is required in order for the control to provide target water temperature for the space heating system. Once the control registers a CH Call, it will display the "Heat" icon under the Calls in the display. A heat call can be provided in two ways:
Contact Closure
A dry contact or 24 V (ac) signal is applied across the CH Call terminals 5 & 6.
Characterized Heating Curve
A characterized heating curve determines the amount the target water temperature is raised for every 1° drop in outdoor air temperature.
The characterized heating curve takes into account the type of terminal unit that the system is using. Since different types of heating terminal units transfer heat to a space using different proportions of radiation, convection & conduction, the supply water temperature must be controlled differently. The control uses the terminal unit setting to vary the supply water temperature to suit the terminal unit being used. This improves the control of the air temperature in the building.
Boiler Characterized Heating Curve
Terminal Unit
Select the appropriate terminal unit in the Setup Menu. This will change the shape of the characterized heating curve to better match the heat transfer properties of that specific terminal unit.
Hydronic Radiant Floor (HRF1)
A heavy or high mass, hydronic radiant floor system. This type of a hydronic radiant floor is embedded in either a thick concrete or gypsum pour. This heating system has a large thermal mass & is slow acting.

Hydronic Radiant Floor (HRF2)
A light or low mass, hydronic radiant floor system. Most commonly, this type of radiant heating system is attached to the bottom of a wood sub floor, suspended in the joist space, or sandwiched between the subfloor & the surface. This type of radiant system has a relatively low thermal mass & responds faster than a high mass system.

Fancoil (COIL)
A fancoil terminal unit or air handling unit (AHU) consisting of a hydronic heating coil & either a fan or blower. Air is forced across the coil at a constant velocity by the fan or blower & is then delivered into the building space.

Fin-tube Convector (CONV)
A convector terminal unit is made up of a heating element with fins on it. This type of terminal unit relies on the natural convection of air across the heating element to deliver heated air into the space. The amount of natural convection is dependant on the supply water temperature to the heating element & the room air temperature.

Radiator (RAD)
A radiator terminal unit has a large heated surface that is exposed to the room. A radiator provides heat to the room through radiant heat transfer and natural convection.

Baseboard (BASE)
A baseboard terminal unit is similar to a radiator, but has a low profile and is installed at the base of the wall. The proportion of heat transferred by radiation from a baseboard is greater than that from a fin-tube convector.

Boiler Terminal Unit Defaults
When a terminal unit is selected for boiler zones, the control loads default values for the boiler design, boiler maximum supply, and boiler minimum supply temperatures. The factory defaults can be changed to better match the installed system. Locate the Terminal Unit setting in the Setup menu.
| Terminal Unit Boil | DSGN Boil MAX *Boil MIN | |
| High Mass Radiant | 120°F (49°C) 140°F (60°C) 140°F (60°C) | |
| Low Mass Radiant | 140°F (60°C) 160°F (71°C) 140°F (60°C) | |
| Fancoil | 190°F (88°C) 210°F (99°C) 140°F (60°C) | |
| Fin-Tube Convector | 180°F (82°C) 200°F (93°C) 140°F (60°C) | |
| Radiator | 160°F (71°C) 180°F (82°C) 140°F (60°C) | |
| Baseboard | 150°F (76°C) 170°F (77°C) 140°F (60°C) |
Requirements: Boil MIN is only available if at least one boiler is set to non-condensing. If all available boilers are set to condensing, Boil MIN is not available and is hard-coded to OFF.
Room
The Room setting is the desired room air temperature, according to the outdoor reset heating curve. The Room setting parallel shifts the heating curve up or down to change the target water temperature. Adjust the Room setting to increase or decrease the amount of heat available to the building. Once the heating curve has been set up properly, the Room setting is the only setting that needs to be adjusted. The default Room setting is 70°F (21°C), and it can be adjusted for both the occupied and unoccupied periods.
Outdoor Design
The outdoor design temperature is typically the coldest outdoor air temperature of the year. This temperature is used when doing the heat loss calculations for the building and is used to size the heating system equipment. If a cold outdoor design temperature is selected, the supply water temperature rises gradually as the outdoor temperature drops. If a warm outdoor design temperature is selected, the supply water temperature rises rapidly as the outdoor temperature drops.
Boiler Indoor
The boiler indoor design temperature is the indoor temperature the heating designer chose while calculating the heat loss for the boiler water heated zones. This temperature is typically 70°F (21.0°C). This setting establishes the beginning of the boiler characterized heating curve.
Boiler Design
The boiler design supply temperature is the boiler water temperature required to heat the zones at the outdoor design temperature, or on the typical coldest day of the year.
(Default automatically changes based on terminal unit setting)
Warm Weather Shut Down (WWSD)
Warm Weather Shut Down disables the heating system when the outdoor air temperature rises above this programmable setting. When the control enters into WWSD, WWSD is indicated in the status field. WWSD is only available when the Application Mode is set to RSET.
While in WWSD, the control will still operate to provide Indirect Domestic Hot Water or Setpoint operation.
Setpoint Operation
If the Application Mode is configured for Setpoint (SETP), the control provides heat for the setpoint load.
Indirect Domestic Hot Water (IDHW) operation is available during setpoint operation.
Central Heat (CH) Call
A CH Call is required in order for the control to provide heat to a setpoint load, such as a spa, pool or snowmelt load. Once the control registers a CH Call, it will display the "Heat" icon under the Calls in the display. A CH Call can be provided in two ways:
Contact Closure
A dry contact or 24 V (ac) signal is applied across the CH Call terminals 9 & 10.
Boiler Target Temperature During a Setpoint Call
When a CH Call is present, a boiler target is determined.
- When using a Contact Closure, the boiler target is set to the SETP Setpoint setting.
- When using a tekmarNet® Setpoint Control, the boiler target is set to the device's Exchange Supply setting.
If there are multiple devices calling for heat, the boiler target is set to the highest temperature requirement.
Setpoint During Unoccupied
When using a contact closure, a second setpoint setting is available for the unoccupied periods.
The DIP switch must be set to Setback to view unoccupied items.
Setpoint operation is not provided during the Away scene.
Energy Management System (EMS) Operation
The control can accept an external DC signal from an Energy Management System (EMS). The control converts the DC signal into the appropriate boiler target temperature for the space heating system.
EMS is available by setting the APP MODE in the Setup Menu to EMS.
Indirect Domestic Hot Water (IDHW) is available during EMS operation.
Heat Call
A heat call is required in order for the control to provide a target water temperature for the space heating system. Once the control registers a heat call, it will display the "Heat" icon under the Calls in the display.
A heat call is provided by:
Input Signal
An external signal is generated by applying a voltage between 0 V (dc) and 10 V (dc) across the EMS (+) In and Com (-) terminals (16 and 19). Voltages that exceed 10 V (dc) will still be considered a 10 V (dc) signal.
If the EMS signal goes below the minimum voltage, the "Heat" icon under the Calls in the display is turned off. The boiler target temperature is displayed as "—" to indicate that there is no longer a call for heating.
External Central Heat (CH) Call terminals are not operational.
EMS Signal
The control can accept either a 0-10 V (dc) signal or a 2-10 V (dc) signal. The EMS SGNL setting must be set to the proper setting based on the signal that is being sent to the control.
0 - 10 V (dc) or 0 - 20 mA
When the 0-10 V (dc) signal is selected, an input voltage of 1 V (dc) corresponds to a boiler target temperature of 50°F (10°C). An input voltage of 10 V (dc) corresponds to a boiler target temperature of 210°F (99°C). As the voltage varies between 1 V (dc) and 10 V (dc), the boiler target temperature varies linearly between 50°F (10°C) and 210°F (99°C).
If a voltage below 0.5 V (dc) is received, the boiler target temperature is displayed as “—” indicating that there is no longer a call for heating.
A 0 - 20 mA signal can be converted to a 0 - 10 V (dc) signal by installing a 500 Ω resistor between the EMS (+) In and Com (-) terminals (16 and 19).
2 - 10 V (dc) or 4 - 20 mA
When the 2 - 10 V (dc) signal is selected, an input voltage of 2 V (dc) corresponds to a boiler target temperature of 50°F (10°C). An input voltage of 10 V (dc) corresponds to a boiler target temperature of 210°F (99°C). As the voltage varies between 2 V (dc) and 10 V (dc), the boiler target temperature varies linearly between 50°F (10°C) and 210°F (99°C). If a voltage below 1.5 V (dc) is received, the boiler target temperature is displayed as “—” indicating that there is no longer a call for heating.
A 4 - 20 mA signal can be converted to a 2 - 10 V (dc) signal by installing a 500 Ω resistor between the EMS (+) In and Com (-) terminals (16 and 19).
| CONVERSION TABLE 0 - 10 | ||
| 0 - 20 mA* 0 - | 10 V (dc) Boiler Target | |
| 0 0 --- (OFF) | ||
| 2 1 50°F (10°C) | ||
| 4 2 68°F (20°C) | ||
| 6 3 86°F (30°C) | ||
| 8 4 103°F (39°C) | ||
| 10 | 5 121°F (49°C) | |
| 12 | 6 | 139°F (59°C) |
| 14 | 7 157°F (69°C) | |
| 16 | 8 | 174°F (79°C) |
| 18 | 9 | 192°F (89°C) |
| 20 | 10 | 210°F (99°C) |
| CONVERSION TABLE 2 - 10 | ||
| 4 - 20 mA* 2 - | 10 V (dc) Boiler Target | |
| 0 0 --- (OFF) | ||
| 4 2 50°F (10°C) | ||
| 6 3 70°F (21°C) | ||
| 8 4 90°F (32°C) | ||
| 10 5 110°F (43°C) | ||
| 12 6 130°F (54°C) | ||
| 14 7 150°F (66°C) | ||
| 16 8 170°F (77°C) | ||
| 18 9 190°F (88°C) | ||
| 20 | 10 | 210°F (99°C) |
*Requires 500 Ω Resistor in Parallel *Requires 500 Ω Resistor in Parallel
EMS Offset
For external input operation, the boiler target (determined from the external input signal) may be fine tuned. The EMS OFFST setting is used to provide the fine tuning. The setting may be adjusted ±10°F (±5.5°C). When set to 0°F (0.0°C), if the temperature determined from the external signal is 140°F (60.0°C), the boiler target will be 140°F (60.0°C). When set to +5°F (+3.0°C) and with the same external signal representing 140°F (60.0°C), the boiler target will be 145°F (63.0°C).
| Example | ||
| Range | = 0 - 10 V (dc) | |
| Input | = 7 V (dc) | 157°F (69°C) |
| Offset | = +5°F (3°C) | +5°F (3°C) |
| Boiler Target = | 162°F (72°C) | |
The minimum and maximum settings also apply for external input operation. For example, if a boiler minimum of 140°F (60.0°C) is set and the external signal received represents 80°F (27.0°C), the boiler target will be 140°F (60.0°C). MIN will also be displayed in the status field to indicate that a limiting condition is in effect. This also applies for the MAX limit.
Indirect Domestic Hot Water (DHW) Operation
IDHW operation is applicable during the following application modes: outdoor temperature reset, fixed setpoint and EMS.
DHW Call
A DHW Call is required in order for the control to provide heat to an indirect DHW tank. Once the control registers a DHW Call, it will display the "DHW" icon under Calls in the display. A DHW Call can be provided in three ways:
DHW Tank Aquastat
If a DHW Tank Aquastat (mechanical switch) is used to apply a DHW Call, the tank is heated to the aquastat temperature setting. A dry contact or 24 V (ac) signal is applied across the DHW Tank Call terminals 7 & 8.
Requirements: IDHW Sensor must be set to Off.
DHW Sensor
A DHW Tank Sensor provides superior temperature control of the tank compared to an aquastat. The control can register a DHW Call when a DHW Sensor is wired to terminals 21 & 22. Once the DHW Sensor temperature drops 1/2 of the IDHW Differential setting below the IDHW Setpoint, the control registers a DHW Call.
Requirements: The IDHW Sensor must be set to On. There cannot be an external IDHW Call when using a DHW sensor.
DHW Differential
Due to large differences between the heating load & the DHW load, a separate DHW differential should be used whenever a DHW Call is present. This will improve staging & boiler cycling. When using a DHW Sensor, a DHW Call is registered when the temperature at the DHW sensor drops the IDHW DIFF setting below the IDHW Setpoint setting. The DHW Call is satisfied
once the temperature at the DHW Sensor rises to the IDHW Setpoint setting.

Boiler Target Temperature during a DHW Call
When a DHW Call is present, a boiler target is determined.
- When using a DHW Tank Aquastat, the boiler target is set to the IDHW Exchange setting.
- When using a DHW Tank Sensor, the boiler target is fixed at the IDHW Setpoint setting plus 40°F (22.0°C).
- When using a tekmarNet® Setpoint Control, the boiler target is set to the device's Exchange Supply setting.
If there are multiple devices calling for heat, the boiler target is set to the highest temperature requirement.
IDHW During UnOccupied
When using a DHW Tank Aquastat, a second IDHW Exchange setting is available for the UnOccupied or Sleep period.
When using a DHW Sensor, a second IDHW Setpoint setting is available for the UnOccupied or Sleep period.
DIP Switch must be set to Setback to view UnOccupied items. During the Away Scene, DHW Calls are ignored.
IDHW Mode
The control has an IDHW MODE setting that selects whether or not indirect DHW operation is active.
OFF
IDHW operation is inactive. All DHW Calls are ignored. If this mode is selected while DHW operation is underway, all DHW operation ceases.
ON
IDHW operation is active. All DHW Calls are responded to.
IDHW Location
The control has an IDHW Location setting that selects where the indirect DHW tank is located in the system. This setting determines the operating sensor & affects pump operation.
NEAR
The indirect DHW tank is piped in parallel within the near boiler piping of boiler 4. When a valid DHW Call is present, the IDHW Pump relay turns on and boiler pump 4 turns off. The control uses the boiler 4 outlet sensor as the operating sensor to measure the boiler supply temperature supplied to the indirect DHW tank. There are two boiler target temperatures: one for the space heating system (Boil TARG) and one for the indirect DHW system (IDHW TARG).
![graph LR A["Steam Generator"] --> B["Reactor Unit 1"] A --> C["Reactor Unit 2"] B --> D["Pressure Gauge"] C --> E["Pressure Gauge"] D --> F["Reactor Unit 3"] E --> G["Reactor Unit 4"] F --> H["Reactor Unit 5"] G --> I["Reactor Unit 6"] H --> J["Reactor Unit 7"] I --> K["Reactor Unit 8"] J --> L["Rea…](/content/2026/05/1039689/images/bd38fae34d0269b1a74c49b62171f1508a9d2d584f86c47290e5ef1b1084ffdc.jpg)
- All boilers are used for space heating requirements.
- Boiler 4 is used for indirect DHW when there is a DHW Call.
- The dedicated indirect DHW boiler is always boiler 4, even if there are less than four boilers.
- If boiler 4 is disabled and NEAR is selected for the IDHW Location, the dedicated indirect DHW boiler 4 will not operate.
PRIM
The indirect DHW tank is piped in the boiler system loop. When a valid DHW Call is present, the IDHW Pump relay turns on.
![graph TD A["Gas Tank"] --> B["Piped off boiler system loop"] B --> C["Boiler"] C --> D["Coiled Boiler"] D --> E["Return Line"] style A fill:#f9f,stroke:#333 style B fill:#ccf,stroke:#333 style C fill:#cfc,stroke:#333 style D fill:#fcc,stroke:#333](/content/2026/05/1039689/images/c5f4825e8895513d0f107899187e590ba3f0ec744cdf09d77bbc2d4453265b9c.jpg)
Primary Pump During IDHW
The control has a Primary Pump during IDHW setting that selects whether or not the primary pump is required during indirect DHW operation.
OFF
The primary pump does not turn on during indirect DHW operation. This would be typical of an indirect DHW tank piped in parallel in the boiler system loop. It is assumed that the DHW pump will provide adequate flow through the indirect DHW heat exchanger and the boiler system loop.
![graph TD A["Main Pump"] --> B["DHW Pump ON"] B --> C["Main Pump OFF"] C --> D["Main Pump"] style A fill:#f9f,stroke:#333 style B fill:#ccf,stroke:#333 style C fill:#cfc,stroke:#333 style D fill:#fcc,stroke:#333](/content/2026/05/1039689/images/3acd992d13ee54e159b6180f985624ce585c4f18350d19e6935d6248f2b16988.jpg)
ON
The primary pump turns on during indirect DHW operation. This would be typical of an indirect DHW tank piped in primary/secondary in the boiler system loop.
![graph LR A["Main Pump"] --> B["Primary Pump ON"] B --> C["Main Control Valve"] C --> D["DHW Pump ON"] D --> E["Output Line"] style A fill:#f9f,stroke:#333 style B fill:#f9f,stroke:#333 style C fill:#ccf,stroke:#333 style D fill:#cff,stroke:#333](/content/2026/05/1039689/images/1bd6d42c3b0250d88da554eb25cdd3e50f22204a66d1d69cb88924a17f075cdb.jpg)
IDHW Priority
The control has an IDHW Priority setting that selects whether or not priority of indirect DHW is required over the space heating system. Indirect DHW priority stops or limits the delivery of heat to the space heating system while the indirect DHW tank calls for heat. This allows for quick recovery of the indirect DHW tank.
OFF
IDHW priority is not provided. The primary pump can operate when a Heat Call is present. Heating zones are unaffected by indirect DHW operation.
ON
IDHW priority is provided. The primary pump shuts off for a period of time to provide priority.
Priority Override
Priority override applies when IDHW Priority is set to ON & prevents the building from cooling off too much or the possibility of a potential freeze up during IDHW priority.
When set to auto, the priority time is calculated based on outdoor temperature. At or below the design outdoor temperature, 15 minutes is allowed for IDHW priority. At or above the design indoor temperature, 2 hours is allowed for IDHW priority. The time allowed for IDHW priority varies linearly between the above two points. There is a manual setting also available in the Setup menu.
The priority timer does not start timing until priority is selected & both a DHW Call & a Heat Call exist together. Once the allowed time for priority has elapsed, the control overrides the DHW priority & resumes space heating.
Requirements: Auto is only available when the application mode is set to RSET.
Automatic Priority Override
Conditional IDHW Priority
If the boiler supply temperature is maintained at or above the required temperature during IDHW operation, this indicates that the boilers have enough capacity for IDHW & possibly heating as well. As long as the boiler supply temperature is maintained near the target, IDHW & heating occurs simultaneously.
IDHW Post Purge
After the DHW Call is removed, the control performs a purge. The control shuts off the boilers & continues to operate the IDHW Pump & the primary pump if applicable. This purges the residual heat from the boilers into the DHW tank. The control continues this purge until one of the following occurs:
- A Heat Call is detected.
- The boiler supply drops 20°F (11.0°C) below the DHW target temperature.
- The DHW tank temperature rises above the DHW setpoint plus 1/2 DHW Differential.
- Two minutes elapse.
IDHW Mixing Purge
After IDHW operation, the boiler is extremely hot. At the same time, the heating zones may have cooled off considerably after being off for a period of time. When restarting the heating system after a DHW Call with priority, the control shuts off the boiler & continues to operate the IDHW pump while the primary pump is turned on. This allows some of the DHW return water to mix with the cool return water from the zones & temper the boiler return water.
IDHW with Low Temperature Boilers
If DHW heating is to be incorporated into a low temperature system such as a radiant floor heating system, a mixing device is often installed to isolate the high DHW supply temperature from the lower system temperature. If a mixing device is not installed, high temperature water could be supplied to the low temperature system while trying to satisfy the DHW Call. This may result in damage to the low temperature heating system.
The control is capable of providing IDHW heating in such a system while minimizing the chance that the temperature in the heating system exceeds the design supply water temperature. In order to do this, the following must be true:
- All available boilers are set to condensing. • IDHW Location set to PRIM. • Primary Pump DURING IDHW set to OFF. • IDHW Priority set to ON.
On a DHW Call, the control provides IDHW priority by turning off the primary pump for a period of time. The length of time is based on the outdoor air temperature, or selectable time, as described in the IDHW Priority Override section. However, if the DHW Call is not satisfied within the allotted time, the boiler shuts off & the heat of the boiler is purged into the DHW tank. A IDHW mixing purge occurs in order to reduce the boiler water temperature & once the boiler supply temperature is sufficiently reduced, the IDHW Pump contact shuts off. The primary pump is allowed to turn on for a period of time to prevent the building from cooling off. After a period of heating, & if the DHW Call is still present, the control shuts off the primary pump & provides heat to the DHW tank once again.
IDHW Boil COUNT IDHW
Selects the number of boilers to be used for IDHW operation. This applies when only there is a requirement for IDHW. All available boilers are allowed to operate if there is both a requirement for space heating & IDHW.
Dedicated Domestic Hot Water (DDHW) Operation
The control can operate to provide heat for a Dedicated Domestic Hot Water (DDHW) system.
DDHW heating is available by setting the Application Mode in the Setup Menu to DDHW.
![graph LR A["Top Tank"] --> B["Valve 1"] C["Top Tank"] --> D["Valve 2"] B --> E["Valve 3"] D --> E E --> F["Central Processing Unit"] F --> G["Valve 4"] G --> H["Valve 5"] H --> I["Valve 6"] I --> J["Valve 7"] J --> K["Valve 8"] K --> L["Valve 9"] L --> M["Valve 10"] M --> N["Valve 11"] N --> O["Valv…](/content/2026/05/1039689/images/07f275fbc12b4eab1c1976106f10d3318f0f5f9faf2a311071c8936d2bb5c8b1.jpg)
DHW Call
A DHW Call is required in order for the control to provide heat to a dedicated DHW tank. Once the control registers a DHW Call, it will display the "DHW" icon under Calls in the display. This can be done by:
DHW Sensor
The control can register a DHW Call when a DHW Sensor is wired to terminals 21 & 22. Once the DHW Sensor temperature drops 1/2 of the DDHW Differential setting below the DDHW Setpoint, the control registers a DHW Call.
DDHW Differential
A DHW Call is registered when the temperature at the DHW sensor drops the DDHW DIFF setting below the DDHW Setpoint setting. The DHW Call is satisfied once the temperature at the DHW Sensor rises to the DDHW Setpoint setting.

Boiler Target Temperature During a DDHW Call
When a DHW Call is present, a boiler target is determined. The boiler target is set to the DDHW Setpoint setting.
DDHW During UnOccupied
A second DDHW Setpoint setting is available for the UnOccupied periods.
DIP Switch must be set to Setback to view UnOccupied items.
During the Away Scene, DHW Calls are ignored.
Building Automation System (BAS)
The control can communicate with a Building Automation System (BAS) to provide remote monitoring & adjustment capability.
BAS Mode
There are two modes of BAS communication that define the interaction between the BAS and the control. The level of interaction is determined by the Application Mode setting.
Refer to the Heatronic 4000 BAS Manual for more information, including a listing of the read/write parameters.
Monitor
Monitor mode is available when the Application Mode is set to either Outdoor Temperature Reset, Setpoint, Dedicated Domestic Hot Water (DDHW), or Energy Management System (EMS). The BAS Monitor item in the BAS Menu must be set to ON to enable Monitor mode.
In Monitor mode, the control allows for viewing and adjustment capability of select items within the various menus.
Temperature
Temperature mode is available when the Application Mode is set to Building Automation System (BAS).
In Temperature mode, the control operates to maintain the setpoint temperature provided over the BAS network. In order for the control to be able to operate to maintain the BAS Setpoint temperature, the BAS must also write a Heat Call command over the BAS network.
Whenever a BAS Heat Call command is received, the Heat segment is turned on under the Calls in the status field of the display.
If primary pump operation is desired, the BAS must write a BAS Primary Pump command over the BAS network.
If indirect DHW pump operation is desired, the BAS must write a BAS IDHW Pump command over the BAS network.
BAS Type
The control supports Modbus® and BACnet® IP communications. Selection is made through the BAS TYPE item in the BAS menu.
Network Configuration Settings in BAS Menu
Refer to the BAS menu section of this brochure for a listing of all the BAS network configuration settings.
Pump Operation
Primary Pump Operation
The control includes two primary pump outputs with capability for sequencing. There is a pump enable setting for each primary pump in the Setup menu. When both primary pumps are set to Auto, primary pump sequencing is activated. Primary pump 1 & 2 are operated in stand-by mode when pump sequencing is activated.
The running times of the primary pumps are logged in the Monitor Menu. To reset these values back to zero, select "Clear" while viewing this item.
Operation of the primary pump(s) is determined from the Application Mode & the presence of an appropriate call.
Application Mode: Outdoor Temperature Reset (RSET)
- Heat Call from Contact Closure.
- DHW Call & the Primary Pump during IDHW operation set to ON.
Application Mode: Setpoint (SETP)
- Heat Call from Contact Closure.
- DHW Call & the Primary Pump during IDHW operation set to ON.
Application Mode: Energy Management System (EMS)
- Heat Call from Analog Input Signal.
- DHW Call & the Primary Pump during IDHW operation set to ON.
Application Mode: Building Automation System (BAS)
- BAS Primary Pump request.
Primary Pump Flow Proof
The control includes a flow proof in order to prove flow once a primary pump has turned on. In order for boiler operation to commence the proof must be present. A flow proof is required at all times during pump operation.
Once a primary pump contact is turned on, a flow proof must be present before the flow proof delay has expired.
The Flow Proof feature is enabled by setting the DIP switch to the Prim Pump Flow Proof position.
A flow proof can be provided in two ways:
Contact Closure
A dry contact or 24 V (ac) signal is applied across the PrimPump Flow Proof terminals 1 & 2.
A contact closure can come from a flow switch, pressure differential switch, current sensing or power sensing device.
| ΔP | Pressure Differential Switch |
| FS Flow Switch | |
| KW | Power Sensing Device |
| Amp | Current Sensing Device |
4-20 mA Analog Flow Sensor
A 4-20 mA analog flow sensor can be used to monitor & prove primary flow. The Flow Sensor item in the Setup Menu must be set to ON to enable the flow sensor to provide monitoring.
To enable the flow proof feature, the Flow Proof item in the Setup Menu must be set to a flow percentage. The flow percentage is the percentage of full flow (dependant on the flow model selected) that must be achieved within the flow proof delay time to prove flow. If the flow sensor is not required to prove flow, the Flow Proof item must be set to OFF.
Stand-by Operation
The control only operates one primary pump at a time. A flow proof device can be used to detect when stand-by pump operation is required.
- When an appropriate Call is registered, the lead pump is activated, & the control waits for flow to be established within the flow proof delay time.
- If no flow is established, the lead pump is de-activated, the lag pump is activated, and the control waits again for the flow to establish within the flow proof delay time.
- If no flow is established with the lag pump, the control will make a second attempt to prove flow with the pumps, starting with the lead pump. If flow cannot be proved after the second attempts, the control stops operation until the error is cleared. Verify that the pumps and flow proof device are working correctly before clearing the error.
- If the lead pump establishes flow and fails during operation, the lag pump is activated.
- If at any time, one or both pumps fail to prove flow, an error message is displayed.
Normal Operation
Stand-by Pump Operation
Flow Proof Delay
The control waits a period of time to receive a flow proof call from the time the primary pump turns on. If the control does not receive a flow proof call within that period of time, the primary pump turns off and the stand-by primary pump (if active) turns on. The control then waits that period of time again for the stand-by primary pump to prove flow. If flow is not proven, the stand-by pump turns off. The period of time is set through the FLW PROOF item in the Setup menu and it is adjustable between 10 seconds and 3 minutes.
Flow Proof Demand Test
The control includes a flow proof test in order to determine if the flow device has failed. A flow proof failure is detected if a flow proof is present after the pumps have been shut off for more than four minutes. This can occur if the flow proof device sticks in the on position even when flow has stopped in the system. A flow proof call error will latch when this condition exists.
Primary Pump Rotation
The control rotates the pumps based on the primary pump Rotate item in the Setup menu. Frequency of Rotation is based on the running time of the pumps. Rotation is done when the lead pump is off. If the lead pump runs continuously, the rotation is delayed for up to 12 hours. If the pump runs continuously and rotation is required, the control shuts off the lead pump and 1 second later the stand-by pump is turned on. This eliminates overloading the pump electrical circuit. Upon turning on the stand-by pump the flow proof call input is checked after the flow proof call delay time.
Primary Pump Purge
After the last valid call is removed, the primary pump is operated for an additional period of time. The purge period for the primary pump is adjustable between 10 seconds and 20:00 minutes.
Boiler Pump Operation
The control includes relays to operate the boiler pumps.
Pre-purge
The control includes a boiler pump pre-purge which operates the respective boiler pump for a period of time before the boiler is ignited in order to purge potential residual heat out of the boiler. The pre-purge time is determined from the boiler mass setting. As the boiler mass setting is increased, the boiler pump pre-purge time is also increased. The pre-purge time is fixed at 4 seconds whenever a DHW Tank Call is provided in order to reduce boiler pick-up times.
Post-purge
The control includes a boiler pump post-purge feature that operates the respective boiler pump for a period of time after the boiler is turned off. This feature will purge heat out of the boiler & aid in reducing "kettling". The amount of time for the boiler pump post purge is adjustable between 10 seconds & 20:00 minutes.
Pump Logic
The control includes a special pump logic feature for protection against flue gas condensation due to cool water temperatures. The pump logic feature considers a flow temperature condition applicable after turning on a boiler and a burner turn-off condition applicable when turning off a boiler. The pump logic feature is only applicable for Bosch / Buderus boiler models that are non-condensing.
The control uses the boiler outlet sensor of the respective boiler for the pump logic feature. If the boiler outlet sensor becomes unavailable, the boiler will be locked out from operation.
For the flow temperature condition, a minimum temperature of 122° F ( 50° C) must be reached within 10 minutes from the time flame has been established within the boiler.
If the boiler outlet temperature reaches 122° F ( 50° C) within 10:00 minutes from the time flame has been established, the boiler pump remains on and the burner is operated as required to satisfy the Boiler Target temperature. If the boiler outlet temperature then drops below 122° F ( 50° C), the boiler
pump is turned off until the boiler outlet temperature reaches the 122°F (50°C).
If the boiler outlet temperature does not reach 122° F ( 50° C) within 10:00 minutes from the time flame has been established, the boiler pump turns off. The boiler pump then remains off until the boiler outlet temperature reaches 122° F ( 50° C).
For the burner turn-off condition, a minimum temperature of 129° F ( 54° C) is required in order for the burner to be turned off. Also, for modulating boilers, the burner is adjusted to a maximum of 60% rate prior to being turned off.
If the boiler outlet temperature of an applicable boiler is at least 129° F ( 54° C) when it is required to be turned off, the burner output is adjusted to 60% (for modulating burner). The burner then turns off.
If the boiler outlet temperature of an applicable boiler is less than 129°F (54°C) when it is required to be turned off, the boiler pump is turned off and the output is adjusted to 60% (for modulating burner) until the boiler outlet temperature reaches 129°F (54°C).
Indirect DHW (IDHW) Tank Pump Operation
The control includes a relay to operate an indirect DHW tank pump.
Operation of the IDHW tank pump is determined by the Application Mode and the presence of an appropriate call.
Application Mode: Outdoor Temperature Reset, Setpoint, Energy Management System
Application Mode: Building Automation System
The control has the capability to operate a DHW Recirculation Pump when the control is configured for either Indirect Domestic Hot Water (IDHW) or Dedicated Domestic Hot Water (DDHW). IDHW is available when the application mode is set to either outdoor temperature reset, setpoint, or EMS. DDHW is available when the applicable mode is set to DDHW. The Aux Relay setting in the Setup Menu must be set to DHWR to enable the DHW recirculation pump.
The DHW recirculation pump operates continuously during the Occupied period. If setback is enabled, the pump operates when heat is required during the Unoccupied period.
Combustion Air (Comb Air) Damper and DHW Recirculation Pump Settings
Auxiliary Relay
The control includes an auxiliary relay that can be used either for a combustion/venting device or a DHW recirculation pump. Selection is made through the AUX RELAY item in the Setup menu. Off is also available if there is no Auxiliary device.
When the Aux Relay is set to DHWR, terminals 43 and 44 operate a domestic hot water (DHW) recirculation pump. Refer to the Pump Operation section of this brochure for a description of the DHW recirculation pump operation.
Combustion Air Damper
When the Aux Relay is set to DMPR, terminals 43 and 44 operate a combustion air damper/fan motor or power vent motor. The relay closes once an appropriate call (e.g., Heat) is received and the control has determined that one or more boilers need to be turned on.
Combustion Air (Comb Air) Proof
The Comb Air Proof is used to prove a combustion air or venting device. Boiler operation cannot occur until the proof call is present. If the proof is lost during operation, the boiler plant is sequenced off.
Once the DMPR contact is turned on, a Comb Air Proof must be present before the Comb Air proof delay has expired.
The Comb Air Proof feature is enabled by setting the DIP switch to the Comb Air Proof position.
A Comb Air Proof can be provided by:
Contact Closure
A dry contact or 24 V (ac) signal is applied across the Comb Air Proof terminals 3 & 4.
Combustion Air Proof Delay
The control includes a time delay that is associated with the Comb Air Proof feature in order to determine if the proof device is functional. Once the DMPR relay closes, the control allows for this time delay to receive the Comb Air Proof. If the Comb Air Proof is not received within the delay time, the control will display an error message.
Combustion Air (Comb Air) Proof Test
The control includes a Comb Air Proof test in order to determine if the proving device has failed. If the DMPR relay is opened, the Comb Air Proof should not be present after 4 minutes. If the Comb Air Proof remains, the control will display an error message.
Combustion Air Delay
If the Comb Air Proof feature is set to OFF (DIP switch), sequencing only occurs once a user adjustable time delay elapses.
Combustion Air Post Purge
There is a fixed 15 second post purge of the DMPR relay after the last boiler has turned off, or the appropriate call (e.g. Heat) is removed. If there is a call still present once the last boiler has turned off, the control can look at the error & determine if sequencing is to occur in a "short" period of time. If the control does anticipate staging, the DMPR relay will remain on. Otherwise, the DMPR relay will be turned off once the 15 second post purge elapses.
Setting the Schedule
To provide greater energy savings, you can operate the control on a programmable schedule. The schedule is stored in memory and is not affected by loss of power to the control.
Control (CTRL) Schedule
The schedule only applies to the control. The control follows its own schedule and the events are not communicated to tN4 thermostats.
Requirements:
The Heatronic 4000 Setback/Off DIP Switch must be set to Setback to access the Schedule Menu.
Schedule Types
The schedule type determines when the schedule repeats itself. This control includes four different schedule types:
• 24 Hour: Repeats every 24 hours.
- 5-2: Repeats on a weekly basis. However, it breaks the week into weekend followed by the weekdays. This reduces the amount of schedule event settings.
- 5-11: Repeats on a weekly basis. However, it breaks the weekend into Saturday & Sunday followed by the weekdays. This reduces the amount of schedule event settings.
- 7 Day: Repeats on a weekly basis and allows for separate event times for each day.
| Schedule Type | ||||
| Day 24 Hour | 5-2 5-11 7 | day | ||
| Saturday | • | • | • | • |
| Sunday | • | • | ||
| Monday | • | • | • | |
| Tuesday | • | |||
| Wednesday | • | |||
| Thursday | • | |||
| Friday | • | |||
Events / Day
The events / day can be either 4 or 2. An event is a time at which the control changes the target temperature. The event time can be set to the nearest 10 minutes. If you wish to have the thermostat skip the event, enter “--:--” as the time. The “--:--” time is found between 11:50 PM and 12:00 AM. See the table, Events / Day, for more details regarding types of events.
| Events / Day | Event | 24Hr | Sat | Sun | Mon | Tue | We | Thu | Fri |
| 4 events per day | Occupied 1 | 6:00 AM 6:00 | AM 6:00 AM 6:00 | AM 6:00 AM 6:00 | AM 6:00 AM 6:00 | AM 6:00 AM 6:00 | AM 6:00 AM 6:00 | AM | |
| UnOccupied 1 | 8:00 AM 8:00 | AM 8:00 AM 8:00 | AM 8:00 AM 8:00 | AM 8:00 AM 8:00 | AM 8:00 AM 8:00 | AM 8:00 AM 8:00 | AM | ||
| Occupied 2 | 6:00 PM 6:00 | PM 6:00 PM 6:00 | PM 6:00 PM 6:00 | PM 6:00 PM 6:00 | PM 6:00 PM 6:00 | PM 6:00 PM 6:00 | PM | ||
| UnOccupied 2 | 10:00 PM | 10:00 PM | 10:00 PM | 10:00 PM | 10:00 PM | 10:00 PM | 10:00 PM | 10:00 PM | |
| or | |||||||||
| 2 events per day | Occupied | 6:00 AM 6:00 | AM 6:00 AM 6:00 | AM 6:00 AM 6:00 | AM 6:00 AM 6:00 | AM 6:00 AM 6:00 | AM 6:00 AM 6:00 | AM | |
| Unoccupied | 10:00 PM | 10:00 PM | 10:00 PM | 10:00 PM | 10:00 PM | 10:00 PM | 10:00 PM | 10:00 PM | |
Time Clock
The control has a built-in time clock to allow the control to operate on a schedule. A battery-less backup allows the control to keep time for up to 4 hours without power. The time clock supports automatic adjustment for Daylight Saving Time (DST) once the day, month, and year are entered. Use the Time menu to set the correct time, day, month, and year.
Requirements: The Setback / Off DIP Switch must be set to Setback before the Time menu can be accessed.
Installation
WARNING

- Disconnect all power before opening the control.
- Improper installation and operation of this control could result in damage to the equipment and possibly even personal injury or death.
- This electronic control is not intended for use as a primary limit control. Other controls that are intended and certified as safety limits must be placed into the control circuit.
CAUTION


- Read Manual and all product labels BEFORE using the equipment. Do not use unless you know the safe and proper operation of this equipment.
- Keep this Manual available for easy access by all users.
- Do not attempt to service the control. There are no user serviceable parts inside the control. Attempting to do so voids warranty.
- It is your responsibility to ensure that this control is safely installed according to all applicable codes and standards. Bosch is not responsible for damages resulting from improper installation and/or maintenance.
Installation Location
When choosing the location for the control, consider the following:
- Keep dry. Avoid potential leakage onto the control.
RH ≤ 90% to 104°F (40°C).
Non-condensing environment.
- Do not expose to operating temperatures beyond 32-104°F (0-40°C).
- Provide adequate ventilation.
- Keep away from equipment, appliances or other sources of electrical interference.
- Provide easy access for wiring, viewing, & adjusting the display screen.
- Mount approximately 4-6 ft. (1.2-1.8 m) off the finished floor.
- Locate the control near pumps &/or zone valves if possible.
- Provide a solid backing to mount the enclosure to. For example: plywood, studs, etc.
- Use the conduit knockouts provided on the upper, lower, back & sides of the enclosure.
Figure 1
Figure 2
Control Wiring
This section explains how to wire individual devices to the Heatronic 4000. For step by step wiring refer to the terminal number on the right of the page.
WARNING

- Before wiring, ensure all power is turned off and take all necessary precautions. Install the supplied wiring compartment barriers by sliding them into the grooves provided to isolate the low and high voltage wiring.
- Strip all wiring to a length of 3/8 in. or 10 mm for all terminals.
- A circuit breaker or power disconnect that provides power to the control should be located nearby and clearly labeled.
- Refer to the current and voltage ratings at the back of this brochure before connecting devices to this control.
- Only qualified personnel should install or service the control.

Wiring the Input Power
Terminals 83, 84
Provide a 15 Amp circuit for the input power.
- Connect the 115 V (ac) line wire (L) to terminal 83.
- Connect the neutral wire (N) to terminal 84.
- Connect the ground wire (G) to one of the ground screws provided in the wiring chamber.


Wiring the Primary Pumps
Terminals 47 to 50
Primary pumps requiring up to 230 V (ac) 10 A, 1/2 hp can be switched through terminals 47, 48 & 49, 50. If a single power source is used for multiple pumps, ensure they are not tied together at any point between the pumps & the control. For simplicity in wiring & troubleshooting, a separate breaker for each pump is recommended.
- For Primary Pump P1 connect the power source line wire (L) to terminal 47.
- Connect a wire from terminal 48 to the pump L.
- Connect a wire from the pump N back to the power source neutral.
- For Primary Pump P2 connect the power source line wire (L) to terminal 49.
- Connect a wire from terminal 50 to the pump L.
- Connect a wire from the pump N back to the power source neutral.
- Ensure grounds are connected in the pump & control wiring chambers.


Wiring the Boiler Pumps
Terminals 75 to 82
Boiler pumps requiring up to 230 V (ac) 5 A, 1/3 hp can be switched through terminals 75 to 82. If a single power source is used for multiple pumps, ensure they are not tied together at any point between the pumps & the control. For simplicity in wiring & troubleshooting, a separate breaker for each pump is recommended.
- For the Boiler 1 Pump connect the power source line wire (L) to terminal 75.
- Connect a wire from terminal 76 to the pump L.
- Connect a wire from the pump N back to the power source neutral.
- Repeat for additional pumps using the Boiler 2 Pump to Boiler 4 Pump terminal sets (77 & 78), (79 & 80) & (81 & 82).
- Ensure grounds are connected in the pump & control wiring chambers.


A DHW tank pump requiring up to 230 V (ac) 5 A, 1/3 hp can be switched through the IDHW Pump terminals.
- Connect the line wire (L) to terminal 85.
- Connect a wire from terminal 86 to the pump L.
- Connect a wire from the pump N back to the power source neutral.
- Ensure grounds are connected in the pump & control wiring chambers.


Wiring Auxiliary Terminals
Terminals 43, 44
A C.A. damper or DHW recirculation pump requiring up to 230 V (ac) 5 A, 1/6 hp can be switched through the Auxiliary terminals.
- Connect the line wire (L) or R (low voltage) to terminal 43.
- Connect a wire from terminal 44 to the L or R on the auxiliary device.
- Connect the N (line voltage) or C (low voltage) back to the power source neutral.
- Ensure grounds are connected in the pump & control wiring chambers.

OR


Wiring an Alert
Terminals 45, 46
An Alert device requiring up to 230 V (ac) 5 A, 1/6 hp can be switched through the Alert Dry terminals to provide notification of specific system events.
- Connect the line wire L (line voltage) or R (low voltage) to terminal 46.
- Connect a wire from terminal 45 to L or R on the alert device.
- Connect the N (line voltage) or C (low voltage) back to the power source neutral.


Wiring a Primary Pump (PrimPump) Flow Proof
Terminals 1, 2
The Heatronic 4000 requires a closed switch or short for proof of flow. Up to 24 V (ac) can be passed through the switch. If a flow proof device is being used, ensure the Prim Pump Flow Proof / Off DIP switch on the front of the control is set to the Prim Pump Flow Proof position.
- Connect the PrimPump Flow Proof terminals 1 & 2 to the flow proof device.
If a flow sensor is being used as the flow proving device, a jumper must be placed across the flow proof call terminals.


Wiring a Combustion Air (Comb Air) Proof
Terminals 3, 4
The Heatronic 4000 requires a closed switch or short for proof of combustion air. Up to 24 V (ac) can be passed through the switch. If a combustion air proof device is being used, ensure the Comb Air Proof / Off DIP switch on the front of the control is set to the Comb Air Proof position.
- Connect the Comb Air Proof terminals 3 & 4 to a combustion air proof.

WARNING

- Do not use unless you know the safe and proper operation of equipment required for installation. - It is the installer's responsibility to ensure that this product is safely installed according to all applicable codes and standards.
⚠ Wiring a Central Heat (CH) Call
Terminals 5, 6
The Heatronic 4000 requires a switched external heat call to operate the boiler plant unless calls for heat are generated through a tekmarNet® device, EMS, BACnet® or Modbus® connection. The central heat (CH) call can be volt free or up to 24 V (ac).
- Connect the CH Call terminals 5 & 6 to a switched heat demand. • Typical heat calls are from a zone relay box or thermostat.
- A permanent CH call can be created by installing a jumper wire between terminals 5 & 6.
Heatronic 4000

If the DHW sensor option is not used, a call for indirect domestic hot water can come from an aquastat connected to terminals 7 & 8. The DHW Tank Call can be volt free or up to 24 V (ac).
- Connect the DHW Tank Call terminals 7 & 8 to the DHW tank aquastat.
Heatronic 4000

Wiring a Fuel Switch
Terminals 9, 10
The Fuel Switch terminals 9 & 10 can receive an input from a switching device that selects what burner is to be used on applicable boilers that include dual fuel burners. The Fuel Switch device can be volt free or up to 24 V (ac).
- Connect the Fuel Switch terminals 9 & 10 to the output terminals on a fuel switchover device.
Heatronic 4000

Single Stage Boiler Wiring
Terminals 53 to 72
A single stage condensing or non-condensing boiler is enabled through the TT contacts.
- For Boiler 1 connect Stage 1 terminals 53 & 54 to the boiler TT contacts.
- For Boiler 2 connect Stage 1 terminals 59 & 60 to the boiler TT contacts.
- For Boiler 3 connect Stage 1 terminals 65 & 66 to the boiler TT contacts.
- For Boiler 4 connect Stage 1 terminals 71 & 72 to the boiler TT contacts.
Heatronic 4000
Two Stage Boiler Wiring
Terminals 53 to 74
A two stage condensing or non-condensing boiler requires two wires for each stage.
- For Boiler 1 connect Stage 1 terminals 53 / 54 & 55 / 56 to the boiler stage 1 & stage 2 contacts.
- For Boiler 2 connect Stage 1 terminals 59 / 60 & 61 / 62 to the boiler stage 1 & stage 2 contacts.
- For Boiler 3 connect Stage 1 terminals 65 / 66 & 67 / 68 to the boiler stage 1 & stage 2 contacts.
- For Boiler 4, connect Stage 1 terminals 71/72 and 73/74 to the boiler's Stage 1 and Stage 2 contacts.
Heatronic 4000
For modulating boilers that do not require an enable:
- The Heatronic 4000 provides either a 4-20 mA or a 0-10 V (dc) output to each boiler.
- Polarity is important.
- Connect the Mod + terminals from boilers 1, 2, 3, and 4 to the Heatronic 4000 terminals 51, 57, 63, and 69, respectively.
- Connect the Mod - terminals from boilers 1, 2, 3, and 4 to the Heatronic 4000 terminals 52, 58, 64, and 70, respectively.
Special Requirements: Some modulating boilers may also require an on/off signal in addition to the modulating signal. See the Stage 1 terminals for boilers 1, 2, 3, and 4.

Modutrol IV™ gas valve
The 4 to 20 mA output can be converted to a 0 - 135 Ω output for a Modutrol IV™ gas valve actuating motor using a 0 - 135 Ω tekmar Converter 005 (sold separately).

V9055™ gas valve
The 4 to 20 mA output can be converted to a 0 - 135 Ω output for a V9055™ gas valve actuating motor using a 0 - 135 Ω tekmar Converter 005 (sold separately).

Modutrol IV™ and V9055™ are trademarks of Honeywell, Inc.
Sensor Installation & Wiring
Mounting the Outdoor Sensor
The temperature sensor (thermistor) is built into the sensor enclosure.
- Remove the screw and pull the front cover off the enclosure.
- The sensor can either be mounted directly onto a wall or a 2" x 4" electrical box. When the sensor is wall mounted, the wiring should enter through the back or bottom of the enclosure. Do not mount the sensor with the conduit knockout facing upwards as rain could enter the enclosure and damage the sensor.
- In order to prevent heat transmitted through the wall from affecting the sensor reading, it may be necessary to install an insulating barrier behind the enclosure.
- The Outdoor Sensor should be mounted on a wall which best represents the heat load on the building (a northern wall for most buildings and a southern facing wall for buildings with large south facing glass areas). The sensor should not be exposed to heat sources such as ventilation or window openings.
- The sensor should be installed at an elevation above the ground that will prevent accidental damage or tampering.


WARNING

- Do not use unless you know the safe and proper operation of equipment required for installation.
- It is the installer's responsibility to ensure that this product is safely installed according to all applicable codes and standards.
Wiring the Outdoor Sensor (7738003452)
Terminals 17, 19
- Connect 18 AWG or similar wire to the two terminals provided in the enclosure and run the wires from the sensor to the control. Do not run the wires parallel to telephone or power cables. If the sensor wires are located in an area with strong sources of electromagnetic interference (EMI), shielded cable or twisted pair should be used or the wires can be run in a grounded metal conduit. If using shielded cable, the shield wire should be connected to the Com terminal on the control and not to earth ground.
- Replace the front cover of the sensor enclosure.
- Connect one wire from the outdoor sensor to the Outdoor terminal 17 on the Heatronic 4000.
Connect the second wire to the Com terminal 19.


Mounting the Universal Sensors (7738003451)
These sensors are designed to mount on a pipe or in a temperature immersion well.
The Universal Sensor should be placed downstream of a pump or after an elbow or similar fitting. This is especially important if large diameter pipes are used as the thermal stratification within the pipe can result in erroneous sensor readings. Proper sensor location requires that the fluid is thoroughly mixed within the pipe before it reaches the sensor.
Strapped to Pipe
The Universal Sensor can be strapped directly to the pipe using the cable tie provided. Insulation should be placed around the sensor to reduce the effect of air currents on the sensor measurement.

Immersion Well
If a Universal Sensor is mounted onto 1" (25 mm) diameter L type copper pipe, there is approximately an 8 second delay between a sudden change in water temperature & the time the sensor measures the temperature change. This delay increases considerably when mild steel (black iron) pipe is used. In general, it is recommended that a temperature well be used for steel pipe of diameter greater than 1-1/4" (32 mm). Temperature wells are also recommended when large diameter pipes are used & fluid stratification is present. If the well is not a snug fit on the sensor tube, use the heat transfer paste supplied with the product. Apply paste to the sides of the sensor and place a pea-sized globule on the sensor tip. Push the sensor into the well and when it bottoms out, press firmly. The paste will be forced up the sides of the well.
Wiring Boiler Outlet Sensors (7738003451)
Terminals 26 to 31
Up to 4 boiler outlet sensors can be wired to the Heatronic 4000. These connections are not polarity sensitive.
- Connect one wire from the outlet sensor for boiler 1 to the Boil 1 Out terminal 26.
- Connect the second wire from the outlet sensor for boiler 1 to the Com terminal 28.
- Repeat for additional boiler outlet sensors using terminal sets 27 & 28, 29 & 31, 30 & 31.


Wiring a Boiler Inlet Sensor (7738003451)
Terminals 24, 25
A single boiler inlet sensor measures the water temperature entering the boilers.
- Connect one wire from the boiler inlet sensor to the Boil In terminal 24.
- Connect the second wire to the Com terminal 25.


Wiring a Primary Supply Sensor (7738003451)
Terminals 18, 19
A primary supply sensor measures the temperature of water coming from the boiler plant. This sensor should be installed on the supply pipe ahead of the tees supplying any loads.
- Connect one wire from the primary supply sensor to the Prim Sup terminal 18.
- Connect the second wire to the Com terminal 19.


Wiring a Primary Return Sensor (7738003451)
Terminals 20, 22
A primary return sensor measures the temperature returning to the boiler plant. This sensor can be installed on the return side of the primary loop, ahead of the boiler plant piping.
- Connect one wire from the boiler return sensor to the Prim Ret terminal 20.
- Connect the second wire to the Com terminal 22.


Wiring a DHW Sensor (7738003451)
Terminals 21 to 22
A DHW sensor is used to measure the temperature of a DHW tank. For indirect DHW heating, the DHW sensor can be used instead of a DHW aquastat. For direct DHW heating, only the DHW sensor can be used to control the temperature of the DHW tank.
- Connect one wire from the DHW sensor to the DHW terminal 21.
- Connect the second wire to the Com terminal 22.


Wiring a Flow Sensor (provided by others)
Terminals 11, 12
An analog flow sensor can be connected to the Heatronic 4000 to provide flow monitoring. The control supports an analog 4-20 mA type flow sensor. Using the primary supply sensor & the primary return sensor, energy output can be calculated & displayed from the flow measurement. The flow sensor can also be used to prove primary pump flow.
- Connect one wire from the flow sensor to the 20 V dc Out terminal 11.
- Connect the second wire to mA (+) In terminal 12.


Wiring a Pressure Sensor (provided by others)
Terminals 13 to 15
A pressure sensor can be connected to the Heatronic 4000 to provide water pressure monitoring. The control supports a pressure transducer that provides a 0.5 to 4.5 V (dc) output. The control provides 5 V (dc) power supply for the pressure sensor.
- Connect one wire from the power supply (+5 VDC) on the pressure sensor to the 5V dc Out terminal 13.
- Connect one wire from the pressure signal on the pressure sensor to the Vdc (+) In terminal 14.
- Connect one wire from the GND (0V) on the pressure sensor to the Gnd (-) terminal 15.


Wiring a Common Flue Sensor (provided by others)
Terminals 23, 25
A common flue sensor can be connected to the Heatronic 4000 to provide monitoring of the common boiler plant flue temperature. The common flue sensor can also be used to provide a common flue temperature maximum limiting feature.
- Connect one wire from the vent sensor to the Com Flue terminal 23.
- Connect the second wire to the Com terminal 25.

EMS, Modbus® & BACnet® Connections

EMS Connection
Terminals 16, 19
An Energy Management System (EMS) can be connected to the Heatronic 4000 to provide a target water temperature. Either a 0 to 10 V (dc) or 2 to 10 V (dc) signal may be used.
- Connect one wire from the EMS to the EMS (+) In terminal 16.
- Connect a second wire from the EMS to the Com (-) terminal 19.
A 0 - 20 mA signal can be converted to a 0 - 10 V (dc) signal by installing a 500 Ω resistor in parallel between the Com (-) & EMS (+) In terminals (19 & 16). The EMS Signal setting must be set to 0-10.

A 4 - 20 mA signal can be converted to a 2 - 10 V (dc) signal by installing a 500 Ω resistor in parallel between the Com (-) & EMS (+) In terminals (19 & 16). The EMS Signal setting must be set to 2-10.
Requirements: the APP MODE setting in the Setup Menu must be set to EMS.

Modbus® Connection
Terminals 40 to 42
A Building Automation System (BAS) can be connected to the Heatronic 4000 for remote monitoring & adjustment capability. Modbus® communications use an RS 485 connection. Use 18 AWG Twisted Shielded Pair cable. Cable length is dependent on the baud rate & whether or not terminating resistors are used. Refer to the BAS Integration Manual Heatronic 4000_B for details on the maximum recommended cable length.
- Connect the B (+) terminal on the BAS network to the RS 485 B (+) terminal 40.
- Connect the A (-) terminal on the BAS network to the RS 485 A (-) terminal 41.
- Connect the ground (G) terminal on the BAS network to the Gnd terminal 42.

Heatronic 4000
A Building Automation System (BAS) can be connected to the Heatronic 4000 for remote monitoring & adjustment capability. BACnet® IP communications use an ethernet socket. Use a CAT-5E or CAT-6 cable. The maximum recommended cable length for CAT-5E is 150 ft. (45.7 m) & 300 ft. (91.4 m) for CAT-6.
- Connect the Ethernet RJ45 socket on the BACnet® IP network to the Ethernet RJ45 socket on the Heatronic 4000, labeled BACnet, top center of control.

Testing the Sensor Wiring
A good quality test meter capable of measuring up to 5,000 kΩ (1 kΩ = 1000 Ω) is required to measure the sensor resistance. In addition to this, the actual temperature must be measured with either a good quality digital thermometer, or if a thermometer is not available, a second sensor can be placed alongside the one to be tested & the readings compared.
First measure the temperature using the thermometer & then measure the resistance of the sensor at the control. The wires from the sensor must not be connected to the control while the test is performed. Using the chart below, estimate the temperature
measured by the sensor. The sensor & thermometer readings should be close. If the test meter reads a very high resistance, there may be a broken wire, a poor wiring connection or a defective sensor. If the resistance is very low, the wiring may be shorted, there may be moisture in the sensor or the sensor may be defective. To test for a defective sensor, measure the resistance directly at the sensor location.
Do not apply voltage to a sensor at any time as damage to the sensor may result.
| Temperature Resistance | ||
| °F °C | Ω | |
| -40° | -40° | 336,479 |
| -31° | -35° | 242,681 |
| -22° | -30° | 176,974 |
| -13° | -25° | 130,421 |
| -4° | -20° | 97,081 |
| 5° | -15° | 72,957 |
| 14° | -10° | 55,329 |
| 23° | -5° | 42,327 |
| 32° | 0° | 32,650 |
| 41° | 5° | 25,392 |
| 50° | 10° | 19,901 |
| 59° | 15° | 15,712 |
| 68° | 20° | 12,493 |
| 77° | 25° | 10,000 |
| 86° | 30° | 8,057 |
| 95° | 35° | 6,531 |
| Temperature Resistance | ||
| °F °C | Ω | |
| 104° 40° | 5,326 | |
| 113° | 45° | 4,368 |
| 122° 50° | 3,602 | |
| 131° | 55° | 2,986 |
| 140° | 60° | 2,488 |
| 149° | 65° | 2,083 |
| 158° 70° | 1,752 | |
| 167° 75° | 1,480 | |
| 176° 80° | 1,255 | |
| 185° 85° | 1,070 | |
| 194° 90° | 915 | |
| 203° 95° | 786 | |
| 212° | 100° | 678 |
| 221° | 105° | 587 |
| 230° | 110° | 510 |
| 239° | 115° | 445 |
| Temperature Resistance | ||
| °F °C | Ω | |
| 248° 120° | 389 | |
| 257° | 125° | 341 |
| 266° | 130° | 301 |
| 275° | 135° | 265 |
| 284° | 140° | 235 |
| 293° | 145° | 208 |
| 302° 150° | 186 | |
| 311° | 155° | 166 |
| 320° 160° | 148 | |
| 329° | 165.° | 133 |
| 338° | 170° | 119 |
| 347° | 175° | 107 |
| 356° | 180° 97 | |
| 365° | 185° | 87 |
| 374° | 190° | 79 |
| 383° 195° | 72 | |
Testing the Control Wiring
Testing the Power
Terminals 83 & 84
If the control display does not turn on, check the Power In L & N terminals (83 & 84) using an electrical multimeter. The voltage should measure between 103.5 to 126.5 V (ac).
User Test (HAND)
Manual Override Button
Manual
Override
The User Test (HAND mode) is one of the Manual Override modes of the control. Refer to the Hand mode for a description of the steps that are included to operate the outputs. The steps are dependent on how the boiler(s) (Source # Menu) & the system (Setup menu) are configured.
Testing the Auxiliary Relay
Activate the HAND mode within the Manual Override. Select the Auxiliary item & set it to ON. Using an electrical meter, measure for continuity between the Auxiliary terminals (43 & 44).
Testing the Alert Dry Relay
Activate the HAND mode within the Manual Override. Select the Alert item & set it to ON. Using an electrical meter, measure for continuity between the Alert Dry terminals (45 & 46).
Testing the Primary Pumps
Activate the HAND mode within the Manual Override.
For primary pump 1, select the Primary Pump item & set it to PMP1. Using an electrical meter, measure for continuity between the Primary Pump 1 terminals (47 & 48).
For primary pump 2, select the Primary Pump item & set it to PMP2. Using an electrical meter, measure for continuity between the Primary Pump 2 terminals (49 & 50).
Activate the HAND mode within the Manual Override. Select the DHW Pump item & set it to ON. Using an electrical meter, measure for continuity between the DHW Tank Pump terminals (85 & 86).
Testing the Boiler Pump(s)
Activate the HAND mode within the Manual Override. Select the Boil 1 PUMP item & set it to ON. Using an electrical meter, measure for continuity between the Boiler 1 Pump terminals (75 & 76). Repeat the steps above for Boiler Pumps 2, 3 & 4.
Testing the Boiler Stage(s)
This test applies for single stage & two stage boilers only. Activate the HAND mode within the Manual Override. For a single stage boiler, select the Boil STG item & set it to 1. Using an electrical meter, measure for continuity between the Boiler 1 Stage 1 terminals (53 & 54).
For a two stage boiler, select the Boil STG item & set it to 1. Using an electrical meter, measure for continuity between the Boiler 1 Stage 1 terminals (53 & 54). Set the Boil STG item to 2. Using an electrical meter, measure for continuity between the Boiler 1 Stage 2 terminal (55 & 56). Repeat the steps above, as applicable, for Boilers 2, 3 & 4.
Testing the Modulating Boiler Output
This test applies for modulating boilers only.
Activate the HAND mode within the Manual Override.
Select the Boil 1 MOD item & set a desired firing rate. Using an electrical meter, measure for either a V (dc) or mA signal between the Boiler + Mod - terminals (51 & 52). The reading should be between 0 V (dc) & 10 V (dc) or 4 mA & 20 mA. Repeat the steps above for Boilers 2, 3 & 4.
Testing the Temperature Boiler Output
This test applies for EMS boilers only. Activate the HAND mode within the Manual Override.
Select the Boil 1 TEMP item & set a desired temperature between 50 & 210°F (10 & 99°C). Using an electrical meter, measure for a V (dc) signal between the Boiler + Mod - terminals (51 & 52). The reading should be between 0 V (dc) & 10 V (dc). Repeat the steps above, as applicable, for Boilers 2, 3 & 4.
Testing the Central Heat (CH) Call
Terminals 5 & 6
Set the Application Mode to RSET. Remove all wires from the CH Call terminals (5 & 6). The control display should show no Heat Call. Reconnect wires. Then apply either a
short circuit or 24 V (ac) over the CH Call terminals. The control should now show a Heat Call.
Set the Application Mode to either RSET, SETP or EMS. Remove all wires from the DHW Tank Call terminals (7 & 8). The control display should show no DHW Call. Reconnect
wires. Then apply either a short circuit or 24 V (ac) over the DHW Tank Call terminals. The control should now show a DHW Call.
Testing the Fuel Switch
Terminals 9 & 10
Set the Application Mode to either RSET, SETP or EMS. Remove all wires from the Fuel Switch terminals (9 & 10). The control display should show no F SW. Reconnect wires.
Then apply either a short circuit or 24 V (ac) over the Fuel Switch terminals. The control should now show a F SW.
Control Settings
Access Level
The access level restricts the number of menus & items that can be accessed by the user. The Access Level setting is found in the Toolbox menu. Select the appropriate access level for the people who work with the control on a regular basis. There are three Access Level settings:
- User (USER): Select this access level to limit the number of items available to the end user.
- Installer (INST): Select this access level to limit some of the
items available to the installer. This is the factory default access level. The Heatronic 4000 defaults to the 'Installer' access level after 24 hours.
- Advanced (ADV): Select this access level to have complete access to all of the items.
Requirements: the Lock / Unlock switch on the front of the control must be set to the Unlock position to change the access level.
DIP Switch Settings
| DIP | Description | Default |
| Lock / Unlock & Access LevelsUse this DIP switch to lock & unlock the Access Level of the Heatronic 4000. For details, see above.Once unlocked, the access level can be changed in the Toolbox menu.Once locked, the access level in all devices cannot be viewed or changed.When the control is locked a small segment representing a padlock is show in the display. | Unlocked | |
| PrimPump FlowProof/Off | Prim Pump Flow Proof / OffUse this DIP switch to select whether or not the Prim Pump Flow Proof feature is to be used.If the Prim Pump Flow Proof feature is being used, set the DIP switch to the Prim Pump Flow Proof position. The control must receive an external Prim Pump Flow Proof within a period of time once a primary pump is turned on.If the Prim Pump Flow Proof feature is not being used, set the DIP switch to the Off position. | Off |
| Comb Air Proof / Off | Comb Air Proof / OffUse this DIP switch to select whether or not the Comb Air Proof feature is to be used.If the Comb Air Proof feature is being used, set the DIP switch to the Comb Air Proof position. The control must receive an external Comb Air Proof within a period of time once the C.A. damper is turned on.If the Comb Air Proof feature is not being used, set the DIP switch to the Off position. | Off |
| Off / Exercise | Off / ExerciseUse this DIP switch to select whether or not the control is to exercise all pumps for 10 seconds every three days of inactivity. | Exercise |
| Setback / Off | Setback / OffUse this DIP switch to select whether or not the control is to follow a schedule. | Off |
User Interface
Display

Boiler Output Status Fields
Symbols
| Heat, DHW, Setpoint | CALLSDisplays any call the control is receiving. | °F, °C, AM, PM, min, hr, m3/h, gpm, kWh, %, MBtu, psi, kPa | °F, °C, AM, PM...Units of measurement for current number. |
Prim  | PRIMARY PUMPDisplays when primary pump 1 or primary pump 2 is operating. |  | WARNINGDisplays if an error or warning exists on the system. |
| DHW [SKYK] | DHW PUMPDisplays when the DHW pump is operating. | [00SH] | BOILER PUMPDisplays when a boiler pump 1 is operating. |
| Alert | ALERTDisplays if an error or warning exists. | ||
| Boiler 1 | BOILERIndicates that the boiler 1 is operating (flashing icon indicates boiler is igniting). | ||
| Aux | AUXILIARYDisplays when the C.A. damper or DHW recirculation pump is operating. | ||
| Occ 1, UnOcc 1, Occ 2, UnOcc 2 | OCC1, UNOCC1, OCC2, UNOCC2Displays the current event of a schedule. |  | BOILER OUTPUTDisplays output of boiler 1. Dependent on boiler type.Single stage: 100% (On)Two stage: 50% (stage 1 On), 100% (stage 2 On)Modulating: current modulation %EMS = current setpoint temperature |
| [TZY2] | tekmarNet®The Heatronic 4000 is communicating with other tekmarNet®devices. |
Navigating The Display
The menu items of the Heatronic 4000 are described in detail in the following pages. The number of available items changes depending on the control configuration. To find out what other settings affect the display of an item, refer to the menu descriptions.
![graph LR A["View Menu (default display)"] --> B["Press & hold Home"] B --> C["Navigate available menus"] C --> D["Setup Source 1\nSource 2\nSource 3\nSource 4\nMonitor 1\nMonitor 2\nMonitor 3\nMonitor 4\nSchedule Time BAS Toolbox"] D --> E["Enter selected menu"] E --> F["Navigate available items"] F…](/content/2026/05/1039689/images/d962d063e899229ae029997375080c75446330bcdd0d85320aaa9c11220ab070.jpg)
View Menu (1 of 2)
The View Menu includes general information about boiler & pump operation, calls & temperatures. The View Menu is the default display of the Heatronic 4000.
| Item Field Range Description | ||
 | Access:User | TIMECurrent date & time.Requirements:This item is only available when the Setback / Off switch is set to Setback & Clock (Time menu) is set to ON. |
 | ---, -76 to 149°F(-60.0 to 65.0°C)Access:User | OUTDOORCurrent outdoor temperature as measured by the outdoor sensor. “----” is displayed if there is a sensor fault.Requirements:This item is only available when Application Mode is set to RSET or an outdoor sensor is connected. |
 | ---, -22 to 266°F(-30 to 130°C)Access:User | PRIMARY SUPPLYCurrent primary supply water temperature as measured by the primary supply sensor.“----” is displayed if there is a sensor fault. |
 | ---, -22 to 266°F(-30 to 130°C)Access:ADV | BOILER TARGETThe boiler target is the temperature the control is trying to maintain at the primary supply sensor. “----” is displayed when no heat is required. |
 | ---, -22 to 266°F(-30.0 to 130.0°C)Access:ADV | INDIRECT DHW EXCHANGE TEMPERATUREThe indirect DHW exchange target is the temperature the control is trying to maintain at the boiler 4 outlet sensor. “----” is displayed when no heat is required.Requirements:This item is only available if Application Mode is set to RSET, SETP or EMS, IDHW Mode is set to ON & IDHW Location is set to NEAR. |
 | ---, -22 to 266°F(-30.0 to 130.0°C)Access:User | INDIRECT DHWCurrent indirect DHW tank temperature as measured by the DHW sensor. “----” is displayed if there is a sensor fault.Requirements:This item is only available if Application Mode is set to RSET, SETP or EMS, IDHW Mode is set to ON & IDHW Sensor is set to ON. |
View Menu (2 of 2)
| Item Field Range Description | ||
 | ---, -22 to 266°F(-30.0 to 130.0°C)Access:User | DEDICATED DHWCurrent dedicated DHW tank temperature as measured by the DHW sensor. “----” is displayed if there is a sensor fault.Requirements:This item is only available if Application Mode is set to DDHW. |
 | ---, -22 to 266°F(-30.0 to 130.0°C)Access:ADV | PRIMARY RETURNCurrent primary return water temperature as measured by the boiler return sensor.“----” is displayed if there is a sensor fault.Requirements:This item is only available if a primary return sensor is connected. |
 | -22 to 266°F(-12.0 to 148.0°C)Access:ADV | PRIMARY SUPPLY DIFFERENTIALCurrent temperature difference between the primary supply & primary return sensors.Requirements:This item is only available if primary supply & primary return sensors are connected. |
 | ---, -40 to 500°F(-40.0 to 260.0°C)Access:ADV | COMMON FLUE TEMPERATURECurrent common flue temperature of the boiler plant. “----” is displayed if there is a sensor fault.Requirements:This item is only available if a common flue sensor is connected. |
 | GPM or m3/hAccess:ADV | FLOW RATECurrent flow rate as measured by the 0-10 V (dc) flow sensor.Requirements:This item is only available if Flow Sensor is set to ON. |
 | MBtu/h or kWAccess:ADV | BOILER LOADCurrent boiler plant output.Requirements:This item is only available if Flow Sensor is set to ON & if boiler supply & boiler return sensors are connected. |
 | psi or kPaAccess:ADV | PRESSURECurrent system pressure as measured by the 4-20 mA pressure sensor.Requirements:This item is only available if Pressure Sensor is set to ON. |
 | ---, -22 to 266°F(-30.0 to 130.0°C)Access:ADV | BOILER INLET TEMPERATURECurrent boiler inlet water temperature.Requirements:This item is only available if a boiler inlet sensor is connected. |
 | ---, -22 to 266°F(-30.0 to 130.0°C)Access:ADV | BOILER (#) OUTLET SENSORCurrent boiler outlet temperature of boiler 1. This item is available for all enabled boilers provided their respective boiler outlet sensor is connected.Requirements:This item is only available if a boiler 1 outlet sensor is connected. |
 | -22 to 266°F(-12.0 to 148.0°C)Access:ADV | BOILER (#) TEMPERATURE DIFFERENTIALCurrent temperature difference between the boiler 1 outlet & boiler inlet sensors. This item is available for all enabled boilers provided their respective boiler outlet sensor is connected.Requirements:This item is only available if boiler 1 outlet & boiler inlet sensors are connected. |
Setup Menu (1 of 6)
Setup Menu items are used for system specific configuration.
| Item Field Range Description | ||
 | RSET, SETP, DDHW,EMS, BASDefault = RSET | APPLICATION MODERSET = Outdoor Temperature ResetSETP = Setpoint HeatingDDHW = Dedicated DHW HeatingEMS = Energy Management SystemBAS = Building Automation System |
| Access: INST | ||
 | 35 to 100°F(2.0 to 38.0°C)Default = 70°F (21.0°C) | ROOM OCCUPIEDThe desired room air temperature during the occupied periods.Requirements: This item is only available if the Application Mode is set to RSET. |
| Access: INST | ||
 | 35 to 100°F(2.0 to 38.0°C)Default = 65°F (18.5°C) | ROOM UNOCUPIEDThe desired room air temperature during the unoccupied periods.Requirements: This item is only available if the Application Mode is set to RSET, Setback / Off switch is set to Setback & a schedule is selected. |
| Access: INST | ||
 | OFF, 0:20 to 8:00 hrsDefault: OFF | BOOSTThe maximum amount of morning boost when change from the unoccupied to the occupied period.Requirements: This item is only available if the Application Mode is set to RSET & the Setback / Off switch is set to Setback. |
| Access: ADV | ||
 | -60 to 45°F(-51.0 to 7.0°C)Default: 10°F (-12.0°C) | OUTDOOR DESIGNThe design outdoor air temperature used in the heat loss calculations for the space heating system. Typically set to the outdoor temperature of the coldest day of the year.Requirements: This item is only available if the Application Mode is set to RSET. |
| Access: INST | ||
 | HRF1, HRF2, COIL,CONV,RAD, BASEDefault: CONV | TERMINAL UNITThe type of terminal units that are being used for the space heating system. Selection includes: high mass radiant floor (HRF1), low mass radiant floor (HRF2), fancoil (COIL), fin-tube baseboard (CONV), radiator (RAD) & cast iron baseboard (BASE).Requirements: This item is only available if the Application Mode is set to RSET. |
| Access: INST | ||
 | 35 to 100°F(2.0 to 38.0°C)Default: 70°F (21.0°C) | INDOOR DESIGNThe design indoor air temperature used in the heat loss calculations for the space heating system.Requirements: This item is only available if the Application Mode is set to RSET. |
| Access: ADV | ||
 | 70 to 230°F(21.0 to 110.0°C)Default: 180°F (82.0°C) | PRIMARY DESIGNThe supply water temperature required for the space heating system on the typical coldest day of the year.Requirements: This item is only available if the Application Mode is set to RSET. |
| Access: ADV | ||
 | 0-10 or 2-10Default: 0-10 | EMS SIGNALSelects the analog input signal range used with the Energy Management System (EMS).Requirements: This item is only available if the Application Mode is set to EMS. |
| Access: ADV | ||
 | -10 to 10°F(-5.5 to -5.5°C)Default: 0°F (0.0°C) | EMS OFFSETSelects the offset from the boiler target temperature interpreted from the EMS analog input signal.Requirements: This item is only available if the Application Mode is set to EMS. |
| Access: ADV | ||
Setup Menu (2 of 6)
| Item Field Range Description | ||
 | OFF, 60 to 180°F (OFF, 15.5 to 82.0°C)Default: 140°F (60.0°C)Access: ADV | PRIMARY MINIMUMThe minimum allowed boiler target temperature used for the non-condensing boiler group. Check the boiler manufacturer's manual for recommended minimum boiler supply temperatures.Requirements: This item is only available if there is at least one boiler set to auto (Boiler Enable = AUTO) & non-condensing (Boiler Condense = NO). |
 | 90 to 225°F, OFF (32.0 to 107.0°C, OFF)Default: 200°F (93.0°C)Access: ADV | PRIMARY MAXIMUMThe maximum allowed boiler target temperature. |
 | AUTO, 2 to 42°FAUTO, 1.0 to 23.5°CDefault: AUTOAccess: ADV | PRIMARY DIFFERENTIALThe temperature differential that the control is to use to cycle the boiler On & Off (half above & half below the boiler target temperature).Requirements: This item is only available if Application Mode is set to either RSET, SETP, EMS or BAS. |
 | OFF, DMPR, DHWRDefault: OFFAccess: ADV | AUXILIARY RELAYSelects the operation of the auxiliary relay to be either Combustion Air Damper (DMPR) or DHW Recirculation Pump (DHWR).Requirements: If the External C.A. Proof / Off switch is set to External C.A. Proof, this setting is fixed at DMPR. |
 | OFF or AUTODefault: AUTOAccess: ADV | PRIMARY PUMP 1Selects whether primary pump 1 is operational or not.Requirements: This item is only available if Application Mode is set to either RSET, SETP, EMS or BAS. |
 | OFF or AUTODefault: OFFAccess: ADV | PRIMARY PUMP 2Selects whether primary pump 2 is operational or not.Requirements: This item is only available if Application Mode is set to either RSET, SETP, EMS or BAS. |
 | 12 to 180 hr, OFFDefault: 96 hrAccess: ADV | ROTATE PRIMARY PUMPSSets the frequency of rotation of the primary pumps.Requirements: This item is only available if Application Mode is set to either RSET, SETP, EMS or BAS & Primary Pump 1 & Primary Pump 2 set to AUTO. |
 | OFF, 0:10 to 20:00 minDefault: 0:20 minAccess: ADV | PRIMARY PUMP PURGETime the primary pump remains on once the appropriate calls (heat, setpoint or DHW) are removed to purge heat from the boiler plant.Requirements: This item is only available if Application Mode is set to either RSET, SETP, EMS or BAS & Primary Pump 1 or Primary Pump 2 is set to AUTO |
 | 0:10 to 3:00 minDefault: 0:30 minAccess: ADV | FLOW PROOF DELAYThe time allowed for the control to receive a flow proof call once the primary pump turns on.Requirements: This item is only available if the Prim Pump Flow Proof / Off switch is set to Prim Pump Flow Proof. |
 | 0:10 to 3:00 minDefault: 1:00 minAccess: ADV | COMBUSTION AIR PROOF DELAYThe time allowed for the control to receive a Comb Air Proof once the Comb Air damper (Aux) relay turns on.Requirements: This item is only available if the Comb Air Proof / Off switch is set to Comb Air Proof. |
 | OFF, 0:10 to 3:00 minDefault: 1:00 minAccess: ADV | COMBUSTION AIR DELAYThe time delay for the first boiler to operate once the Comb Air damper (Aux) relay turns on.Requirements: This item is only available if the Comb Air Proof / Off switch is set to Off & Auxiliary Relay is set to DMPR. |
Setup Menu (3 of 6)
| Item Field Range Description | ||
 | 150 to 350°F, OFF(65.5 to 177.0°C)Default: OFF | COMMON FLUE MAXIMUMThe maximum common flue temperature that is used for vent temperature limiting.The boiler plant will be shut down if the common flue temperature rises to the common flue maximum temperature. Set to OFF if only common flue temperature monitoring is desired. |
| Access: ADV | ||
 | AUTO, 0:30 to 40:00 minDefault: AUTO | STAGE DELAYThe minimum time delay between the operation of boiler stages, either within a boiler or between boilers.Requirements: This item is only available if there are at least two boilers set to auto (Boiler Enable = AUTO). |
| Access: ADV | ||
 | SEQ or PARDefault: PAR | MODULATION MODE CONDENSINGSelects either sequential or parallel modulation for multiple modulating condensing boilers.Requirements: This item is only available if there are at least two boilers set to auto (ENABLE=AUTO), condensing (Boiler Condense = YES) & Modulating (Boiler Type = MOD or EMS). |
| Access: ADV | ||
 | SEQ, PARDefault: SEQ | MODULATION MODE NON-CONDENSINGSelects either sequential or parallel modulation for multiple modulating non-condensing boilers.Requirements: This item is only available if there are at least two boilers set to auto (Boiler Enable = AUTO), non-condensing (Boiler Condense = NO) & Modulating (Boiler Type = MOD or EMS). |
| Access: ADV | ||
 | LHLH or LLHHDefault: LHLH | STAGING MODE CONDENSINGSelects either low-high-low-high (LHLH) or low-low-high-high (LLHH) staging for multiple two-stage condensing boilers.Requirements: This item is only available if there are at least two boilers set to auto (Boiler Enable = AUTO), condensing (Boiler Condense = YES) & two stage (Boiler Type = 2STG). |
| Access: ADV | ||
 | LHLH or LLHHDefault: LHLH | STAGING MODE NON-CONDENSINGSelects either low-high-low-high (LHLH) or low-low-high-high (LLHH) staging for multiple two-stage non-condensing boilers.Requirements: This item is only available if there are at least two boilers set to auto (Boiler Enable = AUTO), non-condensing (Boiler Condense=NO) & two stage (Boiler Type = 2STG). |
| Access: ADV | ||
 | OFF or ONDefault: ON | ROTATION CONDENSING BOILER GROUPSelects the equal run time rotation feature within the condensing boiler group.Requirements: This item is only available if there are at least two boilers set to auto (Boiler Enable = AUTO) & condensing (Boiler Condense = YES). |
| Access: ADV | ||
 | OFF or ONDefault: ON | ROTATION NON-CONDENSING BOILER GROUPSelects the equal run time rotation feature within the non-condensing boiler group.Requirements: This item is only available if there are at least two boilers set to auto (Boiler Enable = AUTO) & non-condensing (Boiler Condense = NO). |
| Access: ADV | ||
 | OFF or ONDefault: OFF | FIXED LEADSelects whether or not the first boiler is to be excluded from the rotation sequence. If set to ON, boiler 1 is always the first to fire.Requirements: This item is only available if boiler 1 is enabled (Boiler Enable = AUTO) & all available boilers are either condensing or non-condensing. |
| Access: ADV | ||
 | OFF or ONDefault: OFF | FIXED LASTSelects whether or not the last boiler is to be excluded from the rotation sequence. If set to ON, boiler 4 is always the last to fire.Requirements: This item is only available if boiler 4 is enabled (Boiler Enable = AUTO) & all available boilers are either condensing or non-condensing. |
| Access: ADV | ||
Setup Menu (4 of 6)
| Item Field Range Description | ||
 | AUTO, 5 to 30 minDefault: AUTO | HEATING CYCLESThe cycle length to which all tN4 devices will synchronize.Requirements: This item is only available when Application Mode is set to RSET & a tN4 device is present. |
| Access: ADV | ||
 | OFF or ONDefault: OFF | INDIRECT DHW MODESelects whether indirect DHW heating is active or not.Requirements: This item is only available when Application Mode is set to RSET, SETP or EMS. |
| Access: ADV | ||
 | NEAR or PRIMDefault: PRIM | INDIRECT DHW LOCATIONSelects the location of the indirect DHW tank.NEAR = Near boiler piping supplied by boiler 4.PRIM = Primary loop piping supplied by boiler plant.Requirements: This item is only available when Application Mode is set to RSET, SETP or EMS & Indirect DHW Mode is set to ON. |
| Access: ADV | ||
 | OFF or ONDefault: OFF | INDIRECT DHW SENSORSelects if a DHW Sensor is to be used for indirect DHW heating.Requirements: This item is only available when Application Mode is set to RSET, SETP or EMS & Indirect DHW Mode is set to ON. |
| Access: ADV | ||
 | 70 to 190°F(21.0 to 88.0°C)Default: 140°F (60.0°C) | INDIRECT DHW SETPOINT OCCUPIEDThe temperature of the indirect DHW tank during the occupied periods.Requirements: This item is only available when Application Mode is set to RSET, SETP or EMS, Indirect DHW Mode is set to ON & Indirect DHW Sensor is set to ON. |
| Access: ADV | ||
 | OFF, 70 to 190°F(21.0 to 88.0°C)Default: OFF | INDIRECT DHW SETPOINT UNOCCUPIEDThe temperature of the indirect DHW tank during the unoccupied periods. If operation is not desired during the unoccupied periods, select OFF.Requirements: This item is only available when Application Mode is set to RSET, SETP or EMS, Indirect DHW Mode is set to ON, Indirect DHW Sensor is set to ON & the Setback / Off switch is set to Setback. |
| Access: ADV | ||
 | 1 to 42°F(0.5 to 23.5°C)Default: 6°F (3.0°C) | INDIRECT DHW DIFFERENTIALThe temperature differential of the indirect DHW tank from the IDHW SETPOINT settings.Requirements: This item is only available when Application Mode is set to RSET, SETP or EMS, Indirect DHW Mode is set to ON & Indirect DHW Sensor is set to ON. |
| Access: ADV | ||
 | 100 to 220°F(38.0 to 104.0°C)Default: 180°F (82.0°C) | INDIRECT DHW EXCHANGE OCCUPIEDThe boiler target temperature for the indirect DHW heat exchanger during the occupied periods.Requirements: This item is only available when Application Mode is set to RSET, SETP or EMS, Indirect DHW Mode is set to ON & Indirect DHW Sensor is set to OFF. |
| Access: ADV | ||
 | OFF, 100 to 220°F(OFF, 38.0 to 104.0°C)Default: OFF | INDIRECT DHW EXCHANGE UNOCCUPIEDThe boiler target temperature for the indirect DHW heat exchanger during the unoccupied periods. If operation is not desired during the unoccupied periods, select OFF.Requirements: This item is only available when Application Mode is set to RSET, SETP or EMS, Indirect DHW Mode is set to ON, Indirect DHW Sensor is set to OFF & the Setback / Off switch is set to Setback. |
| Access: ADV | ||
 | OFF or ONDefault: OFF | INDIRECT DHW PRIORITYSelects whether indirect DHW priority is active or not.Requirements: This item is only available when Application Mode is set to RSET, SETP or EMS & Indirect DHW Mode is set to ON. |
| Access: ADV | ||
Setup Menu (5 of 6)
| Item Field Range Description | ||
 | 1 to 4Default: 2 | INDIRECT DHW BOILER COUNTSelects the number of boilers to be used when only a DHW Tank Call is present.Requirements: This item is only available when Application Mode is set to RSET, SETP or EMS, Indirect DHW Mode is set to ON & Indirect DHW Location is set to Boil. |
| Access: ADV | ||
 | 60 to 220°F(15.5 to 104.0°C)Default: 180°F (82.0°C) | SETPOINT OCCUPIED TEMPERATUREThe boiler target temperature when a Central Heat (CH) Call is present during the occupied periods.Requirements: This item is only available when Application Mode is set to SETP. |
| Access: ADV | ||
 | OFF, 60 to 220°F(15.5 to 104.0°C)Default: OFF | SETPOINT UNOCCUPIED TEMPERATUREThe boiler target temperature when a Central Heat (CH) Call is present during the unoccupied periods. If operation is not desired during the unoccupied periods, select OFF.Requirements: This item is only available when Application Mode is set to SETP & the Setback / Off switch is set to Setback |
| Access: ADV | ||
 | 70 to 190°F(21.0 to 88.0°C)Default: 140°F (60.0°C) | DEDICATED DHW OCCUPIED SETPOINTThe temperature of the dedicated DHW tank during the occupied periods.Requirements: This item is only available when Application Mode is set to DDHW. |
| Access: ADV | ||
 | OFF, 70 to 190°F(21.0 to 88.0°C)Default: OFF | DEDICATED DHW UNOCCUPIED SETPOINTThe temperature of the dedicated DHW tank during the unoccupied periods.Requirements: This item is only available when Application Mode is set to DDHW & the Setback / Off switch is set to Setback. |
| Access: ADV | ||
 | 2 to 10°F(1.0 to 5.5°C)Default: 5°F (3.0°C) | DEDICATED DHW DIFFERENTIALThe temperature differential of the dedicated DHW tank from the DDHW SETPOINT settings.Requirements: This item is only available when Application Mode is set to DDHW. |
| Access: ADV | ||
 | OFF, AUTO, 0:20 to 4:00 hrsDefault: OFF | PRIORITY OVERRIDEThe amount of time priority is given for indirect DHW before space heating resumes.Requirements: This item is only available when Application Mode is set to RSET, SETP or EMS, & Indirect DHW Mode is set to ON & Indirect DHW Priority is set to ON. |
| Access: ADV | ||
 | 35 to 100°F, OFF(2.0 to 38.0°C)Default: 70°F (21.0°C) | WWSD OCCUPIEDThe system's warm weather shutdown temperature during the occupied periods.Requirements: This item is only available when the Application Mode is set to RSET. |
| Access: ADV | ||
 | 35 to 100°F, OFF(2.0 to 38.0°C)Default: 60°F (15.5°C) | WWSD UNOCCUPIEDThe system's warm weather shutdown temperature during the unoccupied periods.Requirements: This item is only available when the Application Mode is set to RSET & the Setback / Off switch is set to Setback. |
| Access: ADV | ||
 | OFF, 3 to 40 minDefault: 20 min | BOILER ALERTAlert signal if the boiler supply temperature does not increase in temperature, after all available boilers have been turned on, within the selected time. |
| Access: ADV | ||
Setup Menu (6 of 6)
| Item Field Range Description | ||
 | OFF or ONDefault: OFF | FLOW SENSORSelects whether or not a flow sensor is used. |
| Access: ADV | ||
 | 10 to 100 gpmDefault: 20 gpm | FLOW RATE 4MASets the flow rate that corresponds to 4 mA for the flow sensor.Requirements: This item is only available when Flow Sensor is set to ON. |
| Access: ADV | ||
 | 100 to 2,000 gpmDefault: 500 gpm | FLOW RATE 20MASets the flow rate that corresponds to 20 mA for the flow sensor.Requirements: This item is only available when Flow Sensor is set to ON. |
| Access: ADV | ||
 | OFF, 1 to 100%Default: OFF | FLOW SENSOR PROOFSets the percentage of flow used for proving primary pump flow. If the flow sensor is only used for monitoring, set to OFF. This is the minimum flow required to prove primary pump flow.Requirements: This item is only available when Flow Sensor is set to ON. |
| Access: ADV | ||
 | OFF or ONDefault: OFF | PRESSURE SENSORSelects whether or not a pressure sensor is used. |
| Access: ADV | ||
 | 50, 100, 150, 200, 250, 300Default: 50 | PRESSURE SENSOR RANGESelects the model of pressure sensor based on the pressure range in units of PSI.Requirements: This item is only available when Pressure Sensor is set to ON. |
| Access: ADV | ||
Source # Menu (1 of 3)
There is a different Source Menu for each of the 4 boilers that the Heatronic 4000 can operate. Settings can vary for each boiler if desired.
 | OFF or AUTODefault:AUTO for Boil1OFF for Boiler 2-4 | BOILER ENABLESelects whether the boiler is operational or not. |
| Access: INST | ||
 | OFF or Boil1Default: OFF | COPY BOILER 1Selects whether or not settings from boiler 1 are copied to Boiler 2, 3 & 4.Requirements: This item is applicable for Boiler 2, 3 and 4 and is only available if Boiler Enable is set to AUTO & Bosch / Buderus Model is set to OFF. |
| Access: INST | ||
 | NO or YESDefault: YES | BOSCH / BUDERUS BOILERSelects if the boiler is one of the pre-configured Bosch / Buderus models.Requirements: This item is only available if Boiler Enable is set to AUTO & Copy Boiler 1 is set to OFF.. |
| Access: INST | ||
 | SB#######,SB#######, G#####,G#####, GB#####,GB#####Default: SB625160 | BOSCH / BUDERUS MODEL NUMBERSelects from the different models of pre-configured Bosch / Buderus boilers. Refer to the Appendix on page 58 for a complete listing of the available boiler models.Requirements: This item is only available if Boiler Enable is set to AUTO, Copy Boiler 1 is set to OFF & Bosch / Buderus Model is set to YES. |
| Access: INST | ||
 | GAS, OIL, DUALDefault: GAS | BOSCH / BUDERUS FUEL TYPESelects the type of burner that is used for Bosch / Buderus boiler models that support multiple fuel options.Requirements: This item is only available if Boiler Enable is set to AUTO, Copy Boiler 1 is set to OFF, Bosch / Buderus Model is set to YES & Bosch / Buderus Model Number is set to a model that includes multiple fuel options. |
| Access: INST | ||
 | MOD, 1STG, 2STG,EMSDefault: MOD | BOILER TYPESelects from the different types of burner operation including modulating direct drive (MOD), single stage (1STG), two stage (2STG) & target temperature (EMS).Requirements: This item is only available if Boiler Enable is set to AUTO & Copy Boiler 1 is set to OFF. This item is not available for adjustment if Bosch / Buderus Model is set to YES. |
| Access: INST | ||
 | NO or YESDefault: YES | BOILER CONDENSESelects if the boiler is non-condensing (NO) or condensing (YES).Requirements: This item is only available if Boiler Enable is set to AUTO & Copy Boiler 1 is set to OFF. This item is not available for adjustment if Bosch / Buderus Model is set to YES. |
| Access: ADV | ||
 | 0-10 or 4-20Default: 0-10 | MODULATION TYPESelects either 0-10 Vdc (0-10) or 4-20 mA (4-20) as the modulating output for the modulating boiler.Requirements: This item is only available if Boiler Enable is set to AUTO, Copy Boiler 1 is set to OFF & Boiler Type is set to MOD or EMS. This item is not available for adjustment if Bosch / Buderus Model is set to YES. |
| Access: ADV | ||
 | 10 to 180 secDefault: 36 sec | FIRE DELAYDelay from turn-on of ignition until the burner obtains flame.Requirements: This item is only available if Boiler Enable is set to AUTO & Copy Boiler 1 is set to OFF. This item is not available for adjustment if Bosch / Buderus Model is set to YES. |
| Access: ADV | ||
 | OFF, 10 to 180 secDefault: 10 sec | MODULATION DELAYDelay between the burner obtaining flame & the boiler's ignition control releasing to modulation.Requirements: This item is only available if Boiler Enable is set to AUTO, Copy Boiler 1 is set to OFF & Boiler Type is set to MOD or BOSC. This item is not available for adjustment if Bosch / Buderus Model is set to YES. |
| Access: ADV |
Source # Menu (2 of 3)
 | LOW, MED, HIDefault: HI | BOILER MASSThe thermal mass characteristics of the boiler.Requirements: This item is only available if Boiler Enable is set to AUTO & Copy Boiler 1 is set to OFF. This item is not available for adjustment if Bosch / Buderus Model is set to YES. |
| Access: INST | ||
 | 10 to 9990 MBtu/hDefault: 180 MBtu/h | BOILER OUTPUT LOWMinimum (low fire) heat output in Btu/hr/1000.Requirements: This item is only available if Boiler Enable is set to AUTO, Copy Boiler 1 is set to OFF & Boiler Type is set to MOD. |
| Access: ADV | ||
 | 10 to 9990 MBtu/hDefault: 530 MBtu/h | BOILER OUTPUT HIGHMaximum (high fire) heat output in Btu/hr/1000.Requirements: This item is only available if Boiler Enable is set to AUTO & Copy Boiler 1 is set to OFF. |
| Access: ADV | ||
 | 10 to 230 secDefault: 15 sec | MOTOR SPEEDThe amount of time required for the modulating actuating motor to fully open the gas valve or operate the blower from a stopped position to full speed.Requirements: This item is only available if the Boiler Enable is set to AUTO, Boiler 1 Copy is set to OFF & Boiler Type is set MOD. |
| Access: ADV | ||
 | 0 to 100%Default: 0% | START MODULATIONThe percentage modulation required for ignition.Requirements: This item is only available if the Boiler Enable is set to AUTO, Boiler 1 Copy is set to OFF & Boiler Type is set MOD. |
| Access: ADV | ||
 | 0 to 50%Default: 0% | MINIMUM MODULATIONThe minimum percentage modulation of the burner.Requirements: This item is only available if the Boiler Enable is set to AUTO, Boiler 1 Copy is set to OFF & Boiler Type is set MOD. |
| Access: ADV | ||
 | 50 to 100%Default: 100% | MAXIMUM MODULATIONThe maximum percentage modulation of the burner.Requirements: This item is only available if the Boiler Enable is set to AUTO, Boiler 1 Copy is set to OFF & Boiler Type is set MOD. |
| Access: ADV | ||
 | 0.5 to 10.0Default: 1.0 | EMS SIGNAL MINIMUMThe minimum analog signal used for the EMS (temperature input) boiler and corresponds to the EMS Temperature Minimum.Requirements: This item is only available if the Boiler Enable is set to AUTO, Boiler 1 Copy is set to OFF, Boiler Type is set EMS & Modulation Type is set to 0-10. |
| Access: ADV | ||
 | 50 to 210°F,OFF(10.0 to 99.0°C)Default: 50°F | EMS TEMPERATURE MINIMUMThe temperature that corresponds to the bottom rail (minimum) of the analog signal (4 mA / Vdc Signal Minimum) used for the EMS (temperature input) boiler.Requirements: This item is only available if the Boiler Enable is set to AUTO, Boiler 1 Copy is set to OFF & Boiler Type is set EMS. |
| Access: ADV | ||
 | 50 to 210°F,OFF(10.0 to 99.0°C)Default: 210°F | EMS TEMPERATURE MAXIMUMThe temperature that corresponds to the top rail (maximum) of the analog signal (20 mA / 10.0 Vdc) used for the EMS (temperature input) boiler.Requirements: This item is only available if the Boiler Enable is set to AUTO, Boiler 1 Copy is set to OFF & Boiler Type is set EMS. |
| Access: ADV |
Source # Menu (3 of 3)
 | 120 to 240°F, OFF(49.0 to 115.5°C, OFF)Default: 194°F | MAXIMUM OUTLET TEMPERATUREThe maximum boiler outlet temperature used for boiler outlet temperature limiting.The control will turn off the boiler if the boiler outlet temperature rises to the maximum outlet temperature. If OFF is selected, the control will only monitor the boiler outlet temperature.Requirements: This item is only available if the Boiler Enable is set to AUTO & the Boiler 1 Copy is set to OFF. |
| Access: ADV | ||
 | OFF, AUTO, 0:10 to 20:00 minDefault: 5:00 min | BOILER PUMP POST PURGEThe time the boiler pump remains on once the boiler turns off. If Auto is selected the control will automatically determine the time.Requirements: This item is only available if the Boiler Enable is set to AUTO & the Boiler 1 Copy is set to OFF. |
| Access: ADV |
BAS Menu (1 of 2)
Configure Modbus® & BACnet® options.
| Item Field Range Description | ||
 | OFF or ONDefault: OFF | BAS MONITORSelects whether or not BAS monitor mode is to be used. Monitor mode allows for read / write capability of select menu items.Requirements: This item is only available when Application Mode is set to either RSET, SETP, DDHW or EMS. |
| Access: ADV | ||
 | BACn, MODBDefault: BACn | BAS TYPESelects the communication protocol used with the BAS network. Modbus®communicates over RS485 & BACnet®is over IP. |
| Access: ADV | ||
 | 1 to 247Default: 1 | MODBUS ADDRESSSets the unique address within the Modbus®network.Requirements: This item is only available when BAS Type is set to MODB. |
| Access: ADV | ||
 | RTU or ASCIDefault: RTU | MODBUS DATASelects whether the Modbus®data communication type is RTU or ASCII (ASCII).Requirements: This item is only available when BAS Type is set to MODB. |
| Access: ADV | ||
 | 2400, 9600, 19K2,57K6, 115KDefault: 19K2 | MODBUS BAUD RATESelects the communication speed. In order to ensure reliable communications, the baud rate on the control must be same as the Modbus®network.Requirements: This item is only available when BAS Type is set to MODB. |
| Access: ADV | ||
 | NONE, EVEN, ODDDefault: EVEN | MODBUS PARITYSelects the parity used for the Modbus®communication.Requirements: This item is only available when BAS Type is set to MODB. |
| Access: ADV | ||
 | 0 to 4, 0 to 99, 0 to 99,0 to 99Default: 0, 0, 0, 0 | BACNET DEVICE IDSets the unique address within the BACnet®network. The address is set using four number sets displayed in the source output fields. Touch the 'Next Item' button to view & adjust each number set.Requirements: This item is only available when BAS Type is set to BACn. |
| Access: ADV | ||
 | 0x1 to 0xFFFFDefault: 0xBAC0(47808) | BACNET PORTSets the User Datagram Port (UDP) port on the BACnet®network.Requirements: This item is only available when BAS Type is set to BACn. |
| Access: ADV | ||
BAS Menu (2 of 2)
Item Field Range Description
 | OFF or ONDefault: ON | BACNET DHCPSelects whether or not the Dynamic Host Configuration Protocol (DHCP) is used to automatically assign the IP address on the BACnet® network. If ON is selected, the address is displayed in the source output fields.Requirements: This item is only available when BAS Type is set to BACn. |
| Access: ADV | ||
 | 0 to 255, 0 to 255, 0 to 255, 1 to 254Default: 192,168,0,200 | BACNET IP ADDRESSSets the IP address on the BACnet® network. The address is set using four number sets displayed in the source output fields. Touch the ‘Next Item’ button to view & adjust each number set. Touch the ‘Next Item’ button to view & adjust each number set.Requirements: This item is only available when BAS Type is set to BACn & BACn DHCP is set to OFF. |
| Access: ADV | ||
 | 0 to 255, 0 to 255, 0 to 255, 1 to 254Default: 192,168,0,1 | BACNET GATEWAYSets the Gateway address on the BACnet® network. The address is set using four number sets displayed in the source output fields. Touch the ‘Next Item’ button to view & adjust each number set. Touch the ‘Next Item’ button to view & adjust each number set.Requirements: This item is only available when BAS Type is set to BACn & BACn DHCP is set to OFF. |
| Access: ADV | ||
 | 0 to 255, 0 to 255, 0 to 255, 0 to 255Default: 255,255,255,0 | BACNET SUBNETSets the subnet address on the BACnet® network. The address is set using four number sets displayed in the source output fields. Touch the ‘Next Item’ button to view & adjust each number set. Touch the ‘Next Item’ button to view & adjust each number set.Requirements: This item is only available when BAS Type is set to BACn & BACn DHCP is set to OFF. |
| Access: ADV | ||
 | OFF, 30 to 65535Default: OFF | BACNET BBMD TIMESets the BACnet® Broadcast Management Device (BBMD) time-to-live used for foreign device registration.Requirements: This item is only available when BAS Type is set to BACn & DHCP is set to ON. |
| Access: ADV | ||
 | 0 to 255, 0 to 255, 0 to 255, 0 to 255Default: 127,127,127,127 | BACNET BBMD IPSets the BBMD IP address on the BACnet® network. The address is set using four number sets displayed in the source output fields. Touch the ‘Next Item’ button to view & adjust each number set. Touch the ‘Next Item’ button to view & adjust each number set.Requirements: This item is only available when BAS Type is set to BACn & BACnet® BBMD Time is not set to OFF. |
 | 0x1 to 0xFFFFDefault: 0xBAC0(47808) | BACNET BBMD PORTSets the BBMD UDP port on the BACnet® network.Requirements: This item is only available when BAS Type is set to BACn & BACnet® BBMD Time is not set to OFF. |
| Access: Adv |
Monitor # Menu (1 of 1)
Monitor (#) items are repeated for each available boiler.
| Item Field | Range | Description |
 | 0 to 65535 hours | BURNER RUN TIMEThe total running time of the boiler since this item was last cleared. Press & hold the ‘CLEAR’ button while viewing to reset.Requirements: This item is only available when Boiler Enable is set to AUTO. |
| Access: ADV | ||
 | 0 to 65535 hours | BOILER PUMP RUN TIMEThe total running time of the boiler pump since this item was cleared. Press & hold the ‘CLEAR’ button while viewing to reset.Requirements: This item is only available when Boiler Enable is set to AUTO. |
| Access: ADV | ||
 | 0 to 65535 | BOILER CYCLESThe total number of boiler cycles since this item was cleared. Press & hold the ‘CLEAR’ button while viewing to reset.Requirements: This item is only available when Boiler Enable is set to AUTO. |
| Access: ADV | ||
 | -22 to 266°F(-30.0 to 130.0°C) | BOILER OUTLET HIGHRecords the highest boiler outlet temperature since this item was last cleared. Press & hold the ‘CLEAR’ button while viewing to reset.Requirements: This item is only available when Boiler Enable is set to AUTO & a boiler outlet sensor is connected. |
| Access: ADV | ||
 | -22 to 266°F(-30.0 to 130.0°C) | BOILER OUTLET LOWRecords the lowest boiler outlet temperature since this item was last cleared. Press & hold the ‘CLEAR’ button while viewing to reset.Requirements: This item is only available when Boiler Enable is set to AUTO & a boiler outlet sensor is connected. |
| Access: ADV | ||
 | -22 to 266°F(-12.0 to 148.0°C) | BOILER TEMPERATURE DIFFERENCE HIGHRecords the highest temperature difference between the boiler inlet & boiler outlet sensors since this item was cleared. Press & hold the ‘CLEAR’ button while viewing to reset.Requirements: This item is only available when Boiler Enable is set to AUTO & boiler outlet & boiler inlet sensors are connected. |
| Access: ADV |
Monitor Menu (1 of 2)
This Monitor Menu displays items that are not specific to one boiler.
| Item Field | Range | Description |
 | 0 to 65535 ThermsAccess: ADV | ENERGYTotal calculated energy being delivered to the load since this item was last cleared. Press & hold the ‘CLEAR’ button while viewing to reset.Requirements: This item is only available when Flow Sensor is set to ON & a boiler return sensor is connected. |
 | 0 to 65535 hoursAccess: ADV | PRIMARY PUMP 1 RUN TIMEThe total running time of primary pump 1 since this item was cleared. Press & hold the ‘CLEAR’ button while viewing to reset. |
 | 0 to 65535 hoursAccess: ADV | PRIMARY PUMP 2 RUN TIMEThe total running time of primary pump 2 since this item was cleared. Press & hold the ‘CLEAR’ button while viewing to reset. |
 | 0 to 65535 hoursAccess: ADV | DHW PUMP RUN TIMEThe total running time of the DHW Tank pump since this item was cleared. Press & hold the ‘CLEAR’ button while viewing to reset. |
 | -22 to 266°F(-30.0 to 130.0°C)Access: ADV | PRIMARY SUPPLY HIGHRecords the highest primary supply temperature since this item was last cleared. Press & hold the ‘Clear’ button while viewing to reset. |
 | -22 to 266°F(-30.0 to 130.0°C)Access: ADV | PRIMARY SUPPLY LOWRecords the lowest primary supply temperature since this item was last cleared. Press & hold the ‘CLEAR’ button while viewing to reset. |
 | -22 to 266°F(-30 to 130°C)Access: ADV | PRIMARY RETURN HIGHRecords the highest primary return temperature since this item was last cleared. Press & hold the ‘CLEAR’ button while viewing to reset.Requirements: This item is only available when a primary return sensor is connected. |
 | -22 to 266°F(-30.0 to 130.0°C)Access: ADV | PRIMARY RETURN LOWRecords the lowest primary return temperature since this item was last cleared. Press & hold the ‘CLEAR’ button while viewing to reset.Requirements: This item is only available when a primary return sensor is connected. |
 | -22 to 266°F(-12.0 to 148.0°C)Access: ADV | SUPPLY TEMPERATURE DIFFERENCE HIGHRecords the highest temperature difference between the primary supply & primary return sensors since this item was cleared. Press & hold the ‘CLEAR’ button while viewing to reset.Requirements: This item is only available when the primary supply & primary return sensors are connected |
 | 0 to 65535 gpmAccess: ADV | FLOW RATE HIGHRecords the highest flow rate from the flow sensor since this item was last cleared. Press & hold the ‘CLEAR’ button while viewing to reset.Requirements: This item is only available when Flow Sensor is set to ON. |
 | 0 to 65535 psiAccess: ADV | PRESSURE HIGHRecords the highest pressure since this item was last cleared. Press & hold the ‘CLEAR’ button while viewing to reset.Requirements: This item is only available when Pressure Sensor is set to ON. |
Monitor Menu (2 of 2)
| Item Field | Range | Description |
 | -22 to 266°F(-30.0 to 130.0°C) | BOILER INLET HIGHRecords the highest boiler inlet temperature since this item was last cleared. Press & hold the ‘CLEAR’ button while viewing to reset.Requirements: This item is only available when a boiler inlet sensor is connected. |
| Access: ADV | ||
 | -22 to 266°F(-30.0 to 130.0°C) | BOILER INLET LOWRecords the lowest boiler inlet temperature since this item was last cleared. Press & hold the ‘CLEAR’ button while viewing to reset.Requirements: This item is only available when a boiler inlet sensor is connected. |
| Access: ADV | ||
 | -76 to 149°F(-60.0 to 65.0°C) | OUTDOOR HIGHRecords the highest outdoor temperature since this item was last cleared. Press & hold the ‘CLEAR’ button while viewing to reset.Requirements: This item is only available when an outdoor sensor is connected. |
| Access: ADV | ||
 | -76 to 149°F(-60.0 to 65.0°C) | OUTDOOR LOWRecords the lowest outdoor temperature since this item was last cleared. Press & hold the ‘CLEAR’ button while viewing to reset.Requirements: This item is only available when an outdoor sensor is connected. |
| Access: ADV | ||
 | -22 to 266°F(-30.0 to 130.0°C) | INDIRECT DHW HIGHRecords the highest indirect DHW tank temperature since this item was last cleared. Press & hold the ‘CLEAR’ button while viewing to reset.Requirements: This item is only available when Application Mode is not set to BAS, Indirect DHW Mode is set to ON & Indirect DHW Sensor is set to ON. |
| Access: ADV | ||
 | -22 to 266°F(-30.0 to 130.0°C) | INDIRECT DHW LOWRecords the lowest indirect DHW tank temperature since this item was last cleared. Press & hold the ‘CLEAR’ button while viewing to reset.Requirements: This item is only available when Application Mode is not set to BAS, Indirect DHW Mode is set to ON & Indirect DHW Sensor is set to ON. |
| Access: ADV | ||
 | -22 to 266°F(-30.0 to 130.0°C) | DIRECT DHW HIGHRecords the highest direct DHW temperature (primary supply sensor) since this item was last cleared. Press & hold the ‘CLEAR’ button while viewing to reset.Requirements: This item is only available when Application Mode is set to DDHW. |
| Access: ADV | ||
 | -22 to 266°F(-30.0 to 130.0°C) | DIRECT DHW LOWRecords the lowest direct DHW temperature (primary supply sensor) since this item was last cleared. Press & hold the ‘CLEAR’ button while viewing to reset.Requirements: This item is only available when Application Mode is set to DDHW. |
| Access: ADV | ||
 | -40 to 500°F(-40.0 to 260.0°C) | FLOW HIGHRecords the highest common flue temperature since this item was last cleared. Press & hold the ‘CLEAR’ button while viewing to reset.Requirements: This item is only available when a common flue sensor is connected. |
| Access: ADV | ||
 | -40 to 500°F(-40.0 to 260.0°C) | FLUE LOWRecords the lowest common flue temperature since this item was last cleared. Press & hold the ‘CLEAR’ button while viewing to reset.Requirements: This item is only available when a common flue sensor is connected. |
| Access: ADV |
Time Menu (1 of 1)
The Time menu sets the time and date.
Requirements: The Setback / Off switch setting must be in the Setback position in order to have access to the Time menu.

Schedule Menu (1 of 2)
The Heatronic 4000 can follow an internal schedule or an available schedule on a tekmarNet® network. Four heating schedules can be present on one network. The number of available schedule times depends on selections made for the Heat Schedule, Schedule Type & Events / Day settings.
Schedule Type
Schedule Menu (2 of 2)
| Item Field | Range | Description |
 | OFF, CTRL, MST1,MST2, MST3, MST4,MBR1, MBR2, MBR3,MBR4Default = OFF | HEAT SCHEDULEOFF = No schedule.CTRL = Schedule only used by this control.MST1 to MST4 = Schedule is shared with other tN4 devices.MBR1 to MBR4 = Schedule is set on another tN4 device.Requirements: This item is only available when the Setback / Off switch is set to Setback. |
| Access: USER | ||
 | 24hr, 5-2, 5-11, 7DAYDefault = 24hr | SCHEDULE TYPE24hr = One schedule for all days of the week.5-2 = One schedule for weekdays & one for weekends.5-11 = One schedule for weekdays, one for Saturday & one for Sunday.7DAY = A schedule for each day of the week.Requirements: This item is only available when the Setback / Off switch is set to Setback & the Heat Schedule is set to CTRL or MST1 to MST4. |
| Access: USER | ||
 | 2 or 4Default = 2 | EVENTS / DAY2 = 2 Events per day (Occ, Unocc)4 = 4 events per day (Occ 1, Unocc 1, Occ 2, Unocc 2)Requirements: This item is only available when the Setback / Off switch is set to Setback & the Heat Schedule is set to CTRL or MST1 to MST4. |
| Access: USER | ||
 | 12:00AM to 11:50PM, SKIPor00:00 to 23:50, SKIPDefault = 6:00AM | OCCUPIED START TIME (ALL DAYS, MON-FRI, SAT-SUN)Select the time for the Occupied period to start. Additional occupied event times are available depending on the schedule type & mode settings.Requirements: This item is only available when the Setback / Off switch is set to Setback, Heat Schedule is set to CTRL or MST1 to MST4. |
| Access: USER | ||
 | 12:00AM to 11:50PM, SKIPor00:00 to 23:50, SKIPDefault = 8:00AM | UNOCCUPIED START TIME (ALL DAYS, MON-FRI, SAT-SUN)Select the time for the Unoccupied period to start. Additional unoccupied event times are available depending on the schedule type & mode settings.Requirements: This item is only available when the Setback / Off switch is set to Setback, Heat Schedule is set to CTRL or MST1 to MST4. |
| Access: USER |
Toolbox Menu (1 of 2)
| Item Field | Range | Description |
 | Error DisplayAccess: --- | ERRORIf an error is present, it will be displayed as the first item in the toolbox menu. Additional troubleshooting information scrolls on the display. For more information about error messages, refer to the Error Messages section of this document. |
 | USER, INST, ADVDefault: INSTAccess: USER | ACCESS LEVELThe access level of the control. The access column shows which items are visible in each access level.Requirements: This item is only available if the Lock / Unlock switch is set to Unlock. |
 | OFF, SEL, DONEDefault: OFFAccess: ADV | DEFAULTPress the Enter button to show SEL. After 3 seconds DONE will be indicated & factory defaults will be loaded to all settings. |
 | 4000, Software VersionAccess: USER | TYPE & SOFTWARE VERSIONProduct number of the control displayed in the number field. Software version displayed in the item field. |
 | °F or °CDefault: °FAccess: USER | TEMPERATURE UNITSUnits for display of temperature. |
 | gpm or m3/hDefault: gpmAccess: INST | FLOW RATE UNITSUnits for display of flow rate.Requirements: This item is only available if Flow Sensor is set to ON. |
 | MBtu or kWhDefault: MBtuAccess: INST | ENERGY UNITSUnits for display of Energy. If MBtu is selected, the units used for Energy are Therms (THRM). If kWh is selected, the units used for Energy are Gigajoules (GJ).Requirements: This item is only available if Flow Sensor is set to ON. |
 | psi or kPaDefault: psiAccess: INST | PRESSURE UNITSUnits for display of pressure.Requirements: This item is only available if Pressure Sensor is set to ON. |
 | 1 to 24Access: INST | BOILER BUS B DEVICESDisplays the number of tN4 devices connected to the Boiler Bus b terminals, tN4 & C0 (32 & 33). |
 | 1 to 24Access: INST | BOILER BUS 1 DEVICESDisplays the number of tN4 devices connected to the Boiler Bus 1 terminals, tN4 & C1 (34 & 35). |
Toolbox Menu (2 of 2)

| Item Field | Range | Description |
 | 1 to 24 | BOILER BUS 2 DEVICESDisplays the number of tN4 devices connected to the Boiler Bus 2 terminals, tN4 & C2 (36 & 37). |
| Access: INST | ||
 | 1 to 24 | BOILER BUS 3 DEVICESDisplays the number of tN4 devices connected to the Boiler Bus 3 terminals, tN4 & C3 (38 & 39). |
| Access: INST | ||
 | The error date & the type of error alternate on the screen | ERROR HISTORY 1-5Displays a history of any past errors that have occurred on the system. Will automatically clear after 30 days. To manually clear, press ‘CLEAR’ while viewing the error until CLR is displayed. The last 5 history items will display if present. |
| Access: INST |
Manual Override
Commissioning, testing and troubleshooting features of the Heatronic 4000 are accessed by holding the Manual Override button for 3 seconds. Once an item is selected in this menu, there is a 3 second delay before the feature activates. The Manual Override has five different modes including:
Automatic (AUTO)
The normal operating mode for the control is automatic. The control operates based on the settings, calls and current conditions.
Purge Override (PURG)
In this mode, the control overrides the normal operating mode and operates pumps. This mode is useful for purging air out of the system.
- Primary pump: operation of the primary pump is dependent on the system settings in the Setup menu. Only one enabled primary pump is turned on. If both primary pumps are enabled, primary pump 1 is turned on. If primary pump 1 is disabled and primary pump 2 is enabled, primary pump 2 is turned on. If both primary pumps are disabled, no primary pump is turned on.
- DHW Tank pump: operation of the DHW Tank pump is dependent on the system settings in the Setup menu. If IDHW Mode is turned on, the DHW Tank pump is turned on. If IDHW Mode is turned off, the DHW Tank pump is not turned on.
- When in Purge mode, 'PURG' and 'OVR' will scroll in the status field of the display.
- Purge will operate for a fixed period of 72 hours. After the purge period expires the control will revert to Automatic operation. The purge override can also be terminated by selecting the AUTO override mode.
Max Heat Override (MAX)
In this mode, the control overrides the normal operating mode and operates the system to maintain a boiler target temperature of 230°F. This function is useful on start-up and commissioning, and also when drying sheet rock and paint in the building.
- Operation of the equipment is dependent on the system.
- WWSD, IDHW Priority are disabled during Max Heat.
- While in Max Heat mode, 'MAX' and 'HEAT' will scroll in the status field of the display.
- Max Heat will operate for an adjustable timeout period. After the timeout period elapses the control will revert back to Automatic mode. The max heat override can also be terminated by selecting the AUTO override mode.
Hand Override (HAND)
In this mode, the control overrides the normal operating mode and allows for manual operation of the equipment. This mode is useful for testing and assisting with troubleshooting.
- Operation of the equipment is dependent on the settings in the Setup menu. Refer to the 'Selecting a Manual Override Mode' for the sequence of steps.
- While in Hand mode, 'HAND' and 'OVR' will scroll in the status field of the display.
- Hand mode will operate for an adjustable timeout period. After the timeout period elapses, the control will revert back to Automatic mode. The hand override can also be terminated by selecting the AUTO override mode.
Off Override (OFF)
In this mode, the control overrides the normal operating mode and forces the entire system off. This mode is useful for conducting maintenance or changeout of mechanical components in the system.
- While in Off mode, 'OFF' and 'OVR' will scroll in the status field of the display.
- The Off override can be terminated at any time by selecting the AUTO override mode.
Selecting a Manual Override Mode
Press and hold for 3 seconds

Manual Override


Once an item is selected in this menu, there is a 3 second delay before the feature activates.
| Item Field | Range | Description |
 | AUTO, OFF, HAND, MAX, PURG | MANUAL OVERRIDESelect which mode of manual override to activate. |
 | 1hr to 72hr | TIMEOUTSet the timeout used for the Hand & Maximum Heat manual overrides.Requirements: This item is only available if Manual Override is set to either HAND or MAX. |
 | OFF or ON | ALERTSelects manual operation of the Alert Dry relay.Requirements: This item is only available if Manual Override is set to HAND. |
 | OFF or ON | AUXILIARYSelects manual operation of the Auxiliary relay. The Auxiliary is defined to be either a C.A. damper or a DHW recirculation pump.Requirements: This item is only available if Manual Override is set to HAND. |
 | OFF, PMP1 or PMP2 | PRIMARY PUMPSelects manual operation of the primary pump. Only one pump can operate. If a pump is operating & then the other pump is selected, the former pump will turn off while the latter pump remains on.Requirements: This item is only available if Manual Override is set to HAND. |
 | OFF or ON | DHW TANK PUMPSelects manual operation of the DHW Tank pump.Requirements: This item is only available if Manual Override is set to HAND & IDHW Mode is set to ON. |
 | OFF or ON | BOILER (#) PUMPSelects operation of the boiler pump. This item is available for each of the available boilers.Requirements: This item is only available if Manual Override is set to HAND & Boiler Enable is set to AUTO. |
 | 1STG: OFF or 12STG: OFF, 1 or 2 | BOILER (#) STGSelects operation of single & two stage boilers. This item is available for each of the available single & two stage boilers. If the boiler pump is not already activated, it will turn on.OFF: boiler off (applicable for single & two stage)1: Turn on stage 1 (applicable for single & two stage)2: Turn on stage 2 (applicable for two stage)Requirements: This item is only available if Manual Override is set to HAND & Boiler Enable is set to AUTO & Boiler Type is set to 1STG or 2STG. |
 | 0 to 100% | BOILER (#) MODSets percentage modulation for modulating boilers. This item is available for each of the available modulating boilers. If the boiler pump is not already activated, it will turn on.Requirements: This item is only available if Manual Override is set to HAND & Boiler Enable is set to AUTO & Boiler Type is set to MOD. |
 | EMS: OFF, 50 to 210°F (OFF, 10 to 99°C) | BOILER (#) TEMPSets the target temperature for temperature input boilers. This item is available for each of the available temperature input boilers. If the boiler pump is not already activated, it will turn on.Requirements: This item is only available if Manual Override is set to HAND & Boiler Enable is set to AUTO & Boiler Type is set to EMS. |

Troubleshooting
It is recommended to complete all wiring to ensure trouble-free operation. Should an error occur, simply follow these steps:
- Find: If the Heatronic 4000 flashes ⚠ on the screen, it is indicating a problem on the system.
- Identify: Press and hold the Home button for 3 seconds to view the available menus. Tap the NEXT ITEM button to locate the Toolbox Menu and press ENTER to view the toolbox menu items. The Error code should appear as the first item. The troubleshooting tips will then marquee across the Item field.
- Solve: Using the lookup chart below, match the Error code to the one on the control. Use the Description and Troubleshooting Tips in the chart to solve the problem.
Error Messages (1 of 3)
| Error Message Description Troubleshooting Tips | ||
 | CONTROL SETUP FAILUREThe control failed to read the Setup menu settings, & reloaded factory default settings. Operation stops until this error message is cleared.To clear, press the 'CLEAR' button while viewing this warning message. | RESET DEFAULTS,VERIFY ALL SETTINGS |
 | PRIMARY SUPPLY SENSOR ERROROPEN or SHRT displays on the screen.Due to an open or short circuit, the control failed to read the boiler supply sensor. As a result, & if available, the control operates using the primary return sensor. If the primary return sensor is unavailable, operation stops. The error message self clears once the error condition is corrected. | CHECK PRIMARY SUPPLY SENSOR,CHECK PRIMARY SUPPLY SENSOR WIRING |
 | PRIMARY RETURN SENSOR ERROROPEN or SHRT displays on the screen.Due to an open or short circuit, the control failed to read the boiler return sensor. If the primary supply sensor is available, the control will operate normally. If the primary supply sensor is unavailable, the control can only operate to satisfy indirect DHW if its located in the near boiler piping (i.e. IDHW Location = Near). The error message self clears once the error condition is corrected. | CHECK PRIMARY RETURN SENSOR,CHECK PRIMARY RETURN SENSOR WIRING |
 | DHW SENSOR ERROROPEN or SHRT displays on the screen.Due to an open or short circuit, the control failed to read the DHW sensor. As a result, the control stops operation for DHW heating (indirect or direct DHW). The error message self clears once the error condition is corrected. | CHECK DHW SENSOR,CHECK DHW SENSOR WIRING |
 | OUTDOOR SENSOR ERROROPEN or SHRT displays on the screen.Due to an open or short circuit, the control failed to read the outdoor sensor. As a result, the control assumes an outdoor temperature of 32°F (0.0°C) & continues operation. The error message self clears once the error condition is corrected. | CHECK OUTDOOR SENSOR,CHECK OUTDOOR SENSOR WIRING |
 | FLUE SENSOR ERROROPEN or SHRT displays on the screen.Due to an open or short circuit, the control failed to read the vent sensor. If the Flue Maximum is set to a temperature, the control stops operation. If the Flue Maximum is set to Off, the control continues operation. The error message self clears once the error condition is cleared. | CHECK FLUE SENSORCHECK FLUE SENSOR WIRING |
 | BOILER (#) OUTLET SENSOR ERROROPEN or SHRT displays on the screen.Due to an open or short circuit, the control failed to read the boiler (#) outlet sensor. The error message self clears once the error condition is cleared. | CHECK BOILER (#) OUTLET SENSOR,CHECK BOILER (#) OUTLET SENSOR WIRING |
Error Messages (2 of 3)
Error Message Description Troubleshooting Tips
 | BOILER (#) OUTLET SENSOR MAXIMUM EXCEEDEDThe boiler outlet (#) temperature exceeded the Maximum Outlet temperature. As a result, the control stops operation for the associated boiler. The error message self clears once the error condition is cleared. | BOILER (#) OUTLET TEMPEXCEEDS MAX OUT SETTING |
 | BOILER INLET SENSOR ERROROPEN or SHRT displays on the screen.Due to an open or short circuit, the control failed to read the boiler inlet sensor. The control operates normally while the error message is present. The error message self clears once the error condition is corrected. | CHECK BOILER INLET SENSOR,CHECK BOILER INLET SENSORWIRING |
 | PRIMARY PUMP P1 FLOW PROOF FAILUREThe primary pump P1 has failed. Once the primary pump 1 relay closed, a primary pump flow proof was call not detected before the flow proof delay time elapsed. | CHECK FLOW PROVING DEVICE,CHECK FLOW PROVING DEVICEWIRING |
 | PRIMARY PUMP P2 FLOW PROOF FAILUREThe primary pump P2 has failed. Once the primary pump 2 relay closed, a primary pump flow proof was call not detected before the flow proof delay time elapsed. | CHECK FLOW PROVING DEVICE,CHECK FLOW PROVING DEVICEWIRING |
 | PRIMARY PUMP P1 & P2 FLOW PROOF FAILUREBoth the primary pump P1 & P2 have failed. | CHECK FLOW PROVING DEVICE,CHECK FLOW PROVING DEVICEWIRING |
 | PRIMARY PUMP FLOW PROOF ERRORThe primary pump has been turned off but the primary pump flow proof remains detected after 4 minutes. | CHECK FLOW PROVING DEVICE,CHECK FLOW PROVING DEVICEWIRING |
 | COMBUSTION AIR PROOF FAILUREThe combustion air damper has failed. The Comb Air (Aux) relay closed, but the control did not detect a Comb Air Proof before the C.A. proof delay time elapsed. | CHECK CA PROVING DEVICE,CHECK CA PROVING DEVICEWIRING |
 | COMBUSTION AIR PROOF CALL ERRORThe combustion air damper has been turned off but the Comb Air Proof remains detected after 4 minutes. | CHECK CA PROVING DEVICE,CHECK CA PROVING DEVICEWIRING |
 | COMMON FLUE MAXIMUM EXCEEDEDThe Common Flue Sensor temperature has exceeding the FLUE MAX setting. As a result, the control stops operation for the entire plant. | COMMON FLUE TEMP EXCEEDSMAX SETTING |
 | NO HEAT ALERTThe boiler supply temperature did not increase within the boiler alert time. The control operates normally while this Alert is present. To reset the Alert, press the ‘CLEAR’ button while viewing this warning message. | NO CHANGE IN SUPPLY TEMPWITHIN SPECIFIED PERIOD OF TIME |
Error Messages (3 of 3)
| Error Message Description Troubleshooting Tips | ||
 | tekmarNet®DEVICE LOSTCommunication is lost to a tN4 device on one of the four Boiler Buses (b, 1, 2, 3). The number shown is the address of the lost device. The display on the lost device displays Bus Boil Opn.Ensure that there is power to the lost device. Trace the wires from the control to the lost device looking for loose or damaged wires. The error message self clears when the error condition is corrected.If the tN4 device is deliberately removed, press the ‘CLEAR’ button while viewing this error message/ | DEVICE MISSING ON TN4 BUS (#) |
 | tekmarNet®DUPLICATE MASTER ERRORMore than one tN4 system control has been detected on the tN4 Boiler Bus. The Heatronic 4000 is a “Master Device” & no other tekmarNet reset controls can be added to the tN4 Boiler Bus terminals. If one has been added it must be removed from the system. | DUPLICATE MASTER CONTROL DETECTED ON TN4 BUS |
 | tekmarNet®DEVICE ERROR #:#######is the address of the device with the error. The bus number displays before the colon, & the device number display after. Go to the device with the address displayed.Possible addresses:b:01 to b:24 - Device Error on Boiler Bus b1:01 to 1:24- Device Error on Boiler Bus 12:01 to 2:24 - Device Error on Boiler Bus 23:01 to 3:24 - Device Error on Boiler Bus 3 | DEVICE ERROR ON TN4 BUS (#) |
 | tekmarNet®DUPLICATE SCHEDULE MASTER ERRORMore than one tN4 device has been assigned the same master number. The control operates using the Occupied settings while this error is present.To clear this error, select a different Schedule Master number, set a different Schedule Member number, set the Schedule to Control, or set the Schedule to None. | DUPLICATE MASTER SCHEDULE DETECTED ON TN4 BUS |
 | tekmarNet®SCHEDULE MEMBER ERRORThe control can no longer detect its schedule master. The control operates using the Occupied settings while this error is present.To clear this error, select a different Schedule Member number, set the Schedule to Control, or set the Schedule to None. | CHECK SCHEDULE MASTER WIRING ON TN4 BUS CHECK SCHEDULE MASTER ADDRESS ON TN4 BUS |
WARNING: This product contains chemicals known to the State of California to cause cancer and birth defects or other reproductive harm. For more information: www.watts.com/prop65
Technical Data
Models & Part Numbers - Included Parts
| Item | Part # | Description |
| 1 | 7738003450 | Heatronic 4000 Control |
| 2 | 7738003451 | Universal Sensor |
| 3 | 7738003452 | Outdoor Sensor |
Models & Part Numbers - Replacement Parts
| Item | Part # | Description |
| 2 | 7738003451 | Universal Sensor |
| 3 | 7738003452 | Outdoor Sensor |
| 4 | 7738003453 | Enclosure Cover |
| 5 | 7738003454 | Terminal Plug Set |
Limited Warranty
Limited Warranty The liability of Bosch under this warranty is limited. The Purchaser, by taking receipt of any Bosch product ("Product"), acknowledges the terms of the Limited Warranty in effect at the time of such Product sale & acknowledges that it has read & understands same.
The Bosch Limited Warranty to the Purchaser on the Products sold hereunder is a manufacturer's pass-through warranty which the Purchaser is authorized to pass through to its customers. Under the Limited Warranty, each Bosch Product is warranted against defects in workmanship & materials if the Product is installed & used in compliance with Bosch's instructions, ordinary wear & tear excepted. The pass-through warranty period is for a period of twenty-four (24) months from the production date if the Product is not installed during that period, or twelve (12) months from the documented date of installation if installed within twenty-four (24) months from the production date.
The liability of Bosch under the Limited Warranty shall be limited to, at Bosch's sole discretion: the cost of parts & labor provided by Bosch to repair defects in materials &/or workmanship of the defective product; or to the exchange of the defective product for a warranty replacement product; or to the granting of credit limited to the original cost of the defective product, & such repair, exchange or credit shall be the sole remedy available from Bosch, &, without limiting the foregoing in any way, Bosch is not responsible, in contract, tort or strict product liability, for any other losses, costs, expenses, inconveniences, or damages, whether direct, indirect, special, secondary, incidental or consequential, arising from ownership or use of the product, or from defects in workmanship or materials, including any liability for fundamental breach of contract.
The pass-through Limited Warranty applies only to those defective Products returned to Bosch during the warranty period. This Limited Warranty does not cover the cost of the parts or labor to remove or transport the defective Product, or to reinstall the repaired or replacement Product, all such costs & expenses being subject to Purchaser's agreement & warranty with its customers.
Any representations or warranties about the Products made by Purchaser to its customers which are different from or in excess of the
Bosch Limited Warranty are the Purchaser's sole responsibility & obligation. Purchaser shall indemnify & hold Bosch harmless from & against any & all claims, liabilities & damages of any kind or nature which arise out of or are related to any such representations or warranties by Purchaser to its customers.
The pass-through Limited Warranty does not apply if the returned Product has been damaged by negligence by persons other than Bosch, accident, fire, Act of God, abuse or misuse; or has been damaged by modifications, alterations or attachments made subsequent to purchase which have not been authorized by Bosch; or if the Product was not installed in compliance with Bosch's instructions &/or the local codes & ordinances; or if due to defective installation of the Product; or if the Product was not used in compliance with Bosch's instructions.
THIS WARRANTY IS IN LIEU OF ALL OTHER WARRANTIES, EXPRESS OR IMPLIED, WHICH THE GOVERNING LAW ALLOWS PARTIES TO CONTRACTUALLY EXCLUDE, INCLUDING, WITHOUT LIMITATION, IMPLIED WARRANTIES OF MERCHANTABILITY & FITNESS FOR A PARTICULAR PURPOSE, DURABILITY OR DESCRIPTION OF THE PRODUCT, ITS NON-INFRINGEMENT OF ANY RELEVANT PATENTS OR TRADEMARKS, & ITS COMPLIANCE WITH OR NON-VIOLATION OF ANY APPLICABLE ENVIRONMENTAL, HEALTH OR SAFETY LEGISLATION; THE TERM OF ANY OTHER WARRANTY NOT HEREBY CONTRACTUALLY EXCLUDED IS LIMITED SUCH THAT IT SHALL NOT EXTEND BEYOND TWENTY-FOUR (24) MONTHS FROM THE PRODUCTION DATE, TO THE EXTENT THAT SUCH LIMITATION IS ALLOWED BY THE GOVERNING LAW.
Product Warranty Return Procedure All Products that are believed to have defects in workmanship or materials must be returned, together with a written description of the defect, to the Bosch Representative assigned to the territory in which such Product is located. If Bosch receives an inquiry from someone other than a Bosch Representative, including an inquiry from Purchaser (if not a Bosch Representative) or Purchaser's customers, regarding a potential warranty claim, Bosch's sole obligation shall be to provide the address & other contact information regarding the appropriate Representative.
Appendix - Bosch / Buderus Boiler Model Default Table
| Boiler Model | Fuel Type | Dual Fuel | Boil Type* | Condense * | Mod Type* | Fire Dly* | Mod Delay* | Boil Mass* | Output Low | Output High | Motor Spd | Start Mod | Min Mod | Max Mod | Max Out | Pump Purge |
| SB625160 | Gas | MOD | Yes | 0-10 | 36 | 10 | High | 180 | 530 | 15 | 0 | 0 | 100 | 194 | 5:00 | |
| SB625220 | Gas | MOD | Yes | 0-10 | 108 | 13 | High | 250 | 750 | 25 | 0 | 0 | 100 | 194 | 5:00 | |
| Dual | Gas | MOD | Yes | 0-10 | 108 | 13 | High | 250 | 750 | N/A | 0 | 0 | 100 | 194 | 5:00 | |
| Oil | 2 STG | No | N/A | 108 | N/A | High | N/A | 750 | N/A | N/A | N/A | N/A | 194 | 5:00 | ||
| SB625290 | Gas | MOD | Yes | 0-10 | 108 | 13 | High | 320 | 960 | 25 | 0 | 0 | 100 | 194 | 5:00 | |
| Dual | Gas | MOD | Yes | 0-10 | 108 | 13 | High | 320 | 960 | N/A | 0 | 0 | 100 | 194 | 5:00 | |
| Oil | 2 STG | No | N/A | 108 | N/A | High | N/A | 960 | N/A | N/A | N/A | N/A | 194 | 5:00 | ||
| SB625370 | Gas | MOD | Yes | 0-10 | 108 | 13 | High | 410 | 1240 | 25 | 0 | 0 | 100 | 194 | 5:00 | |
| Dual | Gas | MOD | Yes | 0-10 | 108 | 13 | High | 410 | 1240 | N/A | 0 | 0 | 100 | 194 | 5:00 | |
| Oil | 2 STG | No | N/A | 108 | N/A | High | N/A | 1240 | N/A | N/A | N/A | N/A | 194 | 5:00 | ||
| SB625480 | Gas | MOD | Yes | 0-10 | 108 | 13 | High | 530 | 1600 | 25 | 0 | 0 | 100 | 194 | 5:00 | |
| Dual | Gas | MOD | Yes | 0-10 | 108 | 13 | High | 530 | 1600 | N/A | 0 | 0 | 100 | 194 | 5:00 | |
| Oil | 2 STG | No | N/A | 108 | 13 | High | N/A | 1600 | N/A | N/A | N/A | N/A | 194 | 5:00 | ||
| SB625640 | Gas | MOD | Yes | 0-10 | 136 | 13 | High | 690 | 2080 | 35 | 0 | 0 | 100 | 194 | 5:00 | |
| Dual | Gas | MOD | Yes | 0-10 | 136 | 13 | High | 690 | 2080 | 35 | 0 | 0 | 100 | 194 | 5:00 | |
| Oil | 2 STG | No | N/A | 136 | N/A | High | N/A | 2080 | 35 | N/A | N/A | N/A | 194 | 5:00 | ||
| SB745800 | Gas | MOD | Yes | 0-10 | 136 | 13 | High | 950 | 2850 | 35 | 0 | 0 | 100 | 194 | 5:00 | |
| Dual | Gas | MOD | Yes | 0-10 | 136 | 13 | High | 950 | 2850 | 35 | 0 | 0 | 100 | 194 | 5:00 | |
| Oil | 2 STG | No | N/A | 136 | N/A | High | N/A | 2850 | 35 | N/A | N/A | N/A | 194 | 5:00 | ||
| SB7451050 | Gas | MOD | Yes | 0-10 | 136 | 13 | High | 1180 | 3530 | 35 | 0 | 0 | 100 | 194 | 5:00 | |
| Dual | Gas | MOD | Yes | 0-10 | 136 | 13 | High | 1180 | 3530 | 35 | 0 | 0 | 100 | 194 | 5:00 | |
| Oil | 2 STG | No | N/A | 136 | N/A | High | N/A | 3530 | 35 | N/A | N/A | N/A | 194 | 5:00 | ||
| SB7451300 | Gas | MOD | Yes | 0-10 | 136 | 13 | High | 1450 | 4360 | 35 | 0 | 0 | 100 | 194 | 5:00 | |
| Dual | Gas | MOD | Yes | 0-10 | 136 | 13 | High | 1450 | 4360 | 35 | 0 | 0 | 100 | 194 | 5:00 | |
| Oil | 2 STG | No | N/A | 136 | N/A | High | N/A | 4360 | 35 | N/A | N/A | N/A | 194 | 5:00 | ||
| SB7451550 | Gas | MOD | Yes | 0-10 | 136 | 13 | High | 1670 | 5030 | 35 | 0 | 0 | 100 | 194 | 5:00 | |
| Dual | Gas | MOD | Yes | 0-10 | 136 | 13 | High | 1670 | 5030 | 35 | 0 | 0 | 100 | 194 | 5:00 | |
| Oil | MOD | No | 0-10 | 136 | 13 | High | 1670 | 5030 | 35 | 0 | 0 | 100 | 194 | 5:00 | ||
| GB312160 | Gas | MOD | Yes | 0-10 | 40 | 120 | Med | 170 | 540 | 160 | 0 | 0 | 100 | 180 | 5:00 | |
| GB312200 | Gas | MOD | Yes | 0-10 | 40 | 120 | Med | 220 | 680 | 160 | 0 | 0 | 100 | 180 | 5:00 | |
| GB312240 | Gas | MOD | Yes | 0-10 | 40 | 120 | Med | 260 | 810 | 160 | 0 | 0 | 100 | 180 | 5:00 | |
| GB312280 | Gas | MOD | Yes | 0-10 | 40 | 120 | Med | 310 | 940 | 160 | 0 | 0 | 100 | 180 | 5:00 | |
| GB16280 | Gas | MOD | Yes | 0-10 | 20 | 60 | Low | 60 | 260 | 30 | 0 | 0 | 100 | 180 | 5:00 | |
| GB162100 | Gas | MOD | Yes | 0-10 | 20 | 60 | Low | 60 | 300 | 30 | 0 | 0 | 100 | 180 | 5:00 | |
| GB14224 | Gas | MOD | Yes | 0-10 | 20 | 60 | Low | 20 | 80 | 30 | 0 | 0 | 100 | 180 | 5:00 | |
| GB14230 | Gas | MOD | Yes | 0-10 | 20 | 60 | Low | 30 | 90 | 30 | 0 | 0 | 100 | 180 | 5:00 | |
| GB14245 | Gas | MOD | Yes | 0-10 | 20 | 60 | Low | 40 | 140 | 30 | 0 | 0 | 100 | 180 | 5:00 | |
| GB14260 | Gas | MOD | Yes | 0-10 | 20 | 60 | Low | 60 | 180 | 30 | 0 | 0 | 100 | 180 | 5:00 | |
| G3155 | Gas | 1 STG | No | N/A | 42 | N/A | High | N/A | 350 | N/A | N/A | N/A | N/A | 200 | 5:00 | |
| Oil | 1 STG | No | N/A | 12 | N/A | High | N/A | 350 | N/A | N/A | N/A | N/A | 200 | 5:00 | ||
| G3156 | Gas | 1 STG | No | N/A | 42 | N/A | High | N/A | 450 | N/A | N/A | N/A | N/A | 200 | 5:00 | |
| Oil | 1 STG | No | N/A | 12 | N/A | High | N/A | 450 | N/A | N/A | N/A | N/A | 200 | 5:00 | ||
| G3157 | Gas | 1 STG | No | N/A | 42 | N/A | High | N/A | 560 | N/A | N/A | N/A | N/A | 200 | 5:00 | |
| Oil | 1 STG | No | N/A | 12 | N/A | High | N/A | 560 | N/A | N/A | N/A | N/A | 200 | 5:00 | ||
| G3158 | Gas | 2 STG | No | N/A | 67 | N/A | High | N/A | 660 | N/A | N/A | N/A | N/A | 200 | 5:00 | |
| Oil | 1 STG | No | N/A | 12 | N/A | High | N/A | 660 | N/A | N/A | N/A | N/A | 200 | 5:00 | ||
| G3159 | Gas | 2 STG | No | N/A | 67 | N/A | High | N/A | 770 | N/A | N/A | N/A | N/A | 200 | 5:00 | |
| Oil | 1 STG | No | N/A | 12 | N/A | High | N/A | 770 | N/A | N/A | N/A | N/A | 200 | 5:00 | ||
| G5157 | Gas | MOD | No | 0-10 | 108 | 13 | High | 270 | 820 | 25 | 0 | 0 | 100 | 200 | 5:00 | |
| Oil | 2 STG | No | N/A | 20 | N/A | High | N/A | 820 | N/A | N/A | N/A | N/A | 200 | 5:00 | ||
| Dual | Gas | 2 STG | No | N/A | 108 | N/A | High | N/A | 820 | N/A | N/A | N/A | N/A | 200 | 5:00 | |
| Oil | 2 STG | No | N/A | 108 | N/A | High | N/A | 820 | N/A | N/A | N/A | N/A | 200 | 5:00 |
*Item not available for adjustment.
| Boiler Model | Fuel Type | Dual Fuel | Boil Type* | Condense * | Mod Type* | Fire Dly* | Mod Delay* | Boil Mass* | Output Low | Output High | Motor Spd | Start Mod | Min Mod | Max Mod | Max Out | Pump Purge |
| G5158 | Gas | MOD | No | 0-10 | 108 | 13 | High | 340 | 1010 | 25 | 0 | 0 | 100 | 200 | 5:00 | |
| Oil | 2 STG | No | N/A | 20 | N/A | High | N/A | 1010 | N/A | N/A | N/A | N/A | 200 | 5:00 | ||
| Dual | Gas | 2 STG | No | N/A | 108 | N/A | High | N/A | 1010 | N/A | N/A | N/A | N/A | 200 | 5:00 | |
| Oil | 2 STG | No | N/A | 108 | N/A | High | N/A | 1010 | N/A | N/A | N/A | N/A | 200 | 5:00 | ||
| G5159 | Gas | MOD | No | 0-10 | 108 | 13 | High | 400 | 1200 | 25 | 0 | 0 | 100 | 200 | 5:00 | |
| Oil | 2 STG | No | N/A | 20 | N/A | High | N/A | 1200 | N/A | N/A | N/A | N/A | 200 | 5:00 | ||
| Dual | Gas | 2 STG | No | N/A | 108 | N/A | High | N/A | 1200 | N/A | N/A | N/A | N/A | 200 | 5:00 | |
| Oil | 2 STG | No | N/A | 108 | N/A | High | N/A | 1200 | N/A | N/A | N/A | N/A | 200 | 5:00 | ||
| G51510 | Gas | MOD | No | 0-10 | 108 | 13 | High | 460 | 1390 | 25 | 0 | 0 | 100 | 200 | 5:00 | |
| Oil | 2 STG | No | N/A | 20 | N/A | High | N/A | 1390 | N/A | N/A | N/A | N/A | 200 | 5:00 | ||
| Dual | Gas | 2 STG | No | N/A | 108 | N/A | High | N/A | 1390 | N/A | N/A | N/A | N/A | 200 | 5:00 | |
| Oil | 2 STG | No | N/A | 108 | N/A | High | N/A | 1390 | N/A | N/A | N/A | N/A | 200 | 5:00 | ||
| G51511 | Gas | MOD | No | 0-10 | 108 | 13 | High | 530 | 1580 | 25 | 0 | 0 | 100 | 200 | 5:00 | |
| Oil | 2 STG | No | N/A | 20 | N/A | High | N/A | 1580 | N/A | N/A | N/A | N/A | 200 | 5:00 | ||
| Dual | Gas | 2 STG | No | N/A | 108 | N/A | High | N/A | 1580 | N/A | N/A | N/A | N/A | 200 | 5:00 | |
| Oil | 2 STG | No | N/A | 108 | N/A | High | N/A | 1580 | N/A | N/A | N/A | N/A | 200 | 5:00 | ||
| G51512 | Gas | MOD | No | 0-10 | 108 | 13 | High | 590 | 1770 | 25 | 0 | 0 | 100 | 200 | 5:00 | |
| Oil | 2 STG | No | N/A | 20 | N/A | High | N/A | 1770 | N/A | N/A | N/A | N/A | 200 | 5:00 | ||
| Dual | Gas | 2 STG | No | N/A | 108 | N/A | High | N/A | 1770 | N/A | N/A | N/A | N/A | 200 | 5:00 | |
| Oil | 2 STG | No | N/A | 108 | N/A | High | N/A | 1770 | N/A | N/A | N/A | N/A | 200 | 5:00 | ||
| G6159 | Gas | MOD | No | 0-10 | 136 | 13 | High | 650 | 1950 | 35 | 0 | 0 | 100 | 200 | 5:00 | |
| Oil | MOD | No | 0-10 | 136 | 13 | High | 810 | 1950 | 35 | 0 | 0 | 100 | 200 | 5:00 | ||
| Dual | Gas | MOD | No | 0-10 | 136 | 13 | High | 650 | 1950 | 35 | 0 | 0 | 100 | 200 | 5:00 | |
| Oil | 2 STG | No | N/A | 136 | N/A | High | N/A | 1950 | N/A | N/A | N/A | N/A | 200 | 5:00 | ||
| G61510 | Gas | MOD | No | 0-10 | 136 | 13 | High | 750 | 2240 | 35 | 0 | 0 | 100 | 200 | 5:00 | |
| Oil | MOD | No | 0-10 | 136 | 13 | High | 880 | 2240 | 35 | 0 | 0 | 100 | 200 | 5:00 | ||
| Dual | Gas | MOD | No | 0-10 | 136 | 13 | High | 750 | 2240 | 35 | 0 | 0 | 100 | 200 | 5:00 | |
| Oil | 2 STG | No | N/A | 136 | N/A | High | N/A | 2240 | N/A | N/A | N/A | N/A | 200 | 5:00 | ||
| G61511 | Gas | MOD | No | 0-10 | 136 | 13 | High | 840 | 2530 | 35 | 0 | 0 | 100 | 200 | 5:00 | |
| Oil | MOD | No | 0-10 | 136 | 13 | High | 1120 | 2530 | 35 | 0 | 0 | 100 | 200 | 5:00 | ||
| Dual | Gas | MOD | No | 0-10 | 136 | 13 | High | 840 | 2530 | 35 | 0 | 0 | 100 | 200 | 5:00 | |
| Oil | 2 STG | No | N/A | 136 | N/A | High | N/A | 2530 | N/A | N/A | N/A | N/A | 200 | 5:00 | ||
| G61512 | Gas | MOD | No | 0-10 | 136 | 13 | High | 940 | 2820 | 35 | 0 | 0 | 100 | 200 | 5:00 | |
| Oil | MOD | No | 0-10 | 136 | 13 | High | 1120 | 2820 | 35 | 0 | 0 | 100 | 200 | 5:00 | ||
| Dual | Gas | MOD | No | 0-10 | 136 | 13 | High | 940 | 2820 | 35 | 0 | 0 | 100 | 200 | 5:00 | |
| Oil | 2 STG | No | N/A | 136 | N/A | High | N/A | 2820 | N/A | N/A | N/A | N/A | 200 | 5:00 | ||
| G61513 | Gas | MOD | No | 0-10 | 136 | 13 | High | 1040 | 3110 | 35 | 0 | 0 | 100 | 200 | 5:00 | |
| Oil | MOD | No | 0-10 | 136 | 13 | High | 1330 | 3110 | 35 | 0 | 0 | 100 | 200 | 5:00 | ||
| Dual | Gas | MOD | No | 0-10 | 136 | 13 | High | 1040 | 3110 | 35 | 0 | 0 | 100 | 200 | 5:00 | |
| Oil | 2 STG | No | N/A | 136 | N/A | High | N/A | N/A | N/A | N/A | N/A | N/A | 200 | 5:00 | ||
| G61514 | Gas | MOD | No | 0-10 | 136 | 13 | High | 1130 | 3400 | 35 | 0 | 0 | 100 | 200 | 5:00 | |
| Oil | MOD | No | 0-10 | 136 | 13 | High | 1330 | 3400 | 35 | 0 | 0 | 100 | 200 | 5:00 | ||
| Dual | Gas | MOD | No | 0-10 | 136 | 13 | High | 1130 | 3400 | 35 | 0 | 0 | 100 | 200 | 5:00 | |
| Oil | 2 STG | No | N/A | 136 | N/A | High | N/A | 3400 | N/A | N/A | N/A | N/A | 200 | 5:00 | ||
| G61515 | Gas | MOD | No | 0-10 | 136 | 13 | High | 1230 | 3690 | 35 | 0 | 0 | 100 | 200 | 5:00 | |
| Oil | MOD | No | 0-10 | 136 | 13 | High | 1440 | 3690 | 35 | 0 | 0 | 100 | 200 | 5:00 | ||
| Dual | Gas | MOD | No | 0-10 | 136 | 13 | High | 1230 | 3690 | 35 | 0 | 0 | 100 | 200 | 5:00 | |
| Oil | 2 STG | No | N/A | 136 | N/A | High | N/A | 3690 | N/A | N/A | N/A | N/A | 200 | 5:00 | ||
| G61516 | Gas | MOD | No | 0-10 | 136 | 13 | High | 1330 | 3980 | 35 | 0 | 0 | 100 | 200 | 5:00 | |
| Oil | MOD | No | 0-10 | 136 | 13 | High | 1610 | 3980 | 35 | 0 | 0 | 100 | 200 | 5:00 | ||
| Dual | Gas | MOD | No | 0-10 | 136 | 13 | High | 1330 | 3980 | 35 | 0 | 0 | 100 | 200 | 5:00 | |
| Oil | 2 STG | No | N/A | 136 | N/A | High | N/A | 3980 | N/A | N/A | N/A | N/A | 200 | 5:00 |
* Item not available for adjustment.
Bosch Thermotechnology Corp.
50 Wentworth Avenue
Londonderry, NH 03053
Tel. 603-552-1100
Fax 603-965-7581
www.bosch-climate.us
U.S.A.
Bosch Thermotechnology Corp. reserves the right to make changes without notice due to continuing engineering and technological advances.
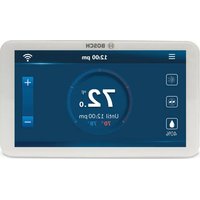

- FEATURES
- HEATRONIC
- BOSCH
- WARNING
- TABLE OF CONTENTS
- UNDERSTANDING SAFETY INFORMATION
- CAUTION
- NOTICE
- RADIO FREQUENCY INTERFERENCE
- SEQUENCE OF OPERATION
- BOILER (SOURCE (#) MENU) SETUP AND OPERATION
- BOILER ENABLE
- OFF
- AUTO
- COPY BOILER
- BOIL
- BOSCH / BUDERUS BOILER
- YES
- NO
- BOSCH / BUDERUS BOILER MODEL
- BOSCH / BUDERUS FUEL TYPE
- GAS
- OIL
- DUAL
- BOILER TYPE
- MOD
- STG
- EMS
- CONDENSING
- MODULATING TYPE
- FIRE DELAY
- MODULATION DELAY
- BOILER MASS
- LOW (GB SERIES)
- MED
- HI (SB AND G SERIES)
- LOW FIRE AND HIGH FIRE BOILER OUTPUT
- MOTOR SPEED
- START MODULATION
- MINIMUM MODULATION
- FOR 0 TO 10 V (DC)
- FOR 4 TO 20 MA
- EXAMPLE
- MAXIMUM MODULATION
- EMS SIGNAL MINIMUM
- EMS TEMPERATURE MINIMUM
- EMS TEMPERATURE MAXIMUM
- MAXIMUM BOILER OUTLET
- BOILER PUMP POST PURGE
- SYSTEM SETUP AND OPERATION
- APPLICATION MODE
- BOILER MINIMUM
- BOILER MAXIMUM
- BOILER DIFFERENTIAL
- EXERCISING
- BOOST
- FLOW MONITORING
- FLOW RATE 4 MA
- FLOW RATE 20 MA
- ENERGY MONITORING
- PRESSURE MONITORING
- FLUE TEMPERATURE MONITORING & LIMITING
- ALERT DRY RELAY
- BOILER ALERT
- BOILER PLANT OPERATION
- BOILER OPERATION
- SINGLE STAGE ON/OFF BOILER
- TWO STAGE ON/OFF BOILER
- MODULATING BOILER
- EMS BOILER
- BOILER TARGET TEMPERATURE
- STAGE DELAY
- MODULATION MODE
- MODULATION MODE IS NOT AVAILABLE WHEN THE APPLICATION MODE IS CONFIGURED FOR DEDICATED DOMESTIC HOT WATER (DDHW)
- SEQUENTIAL MODULATION (SEQ)
- PARALLEL MODULATION (PAR)
- STAGING MODE SETUP
- LO/HI
- LO/LO
- BOILER GROUP ROTATION
- BOILER RUN TIME MONITORING
- FIXED LEAD
- ON
- FIXED LAST
- CONDENSING & NON-CONDENSING BOILER GROUPS
- DUAL FUEL BOILER OPERATION
- FUEL SWITCH
- OUTDOOR TEMPERATURE RESET OPERATION
- CENTRAL HEAT (CH) CALL
- CONTACT CLOSURE
- CHARACTERIZED HEATING CURVE
- TERMINAL UNIT
- HYDRONIC RADIANT FLOOR (HRF1)
- HYDRONIC RADIANT FLOOR (HRF2)
- FANCOIL (COIL)
- FIN-TUBE CONVECTOR (CONV)
- RADIATOR (RAD)
- BASEBOARD (BASE)
- BOILER TERMINAL UNIT DEFAULTS
- ROOM
- OUTDOOR DESIGN
- BOILER INDOOR
- BOILER DESIGN
- WARM WEATHER SHUT DOWN (WWSD)
- SETPOINT OPERATION
- INDIRECT DOMESTIC HOT WATER (IDHW) OPERATION IS AVAILABLE DURING SETPOINT OPERATION
- BOILER TARGET TEMPERATURE DURING A SETPOINT CALL
- SETPOINT DURING UNOCCUPIED
- ENERGY MANAGEMENT SYSTEM (EMS) OPERATION
- INDIRECT DOMESTIC HOT WATER (IDHW) IS AVAILABLE DURING EMS OPERATION
- HEAT CALL
- INPUT SIGNAL
- EXTERNAL CENTRAL HEAT (CH) CALL TERMINALS ARE NOT OPERATIONAL
- EMS SIGNAL
- V (DC) OR 0 - 20 MA
- V (DC) OR 4 - 20 MA
- EMS OFFSET
- INDIRECT DOMESTIC HOT WATER (DHW) OPERATION
- DHW CALL
- DHW TANK AQUASTAT
- DHW SENSOR
- DHW DIFFERENTIAL
- BOILER TARGET TEMPERATURE DURING A DHW CALL
- IDHW DURING UNOCCUPIED
- IDHW MODE
- IDHW LOCATION
- NEAR
- PRIM
- PRIMARY PUMP DURING IDHW
- IDHW PRIORITY
- PRIORITY OVERRIDE
- CONDITIONAL IDHW PRIORITY
- IDHW POST PURGE
- IDHW MIXING PURGE
- IDHW WITH LOW TEMPERATURE BOILERS
- IDHW BOIL COUNT IDHW
- DEDICATED DOMESTIC HOT WATER (DDHW) OPERATION
- DDHW DIFFERENTIAL
- BOILER TARGET TEMPERATURE DURING A DDHW CALL
- DDHW DURING UNOCCUPIED
- BUILDING AUTOMATION SYSTEM (BAS)
- BAS MODE
- MONITOR
- TEMPERATURE
- BAS TYPE
- NETWORK CONFIGURATION SETTINGS IN BAS MENU
- PUMP OPERATION
- PRIMARY PUMP OPERATION
- APPLICATION MODE: OUTDOOR TEMPERATURE RESET (RSET)
- APPLICATION MODE: SETPOINT (SETP)
- APPLICATION MODE: ENERGY MANAGEMENT SYSTEM (EMS)
- APPLICATION MODE: BUILDING AUTOMATION SYSTEM (BAS)
- PRIMARY PUMP FLOW PROOF
- MA ANALOG FLOW SENSOR
- STAND-BY OPERATION
- FLOW PROOF DELAY
- FLOW PROOF DEMAND TEST
- PRIMARY PUMP ROTATION
- PRIMARY PUMP PURGE
- BOILER PUMP OPERATION
- PRE-PURGE
- POST-PURGE
- PUMP LOGIC
- INDIRECT DHW (IDHW) TANK PUMP OPERATION
- APPLICATION MODE: OUTDOOR TEMPERATURE RESET, SETPOINT, ENERGY MANAGEMENT SYSTEM
- APPLICATION MODE: BUILDING AUTOMATION SYSTEM
- COMBUSTION AIR (COMB AIR) DAMPER AND DHW RECIRCULATION PUMP SETTINGS
- AUXILIARY RELAY
- COMBUSTION AIR DAMPER
- COMBUSTION AIR (COMB AIR) PROOF
- COMBUSTION AIR PROOF DELAY
- COMBUSTION AIR (COMB AIR) PROOF TEST
- COMBUSTION AIR DELAY
- COMBUSTION AIR POST PURGE
- SETTING THE SCHEDULE
- CONTROL (CTRL) SCHEDULE
- REQUIREMENTS
- SCHEDULE TYPES
- EVENTS / DAY
- TIME CLOCK
- INSTALLATION
- INSTALLATION LOCATION
- CONTROL WIRING
- WIRING THE INPUT POWER
- WIRING THE PRIMARY PUMPS
- WIRING THE BOILER PUMPS
- WIRING AUXILIARY TERMINALS
- WIRING AN ALERT
- WIRING A PRIMARY PUMP (PRIMPUMP) FLOW PROOF
- WIRING A COMBUSTION AIR (COMB AIR) PROOF
- ⚠ WIRING A CENTRAL HEAT (CH) CALL
- WIRING A FUEL SWITCH
- SINGLE STAGE BOILER WIRING
- TWO STAGE BOILER WIRING
- MODUTROL IV™ GAS VALVE
- V9055™ GAS VALVE
- SENSOR INSTALLATION & WIRING
- MOUNTING THE OUTDOOR SENSOR
- WIRING THE OUTDOOR SENSOR (7738003452)
- MOUNTING THE UNIVERSAL SENSORS (7738003451)
- STRAPPED TO PIPE
- IMMERSION WELL
- WIRING BOILER OUTLET SENSORS (7738003451)
- WIRING A BOILER INLET SENSOR (7738003451)
- WIRING A PRIMARY SUPPLY SENSOR (7738003451)
- WIRING A PRIMARY RETURN SENSOR (7738003451)
- WIRING A DHW SENSOR (7738003451)
- WIRING A FLOW SENSOR (PROVIDED BY OTHERS)
- WIRING A PRESSURE SENSOR (PROVIDED BY OTHERS)
- WIRING A COMMON FLUE SENSOR (PROVIDED BY OTHERS)
- EMS, MODBUS® & BACNET® CONNECTIONS
- EMS CONNECTION
- MODBUS® CONNECTION
- TESTING THE SENSOR WIRING
- TESTING THE CONTROL WIRING
- TESTING THE POWER
- USER TEST (HAND)
- TESTING THE AUXILIARY RELAY
- TESTING THE ALERT DRY RELAY
- TESTING THE PRIMARY PUMPS
- TESTING THE BOILER PUMP(S)
- TESTING THE BOILER STAGE(S)
- TESTING THE MODULATING BOILER OUTPUT
- TESTING THE TEMPERATURE BOILER OUTPUT
- TESTING THE CENTRAL HEAT (CH) CALL
- TESTING THE FUEL SWITCH
- CONTROL SETTINGS
- ACCESS LEVEL
- USER INTERFACE
- DISPLAY
- NAVIGATING THE DISPLAY
- VIEW MENU (1 OF 2)
- VIEW MENU (2 OF 2)
- SETUP MENU (1 OF 6)
- SOURCE # MENU (1 OF 3)
- BAS MENU (1 OF 2)
- BAS MENU (2 OF 2)
- MONITOR # MENU (1 OF 1)
- MONITOR MENU (1 OF 2)
- TIME MENU (1 OF 1)
- SCHEDULE MENU (1 OF 2)
- TOOLBOX MENU (2 OF 2)
- MANUAL OVERRIDE
- AUTOMATIC (AUTO)
- PURGE OVERRIDE (PURG)
- MAX HEAT OVERRIDE (MAX)
- HAND OVERRIDE (HAND)
- OFF OVERRIDE (OFF)
- SELECTING A MANUAL OVERRIDE MODE
- TROUBLESHOOTING
- ERROR MESSAGES (2 OF 3)
- ERROR MESSAGES (3 OF 3)
- LIMITED WARRANTY
Brand : BOSCH
Model : Heatronic 4000
Category : Thermostat