
OR80 OT - Thermostat BOSCH - Free user manual and instructions
Find the device manual for free OR80 OT BOSCH in PDF.


| Product Type | Thermostat |
| Brand | Bosch |
| Model | OR80 OT |
| Dimensions (Approx.) | 80 x 80 x 30 mm |
| Weight | 0.2 kg |
| Power Supply | 2 x AA batteries (3V) |
| Display Type | LCD |
| Temperature Control Range | 5°C to 35°C |
| Accuracy | ±0.5°C |
| Programmable Schedule | 7-day, up to 6 periods per day |
| Compatible Systems | Gas, oil, electric, heat pump |
| Wiring | 2 or 4 wire (battery backup optional) |
| Maintenance | Clean with a soft, dry cloth |
| Safety Features | Overheat protection, low battery indicator |
| Spare Parts | AA batteries (replaceable) |
| Warranty | 2 years |
Frequently Asked Questions - OR80 OT BOSCH
User questions about OR80 OT BOSCH
0 question about this device. Answer the ones you know or ask your own.
Ask a new question about this device
Download the instructions for your Thermostat in PDF format for free! Find your manual OR80 OT - BOSCH and take your electronic device back in hand. On this page are published all the documents necessary for the use of your device. OR80 OT by BOSCH.
USER MANUAL OR80 OT BOSCH
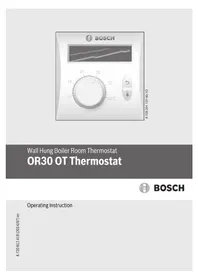
Wall Hung Boiler Room Thermostat OR80 OT Thermostat

BOSCH
Operating Instruction
Contents
1 Symbols and safety precautions 4
1.1 Key to symbols 4 1.2 Safety instructions .... 5
2 Product instruction 6
2.1 Proper use 6 2.2 Electric parameters 6 2.3 Main functions and features 7 2.4 Cleaner....7
3 Product description 8
4 Product appearance dimensions 9
5 Installation 10
5.1 Mounting position 10 5.2 Installation steps ..... 10
6 Operation instruction 12
6.1 Temperature setting 12 6.2 Time setting.... 13 6.3 Function setting 13 6.4 Weekly program 15
7 Program 18
8 Basic operation procedure 20 9 Temperature calibration 24 10 Holiday mode 25 11 Boiler information 26 12 Safety instructions 26 13 Applicable models 27
1 Symbols and safety precautions
1.1 Key to symbols
Warnings

Warnings in this document are identified by a warning triangle printed against a grey background.
Keywords at the start of a warning indicate the type and seriousness of the ensuing risk if measures to prevent the risk are not taken.
The following keywords are defined and can be used in this document:
- NOTICE indicates a situation that could result in damage to property or equipment.
- CAUTION indicates a situation that could result in minor to medium injury.
- WARNING indicates a situation that could result in severe injury or death.
- DANGER indicates a situation that will result in severe injury or death.
Important information

This symbol indicates important information where there is no risk to people or property.
Additional symbols
Symbol Explanation
▶ Step in an action sequence
→ Cross-reference to another part of the document
- List entry
- List entry (second level)
Table 1
1.2 Safety instructions
General safety instructions
Thank you for using our room thermostat. Please read the following content before using:
▶ Operate this product according to the instructions. ▶ Follow the manual to ensure complete functionality. ▶ Install and use heaters and other accessories according to the manual. ▶ Accessories may only be installed by an authorized installer. ▶ Before installing the accessories: Interrupt the power supply of heaters and other members of the bus (220~240V AC). ▶ Inform users of the working method of the accessories and guide them on operation. ▶ The heater is switched on when freezing danger occurs; comply with anti-freezing tips. ▶ The accessories must not be connected to a 220~240V power supply. ▶ Users should learn the product default settings (refer to “2.2 Electric parameters”). Do not change default settings unless necessary. ▶ Mount the thermostat as per “5.1 Mounting position”. ▶ HRT-196WT is powered by OT 3.3V low voltage. ▶ If the product breaks down within 12 months, we will fix it free of charge. ▶ There will be an extra charge under the following situations even if within the warranty period: - The fault is caused by misuse or failure to follow the instructions; - Destruction due to flood, fire, or lightning strike; - Damage caused during product dismantling or modification by the user or an unauthorized maintainer; - Immersion in water, dampness, collisions, or extrusion that destroy the product. ▶ If you have any questions, please contact our manufacturer or agents.
6 Product instruction
Damage caused by operational errors
Operational errors may cause personal injury and/or property damage.
▶ Ensure that children do not operate and/or play with the equipment under unattended circumstances. ▶ Ensure that the equipment is only touched by personnel who can operate it correctly.
2 Product instruction
The OR80 room thermostat has the advantages of easy operation and practicality.
2.1 Proper use
Please carefully read this manual before using, and operate according to requirements specified in the manual.

When communication between OT controller and wall-hung boiler is abnormal, hint "Error E1" will appear, and other failures please refer to error code introduction of wall hung boiler.
2.2 Electric parameters
| Temperature setting range 5~35 °C | |
| Measurement precision 0.1 °C | |
| Hysteresis temperature ± 1 °C | |
| Display LCD Dot matrix | |
| Temperature sensor NTC | |
| Power supply OT low voltage |
Table. 2
2.3 Main functions and features
• 24H Custom program function • Recycle control temperature from Sunday to Monday - Setting temperature in multi period per day - Menu operation mode • Temperature calibration • 128*64 dot matrix display screen - Display current temperature/time/week/working condition - 1 user program function,7 fixed modes - Program preview - Fault display function - Reset, quit operation function
2.4 Cleaner
▶ Use wet cleaning cloth to wipe the housing of controller. Must not use irritant or corrosive detergent.
3 Product description

Fig. 1
[1] + (increase)/ Up key [2] Boiler working condition [3] Mode/Return key [4] - (decrease)/ Down key [5] Current mode [6] Week date [7] Current room temperature [8] Program preview [9] Heating working condition [10] DHW water working condition [11] Left key
[12] 24H Display [13] Main menu/confirm/set key [14] Current time [15] Right key
4 Product appearance dimensions

Fig. 2
The back plate of the room thermostat is a standard 86*86 design and can be mounted in a standard junction box or fixed on the wall.
5 Installation
5.1 Mounting position
Avoid installing the thermostat close to a fridge, radiator, kitchen, computer, window, doorway, or other areas that are over-cooled, over-heated, or have frequently changing temperatures. The best position to install the thermostat is a dry place that can precisely reflect room temperature and has low interference.
5.2 Installation steps
▶ Plug a flathead screwdriver into the recesses at the product bottom, and move it up to open the back cover, as shown in Fig. 3.

Fig. 3
▶ Drill two holes from the cable entries on the wall (space between hole centers is 60~80mm), fill the fitting expansion pipes, and then use fitting screws (PA4*30mm) to fix the back cover (see Fig. 4).

Fig. 4
▶ Connect the wire to the wire holder of the PCB, and align the four positioning buckles with the four square holes, then fix the product onto the back cover, as shown in Fig. 5.

Fig. 5
6 Operation instruction
There are 6 function keys on the OR80 OT room thermostat. Press the Prog key to enter the main menu, press the “+” and “-” keys to choose a function, and press the “Prog” key to set this function.
6.1 Temperature setting
The item “temperature setting” in the main menu is used for setting the temperature in three modes: the “+” and “-” keys are for adjusting the temperature, the LEFT and RIGHT keys are for moving the operation point position, and the “Prog” key is used to save the setting and return to the last menu.
| Default setting | |
| Defrost temperature 5 °C | |
| Economy temperature 17 °C | |
| Comfortable temperature 20 °C | |
Table 3
| Main Menu | ||
| Setting Temp | 0 | 3 6 9 12 15 18 21 |
| Time/Week | Sunday | Daily job |
| User prog | Monday | Daily job |
| Sys setting | Tuesday | Daily job |
| Weekly prog | Wednesday | Daily job |
| Holiday mode | Thursday | Daily job |
| Boiler Info | Friday | Daily job |
| Exit | Saturday | Daily job |
Fig. 6 Temperature setting
6.2 Time setting
Set current time and week under "Time/week".
| Main menu | |
| Setting temp. | |
| Time/week | ek |
| User prog. Hour Sys settings Weekly prog. Holiday mode Boiler Info Exit | : 00 MON |
Fig. 7 Time setting
6.3 Function setting
"System Set" includes "Language", "Temperature calibration", "Sensor setting", "Boiler function" and "Restore factory defaults".
- "Language" option includes CHINESE and ENGLISH;
- "Temperature calibration" is for correcting temperature;
- "Sensor setting" option is for selecting indoor temperature sensor and outside temperature sensor;
- "Boiler function" option is used for setting "CH" and "DWH" working condition;
- "Restore factory defaults" can restore all temperatures and functions to default values.
| Main menu | ||
| Temp setting Time/week User prog Sys settings Week prog Holiday mode Boiler Info Exit | Sys settings language Temp calibration Sensor settings Boiler Func Factory set Return Exit | Language 简体中文 English |
| Sys settings Language Temp calibrate Sensor setting Boiler Func Factory set Return Exit | Temp calibration Cur Temp 30.6℃ | |
| Sys settings Language Temp calibration Sensor setting Boiler Func Factory set Return Exit | Sensor setting Room sensor ✓ Outdoor sensor× | |
| CH enable ✓ |
Fig. 8 Function setting
6.4 Weekly program
This function is used for setting temperature mode.
These modes include: office worker, comfort, economy, outing, morning shift, middle shift, night shift, and user-defined. User-defined mode is a custom program mode (see part 7); other modes are set as follows:
| office worker | |
| Time period Temperature | |
| 08:00-12:00 Frost temperature | |
| 12:00-13:30 Comfort temperature | |
| 13:30-17:30 Frost temperature | |
| 17:30-08:00 Comfort temperature | |
Table 4
16 Operation instruction
| Comfort | |
| Time period Temperature | |
| 00:00-00:00 Comfort temperature | |
| Economy | |
| Time period Temperature | |
| 00:00-00:00 Economy temperature | |
| Outing | |
| Time period Temperature | |
| 00:00-00:00 Frost temperature | |
| Morning | |
| Time period Temperature | |
| 07:30-16:00 Frost temperature | |
| 16:00-07:30 Comfort temperature | |
| Middle shift | |
| 15:30-00:00 Frost temperature | |
| 00:00-15:30 Comfort temperature | |
| Night shift | |
| 23:30-08:00 Frost temperature | |
| 08:00-23:00 Comfort temperature | |
Table 5
Table 6
| Main Menu | ||
| Setting Temp | 0 | 3 6 9 12 15 18 21 |
| Time/Week | Sunday | Daily job |
| User prog | Monday | Daily job |
| Sys setting | Tuesday | Daily job |
| Weekly prog | Wednesday | Daily job |
| Holiday mode | Thursday | Daily job |
| Boiler Info | Friday | Daily job |
| Exit | Saturday | Daily job |
Fig. 9 Weekly program
7 Program
This thermostat allows up to 48 programmable time zones per day, and the user can set any temperature within the setting ranges in these 48 programmable time zones. The following is an example with 6 programmable time zones:
| Time period Temperature setting | |
| 06: 00-11: 30 | Economy temperature |
| 11: 30-13: 00 | Comfort temperature |
| 13: 00-18: 00 | Economy temperature |
| 18: 00-23: 30 | Comfort temperature |
| 23: 30-03: 00 | Economy temperature |
| 03: 00-06: 00 | Comfort temperature |
Table 7

Fig. 10 Program
Press "Prog" to enter the main menu; press (-) to select "User prog." and press "Prog" to enter the interface.
When the cursor is at 00:00, set the start time to 06:00 using the ">/<" key; then set the time to 6:00 using the "<" key.

Fig. 11
Press the "Mode" key to move the cursor to "comfort temperature"; move the cursor to "start" -6:30 with ">", and repeat the above two steps to set the temperature for the second time period as "comfort temperature"; repeat the above operation to set the temperature for other time periods. Press the "+" and "-" keys to copy the temperature mode of the last 30 minutes; for instance, if the temperature mode for 06:00 and 06:30 should be the same, users can easily set it by directly pressing "+". Save the last step and press "Prog" to quit programming. All program points will be automatically saved in "User Prog"; end programming.
8 Basic operation procedure
For initial operation, please take the following steps:
▶ Please connect the room thermostat according to “section 5.1”. ▶ After thermostat is connected, LCD display board is shown as below:

Fig. 12
Press "Prog" to enter main menu.
▶ Choose “Setting temp” and press “Prog” key to enter temperature setting. User can set temperature value for three modes: anti-frost mode, economy mode and comfort mode:
- De-Frost temperature: This temperature is suitable for the situation when people stay out for a long time (such as: on vacation). And this mode will not only save energy but also can assure boiler's and pipeline's safety. Setting temperature range: 5-35 °C Default: 5 °C.
- Economy temperature: this mode is suitable for the situation when user can come home in a short time (such as: working hours). Setting temperature range: 5-35 °C. Default point: 17 °C.
- Comfort temperature: this temperature is suitable for the situation when people stay at home. Setting temperature range: 7-35 °C. Default point: 20 °C.
▶ Press “Prog” key to save settings and return to main menu.

Fig. 13
▶ Press “-”key (P10) to start time &week setting, move cursor with “left” and “right” keys, and set current time and week with “up” and “down” key. Press “Prog” key to save settings, and return to main menu.
| Main menu | |
| Setting temp. | |
| Time/week | Set time/week |
| User prog Sys settings Weekly prog Holiday mode Boiler Info exit | Hour 12 : 00 MON |
Fig. 14
22 Basic operation procedure
▶ Choose “boiler function” item in “system setting” and press “Prog” key to enter CH and DWH function setting.
OR80 OT
CH allowed: Start up boiler's CH function.
CH not allowed: Shut off boiler's CH function.
Table 8: Selecting “√/×” with the “left” and “right” keys, where “√” means starting the boiler's CH function. Press the “Prog” key to save settings and return to the main menu.
| Main menu | ||
| Setting temp. | Sys setting | |
| Time/week | language | |
| User prog. | Temp calibrate | |
| Sys setting | Sensor setting | |
| Weekly prog | Boiler function | Boiler func CH |
| Holiday mode | Factory set | |
| Boiler Info | Return | |
| Exit | Exit | |
Fig. 15
Choose “weekly program” and press the “Prog” key to enter mode setting. Select the week date from Monday to Sunday with the “left” and “right” keys, and choose different modes by pressing the “mode” key. All setting periods can be previewed at the top of the LCD screen.

Fig. 16
Press the “Prog” key to return to the main display interface, or automatically exit after 10 seconds.
9 Temperature calibration
Due to regional, environmental, and electrical measuring tolerances, some deviation may exist. Users can adjust the temperature through “temperature calibration”. Press the “Prog(P2)” key to enter the main menu – sys setting – temperature calibration. Press the “up” and “down” keys to set the temperature point, then press “Prog” to save settings and return to the main menu when this operation is finished.
| Main menu | |
| Temp setting | Sys setting |
| Time/week | language |
| User prog | Temp calibrate |
| Sys setting | nsor setting Temp cali |
| Weekly prog | Boiler-func |
| Holiday mode | Factory-set |
| Boiler- Info | Return |
| Exit | Exit |
| 29.0 °C |
Fig. 17

The operation of “Temp calibrate” is not suggested if the deviation of the room thermostat is not obvious.
10 Holiday mode
This mode is selected for situations when people stay out for a long time (such as on vacation).
| Main menu | |
| Temp setting | Holiday length |
| Time/week | Time |
| User prog | 00 day00 hour Sys setting |
| Weekly prog | |
| Holiday mode | |
| Boiler- Info | |
| Exit |
Fig. 18
11 Boiler information

Fig. 19
12 Safety instructions
This room thermostat is driven by low voltage, please be careful.
13 Applicable models
| Boiler mode Boiler No. Serials | ||
| Eurosmart MINI | L1P18 (WBN6000-16C) | 7716482002 |
| N1P17 (WBN6000-15S) | 7716482003 | |
| “New” Eurostar | L1P20-WBN6000 -18CRNS5500 | 0T1010044700023338 |
| N1P20-WBN6000 -18HRNS5500 | 0T1010044700023332 | |
| L1P27-WBN6000 -24CRNS5500 | 0T1010044700023339 | |
| N1P27-WBN6000 -24HRNS5500 | 0T1010044700023333 | |
| L1P31-WBN6000 -28CRNS5500 | 0T1010044700023340 | |
| N1P31-WBN6000 -28HRNS5500 | 0T1010044700023334 | |
Table 9
Robert Bosch (Australia) Pty Ltd
Thermotechnology Division
1555 Centre Road
Clayton Victoria 3168
Australia
Phone: 1300 30 70 37
Fax: 1300 30 70 38
www.bosch-climate.com.au
New Zealand
Phone: 0800 54 33 52
Fax: 0800 543 355
www.bosch-climate.co.nz

- WALL HUNG BOILER ROOM THERMOSTAT OR80 OT THERMOSTAT
- CONTENTS
- SYMBOLS AND SAFETY PRECAUTIONS
- PRODUCT INSTRUCTION
- PRODUCT DESCRIPTION
- PRODUCT APPEARANCE DIMENSIONS
- INSTALLATION
- OPERATION INSTRUCTION
- PROGRAM
- KEY TO SYMBOLS
- WARNINGS
- IMPORTANT INFORMATION
- ADDITIONAL SYMBOLS
- SYMBOL EXPLANATION
- SAFETY INSTRUCTIONS
- GENERAL SAFETY INSTRUCTIONS
- DAMAGE CAUSED BY OPERATIONAL ERRORS
- PROPER USE
- ELECTRIC PARAMETERS
- MAIN FUNCTIONS AND FEATURES
- CLEANER
- MOUNTING POSITION
- INSTALLATION STEPS
- TEMPERATURE SETTING
- TIME SETTING
- FUNCTION SETTING
- WEEKLY PROGRAM
- BASIC OPERATION PROCEDURE
- OR80 OT
- TEMPERATURE CALIBRATION
- HOLIDAY MODE
- BOILER INFORMATION
- APPLICABLE MODELS
Brand : BOSCH
Model : OR80 OT
Category : Thermostat