
7916 TM - Browser BECKER - Free user manual and instructions
Find the device manual for free 7916 TM BECKER in PDF.


| Product Type | GPS Navigation Device |
| Brand | Becker |
| Model | 7916 TM |
| Display | 5.0-inch TFT color touchscreen, 480x272 resolution |
| Dimensions (approx.) | 13.5 x 8.5 x 1.8 cm |
| Weight (approx.) | 160 g |
| Power Source | Rechargeable lithium-ion battery (3.7V, 1200 mAh) and 12V car adapter |
| Battery Life | Up to 4 hours continuous use |
| Processor | ARM Cortex-A8, 500 MHz |
| Memory | 128 MB RAM, 4 GB internal storage (expandable via microSD) |
| Navigation Features | Turn-by-turn voice guidance, lane assistance, speed limit display, points of interest |
| Maps | Preloaded with European maps, lifetime map updates via PC |
| Connectivity | USB 2.0, Bluetooth (for hands-free calling), FM transmitter |
| GPS Chipset | SiRF Star III, 20-channel |
| Operating System | Windows CE 6.0 |
| Maintenance | Clean with a soft, dry cloth. Avoid harsh chemicals. |
| Safety | Use a suction cup mount for windshield; do not block airbags. Operate only when safe. |
| Spare Parts & Repairability | Replacement battery and charger available; device is not user-serviceable. |
| Package Contents | Navigation device, car charger, suction mount, USB cable, user manual |
Frequently Asked Questions - 7916 TM BECKER
User questions about 7916 TM BECKER
0 question about this device. Answer the ones you know or ask your own.
Ask a new question about this device
Download the instructions for your Browser in PDF format for free! Find your manual 7916 TM - BECKER and take your electronic device back in hand. On this page are published all the documents necessary for the use of your device. 7916 TM by BECKER.
USER MANUAL 7916 TM BECKER
Operating instructions

Index
The Traffic Assist Pro 7
Use 7
Navigation 7
Music 7
Pictures 7
Unpacking the Traffic Assist Pro 8
Checking the delivery 8
Delivery contents 8
Complaints procedure 8
Handling the packaging 8
Description of unit 8
Traffic Assist Pro-Basic unit 9
Adapter-Power Supply 9
Battery 9
SD memory card 9
USB connection cable 9
Accessories 10
mains charger 10
External GPS antenna 10
Headset 10
Information about
documentation 10
Quick start guide 10
Operating instructions 10
Maintenance and care 10
Registration 11
Repairs 11
Disposal 11
Emissions 11
Overview Traffic Assist Pro
Maintenance and care
Battery quality declaration
Display quality declaration
Start-up
SD-Card
Inserting the SD memory card
Ejecting the SD memory card
Power supply
Using the battery
Via the public mains grid
Connecting up to power supply
Removing power supply
Via the vehicle battery
(cigarette lighter socket)
Via the TMC receiver
Antenna
GPS antenna
TMC antenna
Switching the Traffic Assist
Pro on/off
Switching on
Switching off
Unit bracket
Traffic Assist Pro with TMC
Traffic Assist Pro without TMC
Fitting the unit bracket
On the windscreen
On the dashboard
Moving the unit holder
Vertical movements
12
Horizontal movements 25
Attaching the Traffic Assist Pro 25
Connecting the telephone mute
function 26
Basic information about the
touch screen 26
Operation 26
Calibration 26
Basic information about the menus 26
The main menu 26
Entries made with the entry menu 27
Entering characters 27
Adopting suggestions 27
27
Scrolling through the lists
Special characters and umlauts
Entering numbers 28
Deleting characters 29
inserting spaces 29
The back key 29
More maps 29
Installation program 29
Transferring files 30
Transferring using the SD card reader 30
Transferring via the USB interface 30
Transferring maps 30
Transferring music and images 31
Faults 31
Index
Navigational mode 32
What is navigation? 32
Selecting navigation 33
Aids for navigation 33
Rapid access 33
Navigation menu 33
Map display 33
Rapid access 33
Structure of rapid access 33
Navigation menu and map display 33
The list of destinations 34
Icons used 34
Operating rapid access 34
Starting using an existing
destination 34
Scrolling in the destinations
memory 34
Displaying or editing destination 35
Change to map display 35
Displaying current position 35
Calling up Navigation menu 35
TheNavigation menu 36
Structure of the navigation menu 36
Navigation 36
Route planning 36
Settings 36
Status 36
Load map 36
Home 36
Navigation menu: Navigation 37
Destination selection window 37
Destination: Selecting a country 37
Destination: select address and
start 38
Voice selection 41
Stopping navigation 42
Destination: Points of interest
select 42
Point of interest: nearby 43
Point of interest: nationwide 43
Point of interest: in a town 44
Destination: selecting from
the map 44
Navigation menu: Route planning 45
Route list 46
Scrolling through the list of routes 46
Using a route 46
The New route button 47
The Edit key 47
The Calculate key 48
The Start key 48
Navigation menu: Settings 48
The Route info key 49
The Signpost info button 49
The Routing options button 50
The Volume key 50
The Map info key 51
The Automode key 51
The Time Zone key 52
The Route planning key 52
The Format key 52
The Speedkey 53
The Home adress key 54
The TMC button 54
The Smart Speller button 55
The Factory settings key 55
Navigation menu: Status 55
Navigation menu: Load map 56
Navigation menu: Home 56
What is dynamic route guidance? 56
Displaying TMC messages on
the map 57
Using TMC 57
Updating the announcement list 58
Station selection 58
Taking announcements into
consideration when calculating
routes 58
Automatic recalculation 58
Manual recalculation 59
Map display 59
Map layout 60
Map display without driving
guidance 60
Map display with driving guidance 60
Map display with toolbar 61
Using the map display 61
Repeating the last announcement 61
Adjust voice prompt volume 61
Information rows 62
Zooming and the map (toolbar) 62
Display route (toolbar) 62
Index
Position and display mode
(toolbar) 63
Displaying TMC messages
(toolbar) 63
Change display (toolbar) 63
Point northwards (toolbar) 64
Move map (toolbar) 64
Call Options menu 64
Position information (toolbar) 65
Playback of MP3 files during an active navigation 66
Music operations 67
Selecting music playback 67
The MP3 player 67
Operating the MP3-Players 68 Scrolling 68
Play 68
Pause 68
Folder overview 69
Opening the next folder 69
Repeat current track 69
Setting volume 69
Navigation during MP3 player operation 69
Closing the MP3-Player 70
Pictures mode 71
Selecting pictures display 71
Picture viewer 71
Operating the Picture Viewers 71
Scrolling 71
Adjusting the music volume 71
Slideshow 72
Full screen 72
Shutting down the Picture Viewer 72
Folder viewing mode 72
Operating folder viewing mode 73
Subfolders 73
Scrolling 73
Selecting a picture 73
Changing folder levels 73
Closing folder viewing mode 73
Settings 74
Selecting the settings 74
The setting menu 74
Operation 74
Selection possibilities 74
Closing the setting menu 74
The individual menu points 74
Energy 74
Displaying the energy supply 74
Ending the status display 75
Brightness 75
Calibration 75
Starting calibration 75
Language 76
Calling up language selection 76
Turn the page 76
Selecting the language 76
Cancelling the language selection 76
Sounds 76
Information 77
Keywords 80
Technical Data 83
FACT SHEET 84
The information contained herein may be changed at any time without prior notification. This manual nor any parts thereof may not be reproduced for any purpose whatsoever without the express written consent of HARMAN/BECKER Automotive Systems GmbH.
© Copyright 2006, HARMAN/
BECKER Automotive Systems GmbH All rights reserved.
⚠ Safety information
- The unit may only be operated if the traffic situation allows for this and if you are absolutely certain that you yourself, your fellow passengers or other road users will not be put at risk, encumbered or disturbed by this. The rules of applicable road traffic acts must be observed at all times. Destinations may only be input when the vehicle is stationary.
- The navigational system is only an aid. The data/details provided may in some cases be incorrect. The driver must always decide whether to follow the details given or not. We accept no liability for the navigational system issuing incorrect details. As a result of traffic routing changes and deviating data, inaccurate or incorrect instructions may be given. Drivers should always pay attention to the actual road signs and traffic control. In particular, the navigational system cannot be used as a means of orientation in cases of poor visibility.
- The unit may only be used for its intended purpose. The volume of the Navigationsgerätes should be set so that noises outside the vehicle can still be heard.
- The unit should be switched off immediately if faults occur (e.g. development of smoke or smells).
-
For safety reasons, the unit may only be opened by a specialist. Please contact your local stockist if you require repairs.
-
The SD memory card can be removed. Caution! Small children could swallow it.
- The mains voltages (V) indicated on the mains charger, the car power adapter and the unit must not be exceeded. Failure to observe this may result in destruction of the unit and the charger and cause the battery to explode.
- Never open the unit or the rechargeable battery. Any modification to the unit is also impermissible and renders the type approval invalid.
- Use only genuine BECKER original accessories. This will ensure that all the relevant regulations are complied with and damage to health and property is avoided. Dispose of defective units and the rechargeable battery according to the applicable legal requirements.
- No warranty is granted in the case of improper use. These safety instructions also apply to genuine BECKER original accessories.
Use
The Traffic Assist Pro is a powerful PND (Personal Navigation Device) for use in vehicles and closed spaces. The unit should be protected from dampness and dirt.

natural_image
Front view of a gray electronic device labeled 'SWERC Assistant 7.00' with control buttons and a red circular icon on the front panel (no readable text beyond branding)The Traffic Assist Pro can be used as:
- navigational unit
• MP3 (device for playing music) - JPEG image viewer
Navigation
Thanks to GPS = Global Positioning System, you no longer need to spend hours searching through road atlases.
The folding receiving antenna gives you constant access to navigation options when outside in the open. Depending on reception, you may not be able to use the navigational function inside buildings. When used in vehicles, you may not be able to adequately receive GPS data depending on how the Traffic Assist Pro is installed. In such cases, you will have to connect up an external antenna (does not fall within the scope of supply).
Depending on the version, the Traffic Assist Pro is equipped with TMC, which gives you the option of receiving traffic announcements via the TMC antenna provided. Traffic announcements are transmitted when the TMC is active. The system plans an alternative route automatically or on request to avoid traffic problems, depending on the setting.
The TMC receiver and antenna are also available as accessories from your local dealer.
Music
Thanks to the integrated MP3-Player, you can listen to your favourite tracks when on the go.
Pictures
The Traffic Assist Pro has a Picture Viewer offering many functions for viewing pictures.
Unpacking the Traffic Assist Pro
Note:
Your Traffic Assist Pro is supplied in stable packaging. Do not unpack the unit in full if you discover any serious damage to the packaging or its content. If this happens, please contact your local stockist.
Checking the delivery
Before the Traffic Assist Pro is started up, the delivery should be checked to ensure that it is complete and in the correct condition (see also page 12).
▶ Carefully unpack the content of the package and check it.
Delivery contents
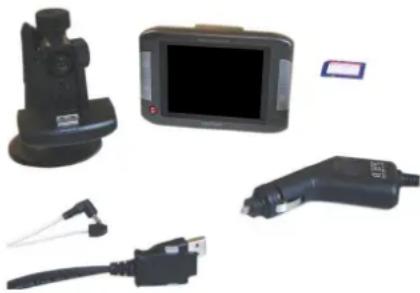
natural_image
Collection of electronic devices including a remote control unit, a monitor, and USB cable (no visible text or labels)Note:
The achievement without TMC has not included a TMC-Antena or a TMC-acceptor.
Complaints procedure
Please contact your local stockist if you have any complaints. The unit can also be sent directly to Harman/Becker in its original packaging.
Handling the packaging
Keep the original packaging in a dry place, at least for the warranty period.
Note:
The packaging should be disposed of correctly in accordance with national disposal guidelines. The packaging must not be burnt. Depending on the country to which the unit is supplied, it may be possible for local stockists to accept packaging.
Description of unit
The Traffic Assist Pro consists of the basic unit Traffic Assist Pro and the accessories included in the delivery. You will find photos of the individual parts under:
See "Delivery contents" on page 12.
Note:
The basic unit and accessories must not be opened or modified in any way.
Traffic Assist Pro - Basic unit
The basic unit consists of a complete electronic unit, a folding antenna for receiving GPS signals, a touch screen for communication, an integrated speaker for broadcasting announcements during navigation and for MP3 files, a microphone for recording voice commands and various connections and interfaces.
Further information on the unit can be found in "Technical Data" on page 83.
Adapter-Power Supply
This cable allows the unit to be connected up to the car's cigarette lighter.
The power supply must satisfy the following requirements:
• DC current 12-36 volts 1.5 amps
Battery
When the replaceable battery is flat, it can be recharged by connecting the Traffic Assist Pro to the power supply. Use the car adapter to connect the unit to an on-board power socket in the vehicle, the mains charger to connect to the mains power supply (100-240V) or the USB cable to connect to a PC.
SD memory card
A SD memory card serves as a storage medium for road maps, music tracks and images.
The card supplied with the unit has a capacity of 2 GB and space for a set of road maps and a limited number of MP3 files and/or images. The number of music/image files that can be stored on the card depends on the size of the files. Alternatively, you can connect a USB memory stick to the USB port to play MP3 files or display images.
Note:
Using USB memory sticks to play MP3 files or display images may significantly decrease the capacity of the battery.
Note:
Using USB memory sticks (for MP3s) may interfere with the GPS signal.
When removed from the unit, store the SD memory card in the packaging provided in a dry location away from direct sunlight. Avoid touching the contact strip and keep clean at all times.
- Further information on the SD memory card can be found in See “SD Card” on page 78.
USB connection cable
You can connect the unit to a standard personal computer with a USB interface using a USB connecting cable. You can also charge the Traffic Assist Pro using the USB cable.
Accessories
mains charger
This power supply allows connection of the Traffic Assist Pro to a mains outlet (not included in standard equipment).
Please consult your
local specialist dealer.
Requirements for power supply:
Alternating current
• 1 0 0 - 2 4 0 V
0.5 Amps
• 50 - 60 Hertz
External GPS antenna
Vehicles with limited GPS reception can be fitted with an external antenna (not included in standard equipment) to improve the reception. Please consult your local specialist dealer.
Note:
The integrated GPS antenna is not suitable for use in vehicles with anti-glare windows (metalised thermo-glass or metal foil, indicated by the window label - SIGLA SOL, SIGLA CHROM, SIGLA, KOOL-OF, SUNGATE, etc.) and vehicles with fine-meshed heating wires in the windows.
If this is the case, use an external GPS antenna. Please consult your local specialist dealer.
Headset
When using the Traffic Assist Pro as an MP3 player, commercially available headphones with a 3.5 mm jack or adapter can be connected (not included).
Danger!
Headsets must not be worn during travel. Observe national regulations and legislation on this matter.
When using the headset, lower the volume so that your hearing is not damaged.
Information about documentation
Quick start guide
The Quick Start Guide is designed to provide a brief introduction to operating your Traffic Assist Pro. The most important basic functions of the Traffic Assist Pro are explained in the Quick Start Guide.
Operating instructions
A comprehensive explanation of the Traffic Assist Pro functionalities is contained in these operating instructions.
Maintenance and care
Note:
Do not use aggressive or abrasive agents or cloths which will scratch the surface.
The unit must not be sprayed with water.
Registration
You can register your product using our software service,
we will then inform you of any new updates and other news.
You can register online on the Becker homepage (www.becker.de).
The “Registration” menu item is located under “Service
Repairs
The unit must not be opened if damaged.
Please contact your local stockist.
Disposal
Note:

The unit, including the parts supplied with it and the batteries and accessories, must be disposed of correctly in accordance
with national regulations for electrical / electronic devices. Depending on the country to which the unit is supplied, your local stockist may be able to accept units.
Emissions
You will find details of emissions and electromagnetic compatibility in "FACT SHEET" on page 84.
Overview Traffic Assist Pro

Delivery contents
1 Unit holder (version without TMC does not include TMC receiver)
2 TMC antenna (version with TMC)
3 USB connecting cable
4 SD memory card (with navigation data)
5 Traffic Assist Pro-PND (Personal Navigation Device)
6 car adapter (12-36V)

Front of the unit with control and display elements
1 Touch screen button
Press = Activates the respective button command
2 Fast access button speech command (See "Saving a destination" on page 41)
3 Fast access button Brightness (See "Brightness" on page 75)
4 BACK button
Press = Returns to various applications
Press and hold = Switches the Traffic Assist Pro on and off
5 Touch screen with selected main menu
6 Fast access button map display (See "Change to map display" on page 35)
7 Fast access button Go home (See "Navigation menu: Home" on page 56)
8 Microphone
Overview Traffic Assist Pro
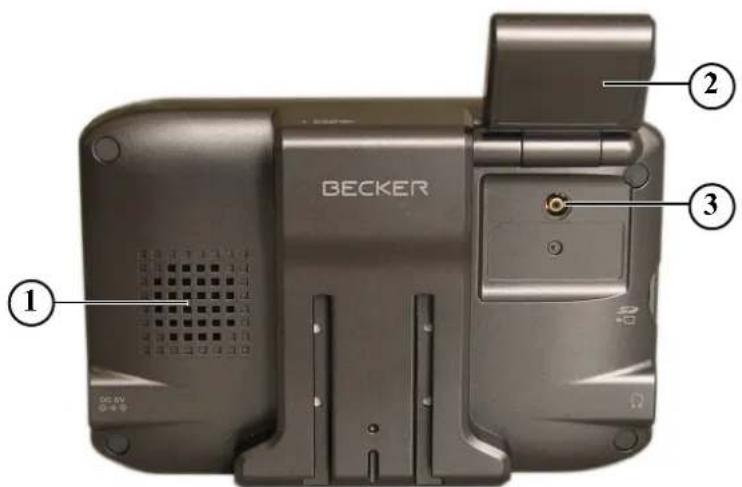
Back of the unit
1 Opening for speaker
2 GPS antenna (folding)
3 Socket for external antenna (external antenna not included in scope of delivery)
natural_image
Close-up of a black mechanical component with labeled parts (1 and 2), no visible text or symbols beyond labels
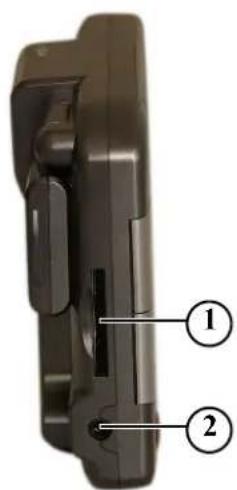
Left side of unit
1 SD memory card slot
2 3.5 mm socket for headphones (headphones not included in scope of delivery)
Right side of unit
3 USB port for data carrier containing MP3 files or images
4 Connection for external power supply
Overview Traffic Assist Pro

Base of unit
1 Reset button
2 PC connection interface
3 Battery compartment cover
4 Screw for battery compartment cover
General operations
Maintenance and care
The unit is maintenance-free.
For proper care, a commercially available cleansing fluid for electrical devices may be applied using a soft damp cloth.
Danger!
Danger to life by electrocution. Always switch off the unit and disconnect the mains power supply unit before cleaning the unit, supplied components, or accessories.
Note:
Do not use any aggressive or abrasive substances or cloths which may damage the surface.
The unit must not be exposed to water.
Your mobile navigation system was designed and manufactured with great care and should be treated with equal care. You will enjoy your mobile navigation system for a long time to come if you observe the recommendations listed in the following:
- "Protect your mobile navigation system from water and moisture. If your unit is exposed to moisture, switch it off immediately and disconnect the power supply. Allow the unit to dry at room temperature.
- Do not operate your mobile navigation system in a dusty or dirty environment and do not store it in such an environment.
- Do not store your mobile navigation system in hot environments. High temperatures can shorten the service life of electronic components in your unit, damage the rechargeable batteries and cause certain plastics to warp or melt.
- Do not store your mobile navigation system in cold environments. During operation, when the unit warms up to operating temperature, moisture may form internally, causing damage to electronic components.
- Do not drop your mobile navigation system unit, protect it from shocks and do not shake it. Improper handling can damage components within the unit.
- Never use corrosive or aggressive chemicals, cleaning solutions or aggressive detergents for cleaning.
All the above information applies equally to the mobile navigation system, the rechargeable battery, the mains charging and car power adapters as well as all accessories. Should one of these parts not work properly, please contact your authorised dealer. He will be pleased to assist.
General operations
Battery quality declaration
The capacity of the rechargeable battery in your mobile navigation system decreases with every charging/discharging cycle. Improper storage at excessively high or low temperatures may also cause a gradual deterioration of capacity. Consequently, the operating time may be substantially reduced even in the case of a fully charged battery.
The rechargeable battery is designed such that it should certainly still be possible for it to be charged and discharged after 6 months of operation of your mobile navigation system. In the event of a significant loss of capacity, we recommend replacement of the rechargeable battery. Please contact your authorised dealer. Use only genuine BECKER original spare parts.
Display quality declaration
In some cases, for technical reasons, a few discoloured dots (pixels) may be visible on the display. Some pixels may also appear brighter or darker. However, such instances do not represent a product flaw.
Start-up
Once the Traffic Assist Pro has been unpacked and checked for damage, the unit can be started up. The individual start-up stages are:
- Insert the SD memory card
- connect to power supply
- Switching on the unit
- Ensuring antenna reception (if navigation is desired)
Note:
When the unit is switched on for the first time, internal configuration takes place. This takes several minutes. Do not switch the unit off during this configuration.
SD-Card
The card supplied with the unit has a capacity of 2 GB and space for a set of road maps and a limited number of MP3 files and/or images. The number of music/image files that can be stored on the card depends on the size of the files. Alternatively, you can connect a USB memory stick to the USB port to play MP3 files or display images.
Note:
Using USB memory sticks to play MP3 files or display images may significantly decrease the capacity of the battery.
Note:
Using USB memory sticks (for MP3s) may interfere with the GPS signal.

Note:
A small slider is located on one side of the card. If it's pushed in arrow direction the SD-card is safed against overwriting.
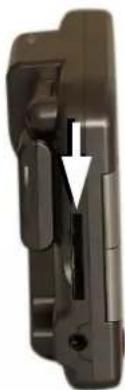
natural_image
Close-up of a black mechanical component with a white arrow indicating a cut or feature (no text or symbols visible)There is a card slot on the left-hand side of the unit. The card compartment is equipped with a spring-actuated lock and ejection mechanism.
Notes:
The memory card should only ever be inserted and ejected when the unit is switched off. If the unit is not switched off, data may be lost.
Navigational operations are not possible if the memory card containing card data is not inserted. If you remove this during navigation, directions to your destination will be aborted immediately.
Inserting the SD memory card

▶ Remove the SD memory card from its packaging without touching or soiling the contact bar.
▶ Hold the SD memory card such that the contact bar faces towards the rear of the unit.
▶ Insert the SD memory card into the card slot.
▶ Using slight pressure, push the SD memory card into the card slot until it engages.
Ejecting the SD memory card
The card slot ejects the card so that you can pull it out with two fingers.
▶ Gently push the SD memory card all the way into the card slot against the tension of the spring.
▶ Then release the card.
The card is ejected.
▶ Remove the memory card and place it in the packaging while ensuring not to touch contact bar.
General operations
Power supply
Note:
First always switch off the Traffic Assist Pro before connecting up or removing the power supply.
Using the battery
The integral replaceable battery supplies power to the unit. The rechargeable battery is maintenance-free and does not require any particular care
Note:
Please note that with a completely discharged battery, the unit requires up to one minute until it can be switched on again.
Via the public mains grid
Danger of Death!
Make sure that your hands are not damp and that the mains section is dry. Only connect the mains section to a mains supply with which such purposes are permitted.
Connecting up to power supply
The mains charger is connected to the public mains grid as follows:
▶ Hold the connector at the corrugated grip area and push it into the connecting socket up to the stop without employing excessive force.
▶ Use the plug to insert the mains section in the socket.
The power supply is now connected.
Removing power supply
▶ To remove the power supply, proceed in reverse.
Note:
Remove the mains section if you are not planning on using the Traffic Assist Pro for a long time.
Via the vehicle battery (cigarette lighter socket)
Connect the power supply via the vehicle battery and the car adapter provided as follows:
- Insert the connector on the car adapter into the socket marked “DC 5V” on the Traffic Assist Pro.
Note:
If the cigarette lighter has just been used and is still warm, wait until this has cooled down in its mounting.
▶ Insert the adapter into the socket on the vehicle.
General operations
Note:
If the engine is switched off, using the vehicle's power supply through the cigarette lighter will slowly drain the vehicle battery! Do not therefore operate the Traffic Assist Pro for extended periods with the engine off.
Note:
If the engine is switched off, using the vehicle's power supply through the cigarette lighter will slowly drain the vehicle battery! Do not therefore operate the Traffic Assist Pro for extended periods with the engine off.
Antenna
GPS antenna
The folding GPS antenna is fitted to the housing.
Note:
Align the antenna horizontally to achieve the best GPS reception.
Via the TMC receiver
Note:
The TMC only functions in combination with a power supply from the TMC receiver.
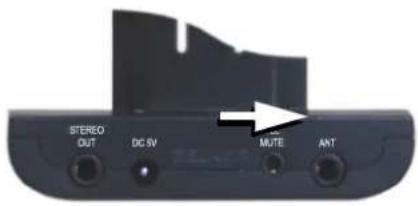
Power is supplied via the TMC receiver (e.g. in vehicle) by connecting the TMC receiver to the vehicle battery using the car adapter provided.
- Insert the connector on the car adapter into the socket marked "DC 5V" on the TMC receiver.
Note:
If the cigarette lighter has recently been used and is still hot, wait until the lighter socket has cooled down.
▶ Insert the adapter into the socket.
TMC antenna
The TMC antenna included in the accessories is used to receive traffic announcements.
▶ Push the connector on the TMC antenna into the socket marked "ANT" on the TMC receiver without employing excessive force.
General operations
| Note: |
| The TMC only functions in combination with a power supply from the TMC receiver. |
Switching the Traffic Assist Pro on/off
The unit is switched on and off using the back key.

Switching on
▶ Press the BACK button.
The unit is switched on. The following prompt appears on the touch screen: Comply with highway code
The following question appears shortly thereafter: Comply with highway code

▶ If you agree with this request, press the OK key.
Note:
The Traffic Assists may only be used in accordance with the applicable national road traffic act!
Switching off
You can switch the unit off at any time. If necessary, new destinations should first be saved.
▶ Press the back key for a few seconds. The unit switches off.
▶ Switch the On/Off switch to Off for final deactivation of the unit.
General operations
Unit bracket
The unit holder on the Traffic Assist Pro can be attached directly to the windshield or the instrument panel of your vehicle (see also page 24).
Note:
The Traffic Assist Pro and unit bracket must not be exposed to long periods of direct sunlight. Temperatures inside the vehicle of +70 C and higher may damage parts of the bracket.
Traffic Assist Pro with TMC
The TMC receiver is integrated in the unit holder and has connections for an external power supply, a TMC antenna, stereo earphones and a radio mute function for navigation announcements.

1 "Rotate" fastening screw
2 Bracket/TMC receiver
3 Suction cup lever
4 Suction cup
5 "Horizontal" fastening screw
6 "Vertical" fastening screw
Traffic Assist Pro without TMC

1 "Rotate" fastening screw
2 Bracket
3 Suction cup lever
4 Suction cup
5 "Horizontal" fastening screw
6 "Vertical" fastening screw
General operations
Fitting the unit bracket
The unit bracket can be secured directly to the inside of the windscreen or to the dashboard.
Note:
Fasten the unit holder such that your field of vision is not impaired when the Traffic Assist Pro is installed and ensure that the unit is outside the deployment area of the airbag.
Ensure that the electrical connection cable does not hamper you from accessing the vehicle's controls.
Also ensure that there is enough space to easily slide the Traffic Assist Pro back out of the bracket.
Clean the mounting area on the wind-screen or dashboard so that it is clean and free of grease. Do not use smearing, soapy cleaning agents, otherwise this may affect how it sticks to the dashboard.
On the windscreen
If the dashboard is too far away from the driver, the unit bracket can be fitted indirectly to the windscreen using the suction mechanism.
▶ Remove the adapter plate if already attached to the suction cup (4). Pull the lever (3) upwards and remove the adapter plate (4).
▶ Unscrew the fastening screws (5) and (6).
▶ Find a suitable position.
▶ Press the suction cup on the unit holder (4) against the windshield.
▶ Rotate the unit bracket so that the support plate is roughly in the direction of viewing required.
▶ Press the lever (3) downwards.
The bracket will have stuck firmly to the windscreen. It can now be set precisely. To remove, actuate the lever (3) again.
On the dashboard
An adapter plate is provided for mounting on the dashboard. This is stuck on to the dashboard. The mounting face may only be slightly curved.
Note:
If the adapter plate is removed, you may find residue from the glue on your dashboard.
▶ Find a suitable position.
▶ Unscrew the fastening screws (5) and (6).
▶ Remove the protective film from the lower contact surface of the adapter plate.
▶ Press the adapter plate onto the instrument panel.
▶ Press the suction cup on the unit holder (4) into the upper contact surface of the adapter.
▶ Turn the unit holder such that the carrier plate is positioned roughly in the desired viewing direction.
▶ Press the lever (3) downwards.
The bracket will have stuck firmly to the adapter. It can now be set precisely. To remove, actuate the lever (3) again.
Moving the unit holder
The bracket can be swivelled both horizontally and vertically as well as rotated on its own axis, allowing the driver to adjust the unit to virtually any viewing angle.
Note:
Do not swing the support plate in both directions at the same time! Before moving, always take the Traffic Assist Pro off the unit bracket.
Vertical movements
▶ Loosen the fastening screws (6) far enough to be able to swivel the bracket (2) downwards from above without exerting excessive force.
▶ Steady the unit holder with one hand and swivel the bracket (2) upwards, to the centre or downwards to the desired position.
▶ Tighten the fastening screws (2) sufficiently so that the Traffic Assist Pro is held securely in place when the vehicle is in motion.
Horizontal movements
▶ Loosen the fastening screws (5) far enough to be able to swivel the bracket (2) from left to right without exerting excessive force.
▶ Steady the unit holder with one hand and swivel the bracket (2) to the desired position on the left, right or in the centre.
▶ Steady the unit holder with one hand, pull the bracket (2) forwards against the spring force with the other and turn to the desired position.
▶ Release the bracket (2).
Attaching the Traffic Assist Pro
The unit holder is fitted with a bracket.
▶ Carefully position the Traffic Assist Pro on the bracket.
▶ Slide the Traffic Assist Pro downwards until it audibly engages.
Your navigation unit is now in position and ready for use.
Note:
To remove the Traffic Assist Pro, use both hands to pull the unit carefully upwards out of the bracket.
General operations
Connecting the telephone mute function
You can connect your Traffic Assist Pro with TMC to your car radio using the optional cable for the telephone mute function. Once this cable is connected correctly, your Traffic Assist Pro mutes the car radio for route guidance instructions.

▶ Insert the jack on the cable into the socket on the TMC receiver.
- Connect the other end of the cable to the telephone mute socket on your radio (see the manufacturer's connection specifications).
Basic information about the touch screen
The Traffic Assist Pro is fitted with a touch screen.

Note:
To ensure that the display's surface is not damaged, you may only touch it with your fingers or a blunt, non-smearing object.
Operation
The buttons which appear in the menus or message windows should simply be touched so that they are displayed as if they had been pressed.
If the key pressed is not permitted in the current situation, a short signal will sound.
Calibration
If the touch screen starts responding imprecisely and e.g. buttons have to be touched off-centre in order to be actuated, calibration should be undertaken. The calibration function is started from the Settings menu (see also page 75).
Basic information about the menus
During operations, you are assisted by various menus and entry windows.
The main menu
The top menu level is the main menu. The individual applications are started from the main menu.
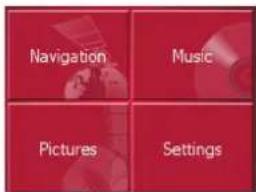
You will find information about the individual applications in the corresponding main chapters.
Entries made with the entry menu
Some applications require entries to be made via the entry menu. The entry menu is operated in a similar way to a keypad.

The character entered on the keypad is displayed in the top line of the entry menu. The central area is used to enter characters. Help functions are provided in the bottom line. Descriptions of how to operate the menu are provided below.
Entering characters
Characters are entered by pressing the keys in the central area.

Once the entry is complete, the process is concluded by pressing the key and the entry passed on to the Traffic Assist Pro for processing.
Adopting suggestions
When a navigation destination is entered, the Traffic Assist Pro compares the current entry with the data stored on the SD memory card. The Traffic Assist Pro then displays only the letters that can be selected and proposes a destination based on the letters entered.
The suggestion and the characters which cannot be selected are depicted with a slightly darker font. If the desired input appears in the upper display area after entering the first few letters or numbers, you can immediately accept this suggestion.
Note:
If necessary, you can switch off the smart speller in the navigation settings. It should also be noted that in southern countries (e.g. Italy), the "prefix" (e.g. via Gran Mundo) needs to be entered afterwards (e.g. Gran Mundo_via).

▶ To accept the suggested entry, press the destination or the button OK
Scrolling through the lists
If you have already entered some of the letters of the selection you want, you can use the selection list to display all the destinations containing the combination of letters in question.
General operations

▶ To call up the selection list, press the key.
The selection list appears.

▶ Press the ▼arrow keys on the right hand side of the screen to scroll through the list.
▶ Press the destination you want. The destination is accepted and the selection list closes.
Special characters and umlauts
Special characters and umlauts do not have to used when entering the names of towns and streets. The Traffic Assist Pro will change entries from AE, OE and UE if necessary.
▶ If e. g. you are searching for the town of "Würzburg, then simply press "WUERZBURG".
Special characters can be useful when naming destinations and routes.
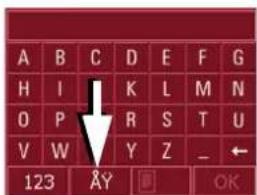
▶ To change to the special character keypad, press the key.
The special character keypad is displayed.

▶ Enter the special character you want. As soon as you have entered a special character, the system automatically switches back to the letters keypad.
Entering numbers
You have to change to the numerical keypad to enter numbers.
▶ Press the 123. The numerical keypad is displayed.
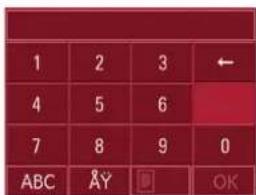
▶ To return to entering letters, press "ABC".
General operations
Deleting characters
To delete the last character, use the back key.

▶ To delete the character to the left of the cursor, press the key.
inserting spaces
If you have an entry with two words, e.g. for names of towns, the words should be separated by a space.

▶ To enter a space, press the _key.
The back key
The back key is integrated in the bottom left hand corner of the casing.
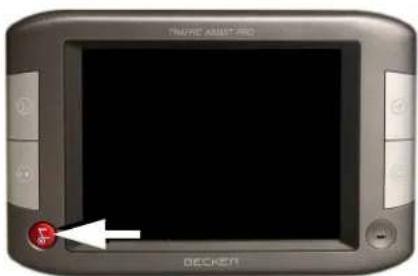
It has various functions:
- Pressing and holding this button switches the Traffic Assist Pro on or off.
- Depending on the menu context, if pressed briefly, you will be returned to the previous entry level.
More maps
The SD memory card is supplied with the map set already installed.
Installation program
There is a map installation program on the map DVD. Once the DVD is inserted in a personal computer's DVD drive, this program will usually start up automatically. The program guides you through the installation process.
Otherwise, you will have to start the program manually.
▶ Open Windows® Explorer.
▶ Select your DVD drive folder.
▶ Double click on the "Setup.exe" file.
General operations
Transferring files
Files can be transferred indirectly via the SD memory card or directly via the USB interface.
Note:
Only the maps supplied in the Traffic Assist Pro may be used. The installation or transfer of files or programs which limit or modify the function of the Traffic Assists is prohibited!
Transferring using the SD card reader
Files are transferred using a conventional SD card reader (not included in delivery). The SD memory card is inserted in this reader.
The computer software then stores the required files on the SD memory card
Transferring via the USB interface
The Traffic Assist Pro can be connected directly to a personal computer via the USB interface.

natural_image
Front view of a gray electronic device with a screen and ports (no visible text or symbols)The link then involves several steps:
▶ Switch off the Traffic Assist Pro.
▶ Remove the protective cap on the USB socket on the underside of the unit.
▶ Connect the Traffic Assist Pro to the computer using the USB cable.
▶ Switch the Traffic Assist Pro back on: The Traffic Assist Pro establishes a connection to the computer automatically.
Transferring maps
The installation software from the DVD should be used for the transfer. This involves the following stages:
▶ Switch off the Traffic Assist Pro.
▶ Remove the SD memory card and insert in an SD card reader or connect the Traffic Assist Pro to the computer using the USB cable.
▶ Start the computer and insert the DVD.
▶ Transfer the contents of the card using the installation program.
▶ de the SD memory card back into the Traffic Assist Pro or remove the USB cable correctly.
▶ Switch the Traffic Assist Pro back on.
Transferring music and images
Files can be transferred via a card reader or the USB connection to a PC.
Note:
Using USB memory sticks to play MP3 files or display images may significantly decrease the capacity of the battery.
Note:
Using USB memory sticks (for MP3s) may interfere with the GPS signal.
Note:
Assign a self-explanatory directory name. This will help you to locate the desired file in the Traffic Assist Pro.
Faults
If unit faults relating to the operating system occur, messages to this effect will be displayed. These should be acknowledged. If the activated function cannot then be executed, the Traffic Assist Pro must be restarted using the reset button.
If the messages reappear or the unit does not function correctly for any other reason, please contact your local stockist.
Note:
Never attempt to open the unit yourself. Please contact your authorised dealer if you are unable to remedy the fault.
Navigational mode
What is navigation?
The term "navigation" (lat. navigare = to travel by sea) is generally understood to mean the location of a vehicle, the determination of the direction and distance from the desired destination and the required route. Stars, prominent landmarks, compass and satellites etc. are used as navigation aids.
With the Traffic Assist Pro, the location is determined by the GPS receiver. The Navigational Satellite Timing and Ranging - Global Positioning System (NAVSTAR-GPS, usually referred to as GPS) was developed in the 70s by the American military for navigation and location purposes.
GPS operates using signals from satellites orbiting the globe on a fixed trajectory. At any one time, there are a minimum of 24 satellites guaranteeing constant reception from any point in the world. The GPS receiver receives these signals, uses the signal times to calculate the distance from the individual satellites and then determines your current geographical position.
Signals from at least three satellites are required to determine your position;
your height above sea level can be calculated if signals are received from five or more satellites.
The Traffic Assist Pro determines the direction and distance from the destination using a navigation computer and a digital street map on the SD memory card.
For safety, directions to the designation are mainly provided verbally. The direction display and map diagram on the touch screen are further aids.
⚠ Safety information
- The road traffic act takes precedence in all circumstances. The navigational system is only an aid. The data/details provided may in some cases be incorrect. The driver must always decide whether to follow the details given or not.
We accept no liability for the navigational system issuing incorrect details. - When first started up, it may take up to 30 minutes before a position can be determined.
• Precedence should always be given to actual traffic signs and local traffic rules. - The directions only relate to cars. Special recommendations and rules for other vehicles (e.g. commercial vehicles) are not taken into consideration.
- Destinations may only be input when the vehicle is stationary.
Selecting navigation
Navigational mode is called up from the main menu.

▶ Press the Navigation key in the main menu.
Rapid access is called up.
Aids for navigation
Three aids are provided for navigation and directions: rapid access, navigation menu and map display.
Rapid access
Navigation mode always starts with the fast access for immediate selection of already saved destinations.
Navigation menu
If necessary, the navigation menu can be called up from rapid access, e.g. to enter a new destination not yet provided.
Map display
The map display can also be called up. This doesn't just display the current position but also allows a new destination to be selected.
Rapid access
Rapid access allows you to select from the key functions to quickly start navigation. Rapid access is illustrated below using sample destinations.
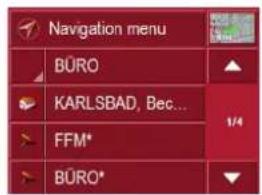
Structure of rapid access
Navigation menu and map display
In rapid access, the Navigation menu key for calling up this menu is displayed in the top line on the left.
To the right of this, you will find a key featuring a map symbol. This is used to change over to map viewing mode.
The list of destinations is shown in the lines under this.
Navigational mode
The list of destinations
The list of destinations displays all the destinations available for quick selection line-by-line. Each line is split into two boxes. Each list box is depicted as a key. The destination is named on the right-hand key and its characteristics shown in the left-hand icon.
Note:
The last 50 destinations are saved in the destinations memory. Once the memory's capacity has been fully used up, the oldest destination is automatically deleted whenever a new one is entered. Important destinations can however be protected.
Icons used
The following icons are used in the list of destinations.
| Icon Meaning | |
 | This destination is a standard destination without any special features. |
 | This destination is protected. Once the destination memory is full, this destination is not automatically deleted. If required, this can be set manually. |
 | This destination is the current home address. |
Operating rapid access
Starting using an existing destination
Destinations already in the destinations memory are listed in the list of destinations.
▶ Press the button with the desired destination to start route calculation.
The calculation is started. Once the calculation is complete, the map display appears and directions to the destination begin.
Scrolling in the destinations memory
You can use the keys to scroll through the list display in the direction indicated on the arrow.
The current list page and the total number of its contents appear between the keys.
Navigational mode
Displaying or editing destination
Each destination in the destinations memory can be displayed or edited.
▶ Press the icon to the left of the destination required.
▶ A selection menu appears.
| Selection Meaning | |
| Display details | All the data relating to the destination is displayed. |
| Show on map | The map display and toolbar are called up and the destination displayed. |
| Protect entry | The destination is protected against automatic deletion. |
| Name entry | The destination can be renamed. |
| Delete entry | The destination is deleted from the destinations memory. |
| Delete list All | destinations (even the protected ones) are deleted from the list. |
Change to map display
You can change to map display from rapid access using the following key.
▶ Press the key featuring the map icon. The map display and all its functions appear.
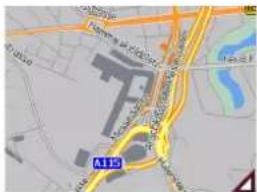
Displaying current position
You can have your current position displayed in the map display.
▶ In rapid access, press the key featuring the map icon on the upper edge of the screen.
Calling up Navigation menu
The extended options of the navigation menu are provided by pressing the Navigation menu key.
- See "TheNavigation menu" on page 36.
Navigational mode
TheNavigation menu
If you do not want to select a destination quickly or if the planned destination is not yet available in the destinations memory, you can use the navigation menu to determine a new destination.

▶ In rapid access, press the Navigation menu key at the upper edge of the screen.
The navigation menu appears.

Structure of the navigation menu
Navigation
The Enter destination key is pressed for the various stages from selecting a destination to starting directions for the destination.
• See "Navigation menu: Navigation" on page 37.
Route planning
A route with several interim destinations can be planned using the Route planning key.
- See "Navigation menu: Route planning" on page 45.
Settings
Various general specifications for navigation mode can be made using the Settings key.
- See "Navigation menu: Settings" on page 48.
Status
The quality of the GPS reception determines the accuracy of the navigation process. Press the Status button to display the current GPS reception status. You can also access TMC information by pressing this button. See "Navigation menu: Status" on page 55..
Load map
The Traffic Assist Pro operates using the map data stored on the SD card. Pressing the Load map button displays the loaded map data. See "Navigation menu: Load map" on page 56.
Home
If you have stored your home address, pressing the Home button or the hard key starts route guidance immediately. See "Navigation menu: Home" on page 56..
Navigational mode
Navigation menu: Navigation
A selection window for specifying the destination is opened from the Navigation menu by pressing the Navigation key.

▶ In the navigation menu, press the Enter destination button.
The destination selection window opens.
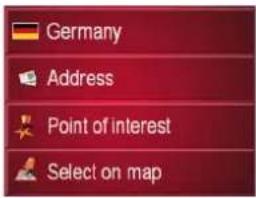
Destination selection window
A destination can be specified in the following ways from the selection window. The various stages and options are described below.
Destination: Selecting a country
The destination country button displays all the countries available on the SD memory card for navigation. A country is adopted automatically in the route calculation menu when selected. If a destination country has already been entered, this appears in the first line and is therefore active.
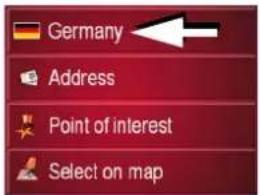
▶ Press the destination country key to access the selection list of countries.
The selection list appears.

▶ Press the key of the country you want.
▶ If necessary, press the arrow keys ▲ ▼ on the right-hand edge of the screen to scroll through all the destination countries available.
Navigational mode
Destination: select address and start
You can enter the exact destination address in the address entry screen.

▶ Press the Address key to specify the destination in more detail.
The address window appears.
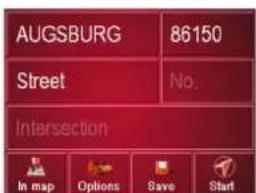
The following details can be entered in the address window:
• Town
- Postcode
• Street and building number
- Intersecting roads as an aid to orientation
You can also:
• display the destination on the map
• define options of the drive profile
- save the destination in the destinations memory
- start directions to the destination immediately.
Selecting a town/city
The destination town can be specified by entering the name or the post code. The name of a proposed town/city or post code is displayed as each letter or number is entered. The Traffic Assist Pro excludes all impossible letter combinations and post codes and only activates letters and numbers that could spell the name of an existing town/city or a post code (Smart Speller active).

▶ Press the town and/or postcode.
▶ Enter the letters of the destination town and/or the letters/numbers of the postcode one after another.
Note:
If necessary, you can switch off the smart speller in the navigation settings. It should also be noted that in southern countries (e.g. Italy), the "prefix" (e.g. via Gran Mundo) needs to be entered afterwards (e.g. Gran Mundo_via).
The OK key
The selected destination can be adopted in the route calculation menu by pressing the OK button. If the desired destination appears at the top of the display after the first letters or numbers are entered, you can select the destination immediately without using the list function by pressing OK.
▶ Press the OK key to transfer your destination into the route calculation menu.
Note:
If two words have to be entered, these should be separated by a "_" character.
Using the list of towns
If you have already entered some of the letters of the town you want, you can use the List function to display all the towns containing the combination of letters in question.
| KARLSBACH (94065), Waldkirchen, Bayern | ▲ |
| KARLSBAD (76307), Badon-Württemberg | 1/19 |
| KARLSBERG (16306), Casekow, Brandenburg | ▼ |
▶ Press the □ key on the bottom edge of the screen to call up the list of towns.
▶ A town is selected by pressing the corresponding button.
Selecting the street
In the destination street area, the street and building number can be entered separately using a letter and numerical key panel. A possible street is displayed each time a new letter is entered.
Traffic Assist Pro rules out all impossible combinations of letters and only activates those letter boxes which will produce an existing street.
A building number can only be selected once the street has been selected and/or if building numbers are also present in the data.
▶ Press the letters of the destination street one another another.
The OK key
The selected destination can be adopted in the route calculation menu by pressing the OK button. If the desired destination appears at the top of the display after the first letters or numbers are entered, you can select the destination immediately without using the list function by pressing OK.
▶ Press the OK key to transfer your destination into the route calculation menu.
Navigational mode
Using the list of streets
If you have already entered some of the letters of the street you want, you can use the List function to display all the streets containing the combination of letters in question.

▶ Press the □ key on the bottom edge of the screen to call up the list of streets.
▶ The street is selected by pressing the corresponding button.
Selecting the Intersection
After you have entered the destination city and street, you can use the junction menu field to display all the streets branching off from or crossing the destination street to assist you in finding your way.
▶ Press the Intersection button to display all intersections in the destination road.
▶ Press a Intersection to transfer this to the route calculation menu.
Displaying destination on the map
Once the destination has been entered, you can display it in the map of the surrounding area.

▶ Press the In map key to display the destination selected on the map.
Options for the drive profile
You can set your drive profile in the Options settings window. The setting made here impacts on the calculation of the probable journey times and the distance (short route / fast route).

▶ Press the field at the top left to select the mode type.
▶ Press the Type of routing box.
▶ Select one of the following options:
| Setting Meaning | |
| Fast route With | this option, the shortest route possible for the time required is calculated. |
| Dynamic route | With this option, the shortest route possible for the time required is calculated in addiction with the incoming trafficmessages. |
Navigational mode
| Short route With this option, the shortest route is calculated in terms of kilometres travelled. |
Press the following boxes one after another:
- Motorways
- Ferries
• Toll roads
▶ Select one of the following options:
| Setting Meaning | |
Allowed With | this option, the corresponding road type is included in the route calculation. |
Avoid With this | this option, where-ver possible, the corresponding road type is avoided. |
Not permitted | With this option, the corresponding road type is not included in the route calculation. |
Saving a destination
The Save button opens a window that allows you to spell the destination using the letter menu (the entry menu allows you to change between upper and lower case). Once you have made your entry via the letter menu, you have the option of recording a voice command to select the destination at a later time.
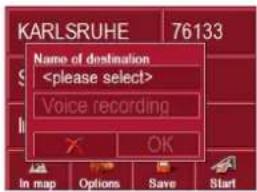
▶ Press the Voice recording button and follow the instructions on the display.

If you have entered a name and pressed OK to accept it, the destination is transferred to the fast access menu, saved and marked with an asterisk.
▶ If you do not wish to make a voice recording, press the button ✗
Voice selection
The “voice selection” fast access button (see also page 13) gives you the option of accessing stored destinations directly using the voice recording function.
▶ Press the “voice selection” button on your Traffic Assist Pro and repeat a previously stored voice command after the signal.
The unit starts to calculate the route and initiates navigation.
Navigational mode
Starting navigation
The Start button can be used to start navigation straight away. All the data entered so far is processed in the route calculation.

▶ Press the Start key to start navigation. The route is calculated. The map display then appears and directions to the destination begin.
Stopping navigation
There are three ways in which you can stop directions to the destination.
▶ Press the map display.
▶ Press the Main menu key.
▶ Press the √key to confirm that you want to stop.
or
▶ Press the map display.
▶ Press the Quit navigation key.
▶ Press the √key to confirm that you want to stop.
or
▶ Press the back key.
▶ Press the √key to confirm that you want to stop.
Destination: Points of interest select
Points of interest, or POI for short (Point of Interest), are included in the map and can be displayed on the map. Points of interest include airports and ferry terminals, restaurants, hotels, petrol stations, public buildings etc. Points of interests can be used as navigational destinations.
Note:
Points of interest from the present surroundings can only be selected if the reception is good enough to locate their position.
You can select between:
- a nearby destination,
• a nationwide destination and - a destination in a town.
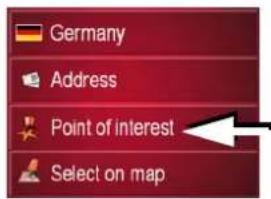
▶ Press the Point of interest key to display the points of interest.
Navigational mode
The search area selection window appears.

You can now use the buttons to select the search area you want.
Point of interest: nearby
▶ Press the Nearby GPS position button.
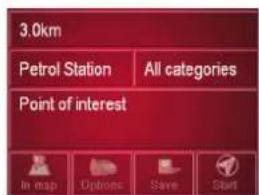
The following specifications are possible for searches in this point of interest window.
▶ In the top button, enter the radius (in kilometres) in which a point of interest should be searched for.
▶ From the All categories box, select a main category (e.g. car hire). Only those points of interest currently nearby are displayed.
▶ Touch the box next to this and select a sub-category (e.g. SIXT, HERTZ).
You will find information about scrolling in lists in the "Scrolling through the lists" on page 27 chapter.
Note:
If you leave the Sub-category box empty, all points of interest from the main category in the radius selected are displayed.
▶ Now select the point of interest which you want to approach.
Note:
The Category boxes do not have to be. These are only used to restrict the list of points of interest. In large towns, this list may be very long.
Point of interest: nationwide
▶ Touch the Nationwide button.

▶ Select the type of point of interest (e.g. airport) from the All categories box.

- Touch the Point of interest key to go to the entry menu. - Select the point of interest you want from the entry menu.
You will find information about working with the entry menu in the chapter "Entries made with the entry menu" on page 27.
Navigational mode
You will find information about scrolling in lists in the "Scrolling through the lists" on page 27 chapter.
Note:
The Category box does not have to be completed. It is only used to restrict the list of points of interest. Depending on the map currently being used, this list may be very extensive.
Point of interest: in a town
▶ Touch the In a town button.

▶ In the Town or Postcode box (top button) enter the town in which you want to search for a point of interest.
▶ From the All categories box, select a main category (e.g. culture). Only those points of interest in the town specified are displayed.
▶ Touch the box next to this and select a sub-category (e.g. museum).
▶ Touch the Point of interest key to go to the entry menu.
▶ Select the point of interest you want from the entry menu.
You will find information about working with the entry menu in the "Entries made with the entry menu" on page 27 chapter.
You will find information about scrolling in lists in the "Scrolling through the lists" on page 27 chapter.
Note:
The Category boxes do not have to be completed. These are only used to restrict the list of points of interest. In large towns, this list may be very long.
Once you have selected a point of interest, the keys in the lower area can be used:
• to display points of interest on the map
- define options of the drive profile
• to save the point of interest in the destinations memory
• to start directions to the point of interest immediately.
Destination: selecting from the map
If the destination required cannot yet or can no longer be found in the destinations memory, the Select on map button allows you to select it directly.
No address details are asked for in this case.

▶ Press the Select on map key to make a direct selection.
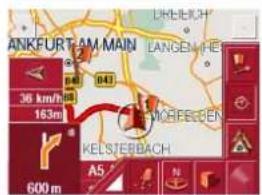
The map display appears.
Note:
You may have to use the zoom keys to increase the area displayed to find the street required.
Navigational mode
▶ Gently press the screen surface until a circle of dots is drawn around the destination requested. The destination is recorded.
Information on the point selected is loaded from the set of data and displayed. There are buttons under the information box which can be used to call up several functions which are provided for the route point selected.
The following function keys are provided for non-active directions to the destination:
| Key Meaning | |
| Navigation Starts navigation | |
| Add Adds the | destination to the route |
| Save Allows your destination to be given a name via the entry menu and saves this in the destinations memory | |
| Search nearby | Entry menu as for normal POI entries |
When directions to the destination is active, the Interim destination button is also still available. You can use this button to add the destination selected from the map to your route as a part-way destination.

▶ Press a key to undertake the action requested.
Navigation menu: Route planning
The Route planning window gives you the possibility to create and select individual routes. Apart from selecting and setting various details, you can also specify intermediate destinations.
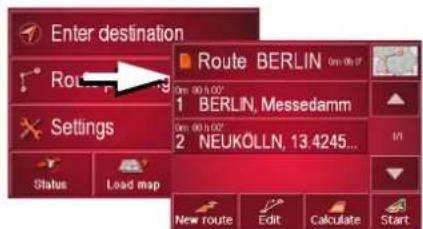
▶ In Navigation menu, press the Route planning key to access the route menu. The map symbol appears at the top right of the route menu. The name of the last programmed route is displayed at the top left and the individual stages of this route appear underneath.
Navigational mode
Route list
Routes already stored in the system are selected from the route list.
▶ Press the button with the name of the current route.
The route list opens.

Note:
If no route is displayed (for example after a Reset), press the route button.
Scrolling through the list of routes
▶ Press the arrow keys on the right hand side of the screen to scroll through the list of routes.
Displaying route details
▶ Press button to display the route details.
The Route details window opens. You can also rename or delete the route in this window.
Press the BACK button to return to the route list.
Selecting a route
▶ Press a route to select it. The route is loaded and displayed in the Route planning window.

Using a route
The following buttons are available:
| Key Meaning | |
| Map symbol S | shows all stages inside actual route in the map. |
| New route Opens | the "address window" for entering a new destination address |
| Edit Activates | individual route points for processing |
| Calculate Calculates the difference in distance and the journey time for the current entries | |
| Start Starts navigation | |
Navigational mode
The New route button
You can create a new route by pressing the New route button.
▶ Press New route.

An empty route window appears. The Attach button appears below this empty window.
▶ Press the Attach button.
The address entry window opens.
▶ Now enter your route destination (See "Navigation menu: Navigation" on page 37.).
▶ Repeat these entries in the route planning window for each intermediate destination by pressing Attach.
▶ You can move the individual entries by pressing the
buttons
▶ Once all the entries have been made in the route planning window, save the destination data by pressing the OK button.
The entry menu appears.
▶ Give the destination a meaningful name.
▶ Press OK.
Route planning is complete. The Routing options entry window opens.
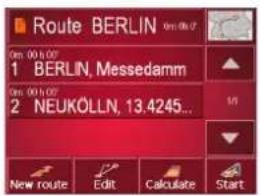
The Edit key
Existing routes can be changed in the Edit menu.
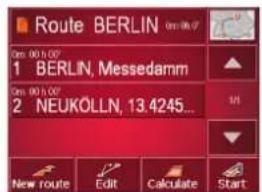
▶ Press the Edit key to change existing routes.
The route planning window appears. The following functions are available:
| Key Meaning | |
| Add This box | can be used to enter a new route point. |
| Delete This | box can be used to delete a hig lighted route point. |
| OK This box can be used to save the processed route and transfer it to rapid access. | |
| Up/Down arrow keys | These keys can be used to scroll up and down through the lists. |
Navigational mode
The Calculate key
A planned route can also be calculated without GPS reception so that you can get an overview of the journey.
When doing this, the first route point specified is used as the starting point for the route.
Note:
During navigation, your current location is the starting point used. The first leg is then the journey to the first route point specified.
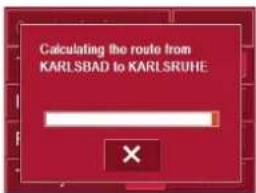
▶ Press the button to have the total distance and probable length of the journey calculated for this route.
The Routing options entry window is opened.
▶ Define the settings as required (See "Options for the drive profile" on page 40.).
▶ Press the Calculate button.
The route is calculated. A window displays the progress of the calculation. Once the calculation is complete, the total distance from the first to the last points on the route and the probable length of the journey for this route are displayed in the Route planning window under the list of route points.

The Start key
▶ Press the Start key in the route planning menu.
The route options are displayed again.
▶ Press the Start key again to start navigation.
Navigation menu: Settings
The settings of relevance to the navigation functions can be found in the Settings menu.
Note:
All settings must be confirmed by pressing the OK key. You can exit the current settings button at any time without saving any changes by pressing the BACK key.

▶ Press the Settings key in Navigation menu.
This takes you to the setting menu.
Navigational mode
Structure
Various buttons are available in the setting menu:

The functions of the various keys are explained below.
The Route info key
You can select settings in the Route info settings window:
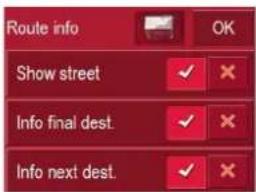
The following settings are possible.
| Setting Meaning | |
| Display street | Displays the current/next street |
| Info about main destination | Displays ETA, distance remaining, time until arrival at the main destination. |
| Info on lcg Dis | plays ETA, distance remaining, time until arrival at the part-way destination. |
For the option buttons, press or to activate or deactivate the requirements.
▶ Confirm your selection by pressing the OK key.
The Signpost info button
You can use the Signpost info button to choose whether or not to display information relating to signs that you should follow during navigation.
| Setting Meaning | |
| Road signs arc displayed. | |
| Road signs arc not displayed. | |
| Note: |
| This information can only be displayed if it is contained in the map material. |
Navigational mode
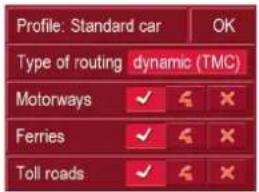
The Routing options button
You can edit your driving profile in the Routing options settings window. Any settings modified here have an affect on the calculation of estimated journey times.

▶ Select the Profile field and choose your mode of transport.
▶ Select the Type of routing field and choose one of the following options:
| Setting Meaning | |
| Fast route With | this option, the shortest route possible for the time required is calculated. |
| Dynamic route | With this option, the shortest route possible for the time required is calculated in addiction with the incoming trafficmessages. |
| Short route With this option, the shortest route is calculated in terms of kilometres travelled. |
▶ Select one of the following options in each of the fields Motorways, Ferries and Toll roads.
| Setting Meaning | |
| Allowed With | this option, the corresponding road type is included in the route calculation. |
| Avoid With this | is option, where-ver possible, the corresponding road type is avoided. |
| Not permitted | With this option, the corresponding road type is not included in the route calculation. |
▶ Confirm your selection by pressing the OK key.
The Volume key
Use the Volume configuration window to set the volume of all voice prompts every time the Traffic Assists is started. Depending on the situation, you can also adjust the volume in the map display.
- Press the Volume field and select a setting.

▶ Confirm your settings by hitting the OK key.
Navigational mode
The Map info key
You can perform the following settings in the Map info configuration window.

| Setting Meaning | |
| Points of interest | If you activate this entry, an additional bar appears at the base of the map, indicating the scale, a compass and your current speed. |
| Street names | If you activate this entry, all street names are displayed in the map. |
| Info box | If u push this button on u get displayed the point of compass, the speed and the sea level. |
The Automode key
You can choose the following settings in the Automode configuration window:
| Setting Meaning | |
| Start setting D | Decide whether you wish to have a 3D display or 2D display of the map as the default setting. |
| 3D autozoom | Decide whether you wish to work with Autozoom or No auto-zoom as the default setting while navigating in the 3D display.With the Autozoom option, the zoom range varies according to your speed: When you drive slowly, the scale is decreased. When you drive faster, the scale is increased. |
| 2D autozoom | Choose No auto zoom, Low, Normal or High as the default setting for navigating with a 2D view. With the auto zoom function, the zoom depth changes in line with your speed: The scale becomes smaller when you drive slowly. The scale becomes larger when you drive faster. |
| 2D display Decide whether you want the map to face North or In route direction as the default setting while you are navigating in the 2D display. | |
▶ Confirm your selection by pressing the OK key.
Navigational mode
The Time Zone key
You can select the time zone relevant for your location in the Time Zone settings window. This setting is important for the correct calculation of estimated arrival times and for journeys with time-dependent traffic guidance.

| Setting Meaning | |
| Time zone Specify the relevant time zone for your region. | |
| Daylight saving time | Specify whether daylight saving time applies to the current time zone. |
The Route planning key
Use the Route planning configuration window to specify whether or not you want the system to calculate the next point along your journey automatically as soon as you have completed one stage.

- If you have activated automatic route calculation, the next point along your journey is automatically determined as soon as one stage is completed.
- If you have deactivated automatic route calculation, you can navigate to the next point by briefly selecting any point on the map and then choosing the Next destination option.
The Format key
Using the Format configuration window, you can specify which units of measurement to use for time and distance.

| Setting Meaning | |
| Time Choose | between a 12-hour and 24-hour display. |
| Distance Choose | between miles and kilometres. |
▶ Confirm your settings by hitting the OK key.
Navigational mode
The Speedkey
In the Speed settings window, you can decide whether to display speed limits during navigation and whether you would like a voice announcement to warn you when you exceed the speed limit.
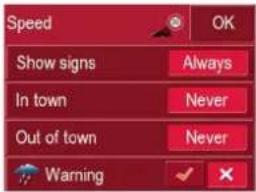
The following settings are possible.
Setting Meaning
| Show traffic signs | The Show traffic signs button allows you to show traffic signs if you exceed the speed limit. |
| Warning in built-up areas | The Warning in built-up areas button indicates the speed limit above which you will receive an acoustic warning when driving in built-up areas. |
| Warning out-side built-up areas | The Warning outside built-up areas button indicates the speed limit above which you will receive an acoustic warning when driving outside built-up areas. |
| Warning Choose whether you would also like a voice announcement to warn you if you exceed speed limits that are only valid when it is raining, snowing or at specific times of the day. | |
▶ Press a button and choose the setting you require.
▶ Confirm your selection by pressing the OK key.
Note:
This information may only be displayed if it is actually contained in the map material.
Important!
Some of the information contained in the map material may be inaccurate due to short-term or recent changes (such as road works, for example).
Supplying information is secondary to the navigation system's main function, which is traffic monitoring and signposting.
Navigational mode
The Home adress key
Enter your Home adress to navigate automatically from any location to your home.
▶ Press the Home adress button.
This opens the Home adress window.

▶ If no home address is entered, press the Set button.
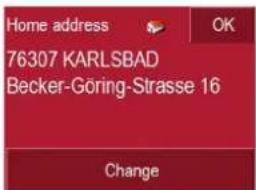
▶ To change the existing home address, press the Change button.
The Destination selection window opens.
▶ Enter you home address (See “Destination selection window” on page 37.).
▶ Press the Set button.
The address is copied and displayed in the Home adress window.
▶ Confirm your home address with the OK key.
This home address is now available to the system. See "Navigation menu: Home" on page 56.
The TMC button
You can adjust the following settings in the TMC settings window:
| Setting Meaning | |
| Station, automatic | By pressing the buttonsor you can choose whether to run an automatic search for the station with the best reception. |
| arrow buttonsto activate the automatic station search. The currently tuned TMC station is displayed in the adjacent field. | |
| Detour This button allows youto choose whether route changes are made automatically or manually (See "Taking announcements into consideration when calculating routes" on page 58.). | |
Navigational mode
The Smart Speller button
The Smart Speller allows you to enter towns, roads or other destinations that you are searching for more quickly using a logical process of elimination.
You can activate or deactivate the Smart Speller in the Smart Speller settings window by pressing the √ and ✗ buttons.
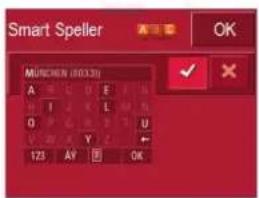
▶ Confirm your entry by pressing OK
The Factory settings key
You can use the Factory settings configuration window to cancel all new settings and reset the system to the factory settings.

▶ Press the Factory settings button.
▶ To revert the Traffic Assist Pro to factory settings, press the City.
Navigation menu: Status
The Status menu shows the number of satellite signals picked up, your current position and current speed.


▶ To view the list of TMC messages in the Status menu (see also page 57), press
▶ To save your current location, press the Save current position button.
Save your location in the same way as described in See "Saving a destination" on page 41..
Navigational mode
Navigation menu: Load map
The Load map menu shows the map that is currently loaded.
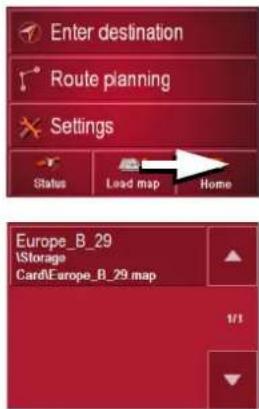
Navigation menu: Home
If you have entered a home address, the system automatically starts route planning to this address. Once planning is complete, the map is displayed with active driving guidance.
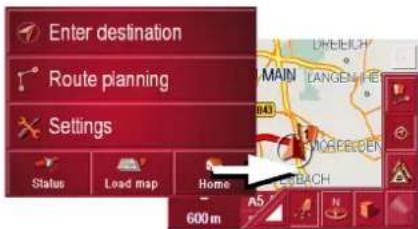
A message appears if no home address has been entered.

▶ If you wish to enter your home address, choose OK
▶ If you wish to cancel the Home function, choose ✗
What is dynamic route guidance?
Dynamic route guidance calculates the route, while taking into account current traffic announcements.
Note:
Dynamic route guidance is not available for all countries (currently only Belgium, Germany, Denmark, France, Italy, The Netherlands, Austria, Sweden, Switzerland and Spain).
TMC reception must be available in order to activate dynamic navigation and the functions described below. TMC reception is only available when the unit holder with TMC receiver is used.
Traffic announcements are transmitted by radio stations via the TMC (Traffic Message Channel) in addition to the radio programme and are received and analysed by the navigation system. Receiving traffic announcements is free of charge.
Navigational mode
Note:
As the traffic announcements are transmitted by radio stations, we cannot assume responsibility for the completeness or accuracy of the announcements.
Austria: The location and event code was made available by ASFINAG and BMVIT.
If dynamic route guidance is active, a continuous check is made for the presence of relevant announcements for the selected route (however, traffic problems still appear on the map even when route guidance is not active).
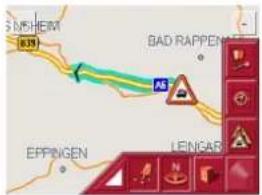
If these continuous checks determine that a traffic announcement is relevant to route guidance, the unit will automatically recalculate a new route to the destination (See "The TMC button" on page 54.).
Displaying TMC messages on the map
Current TMC messages are displayed on the map in graphic form. Sections of the route where there are problems with traffic are highlighted green. A black arrow also indicates the direction of travel. In addition to the coloured mark, a warning sign is displayed on the stretch of road affected.
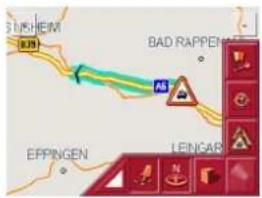
Once you have connected the TMC antenna, your Traffic Assist Pro will receive current traffic announcements and dynamic route calculation will be enabled (traffic jam diversion). You can also view traffic announcements directly.
To preset the TMC, See "The TMC button" on page 54.
▶ Press the map on the map display.
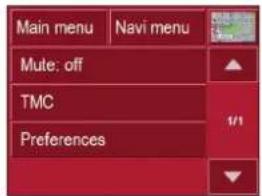
▶ Press the TMC button.
All current traffic announcements are displayed.

Navigational mode
Press the arrow buttons to the left and right of the announcement number to browse through the traffic announcements.
The road number (motorway, A-road or district roads), section of road if applicable, traffic direction and the type of problem are displayed in each traffic message.
Updating the announcement list
▶ To update traffic announcements, press 📋.
Station selection
You can select a TMC station in three different ways: automatically or via the station name or frequency. Press the button at the top right of the screen to switch between the three options. Default setting is Automatic tuning.
| Setting Meaning | |
| Automatic tuning | The automatic station search is active. Select a station using the arrow buttons. |
| Hold Stations | preset via Automatic tuning or Frequency input are tuned in until you drive out of their reception range. |
| Frequency input | If you know the station frequency, you can tune into the station in this mode using the arrow buttons. |
Taking announcements into consideration when calculating routes
Your Traffic Assist Pro can take traffic announcements into consideration when calculating a route. You have the option of setting this function to automatic or manual under "The TMC button" on page 54.
Automatic recalculation
If a traffic announcement affects your route, a new route is calculated to bypass the problem at the earliest possible convenience.
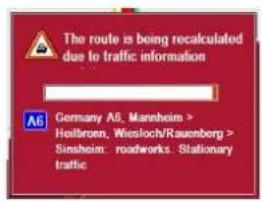
Manual recalculation
If a traffic announcement affects your route, a window with detailed information on the traffic announcement appears.

If you wish to calculate a detour around the traffic problem, press Evade or alternatively Ignore.

Changing status
You can set the function to act upon or ignore an announcement at any time.
▶ Press the icon on the map display to open the list of TMC announcements.

▶ Press the relevant traffic announcement.
Press the button at the bottom of the screen to switch between Evade and Ignore.

Map display
You can call the map display from various applications using the miniature map icon.

▶ Press the button with the map icon.
Navigational mode
Map layout
The map layout varies according to the current mode of operation of the Traffic Assists.
Map display without driving guidance
If the navigation function has not been activated, the map display will cover virtually all of the touchscreen. An icon for switching to configuration mode with a toolbar is always displayed in the lower right-hand corner of the map.
Map display with driving guidance

If the navigation function has been activated, the position icon will indicate your current location on the map.

Depending on which setting was made in option mode, the position icon may remain stationary while the map moves, or vice versa.
The info box on the left side of the screen displays a compass diagram pointing north, your current speed and the height above sea level in metres.

Information appears in the bottom left corner of the preview area.

The distance remaining is indicated by means of the number of kilometres (or miles) below an arrow. If there are two impending driving manoeuvres in quick succession, a small arrow appears over the first manoeuvre to indicate that another one is coming up.
Additional rows displayed at the bottom of the screen provide more information.

Depending on the settings selected in the Settings menu options, a total of three information rows may appear, each containing specific details.
Navigational mode
Map display with toolbar
Press the following key to activate the toolbar. Press again to deactivate the toolbar.

The following function keys are displayed in addition to the map display.

The following function keys appear in the toolbar:
| Icon Meaning | |
 | See "Display route (toolbar)" on page 62. |
 | See "Position and display mode (toolbar)" on page 63. |
 | See "Displaying TMC messages (toolbar)" on page 63. |
 | See "Change display (toolbar)" on page 63. |
 | See "Point northwards (toolbar)" on page 64. |
 | See "Move map (toolbar)" on page 64. |
 | See "Play" on page 68. |
Using the map display
Repeating the last announcement
During route guidance, the system announces important information, e.g. the next driving manoeuvre. The last an nouncement can be repeated with updated information.

▶ Press the preview area while route guidance is active.
The last announcement is repeated with updated information. The volume is also displayed.
Adjust voice prompt volume
You can adjust the volume of the voice prompts.

Navigational mode
▶ Press the preview area while route guidance is active.
The volume is displayed. The last announcement is also repeated.

Volume bars indicate the current volume in relation to the overall volume. The left bar shows the music playback volume and the right bar shows the navigation announcement volume.
You can increase or decrease the respective volume by pressing the + or - buttons.
⚠ Warning.
Always adjust the volume so that you can still hear any ambient noise while driving.
Important!
Make sure that you adjust the volume so you can still hear all ambient noise properly.
The control bar disappears after a few seconds without you having to press any more buttons.
Information rows
While directions are being given, a maximum of three information rows may be displayed (or hidden) with the following details:
- Current street or next street
• Estimated arrival time, journey time to destination, remaining distance to destination (this row is displayed with a flag).
• Estimated arrival time at interim destination (stopover), journey time and remaining distance to interim destination (this row is displayed with a flag and an additional marking peg).
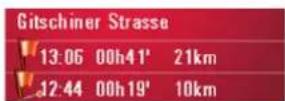
▶ Select your information rows in the Settings menu using the Route info button, page 54.
Zooming and the map (toolbar)
You can gradually zoom in and out of the map display using the zoom keys in the top two corners of the touchscreen.


▶ Press Zoom in -÷ to expand or "zoom in on the map" and view individual features more closely.
▶ Press Zoom out - to "zoom out from the map" and get a broader overview of the area.
Display route (toolbar)
Press this button to enlarge or reduce the map automatically so that the whole route is displayed. This function is only active when a route has been selected for route guidance.

▶ Press the Route key. The map is expanded and the specific route destinations are displayed.
Position and display mode (toolbar)
You can select a number of different functions with the position key while driving guidance is active.
- When the position key is activated, the map is automatically displayed in such a way that the position icon is roughly located in the centre of the map. The map itself moves constantly.
This function is automatically selected when driving guidance is started.
Choose this function whenever you want, for example, to locate your current position again after the map display has shifted.
- When the position key is deactivated, the map remains stationary and the position icon moves across the map to the edge of the touchscreen. The icon then disappears.
This function is automatically displayed if you have manually moved the map. Otherwise the map display would constantly return to the current position.
Choose this function whenever you want to call up the information window at a particular point on the map.

▶ While driving guidance is activated, press the position key.
The key is displayed as activated (depressed). Press again to deactivate the key.
Displaying TMC messages (toolbar)
Press this button to display all TMC traffic announcements received from the station you are currently tuned in to.

You have the option of obtaining an overview of the current traffic situation and calculating an alternative route or deleting a previously calculated detour, as required (See “Taking announcements into consideration when calculating routes” on page 58.).

▶ Press the TMC announcement button. A list of TMC announcements opens. Press the arrow buttons on the right of the screen to browse through the list.
Change display (toolbar)
The map can be displayed in 2D (street map view) or in 3D (schematic view).

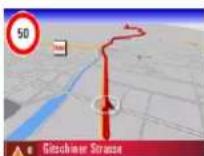
Change the display using the 3D key.

▶ Press the 3D key.
The display is changed. Press the key again to return to the previous display.
Navigational mode
Point northwards (toolbar)
Use the compass key to orient the map on the touchscreen towards the north.

▶ Press the compass key.
The map is pointed north on the touch-screen.
Move map (toolbar)
In move mode, you can shift the map in any direction required. You can do this by "pinning down" the map at any point and then shifting it. Move mode is activated and deactivated with the following key.

▶ To activate move mode, select the key with the hand icon.
▶ Press on your chosen point in the map and move this point in the direction required.
The map follows this point immediately afterwards.
Note:
If you wait too long after touching the map, the Options menu is displayed.
Call Options menu
The Options menu offers a range of useful functions.
▶ Press on the map briefly.
The Options menu is displayed. To close this menu again, use the Back key or press on the map icon.

The following options are available.
| Selection Meaning | |
| Main menu Terminates driving guidance and allows you to use other functions such as MP3-Player. | |
| Navigation menu | Terminates driving guidance and switches to rapid access mode. |
| Map icon Switches to map display | |
| Quit navigati-on | Terminates driving guidance (if activated). The rapid access screen is displayed. |
| Route options | Allows you to change route options (only if driving guidance is activated).• See "Options for the drive profile" on page 40. |
Navigational mode
| Block road The | driving directions planned by the Traffic Assist Pro may be hindered by unanticipated road blocks.This function notifies the system of the length of a road block. Existing road block lengths may be selected. Once the length has been entered, the route is replanned and new directions given (only if driving guidance is activated). |
| Interim destination | Allows you to enter a interim destination (only if driving guidance is activated).See "Navigation menu: Navigation" on page 37. |
| Next destination | Indicates the next destination, if multiple destinations have been entered (only if driving guidance is activated). |
| Mute mode The voice prompt for driving manoeuvres can be activated or deactivated. | |
| Settings • See "Navigation menu: Settings" on page 48. | |
| TMC • See "Using TMC" on page 57. | |
| Status • See "Navigation menu: Status" on page 55. |
Position information (toolbar)
You can call up the information window if you require information on a particular point on the map display. If information has been stored, this window shows the address of the particular point on the map and offers a number of functions so you can decide on your next step.
▶ Press the following key on the toolbar to stop the driving guidance and map display temporarily.

The map remains stationary. If a particular destination does not appear in the map display, you can either expand the map display or move the map using the keys in the toolbar.
▶ Press and hold down the required destination in the map until a window opens to allow you edit the destination.
Navigational mode

▶ Make the settings as required.
Playback of MP3 files during an active navigation
Previously recorded MP3 files can be played back while an active navigation is in progress.
▶ Press .
The MP3 player opens.
You can now play back your music files (refer to "Playback" on page 60).
Selecting music playback
Music playback is called up from the main menu.

▶ Press the Music key in the main menu.
Calling up without active navigation
The MP3-Player is called up and appears with its main screen.
- If a music track was stopped beforehand, this last music track is displayed.
- If this is no longer available, the first music track on the SD memory card is displayed.,
- If the SD memory card does not contain any music tracks, the message No music available appears.
The MP3 player
The MP3 player can access and play MP3 files saved on a SD memory card or USB memory stick.
Note:
Please refer to "Transferring music and images" on page 31" to find out how to save tracks to the internal memory or on to a memory card.
Note:
Using USB memory sticks to play MP3 files or display images may significantly decrease the capacity of the battery.
Note:
Using USB memory sticks (for MP3s) may interfere with the GPS signal.
The MP3-Player is shown below along with its standard display and a sample track.

In the upper section of the MP3-Players the title of the piece of music currently loaded is displayed along with the artist the number in the current folder level in the track line.
Note:
The artist and track name are taken from the ID3 tag of the MP3 file. If the MP3 track played does not have an ID3 tag, the file name of the track is displayed directly.
Music operations
Operating the MP3-Players
Various key panels are arranged around the track line to simplify operations.
Scrolling
The name of the next or previous track is displayed above or below the current music track.
▶ Press a music track.
The track is loaded in the track line.
- If the play button is not pressed, the track is not yet played.
- If a piece of music is being played at present, this is stopped and playback of the new track started.
Play
The pieces of music starting from the track displayed in the track line are played when the following key is pressed.

▶ Press the key featuring the play icon. The MP3-Player starts playback. The key changes to display the pause icon.

During playback, a bar diagram appears under the track to display the play time in relation to the total length of the track. These details are also displayed numerically under the diagram.
Note:
Depending on the bit rate (compression) of the MP3 track, the times displayed may vary slightly from the actual time.
Pause
Playback can be paused at any time and then continued.

▶ Press the key featuring the pause icon. Playback is interrupted. The current track is still displayed in the track line. The button display changes to the Playback icon. Playback is continued by pressing again.
Music operations
Folder overview
All the music folders saved on the memory card are listed next to the folder button.

▶ Press the Folder button (see arrow). The list menu for the folders appears.

You can now select a folder and add it to the playback menu by scrolling up or down.
Opening the next folder
Pressing the following button opens the next folder containing MP3 files and starts playing the first track.

Repeat current track
The piece of music currently being played is repeated continuously when the following key is pressed.

▶ Press the key featuring the repeat icon. Playback of the piece of music is repeated continuously.
▶ If you want to stop the repeat function, again press the key featuring the repeat icon.
Setting volume
A volume bar indicates the current volume in relation to the overall volume. You can increase or decrease the volume by pressing the or buttons.
⚠ Warning.
Always adjust the volume so that you can still hear any ambient noise while driving.
Navigation during MP3 player operation
You can start or continue an navigation while the MP3 player is playing music.
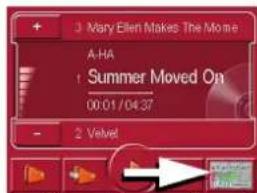
▶ Press the card symbol on the lower right-hand edge of the screen for this purpose.
The map view is displayed while the music continues to play.
Music operations

Note:
Using USB memory sticks (for MP3s) may interfere with the GPS signal.
Closing the MP3-Player
Press the BACK button to exit the MP3 menu.
Note:
Bear in mind that music will continue to play when you exit the MP3 menu. Press the pause icon to stop music playback (See "Pause" on page 68.).
Selecting pictures display
The pictures display is called up from the main menu.

▶ Press the Pictures key in the main menu.
The Picture Viewer is called up and appears with its main screen.
- If the last image displayed is present on the SD memory card, this will be displayed in the image area.
- If this is no longer available, the next image in the same folder is displayed. No images are displayed if there are no images in the corresponding folder.
- If the SD memory card does not contain any images, the message No pictures available appears.
Picture viewer
Images (JPG) saved on an SD card or USB memory stick can be accessed and displayed via the Picture Viewer. The standard view of the Picture Viewer displays a sample image, as shown below.
Note:
You can find out how to save image files on a memory card under “Transferring music files and images” on page 26.

The picture currently loaded is displayed in the centre of the Picture Viewers. The file name appears above the picture
Operating the Picture Viewers
Various key panels are arranged around the picture display to simplify operations.
Scrolling
The keys can be used to scroll in the direction indicated by the arrow and to therefore move between the pictures at the current folder level. A preview of the associated pictures and their file names is displayed under the keys.
Adjusting the music volume
You can change the volume of music in the picture viewer.
▶ Press the button with the speaker icon. The volume control appears.
▶ To adjust the volume, press the buttons + or .
The volume control disappears 5 seconds after the last adjustment is made.
Pictures mode
Slideshow
During the slideshow, all pictures from the current folder level are automatically displayed one after another. The slide-show can be started using the following key.

▶ Press the key featuring the slideshow icon.
A prompt appears once all images have been displayed.
▶ If you wish to repeat the slide show, press √.
▶ If you wish to end the slide show, press ✗.
The slide show will be repeated automatically if no buttons are pressed.
▶ Press the BACK button to end the slide show.
The image display changes to full screen display and initiates the slide show with the displayed image of the current folder level.
▶ The slide show will repeat once all images have been displayed.
Full screen
In full screen mode, the current picture is enlarged to fill the entire touch screen. Full screen mode can be started using the following keys.

▶ Press the key featuring the full screen icon.
The image display changes to full screen and initiates the slide show with the displayed image of the current folder level.
By pressing the left-hand or right-hand touchscreen surface, the previous or next image in the current folder level is displayed.
You can return to the standard screen by pressing the Back key.
Shutting down the Picture Viewer
Press the back key to shut down the Picture Viewer. The main menu appears.
Folder viewing mode
Under the picture displayed in the Picture Viewer, the picture's folder level is displayed in a key panel.

▶ Press the key panel.
Folder viewing mode appears.

In this viewing mode, the name of the current folder level is displayed in the top line. It content appears in the list provided below the line.
The list fields are also displayed as buttons. Pictures and sub-folders are displayed along with their names.
Pictures mode
Operating folder viewing mode
Subfolders
All folders containing image files are included in the folder overview.
Scrolling
You can use the keys to scroll through the list display in the direction indicated by the arrow.
The current list page and the total number of its contents appear between the keys.
Selecting a picture
You can load a picture from the list straight into the Picture Viewer.
▶ Press the button of the picture you want.
Folder viewing mode is closed and the Picture Viewer appears along without the picture requested.
Changing folder levels
Press to change to the uppermost folder level. All subfolders containing image files are displayed here. Press the appropriate button to display a subfolder's contents.
Closing folder viewing mode
The folder overview is closed by pressing the BACK button.
Settings
Selecting the settings
You can pre-select various basic settings for all applications of the Traffic Assist Pro.
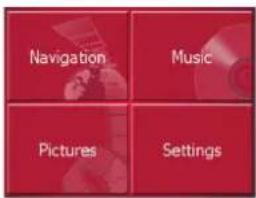
▶ Push the button Settings in the main menu.
This calls up the setting menu for the further selections.
The setting menu
The various setting possibilities can be selected from the setting menu.
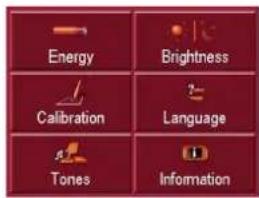
Operation
Selection possibilities
The desired selection is chosen by pushing the desired button. The funtionality of the buttons varies according to the selection and is described under "The individual menu points" on page 74.
Closing the setting menu
The setting menu is closed by pushing the back button, and the main menu then appears.
The individual menu points
Energy
Your Traffic Assist Pro may be operated using an external power supply unit or using an integrated rechargeable battery.
Note:
The current charge condition is particularly important when operating from batteries. If there is insufficient energy, then the navigational aid cannot be maintained until the destination is reached, for example.
The energy supply and its condition is visualised using the status display.
Displaying the energy supply
The status display can be called up using the following button.

▶ Push the button Energy.
The status display is called up and the energy supply is visualised.

The energy supply and status are shown on a display.
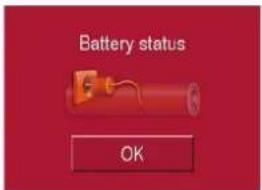
Ending the status display
By pushing the button OK the status display is ended and the setting menu appears.
Brightness
The following button allows switching between the maximum and minimum brightness of the screen.


▶ Push the button Brightness.
The brightness of the screen display changes to the other brightness level. The icon of the active settings is emphasised.
- Icon Day: maximum brightness
- Icon Night: minimum brightness
You can also adjust the brightness by pressing the Brightness fast access button (See page 13.).
Calibration
If the touch-screen reacts incorrectly to the touching of the screen in specific areas, calibration is required.
The calibration procedure ends automatically once all items are pressed. The Settings menu appears. The touch screen should now function more accurately.
Starting calibration
The calibration can be started using the following button.

▶ Push the button Calibration.
The calibration process is started. Various positions on the screen are indicated in sequence by cross-hairs. Touch this position as accurately as possible. After all the positions have been touched the calibration process finishes automatically. The setting menu appears. The touch-screen should now operate exactly.
Settings
Language
The text of the touch-screen images can be displayed in various languages.
Calling up language selection
The following button allows selection of various different languages.

▶ Push the button Language.
The language selection appears.
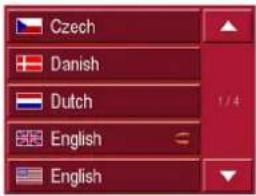
In the language selection, the available languages are shown in a list which extends over several pages. Each list area is a contact surface. The individual contact surfaces are marked with the language designation and the associated national flag.
Turn the page
These buttons allow page turning in the direction shown by the arrow through the pages of the list. The current page of the list and the total number of pages is shown between the buttons.
Selecting the language
If you change the language the software restarts.
▶ Push the contact area of the desired language. For safety reasons, the selection is called up again using the signal Set language to
- In order to accept the selected language, push the button √ - In order not to accept the selected language, push the button ✗
Cancelling the language selection
The language selection is closed by pushing the back button, and the setting menu then appears.
Sounds
The following button allows you to switch on or off the acknowledgement tones that sound when the touch screen is operated.

▶ Press Tones.

Information
Information concerning the Traffic Assist Pro is displayed using the following buttons.

▶ Push the button Information.
The information display appears.

Please note particularly the product designation and the details of the software version. Always quote these details in the event of queries with Harman/Becker service department.
Specialist words
ETA
((Estimated Time of Arrival)
The estimated time of arrival at the destination. When making calculations, the Traffic Assist Pro takes into consideration on the various average speeds for different road types (inner city, A-roads, motorways, etc.) and the current traffic situation in combination with the TMC.
GMT
(Greenwich Mean Time)
Central European Time
The standard time at 0 degrees of longitude (the longitude which passes through Greenwich, Great Britain). This time is used worldwide for the synchronisation of data collection.
GPS
(Global Positioning System)
GPS determines your actual geographical position by the use of satellites. It is based on 24 satellites which orbit the Earth and emit signals. The GPS receiver receives these signals and calculates the distance to each satellite from the running time differences and thus evaluates its actual current position in terms of geographical length and width. In order to determine the position, signals from at least three satellites are required, and the fourth one allows the height to be determined.
HDOP
(Horizontal Dilution Of Precision)
HDOP states the quality of the positional determination. In theory, values from 0 to 50 are possible, whereby the following applies: the smaller the value the more accurate the positioning (value 0= no deviation from the actual position). Values of up to 8 are acceptable for navigation units.
ID3-Tag
„Index of Contents" of an MP3 title. Contains information such as title, artist, album, year and genre.
JPG/JPEG
(Joint Photographic Experts Group)
The JPEG is the most common type of storage format for dissipating picture compression., i.e. when compressing, details of the picture are lost. Still provides good picture quality despite compression, compression stages are selectable. It is the most common format for representation and exchange of pictures on the internet.
MP3
Special compression process for audio data (e.g. music).
File
Index
File on a CD/storage card/microdrive which contains MPS titles.
SD Card
(Secure Digital)
The Secure Digital Card was developed in 2001 by SanDisk on the basis of the older MMC standard. An SD card is a re-writable change-over storage card.
Stylus
A stylus is an input pointer which is used for the operation of touch-screens, mobile phones or PDAs.
The stylus consists basically of a plastic pointer with a softer plastic core. The sleeve is hard and can be gripped and the softer core emerges at the tip and is designed to touch the screen as softly as possible (i.e. without the danger of scratching the screen).
The stylus is more accurate than operation using the fingers, since only the thin tip touches the screen. In addition, dirty marks on the screen caused by finger prints are avoided.
TMC
(Traffic Message Channel)
Traffic announcements transmitted by most FM stations via RDS. Basis for dynamic navigation.
USB
(Universal Serial Bus)
The Universal Serial Bus (USB) is a bus sytem for interconnection of a computer with external USB peripherals for the exchange of data.
Keywords
A
Adjusting the volume ..... 54, 61
Autozoom 51
C
Calling up without active
navigation 67
Changing folder levels .....73
Closing folder viewing mode .....73
D
Daylight saving time .....52
Destination 37
Destination selection
Entering address .....38
from map . . . . . . . . . . . . . . . . . . . . . . . . . . . . . . . . . . 44
Point of interest .....42
Destinations
entering 36
Home address 34
protected 34
save 41
standard 34
Destinations memory .....34
changing 34, 35
Points of interest .....44
scrolling 34
Display 51
Display street names .....49
Displaying current position .....35
Displaying current street .....49
Distance to destination .....49
Drive profile .....40
E
Entering address ....38
ETA 49
F
Fast route 40
Ferry 41
File 78
Folder viewing mode .....72
Full screen 72
G
GMT 78
GPS 78
H
HDOP 78
Home address 34, 36, 54
I
ID3 tag 67
ID3-Tag 78
Intended use 5
Intersecting road 40
J
JPG/JPEG 71,78
L
Limitations
Ferry 41
Motorway 41
Toll road 41
List of destinations .....34
List of routes
edit 46
new route....46
Lists
List of destinations .....33
List of streets .....40
List of towns 39
Keywords
M
Main menu .....26
Map data....36
Map display 33
2D, 3D .....51
changing from rapid access . . . 35
Current position .....33
Destination displays .....40
Points of interest .....44
Map symbol key 35
Memory card....18
Motorway 41
MP3 67,78
MP3 player ....67
calling up .67
Music 67
N
Navigation ....32
Navigating home ....36
Rapid access 33
starting....42
stopping....42
Navigation menu 33, 36
structure....36
0
Operating folder viewing mode ....73
P
Part-way destination .....45
Pause 68
Picture Viewer ....71
shutting down 72
Picture viewer....71
Play 68
Points of interest....42
nearby 43
display on the map .....49
R
Rapid access 34
Icons 34
Repeat current track .....69
Route
deleting 46
fast 40
renaming ....46
short 41
Type of ....40
Route info ....54
Route planning 36,45
S
Safety information 5,32
Scrolling
in lists . . . . . . . . . . . . . . . . . . . . . . . . . . . . . . . . . . . . . . . . . . . . . . . . 73
in the music folder .....68
in the pictures folder .....71
SD card 18
Selecting a country .....37
Selecting a picture .....73
Selecting a town/city .....38
Selecting pictures display .....71
Selecting street 39
Selecting town 38
Setting volume 69
Settings
for navigation ..... 36, 48
Short route 41
Shutting down the Picture Viewer ..72
Slideshow 72
Speed limit ....53
Speed profile ....50
Stylus 79
Keywords
T
Time format ....52
Time of arrival .....49
Time zone ....52
TMC 56
Display on the map .....57
Recalculating routes .....58
Settings 54
Station selection .....58
Updating announcements .....58
Toll road ....41
Traffic signs .....49
Travel time .....49
Travel time remaining .....49
Type of route .....40
U
Units of measurement .....52
USB 79
W
Warnings
Speed limit ....53
Traffic signs .....49
Technical Data
- Dimensions:
(W x H x D) in mm 137 x 88 x 19,5 - Weight:
272 grams - Processor:
400 MHz Processor CISC-architecture - Screen:
4 Inch
Touch-Screen with 16 Bit colour depth
65.536 Colours
Low reflection values - Storage:
64 MB Flash Storage
64 MB SD-RAM - SD Card Reader:
Support up to 2 GB - USB Interface:
USB 1.(Host)
USB 2.0 (mit Client)
• Headphone output:
5 mm Stereo Socket
• 2 Internal speakers:
2 Watt max.
• Power supply voltage:
5 Volt
- AC Adapter:
100 - 240 Volt
5 Ampere
50 - 60 Hz
- Output Voltage:
5Volt
FACT SHEET
In accordance with current EU guidelines, this unit can be operated by any person.
This unit conforms with the currently applicable European and harmonised national standards. The marking of the unit gives you the guarantee that the electromagnetic compatibility specification applicable to the unit is maintained. This means that interference with other electrical/electronic units by your unit and that interfering influences on your unit by other electrical/electronic units is avoided to a large degree.
The type approval mark (e11) issued in accordance with European
vehicle-EMV guideline 95/54/EG provides approval for installation and operation within powered vehicles (classes M, N and O).
Traffic Assist Pro

023718
TMC Docking Station

023717
- Operating instructions
- Index
- The Traffic Assist Pro 7
- Overview Traffic Assist Pro
- Navigational mode 32
- Music operations 67
- Pictures mode 71
- Settings 74
- ⚠ Safety information
- Use
- Navigation
- Music
- Pictures
- Unpacking the Traffic Assist Pro
- Note:
- Checking the delivery
- Delivery contents
- Complaints procedure
- Handling the packaging
- Description of unit
- Traffic Assist Pro - Basic unit
- Adapter-Power Supply
- Battery
- SD memory card
- USB connection cable
- Accessories
- mains charger
- External GPS antenna
- Headset
- Danger!
- Information about documentation
- Quick start guide
- Maintenance and care
- Registration
- Repairs
- Disposal
- Emissions
- Front of the unit with control and display elements
- Back of the unit
- Left side of unit
- Right side of unit
- Base of unit
- General operations
- Battery quality declaration
- Display quality declaration
- Start-up
- SD-Card
- Notes:
- Inserting the SD memory card
- Ejecting the SD memory card
- Power supply
- Using the battery
- Via the public mains grid
- Danger of Death!
- Connecting up to power supply
- Removing power supply
- Via the vehicle battery (cigarette lighter socket)
- Antenna
- GPS antenna
- Via the TMC receiver
- TMC antenna
- Switching the Traffic Assist Pro on/off
- Switching on
- Switching off
- Unit bracket
- Traffic Assist Pro with TMC
- Traffic Assist Pro without TMC
- Fitting the unit bracket
- On the windscreen
- On the dashboard
- Moving the unit holder
- Vertical movements
- Horizontal movements
- Attaching the Traffic Assist Pro
- Connecting the telephone mute function
- Basic information about the touch screen
- Operation
- Calibration
- Basic information about the menus
- The main menu
- Entries made with the entry menu
- Entering characters
- Adopting suggestions
- Scrolling through the lists
- Special characters and umlauts
- Entering numbers
- Deleting characters
- inserting spaces
- The back key
- More maps
- Installation program
- Transferring files
- Transferring using the SD card reader
- Transferring via the USB interface
- Transferring maps
- Transferring music and images
- Faults
- Navigational mode
- What is navigation?
- Selecting navigation
- Aids for navigation
- Rapid access
- Navigation menu
- Map display
- Structure of rapid access
- Navigation menu and map display
- The list of destinations
- Icons used
- Operating rapid access
- Starting using an existing destination
- Scrolling in the destinations memory
- Displaying or editing destination
- Change to map display
- Displaying current position
- Calling up Navigation menu
- TheNavigation menu
- Structure of the navigation menu
- Route planning
- Settings
- Status
- Load map
- Home
- Navigation menu: Navigation
- Destination selection window
- Destination: Selecting a country
- Destination: select address and start
- Selecting a town/city
- The OK key
- Using the list of towns
- Selecting the street
- Using the list of streets
- Selecting the Intersection
- Displaying destination on the map
- Options for the drive profile
- Saving a destination
- Voice selection
- Starting navigation
- Stopping navigation
- Destination: Points of interest select
- Point of interest: nearby
- Point of interest: nationwide
- Point of interest: in a town
- Destination: selecting from the map
- Navigation menu: Route planning
- Route list
- Scrolling through the list of routes
- Displaying route details
- Selecting a route
- Using a route
- The New route button
- The Edit key
- The Calculate key
- The Start key
- Navigation menu: Settings
- Structure
- The Route info key
- The Signpost info button
- The Routing options button
- The Volume key
- The Map info key
- The Automode key
- The Time Zone key
- The Route planning key
- The Format key
- The Speedkey
- Important!
- The Home adress key
- The TMC button
- The Smart Speller button
- The Factory settings key
- Navigation menu: Status
- Navigation menu: Load map
- Navigation menu: Home
- What is dynamic route guidance?
- Displaying TMC messages on the map
- Updating the announcement list
- Station selection
- Taking announcements into consideration when calculating routes
- Automatic recalculation
- Manual recalculation
- Changing status
- Map layout
- Map display without driving guidance
- Map display with driving guidance
- Map display with toolbar
- Using the map display
- Repeating the last announcement
- Adjust voice prompt volume
- ⚠ Warning.
- Information rows
- Zooming and the map (toolbar)
- Display route (toolbar)
- Position and display mode (toolbar)
- Displaying TMC messages (toolbar)
- Change display (toolbar)
- Point northwards (toolbar)
- Move map (toolbar)
- Call Options menu
- Position information (toolbar)
- Playback of MP3 files during an active navigation
- Selecting music playback
- Calling up without active navigation
- The MP3 player
- Music operations
- Operating the MP3-Players
- Scrolling
- Play
- Pause
- Folder overview
- Opening the next folder
- Repeat current track
- Setting volume
- Navigation during MP3 player operation
- Closing the MP3-Player
- Selecting pictures display
- Picture viewer
- Operating the Picture Viewers
- Adjusting the music volume
- Pictures mode
- Slideshow
- Full screen
- Shutting down the Picture Viewer
- Folder viewing mode
- Operating folder viewing mode
- Subfolders
- Selecting a picture
- Changing folder levels
- Closing folder viewing mode
- Selecting the settings
- The setting menu
- Selection possibilities
- Closing the setting menu
- The individual menu points
- Energy
- Displaying the energy supply
- Ending the status display
- Brightness
- Starting calibration
- Language
- Calling up language selection
- Turn the page
- Selecting the language
- Cancelling the language selection
- Sounds
- Information
- Specialist words
- ETA
- GMT
- GPS
- HDOP
- ID3-Tag
- JPG/JPEG
- MP3
- File
- SD Card
- Stylus
- TMC
- USB
- Keywords
- A
- C
- D
- E
- F
- G
- H
- I
- J
- L
- M
- N
- 0
- P
- R
- S
- T
- U
- W
- Technical Data
- FACT SHEET
Brand : BECKER
Model : 7916 TM
Category : Browser