
Voice Tracer VTR5100 - Dictaphone PHILIPS - Free user manual and instructions
Find the device manual for free Voice Tracer VTR5100 PHILIPS in PDF.


| Product Type | Digital voice recorder |
| Brand | Philips |
| Model | Voice Tracer VTR5100 |
| Dimensions (approx.) | 110 x 38 x 16 mm |
| Weight (with batteries) | 60 g |
| Power Source | 2 AAA batteries (not included) |
| Recording Format | MP3 (mono/stereo) |
| Storage Capacity | Internal memory 4 GB (up to 270 hours recording) |
| Recording Modes | High Quality (HQ), Standard (SP), Long Play (LP) |
| Microphone | Built-in stereo microphone |
| Speaker | Built-in loudspeaker |
| Display | OLED display with backlight |
| Interface | USB 2.0 (micro USB), 3.5 mm headphone jack |
| Battery Life | Approx. 20 hours (LP mode) |
| File Transfer | Drag and drop via USB (mass storage class) |
| Special Functions | Voice activation (VCVA), noise reduction, password protection |
| Cleaning | Wipe with a dry soft cloth; do not use liquids |
| Safety | Keep away from moisture and extreme temperatures |
| Spare Parts / Repairability | Battery compartment accessible; USB port replaceable |
| General Information | Free user manual available for download in PDF |
Frequently Asked Questions - Voice Tracer VTR5100 PHILIPS
User questions about Voice Tracer VTR5100 PHILIPS
0 question about this device. Answer the ones you know or ask your own.
Ask a new question about this device
Download the instructions for your Dictaphone in PDF format for free! Find your manual Voice Tracer VTR5100 - PHILIPS and take your electronic device back in hand. On this page are published all the documents necessary for the use of your device. Voice Tracer VTR5100 by PHILIPS.
USER MANUAL Voice Tracer VTR5100 PHILIPS
Register your product and get support at
www.philips.com/welcome
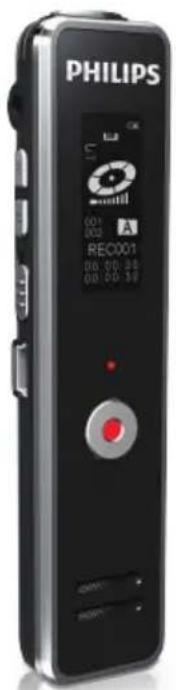
3.2 概览:

1.1 Product features 24
2 Important
2.1 Safety 25
2.2 Hearing protection 25
3 Your recorder
3.1 What's in the box? 26
3.2 Overview 26
4 Start to use
4.1 Power on/off 27
4.2 Battery charging 28
5 Recording
6 Voice & music mode
6.1 Basic operations 31
6.2 Delete 32
6.3 A-B Replay 32
6.4 Play mode 33
6.3 Volume adjustment 33
6.4 Equalizer Mode (for music mode) 33
7 System settings 34
7.1 Quality settings 34
7.2 Record light 35
7.3 Key tone 35
7.4 Voice-activated recording 35
7.5 Auto divide recording 36
7.6 Set date & time 36
7.7 Record timer 37
7.8 Duration 37
7.9 Language 38
7.10 Display backlight 38
7.11 Display contrast 39
7.12 Auto power-off 39
7.13 Remaining recording time 39
7.14 Format memory 40
7.15 Information 40
8 Frequently asked questions 42
9 Technical parameters 43
EN 23
1 Welcome
Welcome to the world of Philips! We are honored by your choice and purchase of Philips' products. You can have Philips' comprehensive technical supports from our website, e.g. user's manuals, software downloading and warranty information etc.
www.philips.com
1.1 Product features
Digital noise reduction: Effectively filter the ambient noise in the recording environment and record clear sound, which is recommended to use in noisy environment. It's recording type is PCM Noise Reduction.
- HD loudspeaker: The adoption of high quality speaker allows you to experience natural sound during playback of recordings or music files as well.
• Record in MP3 format. - Quick access to recordings and data by using high speed USB 2.0.
• Voice-activated recording.
• USB mass storage, ensuring maximum compatibility. - Keylock function: Keylock function can prevent accidentally touch pause or exit button during recording.
2 Safety information
2.1 Safety
- To avoid a short circuit, do not expose the product to rain or water.
- Do not expose the device to excessive heat caused by heating equipment or direct sunlight.
- Protect the cables from being pinched, particularly at plugs.
- Attention! Before using the device please read this user's manual carefully. The company shall not be liable for any data loss due to erroneous operation or causes of a force majeure nature. Special attention should be given to careful operations and prepare backup of files.
2.2 Hearing protection
Observe the following guidelines when using your headphones:
-
Adjust to suitable volume; do not use the earphone for a long time.
• Please do not turn the volume up beyond your tolerance.
Do not turn up the volume so high that you can't hear
what's around you. -
When in dangerous conditions, please carefully use the earphones or stop using.
- Do not use the earphones when driving, cycling and skateboarding to avoid traffic accident and violating laws and regulations.
3 Your recorder
3.1 What's in the box?

3.2 Overview:

26 EN
① Headset jack
② Volume (VOL)
③ Menu key (MENU)
④ Power on/off (ON/OFF)
⑤ USB port
⑥ Display
⑦ Record, Play, Charging indicator
⑧ Record, Pause
⑨ Speaker
⑩ Play, Pause ▶
⑪ Volume up, Fast reverse, File selection previous,
Menu item selection ▲
⑫ Volume down, Fast forward, File selection next,
Menu item selection ▼
⑬ Stop, Folder selection
⑭ Microphone jack (MIC)
4 Start to use
4.1 Power on/off

Note
- Please recharge the device for three hours before using it for the first time! (See also chapter 4.2 Charging battery, page 28.)
To power on/off,
1 Slide the on/off switch on the side of the device in the ON position,
- The device turns on and the start-up screen is displayed; the device starts automatically and then displays "PHILIPS", as shown below.

2 Press the ON/OFF switch to power the device on/off.

Note
- If the device shall be idle for a long time, please slide the power switch to OFF position.
- If the device cannot work normally, please make sure the device is not out of electricity.
- When the device is recording, please do not cut off the power, otherwise damaged file or malfunction may be resulted.
- When the battery indicator “☐” is displayed, please charge the device promptly.
- Please charge battery in advance if you need to record for a long time. A fully charged battery will allow you to record for approx 6.5 hours.
4.2 Battery charging
1 Prior to charging, please slide power switch to ON position.
2 Connect the device to PC through USB cable or use special charger to recharge.
- The battery indicator shows a battery icon turning from empty to full repeatedly, indicating that the device is recharging, with orange charging indicator being lit.
• The device can be fully charged in around 3 hours. - The orange charging indicator is not displayed when the device is fully charged.
USB connection and charging interface:

When the power switch is slide to the OFF position, the battery symbol ☐ will not be displayed.

Note
- During charging, the device cannot be used to record or playback.
Connect to computer
The device can be used as a USB mass storage to conveniently store, back up and move files. Link the device to a computer with a USB cable, the voice recorder can automatically be recognized as a portable device without the need to install any software.

Note
- When moving files into or out of the device, please do not disconnect the device from the computer.
5 Recording
1 In the stop state of voice mode, press STOP button ■ to select the folder you prefer. You can select folder A, B, C, D.
2 Press REC button ⚙ to start recording,
- the red indicator light will be on and the display will show "REC"; please point the top of the device towards the source of sound.
3 Press REC button ⓞ to pause recording,
- the red indicator light will flicker, and the display will show "Pause".
4 Press REC button ● again to resume recording.
5 Press STOP button ■ to save recording,
- red indicator light is turned off, and the device will return to the Stop interface of current recorded file.
6 Long-press menu button to realize lock screen which can avoid hitting pause or exit button. Long-pres menu button to release the lock.

Note
- When the device is in a dormant state, long press REC button to start recording.
Illustration of recording interface:
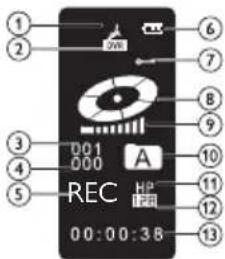
① Record icon
② Voice mode
③ Current file
④ The total files of the current directory
⑤ Record status
⑥ Battery
⑦ Lock status
⑧ Status indicator
⑨ Volume
⑩ Voice folder
⑪ Record type
⑫ Bit rate
⑬ Current duration of recording

Note
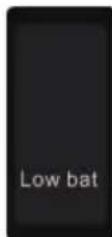
- When the low battery icon occurs, it means the battery is nearly empty and the system will automatically shut down. If the device is recording, the system will automatically save the recorded file then shut down. If the device has low battery, please recharge promptly. When the device is to shut down due to low battery, the following icon will display.


Note
- Prior to recording, please preset the recording format you need (See “Quality settings” in System settings, chapter 7.1, page 34.) and the folder where you want to save recorded files (See “Voice folder selection” in the Voice & music mode, chapter 6, page 31).
- Check if the remaining recording time is sufficient for the next recording (See “Remaining recording time” in The System setting, chapter 7.13, page 39).
- When recording, press ▼ button to save the current recording and start the next recording.
- Please test recording to ensure that the Voice Tracer setting is right.
- A/B/C and D folder can store 99 files at most, with 396 files in total (99 x 4).
- If the recording time exceeds the usable capacity of the device or the number of files reaches the limit of 396, the recording stops. Please delete part of recording or move it to a computer.
- When the device is in the recording mode, please do not slide power switch to OFF, otherwise the current recoding files will be damaged.
6 Voice & music mode
Voice mode: the device will display DVR when it's playing recorded documents;
Music mode: the device will display MUSIC when it's playing music documents;
The two modes can be switched through short-pressing menu button.
Return to voice mode by short pressing stop button or long pressing menu button in the settings interface.
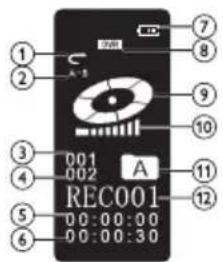
Interface of playing files
① Play mode
② Replay mode
③ Current file
④ The total files of the current directory
⑤ Current time
⑥ Total time
⑦ Battery
⑧ Voice mode
⑨ Status indicator
⑩ Volume
⑪ Voice folder
⑫ Current file
6.1 Basic operations
1 In stop state, press STOP button ( ■ ) to select voice folder, A-B-C-D-MUSIC-A...
2 Press ▲ or ▼ to select the file you want to play.
3 Press "PLAY"(▶) to play and press"PLAY"(▶) to stop the playing.
4 When playing, press ▲ or ▼ to fast forward or backward, release the button to resume playing.
5 Press"STOP"(■) to end the playing.
6.2 Delete
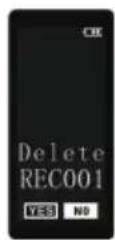
Delete current file
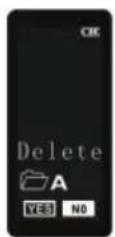
Delete all files in the folder
1 In stop state, long press "STOP" button for 2 to 3 seconds to enter delete interface;
2 Press "PLAY"(▶) to choose "Delete one" or "Delete all";
3 Press ▲ or ▼ to choose "YES" or "NO";
4 Press "MENU" to confirm.
6.3 A-B Replay
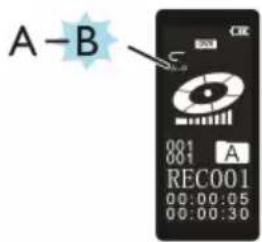
Figure 1

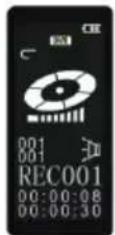
Figure 2
1 When playing, short press VOL button to enter A-B replay mode, and set the start mark A, then the screen displays A-B, and B flashes as shown in Figure 1;
2 Short press VOL button to set the finish mark B, screen displays A-B, and start to replay as shown in Figure 2;
3 Repress the VOL button again to cancel replay, display A-B disappears and return to normal playing (if not press VOL button to cancel replay, device will automatically exit replay mode after replay for five times).
6.4 Play mode
The device supports three play modes, including Sequence, Repeat one and Repeat all. It is able to switch among those three play modes by pressing MENU button when playing.
C:Sequence, it means to play in the order that from the current file to the last one, and then it automatically stops playing.
C1: Repeat one, it means to repeatedly play the current file only.
ALL: Repeat all, it means to play all files in the current folder repeatedly.
6.5 Volume adjustment
1 Long press VOL button to enter volume adjustment, with screen displaying a speaker icon flashing, as shown in the
following figure.
2 Press button ▲ or ▼ to turn up or turn down the volume, then the volume bar on the screen will correspondingly increase or reduce.
6.6 Equalizer Mode (for music mode)
The device supports seven sound effect modes, including normal, rock, popular, classic, soft, and jazz and DBB. Long press STOP key for 2-3 seconds to switch among them when playing.
| Icon | Sound Effect |
| Normal | |
| Rock | |
| Popular | |
| Classic | |
| Soft | |
| Jazz | |
| D88 |
7 System settings
1 In the stop state of music mode, long press "MENU" to enter system settings.
2 Return to voice mode interface by pressing "STOP" button from any system menu interface.
| Menu | Submenu | ||||
| Quality settings | HQ | LP | NR | ||
| Record light | On | Off | |||
| Key tone | On | Off | |||
| Voice-activation | On | Off | |||
| Auto divide feature recording | Off | 30m | 60m | ||
| Set date & time | 12h | 24h | |||
| Recorder timer | |||||
| Duration | 0m | 30m | 60m | 120m | |
| Language | S-C | T-C | EN | ||
| Backlight time | Off | 15s | 30s | 45s | 60s |
| Display contrast | 1-9 | ||||
| Auto power-off | 5m | 15m | |||
| Remaining recording time | |||||
| Format memory | yes | no | |||
| Information | |||||
7.1 Quality settings
1 In the stop interface of music mode or voice mode, long press MENU button to enter quality settings Interface as shown in the following figure:
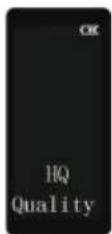
2 Three types of recording are available: high-quality recording, long-time recording and noise reduction recording. Press ▼ or ▲ to select the one you prefer.
HQ: MP3 format, high quality, with bit rate of 128kbps.
LP: MP3 format, long time, with bit rate of 8kbps.
NR: WAV format, high quality, with bit rate of 384kbps.
3 Press MENU to confirm and enter the next menu.
7.2 Record light
1 Short press MENU button to enter record light setting interface, as below:

2 Press ▲ or ▼ to select "On" or "Off".
3 Press MENU to confirm and enter the next menu.
7.3 Key tone
1 Short press MENU button to enter device sounds setting interface, as shown in the following figure:
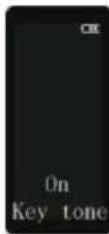
2 Press ▲ or ▼ to select "On" or "Off".
3 Press MENU to confirm and enter the next menu.
7.4 Voice-activated recording
1 Short press the MENU to enter voice-activated settings interface, as shown in the following figure:

2 Press ▲ or ▼ to select "On" or "Off",
- if voice-activated recording is enabled, recording session will start when you begin speaking.
- when you stop speaking, the device will automatically pause recording after three seconds of silence, and resume only when you begin speaking again.
3 Press MENU to confirm and enter the next menu.
7.5 Auto divide recording
You can automatically divide large recordings, such as a multi-hour meeting recording. Once the set time has been reached, the device stops the current recording and automatically starts a new one.
1 Short press on the MENU to enter the auto divide feature recording setting interface, as shown in the following figure:
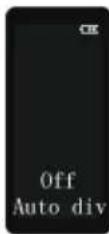
2 Press ▲ or ▼ to select preset auto divide time: "Off", "30min" and "60min".
3 Press MENU to confirm and enter the next menu.
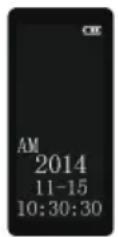
7.6 Set date & time
1 Short press on the MENU to enter the time format setting interface, as shown in the following figure:
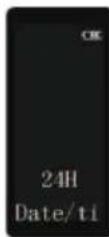
2 Press ▲ or ▼ to select "12H" or "24H" format.
3 Press MENU to confirm and enter the system time setting interface, as shown in the following figures:
12h 24h

4 In this state, press VOL to switch among the year, month, date, hour, minute and second. The number will flash in the state of setting, press ▲ or ▼ to adjust the numerical value.
5 Press MENU to save the current time/date settings and enter the next menu.
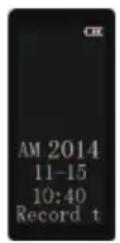
7.7 Record timer
You can use this function to start a recording at a specified date and time.
Short press the MENU button as shown in the following
figures:
12h 24h

The setting method refers to "Set date & time".
7.8 Duration
It is used to set time duration of auto recording. Device will automatically save recording when reaches the preset time.
1 Short press on the MENU to enter the duration setting, as shown in the following figures:
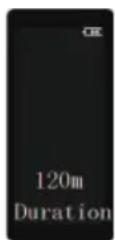
2 Press ▲ or ▼ button to select "0 m"(to disable auto save), "30 m"(to auto save at a 30 min interval), "60 m"(to auto save at a 60 min interval), "120 m"(to auto save at a 120 min interval), press MENU to confirm and enter the next menu.
7.9 Language
It is used for setting the system language.
1 Short press on the MENU to enter the language setting interface, as shown in the following figures:

2 Press ▲ or ▼ to select “Simplified Chinese” (S-C), “Traditional Chinese” (T-C) or “English” (EN).
3 Press MENU to confirm and enter the next menu.
7.10 Display backlight
1 Short press on the MENU to enter the backlight time setting, as shown in the following figures:
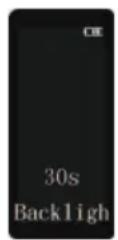
2 Press ▲ or ▼ to select "Off", "15s", "30s", "45s" and "60s".
3 Press MENU to confirm and enter the next menu.
7.11 Display contrast
1 Short press on the MENU to enter the contrast setting interface, as shown in the following figures:
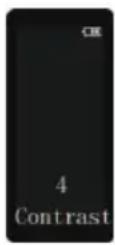
2 Press ▲ or ▼ to adjust numerical value.
3 Press MENU to confirm and enter the next menu.
7.12 Auto power-off
The device switches off automatically if no key is pressed within a preset period of time. This saves power.
1 Short press on the MENU to enter the auto power-off setting, as shown in the following figures:
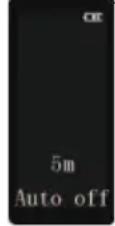
2 Press ▲ or ▼ to select "5m" or "15m".
3 Press MENU to confirm and enter the next menu.
7.13 Remaining recording time
1 It is be used for check remaining time for recording.
2 To enter the remaining time checking interface,
• short press the MENU, as shown in the following
figures:
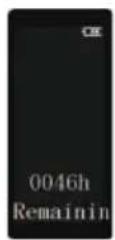

Note
- Different record types vary in remaining time.
7.14 Format memory
It is used for formatting the internal storage of the device.

Note
- Prior to formatting, please backup important data or files in advance.
1 Short press on the MENU to enter the clear memory interface, as shown in the following figures:

2 Press ▲ or ▼ to select "Yes" or "No".
3 Press MENU to confirm the formatting,
- when you selecting "YES";
- if press MENU with "No", it will cancel the formatting and enter the next menu.
7.15 Information
It is used for checking the version of firmware and the date.
1 To enter the firmware version checking interface,
- on the stop interface of music mode, consecutively short press on the MENU as shown in the following figures:
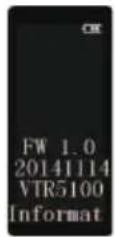
2 Press MENU to return to the voice mode.
8 Frequently asked questions (FAQ)
Answers to the frequently asked questions are listed here to solve simple problems that may occur. If the problem cannot be solved, please contact the dealer or visit our official website: www.philips.com/support
Cannot switch on the device
The battery is empty, please recharge promptly.
Cannot record with the device
Exceed the maximum file number or the device's storage is full, Please delete some recordings or move them to other storage devices.
Voice Tracer fails to play
Please recharge the battery as it has run out power.
Unable to listen to recording via speaker
1 Please unplug the headset.
2 Adjust the volume of speaker as the volume may have been set at the minimum value.
9 Technical parameter
Memory
Reference recording time (8GB): About 48 hours for digital noise reduction recording mode, 136 hours for high quality recording mode and 2160 hours for long time recording mode.
Type of internal memory: NAND Flash (flash memory) Mobile storage device (PC): Yes
Recording time with fully charged battery: approx 12 hours
Dimensions
Product dimensions (W × D × H): 22.7×97.6×14.8 mm Weight (including battery): 40 g
System requirements
Operating System: Windows 7/Vista/XP/2000, Mac OS X, Linux
Port: USB port
Recording
Recording format:
(High quality) HQ: Bit rate 128kbps, MP3 format
(Long time) LP: Bit rate 8kbps, MP3 format
(Digital noise reduction) NR: Bit rate 384kbps, WAV format
Operational condition
Temperature: 5° - 45°C
Air humidity: 10% – 90%, non-condensing
Warranty card

质保书
一年质保
Type: VTR5100
Serial nr:
Date of purchase
购买日期
Dealer's name, address and signature
销售商名称、地址及签字
www.philips.com/welcome
This document is printed on chlorine free produced paper Data subject to change without notice
This product was brought to the market by Speech Processing Solutions GmbH or one of its affiliates, further referred to in this document as SPS, which is the manufacturer of the product. SPS is the warrantor in relation to the product with which this booklet was packaged.
For China only
只限中国地区
Printed in China


© 2015 Speech Processing Solutions GmbH.


- 2 IMPORTANT
- 3 YOUR RECORDER
- 4 START TO USE
- 5 RECORDING
- 6 VOICE & MUSIC MODE
- 7 SYSTEM SETTINGS 34
- 8 FREQUENTLY ASKED QUESTIONS 42
- 9 TECHNICAL PARAMETERS 43
- 1 WELCOME
- 1.1 PRODUCT FEATURES
- 2 SAFETY INFORMATION
- 2.1 SAFETY
- 2.2 HEARING PROTECTION
- 3.1 WHAT'S IN THE BOX
- 3.2 OVERVIEW
- 4.1 POWER ON/OFF
- NOTE
- TO POWER ON/OFF
- 4.2 BATTERY CHARGING
- CONNECT TO COMPUTER
- ILLUSTRATION OF RECORDING INTERFACE
- 6.1 BASIC OPERATIONS
- 6.2 DELETE
- 6.3 A-B REPLAY
- 6.4 PLAY MODE
- 6.5 VOLUME ADJUSTMENT
- 6.6 EQUALIZER MODE (FOR MUSIC MODE)
- 7 SYSTEM SETTINGS
- 7.1 QUALITY SETTINGS
- 7.2 RECORD LIGHT
- 7.3 KEY TONE
- 7.4 VOICE-ACTIVATED RECORDING
- 7.5 AUTO DIVIDE RECORDING
- 7.6 SET DATE & TIME
- 7.7 RECORD TIMER
- 7.8 DURATION
- 7.9 LANGUAGE
- 7.10 DISPLAY BACKLIGHT
- 7.11 DISPLAY CONTRAST
- 7.12 AUTO POWER-OFF
- 7.13 REMAINING RECORDING TIME
- 7.14 FORMAT MEMORY
- 7.15 INFORMATION
- 8 FREQUENTLY ASKED QUESTIONS (FAQ)
- CANNOT SWITCH ON THE DEVICE
- CANNOT RECORD WITH THE DEVICE
- VOICE TRACER FAILS TO PLAY
- UNABLE TO LISTEN TO RECORDING VIA SPEAKER
- 9 TECHNICAL PARAMETER
- MEMORY
- DIMENSIONS
- SYSTEM REQUIREMENTS
- RECORDING
- OPERATIONAL CONDITION
- WARRANTY CARD
- 质保书
- 一年质保
- WWW.PHILIPS.COM/WELCOME
Brand : PHILIPS
Model : Voice Tracer VTR5100
Category : Dictaphone