
TP7-1000DC - Tablet i-onik - Free user manual and instructions
Find the device manual for free TP7-1000DC i-onik in PDF.


| Product type | Tablet PC |
| Model | TP7-1000DC |
| Brand | i-onik |
| Dimensions | Approx. 189 x 114 x 9.5 mm |
| Weight | Approx. 276 g |
| Operating system | Android 4.1.1 |
| Processor | Dual Core 1.0 GHz (Cortex A5) |
| RAM | 1 GB DDR3 |
| Internal storage | 8 GB NAND Flash |
| Expansion | Micro SD/SDHC (TF) card slot, up to 32 GB |
| Display | 7" G+P capacitive 5-point touch screen, 1024 x 600 pixels |
| Front camera | 0.3 MP |
| Rear camera | 2 MP |
| Battery | Li-Polymer rechargeable 1750 mAh, 3.7 V |
| Charging | DC 5V/2A via included charger |
| Connectivity | Wi-Fi 802.11 b/g/n |
| Ports | Micro USB (data only), Mini HDMI, 3.5 mm earphone jack |
| Audio | Built-in speaker 1x1 W |
| Video formats | AVI, MKV, MP4, FLV, MPG, 3GP, WMV, RMVB, TS, RM, MOV |
| Music formats | MP3, AMR, OGG, APE, FLAC, WAV, WMA, AC3, MID, M4A, M4R, RA |
| Picture formats | JPEG, BMP, PNG |
| Operating temperature | -10 °C to +55 °C |
| Material | Aluminium |
| Safety | Not water resistant; use only supplied charger |
| Maintenance | Clean with soft cloth; do not use alcohol, solvents, or benzene |
| General info | Supports OTG, G-sensor, email, browsing, apps via Play Store |
Frequently Asked Questions - TP7-1000DC i-onik
User questions about TP7-1000DC i-onik
0 question about this device. Answer the ones you know or ask your own.
Ask a new question about this device
Download the instructions for your Tablet in PDF format for free! Find your manual TP7-1000DC - i-onik and take your electronic device back in hand. On this page are published all the documents necessary for the use of your device. TP7-1000DC by i-onik.
USER MANUAL TP7-1000DC i-onik
natural_image
Digital tablet displaying a blue abstract background with a white lock icon and '5:15' text (no readable document content)Chips and More GmbH
*Kostenfrei aus allen deutschen Netzen / Free from all German telephone networks
25030-33
i.onik
mobile
Deutsch
All trademarks, registered trademarks and logos are the property of their respective owners. We do not guarantee any data with respect to their content, completeness or up-to-dateness
Vorsichtsmaßnahmen
natural_image
Black rectangular electronic device with a small label showing 'IP25' and an arrow pointing to it (no readable text or symbols on the device itself)Bemerkungen:
natural_image
Abstract gradient background with pink, orange, and white circular shapes (no text or symbols)natural_image
Abstract digital image with glowing shapes and a timestamp overlay (no readable text or symbols)
- Hauptbildschirm


natural_image
Abstract digital interface with pink gradient background and floating circular elements (no text or symbols)Widgets hinzufügen
natural_image
Abstract digital interface with colorful gradient background and floating icons (no readable text or symbols)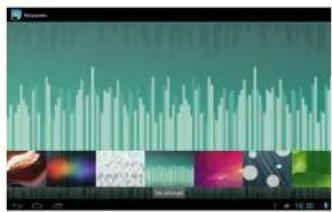
Internet

2. Software Installation
natural_image
Screenshot of a mobile app interface with abstract colorful background and UI elements (no readable text or symbols)natural_image
Close-up of colorful, round, round-shaped USB-style USB drives with red and green markings (no readable text or symbols)
Thank you for purchasing this product!
Please read the instructions carefully before using this product.
This manual is intended to introduce you to the basic characteristics of this product, so you can get the best out of your experience using the MID (Mobile Internet Device). The product's features are described and detailed information is given. Furthermore you receive tips and hints to fully understand the technical capability of the tablet.
The warranty, which is included, will explain you our additional services. Please read the terms of warranty carefully, to avoid unnecessary problems.
Attention:
All the information in this manual is correct at the time of publication. However, as we continue to update and improve the product, the software may be slightly different in appearance and functionality than described in this manual.
We reserve the right to improve the product, specification and design without prior notice!
Content
Important Safety Precautions 22
Technical Specification 22
Tablet (MID) Overview 23
-
Tablet Introduction....23
-
TF Card .... 23
- Charging .... 24
Finding your Way 24
-
Turning on the MID 24
-
Switching off the MID 25
-
Lock-screen and Power-saving Mode....26
-
Main Interface....26
-
Custom Screen....27
-
Custom Screen....27
-
Changing your Wallpaper....28
-
Connection of USB Cable 29
System Settings 29
Internet....30
-
Network Settings 30
-
Internet 30
Software Management 31
-
Explorer 31
-
Software Installation 32
Applications 32
-
Playing Music 32
-
Browsing Pictures ....33
-
E-Mail 34
-
Camera and Video 34
-
Apk Installer 34
We do not assume any liability for lost or destroyed data or for any other devices. Keep away from children. Danger of choking on or swallowing small parts. All data without guaranty.
Important Safety Precautions
- Do not disassemble the product; do not use alcohol, solvent or benzene to clean the surface of the product. Please contact us if you experience any problems.
• This product should be charged for more than 12 hours when charging it the first three times. - Do not store the product in high temperature, humidity or dust; do not put the product in a vehicle with closed windows especially not during summer.
- Avoid dropping or strong impact to the product, do not shake it violently, otherwise it may cause damage to the touch screen or display.
- Please select the appropriate volume; the volume should not be too high when using headphones; if you feel signs of tinnitus, please turn down the volume or stop using the product.
- Please charge the product when:
a. The battery icon shows low power.
b. The system is automatically shut down. (The system will shut down automatically when the battery is low.)
c. There is no response when clicking buttons.
Note: Please only use the adapter delivered with the product to charge the MID. No other chargers can be used - risk of fire! - Please do not disconnect the machine when it is formatting or uploading/downloading, otherwise a program error may occur.
- When improperly being shut down, the machine will scan and repair the disk on reboot. This
process may take a few minutes. - The company is not responsible for memory loss caused by damaging or repairing the product or other reasons stated. Please follow the instructions of this manual when using the MID.
- Do not use the product in places where the use of electronic devices is prohibited; e.g. an aircraft
- Please do not use the product when driving or walking. It may cause an accident.
- USB is for data transmission only, do not use it for charging the product.
• This machine is not water resistant.
Technical specifications
| Main Body | Material Aluminium | |
| Dimensions ca. 189 x 114 x 9.5 mm | ||
| Weight ca. 276 g | ||
| Configuration | Operating System Android 4.1.1 | |
| CPU Info TM X 15, Cortex A5 Dual Core, 1.0 GHz | ||
| Flash Memory 8 GB NAND Flash | ||
| RAM 1 GB DDR3 | ||
| Expansion slot Micro SD/SDHC (TF) card slot, up to 32 GB | ||
| Display | Screen 7" G+P capacitive 5-point touch-screen, display ratio: 16:9 | |
| Resolution 1024 x 600 Pixels | ||
| Connection | Network access Wi-Fi 802.11 b/g/n | |
| Sound | Speaker | 1x1 W |
| Ports | USB Interface | Micro USB |
| HDMI interface | Mini HDMI interface | |
| Earphone | 3.5 mm | |
| Camera | Front: 0.3 MP, Back: 2 MP | |
| Battery | Battery | Li-Polymer rechargebale battery 1750 mAh 3.7 V |
| System operation conditions | Voltage | DC 5 V/2 A |
| Working temperature | -10 °C - +55 °C | |
| Entertainment | Music formats AMR, OGG, APE, MP3, FLAC, WAV, WMA, AC3, MID, M4A, M4R, RA | |
| Video formats AVT, MKV, MP4, FLV, MPG, 3GP MPEG, WMV, RMVB, TS, RM, MOV | ||
| Picture formats | JPEG, BMP, PNG | |
| Maps | Google Maps, navigation map | |
| E-Mail, Gmail (optional) | ||
Tablet (MID) Overview
1. Tablet Introduction
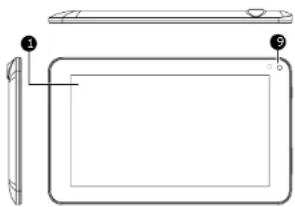
This chapter describes the appearance of the MID, including its buttons and ports; it will guide you to understand the features and accessories.
natural_image
Technical line drawing of a tablet device showing front, top, and side views (no text or symbols)


(1) Touch screen
(5) DC port
(9) Camera
(2) Power switch
(6) TF card slot
(10) Speaker
(3) Earphone plug
(7) HDMI port
(4) USB port
(8) Reset
Note:
1) Clicking and dragging are performed using the LCD touch screen. Please do not use pens, pencils or other sharp objects to click on the screen to avoid scratching.
2) Please keep the speakers clean to avoid them being blocked by dirt and affecting the sound quality.
3) The antenna and the type label are located at the back of the MID. Please do not cover the back with metal objects to avoid poor signal strength.
2. TF Card
Follow the instructions of the icon displayed on the MID when inserting a TF card. Please pay attention to the direction in which the TF card has to be inserted. (Press the card with your thumb and then release it to remove the card. The card will be ejected automatically.)

natural_image
Black rectangular electronic device with a small card showing 'micro' and 'USB' on its side (no visible text or symbols on the device itself)Note:
1) Keep the card slot free of dust or other objects. (To prevent damage to the card due to dust or moisture, please put the card back into its box or package when not in use).
2) Be sure that the MID is switched off when removing a TF card.
3) Avoid accidental removal of the TF card when the MID is switched on.
3. Charging
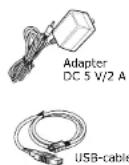
This product uses a standard 5V/2A power supply. Please use the supplied power charger. Other chargers may cause failure and risk of fire. Do not use the charger in a humid environment. If your hands and feet are wet, please do not touch the charger. When using the charger or charging the product, please maintain good ventilation. Do not cover the machine with paper or other objects. This could result in a reduced cooling effect.
Finding your way
The MID can achieve a variety of operating modes:
(1) Clicking, (2) Holding, (3) Sliding, (4) Dragging, (5) Rotating.
Key action definition: (1) Short press: press less than 1.2 seconds. (2) Long press: press and hold for more than 3 seconds. All operations in this manual are performed by a short press unless stated otherwise.
360 degree rotation: Rotate the MID to switch between horizontal and vertical view.
1. Turning on the MID
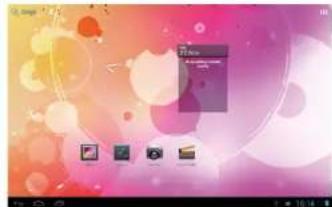
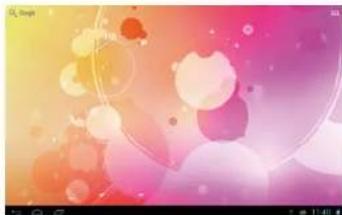
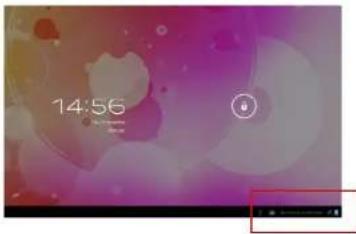
1.1 Press the power switch at the side of the MID (long press) and the machine will be booted. The booting screen and animations will be shown on the LCD screen for a few seconds, before you will enter the lock screen as shown in the screenshots below.
natural_image
Abstract gradient background with pink, orange, and white circular shapes (no text or symbols)1.2 Press and hold the unlock button and a circle will appear around the lock. Drag to the right to unlock. The hold and drag function prevents the accidental booting of the MID.

natural_image
Two identical video frames showing a person with a clock icon, no visible text or symbols2. Switching off the MID
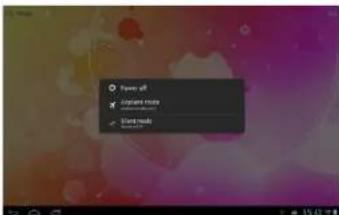
Press the power switch key (long press) and the system will display the shutdown screen.
Three options will be displayed: "Power off", "Airplane mode" and "Silent mode". Select "Power off" to enter the next screen.

Receiving incoming signals will be disabled when selecting "Airplane mode".
Select "Silent mode" and the MID is muted.
When the battery level is down to 15 %, the system will prompt to connect the charger. When the battery is running low, the system will automatically shut down.
3. Lock-Screen and Power-Saving Mode
If the screen is inactive for a certain time, or when pressing the power switch, the MID will enter the screen-off/lock screen status to save power. Programs are still running, but the screen is blank. Pressing the power switch again will open the unlock screen. Hold and drag the unlock button to the right and the MID will resume working status.
natural_image
Abstract digital interface with pink gradient background and white circular elements, no readable text or symbols
- Main Interface

| Voice search Icon | When connected to a network, click to enter the voice search menu. Speak a keyword directly into the MIC. |
| APPS Icon Click to enter the applications menu. | |
| Shortcut Icon Shortcut icon add/delete (will be covered later) | |
| Widgets Widgets add/delete (will be covered later) | |
| Back Key Press in pop-up menu to cancel an operation.In other menus, press to return to parent menu. | |
| Home Key Press in any menu to return to main interface. | |
| Apps having been opened | Click to display all APPS that have been opened. Click each of the applications to enter the relevant menu. |
| Notice/Fast Setting Column | Click to display more information: USB, Wi-Fi, Date etc. Click on any item to enter its settings menu. |
| Text search Icon When connected to a network, click to enter the Text search menu. Type in a key word and search. | |
The main interface features 5 different menu pages. Switch between pages by sliding the screen left and right. You can add/delete icons in each of the pages of the main menu.
5. Custom Screen
Add Shortcut
Click the button in the main interface to open the Application Program menu. Pressing and holding the icon will open the add shortcut interface. Move the icon to the place where you want to place the shortcut and it will be added to the main interface.

natural_image
Abstract digital wallpaper with pink, orange, and white geometric shapes (no text or symbols)Add Widgets
Click the button in the main interface to open the Application Program menu. Press the "WIDGETS" option. This will open the widget interface. Pressing and holding the icon will open the add widget interface. Move the icon to the place where you want to place the widget and it will add to the main interface.


natural_image
Abstract digital interface with colorful gradient background and a small embedded screen (no readable text or symbols)Delete Shortcut/Widgets
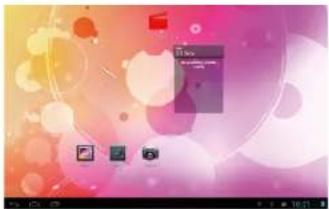
Press and hold a shortcut icon or widget icon in the main interface until on the top of the screen appears the icon. Then drag the shortcut/widget to the icon. The icon will turn red. The shortcut or widget will be deleted after releasing the button.

natural_image
Computer desktop wallpaper with abstract background and floating icons (no readable text or symbols)
natural_image
Abstract digital interface with colorful gradient background and floating icons (no readable text or symbols)Click and drag any shortcut or widget icon to customize your main interface.
natural_image
Abstract digital interface with pink gradient background and circular graphics, no visible text or symbols6. Changing your Wallpaper
In order to personalize the main interface users can set their favorite pictures or photos as wallpaper of the main interface.
6.1 Click the touch screen in the main interface to open the "Choose wallpaper" dialog box.
6.2 Click "Wallpaper" to enter the selection menu of pictures.

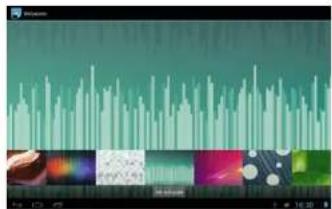
6.3 Select a picture. Click "Wallpaper" for more options.
6.4 Slide the screen, browse and select the picture. Click return to the settings interface. The wallpaper is now set.
7. Connection of USB Cable
When connecting the MID to a computer with a USB cable, the icon will be displayed in the Notice/Fast settings column of the main interface
Click ☐, and the following interface is displayed.

Click 📄, it will enable the synchronized operation between the MID and the computer. Files on the TF card and the memory of the MID will be displayed on the computer; you can copy and transfer data.
System Settings
The settings interface allows a variety of custom settings and you can overview relevant information of all the installed software. Click ■ in the Application Program menu to enter the settings menu.
"APPS"
In the apps settings interface, users can see all installed applications. If you open one application, the relevant information is displayed. If you do not wish to use an application any longer, select "Delete" to remove the application.
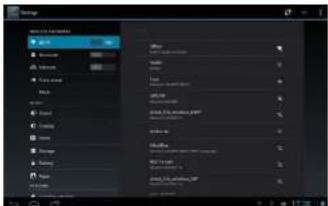

Internet
1. Network Settings
The MID features a built-in WI-FI module. Click ■, the settings menu will be displayed on the MID.

1.1 Wi-Fi
1.1.1 Slide the "Wi-Fi" switch button to ON to enable Wi-Fi.
1.1.2 Click "Wi-Fi" to enter the Wi-Fi settings menu.
1.1.3 The system will automatically search for available networks and display the name of the network.


Click on a wireless network and the MID will open the message screen. Click space to open the keyboard, enter the password and click Connect.
If the connection is successful, the network icon ■ will be displayed in the Notice/Fast settings column of the main interface.
Please note:
The MID will save connected routers automatically. When searching for a network, the MID will automatically connect to the saved router.
When the network icon is displayed in the main interface, the MID has connected to the Wi-Fi network successfully.
2. Internet
2.1 When successfully connected to a network, click In the main interface to enter the Google browser.

2.2 Click the input box. The keyboard will pop-up. Type in a new search and open the website.
2.3 Click the icon (red border) and a dropdown menu with more operational functions is displayed.

Software Management
The product supports third-party applications on an Android platform. Most applications can be obtained and downloaded from the Internet.
1. Explorer
Click in the Application Program Interface to enter the explorer. You can browse, copy, delete, move, edit and rename programs saved on the MID or a TF card.


2. Software Installation
2.1 Click the software to be installed in the explorer. The MID will open the installation menu.

2.2 Click „Install“. The MID will show the progress. After installation, it will display „Application installed successfully”.
2.3 Click "Finish" to exit. The application shortcut will be added to the "Application function key menu".
2.4 Click the icon to open the software.
Special note:
You can also download chats, like QQ, MSN, etc.
Applications
1. Playing Music
1.1 Click in the Application Program Interface to enter the playlist.
1.2 Click a music file to open and play it.

1.3 Background play
When playing music, click ☐ to open the main interface. The MID will play the music in the background.
1.3.1 Click in the main interface to display the music player menu.

natural_image
Screenshot of a mobile app interface displaying a colorful abstract background with circular shapes and text overlays (no readable document content)1.3.2 Select the music player to return to the player menu.
2. Browsing Pictures
2.1Click in the Application Program Interface to browse pictures. Here you find all pictures and videos saved on the MID or a TF card.
2.2 Select to open a picture.

2.3 Select to play a video.

3. E-mail
Click In the Application Program Interface to open the E-mail settings. Enter the email address and password to send and receive email messages.

4. Camera and Video
Click ■ in the Application Program Interface to open the camera manual.

5. Apk Installer
Click "Apk Installer", select "Install". Then click "Internal Memory" to install new software.

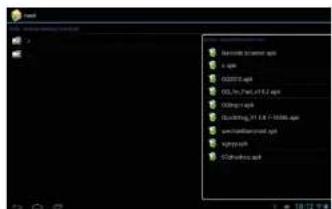
Click "Manage" to launch, export, uninstall or cancel.
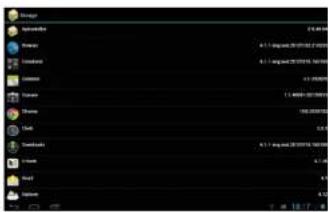

i. onik mobile
TP7-1500DC-metal Tablet PC
* Kostenfrei aus allen deutschen Netzen / Free from all German telephone networks
24007
i.onik mobile
Deutsch

1-4 Touchscreen
natural_image
Colorful 3D geometric design with green and purple blocks, no visible text or symbolsnatural_image
Desktop screenshot showing colorful 3D geometric shapes with app icons (no readable text or symbols)
natural_image
Game scene with purple and pink gradient background, featuring floating characters and curved lines (no readable text or symbols)4-1-1 WI-FI Verbindung
natural_image
Close-up of a blue USB cable connector with a black connector attached, against a plain wall (no text or symbols visible)Bemerkungen:
C: Zeit einstellen:
- Before using the tablet PC, please read all the information provided first, to ensure this product is used correctly. Please make sure that you have read this manual carefully before using this product.
- This manual is copyrighted by our Company, any full or partial commercial duplication or interpretation of the manual is forbidden.
- All information covered in this manual is based on the latest information, and products are subject to change for further development, without notice. We are not liable for any mistakes or discrepancies within this manual. For additional product information, visit the company's website.
- When using this product, please backup your data, as our company is only responsible for the actual hardware, and will not be held responsible for any loss or damage of personal data and information.
Precautions
This manual includes important information on safety precautions and proper use of this product.
To prevent any accident, please make sure that you have read this manual carefully before using this product.
- Do not keep this product in a hot, humid or dusty location. In particular, do not use this product in a car with shut windows during the summer, and keep out of direct sunlight.
- Avoid dropping and heavy shocks to this product. Also, do not shake the device violently, otherwise this may damage it, causing it to not work correctly.
- Please choose a suitable volume. Avoid an excessively high volume when using a headset. If the noise affects your ears, please decrease the volume.
- Do not suddenly cease connection when this product is formatting, uploading or downloading material, as this may cause errors.
- The producer will not be held responsible for any lost data due to product damage, repairing the product, or for any other reasons.
- Do not disassemble this product by yourself, and do not clean the surface of this product with alcohol, thinner or benzene.
- Do not use this product in a place where using electronic devices is prohibited, such as on an aeroplane.
- Do not use this product while driving a car or walking in the street, as this could cause a traffic accident.
- The producer reserves the right to improve and develop this product. No further notice will be provided on any variation of the specification and design of this product!
(This product is not waterproof)
Content
Important Information 24
Precautions....24
Main Functions....26
Appearance and Buttons....26
-
Quick Start 27
1-1 Power ON/OFF/Lock/Unlock....27
1-2 Battery and Charge....28
1-3 Computer Connection & File Transfer 28
1-4 Using the Touch Screen 29
1-5 G-Sensor 29
1-6 Solving Problems of the Machine Running Slowly....29
1-7 Entering text....29 -
Main Screen Function/Icons....30
2-1 Main Screen Function 30
2-2 Main Interface 31
2-3 Add/Move/Delete Desktop Icon....31
2-4 Shortcut 32
- Application Installation 32
3-1 Methods of how to Acquire 33
3-2 Program Install....33
3-3 Program Uninstall ....33
- Internet....33
4-1 Network Setting ......33
4-2 Ethernet Setting 34
4-3 Webpage Browser 36
-
File Manager....38
-
OTG Function....38
-
External USB Keyboard and Mouse 38
-
Usage of Micro SD/SDHC (TF)-Card 38
-
Basic Setting ......39
9-1 Wireless & Network Setting 39
9-2 Display Settings....40
9-3 Security....40
9-4 Setting Date and Time....41
-
Troubleshooting 41
-
Specifications 43
-
i.onik Products ....46
Pictures may differ from original product.
Main Functions:
- 7 inch, G + G capacitive 5 Point touch-screen, 1024 x 600 pixel resolution.
• Supports built-in 0.3 mega pixels front, 5 mega pixels back camera. - Supports OTG function and USB stick, portable OTG hard disc to transfer data. (Whilst connecting to the portable hard disc, DC power must be connected to the product's power supply, otherwise the tablet PC will crash due to insufficient power supply).
- Multiple network access to the Internet. As Wi-Fi is supported, you can enjoy the Internet anywhere, at anytime.
- With the Gravity sensor (G-sensor), in addition to being able to switch the screen horizontally and vertically, you can also install various software to improve this function, such as flicking through text, changing songs, fun games, etc.
- With the Play Store intelligent operating system, you can create your own personalized space with APKs.
- Supporting APK installation and application, existing software can be downloaded and installed from the Android Market or Internet to your MID or PC.
- With this product, you can easily conduct business and also be entertained through existing applications, such as E-Mail, Word, website browsing, the news, instant messaging, financial activity, blogs, online games, online videos, the stock market, weather reports, mobile TV, maps, general "fun" software etc.
- Supports MP3, M4A, WMA, APE, FLAC, AAC, MID, WAV, AMR, OGG etc.
- Supports full HD video decoding (2160P, 1080P, 720P, 480P); video formats: MKV, AVI, RM/RMVB, WMV, 3GP, MOV, MP4, ASF, MPG, DAT, VOB, FLV etc.
- Supports JPG, JPEG, BMP, PNG, etc, and formats image browsing.
- Supports Micro SD/SDHC (TF) Card, with a capacity of up to 64 GB.
- Personalized settings - freely adjustable brightness, key tone on or off, changing wallpaper and so on.
- Multilingual
- More functions could be added by updating Firmware.
Appearance and Buttons
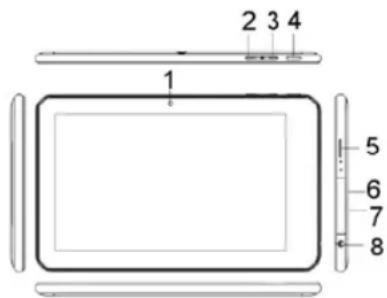
Definition:
- Front 0.3 mega pixels camera
- "V-": Volume down
3."V+": Volume up
4." "Power Button, long press this button to turn On/Off the player, short press this button to lock screen in order to avoid operation error - Micro SD/SDHC (TF) card slot
- HDMI slot
- USB Port: Micro USB 5 Pin data cable supports external USB sticks, MP3, MP4, wired mouse, 3G wireless Internet card, etc.
- Earphone Jack
1. Quick Start
1-1 Power On/Off and unlock
When the power is off, hold down for three seconds to turn the power on. It will take a little time to turn on, please be patient. It will take about 100 seconds to enter the system, drag the unlock icon to the camera icon on the left to take a photo, and to the unlocking icon on the right to unlock, see below:

Energy-saving and locking mode: When the machine is not being used, the system will automatically enter into the energy-saving mode. Press ☐ to awaken the screen, the system will then be ready to unlock in one second, touch ☐ to unlock.
Notes: In energy saving mode, the system will still be turned on, only the LCD screen will be off, showing a black screen. Music or video will continue to play.
Power Off: Whilst using the product, press for 5 seconds, the screen will give a "power off" option. Select this "Power off" option, confirm your choice and the system will then automatically turn off. Select "Cancel" to cancel the machine powering off.
Notes: When at low power, a warning will be given; at this point, connect the DC adapter and begin to charge, it will then automatically turn off. If the product cannot boot, please check the battery.
1-2 Battery and Charge
The battery should be charged for 8 to 12 hours for the first time, in order to make sure the battery has enough power. Please use the provided charger. Now that the device is being charged, the battery icon will show that the device is charging. Please do not disconnect the charger until the device is fully charged. The battery icon will show when it is fully charged. Please note the following precautions for protecting the lithium battery:
a. Don't charge in or under a high temperature (for example, under direct sunlight).
b. The lithium battery does not need to be completely empty before the user can charge it.
c. While charging, it is normal that both the charger and the device will heat up.
1-3 Computer Connection & File Transfer
Upon connection of the product to the computer with a USB cable, the status bar will show that the USB has connected. The product's default is set for a USB connection. If you are connecting an external mobile hard disc, "USB connected" needs to be showing on the status bar. Click the option to enable the USB status to be altered, with reference to the icon on the bottom right, "Open USB storage equipment", switch this into the USB storage status. Now, the user can access the external hard disc. On USB storage, click the icon again to disconnect USB and recover to charge mode. The USB storage mode system will limit the user's access to the local disc application. By disconnecting USB storage mode, the system will go back to the normal status, as seen in the following image:

1-4 Using the Touch Screen
There are various ways to operate this. You can view the main screen, menu and application.
1-4-1 Click
When you want to use the screen keyboard or select the application in the main menu, it can be done by using your fingers or stylus to click.
1-4-2 Press
When you want to open a file, shortcut, or application in the main menu, just press "OK".
1-4-3 Movement
Movement with your finger or stylus to make the screen drag horizontally or vertically.
1-4-4 Drag
Before dragging, please use your finger or stylus to press, to get to the required location.
1-5 G-Sensor
The product has the function of a G-sensor. After activating the function in the settings (default setting is active), by rotating the machine 90 degrees, the screen will switch from horizontal to vertical automatically.
As well as the screen switching from horizontal to vertical, it can support more functions too, such as flicking through text, changing music and fun games.
1-6 Solving problems of the machine running slowly
After using the product for some time, even though applications have been shut down, they are still running in the background, thus making the system run slowly. Therefore, you need to end these programs in Advanced Task Manager to allow the product to run smoothly.
1-7 Entering Text
When you start an application or select the text edit box to enter text or numbers, the screen keyboard will appear. The keyboard has the following options to select:
- Android keyboard
- Google Pinyin IME (Input Method Editor)
1-7-1 Select IME
With the original setting of the product, the Android keyboard will appear when you input the words.
- On the main screen press the menu key, and then click settings
-
Click language & input
-
In the language & input area, the product will list the installed IME
- Select it after selecting the IME you need
Android Keyboard Panel

2 Main Screen Function/Icon
2-1 Main Screen Function

natural_image
Computer desktop wallpaper showing abstract geometric shapes in green, purple, and orange tones (no text or symbols visible)| Icon Definition Icon Definition | ||
 | Google Search Settings | |
| [WW4] | Back Function Modu | Menu |
| [CSKH] | Back to main screen from any interface | Camera |
| [XZ6K] | Current time Battery | |
 | WI-FI signal Menu | |
| New device found | ||
2-2 Main Interface

natural_image
Abstract 3D geometric design with green, purple, and orange blocks (no text or symbols)Hold down "Power" to turn on, the screen is then locked after the power is on, press the unlock key to unlock and enter the main screen as below. On this screen, you can view the status bar, change wallpaper, add widgets, add program shortcuts, start programs, etc.
2-2-1 Status Bar
With a stylus, slide down to read prompts in the status bar to open the notification bar and you can see today's date.
2-2-2 Menu
Press menu button or press to open open screen menu:
- Wallpaper: in this menu, you can choose your favourite photos for the main screen background.
- Manage Applications: You can check all the programs that are within this device, and remove all installed programs.
- System Set: Click to enter the system setting menu screen directly.
2-3 Add, move or delete Desk Icon
On the main screen, click 🎯 to enter the function menu list, displaying applications of all web pages. Press and hold to drag the icon to copy it to current desktop, for example, creating shortcuts on the desktop.



natural_image
Game interface screenshot showing purple and pink gradient background with floating characters and UI elements (no readable text or symbols)You can delete the icon which is added to main screen, by highlighting the icon which you are going to delete. Now there will be an "X" on the top, just drag this icon to "X" to delete.
2-4 Shortcut
click to show all function icons as below:

This window shows all the function icons, click any icon to enter corresponding screen, see the following:
Sending/Receiving E-Mails.
Browser: Click to enter the Internet to browse web pages.
Calendar: Check the calendar and settings.
Calculator Icon: Click this icon to use the calculator.
Alarm Clock: Clock icon, click this icon to set an alarm.
Play music.
Video player icon or photo browser: Click this icon to play videos and view photos.
Webpage research.
Camera.
Enter recording screen.
File Manager: Check all file types and content.
Advanced task manager: Manage applications and remove. When the machine runs slowly, this function will shut down unused applications in order to prevent the machine running slowly.
Setting icon: Click this icon to enter system setting screen.
3. Application Installation
This device can install APKs (Android Packages) with ease, you can get third-party applications which are suitable for this Android system from the "Play Store" and the Internet. APKs can be installed on this machine.
First select "Setting/Application Program", then select "unknown sources".
3-1 Methods of how to Acquire
Method 1: Download from the website and copy the applications onto the Micro SD/SDHC (TF)-card and insert into the product.
Method 2: Through the product's "Play Store", by downloading the application onto the Micro SD/SDHC (TF)-card.
3-2 Program Install
Click the main screen's shortcut key, then select "File Manager". Now select the SD card sub-menu and click on the APK.
Note: On the website, all files have the .apk suffix in the third-party program.
3-3 Program Uninstall
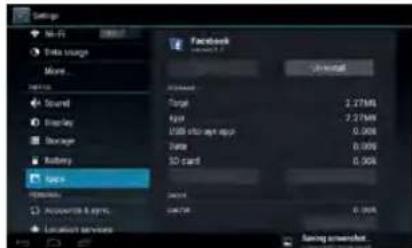
Click „Settings" then select Apps and then click „uninstall".
Uninstall: Uninstall this application, click ■ to go back to previous screen.
4. Internet
4-1 Network Setting
Click the shortcut on the main screen, choose "Setting/Wireless and Network" to enter the network setting screen:

4-1-1 WI-FI Connection
Click the shortcut on the main screen, select "Internet Connection Manager", click "WI-FI setting", then enter the Wi-Fi setting screen, now select "WI-FI" and activate it.

After WI-FI has opened, it will automatically search for wireless network, this shows on the menu, now click wireless network, enter the password screen, and now input the password and connect. Seconds later, the system will connect to wireless network automatically.
When WI-FI is open, this will make the machine use 25 % more power. When not using WI-FI, please turn it off to extend the battery life.
4-2 Ethernet Setting
Using the Ethernet card (USB-RJ45) when connecting to the Internet. There are two requirements needed to use USB-RJ45 to connect to the Internet, and these are detailed below:
- ADSL account and password are set up correctly on router.
- USB-RJ45 network card is the model which is supported by this device.
Models supported are listed below:
AX88772/AX88772a/AX88772B/AX88178/AX88760/QF9700/
SR9600/MCS7830/MCS7832/MCS7730
Steps for Internet Connection:
First connect the network cable to the USB Ethernet card, then insert the USB OTG cable which is meant for this device into USB Ethernet card and the other end into USB port of the device.
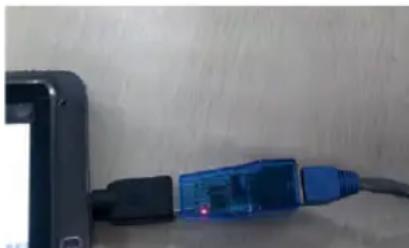
natural_image
Close-up of a blue USB cable connector attached to a black rectangular device (no visible text or symbols)Notes:
- First close the WI-FI network, only one network can be used, otherwise there will be errors.
- This device will automatically detect the USB Ethernet card and switch on the "Ethernet". There will now be a network icon in the status column.
-
Wait a moment, as this device will try to connect to Internet automatically. If the router and the DHCP service are already open, and the netgate, DNS and relevant settings have been applied, then the device will connect to the Internet automatically. (The Ethernet card function must be selected already).
-
If the device fails to connect, usually this is because the settings in the router are not correct. You can set the parameters in the device as follows:
a. Enter setting/Ethernet setting, select and open Ethernet. Enter configuration information, choose "static IP setting", then enter the static IP setting screen (the default setting is automatic acquiring IP. Usually, automatic acquiring IP is fine for everything, but some companies' routers will use specified IPs, not allowing automatic acquiring IP, it depends on router settings, therefore static IP needs to be used at this time).
b. There is no need to fill in the Ethernet card device and physical address. The machine will automatically detect this, after successfully connecting the Ethernet. In the IP address column, enter the IP address, the default usually being 192.168.1.1xx.
c. In "subnet mask", enter network segment mask, the default is 255.255.255.0.
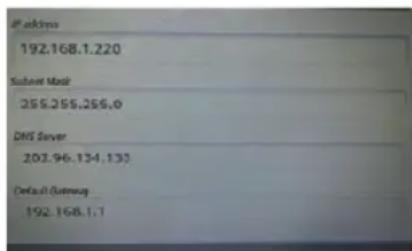
d. In the "DNS server", enter your local network service provider's DNS server IP. A different location has a different DNS server IP - if you are unsure, you can search by Google.
e. Enter the gateway in the „default gateway". The general default is 192.168.1.1 (you can check the router's manual for confirmation). It must be set to the same as the router; otherwise connection will be shown, however cannot connect to the Ethernet.
f. Finally, click the lower right corner of the "Save" button, then select Save. The system will automatically connect after saving, then you can use the Ethernet.
- Close the Ethernet, unplug the "Ethernet" cable, now you can turn off the Ethernet connection.
- Unplug the OTG cable.
Attention:
- If you are unsure about router settings and the DHCP service, please consult the router's manufacturer, point-of-service, network service providers (or ask network management, network experts, etc.), or research independently. Our company does not supply this kind of service and support.
- If you are not using Ethernet, please unplug the OTG cable and Ethernet card, otherwise the machine will continue to use power.
4-3 Webpage Browser
Set up the network as in chapter 4-1, you can then use the browser to browse the web. Click the shortcut on the main screen. Enter the required URL in the address bar. Open the web page; then slide your finger up and down the screen to view other parts of the page.
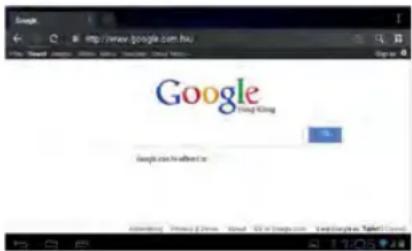
4-3-1 Bookmark Manager
- SettingBookmarks
On the browsing screen, if you want to add the current address to bookmark, click the "star" icon select "Bookmark", then click "Add bookmark". Click "Yes" to confirm.
- Open Bookmarks
On the browser screen, click the icon "flag with star" to select "Bookmark", then select the bookmark which you want and open the web page.
- Edit Bookmarks
hold down the bookmark which you like to edit, then select "Edit bookmark" to edit it, and click "Yes" to confirm.
4-3-2 Open new Window
- Open new Browser Window
On the browser screen, click "Menu", then select "New tab" to open a new browser window.
- Switching the Browser Window
The tabs are shown in the top task bar. Here you can switch the tabs.
4-3-3 Change your Startpage
On the browser screen, click "Menu", and the settings menu will appear. Then click "More", and then "Settings", then "Settings homepage" on the settings screen, then enter the required URL, finally click "Yes" to save it.
4-3-4 Browser Settings
On the browser screen, click "Menu", then "Settings" to configure the browser.
4-3-5 E-Mail
You can receive and send E-Mails with this machine. You can add a POP3 OR an IMAP E-Mail account from a standard web E-Mail server (Such as Yahoo, Gmail, or Hotmail).
Notes: Before setting up E-Mail, please ensure your Internet is connected.

4-3-6 E-Mail Setting Guide
Click the shortcut on the main screen, then an E-Mail settings guide will appear to help set up.
Click the "Next" button, enter your E-Mail address and password of your E-Mail account. Then, click the "Next" button. Select your E-Mail type, either POP3 or IMAP. Click the "Next" button to check whether the sending and receiving servers for E-Mail can be used, then enter your account name and E-Mail name, then click "Finish". When E-Mail arrives, it will now enter your inbox automatically.
4-3-7 Receiving and Sending E-Mail
Click the shortcut on the main screen, select the "E-Mail" icon to enter your inbox. The system will refresh automatically, click to read new E-Mails.
Click the icon "envelope +" to write a new E-Mail. Enter the receiver's E-Mail address, subject matter and write the body of your E-Mail. Then if you want to add an attachment, click the icon "paper clip" to bring up the menu, click "Add attachment" to select the attachment. Then click "Send" to send the E-Mail.
Notes: If you have more than one account, and aim to send E-Mail using one specific account, click and choose the desired account name, write the E-Mail.
4-3-8 Delete E-Mail Account
You can delete the POP3 or IMAP E-Mail account from your E-Mail program.
Choose the account you want to delete, then click "Delete account". Click "Yes" to delete.
4-3-9 Instant Messaging
You can send instant messages with friends through "Google Talk" or "Mobile QQ" or other APKs.
5. File Manager
On the main screen, click the file manager icon ☐, then select the storage location to show the files. Here you can copy, move, paste or rename files. Hold down a single folder or file, the Edit box will then pop up with choices to delete, rename, copy, paste or send E-Mail.

6. OTG Function
This product has an OTG function. It can support a USB stick and some other devices like self-powered hard disc, etc. This product will automatically detect the USB device after connecting to it via an OTG cable. You have access to the USB device files, as you do the files on your machine.
With a low battery or the DC charger not plugged in and charging, please do not use the OTG function, or the machine may turn off automatically because of low power.
7. External USB Keyboard and Mouse
After the mouse is connected, the pointer will appear on the screen. The left button is to select, the right button is to return and the middle slider to slide up and down.
Note: Some keys cannot work on this machine. The keyboard will be revised as per the definition of the Android system. We recommend a standard USB keyboard to be used.
8. Usage of Micro SD/SDHC (TF) Card (following TF)
This product comes with TF-card slot. It supports reading files on the TF-card. When using, insert the TF-card into the machine. To take out the TF-card, push the TF-card inside a little then release. The TF-card will then pop out automatically, and you can now remove it. This product supports a TF card from 1 GB to 16 GB.
Tips:
A. Please insert the TF-card into the card slot correctly.
B. When the TF-card is working (such as reading, copying, etc.), please do not pull out the card as this will lead to data errors.
C. Avoid using the memory card in a high temperature or humid environment.
D. Keep the memory card away from liquid or corrosive material.
Note: if you cannot take out the memory card, or it is stuck in the machine, you can use tweezers or other tools to pull it out slowly and carefully.
9. Basic Setting
Click the icon to enter the settings menu: Wireless & Networks, Sound, Display, Storage, Battery, Applications, Accounts & Sync, Location Services, Security, Language & Input, Backup & Reset, Date & Time, Accessibility, and Developer. Press and drag the screen up or down to turn pages.
9-1 Wireless & Network Setting
Click WLAN in Wireless & Network in the "Settings" menu to enter (shown here):

- WI-FI: Click "ON" to open WI-FI
- Mobile networks: Click "More", then "Mobile networks", and turn on the Modem power. If WI-FI is on, this will bring up a box saying, "Please turn off WI-FI first". Click "Yes", now WI-FI will shut down automatically.
- Mobile network settings: Click to set Data Enabled, Data Roaming, Access Point Names, Network Operators, etc.
- Ethernet Settings: Please refer to the chapter 4-3 relating to Ethernet Settings.

9-2 Display Settings
Click Display in the Settings menu to enter the settings screen (as below):
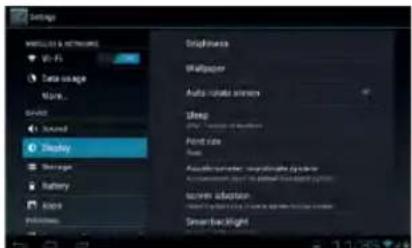
A. Brightness: Click here to adjust the brightness of the screen.
B. Wallpaper: Click here to set Live Wallpaper, Wallpapers.
C. Screen Auto-rotation: Screen Auto-rotation: Click here to activate or deactivate screen auto-rotation function.
D. Sleep: Click here to adjust the time for automatic screen lock with choices of 15 seconds, 30 seconds, 1 minute, 2 minutes, 5 minutes, 10 minutes, or 30 minutes.
E. Font size: Click here to adjust the font size.
F. Accelerometer coordinate system: Click here to set a special coordinate for some games.
G. Screen adaption: Click here to adjust the screen size for some games.
9-3 Security
You can set up device administration, screen lock and password visibility.

- Unknown sources: Allow installation of non-Market applications.
- Screen Unlock:
A. None: Disable screen unlock security
B. Pattern: Draw pattern to unlock screen
C. PIN: Enter a numeric PIN to unlock screen
D. Password: Enter a password to unlock screen
9-4 Setting Date and Time
Click "date & time" in the men to enter into setting interface, cancel auto selection, then you can change the date, time zone and time manually.
A: Set Date:

Click ■ to set up year, month, day, click to confirm.
B: Select Time Zone – select your time zone and confirm.
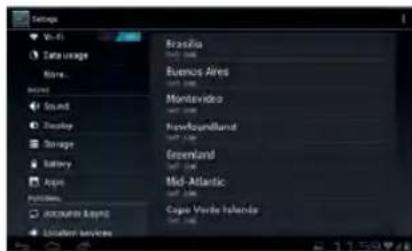
C: Set Time - Click ■ to set up hour, minute, for example, 10:56 then click to confirm.
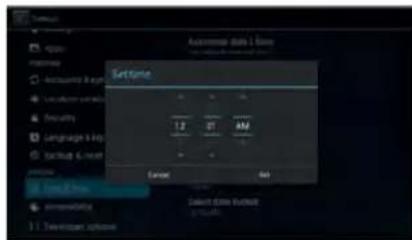
D: Set Date Format - Click the date format you prefer and confirm.
10. Trouble Shooting
1. The tablet turns on slowly the first time
- After a system update, or a factory restore, it takes about 2-3 minutes to install some pre-installed applications the first time, then this will speed up.
2. Unable to connect WI-FI or there is a weak signal
- Ensure the Network is working properly.
- Ensure the username and password are correct.
- Ensure the internal antenna is not blocked.
- Ensure the tablet is within the proper distance of the Network and there is no obstruction in between.
3. Fail to copy files
- Ensure the tablet is connected to the computer correctly.
- Ensure there is still disc space.
- Ensure the USB cable is functioning well.
4. No sound in the earphone
- Ensure that the volume is not set to 0.
- Check whether the headset is correctly connected and if the wire is broken.
5. General issues with the system
- When you install some third-party applications it may lead to various issues. You can restart the tablet or uninstall the applications.
6. Unable to set up E-Mail or use registration applications.
- Ensure your Network is working properly.
- Ensure the E-Mail account is correctly set up.
- Ensure your system time is the same as the local time.
- Run the "Advanced Task Manager" to stop some other applications running.
7. The memory capacity is different from the nominal figure
- Just like the hard disc on a computer, the capacity shown is usually less than the nominal capacity; this is due to different unit conversion used by computer and storage device manufacturers. On a computer, 1 GB = 1024 MB, but storage device manufacturers use 1 GB = 1000 MB as default. The actual capacity is not lower.
- The OS of this tablet pre-installs some applications, games and the OS itself takes up some capacity. This is also one reason why the capacity that can be used for storage is less than the nominal figure.
If the tablet can't work properly or does not respond for long time, please press the reset button with a needle/clip or something like that to reset.

- Specification
| Dimension ca. 190 | x 117.5 x 9 mm | |
| Display | 7 inch, G + G capacitive 5 point touch-screen;resolution:1024 x 600 pixel | |
| PC connection High | speed USB 2.0 | |
| Configuration | CPU RK3066, ARM Cortex A9 DualCore bis zu 1,5 GHz | |
| RAM | 1 GB DDR III | |
| Memory | 8 GB (internal) | |
| Micro SD/SDHC(TF) card | up to 64 GB (optional) | |
| OS Android 4.1 | ||
| Access Network WI-FI IEEE802.11b/g/n | ||
| Power | Internal Lithium battery 3600 mAh | |
| DC output DC 5V/2A | ||
| Audio | max.earphone output | (L) 7mW + (R9 7mW (32 ohm) |
| MP3 bit rate 32 | K bps - 320 K bps | |
| WMA bit rate 16 | K bps -320 K bps | |
| Frequency response | 20 Hz to 20 KHz +/- 3 dB | |
| SNR ≥ 85 dB | ||
| Distortion degree | < 0.6 % | |
| Music Formats | MP1, MP2, MP3, WMA, WAV, OGG, OGA, APE,FLAC, AAC, M4A, 3GPP, etc. | |
| Video Formats | MPEG-1, MPEG-2, MPEG-4, H.263, H.264, AVS,VC-1, RV, VP6/VP8, Sorenson Spark, MVC1920 x 1080P 60FPS, etc. | |
| Image Formats | JPG,JPEG, BMP, GIF, PNG, JFIF, etc. | |
| Environment Temperature | -5 to 40 °C | |
| Language | multi-languages supported | |
| OS Supported from | WindowsXP/Linux2.4/MAC OS 10.4 | |
All trademarks, registered trademarks and logos are the property of their respective owners. We do not guarantee any data with respect to their content, completeness or up-to-dateness
i.onik®
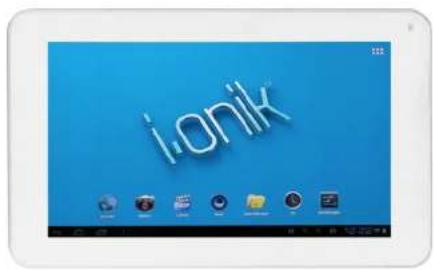
TP7-1000DC white
Tablet PC
Kurzanleitung
Quick Start Guide
Ionik GmbH
*Kostenfrei aus allen deutschen Netzen / Free from all German telephone networks
25041
i.onik
mobile
Deutsch
All trademarks, registered trademarks and logos are the property of their respective owners. We do not guarantee any data with respect to their content, completeness or up-to-dateness.
Vorsichtsmaßnahmen
natural_image
Black rectangular electronic device with a small label showing 'Microsoft' and a cursor arrow pointing to it (no readable text or symbols on the device itself)Bemerkungen:
Widgets hinzufügen

Internet
natural_image
Four-panel collage showing nature scenes: green flowers, blue water, grassland, and purple flowers (no text or symbols)natural_image
Black rectangular image with no visible text, symbols, or identifiable objects
natural_image
Two smartphones with charging cables connected, one displaying a green battery and the other displaying a colorful app interface (no visible text or symbols)natural_image
Product photo of an electronic device with a battery pack and smartphone, featuring a logo for Inkl. 1 EUROSTECKER (no readable text or symbols on main components)PB-3000PB-5000
natural_image
Product photo of a modern audio streaming setup with two speakers and a monitor displaying a woman's dance scene (no visible text or symbols)natural_image
Modern electronic device setup with a large tablet displaying a woman's photo, alongside two smaller speaker units (no visible text or symbols)MSC-330 MSC-21 Bluetooth

Thank you for purchasing this product!
Please read the instructions carefully before using this product.
This manual is intended to introduce you to the basic characteristics of this product, so you can get the best out of your experience using the tablet. The product's features are described and detailed information is given. Furthermore you receive tips and hints to fully understand the technical capability of the tablet.
The warranty, which is included, will explain you our additional services. Please read the terms of warranty carefully, to avoid unnecessary problems.
Attention:
All the information in this manual is correct at the time of publication. However, as we continue to update and improve the product, the software may be slightly different in appearance and functionality than described in this manual.
We reserve the right to improve the product, specification and design without prior notice!
Content
Important Safety Precautions 22
Technical Specification 22
Tablet Overview 23
-
Tablet Introduction....23
-
TF Card .... 23
- Charging .... 24
Finding your Way 24
-
Turning on the Tablet....24
-
Switching off the Tablet 24
-
Lock-screen and Power-saving Mode....25
-
Main Interface....25
-
Custom Screen....26
-
Changing your Wallpaper 27
-
Connection to a Computer via micro USB Cable 27
-
Connection to an External Storage (e.g. USB Stick, microSD Card) via OTG Cable .....28
System Settings 28
Internet....28
-
Network Settings 28
-
Internet 29
Software Management 30
-
File Manager 30
-
Software Installation 30
Applications 30
-
Playing Music 30
-
Browsing Pictures ....31
-
E-Mail 32
-
Camera and Video 32
Warranty Card 33
We do not assume any liability for lost or destroyed data or for any other devices.
Keep away from children. Danger of choking on or swallowing small parts. All data without guaranty.
Pictures may vary.
All trademarks, registered trademarks and logos are the property of their respective owners.
We do not guarantee any data with respect to their content, completeness or up-to-dateness.
Important Safety Precautions
- Do not disassemble the product; do not use alcohol, solvent or benzene to clean the surface of the product. Please contact us if you experience any problems.
• This product should be charged for more than 12 hours when charging it the first three times. - Do not store the product in high temperature, huTabletity or dust; do not put the product in a vehicle with closed windows especially not during summer.
- Avoid dropping or strong impact to the product, do not shake it violently, otherwise it may cause damage to the touch screen or display.
- Please select the appropriate volume; the volume should not be too high when using headphones; if you feel signs of tinnitus, please turn down the volume or stop using the product.
- Please charge the product when:
a. The battery icon shows low power.
b. The system is automatically shut down. (The system will shut down automatically when the battery is low.)
c. There is no response when clicking buttons.
Note: Please only use the adapter delivered with the product to charge the tablet. No other chargers can be used – risk of fire! - Please do not disconnect the machine when it is formatting or uploading/downloading, otherwise a program error may occur.
- When improperly being shut down, the machine will scan and repair the disk on reboot. This process may take a few minutes.
- The company is not responsible for memory loss caused by damaging or repairing the product or other reasons stated. Please follow the instructions of this manual when using the tablet.
- Do not use the product in places where the use of electronic devices is prohibited; e.g. an aircraft
- Please do not use the product when driving or walking. It may cause an accident.
• USB is for data transmission only, do not use it for charging the product.
• This machine is not water resistant.
Technical specifications
| Main Body | Material Metal | |
| Dimensions ca. 190 x 120 x 9,5 mm | ||
| Weight ca. 310 g | ||
| Configuration | Operating System Android | 4.2 |
| CPU Dual Core 1,2 GHz Infotmic X15 | ||
| Flash Memory 8 GB NAND Flash | ||
| RAM 1 GB DDR3 | ||
| Expansion slot Micro SD/SDHC (TF) card slot, up to 32 GB | ||
| Display | Screen 7,85" G+P capacitive 5-point touch screen | |
| Resolution 1024 x 600 Pixel | ||
| Connection | Network access Wi-Fi 802.1 | 1 b/g/n |
| Sound | Speaker | 8 Ohm/1 W |
| Ports | USB Interface | Micro USB |
| Earphone | 3.5 mm | |
| Camera | Front: 0,3 Megapixel, Back: 2 Megapixel | |
| Battery | Battery | Li-polymer rechargeable battery 3000 mAh |
| System operation conditions | Voltage | DC 5 V/2 A |
| Entertainment | Music formats MP3, AMR, APE, FLAC, AAC, WAV | |
| Video formats AVI, MKV, MP4, FLV, RMVB, MPG, WMV, RM | ||
| Picture formats | BMP, PNG, JPG, GIF | |
Tablet Overview
1. Tablet Introduction
This chapter describes the appearance of the Tablet, including its buttons and ports; it will guide you to understand the features and accessories.
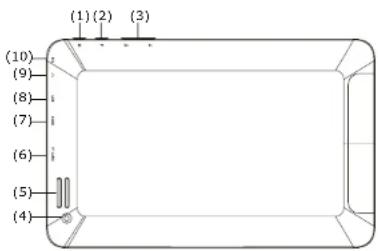
(1) Power On/Off
(2) Back key
(3) Volume +/-
(4) Back camera
(1) Back car (5) Goatken
(5) Speaker
(6) TF card slot
(7) HDMI port
(8) Micro USB port
(6) Micro USB port
(9) Earphone jack
(10) Mikrophone
Note:
1) Clicking and dragging are performed using the LCD touch screen. Please do not use pens, pencils or other sharp objects to click on the screen to avoid scratching.
2) Please keep the speakers clean to avoid them being blocked by dirt and affecting the sound quality.
3) The antenna and the type label are located at the back of the Tablet. Please do not cover the back with metal objects to avoid poor signal strength.
2. TF Card
Follow the instructions of the icon displayed on the Tablet when inserting a TF card. Please pay attention to the direction in which the TF card has to be inserted.
(Press the card with your thumb and then release it to remove the card. The card will be ejected automatically.)

natural_image
Black tablet device with a small icon on the left (no visible text or symbols)Note:
1) Keep the card slot free of dust or other objects. (To prevent damage to the card due to dust or moisture, please put the card back into its box or package when not in use).
2) Be sure that the tablet is switched off when removing a TF card.
3) Avoid accidental removal of the TF card when the tablet is switched on.
3. Charging
This product uses a standard 5V/2A power supply. Please use the supplied power charger. Other chargers may cause failure and risk of fire.
Do not use the charger in a hutablet environment. If your hands and feet are wet, please do not touch the charger.
When using the charger or charging the product, please maintain good ventilation. Do not cover the machine with paper or other objects. This could result in a reduced cooling effect.
Finding your way
The tablet can achieve a variety of operating modes:
(1) Clicking. (2) Holding. (3) Sliding. (4) Dragging. (5) Rotating.
Key action definition: (1) Short press: press less than 1.2 seconds. (2) Long press: press and hold for more than 3 seconds. All operations in this manual are performed by a short press unless stated otherwise.
360 degree rotation: Rotate the tablet to switch between horizontal and vertical view.
1. Turning on the Tablet
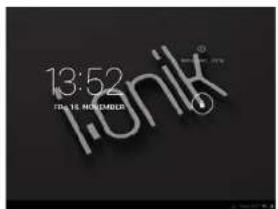
1.1 Press the power switch at the side of the tablet (long press) and the machine will be booted. The booting screen and animations will be shown on the LCD screen for a few seconds, before you will enter the lock screen as shown in the screenshot below.

1.2 Press and hold the unlock button and a circle will appear around the lock. Drag to the right to unlock. The hold and drag function prevents the accidental booting of the tablet.
2. Switching off the Tablet
Press the power switch key (long press) and the system will display the shutdown screen.
Up to five (depending on the model) options will be displayed: "Power off", "Reboot" and "Volume on/off", and "Vibration". Select "Power off" to enter the next screen.


When the battery level is down to 15 %, the system will prompt to connect the charger. When the battery is running low, the system will automatically shut down.
3. Lock-Screen and Power-Saving Mode
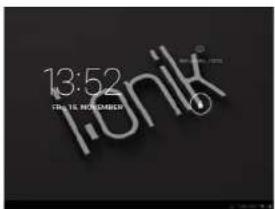
If the screen is inactive for a certain time, or when pressing the power switch, the Tablet will enter the screen-off/lock screen status to save power. Programs are still running, but the screen is blank. Pressing the power switch again will open the unlock screen. Hold and drag the unlock button to the right and the Tablet will resume working status.
- Main Interface

| Voice search Icon | When connected to a network, click to enter the voice search menu. Speak a keyword directly into the MIC. |
| Shortcut Icon Shortcut icon add/delete (will be covered later) | |
| Widgets Widgets add/delete (will be covered later) | |
| Back Key Press in pop-up menu to cancel an operation.In other menus, press to return to parent menu. | |
| Home Key Press in any menu to return to main interface. | |
| Apps having been opened | Click to display all APPS that have been opened. Click each of the applications to enter the relevant menu. |
| Notice/Fast Setting Column | Click to display more information: USB, Wi-Fi, Date etc. Click on any item to enter its settings menu. |
| Text search Icon When connected to a network, click to enter the Text search menu. Type in a key word and search. | |
The main interface features 5 different menu pages. Switch between pages by sliding the screen left and right. You can add/delete icons in each of the pages of the main menu.
5. Custom Screen
Add Shortcut
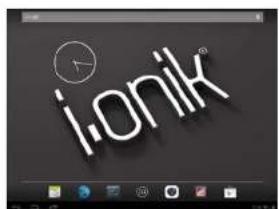
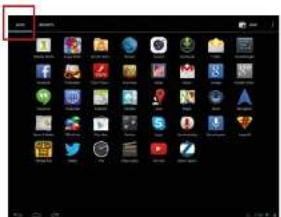
Click the button in the main interface to open the Application Program menu. Pressing and holding the icon will open the add shortcut interface. Move the icon to the place where you want to place the shortcut and it will be added to the main interface.

Add Widgets
Click the button in the main interface to open the Application Program menu. Press the "WIDGETS" option. This will open the widget interface. Pressing and holding the icon will open the add widget interface. Move the icon to the place where you want to place the widget and it will add to the main interface.

Delete Shortcut/Widgets
Press and hold a shortcut icon or widget icon in the main interface until on the top of the screen "Delete" appears. Then drag the shortcut/widget on to the word "Delete". The icon will turn red. The shortcut or widget will be deleted after releasing the button.

Click and drag any shortcut or widget icon to customize your main interface.
6. Changing your Wallpaper
In order to personalize the main interface users can set their favorite pictures or photos as wallpaper of the main interface.
6.1 Click the touch screen (long press) in the main interface to open the "Choose wallpaper" dialog box.
6.2 Click "Wallpaper" to enter the selection menu of pictures.
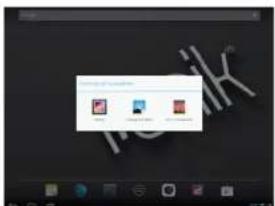

6.3 Select a picture. Now the wallpaper is selected.
7. Connection to a computer via micro USB cable
When connecting the tablet to a computer with a micro USB cable, the icon will be displayed in the Notice/Fast settings column of the main interface.

In the settings under "Storage" you can choose whether you want to use your device as a media device (MTP) or as a camera (PTP).
MTP: Allows you to transfer media files to Windows or by using Android File Transfer to Mac computers (see www.android.com/file transfer).
PTP: Allows you to transfer photos using the camera software and transfer files to computers that do not support MTP.
- Connection to an External Storage (e.g. USB Stick, microSD Card) via OTG Cable From the File Manager, select the menu item "usbdisk" or "sdcard".
System Settings
The settings interface allows a variety of custom settings and you can overview relevant information of all the installed software. Click "Settings" in the application program menu to enter the settings menu.
APPS
In the apps settings interface, users can see all installed applications. If you open one application, the relevant information is displayed. If you do not wish to use an application any longer, select "Delete" to remove the application.

Internet
1. Network Settings
The tablet features a built-in Wi-Fi module. Click ■, the settings menu will be displayed on the tablet.

1.1 Wi-Fi 1.1.1 Slide the "Wi-Fi" switch button to ON to enable Wi-Fi.
1.1.2 Click "Wi-Fi" to enter the Wi-Fi settings menu. 1.1.3 The system will automatically search for available networks and display the name of the network.

Click a wireless network and the tablet opens a window. Enter the network key and click "Connect". If the connection is successful, the network icon ■ will be displayed in the Notice/Fast settings column of the main interface.
Please note:
The tablet will save connected routers automatically. When searching for a network, the tablet will automatically connect to the saved router. When the network icon is displayed in the main interface, the tablet has connected to the Wi-Fi network successfully.
2. Internet
2.1 When successfully connected to a network, click in the main interface to enter the Google browser.

3.2 Click the input box. The keyboard will pop-up. Type in a new search and open the website. 3.3 Click the icon (red border) and a dropdown menu with more operational functions is displayed.

Software Management
The product supports third-party applications on an Android platform. Most applications can be obtained and downloaded from the Internet.
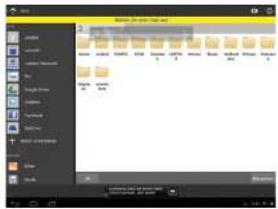
1. File Manager (Depending on the Version also Explorer or Documents)
Click 📄 in the application program Interface to enter the explorer. You can browse, copy, delete, move, edit and rename programs saved on the tablet or a TF card.
2. Software Installation
In Google Play Store click on the software (app) that you want to install. The installation will start automatically.
Applications
1. Playing Music
1.1 Click ▼ in the application program Interface to enter the playlist.
1.2 Click a music file to open and play it.

1.3 Background play
When playing music, click to open the main interface. The Tablet will play the music in the background.
1.3.1 Click in the main interface to display the music player menu.

1.3.2 Select the music player to return to the player menu.
2. Browsing Pictures
2.1Click in the application program Interface to browse pictures. Here you find all pictures and videos saved on the tablet or a TF card.
2.2 Select to open a picture.

natural_image
Four-panel collage showing nature scenes: green grass, blue flowers, purple flower field, and yellow butterfly (no text or symbols)2.3 Select to play a video.

3. E-mail
Click In the application program Interface to open the e-mail settings. Enter the e-mail address and password as well as urther necessary settings to send and receive e-mail messages.

4. Camera and Video
Click ☐ in the application program interface to open the camera manually.

natural_image
Blank black image with no visible content or textGarantiekarte
Modell:
SerienNr.
Assigned by the service
ticket no:
Date of purchase:
Name:
Address:
Tel/Fax/E-Mail:
The warranty is only valid if the card is fully completed and the original invoice or sales receipt is attached. Please keep this card for the duration of the warranty. Customers residing outside of Germany are asked to return the product to their dealer.

For customers from Germany:
How do I get a return receipt?
-
Call us free of charge (see front).
-
Talk to our friendly staff. We are happy to provide you with information on how to procure your return receipt.
- Free pickup or delivery at any DHL drop-off centre on request.
- Free return shipping by DHL after repair.
Short description of error:
In case of abusive and improper handling, force and internal tampering not made of our personnel, and the removal of the security seal will void the warranty. 2 years warranty from date of purchase.
Service
i.onik®
This warranty is valid in the European Union. For technical support please contact:
Please pack the product carefully and don't forget to add the return address and the RMA No. assigned by our service. Please also give a brief description of the fault occurring.
* Free of charge within Germany.


- Deutsch
- Vorsichtsmaßnahmen
- Bemerkungen:
- Widgets hinzufügen
- Internet
- Software Installation
- Attention:
- Content
- Important Safety Precautions
- Tablet (MID) Overview
- Tablet Introduction
- Note:
- TF Card
- Charging
- Finding your way
- Turning on the MID
- Switching off the MID
- Lock-Screen and Power-Saving Mode
- Custom Screen
- Add Shortcut
- Add Widgets
- Delete Shortcut/Widgets
- Changing your Wallpaper
- Connection of USB Cable
- System Settings
- "APPS"
- Network Settings
- Please note:
- Internet
- Software Management
- Explorer
- Special note:
- Applications
- Playing Music
- Browsing Pictures
- Camera and Video
- Apk Installer
- 1-4 Touchscreen
- 4-1-1 WI-FI Verbindung
- Precautions
- Main Functions:
- Definition:
- Quick Start
- 1-1 Power On/Off and unlock
- 1-2 Battery and Charge
- 1-3 Computer Connection & File Transfer
- 1-4 Using the Touch Screen
- 1-4-1 Click
- 1-4-2 Press
- 1-4-3 Movement
- 1-4-4 Drag
- 1-5 G-Sensor
- 1-6 Solving problems of the machine running slowly
- 1-7 Entering Text
- 1-7-1 Select IME
- Main Screen Function/Icon
- 2-1 Main Screen Function
- 2-2 Main Interface
- 2-2-1 Status Bar
- 2-2-2 Menu
- 2-3 Add, move or delete Desk Icon
- 2-4 Shortcut
- Application Installation
- 3-1 Methods of how to Acquire
- 3-2 Program Install
- 3-3 Program Uninstall
- Internet
- 4-1 Network Setting
- 4-1-1 WI-FI Connection
- 4-2 Ethernet Setting
- Steps for Internet Connection:
- Notes:
- 4-3 Webpage Browser
- 4-3-1 Bookmark Manager
- - SettingBookmarks
- - Open Bookmarks
- - Edit Bookmarks
- 4-3-2 Open new Window
- - Open new Browser Window
- - Switching the Browser Window
- 4-3-3 Change your Startpage
- 4-3-4 Browser Settings
- 4-3-5 E-Mail
- 4-3-6 E-Mail Setting Guide
- 4-3-7 Receiving and Sending E-Mail
- 4-3-8 Delete E-Mail Account
- 4-3-9 Instant Messaging
- File Manager
- OTG Function
- External USB Keyboard and Mouse
- Usage of Micro SD/SDHC (TF) Card (following TF)
- Tips:
- Basic Setting
- 9-1 Wireless & Network Setting
- 9-2 Display Settings
- 9-3 Security
- 9-4 Setting Date and Time
- Trouble Shooting
- The tablet turns on slowly the first time
- Unable to connect WI-FI or there is a weak signal
- Fail to copy files
- No sound in the earphone
- General issues with the system
- Unable to set up E-Mail or use registration applications.
- The memory capacity is different from the nominal figure
- Kurzanleitung
- Quick Start Guide
- PB-3000PB-5000
- Tablet Overview
- Turning on the Tablet
- Switching off the Tablet
- Connection to a computer via micro USB cable
- APPS
- File Manager (Depending on the Version also Explorer or Documents)
- Garantiekarte
- For customers from Germany:
- How do I get a return receipt?
- Short description of error:
- Service
Brand : i-onik
Model : TP7-1000DC
Category : Tablet