
BOF20NA/E - Oven BOMPANI - Free user manual and instructions
Find the device manual for free BOF20NA/E BOMPANI in PDF.


| Product Type | Electric Oven (Toaster Oven) |
| Model | BOF20NA/E (Black) |
| Capacity | 20 Liters |
| Power | 1380 W |
| Voltage | 220-240 V ~ 50/60 Hz |
| Temperature Range | 100°C – 230°C |
| Functions | Fan Convection, Grill/Broil, Toast/Bake, Rotisserie |
| Timer | Mechanical timer with bell (up to 60 minutes estimated) |
| Accessories Included | Flat wire rack, non-stick baking tray, crumb tray, roasting spit with handle, tray handle |
| Safety Features | Auto shut-off timer, indicator light, internal light |
| Cleaning | Removable accessories dishwasher safe; wipe exterior with damp cloth; do not immerse |
| Warranty | See conditions on www.bompani.it |
| Country of Origin | China |
| Importer | FOX S.p.a., Modena, Italy |
Frequently Asked Questions - BOF20NA/E BOMPANI
User questions about BOF20NA/E BOMPANI
0 question about this device. Answer the ones you know or ask your own.
Ask a new question about this device
Download the instructions for your Oven in PDF format for free! Find your manual BOF20NA/E - BOMPANI and take your electronic device back in hand. On this page are published all the documents necessary for the use of your device. BOF20NA/E by BOMPANI.
USER MANUAL BOF20NA/E BOMPANI
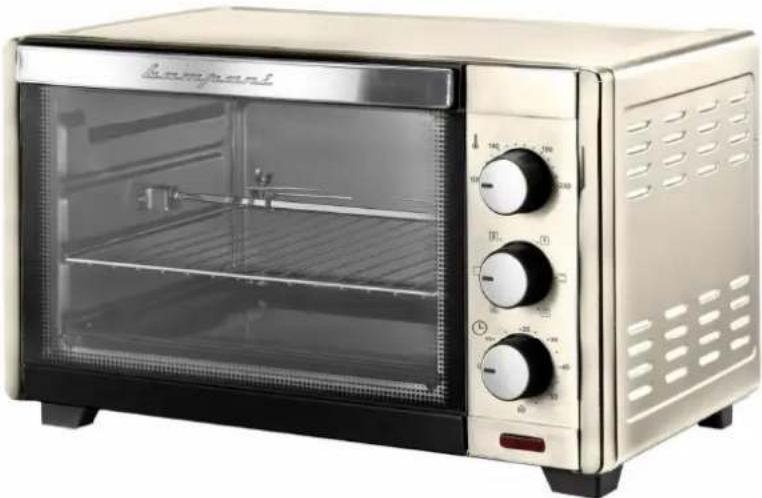
Bompani
FORNO ELETTRI9O 20Litri
BOF20RA/E (rosso)
BOF20CA/E (crema)
BOF20NA/E (nero)

220-240V\~50/60Hz 1380W
LEGGERE E SEGUIRE LE REGOLE DI SICUREZZA ELE ISTRUZIONI OPERATIVE PRIMA DELL'USO.
CONSERVARE PER UTILIZZI FUTURI.
SOLO PER USO DOMESTICO
IMPORTANTI3ISTRUZIONI3DI3SICUREZZA3


Bompani
20L ELE9TRI9 OVEN
BOF20RA/E (red)
BOF20CA/E (cream)
BOF20NA/E (black)
220-240V\~50/60Hz 1380W
READ AND FOLLOW THIS OPERATION MANUALBEFORE USING THE PRODUCT.
SAVE IT FOR FUTURE REFERENCE.
HOUSEHOLD USE ONLY
GENERAL3SAFETY3INSTRUCTIONS3
When using electrical appliances, basic precautions should always be followed, including the following:
- Read all instructions.3
- When3in3operation,3the3door3and3accessible3external3surfaces3could3be3become3very3hot.3
Never3touch3metal3parts3or3the3gl

- *o not touch hot surfaces. Use handles or knobs.
- 9lose supervision is necessary when any appliances are used by or near children.
- To protect against electric shock, do not immerse cord, plug, or any parts of the oven in water or other liquid.
- *o not let cord hang over edge of table or counter, or touch hot surfaces.
- *o not operate appliances with damaged cord or plug or after the appliances malfunctions, or has been damaged in any manner. Return appliances to the nearest 7 authorized Service 9entre for examination, repair, or adjustment.
- The use of accessory attachments not recommended may cause hazard or injury.
- *o not place on or near a hot gas or electric burner, or in a heated oven or in a microwave oven.
- *o not leave inflammable products near the oven or under the work surface where it is located.
- When operating the oven keep at least four inches of space on all sides of the oven to allow for adequate air circulation.
- Unplug from outlet when not in use and before cleaning. 7llow cooling before putting on or taking off parts, and before cleaning.
- To disconnect, turn the control to OFF, then remove the plug. 7lways hold the plug, but never pull the cord.
- Extreme caution must be used when moving an appliance containing hot oil or other hot liquids.
- *o not cover any part of the oven with metal foil.
- *o not clean with metal scouring pads pieces can break off the pad and touch electrical parts, creating a risk of electric shock.
- Never leave the appliances unattended while broiling or toasting.
- Oversized foods or metal utensils must not be inserted in a toaster oven as they may create a fire or risk of electric shock.
- 7 fire may cause if the oven is covered or touching inflammable material, including curtains draperies, walls and like, when on operation. *o not store any item on the oven during operation.
- If food or other parts of the oven catch fire, never try and put out the flames with water. glose the door, unplug from the mains and smother the flames with a damp cloth.
- *o not place anything on the open glass door.

- *o not place any of the following materials in the oven-cardboard, plastic, paper, or anything similar.
- Do not store any materials, other than recommended accessories, in this oven when hot oven.
- 7lways wear protective, insulated oven gloves when inserting or removing items from the hot oven.
- Do not use outdoors.
- Do not use appliance for other than intended use.
BEFORE3USE3
8 before using your toaster oven for the first time, be sure to:
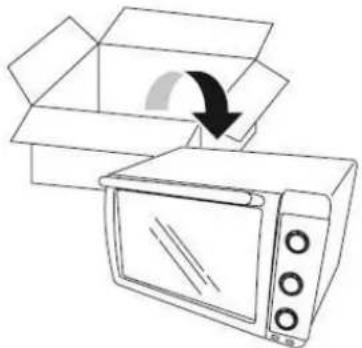
- Unpack the appliance. Remove any paper and other material inside the oven.
- Read all of the instruction included in the manual.
• Make sure that the oven is unplugged and the Time control is in the “OFF” position. - Wash the accessories in hot soapy water or in the dishwasher, before use.
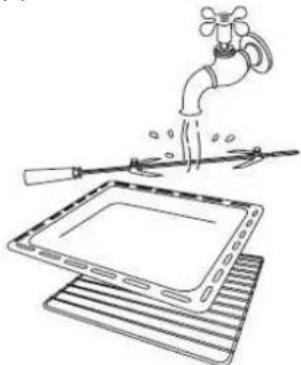
- Thoroughly dry all accessories and re-assemble in oven, plug oven into outlet and you are ready to use your new toaster oven.
- 7fter – reassembling your oven, we recommend that you run it at the highest temperature on the toast function for approximately 15 minutes for eliminate any packing residue that may remain after shipping. This will also remove all traces of odour initially present.
Please note: initial start-up operation may result in minimal smell and smoke. This is normal and harmless.
It is due to burning of the protective substance applied to the heating elements in the factory. It will disappear within 20 minutes.
USE3YOUR3OVEN3
1.3 Temperature33control: choose the desired temperature between 100° C and 230° C for cooking.3
2.3Function3control: this oven is equipped with five positions for a variety of cooking needs: Fan function, Grill/Broil function, Toast/Bake function, Grill/Spit roast function, Grill/Spit roast function.3

: The oven is off. The heaters don't work.

FAN FUNCTION: Upper and lower heating elements working together with "Heat Convection" function.


GRILL/BROIL FUNCTION: Upper heating element working together with “Heat Convection” function, fit for broil fish, steak, poultry, pork chops, etc.


TOAST/BAKE FUNCTION: Upper and lower heating elements working3 together with “Heat Convection” function, fit for toast bread, muffins, frozen waffles, etc. It is also suitable for fish, pies, cookies, etc.

GRILL/SPIT RO7ST FUN9TION: Upper heating element working with rotisserie function.
Fit for chicken and meat.

GRILL/SPIT RO7ST FUN9TION: Upper and lower heating elements working with "Heat 9onvection" function. Fit for chicken and meat.

Note: In general, it is not necessary to preheat the oven, but you may get better results if you heat the oven before cooking some delicate meals, such as rare medium meat and cakes.
-
Time control: when you turn the control to the right (clockwise1. This function has a bell rings at the end of the programmed time.
-
Accessories: flat wire rack, one side non-stick baking tray, crumb tray, roasting spit with handle, tray handle.
-
Indicator lights: the red light on the front panel comes on when the oven is turned on. The internal light is always on when the oven is working.
HELPFUL HINTS
HOW TO USE THE CONVECTION FUNCTION
This “Heat 9onvection” feature distributes the heat uniformly within the cavity and allows a better and quicker cooking.
HOW3TO3USE3THE3ROTISSERIE3FUNCTION3
-
This function is for perfectly roasted chickens.
-
Set the thermostat control to max temperature.
-
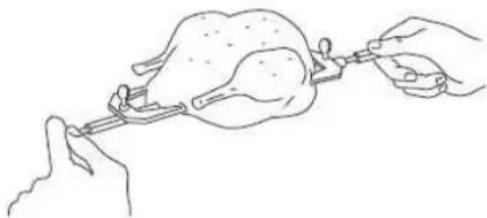
Set the function control to Rotisserie. Insert the pointed end of SPIT through skewer, making sure the points of skewer face in the same direction as pointed end of the spit. Slide towards square of the spit and secure with thumbscrew.
-
Place food to be cooked on the spit by running the spit directly through the Center of the food. Place the second skewer into the other end of the roast of poultry and secure skewer with the thumbscrew.
-
Check the food is centered on the SPIT.

- Insert the point end of the spit it into the DRIVE SOCKET make sure the square end of the spit rests on the spit support.
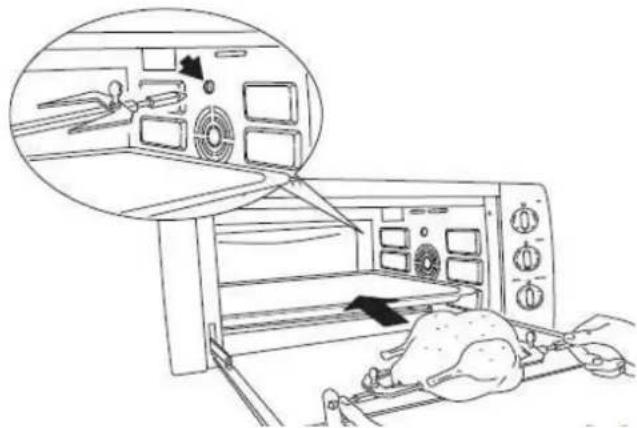
°. Turn the switch knob to

-
Turn the time control to the desired cooking time.
-
When complete, turn the TIMER control to the "O" OFF position.
-
Remove the spit by placing side the hooks of the rotisserie handle under the grooves on either side of the spit. Lift the left side of the spit first by lifting it up and out. Then pull the spit out of the drive socket and carefully remove the roast from the oven take the meat off the of the spit and place on cutting board or platter.
HOW3TO3BAKE
-
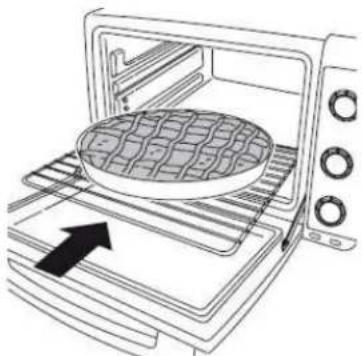
Place the removable rack into the desired position.
-
Place the bake pan on the wire rack. Shut off the oven door.
-
Turn the timer dial to the desired cooking time.
-
Turn the thermostat dial for the desired temperature.
-
When finished baking, turn the time dial till "O" (OFF) position to switch off the oven.
HOW3TO3BROIL
-
Insert the removable wire rack with food and the all-purpose pan.
-
Keep the door half-open.
-
Turn the thermostat dial and the turn the time control to the desired broiling time.
-
When finish broiling, turn the timer dial till "O" (OFF) position to switch off the oven.
HOW3TO3TOAST
-
Set the temperature control to 230° C.
-
Place food to be toasted on the bake rack.
-
Turn the Time Control as desired. Bell will ring to signal the end of the Toast cycle.
-
When finish cooking, turn the timer dial till "O" (OFF) position to switch off the oven.
COOKING3TIPS3
-
Place the drip tray under the grill shell to avoid oil dropping inside the oven.
-
If the food is oily such as roast chicken etc, use two pieces of aluminum foils: put one piece on the drip tray and use another one to cover the food. This avoids oil splashing during operation.
CLEANING3
-
It is important that you clean the appliance after each use to prevent an accumulation of grease and avoid unpleasant odours.
-
Allow the appliance to cool and unplug from outlet before cleaning.

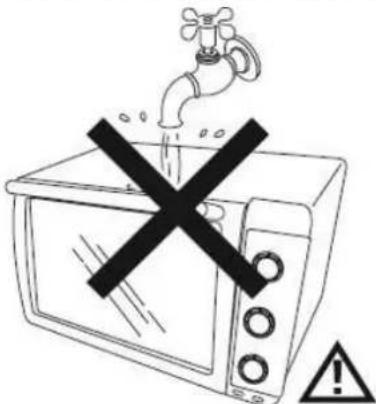
- Do not immerse appliance in water or wash it under waterspout.
- Removable flat wire rack, baking tray, crumb tray, roasting spit can be washed, as normal kitchenware.

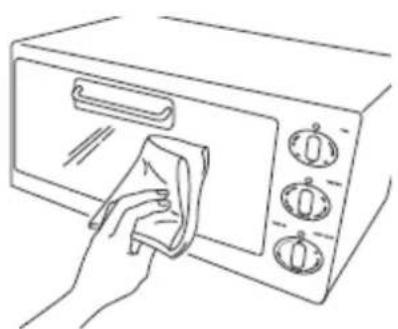
- 9lean outside of appliance with a damp sponge. 9lean inside too.

- Do not use abrasive cleaners or sharp utensils to clean the oven, as scratching may weaker it and cause shattering.
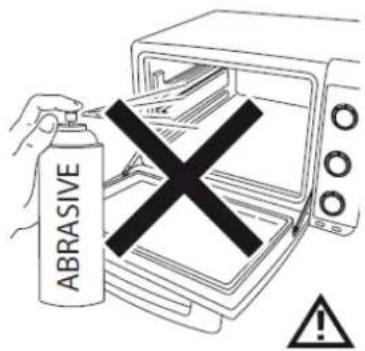

°. Let all parts and surfaces dry thoroughly prior to plugging oven in and using.
AFTER'SALE3SERVICE3
3
For any after-sale service, please visit the website: www.bompani.it
WARRANTY3
3
Warranty conditions are visible on the website: www.bompani.it
MEANING3OF3THE3DUSTBIN3SYMBOL

Protect our environment: do not dispose of electrical equipment in your domestic waste. Please return any electrical equipment that you will no longer use to the collection points provided for their disposal. These simple steps can help to avoid the potential effects that incorrect waste disposal can cause on the environment and human health. This will contribute to recycling and other forms of re-use of electrical and electronic equipment. Information concerning where the equipment can be disposed of can be obtained from your local authorities.


3
3
Imported by
41122 Modena - Italy

Bompani
Electrical Oven
Fometto elettrico
Model: BOF20NA/E
Voltage: 220-240V 50/60 Hz
Power: 1380W
Imported by FOX S.p.a.
Modena - Italy
MADE IN CHINA
Serial number:


Bompani
Electrical Oven
Fornetto elettrico
Model: BOF20CAVE
Voltage: 220-240V 50/60 Hz
Power: 1380W
Imported by FOX S.p.a.
Modena - Italy
MADE IN CHINA
Serial number:



Bompani
Electrical Oven
Fornetto elettrico
Model: BOF20RAVE
Voltage: 220-240V 50/60 Hz
Power: 1380W
Imported by FOX S.p.a.
Modena - Italy
MADE IN CHINA
Serial number:



- BOMPANI
- IMPORTANTI3ISTRUZIONI3DI3SICUREZZA3
- GENERAL3SAFETY3INSTRUCTIONS3
- NEVER3TOUCH3METAL3PARTS3OR3THE3GL
- BEFORE3USE3
- USE3YOUR3OVEN3
- HELPFUL HINTS
- HOW TO USE THE CONVECTION FUNCTION
- HOW3TO3USE3THE3ROTISSERIE3FUNCTION3
- HOW3TO3BAKE
- HOW3TO3BROIL
- HOW3TO3TOAST
- COOKING3TIPS3
- CLEANING3
- AFTER'SALE3SERVICE3
- WARRANTY3
- MEANING3OF3THE3DUSTBIN3SYMBOL
Brand : BOMPANI
Model : BOF20NA/E
Category : Oven