
58G874 - Drill Graphite - Free user manual and instructions
Find the device manual for free 58G874 Graphite in PDF.


| Product Type | Electric Drill |
| Brand | Graphite |
| Model | 58G874 |
| Power Supply | Corded Electric |
| Rated Power | 650 W |
| Voltage | 230 V ~ 50 Hz |
| No-Load Speed | 0–3000 rpm (Variable) |
| Chuck Type | Keyless |
| Chuck Capacity | 1.5–13 mm |
| Max Drilling Diameter (Wood) | 30 mm |
| Max Drilling Diameter (Steel) | 13 mm |
| Forward/Reverse | Yes |
| Variable Speed Trigger | Yes |
| Lock-On Button | Yes |
| Weight | 1.5 kg |
| Cable Length | 2.5 m |
| Included Accessories | Auxiliary Handle, Depth Stop, Chuck Key |
| Maintenance | Clean with dry cloth; keep ventilation slots free of dust |
| Safety | Wear eye protection; disconnect before changing accessories |
| Repairability | Spare parts available via authorized service centers |
Frequently Asked Questions - 58G874 Graphite
User questions about 58G874 Graphite
0 question about this device. Answer the ones you know or ask your own.
Ask a new question about this device
Download the instructions for your Drill in PDF format for free! Find your manual 58G874 - Graphite and take your electronic device back in hand. On this page are published all the documents necessary for the use of your device. 58G874 by Graphite.
USER MANUAL 58G874 Graphite
SR UPUTSTVO ZA UPOTREBU 70
/EC Declaration of Conformity/
/The above listed product is in conformity with the following UE Directives:/
/Machinery Directive 2006/42/EC/
/ 2006/42/EK Gépek /
/EMC Directive 2004/108/EC /
/and fulfils requirements of the following Standards:/
/Last two figures of CE marking year:/
/Name and address of the person who established in the Community and authorized to compile the technical file/
CAUTION: BEFORE USING THE POWER TOOL READ THIS MANUAL CAREFULLY AND KEEP IT FOR FUTURE REFERENCE.
DETAILED SAFETY REGULATIONS
PRECAUTIONS FOR USING HAMMER DRILL
Caution: Unplug the power cord from the mains socket before commencing any activities related to adjustment, repair or maintenance.
- During hammer operation use protective glasses or goggles, ear protection and protective helmet (when there is danger of falling objects). Use of protection half-mask and anti-slip boots is recommended. Use dust extraction systems whenever required by the nature of the work performed.
Prior to operation ensure the drill chuck of the hammer is properly fixed in its place. ●
- During operation working tool may get loosened due to vibrations. Check carefully how the working tool is fixed prior to operation. Unwanted slack may cause tool damage or accident during operation.
- If the hammer is to be operated at low temperature or after long storage, allow the hammer to operate for few minutes without load, for its internal elements get properly lubricated.
- When operating the hammer held high, stand firmly on the ground and ensure there are no bystanders below.
Always hold the hammer with both hands, use additional handle. ●
- Do not touch moving parts of the hammer. Do not stop rotating spindle of the hammer with your hands. Such behaviour can cause hand injury.
Do not direct operating hammer at other persons or at yourself. ●
- When operating the hammer, hold it by insulated parts to avoid electric shock in case of damaging live electrical wire.
- Do not allow any dust to get inside the hammer. Use mineral soap and damp cloth to clean hammer surface. Do not use petrol or other cleaning agents that could damage plastic parts.
- When use of extension cord is necessary always remember to use appropriate one (up to 15 m, section 1.5 mm 2 ; between 15 and 40 m, section 2.5 mm 2 ). Extension cord should be unwound whole.
- Do not use three jaw drill chuck when the hammer drill is set to impact drilling or chiselling mode. This chuck is designed only for regular drilling in wood or steel.
CAUTION! This device is designed to operate indoors.
The design is assumed to be safe, protection measures and additional safety systems are used, nevertheless there is always a small risk of operational injuries.
CONSTRUCTION AND USE
Hammer drill is a hand-operated power tool with insulation class II. The tool is driven by single-phase commutator motor. Hammer drill can be used for drilling holes in working mode with impact, digging channels, or surface processing of materials such as concrete, stone, brick etc. Range of use covers repair and building works, and any work from the range of individual, amateur activities (tinkering).

Use the power tool according to the manufacturer's instructions only.
DESCRIPTION OF DRAWING PAGES
Below enumeration refers to the device elements depicted on the drawing pages of this manual.
SDS-MAX chuck1.
Fixing sleeve2.
Operation mode switch3.
Lid for greasing inlet4.
- Switch
- Voltage indicator lamp
- Bottom engine casing
- Additional handle
MEANING OF SYMBOLS


CAUTION
WARNING
ASSEMBLY/SETTINGS
INFORMATION
EQUIPMENT AND ACCESSORIES
Drills - 1 pce1.
Chisels - 1 pce2.
Depth gauge - 1 pce3.
Dust cover - 1 pce 4.
Grease container - 1 pce 5.
Special key - 1 pce6.
Transport case - 1 pce7.
INSTALLATION AND REPLACEMENT OF WORKING TOOLS

Hammer drill is designed to operate with working tools with SDS-MAX shanks.
Prior to starting operation clean the hammer drill and working tools. Use grease and apply thin layer onto shank of the working tool. It will improve tool durability.

Disconnect the power tool from power supply.
Put the hammer against work bench. ●
- Hold the fixing sleeve (2) of the SDS chuck (1) and pull it to the back, overcoming the spring resistance.
- Insert working tool shank into the chuck and slide it to mechanical stop (it may be necessary to turn the working tool so it can reach appropriate position) (fig. A).
- Release the fixing sleeve (2), it will finally fix the tool.
- Working tool is properly seated if it cannot be removed without pulling off the fixing sleeve.
- If the sleeve does not return to its default position, remove the working tool and repeat the whole operation.

High efficiency of the hammer drill operation can be achieved by using sharp and undamaged working tools.
DEINSTALLATION OF WORKING TOOL

Just after the operation is finished, the working tool may be hot. Avoid direct contact and use appropriate protective gloves. Clean the working tool after removal.

Disconnect the power tool from power supply.
- Pull the fixing sleeve (2) to the back and hold.
- Remove the working tool with your second hand by pulling it to the front.
OVERLOAD CLUTCH

Hammer drill is equipped with factory set overload clutch. Spindle of the hammer drill stops immediately after working tool jams, which might overload the power tool.
SWITCHING ON / SWITCHING OFF

The mains voltage must match the voltage on the rating plate of the hammer drill.
Switching on - press the switch button (5) and hold in this position (fig. B).
Switching off – release pressure on the switch (5).
GRAPHITE
Hammer drill is equipped with 2-function switch of the working mode (3). Depending on its setting, an impact drilling or chiselling is possible. Impact drilling and chiselling require to slightly press the hammer drill. Too great pressure would cause unnecessary, excessive load of the motor. Check technical condition of the working tools regularly. Sharpen or replace working tools when needed.

Impact drilling - set the switch (3) to position marked with the drill and hammer symbol (fig. C).
Chiselling - set the switch (3) to position marked with hammer symbol.

Do not try to change position of the working mode switch when the hammer drill motor is operating. Such action may cause serious damage of the hammer drill.
VOLTAGE INDICATOR LAMP

When the rotary hammer drill is connected to power supply socket, the voltage indicator lamp lights up (6).
IMPACT DRILLING

- Choose appropriate mode of operation, impact drilling in this case.
- Insert appropriate drill with SDS-MAX shank into the chuck (1).
- To get the best results use high quality drills with sintered carbide inserts.
Press the drill against processed material. ●
- Switch on the hammer drill, the hammer mechanism should operate smoothly and the tool should not bounce on the processed material surface.
Unplug the power cord from the mains socket before commencing any activities related to installation, adjustment, repair or maintenance.

- Always keep the hammer drill clean.
Never use any caustic agent for cleaning plastic parts of the hammer drill. ●
- After operation use compressed air to blow through the hammer drill to remove dust deposit, especially to keep ventilation slots pervious.
- It is necessary to regularly check technical condition of carbon brushes of the motor (dirty or worn out brushes can cause excessive sparking and loss of spindle speed of the hammer drill).
GEAR GREASING

It is recommended to check grease in the gear every 50 hours of hammer drill operation and fill up grease according to needs.
- Loosen the lid (4) for greasing inlet by turning it left (fig. D).
- Fill up grease.
- Fix the lid (4) and turn it right (do not twist it too tightly to avoid thread damage).

Do not apply too much grease.
REPLACEMENT OF CARBON BRUSHES

Replace immediately worn out (shorter than 5 mm), burnt or cracked motor carbon brushes. Always replace both brushes at a time.
Entrust replacement of carbon brushes only to a qualified person. Only original parts should be used.
ADDITIONAL HINTS FOR USING HAMMER DRILL
To achieve the best possible efficiency when working on concrete, apply moderate (not excessive) pressure on the hammer drill. Excessive pressure leads to efficiency loss. Hammer drill filled with solid grease requires some time to heat up, depending on the ambient temperature. New hammer drill requires some time to work before it achieves full working efficiency. As mentioned above, high efficiency of operation can be achieved by using sharp tools and taking care of ventilation holes to be pervious.

All faults should be repaired by service workshop authorized by the manufacturer.
TECHNICAL PARAMETERS
RATED PARAMETERS
| Hammer Drill | |
| Parameter Value | |
| Rated voltage 230 V AC | |
| Input current frequency 50 Hz | |
| Rated power 1250 W | |
| No load rotational speed 450 rpm | |
| Chuck SDS-MAX | |
| Maximum drilling diameter concrete 40 mm | |
| Impact energy 10 J | |
| Impact rate 2800 min | -1 |
| Protection class II | |
| Weight 7,3 kg | |
| Year of production 2014 | |
NOISE LEVEL AND VIBRATION PARAMETERS
Sound pressure: LpA=95,1\ dB(A) K=3 dB (A)
Sound power: LwA=106,1\ dB(A) K=3 dB (A)
Weighted value of vibration acceleration (impact drilling): ah = 19,402 m/s2 K = 1,5 m/s2
Weighted value of vibration acceleration (impact only): ah = 18,685 m/s2 K = 1,5 m/s2
ENVIRONMENT PROTECTION
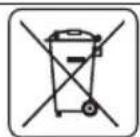
Do not dispose of electrically powered products with household wastes, they should be utilized in proper plants. Obtain information on wastes utilization from your seller or local authorities. Used up electric and electronic equipment contains substances active in natural environment. Unrecycled equipment constitutes a potential risk for environment and human health.
* Right to introduce changes is reserved.
"Grupa Topex Spółka z ograniczoną odpowiedzialnością" Spółka komandytowa with seat in Warsaw at ul. Pograniczna 2/4 (hereinafter Grupa Topex) informs, that all copyrights to this instruction (hereinafter Instruction), including, but not limited to, text, photographies, schemes, drawings and layout of the instruction, belong to Grupa Topex exclusively and are protected by laws accordingly to Copyright and Related Rights Act of 4 February 2004 (ustawa o prawie autorskim i prawach pokrewnych, Dz. U. 2006 No 90 item 631 with later amendments). Copying, processing, publishing, modifications for commercial purposes of the entire Instruction or its parts without written permission of Grupa Topex are strictly forbidden and may cause civil and legal liability.
SCHLAGHAMMER
58G874
DODATNA NAVODILA ZA UPORABO KLADIVA
DARBA REŽIMA PĀRSLĒDZĒJS

POSEBNI PROPISI O SIGURNOSTI
UPOZORENJA VEZANA UZ RAD SA UDARNIM ČEKIĆEM
Pozor: Prije pristupanja radnjama vezanim uz regulaciju, korištenje ili popravak treba izvući utikač kabla za napajanje iz mrežnog napona.


- DETAILED SAFETY REGULATIONS
- PRECAUTIONS FOR USING HAMMER DRILL
- CAUTION! THIS DEVICE IS DESIGNED TO OPERATE INDOORS
- CONSTRUCTION AND USE
- USE THE POWER TOOL ACCORDING TO THE MANUFACTURER'S INSTRUCTIONS ONLY
- DESCRIPTION OF DRAWING PAGES
- MEANING OF SYMBOLS
- EQUIPMENT AND ACCESSORIES
- INSTALLATION AND REPLACEMENT OF WORKING TOOLS
- DISCONNECT THE POWER TOOL FROM POWER SUPPLY
- DEINSTALLATION OF WORKING TOOL
- OVERLOAD CLUTCH
- SWITCHING ON / SWITCHING OFF
- GRAPHITE
- VOLTAGE INDICATOR LAMP
- IMPACT DRILLING
- GEAR GREASING
- REPLACEMENT OF CARBON BRUSHES
- ADDITIONAL HINTS FOR USING HAMMER DRILL
- TECHNICAL PARAMETERS
- NOISE LEVEL AND VIBRATION PARAMETERS
- ENVIRONMENT PROTECTION
- SCHLAGHAMMER
- 58G874
- DODATNA NAVODILA ZA UPORABO KLADIVA
- DARBA REŽIMA PĀRSLĒDZĒJS
- POSEBNI PROPISI O SIGURNOSTI
- UPOZORENJA VEZANA UZ RAD SA UDARNIM ČEKIĆEM
Brand : Graphite
Model : 58G874
Category : Drill