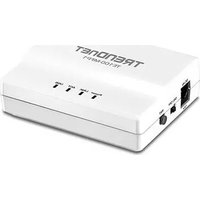
TRENDNET TE100-MP1UN - Print Server

TE100-MP1UN - Print Server TRENDNET - Free user manual and instructions

Find the device manual for free TE100-MP1UN TRENDNET in PDF.

📄 14 pages English EN Download 💬 AI Question 10 questions ⚙️ Specs
Notice TRENDNET TE100-MP1UN - page 4
Pick your language and provide your email: we'll send you a specifically translated version.
Product Type Print Server
Model TE100-MP1UN
Brand TRENDnet
Dimensions (L x W x H) 4.6 x 2.8 x 1.0 in (117 x 71 x 25 mm)
Weight 0.22 lbs (100 g)
Power Supply 5V DC, 1A (external adapter)
Network Interface 10/100 Mbps Ethernet (RJ-45)
Printer Interface USB 2.0 Type B (1 port)
Supported Protocols TCP/IP, NetBEUI, IPX/SPX, AppleTalk
Management Web browser, SNMP, PS Utility
Operating Systems Windows (all), macOS, Linux, Unix
LED Indicators Power, Link/Activity, Printer Status
Maximum Print Speed Depends on printer; supports up to 12 Mbps USB throughput
Supported Printer Types Most USB printers (PCL, PostScript, etc.)
Security No built-in firewall; use network security
Cleaning Wipe with a dry, soft cloth. Do not use liquids.
Spare Parts Power adapter available separately
Warranty 3 years limited
Package Contents Print server, power adapter, quick installation guide, CD-ROM
Environment Temperature: 0°C to 40°C; Humidity: 10% to 90% non-condensing

Frequently Asked Questions - TE100-MP1UN TRENDNET

How do I set up the TRENDnet TE100-MP1UN print server?
Connect the print server to your network via Ethernet, then connect your USB printer. Use the included CD or download the PS Utility from TRENDnet's website to configure the IP address. Install the printer driver on your computer using the standard TCP/IP port.
What printers are compatible with the TE100-MP1UN?
Most USB printers are supported, including HP, Canon, Epson, and Brother models. The print server works with printers that use standard printing languages like PCL or PostScript. Check TRENDnet's compatibility list for specific models.
Can I use the print server with both Windows and Mac?
Yes, the TE100-MP1UN supports Windows, macOS, Linux, and Unix. For Mac, use the Bonjour protocol or assign a static IP. The PS Utility is available for Windows only; Mac users can configure via web browser.
How do I reset the print server to factory defaults?
Locate the small reset button on the device. Use a paperclip to press and hold it for about 10 seconds until the LEDs flash. The print server will reboot with default settings (IP: 192.168.0.100).
The print server is not detected on my network. What should I do?
Ensure the Ethernet cable is properly connected and the LED is lit. Check that your router's DHCP is enabled. Run the PS Utility and scan for devices. If still not found, try a different cable or connect directly to a computer to test.
Can I print from a mobile device using this print server?
The TE100-MP1UN is a legacy device and does not support mobile printing protocols like AirPrint or Google Cloud Print. You would need a print server with built-in mobile support or use a computer as a print server.
How do I update the firmware?
Download the latest firmware from TRENDnet's support page. Access the print server's web interface (enter its IP in a browser), go to Maintenance > Firmware Upgrade, and upload the file. Do not power off during the upgrade.
What does the 'Status' LED indicate?
The Status LED shows printer connection. Solid green means the printer is ready. Blinking indicates data transfer. Off means no printer detected or error. Refer to the manual for other patterns.
Is the power adapter included?
Yes, the TE100-MP1UN comes with a 5V DC power adapter. If lost, you can purchase a compatible adapter from TRENDnet or third parties. Ensure it matches the voltage and polarity.
Can I connect multiple printers to one TE100-MP1UN?
No, the TE100-MP1UN has only one USB port, supporting a single printer. For multiple printers, consider a multi-port print server or a networked printer.

User questions about TE100-MP1UN TRENDNET

0 question about this device. Answer the ones you know or ask your own.

Ask a new question about this device

The email remains private: it is only used to notify you if someone responds to your question.

No questions yet. Be the first to ask one.

Download the instructions for your Print Server in PDF format for free! Find your manual TE100-MP1UN - TRENDNET and take your electronic device back in hand. On this page are published all the documents necessary for the use of your device. TE100-MP1UN by TRENDNET.

USER MANUAL TE100-MP1UN TRENDNET

natural_image White rectangular electronic device with dashed-line edges and two small black dots on top (no visible text or symbols)

Quick Installation Guide

TRENDNET TE100-MP1UN - 1

Table of Contents

English 1

  1. Before You Start 1
  2. How to Install 2
  3. Printing 7
  4. Faxing 8
  5. Scanner 9

Troubleshooting 10

1. Before You Start

TRENDNET TE100-MP1UN - Before You Start - 1

natural_image White rectangular electronic device with ventilation slots and a small logo on top (no visible text or symbols)

Package Contents

• E100-MP1UN
• Utility CD-ROM
• Multi-Language Quick Installation

Guide

- ower Adapter (5V, 2A)

System Requirements

  • CD-ROM Drive
    • CPU: 300Mhz or above/ 800Mhz or above (Windows Vista)
    • Memory: 256MB RAM or above/ 512MB RAM or above (Window Vis
    • Windows 2000/XP/2003 Server/Vista (32bit)

Note:

  1. Do not perform the following unless instructed to do so:

  2. Install the utility

  3. Connect printer to Print Server
  4. Connect computer to Print Server

  5. The utility must be installed on each computer in order to use your multifunction printer.

Application

1-Port Multi-Function Print Server
(TE100-MP1UN)
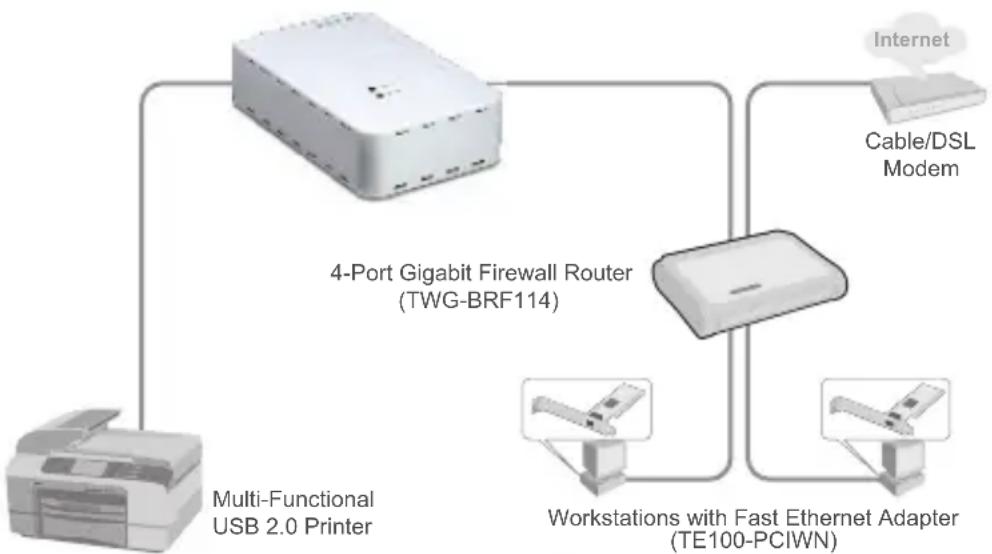
TRENDNET TE100-MP1UN - Application - 1

flowchart
graph TD
    A["4-Port Gigabit Firewall Router (TWG-BRF114)"] --> B["Multi-Functional USB 2.0 Printer"]
    A --> C["Cable/DSL Modem"]
    A --> D["Workstations with Fast Ethernet Adapter (TE100-PCIWN)"]
    B --> D

2. How to install

  1. Install the printer drivers to your computer. Then power down the printer and disconnect the printer from your computer.

Note: Please refer to your printer's manual for printer installation instructions.

  1. Insert the Utility CD-ROM into your CD-ROM drive.

  2. Click Run Autorun.exe (Windows Vista only).

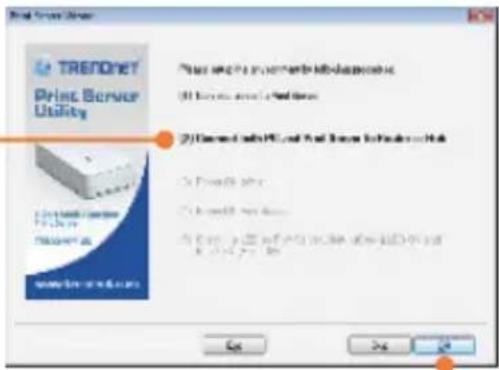
  3. Click Install Utility. Then click Setup Wizard.

  4. Connect the USB Printer to the USB port on the Print Server. Then click OK.
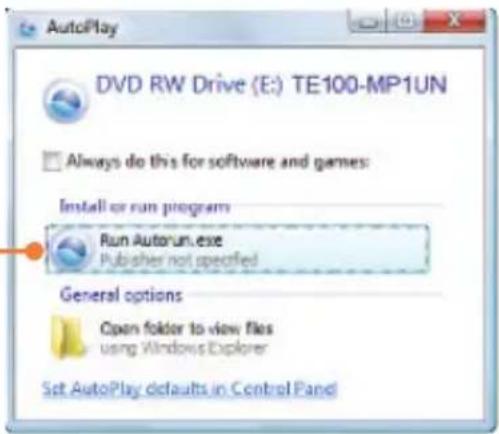
AutoPlay DVD RW Drive (E:) TE100-MP1UN Always do this for software and games: Install or run program Run AutoRun.exe Publisher not specified General options Open folder to view files using Windows Explorer Set AutoPlay defaults in Control Panel

TRENDNET Install Existing Share Wizard Share Use User's Guide Product Registration Edit System 6.2017/2018 @ Open Access

Print Server Utility TRENDET Print Server Utility (1) Open the print server for Print Server (2) Open the print server for Print Server (3) Open the print server for Print Server (4) Open the print server for Print Server (5) Open the print server for Print Server (6) Open the print server for Print Server (7) Open the print server for Print Server (8) Open the print server for Print Server

  1. Connect a RJ-45 network cable from a Switch/Router to the LAN port of the Print Server.
  2. Connect a RJ-45 network cable from a Switch/Router to the Ethernet port on your computer and then click OK.
  3. Power ON your printer and then click OK.
  4. Connect the AC Power Adapter to the Print Server and then to a power outlet. Then click OK.
  5. Verify the Status LED is on and the Error LED if off on the Print Server. Then click Yes.
Print Server Provider TRENCH Print Server Utility Print service providers to include diagnostic (1) Service providers are selected (2) Documented with PDF and PDF services for the other © Print Services © Print Services © Print Services © Print Services © Print Services © Print Services © Print Services © Print Services © Print Services © Print Services © Print Services © Print Services © Print Services © Print Services © Print Services © Print Services © Print Services © Print Services © Print Services © Print Services © Print Services © Print Services © Print Services © Print Services © Print Services © Print Service

Print Service Provider TRENDET Print Scruc Utility Print size: 10 inches Size: 500 mm Power: 200 ohms Power: 200 ohms Power: 200 ohms Power: 200 ohms Power: 200 ohms Power: 200 ohms Power: 200 ohms Power: 200 ohms Power: 200 ohms Power: 200 ohms Power: 200 ohms Power: 200 ohms

Print Scrucor Utility Trenchnet Print Scrucor Utility Print Scrucor Utility Print Scrucor Utility Print Scrucor Utility Print Scrucor Utility Print Scrucor Utility Print Scrucor Utility Print Scrucor Utility Print Scrucor Utility Print Scrucor Utility Print Scrucor Utility Print Scrucor Utility Print Scrucor Utility Print Scrucor Utility Print Scrucor Utility Print Scrucor Utility Print Scrucor Utility Print ScrUCR Utility Print ScrUCR Utility Print ScrUCR Utility Print ScrUCR Utility Print ScrUCR Utility Print ScrUCR Utility Print ScrUCR Utility Print ScrUCR Utility Print ScrUCR Utility Print ScrUCR Utility Print ScrUCR Utility Print ScrUCR Utility Print ScrUCR Utility Print ScrUCR Utility Print ScrUCR Utility Print ScrUCR Utility Print ScrUCR Utility Print Scnscnscnscnscnscnscnscnscnscnscnscnscnscnscnscnscnscnscnscnscnscnscnscnscnscnscnscnscnscnscnscnscnscnscnscnscnscnscnscnscnscnscnscnscnscnscnscnscnscnscnccnsccnccnsccnccnsccnccnsccnccnsccnccnsccnccnsccnccnsccnccnsccnccnsccnccnsccnccnsccnccnsccnccnsccnccnsccnccnsccnccnsccnccnsccnccnsccnccnsccnccnsccnccnsccnccnsccnccnsccnccnsccnccnsccc Print scncsncnscncsncncsncsncsncsncsncsncsncsncsncsncsncsncsncsncsncsncsncsncsncsncsncsncsncsncsncsncsncsncsncsncsncsncsncsncsncsncsncsncsncsncsncsncsncsncsncsncsncsncsncsncmsssssssssssssssssssssssssssssssssssssssssssssssssssssssssssssssssssssssssssssssssssssssssssssssssssssssssssssssssssssssssssssssssssssssssssssssssssssssssssssssssssssssssssssssssssssssssssssssssssssssssecssecssecssecssecssecssecssecssecssecssecssecssecssecssecssecssecssecssecssecssecssecssecssecssecssecssecssecssecssecssecssecssecssecssecssecssecssecssecssecssecssecssecssecssecssecssecssecssecssecssececssecssecssecssecssecssecssecssecssecssecssecssecssecssecssecssecssecssecssecssecssecssecssecssecssecsescecssecssecssecssecssecssecssecssecssecssecssecssecssecssecssecsasecscscecscecscecscecscecscecscecscecscecscecscecscecscecscecscecscecscecscecscecscecscecscecscecscecscecscecscecscecaescecaescecaescecaescecaescecaescecaescecaescecaescecaescecaescecaescecaescecaescecaescecaescecaescecaescecaescecaescecaescecaescecaescecaescecaescecaescecaescecaescecaescecaescecaescecaescecaescecaescescescescescescescescescescescescescescescescescescescescescescescescescescescescescescescescescescescescescescescescescescescescescescescescescescescescescescescescescescescescescescescescescescescescescescescescescescescescescescescescescescescescescescescescescescescescescescescescescescescescescctessessessessessessessessessessessessessessessessessessessessessessessessessessessessessessessessessessessessessessessessessessessessessessessessessessessessessessessessessessessessessessessessessessessessessessessessessessessessessessessessessessessessessessessessessessessessessessessessessessessessescesscsscsscsscsscsscsscsscsscsscsscsscsscsscsscsscsscsscsscsscsscsscsscsscsscsscsscsscsscsscsscsscsscsscsscsscsscsscsscsscsscsscsscsscsscsscsscsscsscsscsscsscsscsscsscsscsscsscsscsscsscsscsscsscsscsscsscsscsscsscsscsscsscsscsscsscsscsscsscsscsscsscsscsscsscsscsscsscsscsscsscsscsscsscsscsscsscsscsscsscssclasscctee10000000000000000000000000000000000000000000000000000000000000000000000000000000000000000000000000000

Print Server Utility TRENDYET Print Scrucr Utility 1. On the Internet Explorer 2. On the Internet Explorer 3. On the Internet Explorer 4. On the Internet Explorer 5. On the Internet Explorer 6. On the Internet Explorer 7. On the Internet Explorer 8. On the Internet Explorer 9. On the Internet Explorer 10. On the Internet Explorer 11. On the Internet Explorer 12. On the Internet Explorer 13. On the Internet Explorer 14. On the Internet Explorer 15. On the Internet Explorer 16. On the Internet Explorer 17. On the Internet Explorer 18. On the Internet Explorer 19. On the Internet Explorer 20. On the Internet Explorer 21. On the Internet Explorer 22. On the Internet Explorer 23. On the Internet Explorer 24. On the Internet Explorer 25. On the Internet Explorer 26. On the Internet Explorer 27. On the Internet Explorer 28. On the Internet Explorer 29. On the Internet Explorer 30. On the Internet Explorer 31. On the Internet Explorer 32. On the Internet Explorer 33. On the Internet Explorer 34. On the Internet Explorer 35. On the Internet Explorer 36. On the Internet Explorer 37. On the Internet Explorer 38. On the Internet Explorer 39. On the Internet Explorer 40. On the Internet Explorer 41. On the Internet Explorer 42. On the Internet Explorer 43. On the Internet Explorer 44. On the Internet Explorer 45. On the Internet Explorer 46. On the Internet Explorer 47. On the Internet Explorer 48. On the Internet Explorer 49. On the Internet Explorer 50. On the Internet Explorer 51. On the Internet Explorer 52. On the Internet Explorer 53. On the Internet Explorer 54. On the Internet Explorer 55. On the Internet Explorer 56. On the Internet Explorer 57. On the Internet Explorer 58. On the Internet Explorer 59. On the Internet Explorer 60. On the Internet Explorer 61. On the Internet Explorer 62. On the Internet Explorer 63. On the Internet Explorer 64. On the Internet Explorer 65. On the Internet Explorer 66. On the Internet Explorer 67. On the Internet Explorer 68. On the Internet Explorer 69. On the Internet Explorer 70. On the Internet Explorer 71. On the Internet Explorer 72. On the Internet Explorer 73. On the Internet Explorer 74. On the Internet Explorer 75. On the Internet Explorer 76. On the Internet Explorer 77. On the Internet Explorer 78. On the Internet Explorer 79. On the Internet Explorer 80. On the Internet Explorer 81. On the Internet Explorer 82. On the Internet Explorer 83. On the Internet Explorer 84. On the Internet Explorer 85. On the Internet Explorer 86. On the Internet Explorer 87. On the Internet Explorer 88. On the Internet Explorer 89. On the Internet Explorer 90. On the Internet Explorer 91. On the Internet Explorer 92. On the Internet Explorer 93. On the Internet Explorer 94. On the Internet Explorer 95. On the Internet Explorer 96. On the Internet Explorer 97. On the Internet Explorer 98. On the Internet Explorer 99. On the Internet Explorer

  1. Select the print server and then click Next.

Print Server Utility TRENDNET Print Server Utility New printed software - config+ New PrintServer C:\WINDOWS Copyright\500\Windows Drive OK Finish Help Help

  1. Configure the IP address of the print server to be in the same subnet as your network and then click Next.

Print Server Utility TRENDNET Print Server Utility © Open Source © Open Source: automatic © Open Source: None IP Litter 100 200 300 400 Screening 100 200 300 400 Text Setup 100 200 300 400 OK Cancel Add

  1. Copy down the IP address and then click Next.

TRENDNET Print Server Utility IP Node: 100.0000 Camera Name: 888-897-896 Default 2 versions: 100.0000 OK Finish Help

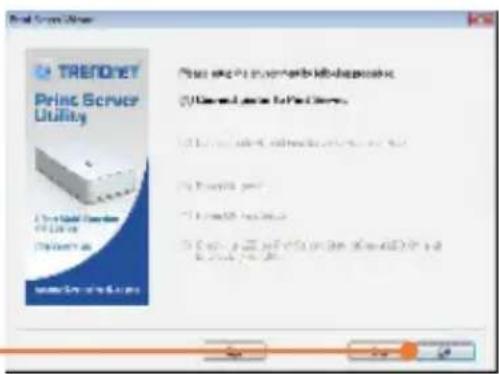
  1. Click Finish.

TRENDAY Print Server Utility [User] print server software, not "Test"

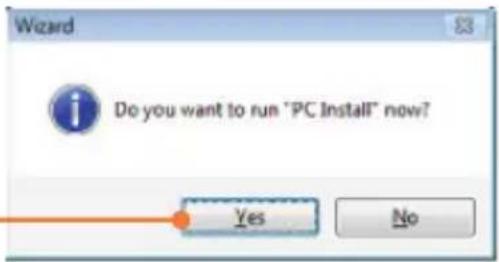
  1. Click Yes.

Wizard Do you want to run "PC Install" now? Yes No

  1. Click Next and then follow the InstallShield Wizard instructions.

IFR Direct Pin Server - Installable Web Welcome to the Installable Web/Installable IFR Direct Pin Server The installed Web version will install IFR Direct Pin Server on account. To continue this test.

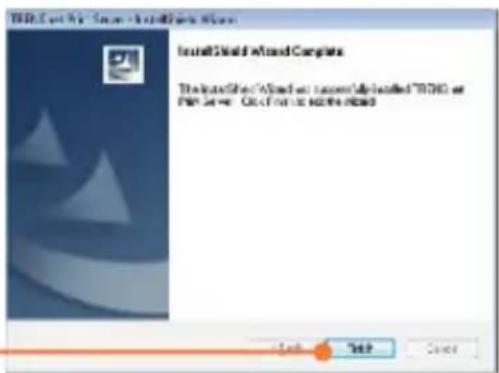
  1. Click Finish.

Install Would to Avoid Complete The Install Would to Avoid an successful version of 19.0% or Plan server - Get First or Next before Next Help Cancel

  1. Click on Resource and then click Connect.

TRENDnet Print Server Utility EC1239286 - Officejet 0630-series Resource: Print, Scan Status: Online Connect Close Ready Not connected

  1. The printer driver wizard appears. Follow the printer driver wizard to install the printer.

  2. Click OK.

Message The Printer was successfully initialized. You can click 'Connect' use the printer. OK

For detailed information regarding the TE100-MP1UN configuration and advanced settings, please refer to the User's Guide on the Utility CD-ROM or TRENDnet's website at www.trendnet.com

Register Your Product

To ensure the highest level of customer service and support, please take a moment to register your product Online at: www.TRENDnet.com/register

Thank you for choosing TRENDnet

3. Printing

Note: Only one user can use the print server at a time. Once a user has finished using the print server, another user can use it.
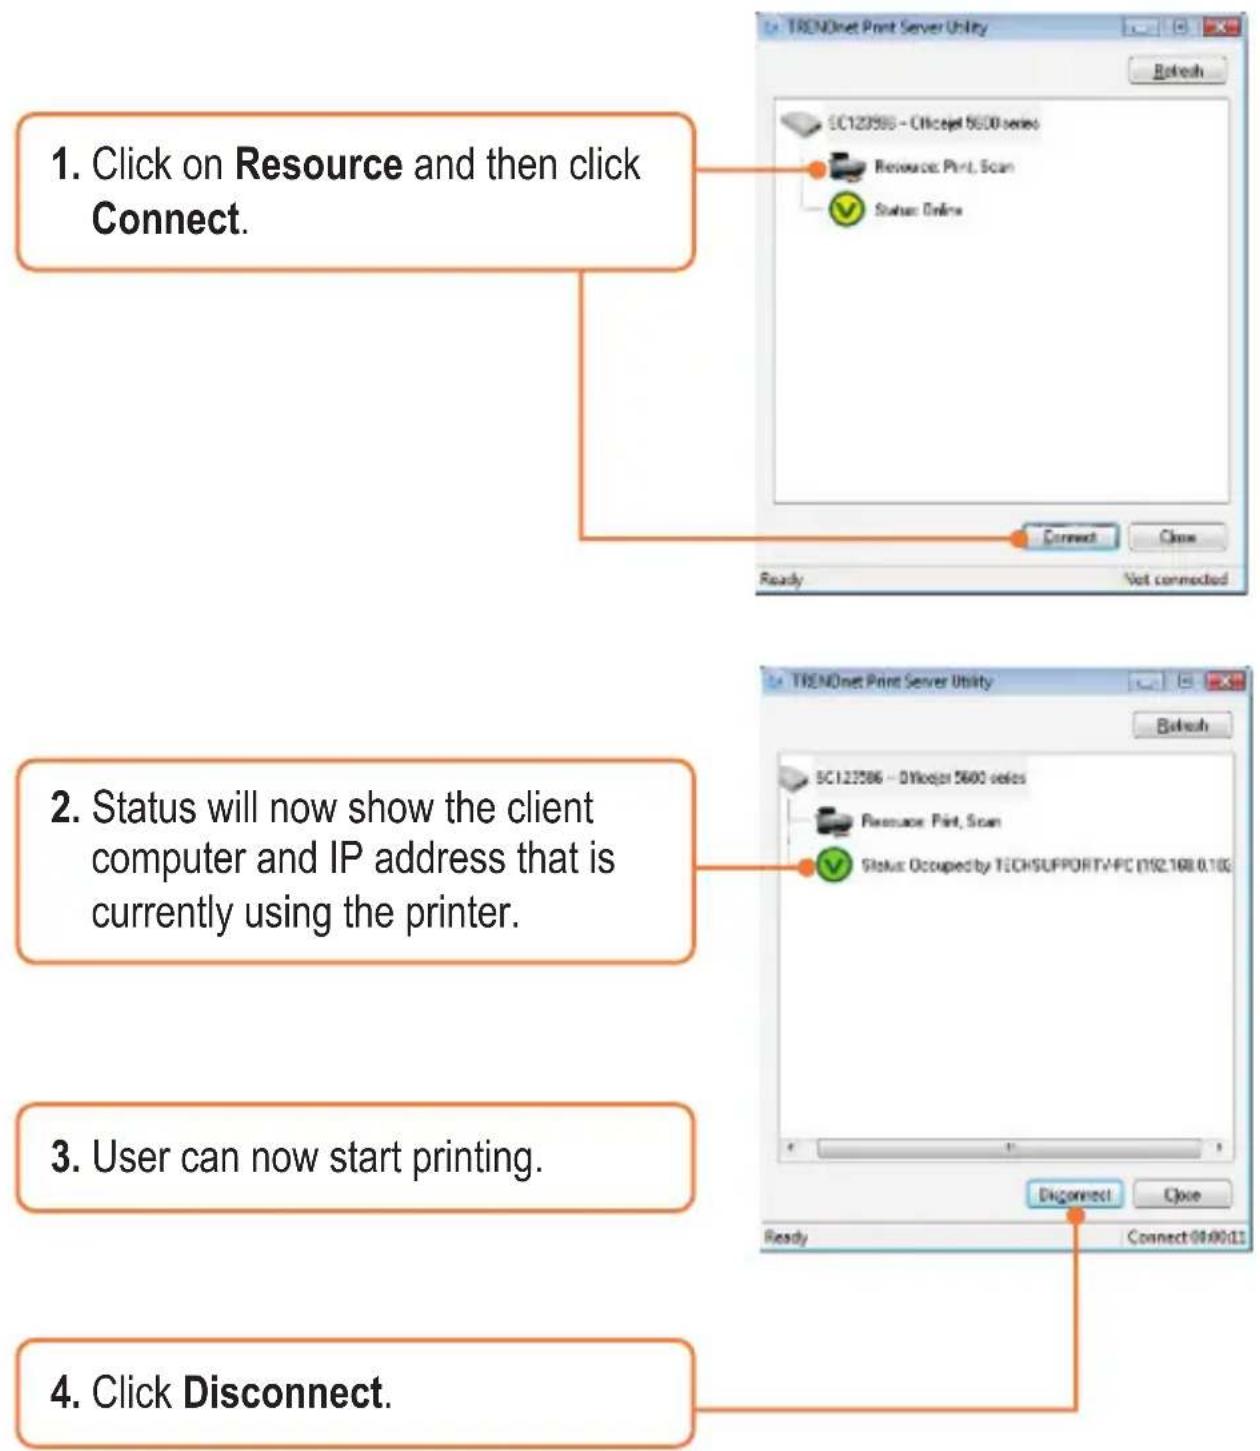
TRENDNET TE100-MP1UN - Printing - 1

flowchart
graph TD
    A["1. Click on Resource and then click Connect."] --> B["2. Status will now show the client computer and IP address that is currently using the printer."]
    B --> C["3. User can now start printing."]
    C --> D["4. Click Disconnect."]

4. Faxing

Note: Only one user can use the print server at a time. Once a user has finished using the print server, another user can use it.

TRENDNET TE100-MP1UN - Faxing - 1

flowchart
graph TD
    A["1. Click on Resource and then click Connect."] --> B["2. Status will now show the client computer and IP address that is currently using the printer."]
    B --> C["3. User can now start Faxing. Follow the Multifunction printer software instructions for faxing."]
    C --> D["4. Click Disconnect."]

5. Scanning

Note: Only one user can use the print server at a time. Once a user has finished using the print server, another user can use it.

  1. Click on Resource and then click Connect.

TRENDnet Print Server Utility Esc123986 -- Officust 9500 server Resource: Print, Scan Status: Online Connect Close Ready Not connected

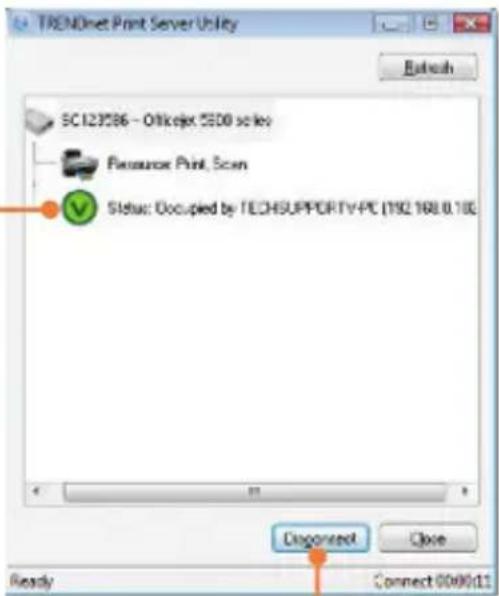
  1. Status will now show the client computer and IP address that is currently using the printer.

  2. Place the document on the Multi-Function Printer's Scanner bed. Then follow the Multifunction printer software instructions for scanning.

  3. Click Disconnect.

TRENDnet Print Server Utility Refresh SC123586 - Officer SSD series Resource Print, Scan Status: Occupied by TECHSUPPORTY-PC (192.168.0.100) Done Ready Connect 0049011

Q1. I inserted the Utility CD-ROM into my computer's CD-ROM Drive but the installation menu does not appear automatically. What should I do?

A1. For Windows 2000/XP, if the window does not appear automatically, click Start, click Run, and type D:\autorun.exe where "D" in "D:\autorun.exe" is the letter assigned to your CD-ROM Drive, and then press the ENTER key on your keyboard. For Windows Vista, if the installation menu does not appear automatically, click Start, click the Start Search box, and type D:\autorun.exe where "D" in "D:\autorun.exe" is the letter assigned to your CD-ROM Drive, and then press the ENTER key on your keyboard.

Q2. The setup wizard does not detect the Print Server and/or printer/storage device. What should I do?

A2. First, double check your hardware connections; make sure that the Print Server and printer are powered ON and are properly connected. Make sure the RJ-45 network cable is securely connected to the Print Server and Switch/Router. Second, disable any software firewall programs such as ZoneAlarm or Norton Internet Security. If your computer is running Windows XP or Vista, disable the built-in firewall. Third, click Refresh. Fourth, power cycle the Print Server. Unplug the power to the Print Server, wait 15 seconds, then plug the Print Server back in.

Q3. The setup wizard does not detect my printer device. What should I do?

A3. First, make sure the printer is powered on and properly connected to the Print Server. Second, connect the printer with another USB cable. Third, reset the print server. Take a pin or paperclip and press the reset button on the print server for 15 seconds, then let go.

Q4. I am unable to print to my Print Server. What should I do?

A4. First, make sure you follow the exact steps for installing the Print Server in section 2 Second, make sure to right click on the print server in the utility and click connect. If another user is using the print server, you must wait until the user is finished using it. Third, if you are connected to the print server and are idled for a couple of minutes, a warning message appears. If you do not respond within a minute, you will be automatically disconnected from the print server. You must connect to the print server again.

Q5. I can print a test page, but I cannot print anything from Microsoft Word or other applications.

A5. Make sure to set the newly installed network printer as your default printer. Click Start and then click Printers & Faxes, verify that your printer icon has a check on it.

Q6. I configured my Print Server to automatically receive an IP Address from a DHCP server, and now I cannot go into the Print Server's web utility.

A6. Open the print server setup wizard (See 1. How to install) to locate your Print Server's IP Address.

Q7. Is there a way to force a computer to give up ownership to the print server?

A7. If the user has been idled for 5 minutes, the user will be automatically disconnected. You can also force a computer to give up ownership by unplugging the power to the print server and plug the power back in.

If you still encounter problems or have any questions regarding the TE100-MP1UN, please refer to the User's Guide included on the Utility CD-ROM or contact TRENDnet's Technical Support Department.

Certifications

This equipment has been tested and found to comply with FCC and CE Rules.

Operation is subject to the following two conditions:

(1) This device may not cause harmful interference.
(2) This device must accept any interference received. Including interference that may cause undesired operation.

TRENDNET TE100-MP1UN - Certifications - 1

TRENDNET TE100-MP1UN - Certifications - 2

TRENDNET TE100-MP1UN - Certifications - 3

Waste electrical and electronic products must not be disposed of with household waste. Please recycle where facilities exist. Check with you Local Authority or Retailer for recycling advice.

TRENDNET TE100-MP1UN - Certifications - 4

NOTE: THE MANUFACTURER IS NOT RESPONSIBLE FOR ANY RADIO OR TV INTERFERENCE CAUSED BY UNAUTHORIZED MODIFICATIONS TO THIS EQUIPMENT. SUCH MODIFICATIONS COULD VOID THE USER'S AUTHORITY TO OPERATE THE EQUIPMENT.

ADVERTENCIA

Product Warranty Registration

Please take a moment to register your product online. Go to TRENDnet's website at http://www.trendnet.com/register
Manual assistant
Powered by Anthropic
Waiting for your message
Product information

Brand : TRENDNET

Model : TE100-MP1UN

Category : Print Server