
MW 380 W - Microwave DELONGHI - Free user manual and instructions
Find the device manual for free MW 380 W DELONGHI in PDF.


| Type of product | Countertop microwave oven |
| Brand | DeLonghi |
| Model | MW 380 W |
| Color | White |
| Capacity | 20 liters |
| Power output | 800 W |
| Power levels | 6 levels (including defrost) |
| Timer | Up to 60 minutes |
| Display | Digital LED |
| Control type | Touchpad with rotary dial |
| Interior light | Yes |
| Turntable | Glass turntable, 25 cm diameter |
| Door opening | Left hinged, push-button open |
| Child safety lock | Yes |
| Dimensions (W x D x H) | 440 x 360 x 259 mm |
| Inner dimensions (W x D x H) | 300 x 300 x 190 mm |
| Weight | 11.5 kg |
| Power supply | 230 V / 50 Hz |
| Power consumption | 1200 W |
| Magnetron frequency | 2450 MHz |
| Cleaning recommendation | Wipe interior with damp cloth, avoid abrasives |
| Spare parts availability | Turntable, fuse, door seal available from DeLonghi service |
| Repairability index | 7.5 / 10 (estimated based on component accessibility) |
Frequently Asked Questions - MW 380 W DELONGHI
User questions about MW 380 W DELONGHI
0 question about this device. Answer the ones you know or ask your own.
Ask a new question about this device
Download the instructions for your Microwave in PDF format for free! Find your manual MW 380 W - DELONGHI and take your electronic device back in hand. On this page are published all the documents necessary for the use of your device. MW 380 W by DELONGHI.
USER MANUAL MW 380 W DELONGHI
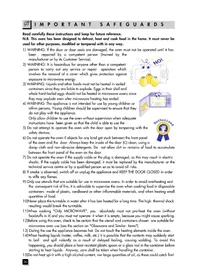
Read these instructions carefully and keep them for future reference.
N.B. This oven has been designed to defrost, heat and cook food in the home. It must never be used for other purposes, modified, or tampered with in any way.
1) WARNING: If the door or door seals are damaged, the oven must not be operated until it has
been repaired by a competent person (trained by the manufacturer or by its Customer Service).
2) WARNING: It is hazardous for anyone other than a competent person to carry out any service or repair operation that involves the removal of a cover which gives protection against exposure to microwave energy.
3) WARNING: Liquids and other foods must not be heated in sealed containers since they are liable to explode. Eggs in their shell and whole hard-boiled eggs should not be heated in microwave ovens since they may explode even after microwave heating has ended.
4) WARNING: The appliance is not intended for use by young children or infirm persons. Young children should be supervised to ensure that they do not play with the appliance.
Only allow children to use the oven without supervision when adequate instructions have been given so that the child is able to use the


5) Do not attempt to operate the oven with the door open by tampering with the safety devices.
6) Do not operate the oven if objects of any kind get stuck between the front panel of the oven and the door. Always keep the inside of the door (C) clean, using a damp cloth and non-abrasive detergents. Do not allow dirt or remains of food to accumulate between the front panel of the oven and the door.
7) Do not operate the oven if the supply cable or the plug is damaged, as this may result in electric shocks. If the supply cable has been damaged, it must be replaced by the manufacturer, the technical service centre, or a qualified person so as to avoid all risks.
8) If smoke is observed, switch off or unplug the appliance and KEEP THE DOOR CLOSED in order to stifle any flames.
9) Only use utensils that are suitable for use in microwave ovens. In order to avoid overheating and the consequent risk of fire, it is advisable to supervise the oven when cooking food in disposable containers made of plastic, cardboard, or other inflammable materials, and when heating small quantities of food.
10) Never place the turntable in water after it has been heated for a long time. The high thermal shock resulting would break the turntable.
11) When cooking "Only MICROWAVE", you absolutely must not pre-heat the oven (without foodstuffs in it) and you must not operate it when it is empty, because you might cause sparking.
12) Before using this oven, check to be certain that the utensil and containers chosen are suitable for microwave oven use (see the section on "Glassware and Similar Items").
13) During use, the appliance becomes hot. Do not touch the heating elements inside the oven.
14) When heating liquids (water, coffee, milk, etc.), it is possible that the contents may suddenly start to boil and spill violently as a result of delayed boiling, causing scalding. To avoid this, place a heat-resistant plastic spoon or a glass rod in the container before starting to heat liquids. In any case, care should be taken when handling the container.
15) Do not heat spirits with a high alcohol content, nor large quantities of oil, as these could catch fire!

16) The contents of feeding bottles and baby food jars shall be stirred or shaken and the temperature shall be checked before consumption in order to avoid burns. It is also advisable to stir or shake the food to ensure that it has an even temperature. When using commercially available bottle sterilisers, before turning the oven on, ALWAYS make sure the container is filled with the quantity of water indicated by the manufacturer.
17) Failure to clean the oven properly could result in damage to the surfaces. This could reduce the working life of the oven and make it hazardous to use.


IMPORTANT INFORMATION FOR CORRECT DISPOSAL OF THE PRODUCT IN ACCORDANCE WITH EC DIRECTIVE 2002/96/EC.
At the end of its working life, the product must not be disposed of as urban waste. It must be taken to a special local authority differentiated waste collection centre or to a dealer providing this service. Disposing of a household appliance separately avoids possible negative consequences for the environment and health deriving from inappropriate disposal and enables the constituent materials to be recovered to obtain significant savings in energy and resources. As a reminder of the need to dispose of household appliances separately, the product is marked with a crossed-out wheeled dustbin.
GLASSWARE AND SIMILAR ITEMS
You can make use of all types of containers made of glass (preferably Pyrex), ceramics, porcelain and glazed pottery as long as they do not have decorations or metal parts (gilded borders, handles, feet). Heat resistant plastic containers can also be used, but only for "Microwave Only" cooking. If you are still doubtful about using a particular container, you can perform a simple test. Place the empty container in the oven for 30 seconds at maximum power ("Microwave Only" function). If the container is still cold or only slightly warm, it is suitable for microwave cooking.
If it is very hot or gives out sparks, it is not suitable. For short heating periods, you may use paper napkins, cardboard trays and plastic "throwaway" plates as a base. As far as shape and size are concerned, it is absolutely essential that containers be such as to allow the turntable to rotate. In order to use large-size rectangular containers (which may not be able to rotate
inside the cooking cavity), you can remove the spindle (B) from its housing to prevent the turntable (D) moving. Bear in mind that to be assured of good results when carrying this out you must stir the food and turn the container around several times during the cooking process. Containers made of metal, wood, recycled kitchen paper, cane and plate glass are not suitable for use in microwave ovens. The metal rack supplied with your microwave have been fully tested for safe use. You should remember, too, that since microwaves heat the food and not the glassware, earthenware or similar containers for that food, it is possible to cook such foods in the serving dish and thereby avoid the problem of having to clean pans later. However, remember that heat may be transferred from the food itself to the plate, making it necessary to use an oven glove.
In any case, observe the guidelines shown in the following table:
| Glass | Cera-mics | Porce-lain | Clay plates | Plastic for micro-waves | Paper cups* | Paper plates* | Parch-ment paper* | Card-board | Metal contain-ers | Glass-ware with metal parts | Special roasting paper | |
| Defrosting | YES | YES | YES | YES | YES | YES | YES | YES | YES | NO | NO | YES |
| Heating | YES | YES | YES | YES | YES | YES | YES | YES | YES | NO | NO | YES |
| Cooking | YES | YES | YES | YES | YES | NO | NO | NO | NO | NO | NO | YES |
* If the cooking time required is too long, there is a possibility of fire.
TECHNICAL DATA
Outer measurements (LxDxH) 455x290x370
Inner measurements (LxDxH) 280x205x270
Approximate weight 14 kg.
Turntable diameter 24.5 cm
Oven light 20 W
Output power 700W (IEC705)
For additional data, consult the serial plate glued to the back of the equipment.
This appliance conforms to EC directives 89/336 and 92/31 on Electromagnetic Compatibility and EC directive no. 1935/2004 of 27/10/2004 on materials intended for contact with food.
ELECTRICAL CONNECTIONS
Connect this equipment only to electrical outlets having a capacity of at least 10A.
Before using this oven, check to make certain that the electrical network is the same as that indicated on the equipment's data plate and that the electrical outlet is connected to an efficient grounding (earth) terminal. The manufacturer shall not be responsible in any manner whatsoever for harm or damage caused by failure to observe this norm.
• Electrical Connection for UK only .....see page 30
INSTALLATION
1) After having removed the oven from its box, check to make certain that the turntable spindle (B) is correctly fitted into its housing. Place the turntable support (E) in the middle of the cooking chamber and set the turntable (D) on top of it. The spindle (B) must be inserted in the related turntable housing. air outlet

2) Check to make certain that this equipment has not been damaged in transport and check especially to see if the door opens and closes correctly. 3) Place this oven on a surface so that there remains a space of about 5 cm.
between the oven's surface portions and the walls to the side and the back, and a free space of at least 20 cm. above the oven (see Fig. 1).


4) Never block up or otherwise obstruct the air outlet holes. In particular, never place anything on the oven and check to be certain that the air and steam outlet slots (located atop the oven) are ALWAYS FREE (see Figs. 2 and 3). 5) DO NOT remove the transparent film on the inner surface of the door.

DESCRIPTION OF CONTROLS

HOW TO GET THE BEST RESULTS FROM YOUR OVEN
| What do I want to do? | What power should I choose? | Page | |
| Defrost | Power level | 25 | |
| 28 | |||
| Melt butter and soften cheeseH eat pastry goods | Power level | 25 | |
| or | 30 | ||
| 34 | |||
| Cook meatCook fish | Power level | 25 | |
| 32 | |||
| 32 | |||
| Cook fruitCook vegetablesC ook rice, pastaHeat up any type of already cooked or frozen food | Power level | 25 | |
| 34 | |||
| 33 | |||
| 34 | |||
| 30 | |||
| Defrost, reheat, cook on two levels at the same time | Microwave only with (SPACER LEVEL) (Not with all models) | 25 | |
| 32 | |||
ADVICE ON USING YOUR OVEN CORRECTLY
Microwaves consist of electromagnetic radiation found in nature under the form of light waves (e.g., sunlight). Inside the oven, these waves penetrate food from all directions and heat up the water, fatty and sugar molecules.
Heat is produced very quickly only in the food itself, whereas the container being used warms up indirectly by means of heat given off by the heated food. This prevents food from sticking to its container, so you can use very little fatty substance or, in some cases, no fat at all during the cooking process.
Therefore cooking in a microwave oven is considered to be healthy and good for one's diet. And in contrast to traditional methods, cooking in a microwave foodstuffs are less dehydrated, lose less of their nutritional value, and retain more of their original flavour.
Basic rules for correct cooking with a microwave oven
1) In order to set cooking times correctly, remember (in referring to the charts on the following pages) that when you increase the amount of foodstuffs the cooking temperature must likewise be proportionately increased and vice-versa. It is important to respect the "standing" times: standing time means that period during which the food must be left to "rest" after being cooked so as to allow an even greater spreading of the temperature within. The temperature of meat, for example, will rise about 5°-8° C. (approx. 9°-15° F.) during the standing time. Standing times may be observed either inside or outside the oven. 2) One of the main things you must do is stir the food several times while it is being cooked. This helps make the temperature distribution more uniform and thus shortens the cooking time.
3) It is also advisable to turn the foodstuff over during its cooking process: this applies especially for meat, whether it is in large pieces (roasts, whole chickens, etc.) or small (chicken breasts, etc.).
4) Foods having a skin, shell or peel (e.g., apples, potatoes, tomatoes, frankfurters, fish) must be pierced with a fork in several points so as to permit steam to escape and to prevent those items from exploding (see Fig. 4).
5) If you are preparing a large number of portions of the same food item (e.g., boiled potatoes), place those portions in a Pyrex dish in order to have them cook in a uniform manner (see Fig. 5):
6) The lower the temperature at which a foodstuff is placed in a microwave oven, the longer the cooking time required. Food having a room temperature will cook more quickly than food having a refrigerator temperature.
7) Always do your cooking by placing the food container in the centre of the turntable.
8) It is perfectly normal for condensation to form inside the oven and near the air outlet. To reduce such condensation, cover the foodstuffs with clear-sheet, wax paper, a glass lid or simply an overturned plate. Then, too, foods having a water content (e.g., greens and vegetables) cook better when covered. The covering of food also helps keep the oven clean on the inside. Use clear-sheet made expressly for microwave ovens.

fig. 4

fig. 5
OPERATING THE OVEN
1
Place the food in a container suitable for microwave cooking and place it in the centre of the turntable
N.B: You do not have to pre-heat the oven.
2
Close the door

3
Choose the power level you want by turning the power selector knob.
![graph TD A["Start"] --> B["PONION LEVEL"] B --> C{Flow Direction} C --> D["End"]](/content/2026/05/1026377/images/5b36ee6d0a9f112cc79458039feed27ff5f83fbfe1e7b0a1de14a05ddd1f930b.jpg)
4
Set the desired cooking time by turning the timer knob clockwise.

When setting short cooking times (less than 10 minutes), turn the timer knob as far as it will go, then bring it back to the required cooking time. For very short cooking times (a few seconds to a minute), you are, however, recommended to check the time using a clock.
5
Once the set cooking time has expired, a buzzer will sound to signal that your food is ready.

It is possible to interrupt the oven's operations at any time simply by turning the timer knob to its "0" setting. You may also change the cooking time (while the cooking itself is in progress) by turning that same knob back or forth. You can check on the situation while the cooking is in progress by opening the door and examining the food. That move will interrupt the oven's operations, but they will begin again once the door has been closed.
By using the spacer wire rack with the microwave-only function, you can defrost, reheat, and cook foods at the same time, even different dishes on two levels. The special double-microwave-emission system makes possible, in fact, a perfect distribution of energy.
When you wish to cook two food dishes at the same time, all you have to do is keep these basic rules in mind:
1) The cooking times for food dishes cooked at the same time are different from those for the cooking of single dishes. So always consult the reference table on page 27.
| Times for simultaneous cooking | |
| Potatoes (above) | 24 min |
| Goulash (below) | 48 min |
| Cooking times for single dishes | |
| Potatoes | 10 - 14 min |
| Goulash | 35 - 40 min |
2) Be careful to ALWAYS place on the SPACER WIRE RACK that food which requires less cooking time: it will thus be easier to remove the upper pan. Take the wire rack out and finish cooking the food underneath.

3) Pay strict attention to the indications and recommendations in the tables. In particular, always check to be sure that the food being reheated is very hot before removing it from the oven.
Defrosting times
| Type | Pan position | Quantity (grams) | Power Knob | Minutes | Notes |
| G round meat | above | 500 | 20 | Turn the meat over after 15 min. When the cooking is finished, let the meat sit for 15 min. | |
| G round meat | below | 500 | 20 | ||
| Chicken in pieces | above | 500 | 24 | During the defrosting, pull the pieces apart. When the cooking is finished, let the meat sit for 15 min. | |
| Stew | below | 500 | 24 | ||
| Cauliflower | above | 450 | 22 | At the end, let sit for 5 to 10 min. | |
| W hole fish | below | 500 | 22 | At the end, let sit for 5 to 10 min. |
Reheating times
| Type | Pan position | Quantity (grams) | Power Knob | Minutes | Notes |
| Meat, single serving | above | 150 | 6 | Cover the food with plastic wrap | |
| Vegetables, single serving | below | 250 | 6 | Cover the food with plastic wrap | |
| Plate of lasagne | above | 500 | 9 | Cover the food with plastic wrap | |
| Plate of lasagne | below | 500 | 9 | Cover the food with plastic wrap | |
| Meat, single serving | above | 150 | 6 | Cover the food with plastic wrap | |
| Plate of lasagne | below | 500 | 8 | Cover the food with plastic wrap |
Cooking times
| Type | Pan position | Quantity (grams) | Power Knob | Minutes | Notes |
| Potatoes | above | 500 | [HTZA] | 20 | Cut in equal-size pieces and cover with plastic wrap. |
| Potatoes | below | 500 | 20 | Cut in equal-size pieces and cover with plastic wrap. | |
| Carrots | above | 500 |  | 16 | Cut in equal-size pieces and cover with plastic wrap. |
| Carrots | below | 500 | 16 | Cut in equal-size pieces and cover with plastic wrap. | |
| Sliced fish | above | 400 | [YBC2] | 13 | Cover with plastic wrap. After 13 min., take out the grill. |
| Zucchini | below | 475 | 15 | Leave whole and cover with plastic wrap. | |
| W hole fish | above | 200 | [GHXW] | 11 | Cover with plastic wrap. After 11 min., take out the grill. |
| Zucchini | below | 475 | 14 | Leave whole and cover with plastic wrap | |
| W hole fish | above | 200 |  | 11 | Cover with plastic wrap. |
| W hole fish | below | 200 | 11 | Cover with plastic wrap. | |
| Potatoes | above | 500 |  | 20 | Cut in equal-size pieces and cover with plastic wrap. |
| Goulash | below | 1500 | 40 | After 24 min., take out the grill. Stir 2 or 3 times. | |
| Rice | above | 300 |  | 22 | Cover with plastic wrap and stir 2 times |
| Cabbage | below | 500 | 22 | Leave whole and cover with plastic wrap | |
| Peas | above | 500 |  | 20 | Cover with plastic wrap. |
| B russels sprouts | below | 500 | 20 | Cover with plastic wrap. | |
| Meat loaf | above | 500 |  | 30 | If needed, turn over at the halfway point |
| Potatoes | below | 500 | 30 | Cover with plastic wrap. | |
| Sausages | above | 300 | [KZYZ] | 22 | Stir 1 or 2 times |
| Sausages | below | 300 | 22 | Stir 1 or 2 times | |
| Stew | above | 700 |  | 36 | Stir 1 or 2 times |
| Pork roast | below | 700 | 36 | Turn over at the halfway point |
DEFROSTING
- Foods frozen in bags or plastic sheeting or in their packaging may be placed directly in the oven, as long as they have no metal parts (e.g., bands or closure rivets).
- Certain foods, such as greens, vegetables and fish, do not generally require defrosting before you begin cooking them.
- Stewed foods and meats as well as meat sauces defrost better and quicker if they are stirred from time to time, turned over or broken up.
- While defrosting, meat and fish lose their liquid content. It is recommended, therefore, that you defrost such items in a tray or basin.
- It is advisable to separate each individual piece of meat from its bag before putting it in the freezer. This will help you save valuable time when preparing foods.
- Be careful about following the timings printed on frozen products, because they are guidelines and may not always be correct. It is best to use defrosting times slightly less than those indicated. The time needed for defrosting will vary in terms of the degree to which the food has been frozen.
Defrosting times
| Type Quantity | Power Selector | Timer (minutes) | Notes | Standing time (minutes) | |
| MEAT | |||||
| • R oasts (pork, beef, veal, etc.) | 1 kg | * | 25 - 28 | 20 | |
| • Steaks, cutlets, meat slices | 200 gr | " | 6 - 8 | 5 | |
| • Stew, goulash | 500 gr | " | 14 - 16 | 10 | |
| • G round meat | 500 gr | " | 12 - 14 | (*) | 15 |
| " | 250 gr | " | 5 - 7 | 10 | |
| • Hamburger | 200 gr | " | 7 - 9 | 10 | |
| • S a u s a g e s | 300 gr | " | 9 - 11 | 10 | |
| POULTRY | |||||
| • Duck, turkey | 1,5 kg | " | 35 - 40 | At the end of the rest peri-od, wash under hot water to remove possible ice | 20 |
| • Whole chickens | 1,5 kg | " | 35 - 40 | 20 | |
| • Cut-up chicken | 500 gr | " | 14 - 16 | 10 | |
| • Chicken breasts | 300 gr | " | 13 - 15 | 10 | |
| VEGETABLES | |||||
| • Cubed eggplant | 500 gr | " | 16 - 19 | 5 | |
| • Cut-up peppers | 500 gr | " | 15 - 18 | 5 | |
| • S helled peas | 500 gr | " | 12 - 15 | 5 | |
| • A r tichoke hearts | 300 gr | " | 9 - 11 | 5 | |
| • Pieces of asparagus | 500 gr | " | 14 - 16 | To make defrosting easier, stir the vegetables from time to time | 5 |
| • Cut-up green beans | 500 gr | " | 15 - 18 | 5 | |
| • Whole broccoli | 500 gr | " | 15 - 17 | 5 | |
| • B russels sprouts | 500 gr | " | 15 - 17 | 5 | |
| • Cut-up carrots | 500 gr | " | 14 - 16 | 5 | |
| • Cauliflower tops | 450 gr | " | 13 - 15 | 5 | |
| • Mixed vegetables | 300 gr | " | 8 - 10 | 5 | |
| • Cut-up spinach | 300 gr | " | 9 - 11 | 5 | |
| FISH | |||||
| • Filleted fish | 300 gr | " | 9 - 11 | Fish is better cook from frozen if it does not require further preparation. | 7 |
| • Cut-up fish | 400 gr | " | 10 - 12 | 7 | |
| • W hole fish | 500 gr | " | 13 - 15 | 7 | |
| • Prawn, shrimps | 400 gr | " | 10 - 12 | 7 | |
| DAIRY PRODUCTS | |||||
| • Butter | 250 gr | " | 5 - 7 | Remove the aluminium paper and metal pieces. Partially defrosted. Needs the standing time. | 10 |
| • Cheese | 250 gr | " | 6 - 8 | 15 | |
| • C r e a m | 200 ml | " | 8 - 10 | Cream is to be removed from its container and put on a plate. | 5 |
| BREAD PRODUCTS | |||||
| • 2 average-size rolls | 150 gr | " | 1 - 2 | 3 | |
| • 4 average-size rolls | 300 gr | " | 4 - 6 | Put the bread directly on the turntable | 3 |
| • Sliced home-style bread | 250 gr | " | 4 - 6 | 3 | |
| • W hole-wheat bread | 250 gr | " | 4 - 6 | 3 | |
| FRUIT | |||||
| • Strawberries, prunes, cherries, currants, apricots | 500 gr | " | 12 - 14 | Mix 2 or 3 times | 10 |
| • R a s p b e r r i e s | 300 gr | " | 8 - 10 | Mix 2 or 3 times | 10 |
| • Blackberries | 250 gr | " | 6 - 8 | Mix 2 or 3 times | 6 |
(*) These indications are suitable for performing the minced meat defrosting test according to Regulation 60705, Par. 13.3 (see page 2). Turn over halfway through the set time. Place directly on the turntable. Further information, including on other performance tests according to Regulation 60705, is given in the table on page 2.
Heating food in a microwave oven is much quicker and energy efficient than traditional methods.
- We recommend that you heat foodstuffs (especially if they are frozen) to a temperature of at least 70°C (it must be piping hot!). Leave to stand for a few minutes as you will not be able to eat that food immediately because it will be too hot.
- This will ensure that any possible bacteria present in food will have been killed. • To heat pre-cooked or frozen foods, follow these rules:
- remove the food from its metal containers;
- Cover it with plastic wrap (the clear-film type suitable for microwave ovens) or wax paper; in this way, all the food's natural flavour will be preserved and the oven will stay cleaner; you may also cover the food with an upside-down plate;
- If possible, stir or turn the food over frequently so as to speed up the heating process and keep the heat uniform at the same time;
- Follow the cooking times listed with great caution; remember that under certain conditions the timings given must be lengthened
- Frozen foods must be defrosted before the heating process begins. The lower the food's initial temperature, the longer the time needed for heating.
- Foodstuffs and drinks may be heated briefly in paper or plastic containers. In any event, however, such containers may become misshapen if the heating time is too long.
ELECTRICAL CONNECTION (U.K. ONLY)
A) If your appliance comes fitted with a plug, it will incorporate a 13 Amp fuse. If it does not fit your socket, the plug should be cut off from the mains lead, and an appropriate plug fitted, as below.
WARNING: Very carefully dispose of the cut off plug after removing the fuse: do not insert in a 13 Amp socket elsewhere in the house as this could cause a shock hazard.
With alternative plugs not incorporating a fuse, the circuit must be protected by a 15 Amp fuse.
WARNING - THIS APPLIANCE MUST BE EARTHED IMPORTANT
The wires in the mains lead are coloured in accordance with the following code:
Green and yellow: Earth
Blue: Neutral
Brown: Live


If the plug is a moulded-on type, the fuse cover must be refitted when changing the fuse using a 13 Amp Asta approved fuse to BS 1362. In the event of losing the fuse cover, the plug must NOT be used until a replacement fuse cover can be obtained from your nearest electrical dealer. The colour of the correct replacement fuse cover is that as marked on the base of the plug.
B) If your appliance is not fitted with a plug, please follow the instructions provided below:
As the colours of the wires in the mains lead may not correspond with the coloured markings identifying the terminals in your plug, proceed as follows:
The green and yellow wire must be connected to the terminal in the plug marked with the letter E or the earth symbol of coloured green or green and yellow.
The blue wire must be connected to the terminal marked with the letter N or coloured black.
The brown wire must be connected to the terminal marked with the letter L or coloured red.
Heating times
| Type Quantity | power level | times (min.) | Notes | |
| SOFTENING FOOD | ||||
| • Chocolate/icing | 100 gr | [23-40] | 5 - 6 | Put on a plate. Mix the icing once. |
| • Butter | 50 -70 gr | 0'.7"-0'.12" | ||
| CHILLED FOOD (INITIAL TEMP. 5/8°C) UP TO 20/30°C | ||||
| • Y o g h u r t | 125 gr | " | 0.'12"-0'.17" | Remove metal foil |
| • Baby's bottle | 240 gr | " | 0'.35"-0'.40" | Heat the baby's bottle without the teat and mix it immediately after heating to make the temperature uniform. Check the temperature of the contents before use. With milk at room temperature the heating time is lower. To avoid risk of fire when using dried milk please stir evenly. Please use already sterilized milk. |
| CHILLED PRECOOKED FOOD (INITIAL TEMP. 5/8°C) TO APPROX. 70°C | ||||
| • Packet of lasagne or of pasta with filling | 400 gr | " | 6 - 8 | Packets of any kind of commercially available pre-cooked food, to be heated to a temp. of 70°C. Remove the food from any rice metal packets and put it directly onto the plate from which it is to be eaten. For best results, always cover the food. |
| • Packet of meat with and/or vegetables | 400 gr | " | 6 - 8 | |
| • Packet of fish and/or vegetables | 300 gr | " | 5 - 7 | |
| • Plate of meat and/or vegetables | 400 gr | " | 7 - 8 | Portions of any kind of already cooked food, to heat to a temp. of 70°C. The food is placed directly onto the plate from which it is to be eaten and is always covered either with a transparent film or with an upturned plate. |
| • Plate of pasta, cannelloni or lasagne | 400 gr | " | 7 - 8 | |
| • Plate of fish and/or rice | 300 gr | " | 6 - 8 | |
| FROZEN FOOD TO REHEAT/COOK (INITIAL TEMP. -18°/-20°C) TO APPROX. 70°C | ||||
| • Packet of lasagne or of pasta with filling | 400 gr | " | 8 - 10 | Packets of any kind of commercially available pre-cooked frozen food, to be heated to a temp. of 70°C directly in its packet. Remove the food from any metal containers and put it directly onto the plate from which it is to be eaten, increasing cooking time by a few minutes. |
| • Packet of meat with rice and/or vegetables | 400 gr | " | 7 - 8 | |
| • Packet of fish and/or pre-cooked vegetables | 300 gr | " | 5 - 7 | |
| • Packet of fish and/or raw vegetables | 300 gr | " | 10 - 12 | Remove the raw food from the packets and place it in a container suitable for microwaves and cover. |
| • Portion of meat and/or vegetables | 400 gr | " | 8 - 10 | Portions of any kind of already cooked frozen food, to be heated to a temperature of 70°C. Place the frozen food in the plate from which it is to be eaten and cover it with another upturned plate or pyrex dish. Check that it is hot in the centre; where possible, mix the food. |
| • Portion of pasta, cannelloni or lasagne | 400 gr | " | 9 - 11 | |
| • Portion of fish and/or rice | 300 gr | " | 6 - 8 | |
| CHILLED DRINKS (INITIAL TEMP. 5°/8°C) UP TO APPROX. 70°C | ||||
| • 1 cup of water | 180 cc | " | 2 - 2'.30" | All the drinks should be mixed after being heated to make the temperature uniform. For the broth we recommend covering it with an upturned plate. |
| • 1 cup of milk | 150 cc | " | 1'.30" - 2 | |
| • 1 cup of coffee | 100 cc | " | 1'.30" - 2 | |
| • 1 plate of broth | 300 cc | " | 4 - 5 | |
| DRINKS AT ROOM TEMPERATURE (INITIAL TEMP. 20°/30°C) UP TO APPROX. 70°C | ||||
| • 1 cup of water | 180 cc | " | 1'.30" - 2 | All the drinks should be mixed after being heated to make the temperature uniform. For the broth we recommend covering it with an upturned plate. |
| • 1 cup of milk | 150 cc | " | 1 - 1'.30" | |
| • 1 cup of coffee | 100 cc | " | 1 - 1'.30" | |
| • 1 plate of broth | 300 cc | " | 3 - 4 | |
COOKING
MEATS
You can make roasts, braised meats and stews. Turn over and rotate those large pieces which cannot be stirred. Be careful not to be deceived by the meat's outward appearance (during and at the end of the cooking), because it may not have the brownish colour common to meats prepared in a regular oven. In return, however, the nutritional values and flavour of meat are retained to an exceptional degree.
POULTRY
You can defrost and then cook all types of poultry in a microwave oven. Poultry skin may not roast to the colour usually associated with other ovens: to obtain a golden brown tone, baste the skin with a brush dipped in melted butter or margarine.
FISH
In a microwave oven, fish can be prepared very quickly and with excellent results. You can season it with a little oil or butter (or not season it at all, if you so prefer). Cover the fish with clear film. The skin is to be slit, of course, and filleted fish must be placed in a uniform fashion. We recommend that you not use this oven to cook fish which has been dipped in egg batter.
Cooking times for meat, poultry and fish
If you wish to make meat more tender, we recommend that you add 1/2 of a cup of water at the start of the cooking process.
| Food | Quantity | Power Selector | Timer (minutes) | Notes | Standing time (minutes) |
| BEEF | |||||
| Meat loaf | 900 gr | ### | 22 - 24 | (*) | 5 |
| Meat loaf | 800 gr | " | 20 - 25 | Mix together 500 grams of ground beef, eggs, ham, bread crumbs, etc. | 5 |
| Loin | 600 gr | " | 22 - 27 | 5 | |
| Roast, leg | 1 kg | " | 32 - 37 | Turn at the halfway point | 10 |
| VEAL | |||||
| Stew | 700 gr | " | 22 - 27 | Stir 2 or 3 times | 8 |
| Roast (rolled loaf) | 1 kg | " | 32 - 37 | Turn at the halfway point | 10 |
| Sliced rump steak | 200 gr | " | 15 - 20 | Tuming not necessary | 2 |
| PORK | |||||
| Leg | 500 gr | " | 20 - 25 | Turn at the halfway point | 5 |
| Roast | 1 kg | " | 32 - 37 | Turn at the halfway point | 10 |
| Saddle of pork | 700 gr | " | 22 - 27 | Turn at the halfway point | 8 |
| LAMB | |||||
| Leg | 1 kg | " | 32 - 37 | Turn at the halfway point | 10 |
| Fresh hamburgers | 100 gr | " | 10 - 13 | 3 | |
| Goulash | 1,5 kg | ### | 40 - 45 | Stir 2 or 3 times | 3 |
| Sausages | 300 gr | ### | 14 - 19 | 3 | |
| POULTRY: CHICKEN | |||||
| Whole | 1,5 kg | " | 45 - 50 | Turn at the halfway point | 10 |
| Half | 500 gr | " | 20 - 25 | Tuming not necessary | 5 |
| Pieces | 500 gr | " | 20 - 25 | Tuming not necessary | 5 |
| Breast | 300 gr | " | 14 - 19 | Tuming not necessary | 3 |
| TURKEY | |||||
| Pieces | 1,5 kg | " | 45 - 50 | Turn at the halfway point | 8 |
| Breast | 500 gr | " | 20 - 25 | Tuming not necessary | 8 |
| DUCK | |||||
| Whole | 1,5 kg | " | 45 - 50 | Turn at the halfway point | 10 |
| FISH | |||||
| Filleted | 300 gr | ### | 7 - 10 | Cover while cooking | 2 |
| Slices | 300 gr | " | 9 - 12 | Cover while cooking | 2 |
| Whole | 500 gr | " | 10 - 13 | Cover while cooking | 2 |
| Whole | 250 gr | " | 7 - 10 | Cover while cooking | 2 |
| Crayfish | 500 gr | " | 9 - 12 | Cover while cooking | 2 |
| Cut-up fish | 400 gr | " | 9 - 12 | Cover while cooking | 2 |
(*) These indications are suitable for performing the minced meat cooking test according to Regulation 60705, Para. 12.3.3. Cover the container with clear film for microwave use. Further information, including on other performance tests according to Regulation 60705, is given in the table on page 2.
GREENS AND VEGETABLES
Greens and vegetables cooked in a microwave oven retain more of their colour and nutritional value than when cooked in traditional ovens.
Per every 500 gr. of greens or vegetables add about 5 teaspoons of water
Greens and vegetables must always be covered with clear film.
Sturdier items (e.g., carrots) should be cut into regular-sized pieces.
Stir greens and vegetables at least once at the halfway point. Add a little salt only at the end.
Cooking times for greens and vegetables
| Type Quantity | Power Selector | Timer (minutes) | Notes | Standing time (minutes) | |
| Asparagus | 500 gr | ### | 11 - 12 | Cut into 2-cm. pieces | 4 |
| Artichokes | 300 gr | " | 12 - 13 | It would be better to use arti-choke bottoms. | 4 |
| Green beans | 500 gr | " | 13 - 14 | Cut into pieces | 4 |
| Broccoli | 500 gr | " | 9 - 10 | Separate into individual "florets" | 4 |
| B russels sprouts | 500 gr | " | 9 - 10 | Leave whole | 4 |
| White cabbage | 500 gr | " | 9 - 10 | Cut into strips | 4 |
| Red cabbage | 500 gr | " | 9 - 10 | Cut into strips | 4 |
| Carrots | 500 gr | " | 11 - 12 | Cut into same-size pieces | 4 |
| Cauliflower | 450 gr | " | 13 - 14 | Separate into stalks | 4 |
| Celery | 500 gr | " | 9 - 10 | Separate into pieces | 4 |
| Eggplant | 500 gr | " | 8 - 9 | Cut into cubes | 4 |
| Leek | 500 gr | " | 8 - 9 | Cut into strips | 4 |
| Mushrooms | 500 gr | " | 8 - 9 | Leave whole No water is needed | 4 |
| Onions | 250 gr | " | 7 - 8 | Whole, but of the same size. No water is needed. | 4 |
| Spinach | 300 gr | " | 8 - 9 | Cover after having washed and drained the leaves. | 4 |
| Peas | 500 gr | " | 12 - 13 | 4 | |
| Fennel | 500 gr | " | 14 - 15 | Cut into quarters | 4 |
| Peppers | 500 gr | " | 11 - 12 | Cut into pieces | 4 |
| Potatoes | 500 gr | " | 10 - 11 | Cut into same-size pieces | 4 |
| Zucchini | 500 gr | " | 9 - 10 | Cut into slices | 4 |
N.B: The cooking times on this table are approximate and depend on the weight, the temperature before cooking, and the sturdiness as well as the constitution of the greens and vegetables.
SOUPS AND RICE
- Soups or broth usually require a smaller amount of liquid because the evaporation in microwave ovens is rather limited. Because it is a dehydrating agent, salt must be added only when the cooking is finished or during the standing time.
- It is correct to say that the temperature required for cooking rice in a microwave oven (as is true also for pasta) is more or less the same as that needed to cook this foodstuff over a burner on a regular stove. The advantage of preparing a risotto dish in a microwave oven lies in the fact that you do not have to stir the rice constantly (two or three times is enough).
The ingredients are placed in a container suitable for microwave ovens and covered with clear wrap (for about 300 g of rice, you need 750 g of broth with the oven programmed at top power for about 12 to 15 minutes). In addition, the rice will not stick to the bottom of its container and, since it can be cooked in a tureen or some other such receptacle to be brought to the table, you will not have to transfer that rice to a serving plate.
BROWNING
The foodstuffs most difficult to brown while being cooked in a microwave oven are usually cutlets, scaloppine, and chicken breasts. To obtain such a browning effect, however, you are advised to grease the outer portion with butter (preferably combined with paprika). You will find on the market sauces especially researched to give colour to foodstuffs cooked in a microwave oven. In each and every case, you must allow the meats or fish to be browned to absorb some fatty and colouring substances.
FRUIT AND BAKED GOODS
Baked goods rise (at lower oven power) much more than they do with regular baking. Since no crust is formed, it is better to garnish the surface portions with cream or icing (e.g., chocolate); in addition, you must keep the item being baked fully covered, because such foodstuffs tend to dry out more quickly than those baked in a regular oven. Fruit is to be pierced if cooked with its peel on and is to be kept covered: it is essential that you adhere to the standing time (3 to 5 minutes).
Cooking times for baked goods and fruit
| Type/quantity | Power Selector | Timer (minutes) | Standing time (minutes) | Observations and advice |
| Nut cake (700 gr) | 18 - 23 | 5 | May be used in combination with any cream whatsoever | |
| Viennese torte (850 gr) | " | 22 - 27 | 5 | Tobe filled with jam or jelly. |
| Pineapple cake (800 gr) | " | 20 - 25 | 5 | The pineapple slices can be laid on the bottom of the pin plate or cut into pieces and mixed into the dough. |
| Apple cake (1000 gr) | " | 22 - 27 | 5 | The apples are spread on top as a decorative effect. |
| Coffee cake (750 gr) | " | 18 - 23 | 5 | Excellent when filled with cream. |
| Zabaione | 4 - 6 | 3 | Mix with a whisk every 30 seconds | |
| Cooked pears (300 gr) | 6 - 8 | 3 | The pears are to be cut into quarters. | |
| Cooked apples (300 gr) | " | 7 - 10 | 3 | The apples are to be cut into pieces. |
| Egg custard (750 gr) | " | 14 - 16 | 5 | These indications are suitable for performing the cooking tests according to Regulation 60705, Para. 12.3.1. |
| Sponge cake (475 gr) | " | 6 - 8 | 5 | These indications are suitable for performing the cooking tests according to Regulation 60705, Para. 12.3.2. Further information, including on other performance tests according to Regulation 60705, is given in the table on page 2. |
CLEANING AND MAINTENANCE
Disconnect the plug from its electrical outlet before beginning any cleaning or maintenance operations.
Cleaning
To keep your microwave oven in the best condition, you are advised to clean regularly the door as well as the interior and exterior with a damp cloth and neutral soap or liquid detergent. Always keep the microwave outlet cover (F) free of fat or splashed grease. Never use abrasive detergents, scouring pads or tools with metal rivets when you clean the oven's exterior and interior. In addition, be careful not to let water or liquid detergent seep into the air and steam outlet slots located atop the oven. Do not use ammonia-based detergents. We likewise recommend that you do not use alcohol, steel wool or abrasive detergents to clean the inside and outside door surfaces in order to avoid scratches. To ensure perfect closing, always keep the inner portion of the oven door clean, being careful not to let any dirt or food residue get caught between the door and the front of the oven. Do not steam clean the inside of the oven.

Give a regular cleaning to the air intake holes found on the back of the oven so that they will not become blocked up with dust or dirt deposits as time goes by.
Every now and then, it will be necessary to remove the turntable (D) and its support device (E) and clean them, just as you must for the floor of the oven itself. Wash the turntable and its support device in warm soapy water obtained by using neutral soap (these pieces may likewise be cleaned in a dish-washer). Never place the turntable in cold water after a prolonged heating session; the extreme thermal shock could irreparably damage the turntable. The turntable motor is sealed tight. When you are cleaning the floor of the oven, however, be careful not to let water seep under the turntable spindle (B).
If something seems not to be working right...
If you should discover a flaw or defect, contact a Service Centre authorised by the manufacturer. In any case, before calling our technicians, you should carry out the following simple checks:
Problem / Cause / Remedy
| • T he oven is not working. | • The door is not properly closed.• The plug has not been placed properly in the electrical outlet.• The outlet is not providing electricity (check the building's fuse box).• The timer has not been set correctly. |
| • Condensation on the cooking level and inside the oven | • When foods containing water are cooked, it is completely normal for the steam formed inside the oven to issue forth and to condense inside the oven itself or on the cooking level. |
| • Sparks inside the oven | • When cooking with a microwave oven, do not make use of metal containers or bags or packages having metal clips. |
| • The food is not heating sufficiently. | • Select the correct power level or increase the cooking time.• The food was not completely defrosted before being placed in the oven. |
| • The food is getting burned | • Select a lower power level or shorten the cooking time. |
| • The food is not cooking in a uniform manner | • Stir the food while it is cooking: Bear in mind that food cooks better if cut into pieces of equal size.• The turntable is stuck. |
In case oven-light is burned, you may continue to use the oven anyway. To replace the light, contact authorised Assistance.


- IMPORTANT INFORMATION FOR CORRECT DISPOSAL OF THE PRODUCT IN ACCORDANCE WITH EC DIRECTIVE 2002/96/EC
- GLASSWARE AND SIMILAR ITEMS
- TECHNICAL DATA
- ELECTRICAL CONNECTIONS
- INSTALLATION
- DESCRIPTION OF CONTROLS
- ADVICE ON USING YOUR OVEN CORRECTLY
- BASIC RULES FOR CORRECT COOKING WITH A MICROWAVE OVEN
- OPERATING THE OVEN
- DEFROSTING
- ELECTRICAL CONNECTION (U.K. ONLY)
- WARNING - THIS APPLIANCE MUST BE EARTHED IMPORTANT
- COOKING
- MEATS
- POULTRY
- FISH
- COOKING TIMES FOR MEAT, POULTRY AND FISH
- GREENS AND VEGETABLES
- SOUPS AND RICE
- BROWNING
- FRUIT AND BAKED GOODS
- CLEANING AND MAINTENANCE
- CLEANING
- IF SOMETHING SEEMS NOT TO BE WORKING RIGHT
- PROBLEM / CAUSE / REMEDY
Brand : DELONGHI
Model : MW 380 W
Category : Microwave