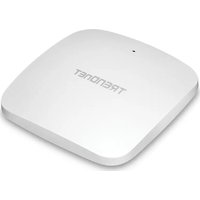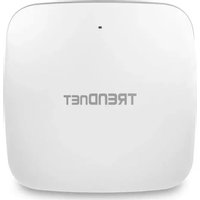
TRENDNET TEW-636APB - Access Point

TEW-636APB - Access Point TRENDNET - Free user manual and instructions

Find the device manual for free TEW-636APB TRENDNET in PDF.

📄 10 pages English EN Download 💬 AI Question 10 questions ⚙️ Specs
Notice TRENDNET TEW-636APB - page 4
Pick your language and provide your email: we'll send you a specifically translated version.
Product TypeAccess Point
BrandTRENDnet
ModelTEW-636APB
Wireless StandardIEEE 802.11n (300 Mbps)
Frequency Band2.4 GHz
Operating ModesAccess Point, Virtual APs (Multiple SSID)
SecurityWPA-PSK, WEP
Number of Virtual APsUp to 4
Interface1 x RJ-45 10/100 Ethernet
Power Supply12V DC, 1A (included)
Default Configuration URLhttp://SCXXXXXX (XXXXXX = last 6 MAC digits)
Default Usernameadmin
Default Passwordpassword
MAC Address LocationLabel on bottom of device
LED IndicatorsPower, LAN, WLAN
Reset MethodPress reset button for 15 seconds
CertificationsFCC, CE
Warranty Registrationwww.trendnet.com/register
Technical Support (Europe)Toll-Free: 00800 60 76 76 67
Technical Support (Worldwide)+(31) (0) 20 504 05 35
Package ContentsTEW-636APB, CD-ROM (User's Guide), Quick Installation Guide, AC Power Adapter, RJ-45 cable

Frequently Asked Questions - TEW-636APB TRENDNET

How do I access the web configuration page of the TEW-636APB?
Open your web browser and type http://SCXXXXXX in the address bar, where XXXXXX is the last 6 digits of the MAC address found on the bottom of the device. Then press Enter.
What are the default login credentials?
The default username is admin and the default password is password (case-sensitive).
How do I reset the TEW-636APB to factory defaults?
Use a pin or paperclip to press and hold the reset button on the device for at least 15 seconds, then release. The device will reboot with factory settings.
What wireless security options are supported?
The TEW-636APB supports WPA-PSK (recommended) and WEP encryption. Configure them under Wireless > Virtual AP.
Can I set up multiple SSIDs on the TEW-636APB?
Yes, you can configure up to 4 Virtual APs with separate SSIDs and security settings. Go to Wireless > Virtual AP, enable each AP, and configure accordingly.
Why can't I access the configuration page even after typing the correct URL?
First, verify hardware connections: ensure the LAN and WLAN lights are lit. Confirm the MAC address on the bottom and retype the URL. If still failing, perform a factory reset by holding the reset button for 15 seconds.
How do I assign a fixed IP address to the TEW-636APB?
Access the web interface, go to System > Basic Settings, select Fixed IP Address, and enter the desired IP, Subnet Mask, Gateway, and DNS values matching your network. Click Save.
What should I do if wireless clients cannot connect to the access point?
Check that the WLAN light is on. Power cycle the access point (unplug for 15 seconds). Ensure the wireless adapter uses the correct SSID and encryption key (if enabled). Default SSID is 'wireless'.
Is the TEW-636APB compatible with older 802.11b/g devices?
Yes, the TEW-636APB is backward compatible with 802.11b/g devices, though they will operate at lower speeds.
How do I change the admin password?
Log into the web interface, go to Management > Admin Login. Enter a new username (optional), check Change Admin Password, enter the new password twice, and click Save. Then click Apply and Reboot to save changes.

User questions about TEW-636APB TRENDNET

0 question about this device. Answer the ones you know or ask your own.

Ask a new question about this device

The email remains private: it is only used to notify you if someone responds to your question.

No questions yet. Be the first to ask one.

Download the instructions for your Access Point in PDF format for free! Find your manual TEW-636APB - TRENDNET and take your electronic device back in hand. On this page are published all the documents necessary for the use of your device. TEW-636APB by TRENDNET.

USER MANUAL TEW-636APB TRENDNET

natural_image Exterior view of a Tresonet wireless router with visible network ports and control buttons (no readable text or symbols beyond branding)

Quick Installation Guide
TRENDNET TEW-636APB - 1

TRENDNET TEW-636APB - 2

TRENDNET TEW-636APB - 3

TRENDNET TEW-636APB - 4

TRENDNET TEW-636APB - 5

TRENDNET TEW-636APB - 6

Table of Contents

English 1

  1. Before You Start 1
  2. Hardware Installation 2
  3. Configure the Access Point 3

Troubleshooting 6

1. Before You Start
TRENDNET TEW-636APB - Before You Start - 1

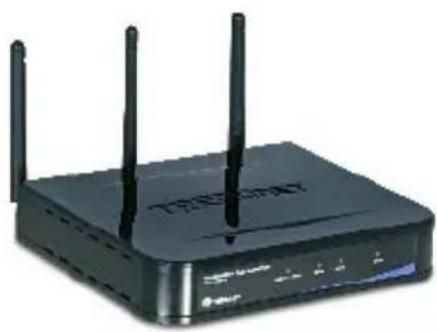
natural_image Black wireless router with three antennas and a control panel (no visible text or symbols)

Package Contents

  • TEW-636APB
  • User's Guide CD-ROM
    • Quick Installation Guide
    • AC Power Adapter (12V DC, 1A)
  • 1 RJ-45 cable

Installation Requirements

• Web Browser: Internet Explorer (5.5 or higher)
• A computer with a network adapter or wireless adapter properly installed
• A network Switch or Hub with an available network LAN port
• A RJ-45 network cable
• TEW-621PC version 2 or TEW-623PI version 2 (Optional)

Application
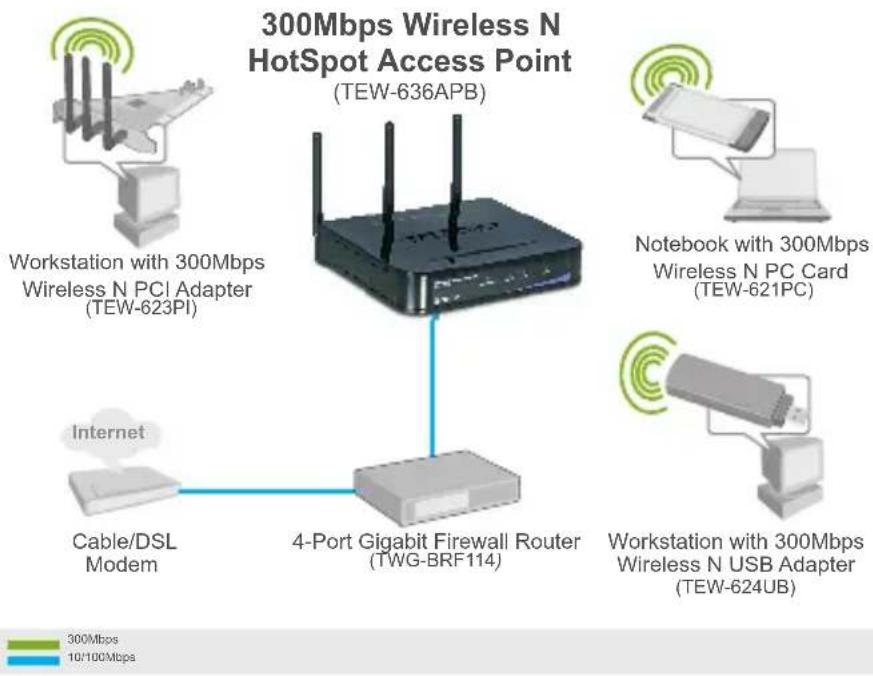
TRENDNET TEW-636APB - Application - 1

flowchart
graph TD
    A["300Mbps Wireless N HotSpot Access Point (TEW-636APB)"] --> B["4-Port Gigabit Firewall Router (TWG-BRF114)"]
    C["Workstation with 300Mbps Wireless N PCI Adapter (TEW-623PI)"] --> B
    D["Notebook with 300Mbps Wireless N PC Card (TEW-621PC)"] --> B
    E["Internet"] --> B
    F["Cable/DSL Modem"] --> B
    G["Workstation with 300Mbps Wireless N USB Adapter (TEW-624UB)"] --> B

2. Hardware Installation

Note: Locate an optimum location for the Access Point. The best place for the Access Point is usually at the center of your wireless network. Please connect the computer configuring the TEW-636APB to the same switch/hub.

1. Connect a RJ-45 cable from the Switch/Hub to the LAN port of the Access Point. 2. Connect the AC Power Adapter to the Access Point and then to a power outlet. 3. Verify that the following panel lights are on: Power and WLAN.

3. Configure the Access Point

Note: It is recommended that you configure the Access Point from a wired computer.

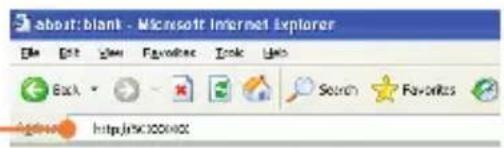
  1. Open your web browser, type http://SCXXXXXX, in the Address bar, and then press Enter. XXXXXX represents the last 6 digits of the Mac Address. You can find the Mac Address on the bottom of the router.
about: blank - Microsoft Internet Explorer File Edit View Favorites Tools Help Back Search Favorites Search http://s100100

  1. Enter the User name and Password, and then click OK. User Name: admin Password: password

Connect to scx0000x TEW-636AP8 Username: admin Passwords Remember my password OK Cancel

  1. Click System and then click Basic Settings. Select your country or domain from the drop down menu, click Fixed IP Address, and type in an IP address, Subnet Mask, Gateway, and DNS to match your current network settings. Click Save.
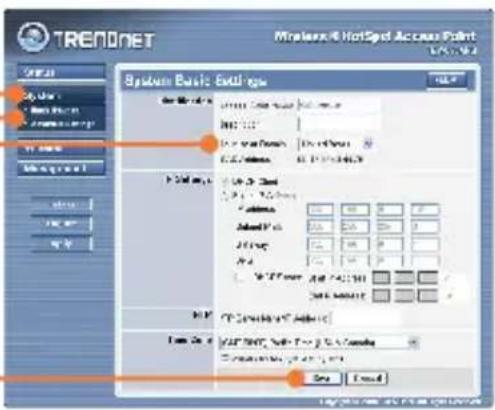
TRENONE Maserless HotSpot Access Point LPG, M.P. System Basic Settings for the Web 1.000000000000000000000000000000000000000000000000000000000000000000000000000000000000000 HCP 123 123:75/1233 123:75/1233 123:75/1233 123:75/1233 123:75/1233 123:75/1233 123:75/1233 123:75/1233 123:75/1233 1.46.8.8.8.8.8.8.8.8.8.8.8.8.8.8.8.8.8.8.8.8.8.8.8.8.8.8.8.8.8.8.8.8.8.8.8.8.8.8.8.8.8.8.8.8.8.8.8.8.8.8. 6 123:75/1233 123:75/1233 123:75/1233 123:75/1233 123:75/1233 123:75/1233 123:75/1233 123:75/1233 124:9999999999999999999999999999999999999999999999999999999999999999999999999999999999999999999999999999 124:99999999999999999999999999999999999999999999999999999999999999999 6 124:16666666666666666666666666666666666666666666666666666666666666666666666666666666666666666666 7 124:144444444444444444444444444444444444444444444444444444444444444444444444 8 124:12222222222222222222222222222222222222222222 1 124:1001001001001001001001001001001001001001001001 1 124:757575757575757575757575757575757575757575757575757575757575757575757575757575757 1 124:533333333333333333333333333333333333333333333333333 1 124:41151515151515151515151515151515151515151515151 1 124:28878888888888888888888888888888888888888888 1 124:25777777777777777777777777777777777777777777 1 124:2265555555555555555555555555555555 1 124:1844444444444444444444444444444 1 124:14222222222222222222222222 1 124:100100100100100100100100100100100 1 124:7588777777777777777777777777777777 1 124:536655555555555555555555555 1 124:314444444444444444444 1 124:1822222222222222222 1 124:14 1 124:8 1 124:6 1 124:3 1 1 1 End On: VSP.NET, Web-Top 3.6.6.6.6.6.6.6.6.6.6.6.6.6.6.6.6.6.6.6.6.6. End On: D:\Users\View\HotSpot\Access Point\NPLC\MPC\MPC\MPC\MPC\MPC\MPC\MPC\MPC\MPC\MPC\MPC\MPC\MPC\MPC\MPC\MPC\MPC\MPC\MPC\MPC\MPC\MPC\MPC\MPC\MPC\MPC\MPC\MPC\MPC\MPC\MPC\MPC\MPC\MPC\nSvcl Foud

  1. Click Wireless and then click Basic Settings. Select the desired Wireless Mode, select Access Point for Operating mode and then click Save.

TRENDNET Wireless N HotSpot Access Point TRENDNET Wireless Basic Settings Parameters: - Basic Settings - Network Area - Network Buffer - Active Control - Advanced Settings - 100% Normal Management OK Cancel Help Switch Switch Switch Switch Switch Switch Switch Switch Switch Switch Switch Switch Switch Switch Switch Switch Switch Switch Switch Switch Switch Switch Switch Switch Switch Switch Switch Switch Switch Switch Switch Switch Switch Switch Switch Switch Switch Switch Switch Switch Switch Switch Switch Switch Switch Switch Switch Switch Switch Switch Senset Senset Senset Senset Senset Senset Senset Senset Senset Senset Senset Senset Senset Senset Senset Senset Senset Senset Senset Senset Senset Senset Senset Senset Senset Senseset Senseset Senseset Senseset Senseset Senseset Senseset Senseset Senseset Senseset Senseset Senseset Senseset Senseset Senseset Senseset Senseset Senseset Senseset Senseset Sensates

  1. Click Virtual APs. Select a Virtual AP, click Enable and then click Configure.
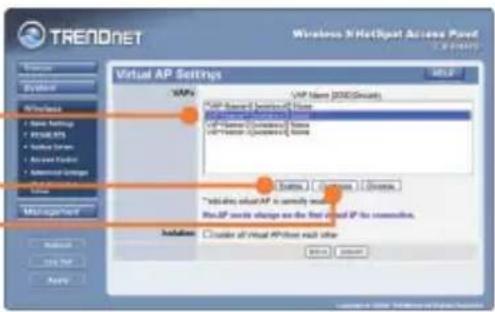
TREADNET Windows 3/HotSpot Access Panel VAPs VAP Name (2000Ground) VAP Support Services/Home VAP Command Service VAP Protection Services VAP Protection Services Switch... Options... Initiate virtual AP to currently set the first digit of IP for connection. This IP needs change on the final digit of IP for connection. Installation: Create all virtual AP points each other OK Cancel

Note: The example below is for WPA-PSK security. If your wireless adapters do not support WPA-PSK, then select WEP.

  1. Enter a SSID, select the desired Security System, enter the Network Key, click Save and then click Back.

TRENDNET Wireless N HorSpot Access Point TX-SPRING System Wireless • Vire Settings • Audio AI • Virtual Ems • Audio Form 10 • Web Project Management VLAN VIP Name USB Bluetooth SSD Windows Operation VLAN ID TCP/IP VLAN ID WIPK Key Updates Group Key Updates Key Lifetime Updates Group Key when any membership terminates Back Save Cancel

  1. Repeat step 5 and 6 for each subsequent Virtual AP.
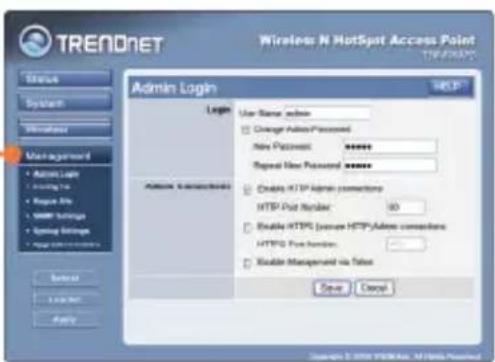
TRENDNET Wireless N HotSpot Access Point TRENDNET Status System Status Main Management • Admin User • Operating Path • Request Info • User Settings • Open Settings • User Connection Admin Login Login User Name: admin Change Admin Processed New Protocol: ****** Repeat New Protocol: ****** Address Connections Create HTTP Admin connectors HTTP Post Number: 80 Enable HTTP (please HTTP) Admin connectors HTTP Post Number: Enable Management via Alert Save Cancel Copyright © 2016 TRENDNET AUTHORITY®

  1. Click Management and then click Admin Login.

  2. If desired, enter a new user name, check Change Admin Password, enter a new password, retype the new password and then click Save. By default:

User Name: admin Password: password

TRENDNET Wireless N NetSpot Access Point myi rights Status System Windows Management Active Locks Config Us Regular Ins SMT Services Multi-Settings Support Training Admin Login Start Menu: admin Orange Address Platform Send Process to: www Properties/Report to: www Active Connection Enable HTTP Active Connections HTTP Port Number: 93 Enable HTTPS (or any HTTP) Address Connections HTTPS Port Number: 100 Enable Management as Path OK Cancel ©2007 TRENDNET. All rights reserved.

  1. Click Apply and then click Reboot. Note: If you skip this step, any settings that you changed will NOT be saved.

TRENDNET Wireless N HotSpot Access Point TCP/IP Status System Main Management • Admin Logis • Running Up • Reset Help • User Settings • Opening Settings • User Interface Admin Login Login User Name: admin Change Admin Passwords New Password: ****** Repeat New Protocol: xxxx** Admin Support: □ Create HTTP Admin connections HTTP Port Number: 90 □ Enable HTTPG (newer HTTP) Admin connections HTTPG Port Number: □ Enable Manager via Tabat Cancel Browse Logit/Net Send/Get Copyright © 2008-103676. Abitlog download

Your installation is now complete.

For detailed information regarding the TEW-636APB's configuration and advanced settings, please refer to the User's Guide included on the Driver CD-ROM or TRENDnet's website at www.trendnet.com

Register Your Product

To ensure the highest level of customer service and support, please take a moment to register your product Online at: www.trendnet.com/register Thank you for choosing TRENDnet

Q1: I typed http://SCXXXXXX in my Internet Browser's Address Bar, but an error message says "The page cannot be displayed." How can I get into the TEW-636APB's web configuration page?

A1: First, check your hardware settings again by following the instructions in section 2. Second, make sure the LAN and WLAN lights are lit. Third, verify the Mac Address of the access point. Look at the bottom of the access point. Copy the last six digits of the Mac Address. Then open up your browser and type in http://SCXXXXXX (XXXXXX represents the last six digits of the Mac Address) and then Enter. Fourth, perform a factory reset. Take a pin or paperclip, press on the reset button for 15 seconds, and then let go.

Q2: All the settings are correct, but I can not make a wireless connection to the Access Point.

A2: First, double check that the WLAN light on the Access Point is lit. Second, power cycle the Access Point. Unplug the power to the Access Point. Wait 15 seconds, then plug the power back in. Third, contact the manufacturer of your wireless network adapter. Make sure the wireless network adapter is configured with the proper SSID. The default SSID of the Access Point is wireless 0. If you have enabled any encryption on the Access Point, make sure to configure the wireless network adapter with the same Pre-shared key. If you do not remember the encryption key, log on to the access point configuration page from a wired computer. Click Wireless -> Virtual AP. Click on the desired Virtual AP and then click Configure.

If you still encounter problems or have any questions regarding the TEW-636APB, please contact TRENDnet's Technical Support Department.

Certifications

This equipment has been tested and found to comply with FCC and CE Rules. Operation is subject to the following two conditions:

(1) This device may not cause harmful interference.
(2) This device must accept any interference received. Including interference that may cause undesired operation.

TRENDNET TEW-636APB - Certifications - 1

TRENDNET TEW-636APB - Certifications - 2

TRENDNET TEW-636APB - Certifications - 3

Waste electrical and electronic products must not be disposed of with household waste. Please recycle where facilities exist. Check with you Local Authority or Retailer for recycling advice.

TRENDNET TEW-636APB - Certifications - 4

NOTE: THE MANUFACTURER IS NOT RESPONSIBLE FOR ANY RADIO OR TV INTERFERENCE CAUSED BY UNAUTHORIZED MODIFICATIONS TO THIS EQUIPMENT. SUCH MODIFICATIONS COULD VOID THE USER'S AUTHORITY TO OPERATE THE EQUIPMENT.

ADVERTENCIA

Europe (Germany • France Italy Spain Switzerland UK)

Toll Free Telephone: +00800 60 76 76 67

English/Espanol - 24/7

Worldwide

Telephone: +(31) (0) 20 504 05 35

English/Espanol - 24/7

Product Warranty Registration

Please take a moment to register your product online.

Go to TRENDnet's website at http://www.trendnet.com/register
Manual assistant
Powered by Anthropic
Waiting for your message
Product information

Brand : TRENDNET

Model : TEW-636APB

Category : Access Point