
IN2128HDA - Projector INFOCUS - Free user manual and instructions
Find the device manual for free IN2128HDA INFOCUS in PDF.


| Product Type | Video Projector |
| Brand | InFocus |
| Model | IN2128HDA |
| Display Technology | DLP |
| Native Resolution | 1920 x 1080 (Full HD) |
| Brightness | 4000 ANSI Lumens |
| Contrast Ratio | 15000:1 |
| Lamp Life | Up to 5000 hours (Normal mode), 10000 hours (Eco mode) |
| Dimensions (W x D x H) | 315 x 244 x 115 mm |
| Weight | 3.5 kg |
| Power Consumption | 310 W (Normal), < 0.5 W (Standby) |
| Input Ports | HDMI, VGA, Composite, S-Video, USB, Audio In |
| Output Ports | Audio Out, VGA Out, RS-232 |
| Lens Shift | Vertical: +10% / -0% |
| Keystone Correction | ±30° (Vertical) |
| Noise Level | 32 dB (Normal), 28 dB (Eco) |
| Projection Distance | 0.5 m - 7.5 m |
| Projection Screen Size | 0.76 m - 7.62 m (30" - 300") |
| Supported Aspect Ratios | 16:9, 4:3 |
| Cleaning Instructions | Clean the lens with a soft, dry cloth. Use compressed air to clean the air filter. Do not use liquids. |
| Safety Warnings | Do not look directly into the lens. Ensure proper ventilation. Replace lamp with an authorized part only. |
| Spare Parts Availability | Lamp, filter, remote control available from InFocus authorized service centers. |
| Warranty | 3 years (projector), 1 year (lamp) |
Frequently Asked Questions - IN2128HDA INFOCUS
User questions about IN2128HDA INFOCUS
0 question about this device. Answer the ones you know or ask your own.
Ask a new question about this device
Download the instructions for your Projector in PDF format for free! Find your manual IN2128HDA - INFOCUS and take your electronic device back in hand. On this page are published all the documents necessary for the use of your device. IN2128HDA by INFOCUS.
USER MANUAL IN2128HDA INFOCUS
natural_image
Line drawing of a projector with visible lens and screen (no text or symbols)
PZ339-A000-00
DISPERINDAG No. 0287/1.824.51/09.03
Regulatory models: IN2128HDa
InFocus
The New Way to Collaborate
Declaration of Conformity
Manufacturer: InFocus Corporation, 13190 SW 68th Parkway, Suite 200, Portland, Oregon 97223-8368 USA
We declare under our sole responsibility that this projector conforms to the following directives and norms:
ErP Directive 2009/125/EC
EMC Directive 2004/108/EC
EMC: EN 55022:2010 + AC:2011, EN 55024:2010
Low Voltage Directive 2006/95/EC
Safety: EN 60950-1:2006+A11:2009+A1:2010+A12:2011+A2:2013
Trademarks
Apple, Macintosh, and PowerBook are trademarks or registered trademarks of Apple Computer, Inc. IBM is a trademark or registered trademark of International Business Machines, Inc. Microsoft, PowerPoint, and Windows are trademarks or registered trademarks of Microsoft Corporation. Adobe and Acrobat are trademarks or registered trademarks of Adobe Systems Incorporated. DLP ^® , DLP Link and the DLP logo are registered trademarks of Texas Instruments and BrilliantColor ^™ is a trademark of Texas Instruments. Google and the Google logo are registered trademarks of Google Inc. InFocus, In Focus, and INFOCUS (stylized) are either registered trademarks or trademarks of InFocus Corporation in the United States and other countries.
NOTE: This product is covered electrical and electronic equipment under the European Union's Waste from Electrical and Electronic Equipment ("WEEE") Directive (2012/19/EU). The WEEE Directive requires that covered equipment be collected and managed separately from typical household waste in all EU member states. Please follow the guidance of your local environmental authority or ask the shop where you purchased the product for collection or recycling options.
FCC Warning
This device complies with part 15 of the FCC Rules. Operation is subject to the following two conditions: (1) This device may not cause harmful interference, and (2) this device must accept any interference received, including interference that may cause undesired operation. Note: This equipment has been tested and found to comply with the limits for a Class B digital device, pursuant to part 15 of the FCC Rules. These limits are designed to provide reasonable protection against harmful interference in a residential installation. This equipment generates, uses and can radiate radio frequency energy and, if not installed and used in accordance with the instructions, may cause harmful interference to radio communications. However, there is no guarantee that interference will not occur in a particular installation. If this equipment does cause harmful interference to radio or television reception, which can be determined by turning the equipment off and on, the user is encouraged to try to correct the interference by one or more of the following measures:
--Reorient or relocate the receiving antenna.
--Increase the separation between the equipment and receiver.
--Connect the equipment into an outlet on a circuit different from that to which the receiver is connected.
--Consult the dealer or an experienced radio/TV technician for help.
Changes or modifications not expressly approved by InFocus Corporation may void authority to operate the equipment.
CE Warning
This product is considered Class A for EU market.
Canada
This device complies with RSS-210 of the Industry Canada Rules.
Operation is subject to the following two conditions:
1) this device may not cause interference and
2) this device must accept any interference, including interference that may cause undesired operation of the device.
Other specific Country Approvals may apply. Please see product certification label.
This document applies to regulatory model IN2128HDa
Input ratings: 100-240Vac, 3.2A, 50-60Hz
InFocus reserves the right to alter product offerings and specifications at any time without notice.
Table of Contents
Introduction 5
Positioning the projector 7
Connecting a computer source 8
VGA connection 8
USB Mini-B connection 8
USB Type-B connection 8
HDMI connection 8
Connecting power 8
Optional computer connections 8
Displaying an image 9
Adjusting the image 10
Connecting a video device 11
Video device connections 11
Composite video connection ||
VGA connection 11
S-video connection II
Audio II
Shutting down the projector 12
Troubleshooting your setup 12
Using the remote control 20
Using the audio 21
Using the keypad buttons 22
Optimizing computer images 23
Presentation features 23
Optimizing video images 24
Customizing the projector 24
Using the menus 25
Basic Menu 26
Advanced Menu 27
Multimedia EZ Suite Menu 31
EZ Media 31
EZ Display 38
EZ Suite Settings 41
Web controlling the projector 42
Displaying Images through EZ Display 46
Projecting from Smartphones/Tablets 47
LiteBoard™ Wand 52
How to Use the Wand 52
Using More than One Wand 53
Wand Features 54
Troubleshooting LiteBoard™ 55
Maintenance 56
Cleaning the lens 56
Using the security lock 56
Replacing the projection lamp 57
Important Operating Considerations for Safety
• Refer to this guide for proper startup and shutdown procedures.
- Follow all warnings and cautions in this manual and on the projector.
- Place the projector in a horizontal position no greater than 15 degrees off axis.
- Locate the projector at least 4' (1.2m) away from any heating or cooling vents.
- Do not block ventilation openings. Locate the projector in a well-ventilated area without obstructions to intake or exhaust vents. Do not place the projector on a tablecloth or other soft covering that may block the vents.
- Do not place the projector in direct sunlight, humid, greasy or dusty places or in places where the projector may come into contact with smoke or steam.
- Do not touch or block the projector lens with any objects as this can damage the projector lens. Scratches, gouges and other lens damage are not covered by the product warranty.
- Do not look directly into the lens while the projector is being used.
- Do not drop the projector.
- Do not spill liquid on the projector. Spilled liquid may damage the projector.
- Use the power cord provided. Connect the power cord to a receptacle with a protective safety (earth) ground terminal. A surge-protected power strip is recommended.
- Do not overload wall outlets.
- When disconnecting the power cord, hold the plug, not the cord.
- Wash hands after handling the cables supplied with this product.
- The projector remote control uses batteries. Make sure the batteries' polarity (+/-) is aligned correctly. Dispose of used batteries in accordance with local disposal laws.
- Use an InFocus approved ceiling mount kit for proper fitting, ventilation and installation. The warranty does not cover any damage caused by use of non-approved ceiling mount kits or by installing in an improper location.
- When the projector is ceiling mounted, wear protective eyewear to prevent eye injury before opening lamp door.
- Refer all service to qualified service personnel. Servicing your own projector can be dangerous to you and will void the warranty.
- Only use replacement parts specified by InFocus. Unauthorized substitutions may result in fire, electrical shock, or injury, and may void the warranty
- Only genuine InFocus lamps are tested for use in this projector. Use of non InFocus lamps may cause electrical shock and fire, and may void the projector warranty.
- Hg – Lamp contains mercury. Manage in accordance with local disposal laws. See www.lamprecycle.org.
- The projector uses a high-pressure mercury glass lamp. The lamp may fail prematurely, or it may rupture with a popping sound if jolted, scratched, or handled while hot. The risk of lamp failure or rupture also increases as the lamp age increases; please replace the lamp when you see the "Replace Lamp" message.
- In the unlikely event of a lamp rupture, particles may exit through the projector vents. Please keep people, food, and drinks at least 3' (1m) away from all projector vents. For ceiling applications, keep people, food and drinks out of the "keep out" area under and around the projector, as indicated by the illustration.
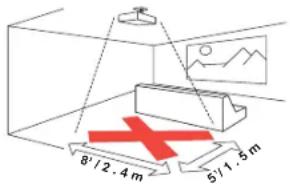
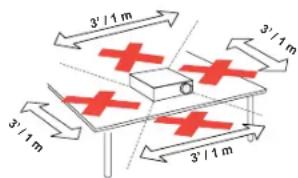
Follow these instructions to help ensure image quality and lamp life over the life of the projector. Failure to follow these instructions may affect the warranty. For complete details of the warranty, see the Warranty/Safety booklet.
Introduction
Your new digital projector is simple to connect, easy to use, and straightforward to maintain. It is a versatile projector that is flexible enough for business presentations and home video viewing too. IN2128HDa has native 1080p 1920 x 1080 resolution. It is compatible with a wide variety of computers and video devices.
Product specifications
To read the latest specifications on your multimedia projector, be sure to visit our website at www.infocus.com, as specifications are subject to change.
Accessories
The standard accessories that came with your projector are listed in the included Quick Start Guide. Optional accessories can be found on our website at www.infocus.com/support or at your retailer or dealer.
Online registration
Register your projector on our website at www.infocus.com/register to activate your warranty and receive product updates, announcements, and registration incentives.
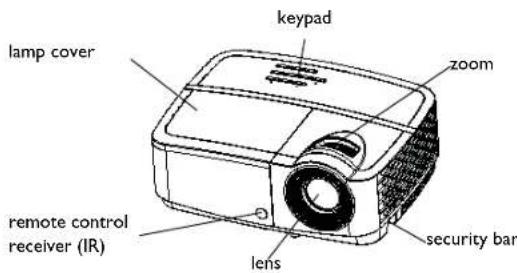
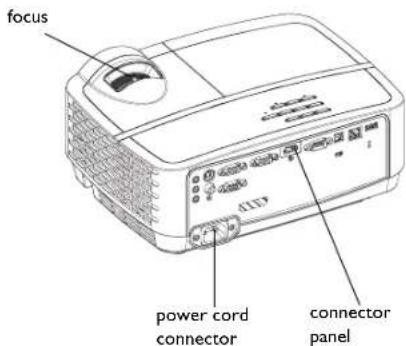
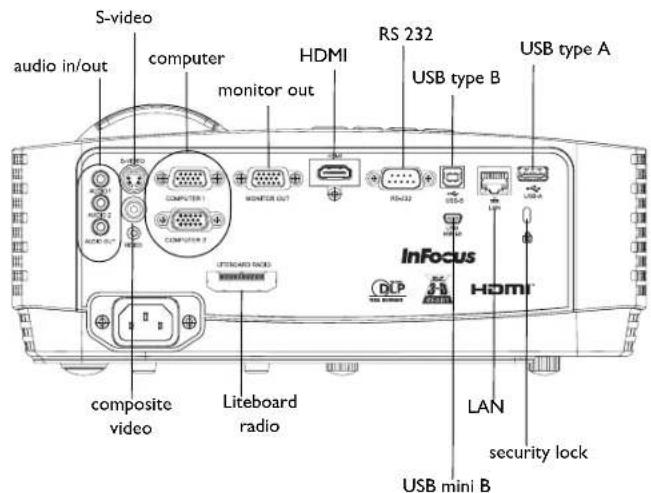
Connector panel
The projector provides both computer and video connection options, including:
• VGA computer (2)
- Composite video
• H D M I
• S - v i d e o
- USB B connector (for projector firmware upgrades, mouse control, Screen Save Preventer, and optional LiteBoard™ wand)
- USB Mini B (for Display over USB, loading internal memory and EZ media firmware upgrade)
- USB A (View photos, movies, documents and listen to audio from USB drive, display wirelessly with optional WiFi adapter, and upgrade EZ Media firmware)
• LAN (RJ45 for network control and video over LAN)
- Liteboard radio for use with the optional LiteBoard™ wand and dongle.
• Monitor out, for VGA pass through to an external monitor.
• Audio inputs for video and computer.
• Audio output to external speakers.
• RS-232 serial control. Command control codes are on our support website at www.infocus.com/support.
Positioning the projector
To determine where to position the projector, consider the size and shape of your screen, the location of your power outlets, and the distance between the projector and the rest of your equipment. Here are some general guidelines:
- Position the projector on a flat surface at a right angle to the screen. IN2128HDa must be at least 37.5" (1.0m) from the projection screen.
- If you are installing the projector on the ceiling, we strongly recommend using InFocus approved ceiling mounts for proper fitting, ventilation and installation. Refer to the installation guide that comes with the InFocus Ceiling Mount Kit (p/n PRJ-MNT-UNIV) for more information. The warranty does not cover any damage caused by use of non-approved ceiling mount kits or by installing in an improper location. To turn the image upside down, see “Ceiling mount” on page 28. We recommend using an InFocus authorized ceiling mount.
- Position the projector the desired distance from the screen. The distance from the lens of the projector to the screen and the video format determine the size of the projected image.
| Model | Minimum Distance to Screen | Offset | Offset for 60in. Image |
| IN2128HDa 37 | 5"/1.0m 17%+-5% 5"/12.7cm |
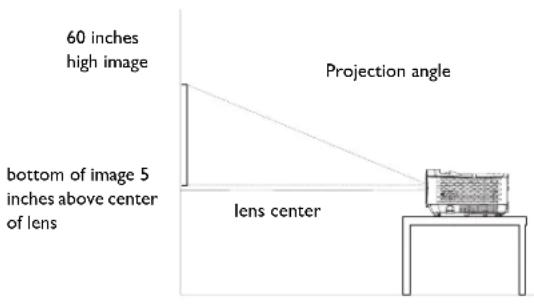
Table 1: IN2128HDa (1080p) Screen size
Throw Ratio = 1.5 to 1.8
| Diagonal Screen Size (inches/m) | Size of the Projected Image Width (inches/m) | Distance to screen | |
| Minimum distance (inches/m) | Maximum distance (inches/m) | ||
| 40"/1.0m 35"/0.9m 52.3" | /1.3m 62.7"/1.6m | ||
| 60"/1.5m 52"/1.3m 78.4" | /2.0m 94.1"/2.4m | ||
| 80"/2.0m 70"/1.8m 104.6" | /2.7m 125.5"/3.2m | ||
| 100"/2.5m 87"/2.2m 130.7"/3.3m 156.9"/4.0m | |||
| 150"/3.8m 131"/3.3m | /5.0m 235.4"/6.0m | ||
Connecting a computer source
VGA connection
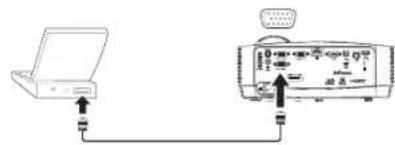
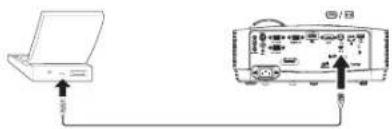
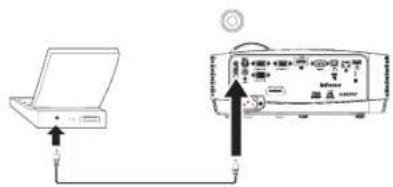
Connect one end of the provided computer cable to the Computer 1/Computer 2 connector on the projector and the other to the VGA connector on your computer. If you are using a desktop computer, you will need to disconnect the monitor cable from the computer's video port first.
USB Mini-B connection
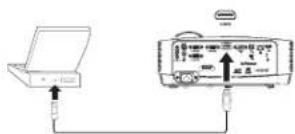
Connect one end of the USB cable to the USB Mini-B connector on the projector and the other to the USB Type-A connector on your computer. See page 38 for EZ USB operation and page 31 for internal memory download.
USB Type-B connection
Connect one end to the USB cable to the USB Type-B connector on the projector and the other to the USB Type-A connector on your computer. See page 52 for LiteBoard operation.
HDMI connection
HDMI is a standard, uncompressed, all-digital audio/video interface. HDMI provides an interface between sources, such as set-top boxes, DVD players, and receivers and your projector. Plug an HDMI cable into the video-out connector on the video device and into the HDMI connector on the projector.
Connecting power
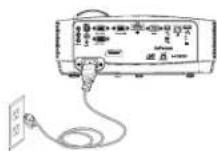
Connect the black power cord to the Power connector on the rear of the projector and to your electrical outlet. If the Power Saving Mode feature is off, the Power LED on the Status Indicator Panel (page 11) blinks blue. If the Power Saving Mode feature is on, the Power LED is steady blue. By default, this feature is off. You can change the setting, see page 29. NOTE: Always use the power cord that shipped with the projector.
Optional computer connections
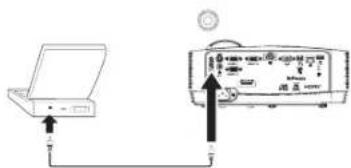
To get sound from the projector, connect an audio cable (optional cable, not included) to your computer and to the Audio I/Audio 2 connector on the projector. You may also need an adapter.
If you are using a desktop computer and want to see the image on your computer screen as well as on the projection screen, connect to the desktop's computer cable to Computer I and the desktop's monitor cable to the Monitor Out connector on the projector.
connect VGA cable
connect USB cable
connect HDMI
connect power
connect audio cable
Displaying an image
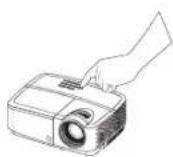
Press the Power button.
The Power LED lights blue, and the fans start to run. When the lamp comes on, the start up screen displays. It can take up to a minute for the image to achieve full brightness. Note: When the feature, AC Power On, is enabled, the projector automatically turns on when power is connected. This allows control of ceiling mounted projectors with a wall power switch.
No start up screen? Get help on page 13.
Turn on your computer or video device.
The image should appear on the projection screen. If it doesn't, press the Source button on the projector's keypad or remote.
If you are using a VGA cable to connect your computer to the projector:
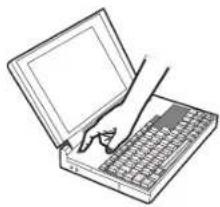
If using a laptop, make sure its external video port is active.
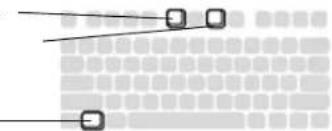
Many laptops do not automatically turn on their external video port when a projector is connected. Usually a key combination like FN + F8 or CRT/LCD key turns the external display on and off. Locate a function key labeled CRT/LCD or a function key with a monitor symbol. Press FN and the labeled function key simultaneously.
Refer to your laptop's documentation for more information about your laptop's key combination.
No laptop image? Try pressing the Auto Image button on the remote. Get help on page 13.
press Power button

turn on computer or video device

natural_image
Line drawing of a hand using a laptop to write on a keyboard (no text or symbols present)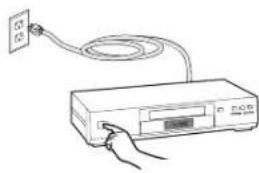
natural_image
Simple line drawing of a device with a cable and a hand inserting a cable (no text or symbols)activate laptop's external port

monitor key or LCD/CRT key
natural_image
Abstract pattern with diagonal lines and scattered square shapes on a grid background (no text or symbols)Adjusting the image
If necessary, adjust the height of the projector by rotating the elevator foot to extend the foot.
If necessary, rotate the leveling foot located at the rear of the projector.
Avoid placing your hands near the hot exhaust vent at the front of the projector.
Position the projector the desired distance from the screen at a 90 degree angle to the screen.
See page 7 for a table listing screen sizes and distances.
Adjust the zoom or focus.
If the image is not square, first make sure that the projector is perpendicular to the screen. If the image is larger or smaller on the top or bottom edge of the screen, press the top
Keystone button to reduce the upper part of the image, and press the bottom
Keystone button ↓ to reduce the lower part.
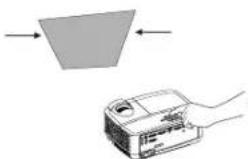
If the left or right side of the screen is larger or smaller the other, you can turn the projector to the left or to the right a few degrees to square the image.
Adjust the Contrast or Brightness in the Basic Menu. See page 26 for help with these menu adjustments.
adjust height
elevator foot
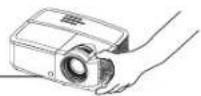
adjust distance
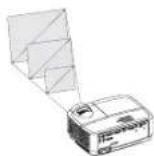
adjust zoom and focus
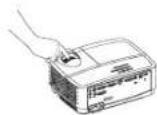
adjust keystone

adjust Basic Menu

natural_image
Diagram showing a hand holding a printer next to a blank plane, with no text or symbols present.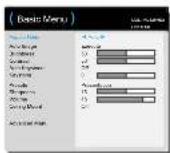
Connecting a video device
You can connect video devices such as VCRs, DVD players, camcorders, digital cameras, video game consoles, HDTV receivers, and TV tuners to the projector. You can connect the audio directly to the projector to get sound from the built-in speaker, or you can bypass the projector's audio system and connect the audio directly from your source to a stereo or home theater system.
You can connect the projector to most video devices that can output video. You cannot directly connect the coaxial cable that enters your house from a cable or satellite company, the signal must pass through a tuner first. Examples of tuners are digital cable boxes, VCRs, digital video recorders, and satellite TV boxes. Basically, any device that can change channels is considered a tuner.
Before connecting your projector, you should decide which aspect ratio you want to use. The projector's Aspect Ratio setting is accessed through the Resize button on the remote or through the projector's Basic Menu. See page 26 for more information.
Video device connections
No video cables are provided with the projector. You can order cables from InFocus or provide your own.
HDMI connection
HDMI is a standard, uncompressed, all-digital audio/video interface. HDMI provides an interface between sources, such as set-top boxes, DVD players, and receivers and your projector. Plug an HDMI cable into the video-out connector on the video device and into the HDMI connector on the projector.
Composite video connection
Plug the composite video cable's yellow connector into the video-out connector on the video device. Plug the other yellow connector into the yellow Video connector on the projector.
VGA connection
If your video device has a 15-pin VGA output, plug one end of the included computer cable into the VGA connector on your video source. This connector may be labeled "To Monitor" on the video source. Plug the computer cable into either the Computer 1 or Computer 2 connector on the projector.
S-video connection
Plug the S-video cable's connector into the video-out connector on the video device. Plug the other connector into the S-Video connector on the projector.
Audio
For audio, connect a 3.5mm stereo cable to the Audio I/Audio 2 connector on the projector and to your source. If your source uses RCA audio connectors, a Y-cable or adapter may be used. (Note: A separate audio connection is not required for HDMI source inputs.)
Shutting down the projector
Auto Off Time
The projector also has an Auto Off Time feature that automatically turns the projector off after no active sources are detected and no user interaction with the projector is performed for 30 minutes. By default, this feature is off. You can change the length of time, see page 30.
Turning off the projector
To turn the projector off, press the Power button on the remote or keypad. The lamp turns off and the Power LED blinks blue for 30 seconds while the fans continue to run to cool the lamp. If the Power Saving Mode feature is on and when the lamp has cooled, the LED lights blue and the fans stop. If the Power Saving Mode feature is off and when the lamp has cooled, the LED blinks blue and the fans stop. Unplug the power cable to completely power off the projector.
Troubleshooting your setup
If your image appears correctly on the screen, skip to the next section. If it does not, troubleshoot the setup.
The Status Indicator Lights on top of the projector indicates the state of the projector and can help you troubleshoot.
| Status Indicator Light Meaning | |
| POWER: Solid BlueTEMP: OffLAMP: Off | 1. If the Power Saving Mode feature is on, the projector is plugged in.2. The projector is on and initialized.3. The projector is in normal operation. |
| POWER: Blinking BlueTEMP: OffLAMP: Off | 1. If the Power Saving Mode is off, the projector is plugged in.2. The projector is powering down and the fans are cooling the projector. |
| POWER: Blinking blueTEMP: Blinking redLAMP: Blinking red | The projector fan(s) are not operating correctly and the projector has been shut down.The lamp failed to ignite.Contact Technical Support if the problem persists. Visit www.infocus.com/support to contact service. |
| POWER: Solid blueTEMP: Blinking redLAMP: Blinking red | The lamp has reached its end of life and must be replaced. The lamp will continue to operate until it fails.Contact Technical Support. Repair may be needed. |
| POWER: Solid blueTEMP: Blinking redLAMP: Off | 1. The projector is overheating and the lamp will be shut off. The fans will continue to run.2. The projector will not turn back on until the cooling process is complete. |
| Problem Solution Result | ||
No start up screen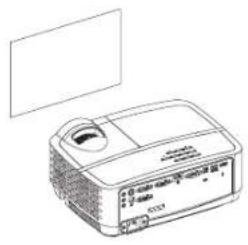 | Plug power cord into the projector press the Power button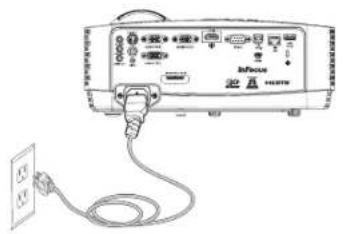 | Correct image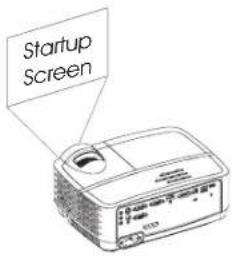 |
Only start up screen appears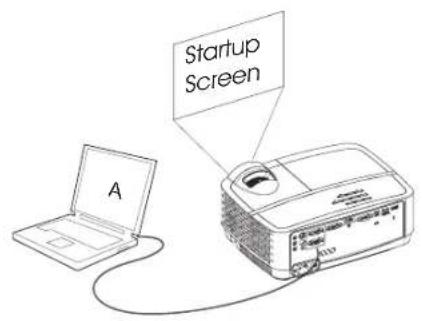 | Press the SOURCE button. activate laptop's external port 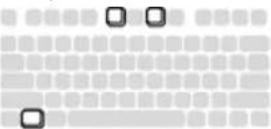 Restart laptop Restart laptop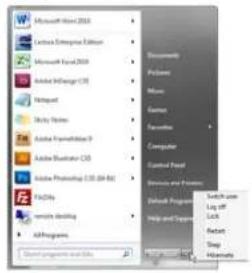 | Computer image projected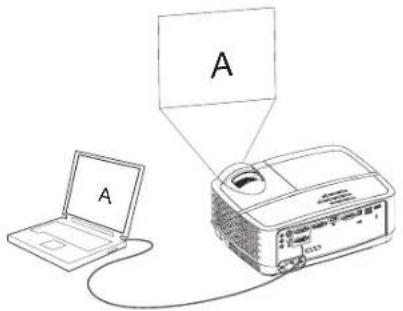 |
No computer image, just the words “Signal out of range”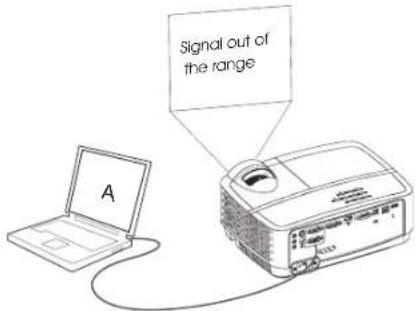 | Press the Auto Image button on remoteAdjust computer refresh rate (Windows 7: Control Panel > Display > Screen Resolution > Advanced Settings > Adapter tab). Varies per operating system.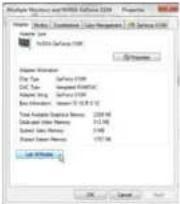 You may also need to set a different resolution on your computer, as shown in the following problem, “image fuzzy or cropped” You may also need to set a different resolution on your computer, as shown in the following problem, “image fuzzy or cropped” | Computer image projected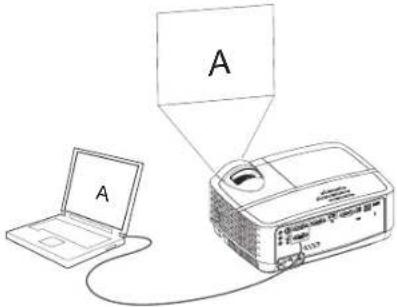 |
Only my laptop’s background appears, not the Desktop icons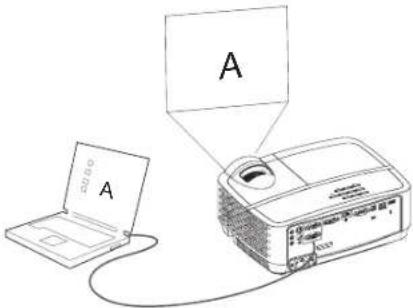 | Change the Multiple Display setting to "Duplicate these displays" (Windows 7: Control Panel > Display > Screen Resolution). Varies per operating system.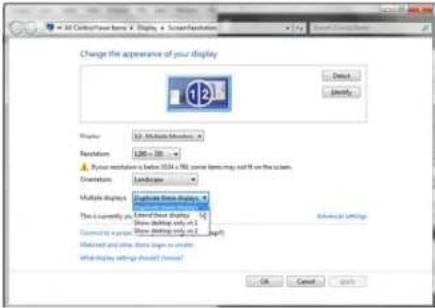 | Background and Desktop projected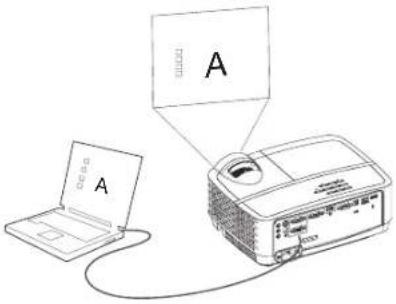 |
Image fuzzy or cropped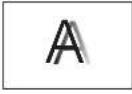 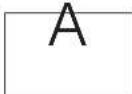 | Change the computer's "Resolution" setting to match the projector's resolution (Windows 7: Control Panel > Display > Screen Resolution). Varies per operating system.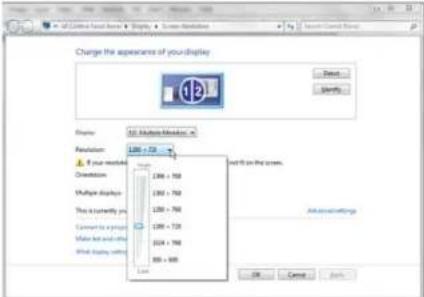 | Image clear and not cropped |
Image not centered on screen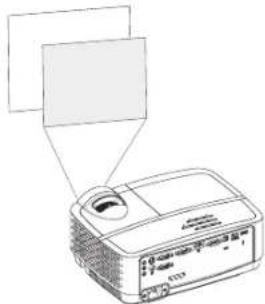 | Move projector, adjust height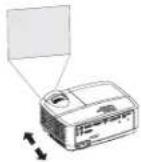 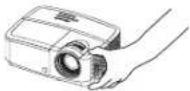 Adjust horizontal or vertical position in Advanced Menu > Image > PC... menu Adjust horizontal or vertical position in Advanced Menu > Image > PC... menu 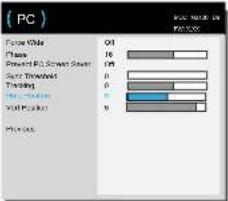 | Correct image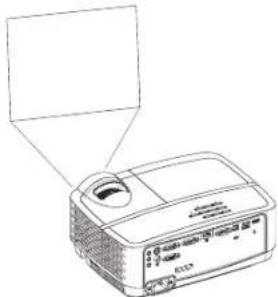 |
Image not square Adjust Keystone on keypad | 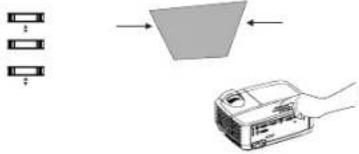 | Square image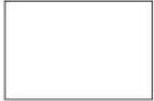 |
Image not sharp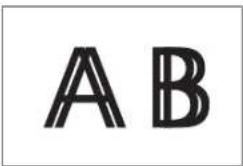 | Adjust Sharpness in the Basic Menu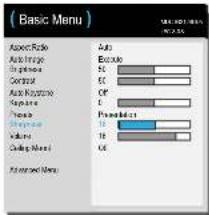 | Correct image |
Image does not fit 4:3 or 16:9 screen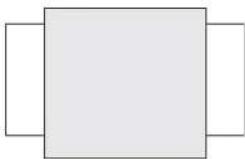 | Change aspect ratio to 4:3 or 16:9 in Basic Menu > Aspect Ratio menu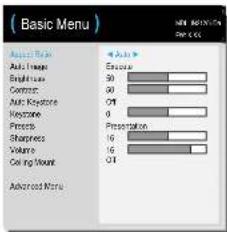 | Correct image |
Image upside down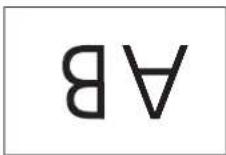 | Turn off Ceiling Mount in Basic menu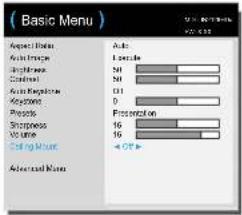 | Correct image |
Image reversed left to right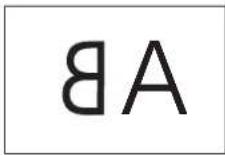 | Turn off Rear Project in Advanced Menu > Setup > Image Setup... menu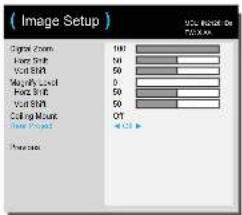 | Correct image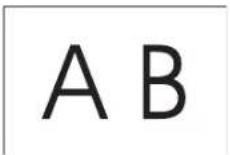 |
Projected colors don’t match source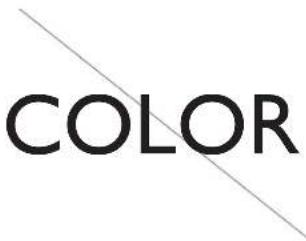 | Adjust the items in the Advanced Menu > Image > Color... menu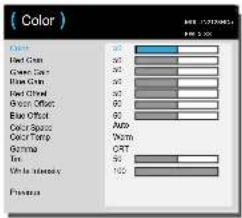 | Correct imageCOLOR |
The video embedded in my PowerPoint presentation does not play on the screen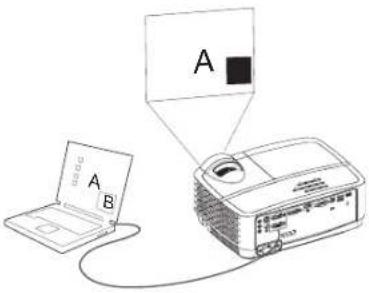 | Turn off the internal LCD display on your laptop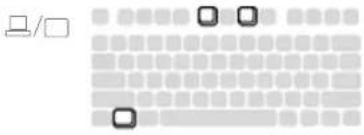 | Embedded video plays correctly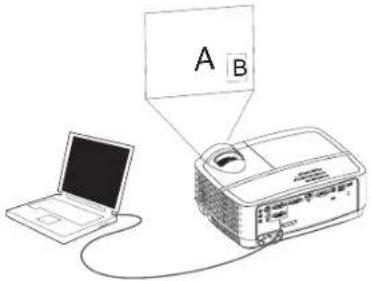 |
Lamp won’t turn on, the projector is overheating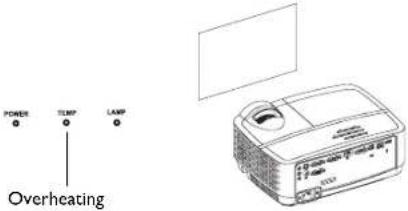 indicator indicator | Make sure vents aren’t blocked, turn off the projector and allow it to cool for one minute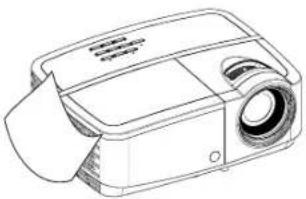 | Lamp turns on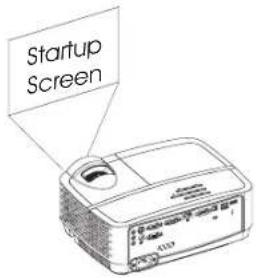 |
“Replace lamp” message appears at startup, lamp won’t turn on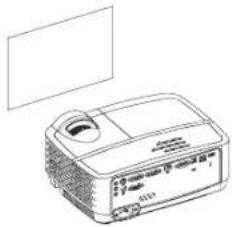 | Lamp must be replaced (see page 57)lamp door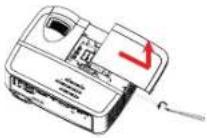 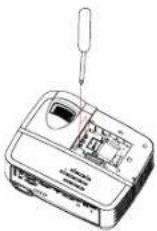 replace lamp replace lamp | Lamp turns on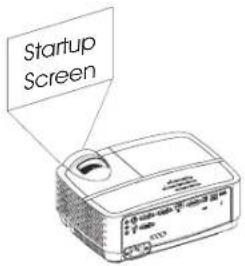 |
Still need assistance?
If you need assistance, visit our website at www.infocus.com/support or call us. See the Quick Start Guide for support contact information.
This product is backed by a limited warranty. An extended warranty plan may be purchased from your dealer. When sending the projector in for repair, we recommend shipping the unit in its original packing material, or having a professional packaging company pack the unit. Please insure your shipment for its full value.
Using the remote control
The remote uses two (2) AAA batteries (not provided). They are easily installed by removing the cover from the remote's back, aligning the + and - ends of the batteries, sliding them into place, and then replacing the cover.
Caution:
- When replacing the remote batteries, be aware that using batteries other than AAA batteries may risk severe damage to the remote. When disposing of the batteries, be sure to do so in an environmentally proper manner.
- If the remote control gets wet, wipe it dry immediately.
- Avoid excessive heat and humidity.
- Ensure the batteries' polarity (+/-) is aligned correctly.
- Do not mix new and old batteries together, or mix different types of batteries together.
- Replace the batteries as soon as they run out.
- Remove batteries from the remote control when storing or not in use for a prolonged period.
To operate, point the remote at the front of the projector (not at the computer). The range of optimum operation is about 15 feet (4.5m).
Press the remote's Power button to turn the projector on and off (see page 52 for shutdown info).
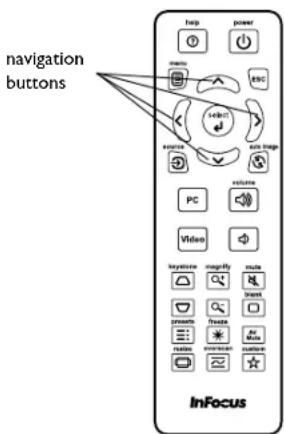
Press the remote's Menu button to open the projector's menu system. Use the arrow buttons to navigate, and the Select button to select features and adjust values in the menus. See page 25 for more info on the menus.
The remote also has:
• Volume buttons adjust the sound.
- Custom button that can be assigned to a special function, like Blank Screen or Freeze (see page 28).
- Source button brings up a menu of all possible sources allowing the user to switch the active source.
- Blank button to blank the screen.
• Presets button to select stored settings (see page 26).
- Mute button to silence the audio.
• Auto Image button to resynch the projector to the source.
- Resize button to switch among aspect ratios (see page 26).
• Help button to get help with connecting sources and improving the picture.
• E S C button to go back to previous OSD menu.
- PC button to cycle through the Computer sources.
• Video button to cycle through Composite/S-Video/HDMI input sources. - Keystone buttons adjust the squareness of the image
• Magnify buttons magnify and reduce the projected picture size. - Freeze button to pause the projected image.
- Overscan button remove noise around the video image.
• AV Mute button blanks the projected image and mutes audio.
Troubleshooting the remote
- Make sure the batteries are installed in the proper orientation and are not dead.
- Make sure you're pointing the remote at the projector or the screen, not the computer, and are within the remote range of 15 feet (4.5m). For best results, point the remote at the projector.
Using the audio
Using the projector's speaker
Connect the audio source to the Audio 1/Audio 2 connectors to hear audio through the projector speakers.
Amplified speakers may also be connected to the projector using the Audio Out connector.
To adjust the volume, press the Volume buttons on the remote.
Troubleshooting Audio
If you aren't hearing the audio, check the following:
• Make sure the audio cable is connected to the Audio 1/Audio 2 connector on the projector, and that the other end of the cable is connected to an Audio Out connector on the source (not a "line-in" or "microphone" connector).
• Make sure the volume is turned up enough. Press the Volume button on the remote.
• Make sure the correct source is active.
- Adjust the audio source.
• If playing a video, make sure the playback has not been paused.
connect audio cable

Using the keypad buttons
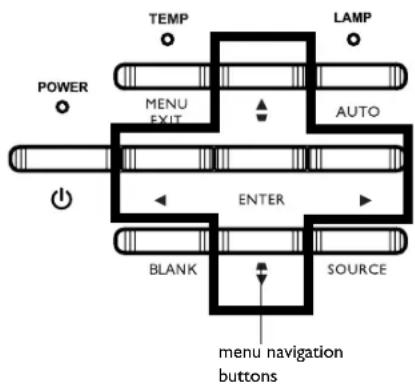
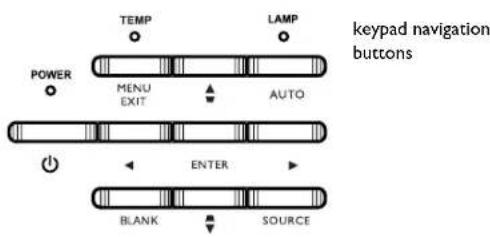
Most buttons are described in detail in other sections, but here is an overview of their functions:
Power-turns the projector on and off (page 9).
Right arrow - When the menu is displayed, the right arrow button navigates through the menu.
Up arrow/Keystone - When the menu is displayed, the up arrow button navigates through the menu. When the menu is not displayed, this button adjusts the squareness of the image (page 10).
Down arrow/Keystone - When the menu is displayed, the down arrow button navigates through the menu. When the menu is not displayed, this button adjusts the squareness of the image (page 10).
Left arrow - When the menu is displayed, the left arrow button navigates through the menu.
Enter - Activates the selected On-Screen Display (OSD) menu item.
Menu/Exit - Turns on the On-Screen Display (OSD) menu. Goes back to previous OSD menu, exits and saves menu settings.
Auto - Resynchronizes the projector to the source.
Blank - Displays a solid color or factory logo screen.
Source - Brings up a menu of available sources.
flowchart
graph TD
    A["POWER"] --> B["MENU EXIT"]
    B --> C["ENTER"]
    C --> D["SOURCE"]
    D --> E["BLANK"]
    E --> F["menu navigation buttons"]
    G["LAMP"] --> H["AUTO"]
    I["TEMP"] --> J["INPUT"]
    K["Power"] --> L["INPUT"]
Optimizing computer images
After the projector is running and the image is on the screen, you can optimize the image using the onscreen menus. For general information on using the menus, see page 25.
- Select the User Preset in the Basic Menu before optimizing images and the settings will be saved in that Preset.
• Adjust the Keystone, Contrast, or Brightness (page 26). - Change the Aspect Ratio. Choose the option that best fits your input source (page 26).
- Adjust the Color Temperature (page 27).
- Adjust the Phase, Tracking, or Horizontal or Vertical position (page 27).
Presentation features
Several features are provided to make giving presentations easier. Here is an overview, details are found in the menu section.
- The Custom key allows you to assign various features to the button. The default effect is Source Info, which displays information about the projector and current source. See page 28 for details.
- The Search Screen option lets you change the appearance of the blank screen and start up screen (page 29).
- Auto Off Time is provided to automatically shut down the projector after several minutes. This helps preserve lamp life (page 29).
- When the projector is connected to the computer via USB Type B, the up and down arrows are used as page up and page down controls.
- When the projector is connected to the computer via USB Type B, the projector will prevent the computer from going into screen saver mode during your presentation.
Optimizing video images
After your video device is connected properly and the image is on the screen, you can optimize the image using the onscreen menus. Select the User Preset in the Basic Menu before optimizing images and the settings will be saved in that Preset. For general information on using the menus, see page 25.
- Adjust the Keystone, Contrast, Brightness, Color, or Tint (page 26).
- Change the Aspect Ratio. Choose the option that best fits your input source (page 26).
- Select a Sharpness setting (page 26).
- Adjust the Color Temperature. Select a listed warmth value (page 27).
• Turn on Overscan to remove noise on the edges of the image (page 27).
Customizing the projector
You can customize the projector for your specific setup and needs. See page 28 for details on these features.
- For rear projection, turn Rear Project on in the Advanced Menu > Setup > Image Setup... menu.
- For ceiling mounted projection, turn Ceiling Mount on in the Basic menu.
- Specify which source the projector checks first for active video during power-up.
- Specify the function of the Custom key on the remote.
- Turn the projector's display messages on and off.
- Turn on power saving features.
- Specify appearance of blank screen and startup screen.
- Specify the language viewed on the menus.
- Save settings for the active source as a preset.
Using the menus
To open the menus, press the Menu button on the keypad or remote. (The menus automatically close after 60 seconds if no buttons are pressed.) Use the arrow buttons to move up and down to review the menu options.
2 To enter a submenu, highlight the desired submenu and press > on the keypad or Select on remote.
3 To adjust a menu setting, highlight the desired menu option and press < or > to scroll through the available adjustments.
4 Press the Menu button to exit the menu system.
The menus are grouped by usage:
• The Basic Menu provides common adjustments.
• The Advanced Menu provides more complex adjustments.
Basic Menu
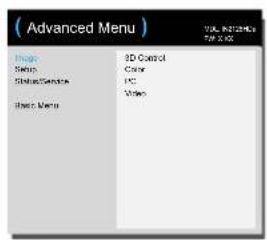
Advanced Menu
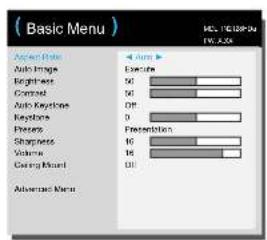
Basic Menu
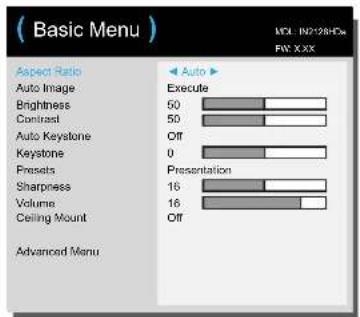
To adjust the following settings, highlight the setting, use the right and left arrows to adjust the values.
Aspect Ratio: Aspect ratio is the ratio of the image width to image height. TV screens are usually 4:3. HDTV and most DVDs are 16:9.
Select Auto to have the projector choose the ratio. Choose Native to see the unmodified input with no resizing by the projector. Select 16:9 to watch enhanced widescreen DVDs.
Auto Image: resets the projector to the source.
Brightness: changes the intensity of the image.
Contrast: controls the degree of difference between the lightest and darkest parts of the picture and changes the amount of black and white in the image.
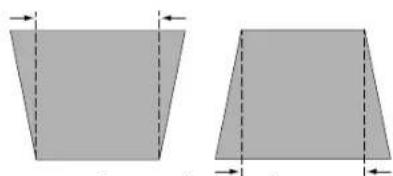
Auto Keystone: automatically corrects distorted images resulting from an angled projection.
Keystone: adjusts the image vertically and makes a squarer image. You can also adjust keystone from the keypad.
Presets: Presets are provided that optimize the projector for displaying computer presentations and video images under certain conditions. Note: Users can save their settings as a User Preset.
Sharpness: Changes the clarity of the edges of a video image. Select a sharpness setting.
Volume: increases or decreases the audio volume.
Ceiling Mount: turns the image upside down for ceiling-mounted projection.
Basic Menu
natural_image
Two identical 3D geometric shapes with dashed lines and arrows indicating measurement or orientation (no text or symbols)increasing keystone decreasing keystone
Advanced Menu
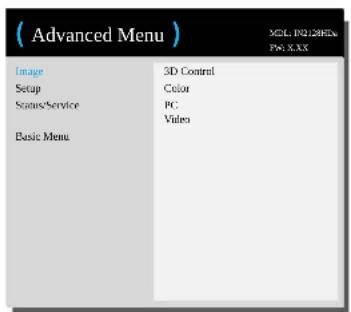
Advanced Menu
Image:
3D Control:
3D: allows you to enjoy 3D (stereoscopic) content. Your projector supports Auto, Top-Bottom, Frame Sequential, Frame Packing, Side-by-Side formats for controlling LCD shutter glasses. In addition to the projector, you will need a pair of 3D shutter glasses, 3D content, and 3D compatible source. Ensure the glasses you choose are consistent with the synchronization mode you will be using.
3D Sync Invert: If the image appears to flutter, look odd or if the image depth looks off or you experience eye strain, turn this feature on to see if the image improves.
Color
Color: adjusts a video image from black and white to fully saturated color. The color setting applies to NTSC video sources only.
Red/Green/Blue Gain: adjusts the gain of the red, green or blue channel of the image.
Red/Green/Blue Offset: adjusts the offset of the red, green or blue channel of the image.
Color Space: applies to computer and component video sources. It allows you to select a color space that has been specifically tuned for the input signal. When Auto is selected, the projector automatically determines the standard. To choose a different
setting, turn off Auto, then choose RGB for computer sources or choose either REC709 or REC601 for component video sources.
Color Temperature: changes the hue of the colors. Select a listed relative warmth value.
Gamma: select the appropriate gamma from among Video, Film, Bright, and CRT.
Tint: adjusts the red-green color balance in the image of NTSC video images. The tint setting applies to NTSC video sources only.
White Intensity: increases the brightness of whites that are near 100%.
PC:
Force Wide: when this is off, the analog locking algorithms choose the standard mode resolution (4:3) as the preferred default resolution. When this is on, the analog locking algorithms choose wide mode resolution (16:10) as the preferred default resolution.
Phase: adjusts the synchronization of the pixels to the pixel clock on analog computer sources.
Prevent PC Screen Saver: prevents your computer from going into Screen Save mode. The projector must be connected to the PC via a Type-B USB cable for this feature to work.
Sync Threshold: (progressive signals only) If a hardware device, such as a DVD player, is not syncing properly with the projector, select this option to help it to sync when connected to the projector.
Tracking: adjusts the pixel clock rate on analog computer sources.
Horizontal/Vertical Position: adjusts the position of a computer source.
Video:
Detect Film: determines whether the original source of the input video was film (progressive) or video (interlaced).
Overscan: crops video sources to remove noise from outside the image.
Set Black Level: analyzes the current input image and calculates an offset value which is then added to the analog to digital converter black level value. This ensures optimum black level for each analog source.
Setup:
Audio Setup
Internal Speakers: turns the internal speaker on or off.
Computer I: selects the audio input for Computer I signal.
Computer 2: selects the audio input for Computer 2 signal.
Video: selects the audio input for video source.
HDMI: selects the audio input for HDMI signal.
Closed Captioning
Closed Captions: controls closed captioning. If the source is NTSC and contains captions on the selected channel, then the projector will display caption text overlaid on the image. Options are: Off, CCI and CC2.
Image Setup
Digital Zoom: reduces the size of projector's display area. If the display area has been resized by this setting, it can be moved by changing the Horz Shift and Vert Shift settings.
Magnify Level: magnifies the image. If the image has been magnified by this setting, it can be moved by changing the Horz Shift and Vert Shift settings.
Ceiling Mount: turns the image upside down for ceiling-mounted projection.
Rear Project: reverses the image so you can project from behind a translucent screen.
Keypad/Remote Settings
Blank Key: select what to display when the blank key on the remote is pressed: a solid color screen (blue, black or white), or the factory logo screen.
Custom Key: allows you to assign a different function to the Custom button, allowing you to quickly and easily use the effect. Highlight an effect and press < or > to choose a different one.
- Blank Screen: displays a solid color or factory logo screen.
• Mute: turns off all sound.
• Source: brings up a menu of available sources.
• Auto Image: resets the projector to the source.
• Freeze Screen: pauses the projected image.
• Source Info: the default action. Shows the Source Info menu.
• Projector Info: shows the Projector Info menu.
• Overscan: removes noise around the image.
- AV Mute: enables or disables AV Mute function.
• Closed Captions: enables or disables Closed Captions.
Keypad: enables or locks the projector keypad.
LiteBoard™ Wand: selects the LiteBoard™ Wand mode. Options are: None, Single Pen and Dual Pens. See page 52 for details.
Lamp
Programmed Dimming: When enabled, Programmed Dimming enhances contrast ratios, lamp life and system noise performance. Lamp power will change continuously based on the brightness of the program content. Note: Image anomalies may be seen when image scenes change from dark to light (or light to dark). This is normal. Programmed Dimming works in conjunction with the lamp. If Lamp Low Power is enabled, Programmed Dimming is unavailable. Note: Programmed Dimming is off by default.
Lamp Low Power: toggles between on and off. Turn it on to lower the light output of the lamp. This also lowers the fan speed, making the projector quieter.
OSD Setup
Language: allows you to select a language for the onscreen display.
Menu Position: allows you to change the position of the On Screen Display items.
Menu Transparency: allows you to change how much of the projected image behind the menu you can see. As the value increases, more of the image behind the menu is visible.
Show Messages: allows you to turn off status messages (such as "Searching") in the upper-left corner of the screen.
PIN Settings
PIN Protect: The PIN (personal identification number) feature allows you to password protect your projector. Once you enable the PIN feature, you must enter the PIN before you can project an image. Use the Left/Right/Up/Down arrows buttons on the remote or keypad to set a 4-button press sequence. If you enter an incorrect PIN 3 times in succession, the projector will automatically shut down. If you lose or forget your custom PIN, contact InFocus Technical Support.
To enter the PIN at projector startup:
Power up the projector. The "Enter PIN" dialog box appears after the startup screen. Enter the default PIN or the new PIN (Left/Right/Up/Down) if it has been changed, using the arrow buttons on the remote or keypad. See the description above for instructions.
To change the PIN:
Select "Change PIN..." in the Advanced Menu > Setup > PIN settings menu. Enter the existing PIN. Enter the new PIN twice. Do not forget the new PIN. Contact InFocus Support to recover a projector with a forgotten PIN.
Power
Power Saving Mode: When the Power Saving Mode is On and the projector is in standby (powered off but connected to AC power), external audio and the Monitor Out function will not work.
AC Power On: When this feature is enabled, the projector automatically turns on when power is connected. This allows control of ceiling mounted projectors with a wall power switch.
Instant Power On: When this feature is enabled and it has been less than 1 minute since the projector was powered down, you can turn the projector back on immediately. When this feature is disabled, you will need to wait for the projector lamp to completely cool before restarting the projector.
Eco Blanking: When this feature is enabled and no video source is sensed, 70% of lamp power is saved and no image is shown. When the video source is again applied, the image is shown immediately.
Source
Auto Source: When this feature is On, the projector automatically finds the active source, checking the selected Power-up Source first. When this feature is Off, the projector defaults to the source selected in Power-up Source. To display another source, you must manually select one by pressing the Source button on the remote or keypad and selecting one from the displayed Source menu.
Power-up Source: determines which source the projector checks first for active video during power-up.
Search Screen: allows you to display a blank screen instead of the default screen at startup, and when no source is detected.
Timer
Auto Off Time: automatically turns the projector off after no signals are detected for a preset number of minutes. If an active signal is received before the projector powers down, the image will be displayed.
High Altitude Setting
High Altitude: We recommend you turn on the High Altitude Mode when your environment is between 5000' (1500m) and 10,000' (3000m) above sea level.
Network
Wired LAN
DHCP: Abbreviation for Dynamic Host Configuration Protocol. This protocol automatically assigns IP Addresses to networked devices.
- When the "DHCP" is set to "On", the DHCP server will assign an IP address to the projector automatically. This may take up to a minute.
- When the "DHCP" is set to "Off", the user will need to set the IP address manually.
IP Address: The numerical address used to identify devices on the network. This is only accessible when DHCP is set to Off.
- The IP Address is the number that identifies this projector on the network. You cannot have two devices with the same IP Address on the same network.
- The IP Address "0.0.0.0" is prohibited.
Subnet Mask: A numeric value defining the number of bits used in an IP Address when the network is divided into subnets. This function can only be used when DHCP is set to Off.
- The Subnet Mask "0.0.0.0" is prohibited.
Default Gateway: A server (or router) to communicate across networks (subnets) that are divided by a Subnet Mask. This function can only be used when DHCP is set to Off.
DNS: Setup DNS server address when DHCP is disabled.
MAC Address: Abbreviation for Media Access Control Address. A MAC Address is a unique ID number assigned to each network adapter.
Apply: Save and execute the wired network settings.
Wireless LAN
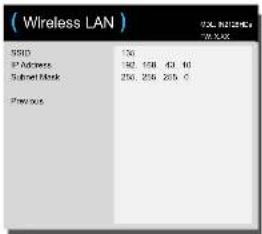
SSID: Display the projector's SSID information.
IP Address: a read-only display of IP Address.
Subnet Mask: a read-only display of Subnet Mask.
Restart Network: Restart network settings.
Status/Service:
Source Info: a read-only display of current source settings.
Projector Info: a read-only display of current projector settings.
Reset Lamp Hours: resets the lamp hours used counter in the Projector Info menu to zero. Do this only after changing the lamp.
Factory Reset: restores all settings to their factory default settings.
Service Code: only used by authorized service personnel.
Multimedia EZ Suite Menu
Use the arrow keys to navigate up and down, left and right. The right-hand menus change based on the left-hand menu selection.
To select a menu option, press the right-hand arrow.
To return to the previous EZ Suite menu (and ultimately the EZ Suite main menu), press the Menu or left arrow key.
EZ Media
Internal Memory
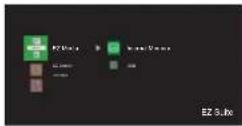
With a mini-B USB cable connected to your PC and the projector, you can load internal memory. See the EZ Suite Settings > System menu USbSwitch feature listed on page 41 for information on how to connect to download internal memory.
USB
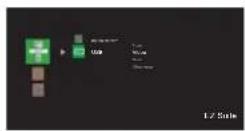
When a USB storage device is inserted into the projector USB Type-A connector, press the Source key and use the arrow keys to highlight Multimedia. Press the Select key on the remote (or the Enter key on the projector) to select the multimedia source. The Multimedia EZ Suite menu displays.
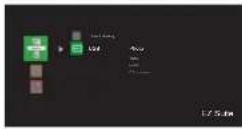
Photo mode
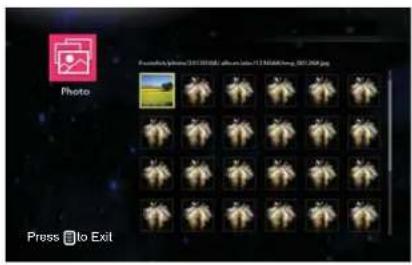
Folders and supported files are represented in thumbnail view.
| Key Action | |
| Up | Scroll through the thumbnails |
| Down | |
| Left | |
| Right | |
| Select/Enter | Opens and closes the file |
| Menu | Exit thumbnail view and return to EZ Suite main menu |
Displaying a picture
natural_image
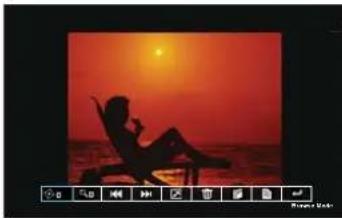
Silhouette of a person relaxing on a chair against a vibrant red sunset sky (no text or symbols visible)• To open/close the Photo View toolbar: press the Menu key.
- To navigate through the toolbar: press the arrow keys ^/</>.
• To return to thumbnail view: press the Select/Enter key.
| Toolbar icon Action | |
| Press v/Enter/Select to select picture rotationToggle the Enter/Select/four arrow keys to rotate the picture counterclockwise, press Menu key to exit from it. | |
| Toggle Enter/Select to zoom in the picture by x0, x1, x2, x3, x4 in sequence, press Menu key to exit from it. | |
| Toggle v/Enter/Select to display the previous picture | |
| Toggle v/Enter/Select to display the next picture | |
| Press v/Enter/Select to start slideshow when Slideshow is On, press Menu key to stop the slideshow. Note: To enable the Slideshow feature and set the slide timing, go to the Settings menu and adjust Slideshow and Slideshow Duration. | |
| Press v/Enter/Select to open the pop-up message screen, press Menu key to close it. | |
| Press v/Enter/Select to open the pop-up message screen, press Menu key to close it. | |
| Press v/Enter/Select to display the current file information | |
| Press v/Enter/Select to return to thumbnail view |
Video mode
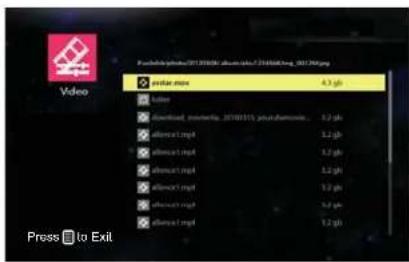
Video playlist is displayed on the screen
| Key Action | |
| Up | Go to the previous video file |
| Down | Go to the next video file |
| Select/Enter | Play the video |
| Menu | Exit video playlist and return to EZ Suite main menu |
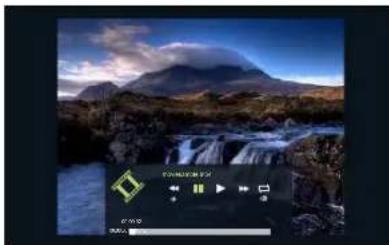
When a video is playing
natural_image
Scenic landscape with a waterfall and mountain backdrop under a blue sky (no text or symbols visible)• To open the Video Viewer toolbar: press the Menu key.
• To stop the video or return to video playlist: press the Select/Enter key when the toolbar is closed.
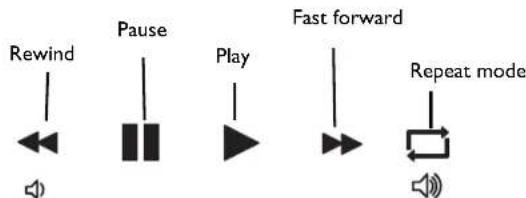
• To pause/play the video file: Press the Select/Enter key to pause and play the video file when the toolbar is displayed.
- To rewind the video file: Press the Menu key to open the Video Viewer toolbar. Press the left arrow key to rewind the video and toggle through the different rewind speeds. Press the Select/Enter key to stop rewinding. Options include: X1, X2, X4, and X8.
- To fast forward the video file: Open the Video Viewer toolbar, press the right arrow key to fast forward the video and toggle through the different forward speeds. Press the Select/Enter key to stop forwarding. Options include: X1, X2, X4 and X8.
• To adjust volume: Press the Volume Up and Down keys on the remote to increase and decrease the volume.
- Repeat mode: set in the EZ Suite Settings > Video menu > Repeat Mode. See page 41.
Music mode
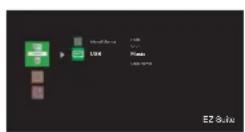
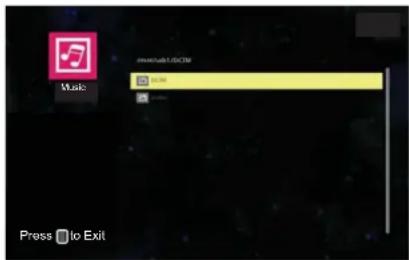
The audio playlist is displayed on the screen.
| Key Action | |
| Up | Go to the previous audio file |
| Down | Go to the next audio file |
| Left | Display the sort type |
| Select/Enter | Play the audio file |
| Menu | Exit audio playlist and return to EZ Suite main menu |
When audio is playing
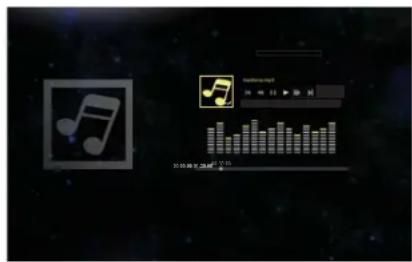
• To return to audio playlist: press the Menu key.
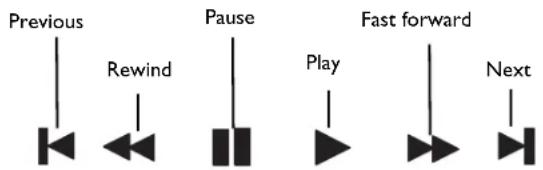
• To pause/start the audio file: Press the Select/Enter key to pause and start the audio file.
• To rewind the audio file: Press the left arrow key to rewind the audio. Press again to return to normal speed.
• To fast forward the audio file: Press the right arrow key to fast forward the audio. Press again to return to normal speed.
• To adjust volume: Press the Volume Up and Down keys on the remote to increase and decrease the volume.
• To go to the previous audio file: Press left arrow key twice within one second.
• To go to the next audio file: Press the right arrow key twice within one second.
Office viewer mode
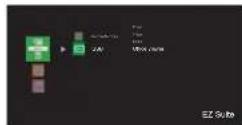
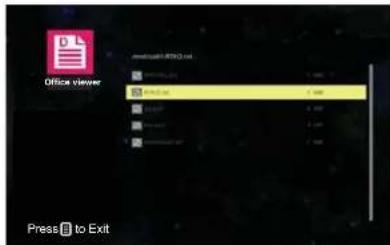
The file list is displayed on the screen.
| Key Action | |
| Up | Go to the previous file |
| Down | Go to the next file |
| Left | Display the sort type |
| Select/Enter | Open a file |
| Menu | Exit file list and return to EZ Suite main screen |
When an Office file is displaying
- Press the Menu key to open/close the Office Viewer toolbar. Use the right or left arrow key to highlight the desired function. Then press the Select/Enter key.
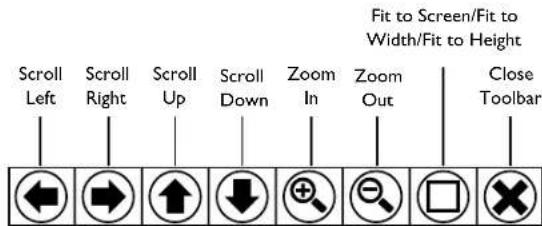
• To return to the filelist: close the toolbar first, and press Select/Enter key. Note: The file name displays in the upper left corner of the Office Viewer toolbar. The current page number and number of pages appears on the upper right corner. The amount of magnification displays on the lower right corner.
Supported file formats
- Images
| Image Format | Profile | Color Space | Size Limitation |
| JPEG | Baseline YUV400 No limit | ||
| YUV420 No limit | |||
| YUV422 No limit | |||
| YUV440 No limit | |||
| YUV444 No limit | |||
| Progressive YUV400 Width <= 10240 & | height <= 6400 | ||
| BMP No limit No | imit No limit | ||
- Audio
| Audio Format Sample | rate (KHz) Bit Rate (Kbps) | |
| OGG 8-48 64-320 | ||
| ADPCM-WAV 8-48 32-384 | ||
| PCM-WAV 8-48 128-1536 | ||
| AAC 8-48 | 8-256 |
- Voice Record
| File Format | Audio Format | Sample rate (KHz) | Bit Rate (Kbps) |
| .wav | IMA-ADPCM | 8 | 32 |
| 16 | 64 | ||
| 24 | 192 | ||
| 48 | 384 |
- Video
| File Extensions | Audio/Video | Codec | Profile/Level Support | Explanation |
| .avi.divx.mkv | Video | MJPEG No limitations | ||
| H.264/AVC | Up to High Profile, Levels 1-4.1 (1080P 30fps 20Mbps) | Only supports 1-3 reference frames. | ||
| XVID | Up to Advance Simple profile (1080P 30fps 20Mbps) | |||
| MPEG2 | Main profile, Low and Main Levels (1080P 30fps 20Mbps) | |||
| MPEG4 | Advanced Simple Profile (frame picture), Levels 0-5 (1080P 30fps 20Mbps) | |||
| .ts | Video | MPEG2 | Main profile, Low and Main Levels (1080P 30fps 20Mbps) | |
| H.264/AVC | Up to High Profile, Levels 1-4.1 (1080P 30fps 20Mbps) | Only supports 1-3 reference frames. | ||
| .dat.vob.mpg.mpeg | Video | MPEG1 | Main profile, Low and Main Levels (1080P 30fps 20Mbps) | D-frames used for fast previews are not supported. |
| MPEG2 | Main profile, Low and Main Levels (1080P 30fps 20Mbps) | |||
| Audio | MPEG-I Layer I, II | |||
| MPEG-I Layer III (mp3) | ||||
| .mov.mp4 | Video | MPEG4 | Advanced Simple Profile (frame picture), Levels 0-5 (1080P 30fps 20Mbps) | |
| H.264/AVC | Up to High Profile, Levels 1-4.1 (1080P 30fps 20Mbps) | Only supports 1-3 reference frames. | ||
- Subtitle
| Format Font Subtitle | Size | |
| Standard SRT UTF-8 / UTF-16 4bits up to 448x200 | 2bits up to 896x200 | |
Note: Mixed subtitle codes are NOT supported.
- Office Viewer
| File Format | Support Version | Pages/Lines Limitation | Size Limitation | Comment |
| Adobe PDF | PDF 1.0 | Up to 1000 pages (One File) | Up to 75MB - | |
| PDF 1.1 | ||||
| PDF 1.2 | ||||
| PDF 1.3 | ||||
| PDF 1.4 | ||||
| MS PowerPoint | British PowerPoint 97 | |||
| PowerPoint 2000 | ||||
| PowerPoint 2002 | ||||
| PowerPoint 2003 | ||||
| PowerPoint 2007 (.pptx) | ||||
| PowerPoint 2010 (.pptx) | ||||
| Office XP PowerPoint | ||||
| PowerPoint presentation 2003 and earlier (.pps) | ||||
| PowerPoint presentation 2007 and 2010 (.ppsx) |
| MS Word | British Word 95. | Because Office Viewer does not load all pages of a Word file simultaneously, there are no obvious page or line limitations. | Up to 100MB | Simplified Chinese bold text is not supported. |
| Word 97, 2000,2002, 2003. | ||||
| Word 2007(.docx), 2010(.docx) | ||||
| MS Excel | British Excel 5, 95. | Maximum number of rows: 595 | Up to 15MB | Password-protected documents are not supported. |
| Excel 97, 2000, 2002, 2003. | Maximum number of columns: 256 | |||
| Excel 2007(.xlsx), 2010(.xlsx). | Maximum number of sheets: 100 | |||
| Office XP Excel. | All of the three above limitations apply. |
EZ Display
EZ USB
The EZ USB allows you to project using EZ USB application from a Windows or Macintosh operating system through a USB mini-B connection.
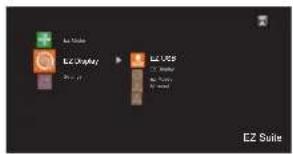
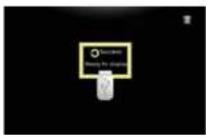
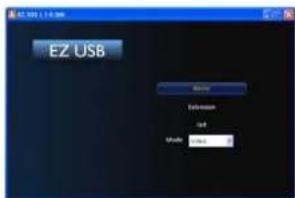
Connect one end of the USB cable to the USB Mini-B connector on the projector and the other to the USB Type-A connector on your computer.
2 Go to Multimedia > EZ Display > EZ USB to connect your device.
3 If your computer doesn't support auto play, go to "My Computer", you will find a removable disk and EZ_USB disk drive, then double click it to install the USB driver and EZ USB application.
4 Launch EZ USB to project the contents on your computer.
Features
• Full Screen Mirror Display and Extended Display
• USB2.0 High Speed Transfer
- OS support: Windows XP 32/64bit SP3 (Professional or above), Windows Vista 32/64bit SP2 (Home premium and above), Windows 7 32/64bit SP1 (Home premium and above) and Windows 8, Mac OS 10.7 and later
NOTE: Win8 doesn't support extension mode.
System Requirements
Windows OS:
| CPU Dual Core 2 GHz or higher (ATOM not supported) | |
| Graphic card Intel, nVIDIA or ATI graphic card with 64MB VRAM or above | |
| Operating System | Windows XP SP3, Vista SP2, Windows 7 SPI, Windows 8 |
| USB USB 2.0 High Speed | |
NOTE: Audio is not supported on XP.
Mac OS:
| CPU Dual Core Intel Core i 1.4 GHz or higher(PowerPC not supported) | |
| Graphic card Intel, nV | DIA or ATI graphic card with 64MB VRAM or above |
| Operating System Mac | OS X 10.7 and above |
| Recommended Models | Mac Book series and iMac series after E/2011 |
Recommended System Configuration
Windows OS:
| CPU Dual Core Intel Core i5 2.4Ghz | |
| Memory DDR 4GB | |
| Graphic card 256MB VRAM or above | |
| Operating System Windows XP SP3, Win 7 SP1 or Win 8 | |
| USB USB 2.0 High Speed | |
Mac OS:
| CPU Dual Core Intel Core i5 2Ghz | |
| Memory DDR 4GB | |
| Graphic card 256MB VRAM or above | |
| Operating System Mac OS X 10.8 | |
| Recommended Models | Mac Book series and iMac series after E/2011 |
For information about this, refer to the EZ USB Display Manual at www.infocus.com/support.
EZ Display
EZ Display allows you to project using the EZ Display application from a Windows PC, Android, Macintosh or iOS device either wirelessly using the optional SP-WIFIUSB-2 adapter or using the LAN connection.
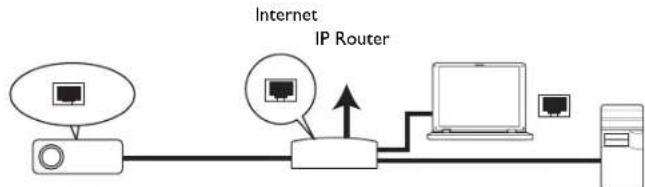
Wired LAN connection
flowchart
graph LR
    A["Client"] --> B["Internet IP Router"]
    B --> C["Client"]
    B --> D["Server"]
    style A fill:#f9f,stroke:#333
    style B fill:#ccf,stroke:#333
    style C fill:#cfc,stroke:#333
    style D fill:#fcc,stroke:#333
I Take a RJ45 cable and connect one end to the RJ45 LAN input jack of the projector and the other end to the RJ45 port.
2 Press Menu on the keypad or remote and then go to Advanced Menu > Setup > Network > Wired LAN menu.
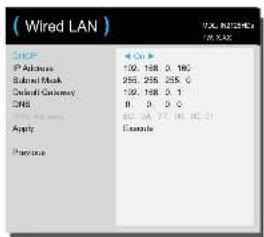
3 Press v to highlight DHCP and press < or > to select On.
4 Press v to highlight Apply and press >.
5 Please wait for around 15 - 20 seconds, and then re-enter the Network page. The IP address, Subnet Mask, Default Gateway, DNS and MAC Address settings will be displayed. Write down the IP address displayed in the IP address row.
- If the Projector IP Address still does not display, contact your network administrator.
- If the RJ45 cables are not properly connected, the IP Address, Subnet Mask, Default Gateway, DNS and MAC Address settings will display 0.0.0.0. Make sure the cables are properly connected and perform the procedures above again.
- If you need to connect to the projector in its standby mode, set the Power Saving Mode feature to Off.
If you are in a non-DHCP environment:
I Repeat steps 1-2 above.
2 Press v to highlight DHCP and press < or > to select Off.
3 Contact your network administrator for information on the IP address, Subnet Mask, Default Gateway and DNS settings.
4 Press ^ or v to select the item you want to modify.
5 Press < or > to move the cursor and then press ^ or v to select the value.
6 Press v to highlight Apply and press > to save the settings.
- If the RJ45 cables are not properly connected, the IP Address, Subnet Mask, Default Gateway, DNS and MAC Address settings will display 0.0.0.0. Make sure the cables are properly connected and perform the procedures above again.
- If you wish to connect to the projector in its standby mode, be sure to select RJ45 and obtain the IP Address, Subnet Mask, Default Gateway, DNS and MAC Address information when the projector is on.
Wireless LAN connection
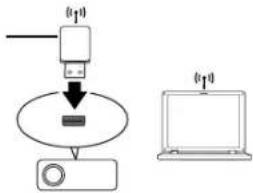
To connect to the projector wirelessly, you need to plug an optional InFocus wireless dongle (p/n SP-WIFIUSB-2) to the USB Type A connector on the projector.
InFocus wireless dongle (p/n SP-WIFIUSB-2)
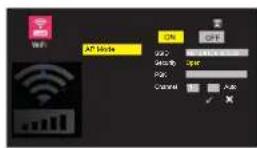
How to setup AP mode:
I Make sure the projector is turned on.
2 Select Multimedia from source list.
3 Go to Settings > WiFi, select AP Mode and set it to ON. See page 42. AP mode is set to ON by default.
4 Press Source then press Menu to display OSD menu. Go to Advanced Menu >
Setup > Network > Wireless LAN menu.
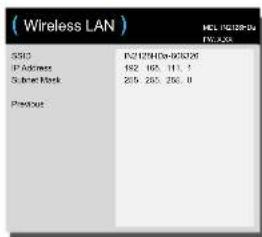
5 Write down the IP address for network connection.
How to setup client mode:
I Select Multimedia from source list.
2 Go to Settings > WiFi, select Client Mode and set it to ON. See page 42.
3 Choose the Wi-Fi network which the projector connect to from the Wi-Fi network list, and press Select/Enter.
4 Press Select/Enter to display on-screen keyboard, enter the password from the on-screen keyboard, then press Menu to close the keyboard.
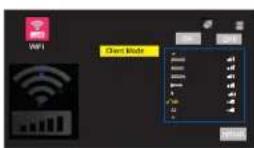
5 Highlight OK and press Select/Enter to connect.
6 Press Source then press Menu to display OSD menu. Go to Advanced Menu >
Setup > Network > Wireless LAN menu.
EZ Mobile
EZ Mobile allows you to connect wirelessly to a media server and DLNA enabled devices. Refer to the EZ Mobile guide on www.infocus.com/support for more information.
Please note: The file compatibility is not the same as EZ Display. Refer to the EZ Mobile guide for compatibility information.
EZ Miracast
EZ Miracast enables wireless delivery of audio and video to or from desktop, tablets, mobile phones, and other devices. EZ Miracast supports SP-WIFIUSB-2 adapter only.
EZ Suite Settings
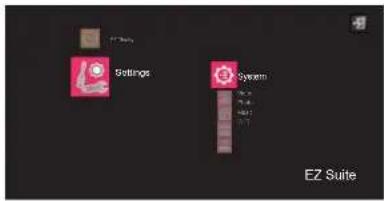
- Press the Select/Enter to enter the selected item. Press the Menu key to exit.
| System Description | |
| Version | This is the version of EZ Suite software on your projector. This is a read only field. |
| Language | Displays the current OSD (on-screen display) language. Using the up and down arrow keys, highlight the desired language and press the Select key. |
| Update | For Service Use Only. |
| Hostname | Displays the current host name for the projector. This will be displayed when using one of the wireless apps. To change the Hostname, highlight Hostname and press the Select key. Using the arrow keys and onscreen keyboard, highlight each alphanumeric character/symbol and press the Select key. Repeat until the hostname is complete. Press the Menu key to exit the keyboard. |
| UsbSwitch | Highlight and select to connect the projector directly to a PC or MAC for downloading photos/video/audio/office documents directly to the internal memory of the projector. |
| Video Description | |
| Display Ratio | Sets the display (aspect) ratio. |
| Repeat Mode | Sets repeat mode |
| Photo Description | |
| Display Ratio | Sets the display (aspect) ratio |
| Slideshow Pattern | Enables slide show mode |
| Slideshow Duration | Sets the time interval each image displays |
| Music Description | |
| Repeat Mode | Sets repeat mode |
| WiFi Description | |
| AP Mode | Sets AP mode on/off. AP mode is set to ON by default. See page 40 for more details. |
| Client Mode | Sets Client mode on/off. See page 40 for more details. |
* WiFi only works when the InFocus wireless dongle (p/n SP-WIFIUSB-2) is connected.
Web controlling the projector
Once you have the correct IP address for the projector and the projector is on or in standby mode, you can use any computer that is on the same local area network to control the projector.
- Use only Microsoft Internet Explorer version 7.0 or higher.
I Enter the address of the projector in the address bar of your browser and press Enter.

2 The main page of the Network Control displays.
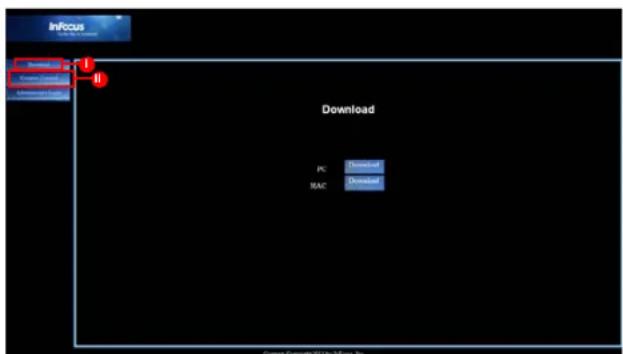
i. To download EZ Display, click Download. See page 46 for details.
ii. The Crestron (eControl) page displays the Crestron eControl user interface. See page 43 for details.
3 To access the Admin page, enter the password. The default password is "0000". If you forget the password, please go to Advanced Menu > Setup > Network > Restart Network to restore the password to the default code.
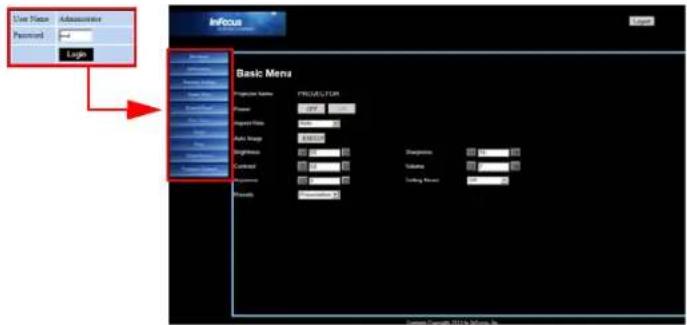
• Information: Displays the status, wired LAN, and wireless LAN information.
• Network Settings: Provides network settings.
- Email Alert: Allows you to setup the mail server and send system error messages to your network administrator.
- Control Panel: Provides some OSD menus such as Basic Menu, Image, Setup, Status/Service for adjusting the projected pictures. See page 25 for details.
• Basic Menu: Provides some common adjustments in Basic Menu.
• Image: Provides some common adjustments in Image settings under Advanced Menu.
- Setup: Provides some common adjustments in Setup settings under Advanced Menu.
• Status Service: Provides Reset Lamp Hours and Factory Reset settings.
- Crestron Control: Displays the Crestron eControl user interface. See page 43 for details.
About Crestron e-Control®
I The Crestron e-Control ^® page provides a variety of virtual keys to control the projector or adjust the projector's image.
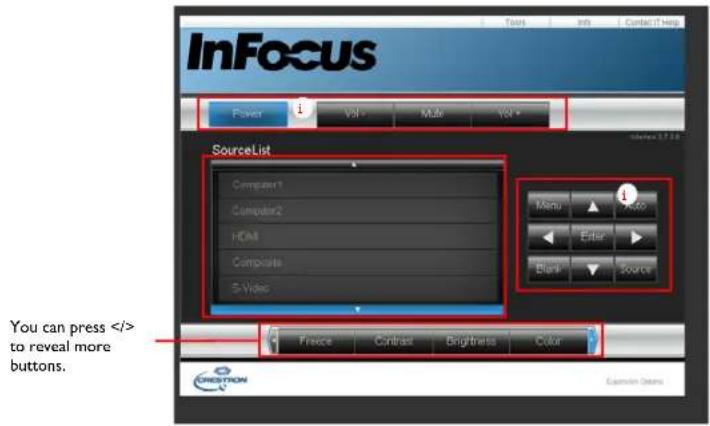
i. These buttons function the same as the OSD menus and remote control functions.
• Source List: To switch the source, click on the desired source.
- Menu: Use to go back to the previous OSD menu, exit and save menu settings.
- When you use the projector control panel or remote control to change the OSD menu settings, it may take a while for the web browser to synchronize these changes with the projector.
2 The Tools page allows you to manage the projector, configure the LAN control settings and remotely access the network operations of this projector.
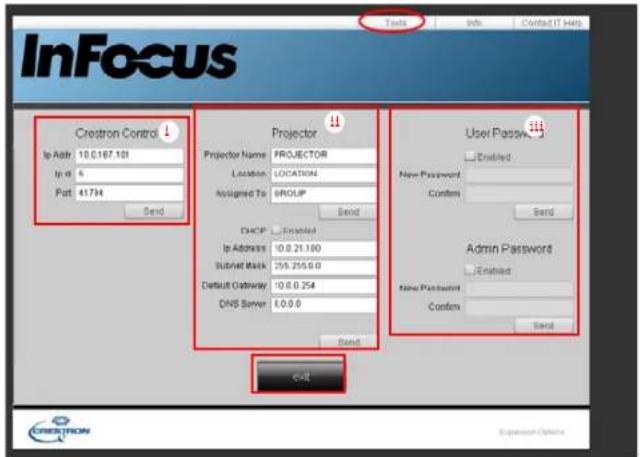
i. This area is only used with a Crestron Control System. Please contact Creston or refer to the Crestron user manual for setup information.
ii. This area is used for naming the projector, associating it with a particular location, assigning a responsible party to it, and adjusting network settings.
iii. This area is used to set User and Admin passwords. When password protection is enabled, unauthorized changes to the projector configuration will be avoided.
• To prevent errors, only enter alphanumeric characters on the Tools page.
- After configuring the settings, press the Send button and the data will be saved in the projector.
- Press exit to go back to the Crestron remote network operation page.
Please pay attention to the input length and character limitations (including character and punctuation restrictions) listed below:
| Input-Length | Maximum Number of Characters | |
| Crestron Control | IP Address 15 | |
| IP ID 2 | ||
| Port 5 | ||
| Projector | Projector Name 10 | |
| Location 9 | ||
| Assigned To 9 | ||
| Network Configuration | DHCP (Enabled) (N/A) | |
| IP Address 15 | ||
| Subnet Mask 15 | ||
| Default Gateway 15 | ||
| DNS Server | 15 | |
| User Password | Enabled (N/A) | |
| New Password | 20 | |
| Confirm | 2 | |
| Admin Password | Enabled (N/A) | |
| New Password | 20 | |
| Confirm | 20 |
/ > < \$ % + \ ' " are prohibited.
3 The Info page displays the information and status of this projector.
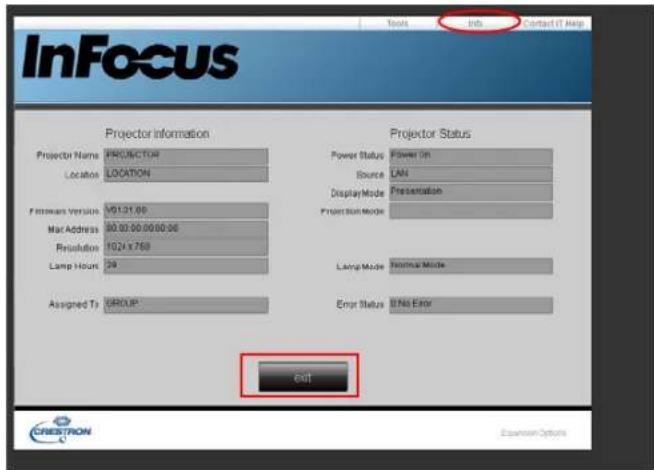
Press exit to go back to the Crestron remote network operation page.
4 After pressing the Contact IT Help button, the Title window will display in the upper right corner of the screen. You will be able to send messages to RoomView™ software administrators/users who are connected to the same local area network.
- For more information, visit http://www.crestron.com and www.crestron.com/getroomview.
Crestron RoomView
From the Crestron RoomView software in the Edit Room page, enter the IP Address (or hostname) as shown on the projector's on-screen display (OSD) menu, "05" for IPID, and "41794" for the reserved Crestron control port.
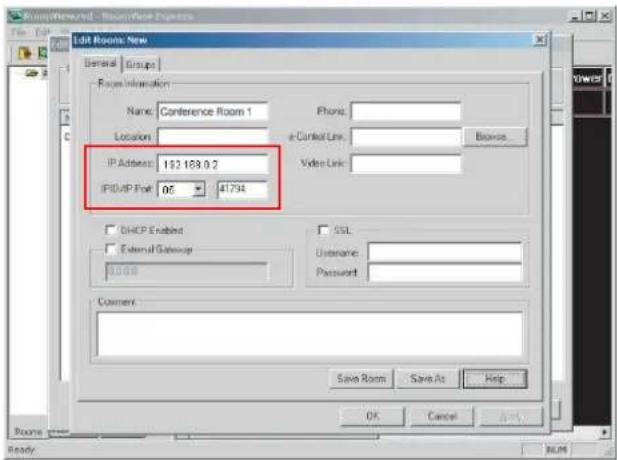
For the Crestron RoomView user guide and information about RoomView settings and commands, go to: http://www.crestron.com/products/roomview_connected_embedded_projectors_devices/resources.asp
Displaying Images through EZ Display
Installation for Windows and Macintosh
EZ Display is an application which can run on the host PC. It helps connect your computer to an available network projector and transfer the desktop content to the network projector via local network connection.
I Access the projector Web page to download EZ Display, see page 42.
2 Download the correct EZ Display for your computer type (MAC or PC).
3 When the download is complete, install the software to your computer by clicking the exe file. Follow the on-screen instructions to complete the installation.
4 Launch EZ Display, click "Enter IP Address" or "Auto Search" to select a connection type to the projector, then click "Start".
5 Select a display mode by clicking "Mirror" or "Extension". If you are connected to the projector both through the wired and wireless connections, a list of the two devices is displayed.
![EZ Display Please Enter IP Address or Auto Search. Auto Search 2nd EZ Display 1.0.1 Browse: P files [01:00]x [01:01] x [01:02] [01:00]x [01:01] x [01:02] Menu Extension Exit Music: None](/content/2026/05/1026178/images/2048df7200713694fcfae0b9872f4e77400ee65c9c6bc127d321db5f59116774.jpg)
6 Enter the passcode on the Multimedia > EZ Display > EZ Display screen.
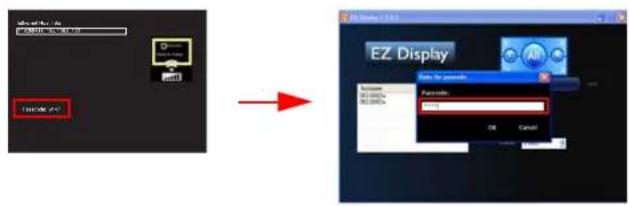
For more information about the applications EZ USB and EZ Display, review these manuals at www.infocus.com/support:
• EZ USB Display Manual(Win+Mac)
• EZ Display Manual-Mac
• EZ Display Manual-Win
• EZ Mobile Operation
• EZ Display - EZ Remote Manual-Android
• EZ Display - EZ Remote Manual-iOS
Using EZ Display
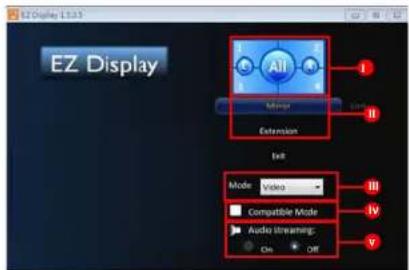
i. Split Screen: Display up to 4 computers or mobile devices in Split Screen using the 1, 2, 3, 4 buttons or 2 displays using the L and R buttons.
ii. Mirror/Extended Display: To duplicate your computer display onto the projector, click Mirror. To extend your desktop display onto the projector, click Extension.
iii. Video/Graphic Display: To display the best image quality, but with a slightly slower transmission speed, click Video. To display images faster, but with slightly less quality, click Graphic. Note: Transmission performance is determined by your network speed.
iv. Compatibility Mode: Check the Compatibility mode box, if the projector is having trouble displaying video from any media players.
v. Audio Streaming: To turn Audio Streaming on or off, click On or Off as appropriate.
Note: Supported functions vary per computer's operating system.
Projecting from Smartphones/Tablets
EZ Display is a special program to project your iOS or Android device display to a projector through a WiFi connection. You can remotely control the projector, decode document files, link to your dropbox account, surf the web, view photos, display a live camera feed and transfer files wirelessly. You can even annotate documents, webpages and photos and save them for sharing.
System Requirements
iOS
| iOS iOS 5.1 and above | |
| Device All iPhone model after iPhone 3GSAll iPad model after iPad 2All iPod touch after iPod touch 4th generation | |
| Resolution support iPhone: 480x320~1136x640iPad: 1024x768-2048x1536 | |
| Storage At least 20MB | free space needed |
Android
| OS Android ICS 4.0 and above | |
| CPU 1Ghz above | |
| Memory 1GB DDR above | |
| Storage At least 20MB free space needed | |
Installation for Android and iOS
Search for "EZ Display" and "EZ Remote" in Google Play or App Store, then download and install the applications. Before downloading, please make sure your device is supported.
Start up
I Insert the optional USB WiFi Adapter (SP-WIFIUSB-2) into the USB Type A input.
2 Establish Wifi connection with your mobile device according to the projector WiFi setup. If in AP mode connect directly to the projector. If in Client mode connect to the same WiFi access point as the projector. Launch the EZ Display or EZ Remote app on your mobile device.
iOS screen
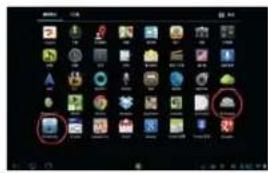
Android screen
EZ Remote
Launch EZ Remote. You will see the connected device shown on the device list. Click it to enable Remote control.
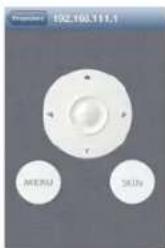
iOS screen
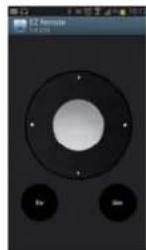
Android screen
*Skin button is reserved for future feature.
EZ Display
Launch EZ Display and it will scan for and list the device's IP address. When you click the device, a passcode is required. Enter the 4 digit number shown on your projector. After entering the correct passcode on the Multimedia > EZ Display > EZ Display page, EZ Display will display and allow you to select the different feature options.
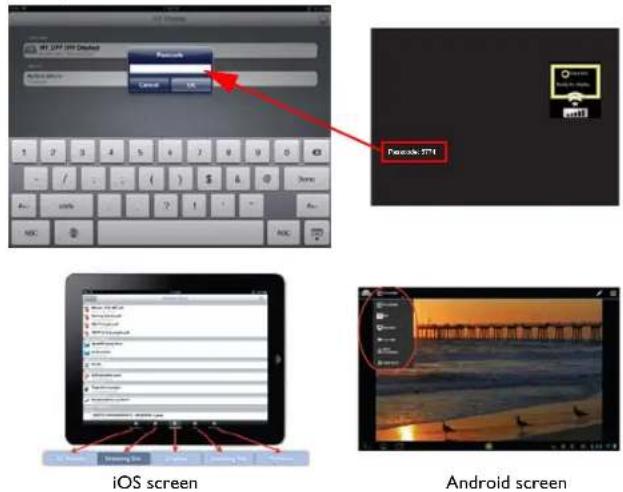
EZ Display: Streaming Doc and Doc Viewer
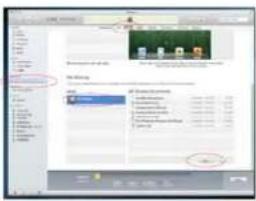
To stream your documents, transfer the documents you want from the computer to your mobile device and disconnect your mobile device. Documents will be organized by their format type.
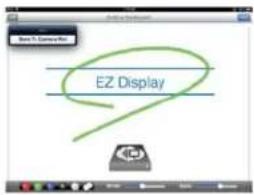
Select a file to display it wirelessly. Click the Sketch icon to begin drawing and annotating your file. Click Save when you are done editing.
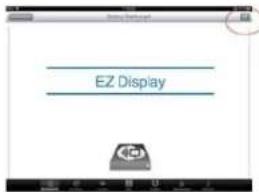
iOS screen
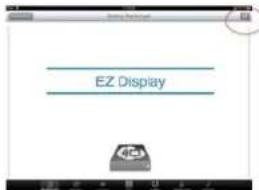
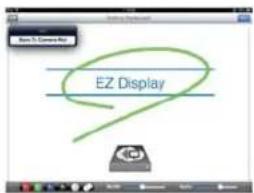
Android screen
EZ Display: Pix Viewer
To display your photos, select Photo Gallery and select your photo. You can also draw on it with the Sketch feature.
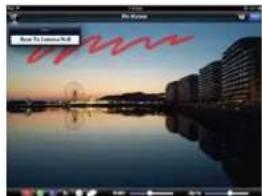
natural_image
Cityscape at dusk with waterfront reflection and modern buildings in the background (no visible text or symbols)iOS screen
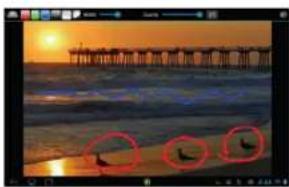
natural_image
Sunset over a beach with a pier and birds silhouetted against the shore (no text or symbols visible)Android screen
EZ Display: Live Cam
Live Cam will project what your camera sees in real-time. You can adjust the image quality and switch between the front or rear view of the camera. When you pause the camera stream, you can enable Sketch and zoom in/out the current image. You can also save your camera stream as a camera roll.
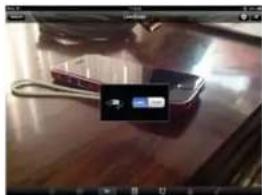
natural_image
Interior view of a kitchen appliance with a digital display showing a blue logo (no visible text or symbols)iOS screen
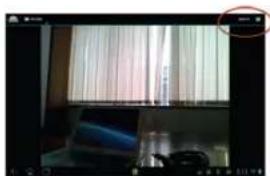
natural_image
Computer monitor displaying a slide with abstract graphics and a circular icon overlay (no readable text or symbols)Android screen
EZ Display: Streaming Web
The web browser will be displayed over WiFi. The Sketch and Save functions are also supported. This feature requires a Client Mode internet connection. See page 40 for more details. Select web browser. The default home page is www.google.com
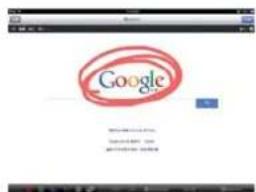
iOS screen
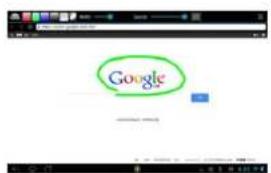
Android screen
EZ Display: Dropbox
Select Dropbox and log in to your existing Dropbox account. Choose documents and photos to display. This feature requires a Client Mode Wifi connection connected to the internet. See page 40 for more details.
iOS screen
Android screen
EZ Display: Split Screen
EZ Display allows up to 4 different sources to be displayed in the same screen.
NOTE:
• Hybrid OS support: Windows, Mac OS, iOS, and Android
• Supports all web, sketch and other functions except EZ Stream.
iOS screen
Android screen
LiteBoard™ Wand
The optional LiteBoard™ Wand (p/n HW-LBWAND-02), when combined with the LiteBoard Wand dongle (p/n HW-LBRADIO), works like a wireless mouse - but one that works in midair, not on your desktop. Just hold the wand in your hand, and point it at the projected image to point, click and drag. The wand works with all your software, just like a regular mouse.
Charging the Wand's Battery
When the wand's red battery light starts to blink, its internal battery is low (if the battery is fully discharged, you won't be able to turn the wand on by pressing its tip, left or right mouse buttons).
To charge the battery, open the flap on the right side of the wand to expose the wand's USB connector. Then connect a USB cable between the wand and a USB power adapter (not included), or a computer (if connecting to a computer, make sure the computer is powered on). The battery light will stay on while the battery is charging, then it will turn off when the battery is fully charged.
When charging is finished, you can disconnect the USB cable (or keep the cable connected and use the wand while it's charging).
NOTE: 5-10 minutes of charging is enough for about an hour of wand use. A full charge will take 3-4 hours and will allow 20-40 hours of non-stop wand use. A fully charged, new wand will hold a charge in standby for up to 3 weeks.
Caution: The lithium battery is only rechargeable, and is not user serviceable or user replaceable.
Caution: Always use a USB cable and power adapter (or your computer) to charge the wand.
How to Use the Wand
Connect the LiteBoard™ Wand dongle (p/n HW-LBRADIO) to the LiteBoard Radio connector of the projector.
2 The projector needs to be powered on and connected to your computer.
3 Connect the projector and your computer with a USB cable (USB Type A to USB Type B).
4 Connect the projector and your computer with a VGA cable.
5 Make sure the wand's battery is charged or charging.
6 Turn on the projector and make sure it's displaying the computer's screen - set the source to Computer 1 or Computer 2 (press the source button on the projector or its remote if needed - you may need to press it several times).
7 Enable the LiteBoard™ Wand in the Advanced Menu > Setup > Keypad/Remote menu.
8 Turn on the wand by pressing its tip, left or right mouse button - 2 blinks of the blue status light means the wand is searching for a connection. When connected the light will be lighted continuously.
9 Point the wand at the screen to point, click, and drag - just like a normal mouse.
NOTE: When you're done, set the wand aside and make sure it isn't pointing at the screen; it will turn itself off automatically after 1 minute.
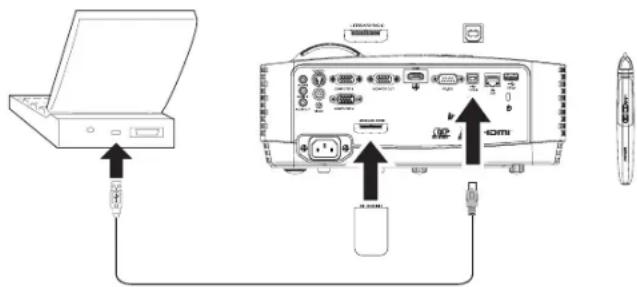
Wand Position and Avoiding Shadows
Your Location Distance from the Screen
You can use the LiteBoard™ Wand right up against the screen, or around the room. You might find that your pointing accuracy will improve if you get closer to the screen. Also, avoid standing too far off from either side of the screen.
Avoid Shadows!
The wand won't work if its sensor is in a shadow or if it is pointing at a shadow:
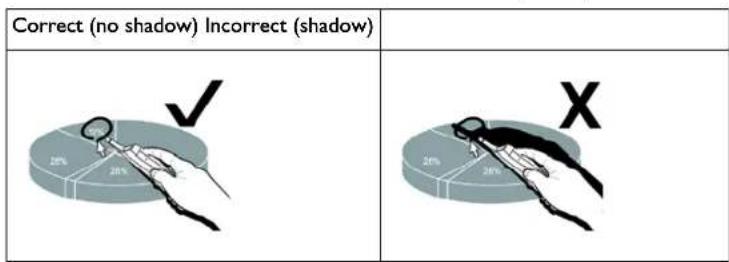
How to Hold the Wand
You can hold the wand the way you would hold a normal pencil or pen, or you can hold it like a remote control - use in whichever position is most comfortable. NOTE: If the wand is up close to the screen, you can press its tip against the projection surface to click and drag. Not recommended for use with fabric screens.
Using More than One Wand
The projector can work with two wands at the same time.
I Enter the Keypad/Remote menu under Advanced Menu> Setup > Keypad/Remote menu.
2 Scroll to the LiteBoard™ Wand function.
3 Select the desired setting:
$$ \text { None } = \text { No Liteboard Wand (Default) } $$
$$ \text { Single } = \text { Use I Liteboard Wand } $$
$$ \text { Dual } = \text { Use 2 Liteboard Wands } $$
When you want to switch to a different wand:
I Point the current wand away from the projected image for at least 3 seconds.
2 Press the tip, left or right button on the new wand to turn it on, and then start using the new wand.
NOTE: You can access the LiteBoard™ Wand menu from the projector's Setup > Keypad/Remote menu. Three options are available: None, Single Pen and Dual Pens.
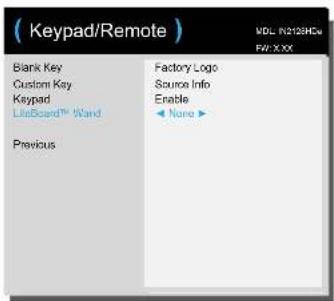
Wand Features
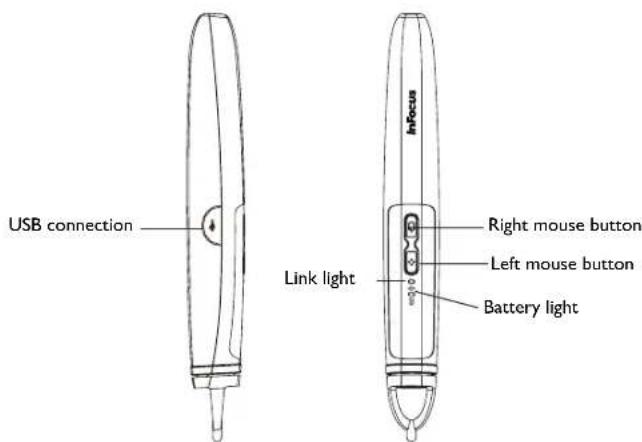
Buttons and Wand Tip
The wand's buttons are equivalent to the left and right buttons on a mouse. The wand's tip is also a button, and is equivalent to the left mouse button.
Battery Light
The red battery light shows the status of the wand's built-in battery (see below for battery information). The battery light will turn on while the wand is charging, and it will blink if the battery is low (1 hour of wand use left).
Link Light
The blue link light shows the status of the wand's wireless connection to the projector. The link light will blink twice per second when the wand is attempting to link to the projector; then it will be on steady after the wand has linked to the projector.
NOTE: The link light will stay off when the wand is off.
USB Connector
The wand's USB connector is behind a flap on the right side of the wand. The USB connector is only used for charging the wand's battery - using a USB power adapter (not included), or a computer.
NOTE: You can use the wand while charging the battery, but after the battery is charged (battery light turns off), you can unplug the USB cable and continue to use the wand without a cable.
Sensor
The wand's optical sensor opening is located behind the wand's tip. Don't block the sensor, and make sure it always has a clear view of the screen.
NOTE: The sensor won't work if you point it at a shadow or away from the screen.
Reset Button
The wand has a reset button, behind a small hole on its underside. Under normal conditions, you should not need to reset the wand. See the Troubleshooting section below for more information.
Internal Radio
The wand has a built-in wireless transmitter/receiver which it uses to communicate with the projector.
Lithium Battery Information
Manufacturer: Shenzhen HYB Battery Co., Ltd.
Model: J233
Rating: 3.7V/800mAh
Caution: Lithium battery is only rechargeable, and not user replaceable. Not user serviceable.
Troubleshooting LiteBoard™
For the most up-to-date information, visit our support site at www.infocus.com/support
- If the wand doesn't work at all, or it works intermittently, try one of these solutions::
- Press the tip, left or right button on the wand to turn it on.
- If the wand's blue Link light never blinks, then the wand's battery is fully discharged; connect the wand to a USB power adapter (not included) or your computer.
- Make sure the wand is not pointing at a shadow and make sure its tip is not in a shadow.
- If the room is brightly lit, reduce the room illumination.
- If you're trying to use the computer's mouse at the same time as the wand, point the wand away from the screen while using the mouse.
- Reset the wand: push the end of a paper clip into the reset opening on the underside of the wand.
- If accurate clicking is difficult, try one of these solutions:
- Hold the wand steadier when clicking.
- Use the wand right up against the screen so it's easier to avoid unexpected movements.
- If the mouse pointer is in the wrong place on the screen, or the mouse pointer's movement is restricted to only part of the screen, try one of these solutions:
- Make sure your projector is displaying the computer's screen and not some other source (such as DVD, VCR, etc.). To change the source, press the Source button on the projector or its remote.
- Make sure the projector is displaying the same image as the computer's main or built-in monitor (don't extend your desktop onto multiple monitors). To correct this:
On Windows XP: Open the Display control panel, click Settings, click the display that represents the projector, then un-check "Extend my Windows desktop...".
On Windows Vista: Right-click on the desktop, choose Personalize..., click Display Settings, click the display that represents the projector, then un-check "Extend the desktop...".
On both Windows 7 and Windows 8: Right-click on the desktop, choose Screen Resolution, click the display that represents the projector, and then choose the "Duplicate Display..." under Multiple Displays.
On Macintosh: Select System Preferences from the Apple Menu, then select Displays. Click Arrangement, and check "Mirror Displays."
the battery light does not turn on when the wand is being charged, try one of the following:
- Make sure a USB cable is connected between the wand and either a USB power adapter (not included), or a USB port on your computer.
- If the wand is connected to a USB power adapter (not included), make sure the adapter is plugged in to a live electrical outlet. If the wand is connected to your computer, make sure the computer is powered on.
- If the wand still won't charge, contact InFocus support at: www.infocus.com/support.
Maintenance
Cleaning the lens
I Apply a non-abrasive camera lens cleaner to a soft, dry cloth.
- Projector must be off and the lens must be at room temperature.
- Avoid using an excessive amount of cleaner, and don't apply the cleaner directly to the lens. Abrasive cleaners, solvents or other harsh chemicals might scratch the lens.
2 Lightly wipe the cleaning cloth over the lens in a circular motion.
WARNINGS:
- Turn the projector off and unplug power cord before cleaning any part of the projector.
- Do not touch or block the projector lens with any objects as this can damage the projector lens. Scratches, gouges and other lens damage are not covered by the product warranty.
- Do not open any cover on the projector, except the lamp cover.
- Do not attempt to service this product yourself as opening and removing covers may expose you to dangerous voltage and other hazards. Refer all servicing to qualified service personnel.
Using the security lock
The projector has a security lock for use with a Cable Lock System. Refer to the information that came with the lock for instructions on how to use it.
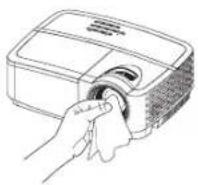
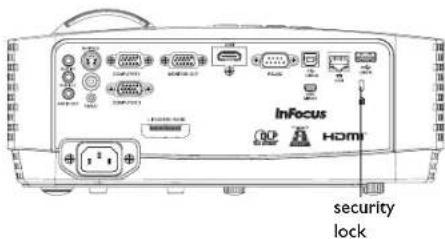
Replacing the projection lamp
The Lamp Hours timer in the Projector Info menu counts the number of hours the lamp has been in use.
NOTE: Be sure to use the InFocus lamp module designed for this projector. You can order new lamps from www.infocus.com (in select areas), your retailer or your dealer. Only genuine InFocus lamps are tested for use in this projector. Use of non InFocus lamps may cause electrical shock and fire, and may void the projector warranty. InFocus is not liable for the performance, safety or certification of any other lamps.
WARNINGS:
- The projector uses a high-pressure mercury glass lamp. The lamp may fail prematurely, or it may rupture with a popping sound if jolted, scratched, or handled while hot. The risk of lamp failure or rupture also increases as the lamp age increases; please replace the lamp when you see the "Replace Lamp" message.
- To avoid burns, allow the projector to cool for at least 60 minutes before you replace the lamp.
- Do not touch or block the projector lens with any objects as this can damage the projector lens. Scratches, gouges and other lens damage are not covered by the product warranty.
- Unplug the power cord before replacing the lamp.
- Do not drop the lamp module. The glass may shatter and cause injury.
- Do not touch the glass surface of the lamp module. Fingerprints can obscure projection sharpness and may cause the glass to shatter.
- Be extremely careful when removing the lamp housing. In the unlikely event that the lamp ruptures, small glass fragments may be generated. The lamp module is designed to contain most of these fragments, but use caution when removing it.
- Before replacing a ruptured lamp, clean the lamp compartment and dispose of cleaning materials. Wash hands after lamp replacement.
- When replacing the lamp while the projector is ceiling-mounted, wear protective eyewear to prevent eye injury.
Hg – Lamp contains mercury. Manage in accordance with local disposal laws. See www.lamprecycle.org.
I Turn off the projector and unplug the power cord.
2 Wait 60 minutes to allow the projector to cool thoroughly.
3 Remove the lamp door, located on top of the projector, by removing the screw on the side of the lamp door, sliding the door forward, and lifting the lamp door off.
4 Loosen the captive screws that attach the lamp housing to the projector.
NOTE: If the projector is installed on a ceiling mount, be careful not to drop the lamp module once the captive screws are loosened.
5 Carefully lift the lamp straight up, off of the alignment pins; being careful not to pinch the lamp connector. Dispose of the lamp in an environmentally proper manner.
6 Install the new lamp module, aligning the pins properly. Be careful not to pinch the lamp connector.
7 Tighten the screws. (NOTE: If the pins have not been aligned properly, the screws will not tighten securely.)
8 Replace the lamp door by (a) aligning the hinges, (b) putting the lamp door down and (c) locking it back into place.
9 Replace the lamp door screw and tighten securely.
10 Plug in the power cord and press the Power button to turn the projector back on.
II To reset the lamp hour timer, navigate to the Advanced Menu > Status/Service menu and select Reset Lamp Hours...
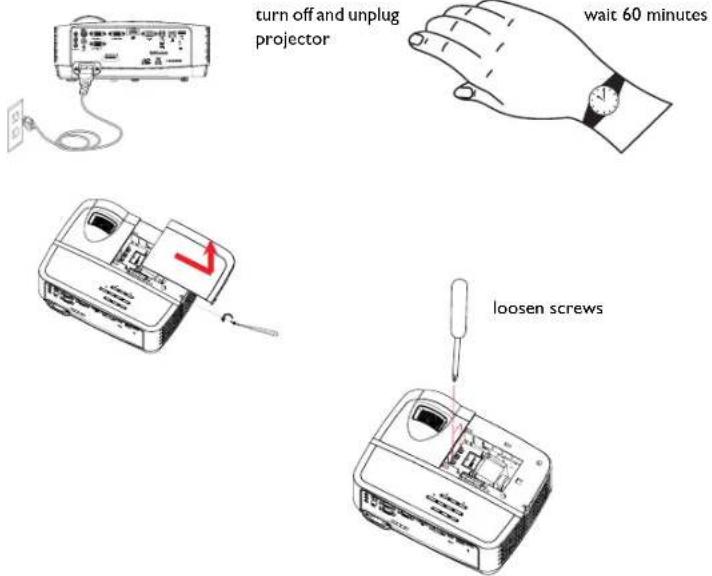
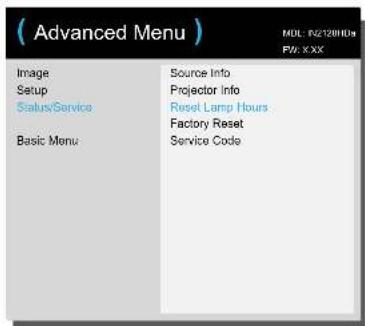
Numerics
3D Sync Invert 27
A
AC Power On 29
AP Mode 40, 42
Apply 30
Aspect Ratio 26
Audio I/Audio 28
Auto Image 26
Auto Keystone 26
Auto Off Time 30
Auto Source 29
AV Mute 28
B
Battery Light 54
Blank Key 28
Blank Screen 28
Brightness 26
C
Cable box II
Ceiling Mount 26, 28
Client Mode 40, 42
Closed Captions 28
Color Space 27
Computer I 28
Computer I/Computer 28
Computer 2 28
Connecting
Video device II
Connecting a video device II
Contacting InFocus 19
Contrast 26
Crestron e-Control® 43
Crestron RoomView 45
Customer service contact information 19
D
Default Gateway 30
Detect Film 27
DHCP 30
Digital Zoom 28
DNS 30
E
Eco Blanking 29
EZ Display 42
F
Factory Reset 30
Focus 10
Force wide 27
Freeze Screen 28
G
Gamma 27
H
HDMI 28
HDTV 26
High Altitude Setting 30
Horizontal Position 27
Horz Shift 28
|
Instant Power On 29
Internal Radio 54
Internal Speaker 28
IP Address 30
K
Keypad 28
Keypad buttons 22
Keystone 26
L
Lamp Low Power 29
Link Light 54
LiteBoard™ Wand 52
M
MAC Address 30
Magnify Level 28
Menu Transparency 29
menu usage 25
Mute 28
N
Network 30
O
only 27
Overscan 27, 28
P
Phase 27
PIN Protect 29
Power connector 8
Power cord 8
Power Saving Mode 29
Prevent PC Screen Saver 27
Programmed Dimming 29
Projector
Connecting video devices ||
Keypad buttons 22
Menus 25
Positioning 7
Setting up 7
Troubleshooting problems 12
Projector Info 28, 30
R
Rear Project 28
Red/Green/Blue Gain 27
Red/Green/Blue Offset 27
remote control 20
Reset Button 54
Resetting the projector 30
Restart Network 30
S
Screen Aspect II
Search Screen 29
Sensor 54
Service 30
Set Black Level 27
Sharpness 26
Show Messages 29
Source 28
Source Info 28, 30
SSID 30
Subnet Mask 30
Sync Threshold 27
T
Tint 27
Tracking 27
Troubleshooting 12
Troubleshooting LiteBoard™ 55
TV tuner II
U
Undo Button 54
USB 6
USB Connector 54
V
Vert Shift 28
Vertical Position 27
Volume 26
Volume button 21
W
Warranty 19
WiFi 40, 42
Wired LAN 30
Wireless connection 40
Wireless LAN 30
Z
zoom 10

- Declaration of Conformity
- Trademarks
- FCC Warning
- CE Warning
- Canada
- Table of Contents
- Important Operating Considerations for Safety
- Introduction
- Product specifications
- Accessories
- Online registration
- Connector panel
- Positioning the projector
- Connecting a computer source
- VGA connection
- USB Mini-B connection
- USB Type-B connection
- HDMI connection
- Connecting power
- Optional computer connections
- Displaying an image
- Adjusting the image
- Connecting a video device
- Video device connections
- Composite video connection
- S-video connection
- Audio
- Shutting down the projector
- Auto Off Time
- Turning off the projector
- Troubleshooting your setup
- Still need assistance?
- Using the remote control
- Caution:
- The remote also has:
- Troubleshooting the remote
- Using the audio
- Using the projector's speaker
- Troubleshooting Audio
- Using the keypad buttons
- Optimizing computer images
- Presentation features
- Optimizing video images
- Customizing the projector
- Using the menus
- Basic Menu
- Advanced Menu
- Image:
- Color
- PC:
- Video:
- Setup:
- Audio Setup
- Closed Captioning
- Image Setup
- Keypad/Remote Settings
- Lamp
- OSD Setup
- PIN Settings
- Power
- Source
- Timer
- High Altitude Setting
- Network
- Wired LAN
- Wireless LAN
- Status/Service:
- Multimedia EZ Suite Menu
- EZ Media
- USB
- Displaying a picture
- Video mode
- Supported file formats
- EZ Display
- EZ USB
- Features
- System Requirements
- Recommended System Configuration
- Wired LAN connection
- If you are in a non-DHCP environment:
- Wireless LAN connection
- How to setup AP mode:
- How to setup client mode:
- EZ Mobile
- EZ Miracast
- EZ Suite Settings
- Web controlling the projector
- About Crestron e-Control®
- Crestron RoomView
- Displaying Images through EZ Display
- Installation for Windows and Macintosh
- Using EZ Display
- Projecting from Smartphones/Tablets
- Installation for Android and iOS
- Start up
- EZ Remote
- EZ Display: Streaming Doc and Doc Viewer
- EZ Display: Pix Viewer
- EZ Display: Live Cam
- EZ Display: Streaming Web
- EZ Display: Dropbox
- EZ Display: Split Screen
- NOTE:
- LiteBoard™ Wand
- Charging the Wand's Battery
- How to Use the Wand
- Wand Position and Avoiding Shadows
- Your Location Distance from the Screen
- Avoid Shadows!
- How to Hold the Wand
- Using More than One Wand
- Wand Features
- Buttons and Wand Tip
- Battery Light
- Link Light
- USB Connector
- Sensor
- Reset Button
- Internal Radio
- Lithium Battery Information
- Troubleshooting LiteBoard™
- Maintenance
- Cleaning the lens
- WARNINGS:
- Using the security lock
- Replacing the projection lamp
- Numerics
- A
- B
- C
- D
- E
- F
- G
- H
- |
- K
Brand : INFOCUS
Model : IN2128HDA
Category : Projector