
LP850 - Projector INFOCUS - Free user manual and instructions
Find the device manual for free LP850 INFOCUS in PDF.


| Product Type | Multimedia Video Projector |
| Model | InFocus LP850 |
| Display Technology | LCD (XGA) |
| Native Resolution | 1024 x 768 (XGA) |
| Lens Type | Standard zoom lens (1.5-2.2:1 throw ratio), optional short/long throw |
| Lens Shift | Vertical (motorized) |
| Zoom | Motorized (power zoom) |
| Focus | Motorized (power focus) |
| Keystone Correction | Vertical and horizontal (digital) |
| Lamp Type | User-replaceable projection lamp (contains mercury) |
| Lamp Life | Typically up to 2000 hours (refer to lamp hour counter) |
| Input Connectors | 1x M1-D (DVI+USB), 1x VESA (D-sub 15), 1x BNC (RGBHV/YPbPr), 1x Component RCA (YPbPr), 1x S-Video, 1x Composite RCA |
| Audio Connectors | 2x Stereo RCA audio in (shared), 1x Audio out (3.5mm), 2x Computer audio in |
| Control Connectors | RS-232 (serial), RJ-45 (Ethernet/ProjectorNet), Wired remote |
| Additional Ports | Monitor out (VESA), USB (for mouse control) |
| Remote Control | IR with laser pointer, backlight, effect key, source buttons |
| Security | Kensington lock slot; laser class II remote warning |
| On-Screen Display (OSD) | Multi-language menu (11 languages) |
| Power Save | Auto power-off after 20 min no signal; screen save after 5 min |
| Mounting | Ceiling mount compatible (image flip via menu), front/rear projection |
| Audio | Built-in speakers; volume, balance, mute controls |
| Picture Modes | Presets: Presentation, Photography, Film, Video; user-definable presets |
| Dimensions (approx.) | 400 x 300 x 150 mm (typical for class) |
| Weight (approx.) | 6.5 kg (typical for class) |
Frequently Asked Questions - LP850 INFOCUS
User questions about LP850 INFOCUS
0 question about this device. Answer the ones you know or ask your own.
Ask a new question about this device
Download the instructions for your Projector in PDF format for free! Find your manual LP850 - INFOCUS and take your electronic device back in hand. On this page are published all the documents necessary for the use of your device. LP850 by INFOCUS.
USER MANUAL LP850 INFOCUS
natural_image
Exterior view of a silver projector with a circular lens and ventilation grille (no text or symbols visible)InFocus®
natural_image
Abstract grayscale illustration of cityscape with skyscrapers and buildings, no visible text or symbols
natural_image
Black and white photo of chess pieces on a checkered board (no text or symbols visible)WARNING: The power cord and cables associated with this product contain lead, a chemical known to the state of California to cause birth defects or other reproductive harm. Wash hands after handling.
WARNING: This product has a lamp which contains a very small amount of mercury. Dispose of it as required by local, state, or federal ordinances and regulations. For more information, see www.eiae.org
This entire user's guide is available on the enclosed CD as an Adobe Acrobat pdf file in the following languages: Dutch, English, French, German, Italian, Norwegian, Portuguese, Spanish, Russian, Japanese, Korean, Traditional Chinese, Simplified Chinese. Before using this projector, please read these instructions.
Declaration of Conformity
Manufacturer: InFocus Corporation, 27700B SW Parkway Ave. Wilsonville, Oregon 97070 USA
European Office: Strawinskylaan 585, 1077 XX Amsterdam, The Netherlands
We declare under our sole responsibility that this projector conform to the following directives and norms:
EMC Directive 89/336/EEC, Amended by 93/68/EEC
EMC: EN 55022
EN 55024
EN 61000-3-2
EN 61000-3-3
Low Voltage Directive 73/23/EEC, Amended by 93/68/EEC
Safety: EN 60950: 2000
October, 2003
Trademarks
Apple, Macintosh, and PowerBook are trademarks or registered trademarks of Apple Computer, Inc. IBM is a trademark or registered trademark of International Business Machines, Inc. Microsoft, PowerPoint, and Windows are trademarks or registered trademarks of Microsoft Corporation. Adobe and Acrobat are trademarks or registered trademarks of Adobe Systems Incorporated. InFocus, ProjectorManager, ProjectorNet, and LP are trademarks or registered trademarks of InFocus Corporation.
FCC Warning
This equipment has been tested and found to comply with the limits for a Class A digital device, pursuant to part 15 of the FCC Rules. These limits are designed to provide reasonable protection against harmful interference when the equipment is operated in a commercial environment. This equipment generates, uses, and can radiate radio frequency energy and, if not installed and used in accordance with the instruction manual, may cause harmful interference to radio communications. Operation of this equipment in a residential area is likely to cause harmful interference in which case the user will be required to correct the interference at his own expense.
EN 55022 Warning
This is a Class A product. In a domestic environment it may cause radio interference, in which case the user may be required to take adequate measures. The typical use is in a conference room, meeting room or auditorium.
Canada
This Class A digital apparatus complies with Canadian ICES-003.
Other specific Country Approvals may apply, see please product certification label.
Remote Control Warning
Laser radiation class II product; wavelength 650nm; maximum output 1mW. Remote control complies with applicable requirements of 21 CFR 1040.10 and 1040.11. Remote control complies with applicable requirements of EN 60 825-1: 1994 +A11.
Do not look into laser beam emitted from the front of the remote control
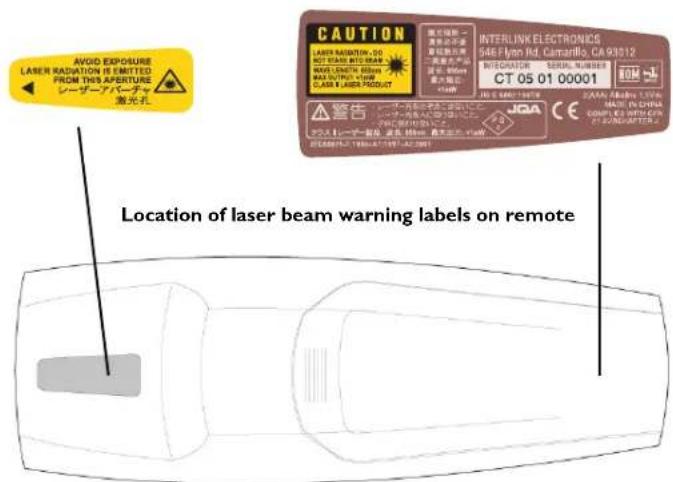
InFocus reserves the right to alter product offerings and specifications at any time without notice.
Table of Contents
Introduction 5
Positioning the projector 7
Connecting a computer 8
Required computer connections 8
Displaying a computer image 10
First-time projector use with Windows 98 11
Adjusting the image 13
Connecting a video device 14
Displaying a video image 16
Shutting down the projector 18
Troubleshooting your setup 18
Using the keypad buttons 26
Using the remote control 27
Using the audio 28
Optimizing computer images 29
Presentation features 29
Optimizing video images 30
Customizing the projector 30
Using the menus 31
Picture menu 32
Settings menu 35
Maintenance 39
Cleaning the lens 39
Changing the lens 39
Replacing the projection lamp 40
Cleaning the dust filter 42
Using the security lock 42
Appendix 43
Projected image size 43
LED Behavior 44
RS-232 commands 45
If you are experienced in setting up presentation systems, use the included Quick Set Up card. For complete details on connecting and operating the projector, refer to this User's Guide. Electronic versions of this User's Guide in multiple languages are available on the included CD and on our website. The website also has technical specifications (an interactive image size calculator, laptop activation commands, connector pin outs, a glossary, the product data sheet), a web store to buy accessories, and a page for online registration. See the inside of the back cover for a list of all relevant web addresses.
Important Operating Considerations for Safety
- Place the projector in a horizontal position no greater than 15 degrees off axis.
- Locate the projector in a well-ventilated area without any obstructions to intake or exhaust vents. Do not place the projector on a tablecloth or other soft covering that may block the vents.
- Locate the projector at least 4' (1.2 m) away from any heating or cooling vents.
- Use only InFocus-approved ceiling mounts.
- Use only the power cord provided. A surge-protected power strip is recommended.
- Refer to this manual for proper startup and shutdown procedures.
- In the unlikely event of the lamp rupturing, discard any edible items placed in the surrounding area and thoroughly clean the area along all sides of the projector. Wash hands after cleaning the area and handling the ruptured lamp. This product has a lamp which contains a very small amount of mercury. Dispose of it as required by local, state or federal ordinances and regulations. For more information see www.eiae.org.
Follow these instructions to help ensure image quality and lamp life over the life of the projector. Failure to follow these instructions may affect the warranty. For complete details of the warranty, see the Warranty section at the end of this User's Guide.
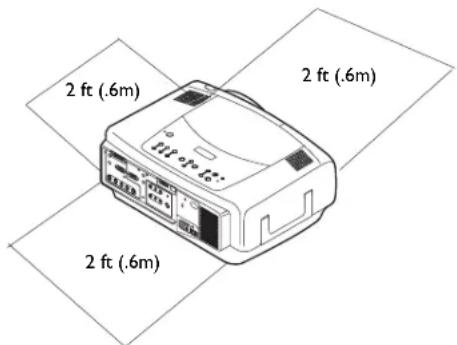
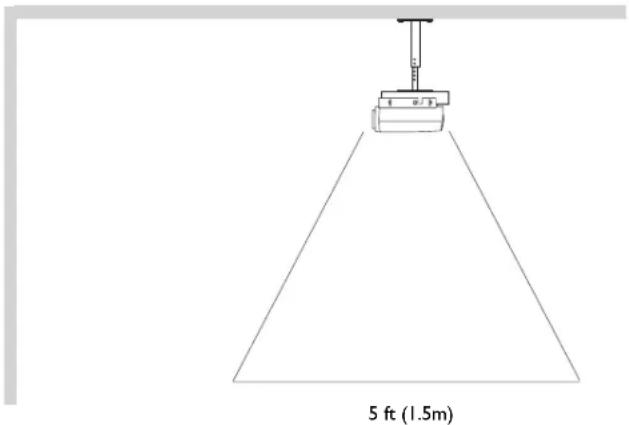
Do not place objects in the areas along the left, back and front sides of the projector. For ceiling mount applications, this area should be 5 feet (1.5m).
Introduction
Your new multimedia projector provides three computer, three video, and two audio inputs, one audio output, and RS-232 control. The LP840 and LP850 have XGA 1024x768 resolution while the LP860 has SXGA+1400x1050 resolution. Optional user-changeable short, fixed short, long and super long throw lenses make this a flexible product suitable for many different uses. The projector is easy to connect, easy to use, and easy to maintain.
Product specifications
To read the latest specifications on your multimedia projector, be sure to visit our website. Web address information is located on the back inside cover of this User's Guide.
Accessories
The standard accessories that came with your projector can be found on the packing list that came with your projector. Optional accessories are listed in the Accessories catalog that came with the projector and can also found on our website. See the inside back cover for the web address.
Online Registration
Register your projector on our website to receive product updates, announcements, and registration incentives. See the inside back cover for the web address.
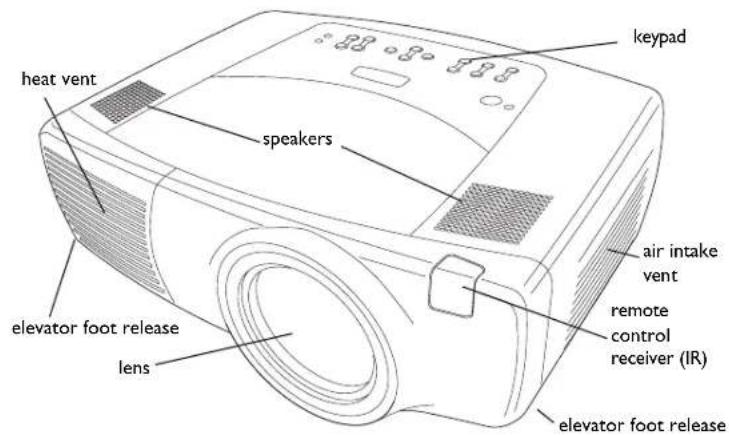
Projector components and features: front
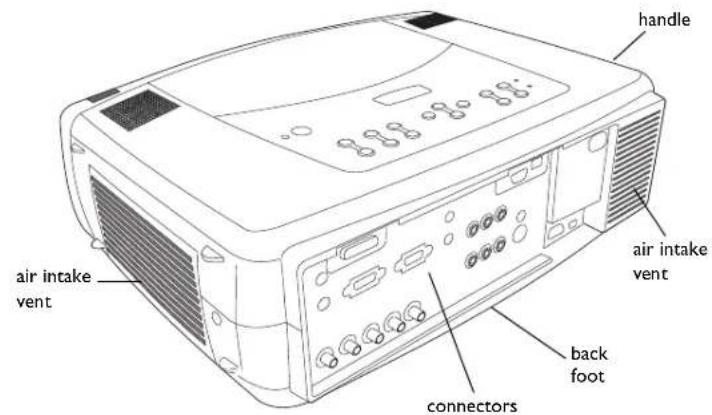
Projector components and features: back
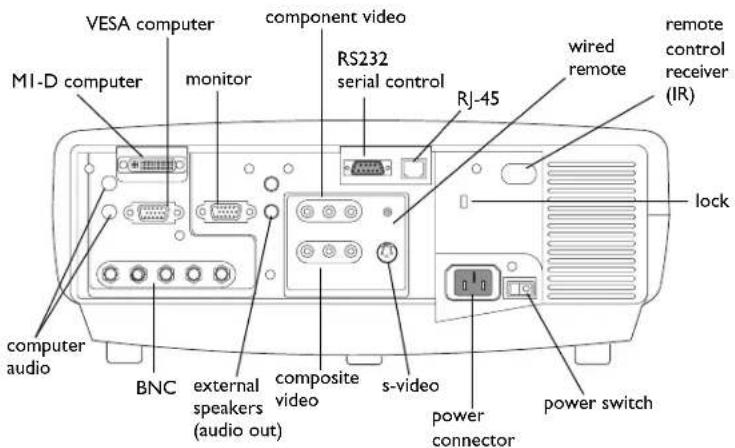
Connector Panel
The projector provides three computer and three video connection options:
• one M1-D (DVI with USB)
- one VESA computer
• one BNC (RGBHV and Pr, Pb, Y)
• one component RCA video (Pr, Pb, Y)
- one S-video
• one composite RCA video
The projector provides computer and video connectors for audio support:
- two composite RCA stereo audio (L, R)
- one audio out
- two audio ins for computer
The projector also provides the following connectors:
- one wired remote
- one monitor out
• RS-232 serial connector (for serial control) - RJ-45 connector (for networked control via ProjectorNet software)
The RS-232 Command Line Interface (CLI) specifications and commands are available on our website. See the back inside cover of this User's Guide for website information.
Positioning the projector
To determine where to position the projector, consider the size and shape of your screen, the location of your power outlets, and the distance between the projector and the rest of your equipment. Here are some general guidelines:
- Position the projector on a flat surface at a right angle to the screen. The projector (with the standard lens) must be at least 3 feet (0.9m) from the projection screen.
- Position the projector within 10 feet (3m) of your power source and within 6 feet (1.8m) of your video device (unless you purchase extension cables). To ensure adequate cable access, do not place the projector within 6 inches (.15m) of a wall or other object.
- If you are installing the projector on the ceiling, refer to the installation guide that comes with the Ceiling Mount Kit for more information. To turn the image upside down, see "Ceiling" on page 35. We recommends using an authorized ceiling mount. The Ceiling Mount Kit is sold separately; see the Accessories catalog that came with this projector or visit our website for more information.
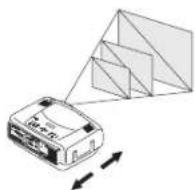
- Position the projector the desired distance from the screen. The distance from the lens of the projector to the screen, the zoom setting, and the video format determine the size of the projected image. For information about image sizes at different distances, see “Projected image size” on page 43.
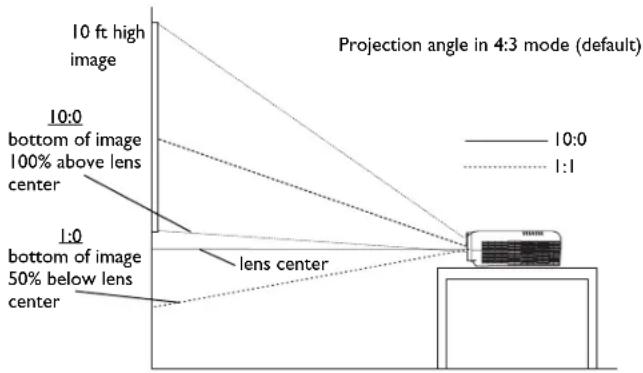
- For the standard lens that comes with the projector, the image exits at a given angle. However, the lens shift feature makes the image offset variable. The image offset is 100% at a 10:0 ratio when the projector is in 4:3 mode (default mode). This means that if you have an image 10' high, all 10' will appear above the center of the lens.
- The image offset is 50% when the lens shift is at a 1:1 ratio. This means that if you have an image 10' high, the bottom of the image will be 5' below the center of the lens.
- For information about the optional lenses image offsets, see "Projected image size" on page 43.
Connecting a computer
Required computer connections
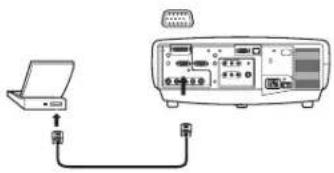
Connect one end of the VESA computer cable to the Computer 2 connector on the projector. Connect the other end to the video port on your computer. If you are using a desktop computer, you first need to disconnect the monitor cable from the computer's video port.
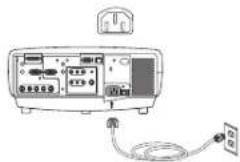
Connect the black power cable to the connector on the back of the projector and to your electrical outlet.
NOTE: Always use the power cable that shipped with the projector.
Optional computer connections
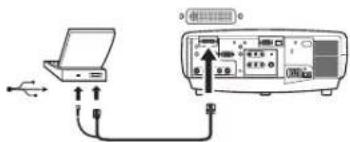
To control your computer's mouse using the projector's remote control, connect the USB and DVI cables to the USB and DVI ports on your computer, and connect the other end to the Computer I (M1-D) connector on the projector. USB drivers must be installed to use the USB feature. For more information, see page 12.
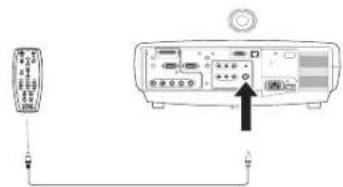
If your projector cannot receive the remote's signal due to IR interference, you can connect directly to the projector via a remote cable. To do so, plug the remote cable into the wired remote connector on the projector. Plug the other end into the connector on the remote,
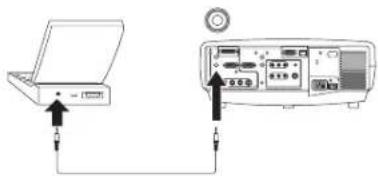
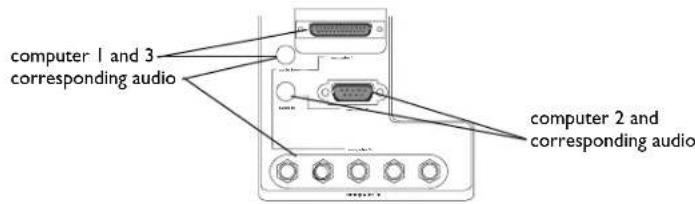
To have sound with your presentation, connect the audio cable to your computer and to the corresponding computer Audio In connector on the projector.
connect computer cable

connect power cable

connect MI-D cable

connect wired remote

connect audio cable

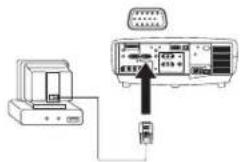
If you are using a desktop computer and want to see the image on your computer screen as well as on the projection screen, plug the monitor cable to the Monitor out connector on the projector.
connect monitor cable

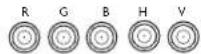
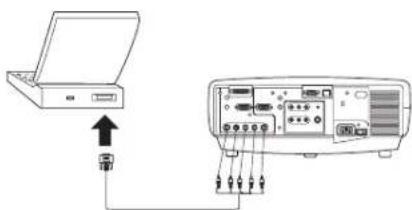
You can also connect to your computer using a BNC cable. Connect the BNC connectors on the BNC cable to the appropriate Computer 3 connectors on the projector. Connect the other end to the video port on your computer. If you are using a desktop computer, you first need to disconnect the monitor cable from the computer's video port. When all 5 BNCs are connected, the projector handles separate synchs on H and V.
connect BNC cables
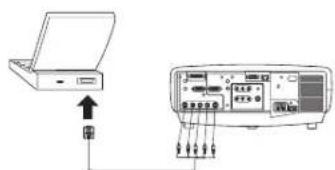
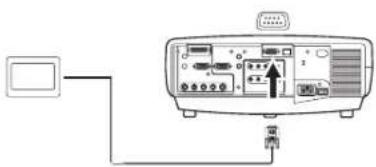
You can control the projector from an LCD control panel, touch screen, or other control device or computer by connecting an RS-232 cable to the projector's Serial connector. Specific RS-232 commands can be found in the Service and Support section of our website and in this User's Guide's Appendix.
connect RS-232 cable

natural_image
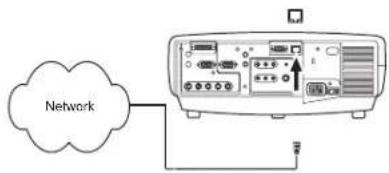
Diagram of an electronic device showing ports, cables, and a monitor (no text or labels visible)The projector can be managed by ProjectorNet networking software through its Network (RJ-45) connector. Contact an authorized dealer or visit our website for information on ProjectorNet.
connect CAT-5 cable

Displaying a computer image
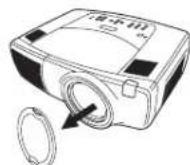
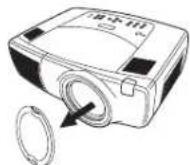
| Remove the lens cap. | remove lens cap | |
| Press the power switch on the back of the projector to the on position, then press thePowerbutton on the top of the projector or the remote.The LED flashes green and the fans start to run. When the lamp comes on, the startup screen is displayed and the LED is steady green. It can take a minute for the image to achieve full brightness.? No startup screen? Get help on page 19. | press Power switch press Power buttonpower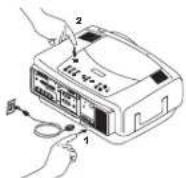 | |
| Turn on your computer.The computer's image should appear on the projection screen. If it doesn't, press theComputerbutton on the projector's keypad. | turn on computercomputer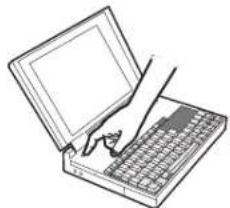 | |
| Make sure your laptop's external video port is active.Many laptops do not automatically turn on their external video port when a projector is connected. Usually a key combination like FN + F5 is used to turn the external display on and off. Refer to your computer's documentation to learn your computer's key combination.? No computer image? Try pressing theAuto Imagebutton on the keypad. Get help on page 19. | activate laptop's external port/□ |
First-time projector use with Windows 98
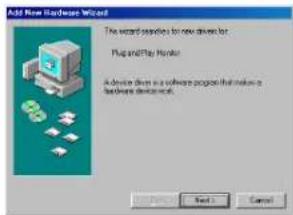
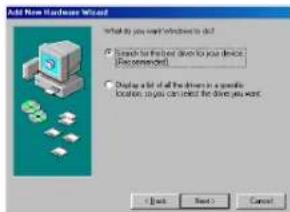
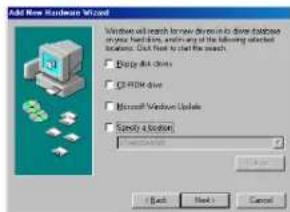
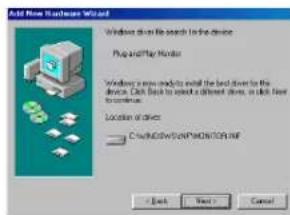
The first time you connect a computer running Windows 98 to the projector, the computer recognizes the projector as "new hardware" and the Add New Hardware Wizard appears. Follow these instructions to use the Wizard to load the correct driver (which was installed with your Windows operating system).
If you are running Windows 2000, Windows ME, or Window XP, skip these steps and go to "Adjusting the image" on page 13.
a Click Next to begin searching for the driver.
b Make sure "Search for the best driver" is selected, then click Next.
c Uncheck any checked boxes, then click Next. Windows automatically locates the driver. If this driver has been removed, reload the driver using your Windows operating system CD.
d When Windows finds the driver, you are ready to install it. Click Next.
a
b
c
d
Skip this page if you did not connect a USB mouse cable
For Windows 98:
- If you connected the USB cable, the Add New Hardware Wizard appears again. Drivers must be installed to use the USB functionality.
• The Wizard launches two times.
The first time it detects a USB Human Interface Device (for the keyboard).
The second time it detects a USB Human Interface Device (for the mouse).
For Windows 2000, Windows ME, and Windows XP:
- The USB drivers are automatically installed.
Adjusting the image
Adjust the height of the projector, if necessary, by pressing the release buttons on each side of the projector's front to extend the elevator feet.
adjust height
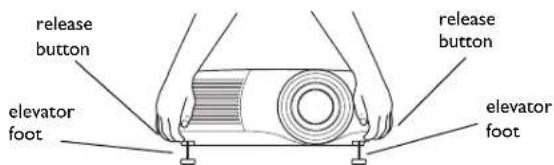
Position the projector the desired distance from the screen at a 90 degree angle (perpendicular) to the screen.
See page 43 for a table listing screen sizes and distances.
adjust distance
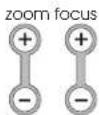
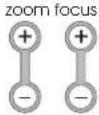
Adjust the zoom or focus by pressing the power Zoom or power Focus buttons on the keypad until the desired image size and focus are produced.
You can also adjust the zoom and focus via the menus. See page 32
adjust zoom and focus
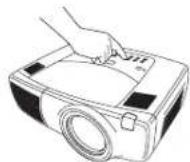
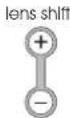
If the image is not on the screen or viewing area, adjust it by pressing the lens shift button on the keypad.
Press the upper Lens Shift button to shift the lens upward. Press the lower Lens Shift button to shift the lens downward.
adjust lens shift
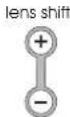
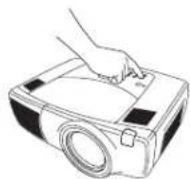
You can also adjust the lens shift via the menus. See page 32.
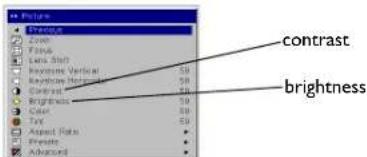
Adjust the Contrast or Brightness in the Picture menu.
See page 31 for help with the menus.
adjust Contrast or Brightness

Connecting a video device
Standard video connections
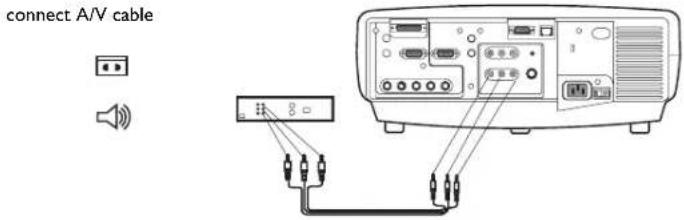
Plug the audio/video (A/V) cable's yellow connector into the video-out connector on the video device. Plug the other yellow connector into the yellow Video 3 connector on the projector. Plug a white connector into the left audio out connector on the video device and plug a red connector into the right audio out connector on the video device. Plug the remaining white connector into the left audio in connector on the projector, and plug the red connector into the right audio in connector on the projector.
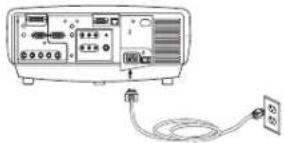
Connect the black power cable to the connector on the back of the projector and to your electrical outlet. NOTE: Always use the power cable that shipped with the projector.
connect power cable

natural_image
Line drawing of a portable electronic device with ports and a cable, no visible text or symbolsOptional video connections
If the video device uses a round, four-prong S-video connector, plug an S-video cable (sold separately) into the S-video connector on the video device and into the Video 2 connector on the projector. Use the A/V cable's audio connectors as described directly above (the yellow connectors on the A/V cable are not used).
connect S-video and video cables


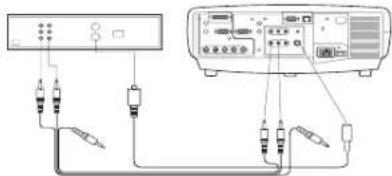
If the video device uses component cable connectors (sold separately), plug the cable's green connectors into the green component-out connector on the video device and into the Video I green component connector (labeled "Y") on the projector. Plug the component cable's blue connectors into the blue component-out connector on the video device and into the blue component connector (labeled "Pb") on the projector. Plug the component cable's red connectors into the red component-out connector on the video device and into the red component connector (labeled "Pr") on the projector. Use the A/V cable's audio connectors as described above (the yellow connectors on the A/V cable are not used). NOTE: The component connectors can be used for HDTV sources (480i, 480p, 720p and 1080i formats).
connect component cables and video cables


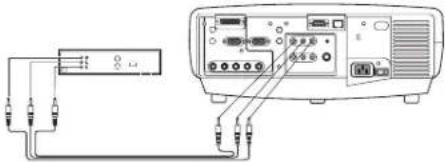
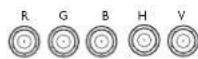
You can also connect to your video device using a BNC cable. Connect the BNC connectors of the BNC cable to the appropriate Computer 3 connectors on the projector. Connect the other end to the video port on your video device. Use the A/V cable's audio connectors as described on the previous page (the yellow connectors on the A/V cable are not used).
When 4 BNCs are connected, the projector handles a composite synch on H. When 3 BNCs are connected, the projector handles a composite synch on G.
NOTE: The BNC connectors can be used for HDTV sources (480i, 480p, 720p and 1080i formats).
connect BNC cables
Displaying a video image
| Remove the lens cap. | remove lens cap | |
| Press the power switch on the back of the projector to the on position, then press thePowerbutton on the top of the projector.The LED flashes green and the fans start to run. When the lamp comes on, the startup screen is displayed and the LED is steady green. It can take a minute for the image to achieve full brightness.? No startup screen? Get help on page 19. | press Power switch press Power buttonpower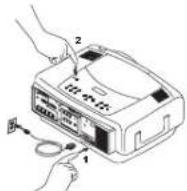 | |
| Plug in and turn on the video device.The video device's image should appear on the projection screen. If it doesn't, press theVideobutton on the keypad. | turn on video device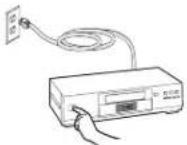 | |
| Adjust the height of the projector, if necessary, by pressing the release buttons on each side of the projector's front to extend the elevator feet. | adjust height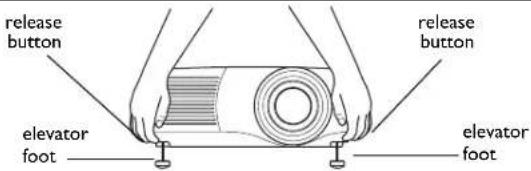 | |
| Position the projector the desired distance from the screen at a 90 degree angle to the screen. See page 43 for a table listing screen sizes and distances to the screen. | adjust distance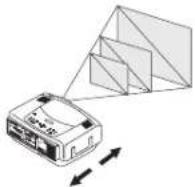 |
Adjust the zoom or focus by pressing the power Zoom or power Focus buttons on the keypad until the desired image size and focus are produced.
You can also adjust the zoom and focus via the menus. See page 32
adjust Zoom and Focus
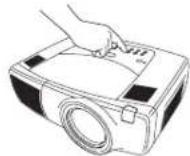
If the image is not on the screen or viewing area, adjust it by pressing the lens shift button on the keypad.
Press the upper Lens Shift button to shift the lens upward. Press the lower Lens Shift button to shift the lens downward
You can also adjust the lens shift via the menus. See page 32.
adjust Lens Shift
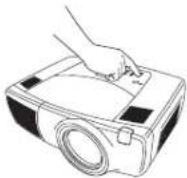
Adjust the volume on the keypad or remote.
adjust volume

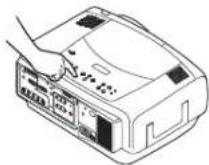
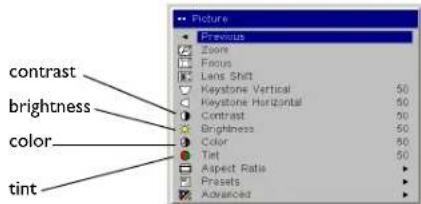
Adjust the Contrast, Brightness, Color, or Tint in the Picture menu. See page 31 for help with the menus.
adjust Picture menu

Shutting down the projector
The projector automatically blanks the screen after no active source is detected for 50 minutes. This blank screen helps preserve the life of the projector. The image returns when an active source is detected or a remote or keypad button is pressed.
Screen Save
You can make the blank screen appear after five minutes by turning on Screen Save in the Settings>System menu. See page 36.
Power Save
The projector also has a Power Save feature that automatically turns the lamp off after no signals are detected for 20 minutes. After 10 additional minutes with no signal, the projector powers down. If an active signal is received before the projector powers down, the image is displayed. You must press the Power button to display an image after 30 minutes have passed. When Power Save is enabled, Screen Save is disabled. See page 36.
Turning off the projector
To turn off the projector, press the power button and verify that you want to turn the projector off by pressing the power button again within 3 seconds. You can cancel the shutdown by not pressing the power button a second time. The lamp turns off and the LED blinks green for over 1 minute while the fans continue to run to cool the lamp. When the lamp has cooled, the LED lights green and the fans stop. Press the power switch on the back of the projector and unplug the power cable to completely power off the projector.
Troubleshooting your setup
If your image appears correctly on the screen, skip to the next section. If it does not, troubleshoot the setup. The LED on top of the projector indicates the state of the projector and can help you troubleshoot. See "LED Behavior" on page 44. for information on LED behavior and what it means.
The following tables show common problems. In some cases, more than one possible solution is provided. Try the solutions in the order they are presented. When the problem is solved, you can skip the additional solutions.
Source Troubleshooting
| Problem | Solution | Result |
No startup screen | Plug power cable in, press power switch, press power button. Remove lens cap.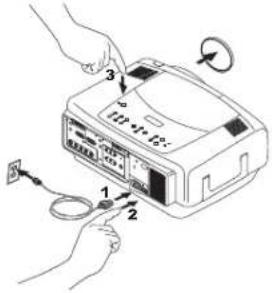 | Correct image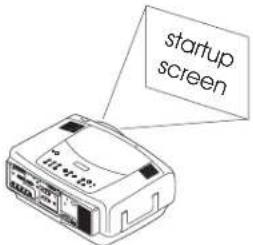 |
Only startup screen appears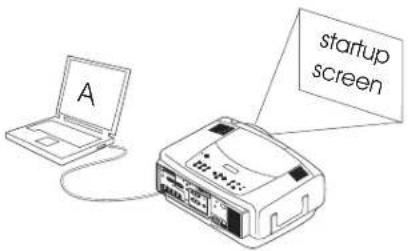 | Press the Computer buttonActivate laptop's external portor restart laptop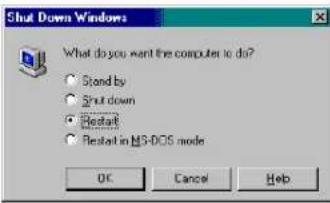 | Computer image projected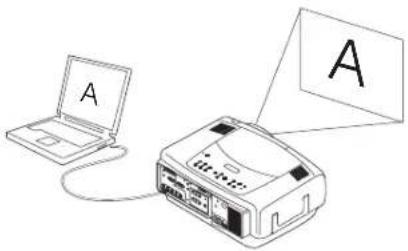 |
No computer image, just the words “Signal out of range”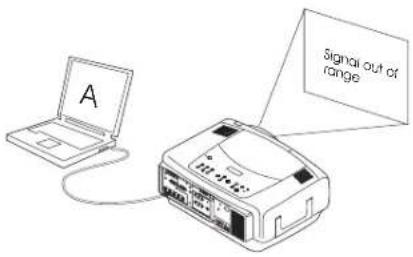 | Adjust computer refresh rate in Control Panel>Display>Settings>Advanced>Adapter (location varies by operating system)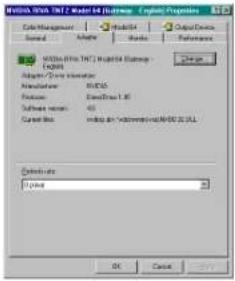 You may also need to set a different resolution on your computer, as shown in the following problem, “Image fuzzy or cropped” You may also need to set a different resolution on your computer, as shown in the following problem, “Image fuzzy or cropped” | Computer image projected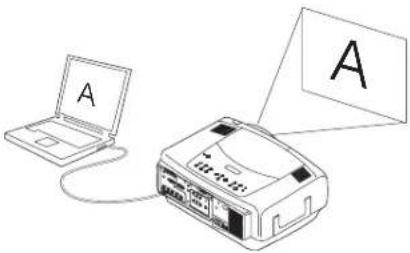 |
Image fuzzy or cropped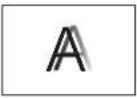 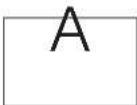 | Set your computer's display resolution to the native resolution of the projector(Start>Settings>ControlPanel>Display>Settings tab, select1024x768 for LP840/850, 1400x1050 for LP860)For a laptop, disable laptop monitoror turn-on dual-display mode 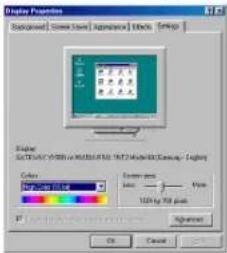 | Image clear and not croppedA |
Remote control navigation buttons not working with my computer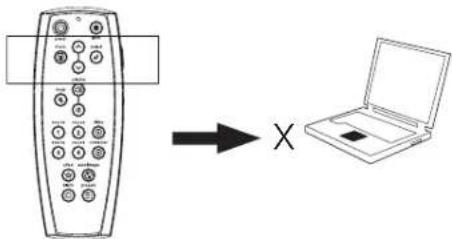 | Connect USB cable (page 8) then load USB drivers, if needed (page 11). Or, connect wired remote cable and reboot your computer (page 8).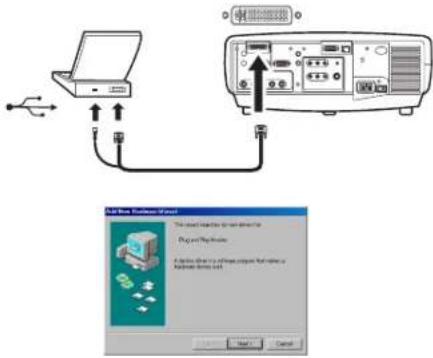 | Remote controls navigation buttons.See page 27 for information on the remote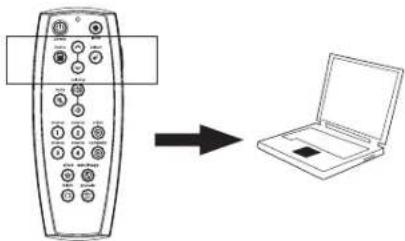 |
Projector troubleshooting
| Problem | Solution | Result |
Image not square Adjust keystone the Picture menu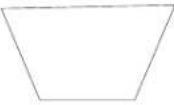 | 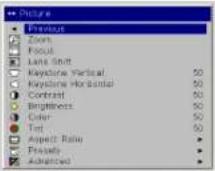 | Square image |
Image not sharp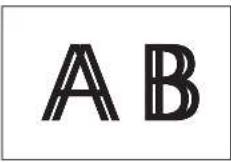 | Adjust the focus on the keypad or Sharpness in the Picture>Advanced menu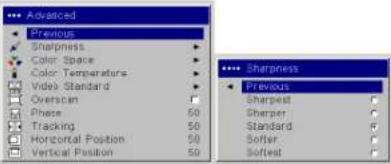 | Correct image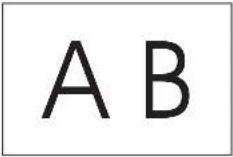 |
Image does not fit 16:9 screen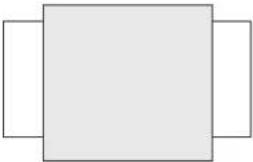 | Change aspect ratio to 16:9 in Picture>Aspect ratio menu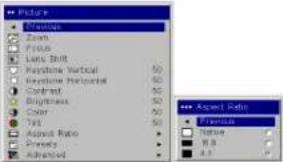 | Correct image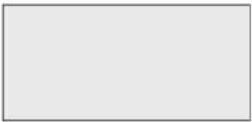 |
Image upside down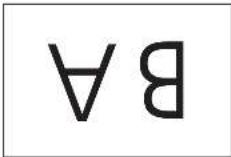 | Turn on/off Ceiling in Settings>System menu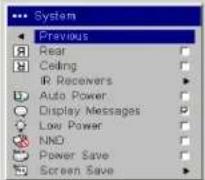 | Correct image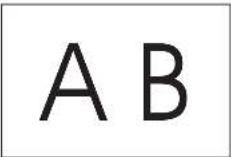 |
Image reversed left to right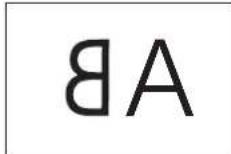 | Turn on/off Rear in Settings>System menu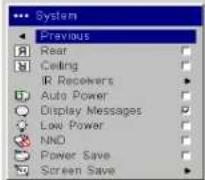 | Correct image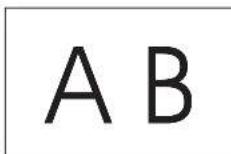 |
Projected colors don't match source | Adjust color, tint, color temperature, brightness, contrast in the menus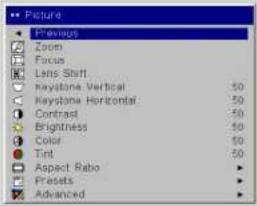 | Correct image |
Lamp won’t turn on, Temp LED solid red (page 44)solidred 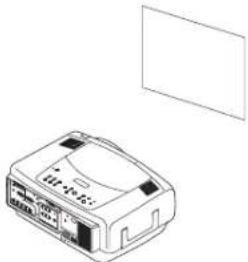 | Make sure vents aren’t blocked; allow projector to cool for one minute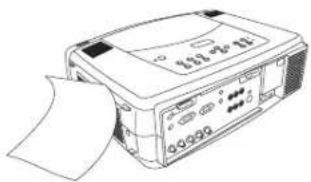 | Unplug projector; wait one minute; plug in projector and turn it on: lamp lights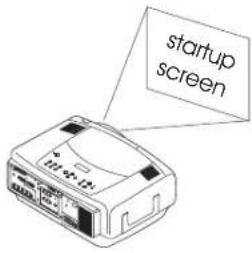 |
Lamp won’t turn on, Lamp LED blinking red(page 44)blinkingred  | Lamp may need to be replaced (page 40)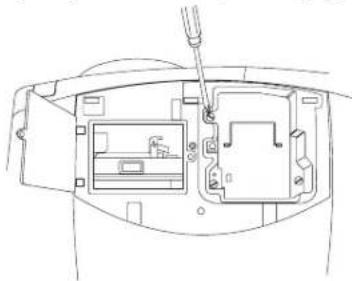 | Lamp turns on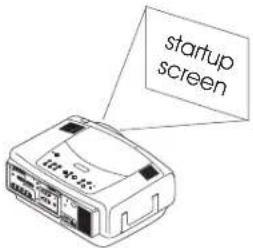 |
Image not centered on screen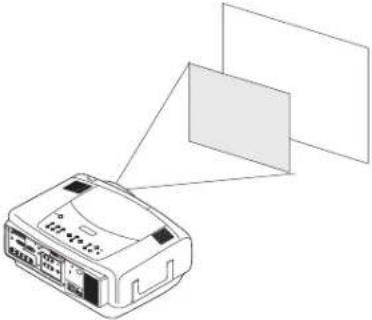 | Move projector, adjust zoom or lens shift on keypad, adjust height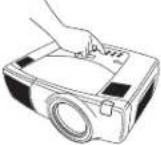 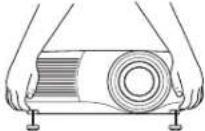 Adjust horizontal or vertical position in Picture>Advanced menu Adjust horizontal or vertical position in Picture>Advanced menu | Correct image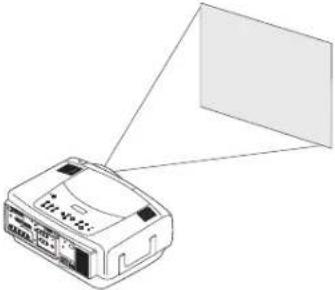 |
Still having problems?
If you need assistance, visit our website or call us. See the inside of the back cover for a list of all relevant web addresses.
This product is backed by a limited two-year warranty. An extended warranty plan may be purchased from your dealer. When sending the projector in for repair, we recommend shipping the unit in its original packing material, or having a professional packaging company pack the unit. Please insure your shipment for its full value.
Using the keypad buttons
Most buttons are described in detail in other sections, but here is an overview of their functions:
power-turns the projector on (page 10) and off (page 16).
lens shift-shifts the projected image up or down
zoom-moves the projected image closer or further away.
focus-adjusts the clarity.
menu—opens the on-screen menus (page 31).
up/down arrows—navigates to and adjusts settings in the menus (page 31).
select—confirms choices made in the menus (page 31).
volume-adjusts sound (page 28).
video and computer-changes the active source.
temp-alerts you to possible temperature-related problems (page 44).
lamp-alerts you to possible lamp-related problems (page 44).
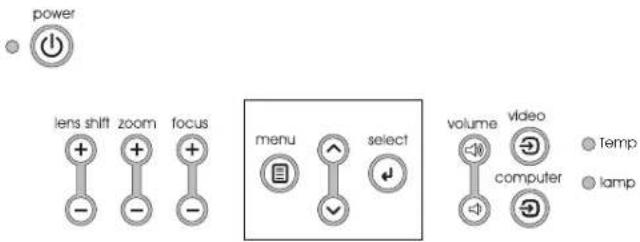
menu navigation buttons
Using the remote control
The remote uses two (2) provided AAA batteries. They are easily installed by sliding the cover off the remote's back, aligning the + and - ends of the batteries, sliding them into place, and then replacing the cover.
To operate, point the remote at the projection screen or at the projector (not at the computer). The range of optimum operation is about 30 feet (9.14m). For best results, aim the remote directly at the projector.
To use the laser pointer, press and hold the Laser button. The laser turns off when the button is released, or times out after two (2) minutes of continuous operation.
WARNING: Do not look into the laser beam emitted from the top of the remote control.
The remote contains four Source buttons that allow you to assign a particular input to a specific source. Simply press the numbered Source buttons to travel to whatever four sources you wish to have available.
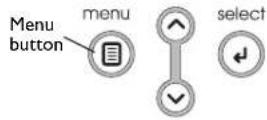
Press the remote's Menu button to open the projector's menu system. Use the arrow buttons to navigate, and the Select button to select features and adjust values in the menus.
The remote also has a power button to turn the projector on and off, volume buttons and a mute button to control the sound, a backlight button to light the remote's buttons in the dark, and a video and computer button to switch between those two sources.
Two presentation-specific features are also provided. Use the blank button to display a blank screen instead of the current slide; use the effect button to invoke a user-definable action, such as freeze, PiP, or magnify.
The Auto Image button reacquires the computer image and the Presets button lets you customize the settings for each source. Up to three Preset settings can be customized and saved.
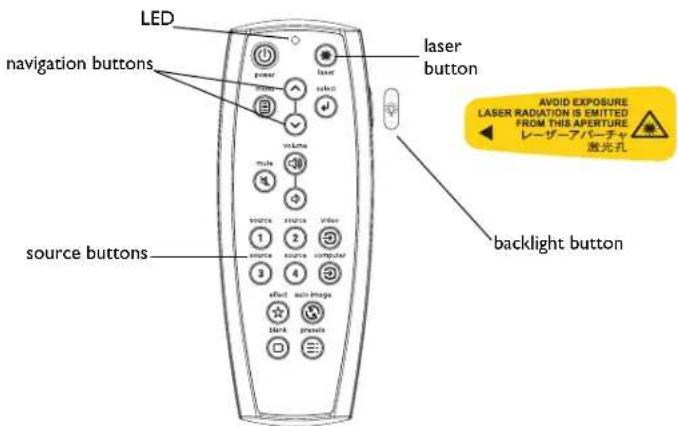
Troubleshooting the remote
- Make sure the batteries are installed in the proper orientation and are not dead. The LED at the top of the remote lights when any button is pressed when the battery power is adequate.
- Make sure you're pointing the remote at the projector, not the computer, and are within the remote range of 30 feet (9.14m).
- If you are trying to control your computer's mouse, make sure a mouse cable is connected. If using the USB cable that is part of the M1 cable, make sure the correct drivers are installed.
Using the audio
To play sound from the projector, connect your source to the Audio In connector on the projector.
To adjust the volume, use the buttons on the keypad or remote.
To adjust the balance, or loudness, use the Audio menu (see page 35).
To mute the sound, press the Mute button.
Troubleshooting audio
If there is no sound, check the following:
- Make sure the audio cable is connected.
• Make sure mute isn't active. - Make sure the volume is turned up enough. Press the volume button on the keypad or remote.
- Make sure you are connected to the corresponding audio in for your source. Computer 1 and 3 share a single audio input. Computer 2 has its own audio input. Video 1, 2 and 3 share a single stereo input.
- Adjust the audio source.
- If playing a video, make sure the playback has not been paused.
Connecting external speakers
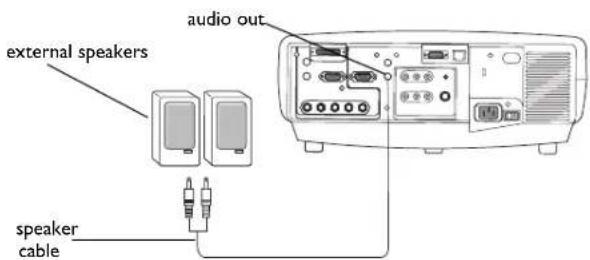
The projector can be attached to external speakers that have their own power source by plugging a speaker cable into the projector's Audio Out connector.
connect audio cable

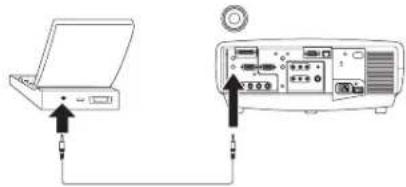
adjust volume volume

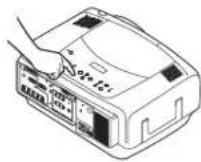
Optimizing computer images
After your computer is connected properly and the computer's image is on the screen, you can optimize the image using the onscreen menus. For general information on using the menus, see page 31.
- Adjust the Keystone, Contrast, or Brightness in the Picture menu.
- Change the Aspect Ratio. Aspect Ratio is the ratio of the image width to image height. TV screens are usually 1.33:1, also known as 4:3. HDTV and most DVDs are 1.78:1, or 16:9. Choose the option that best fits your input source. See page 32 for details.
- Adjust the Color Temperature in the Advanced menu.
- Adjust the Phase, Tracking, or Horizontal or Vertical position in the Advanced menu.
- Once you have optimized the image for a particular source, you can save the settings using Presets. This allows you to quickly recall these settings later. See page 33.
Presentation features
Several features are provided to make giving presentation easier. The following is an overview, details are found in the menu section on page 31.
- The remote's Effect button allows you to assign various features to the key. The default effect is Magnify. You can select from Blank, Mute, Aspect Ratio, Source, Auto Image, Freeze, Magnify, About, and PiP Source. See page 37 for details.
- The Freeze effect allows you to freeze the displayed image. This is useful if you want to make changes on your computer without your audience seeing them.
- The Blank button on the remote allows you to display a blank screen instead of the active source. See page 36.
- The PiP Source effect lets you change the video source in a smaller window on top of the computer image. See page 37.
- The Startup Logo menu option lets you change the default startup screen to a black, white, blue, or a custom logo screen via Logo Capture. See page 36.
- Two menu options, Power Save and Screen Save, are provided to automatically shut down the projector after several minutes of inactivity or display a blank screen. This helps preserve lamp life. See page 35 and page 36.
- A Low Power menu option is also available to help lower the projector's fan sound volume. See page 35.
Optimizing video images
After the video device is connected properly and the image is on the screen, you can optimize the image using the onscreen menus. For general information on using the menus, see page 31.
- Adjust the Keystone, Contrast, Brightness, Color, or Tint in the Picture menu. See page 32.
- Change the Aspect ratio. Aspect ratio is the ratio of the image width to image height. TV screens are usually 1.33:1, also known as 4:3. HDTV and most DVDs are 1.78:1, or 16:9. Choose the option that best fits your input source. See page 32.
- Select a Sharpness setting. See page 34.
- Adjust the Color Temperature. Select a listed value, or select User and individually adjust the intensity of the red, green, and blue color. See page 34.
Customizing the projector
You can customize the projector for your specific setup and needs. See page 35 to page 39 for details on these features.
- For rear projection, turn Rear mode on in the Settings>System menu.
- For ceiling mounted projection, turn Ceiling mode on in the Settings>System menu.
- Specify which source the projector checks first for an active signal during power-up.
- Specify the function of the Effect Key on the remote.
- Turn the projector's on-screen display messages on and off.
- Turn on power saving features.
- Specify blank screen colors and startup logos.
- Specify the menu language.
- Manage your projector via ProjectorNet software. See page 9 for more information.
- Control your projector using RS232 commands. See page 9.
- Customize the projector for your specific installation using optional long or short throw lenses. See the inside back cover of this User's Guide for ordering information.
- Gain control of your projector from your laptop with InFocus ProjectorManager ^TM , a free application that turns any PC into an advanced projector remote control.
ProjectorManager can be downloaded from our website link found on the CD that came with your projector.
Using the menus
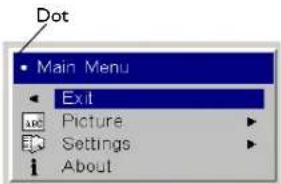
To open the menus, press the menu button on the keypad or remote. (The menus automatically close after 60 seconds if no buttons are pressed.) The Main menu appears. Use the arrow buttons to move up and down to highlight the desired submenu, then press the Select button.
To change a menu setting, highlight it, press Select, then use the up and down arrow buttons to adjust the value, select an option using radio buttons, or turn the feature on or off using check boxes. Press Select to confirm your changes. Use the arrows to navigate to another setting. When your adjustments are complete, navigate to Previous, then press Select to go to the previous menu; press the Menu button at any time to close the menus.
Dots appear before the menu name. The number of dots indicate the menu's level, ranging from one (the Main menu) to four (the most nested menus).
The menus are grouped by usage:
- The Picture menu provides image adjustments.
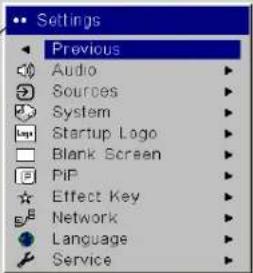
- The Settings menu provides set-up type adjustments that are not changed often.
- The About menu provides a read-only display of information about the projector and source.
Certain menu items may be grayed out until a particular source is connected. For example, Sharpness is only available for video sources and will be hidden when a computer source is active. Other menu items may be grayed out when they are not available. For example, Brightness is grayed out until an image is active.
Main menu
Keypad navigation buttons
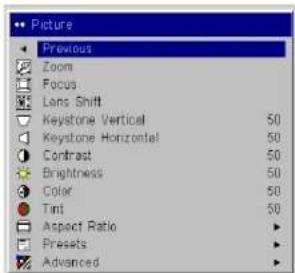
Picture menu Dots Settings menu
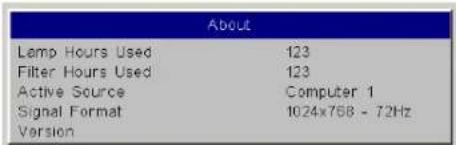
About menu
Picture menu
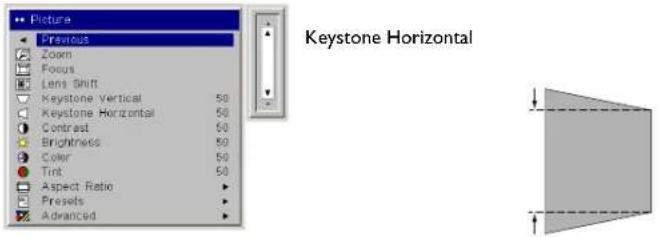
To adjust the following six settings, highlight the setting, press Select, use the up and down arrows to adjust the values, then press select to confirm the changes.
Zoom: allows you to adjust a lens to zoom in and out. Highlight Zoom, then press the up or down arrows on the keypad or remote.
Focus: allows you to adjust the lens focus for an image. Highlight Focus, then press the up or down arrows on the keypad or remote.
Lens Shift: allows you to mechanically shift the lens. Highlight Lens Shift, then press the up or down arrows on the keypad or remote.
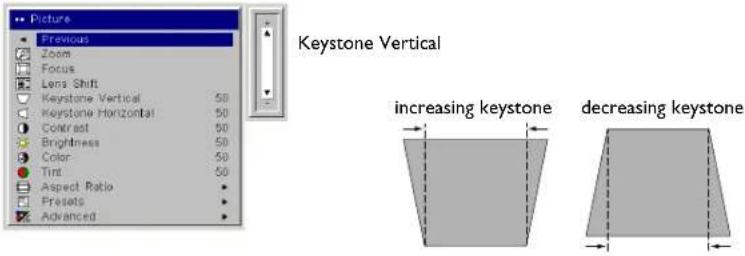
Keystone Vertical: adjusts the image vertically and makes a squarer image by using an adjustable scale band.
Keystone Horizontal: adjusts the image horizontally and makes a squarer image by using an adjustable scale band.
Contrast: controls the degree of difference between the lightest and darkest parts of the picture and changes the amount of black and white in the image.
Brightness: changes the intensity of the image.
Color: (video sources only) adjusts a video image from black and white to fully saturated color.
Tint: adjusts the red-green color balance in the image.
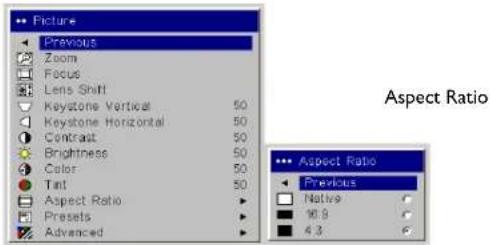
Aspect Ratio: Aspect ratio is the ratio of the image width to image height. TV screens are usually 1.33:1, also known as 4:3. HDTV and most DVDs are 1.78:1, or 16:9. The default is 4:3, which displays the input resized up or down to fill the display area.
Presets: The provided Presets optimize the projector for displaying computer presentations, photographs, film images, and video images. (Film input is material originally captured on a film camera, like a movie; video input is material originally captured on a video camera, like a TV show or sporting event.) You can use the preset as a starting point, then further customize the settings for each source. The settings you customize are saved in the preset for each source. To restore the factory default settings, choose Factory Reset in the Settings>Service menu.
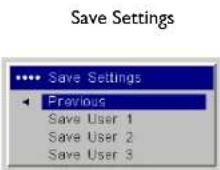
There are also three user-definable presets. To set a preset for the current source, adjust the image, then choose Save User 1, 2, or 3 in the Save Settings menu. You can recall these settings in the future by selecting the appropriate user presets.
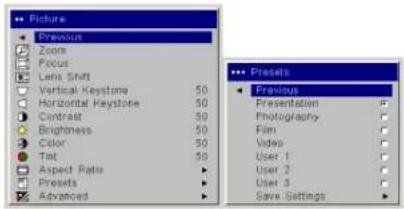
Presets
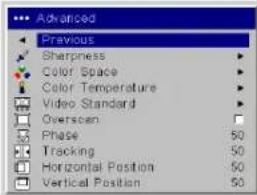
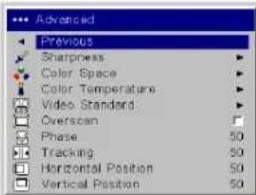
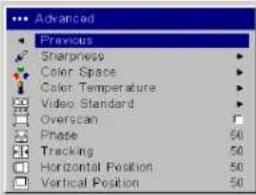
Advanced settings
Sharpness: (video sources only) changes the clarity of the edges of a video image. Select a sharpness setting.
Color Space: This option applies to computer and component video sources. It allows you to select a color space that has been specifically tuned for the input signal. When Auto is selected, the projector automatically determines the standard. To choose a different setting, turn off Auto, then choose RGB for computer sources, choose either SMPTE240, REC709 or REC601 for component video sources.
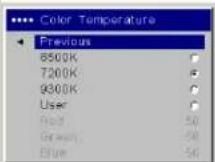
Color Temperature: changes the intensity of the colors. Select a listed value, or select User and individually adjust the intensity of the red, green, and blue colors.
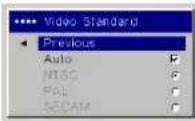
Video Standard: when set to Auto, the projector attempts to automatically pick the video standard based on the input signal it receives. (The video standard options may vary depending on your region of the world.) If the projector is unable to detect the correct standard, the colors may not look right or the image may appear "torn." If this happens, manually select a video standard by selecting NTSC, PAL, or SECAM from the Video Standard menu.
Overscan: (video sources only) removes noise around the video image.
The following 4 options are for computer sources only.
Phase: adjusts the horizontal phase of a computer source.
Trading adjusts the vertical scan of a computer source.
Horizontal / Vertical Position: adjusts the position of a computer source.
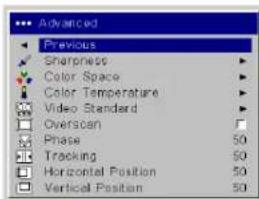
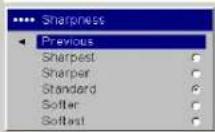
Sharpness
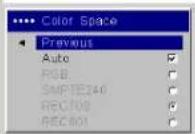
Color Space
Color Temperature
Video Standard
Settings menu
Audio: allows adjustments to the Balance and Volume. Also allows you to turn on and off the Internal speakers, and projector startup Chime.
Sources: allows you to assign a particular input to a specific source key when using the Integrator remote. Also allows selection of a default Startup Source and enables or disables Autosource.
Sources>Power-up Source: this determines which source the projector checks first for active signal during power-up.
Sources>Autosource: When Autosource is not checked, the projector defaults to the source selected in Powerup Source. If no source is found, a blank screen displays. When Autosource is checked, Powerup Source determines which source the projector defaults to at power-up. If no signal is present, the projector checks the sources in order until a source is found or until power down.
System>Rear: reverses the image so you can project from behind a translucent screen.
Ceiling: turns the image upside down for ceiling-mounted projection.
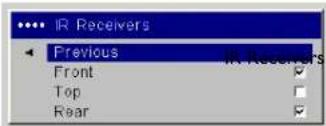
IR Receivers: turns individual IR receivers off or on to avoid environmental interference.
Auto Power: When Auto Power is checked, the projector automatically goes into the startup state after the projector is powered on. This allows control of ceiling mounted projectors with a wall power switch.
Display Messages: displays status messages (such as "Searching" or "Mute") in the lower-left corner of the screen.
Low Power: toggles between on and off. Turn it on to lower the light output of the lamp. This also lowers the fan speed, making the projector quieter.
NND: prevents your notebook computer from going into Screen Save mode (functions only when the USB connector is plugged in).
Power Save: automatically turns the lamp off after no signals are detected for 20 minutes. After 10 additional minutes with no signal, the projector powers down. If an active signal is received before the projector powers down, the image will be displayed.
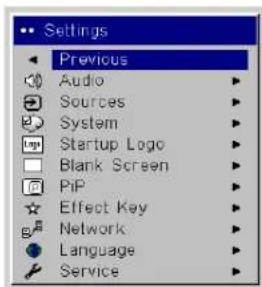
Settings menu
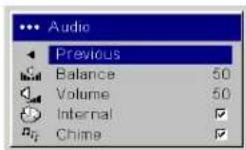
Audio
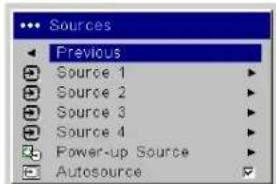
Sources
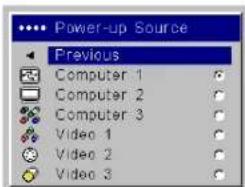
Powerup Source
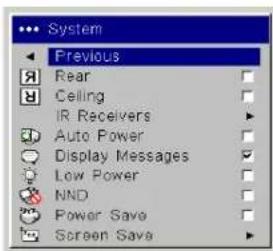
System
IR Receivers
Screen Save: automatically blanks the screen after no signals are detected for five minutes. The image returns when an active source is detected or a remote or keypad button is pressed. Screen Save is disabled when Power Save is enabled.
Startup Logo: allows you to display a blank Black, White, or Blue screen instead of the default screen at startup and when no source is detected. It also allows you to capture and display a custom startup screen.
To capture a custom logo, display the image you want to capture on your computer and select the Logo Capture option. From the Logo Capture menu, use the Capture Position X and Capture Position Y adjustments to frame the logo to be captured. Press Capture Start in the Logo Capture menu. The projector will let you know if the capture was a success or a failure.
The next time you start the projector, the custom logo you captured displays.
Blank Screen: determines what color is displayed when you press the Blank button on the remote.
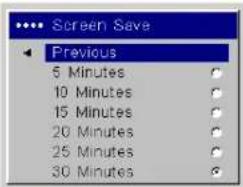
Screen Save
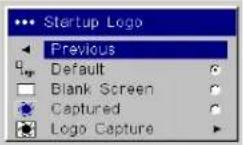
Startup Logo
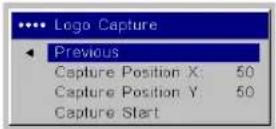
Logo Capture
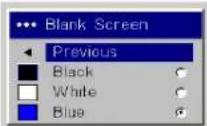
Blank Screen
PiP: (Picture in Picture) allows you to overlay a smaller window showing the video source on top of the larger computer source window. Only video sources 2 and 3 (composite and S-video) support PiP. You must have both a computer and video source connected to use PiP. You can't show a computer image in the smaller PiP window, only a video image. You can select a small, medium, or large window. You can also move the PiP window on the screen using the PiP Position X and Y options, or the Upper left, Upper Right, Lower Left, or Lower Right options in the menu. Press the up and down arrows to change the position.
Effect Key: allows you to assign a different function to the Effect button on the remote to quickly and easily use the effect. Only one effect can be enabled at a time. Highlight an effect and press Select to choose a different one.
Blank: shows an empty screen.
Mute: turns off all sound.
Aspect Ratio: sets the ratio of the image width to image height.
Source: cycles through the available sources.
Auto Image: causes computer sources to be reacquired.
Freeze: pauses the projected image.
Magnify: Is the default effect. It allows you to enlarge a section of the projected image.
About: displays the About menu.
PiP Source: changes the video source of Picture in Picture smaller window display on the projected screen.
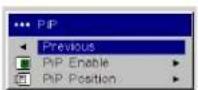
PiP menu
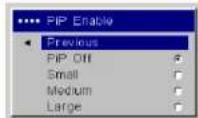
PiP Enable
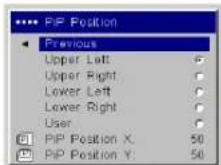
PiP Position
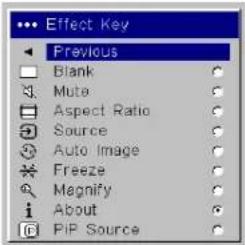
Effect Key
Network: The projector has an RJ45 Ethernet connector that supports network connections and TCP/IP protocols. This will allow for the control and management of the projector over a corporate network. The following fields are accessible when DHCP is not checked and available for manual entry of data.
IP Address: Identifies the projector on the network.
Subnet mask: Separates the network address part of the IP address.
Default gateway: The IP address of the local router.
DHCP: Select this to automatically obtain an IP address, Subnet mask, and Default gateway.
Network Info: Provides information on the network configuration.
The Network Info menu is informational and cannot be edited. It displays the current IP Address, Subnet Mask, Default Gateway, and the projector's MAC Address.
Language: allows you to select a language for the onscreen display of menus and messages.
Service: to use these features, highlight them and press Select.
Factory Reset: restores all settings (except Lamp Hours and Network settings) to their default after displaying a confirmation dialog box.
Lamp Reset: resets the lamp hours counter in the About menu to zero. Do this only after changing the lamp. It displays a confirmation dialog box.
Filter Reset: resets the filter counter in the About menu to zero. Do this only after cleaning the filter. It displays a confirmation dialog box.
Service Code: only used by authorized service personnel.
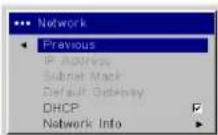
Network
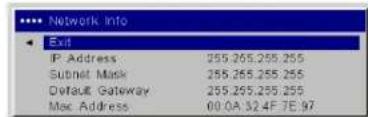
Network Info
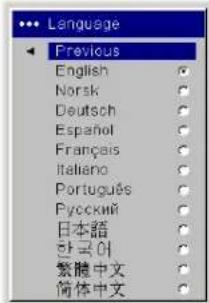
Language
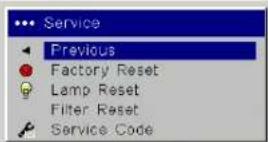
Service menu
Maintenance
NOTE: When you are performing maintenance activities on your projector, keep in mind that you should only remove screws that are single-slot, or flathead, screws. Any other type of screw, such as a phillips or star should not be removed. These types of screws should only be removed by technical support experts.
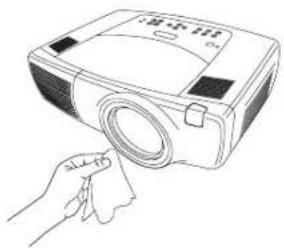
Cleaning the lens
I Apply a non-abrasive camera lens cleaner to a soft, dry cloth.
Avoid using an excessive amount of cleaner, and don't apply the cleaner directly to the lens. Abrasive cleaners, solvents or other harsh chemicals might scratch the lens.
2 Lightly wipe the cleaning cloth over the lens in a circular motion. If you don't intend to use the projector immediately, replace the lens cap.
Changing the lens
Long throw and short throw lenses are available with your projector.
I Turn off the projector and unplug the power cable.
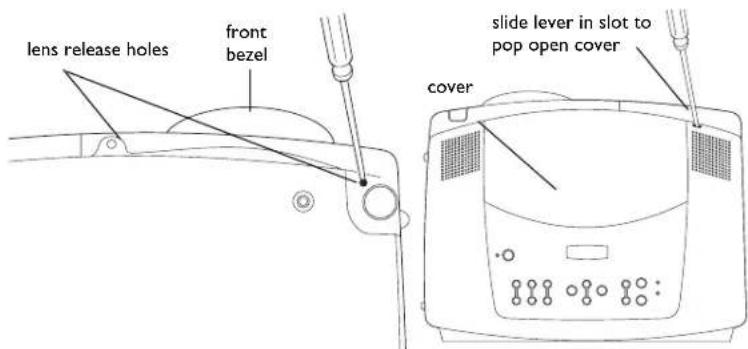
2 Turn the projector upright with the lens facing upward and use a screw-driver to remove the two screws from the front bezel release holes on the bottom of the projector.
3 Lift off the front bezel.
4 Gently place a flathead screwdriver into the slot on the top of the projector (it is by the right speaker) and slide the small lever toward the right speaker. The cover that protects the lens and the lamp housing pops up.
5 Loosen the captive screw to the door that covers the lens housing.
clean the lens with a soft dry cloth and non-abrasive cleaner
natural_image
Line drawing of a hand holding a projector with a magnified cable (no text or symbols)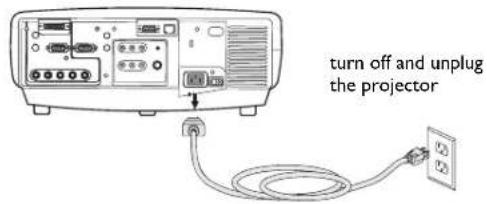
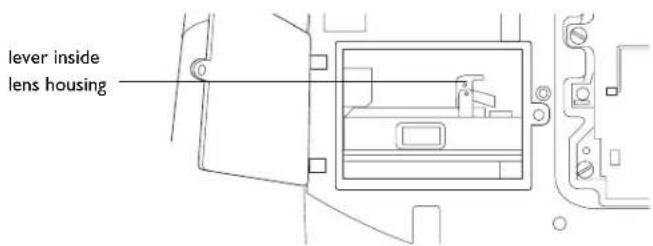
6 To remove a lens, push the lever inside the lens housing and turn the lens counterclockwise until it stops. Remove the lens.
7 To install a new lens, place it in the opening through the front of the projector, aligning the red dot (near the base of the lens) with the red dot on the projector. Turn clockwise until you feel the lens click into place.
8 Tighten the captive screw to the lens housing door. Place the front bezel back onto the projector and replace the two screws on the bottom of the projector. Replace the cover that protects the lens and the lamp housing on top of the projector.
Replacing the projection lamp
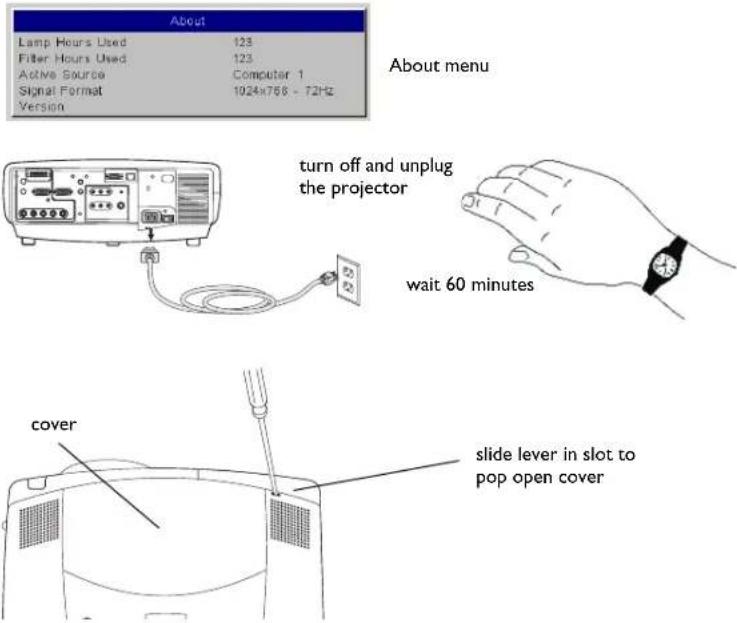
The lamp hour timer in the About menu counts the number of hours the lamp has been in use. Twenty hours before the specified end of the lamp's life, the message "Change lamp" briefly appears on the projected screen. You can order new lamp modules from your dealer. See the Accessories catalog that came with the projector or visit our website for information.
I Turn off the projector and unplug the power cable.
2 Wait 60 minutes to allow the projector to cool thoroughly.
3 Gently place a flathead screwdriver into the slot on the top of the projector (it is by the right speaker) and slide the small lever toward the right speaker. The cover that protects the lamp housing and the lens pops up.
The lamp module is on the right.
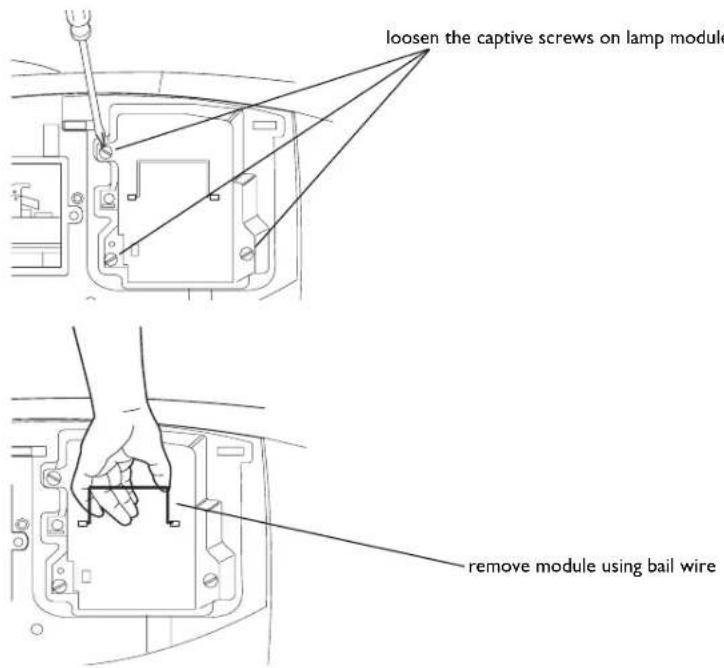
4 Loosen the three captive screws on the lamp module.
WARNINGS:
- To avoid burns, allow the projector to cool for at least 60 minutes before you replace the lamp.
- Do not drop the lamp module. The glass may shatter and cause injury. Do not touch the glass lamp screen. Fingerprints can obscure projection sharpness.
- Be extremely careful when removing the lamp housing. In the unlikely event that the bulb ruptures, small glass fragments may be generated. The lamp housing is designed to contain these fragments, but use caution when removing the lamp housing. Before replacing the lamp, clean the lamp compartment and dispose of cleaning materials. Wash hands after lamp replacement. This product has a lamp which contains a very small amount of mercury. Dispose of it as required by local, state or federal ordinances and regulations. For more information see www.eiae.org.
5 Carefully remove the lamp module by grasping and lifting the metal bail wire. Dispose of the lamp in an environmentally proper manner.
6 Install the new lamp module, making sure that it is properly seated, and tighten the three captive screws.
7 Replace the cover over the lamp module by inserting the tabs into the tab bays and pushing the rest of the cover down into place.
8 Plug in the power cable, press the power switch then press the Power button to turn the projector back on. Reset the lamp hour timer.
Resetting the lamp timer
If the lamp timer has reached the maximum number of hours for the projector lamp, the LED on the projector's keypad will show a lamp error (see "LED Behavior" on page 44). To reset the lamp timer, simultaneously press the decrease volume button and increase volume button on the keypad for 10 seconds. At that point the LED will turn green and you can power on the projector. You can also navigate to the Settings>Service menu and select Lamp Reset to reset the lamp timer.
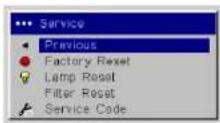
reset lamp time in Service menu
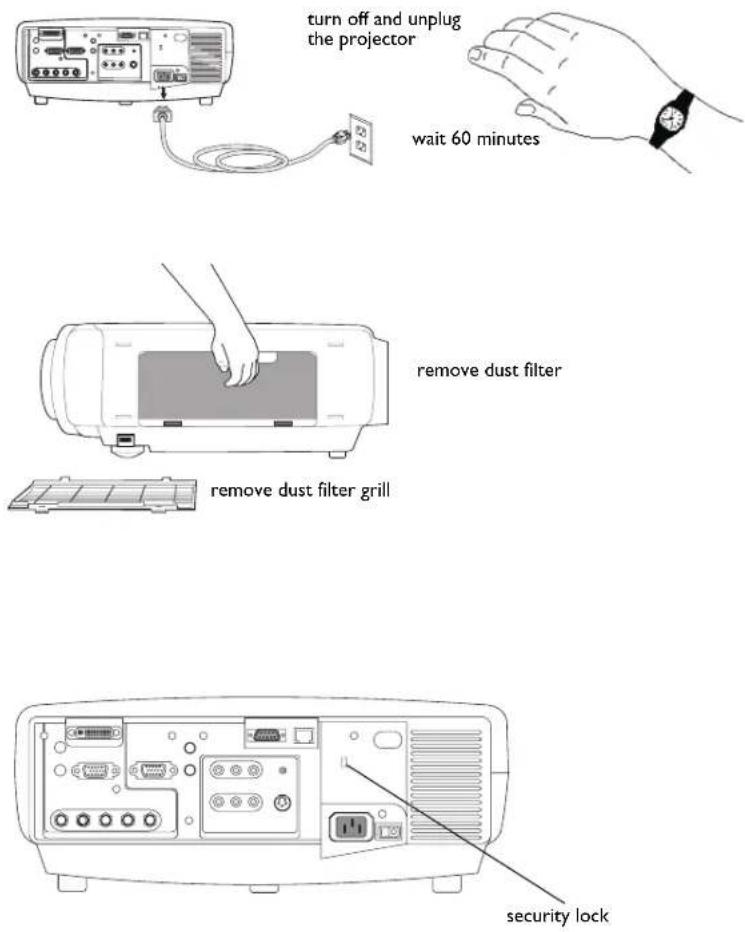
Cleaning the dust filter
I Turn off the projector and unplug the power cable.
2 Wait 60 minutes to allow the projector to cool thoroughly.
WARNING: To avoid burns, allow the projector to cool for at least 60 minutes before you clean or replace the dust filter.
3 Remove the dust filter grill door on the side of the projector by pulling down on the two tabs at the grill's top.
4 Press the tab on the center of the dust filter and lift it off.
5 Clean the filter using a vacuum set on low power.
6 Replace the dust filter and the dust filter grill door.
7 Reset the filter hour timer.
Troubleshooting
If the Temp and Lamp LEDs indicate a problem with the filter, check the following:
- Use a soft cloth to wipe the mirrors on the dust filter grill.
- Remove the dust filter and use a soft cloth to wipe the window behind the dust filter.
- Replace the dust filter and the dust filter grill.
Using the security lock
The projector has a security lock for use with a cable lock system. See the Accessories catalog that came with the projector, or visit our website, for ordering information. Refer to the information that came with the lock for instructions on how to use it.
Appendix
Projected image size
NOTE: Visit the Service section of our website for interactive image size calculators for the standard and optional lenses.
Table I: Projection sizes: Standard lens (1.5 - 2.2:1 throw ratio)
| Minimum Image Maximum Image | ||||
| Distance (feet/m) | Diagonal Image (feet/m) | Image Width (feet/m) | Diagonal Image (feet/m) | Image Width (feet/m) |
| Min Distance 3/0.9 | 1.7/0.52 1.46 | /.42 2.5/0.76 | /.82/0.55 | |
| 5/1.5 | 2.84/0.87 2.27/.69 | 4.17/1.27 4.55 | /1.39 | |
| 10/3.0 | 5.68/1.73 4,46/1.36 | 8.33/2.54 6.5 | 6/2.00 | |
| 20/6.1 | 1.36/3.46 9.09/2.77 | 16.67/5.08 | 13.33/4.06 | |
| 30/9.1 | 7.05/5.2 13.64/4.16 | 25.0/7.62 20.0/6.10 | ||
| 40/12.2 | 22.73/6.93 | 18.18/5.54 | 33.33/10.16 | 26.67/8.13 |
| Max Distance 45.5/13.9 | 25.85/7.88 | 20.68/6.20 | 37.92/11.56 | 30.33/9.25 |
The image offset range for the standard lens is 10:1 (100%) to 1:1 (50%).
LED Behavior
| LED color/behavior Meaning | |
| Power: blinking greenTemp: N/ALamp: N/A | The power switch has been toggled on and the software is initializing, or the projector is powering down and the fans are running to cool the lamp. |
| Power: blinking green (once)Temp: N/ALamp: N/A | Power Save or Screen Save. |
| Power: solid greenTemp: N/ALamp: N/A | The power switch has been toggled on and the software has initialized or the projector has been powered off via the remote. |
| Power: solid greenTemp: blinking redLamp: blinking red | If Temp and Lamp are flashing simultaneously, the filter hasn’t been cleaned in 100 hrs.If Temp and Lamp are flashing simultaneously (twice), the cooling air filter may be dusty. Please see “Cleaning the dust filter” on page 42.If Temp and Lamp are flashing alternately, the projector is below temperature specifications. Please use the projector in an environment between 0^/32^ to 35^/95^ . Contact Technical Support if the problem persists. |
| Power: solid redTemp: N/ALamp: blinking red | Lamp won’t strike (blinks one time)Lamp has exceeded lamp hours limit (blinks two times)Lamp has failed (blinks three times)Lamp door is open (blinks four times)Turn off the projector and wait one minute, then turn the projector on again. If the projector has exceeded its lamp life limit, replace the lamp and reset the lamp timer. Please contact Technical Support if the problem persists. |
| Power: solid redTemp: blinking redLamp: N/A | Fan failure. Make sure the vents aren’t blocked. Contact Technical Support if the problem persists. |
| Power: solid redTemp: solid redLamp: N/A | The projector is overheating. Make sure the vents aren’t blocked. Contact Technical Support if the problem persists. |
| Power: solid redTemp: N/ALamp: N/A | Unidentified error. Please contact Technical Support. |
RS-232 commands
Communication Configuration
Visit our website for additional RS-232 settings and information.
To control this projector via RS-232, connect a null modem cable and set the control system serial port settings to match the following communication configuration:
| RS-232 Port Settings | |
| Setting Value | |
| Bits per second 19,200 | |
| Data bits 8 | |
| Parity None | |
| Stop bits 1 | |
| Flow control None | |
| Emulation VT100 | |
Command Format
All commands consist of 3 alpha characters followed by a request, all enclosed in parentheses. The request can be a read request (indicated by a "?") or a write request (indicated by 1 to 4 ASCII digits).
A read request example:
(AAA?) where
( starts the command
AAA denotes the command
? denotes the read request
) ends the command
A read command returns the range and the current setting, for example:
| Read Command Examples | ||
| Function Command | Response | |
| Brightness (BRT?) (96-1) | 60,128) | |
| Volume (VOL?) (0-32, 0) | ||
| Lamp Hours | (LMP?) | (0-65534, 42) |
A write request example:
(AAA#####) where
(starts the command
AAA denotes the command
#### denotes the value to be written
(leading zeros not necessary)
) ends the command
Some commands have ranges, while others are absolute. If a number greater than the maximum range is received, it is automatically set to the maximum number for that function. If a command is received that is not understood, a "?" is returned. With absolute settings, "0" is off, 1-9999 is on. The one exception is the Power command, where 0 is off and 1 is on.
To assure the projector can process a command, wait 3 seconds before entering the next command.
| Write Command Examples | ||
| Function Command | Response | |
| Brightness (BRT140) Sets the brightness to 140 | ||
| Power (PWRO) Turns power off | ||
| Power (PWRI) Turns power on | ||
Error Conditions
Not all commands are supported for all projectors. If an unsupported command is issued, the command will be ignored. If a command is received that is not understood, a '?' character will be returned indicating the command was not understood.
Limitations
The projector cannot respond to commands coming in at a high-rate. Therefore, a delay must occur between commands to ensure that the command gets properly executed. To assure the projector can process a command, wait 3 seconds before entering the next command.
The Step column refers to increasing or decreasing the menu bar position since the On-screen Display is not an exact match of values. For example, Step 2 changes the data by 2 through the CLI (Command Line Interface). The menu bar is up (or down) by 1.
| Function | Com-mand | Min Max | De-fault | Step | |
| About0: disable1: enable | ABT at W 0 l | n/a | |||
| Aspect Ratio0: Native1: 16:92: 4:3 | A R | Z | a | t | R |
| Auto Image0: disable1: enable | AIM at W | 0 l n/a | |||
| Auto Power0: disable1: enable | APO at RW | 0 l 0 | |||
| Auto Source0: disable1: enable | ASC at RW | 0 l l | |||
| Balance | BAL at RW | 0 | 100 | 50 | l |
| Blank0: off1: on | BLK at RW | 0 l | 0 | ||
| Blank Screen0: black1: blue2: white | BSC at RW | 0 2 l | |||
| Blue Gain | BCG at RW | 0 | 100 | 50 | 2 |
| Brightness BRT at RW 96 160 128 I | |||||
| Ceiling0: disable1: enable | CEL at RW 0 1 0 | ||||
| Chime0: disable1: enable | ACE at RW 0 1 1 | ||||
| Color CLR at RW 65 19 128 I | |||||
| Color Space0: RGB1: SMPTE2402: REC7093: REC6017: Auto | CSM at RW 0 7 7 | ||||
| Color Temp0: 9300K1: 6500K2: 7200K3: User | TMP at RW 0 3 2 | ||||
| Contrast CON at RW | 96 160 128 I | ||||
| Display Messages0: disable1: enable | DMG at RW 0 1 1 1 | ||||
| Effect0: blank1: mute2: aspect ratio3: source4: auto image5: freeze6: zoom7: about8: PiP Source | EFK at RW | 0 | 8 | 7 | 1 |
| Factory Reset0: not reset1: reset | RST at W | 0 | n/a | |||
| Filter Reset0: not reset1: reset | FRT at W | 0 | n/a | |||
| Freeze0: disable1: enable | FRZ at RW | 0 | 0 | |||
| Green Gain | GCG at RW | 0 100 50 2 | |||
| Horizontal Keystone | DKH at RW | 78 |78 | 128 | | ||
| Horizontal Position | HPS at RW | def:-50 | def: +50 | auto | | |
| Internal Sound Enable0: disable1: enable | INT at RW | 0 | | | |||
| IR Receiver front0: disable1: enable | IRF at RW | 0 | | | |||
| IR Receiver rear0: disable1: enable | IRR at RW 0 I | I | |||
| IR Receiver top0: disable1: enable | IRT at RW 0 I | 0 | |||
| Language0 = English1 = French2 = German3 = Spanish4 = Traditional Chinese5 = Japanese6 = Korean7 = Portuguese8 = Russian9 = Norwegian10 = Simplified Chinese11 = Italian | LAN at RW 0 | II 0 I | |||
| Lamp Hours LMP at R 0 | 32766 0 I | ||||
| Lamp Lit0: not lit1: lit | LML at R 0 I | ||||
| Lamp Reset0: not reset1: reset | LRT at W 0 I | n/a | |||
| Number of Lamp Resets0: not reset1: reset | LMR at R 0 32 | 766 0 I |
| Lamp Total On Time(All Bulbs) | LMT at R 0 21 | 4748 | 3646 | ||
| Time In Hours LastBulb1 Lasted | LB1 at R 0 327 | 66 0 | |||
| Time In Hours LastBulb2 Lasted | LB2 at R 0 327 | 66 0 | |||
| Time In Hours LastBulb3 Lasted | LB3 at R 0 327 | 66 0 | |||
| Low Power0: disable1: enable | LPE at RW 0 | 0 | |||
| Magnify MAG at RW | 0 48 0 1 | ||||
| Magnify Enable0: disable1: enable | MGE at RW | 0 | n/a | |||
| Magnify Position Horizontal | MPH at RW | 128 896 | 512 1 | ||
| Magnify Position Vertical | MPV at RW | 96 | 672 | 384 1 | |
| Menu0: disable1: enable | MNU at RW | 0 | 0 | |||
| Menu Navigation0: up1: down4: select | NAV at W 0 4 | n/a | |||
| Motorized Focus Far | MFF at W | 0 100 | 0 1 | ||
| Motorized Focus Near MFN at W 0 100 0 1 | |||||
| Motorized Vertical Down | MVD at W 0 100 0 1 | ||||
| Motorized Vertical Up MVU at W 0 100 0 1 | |||||
| Motorized Zoom In MZI at W 0 100 0 1 | |||||
| Motorized Zoom Out MZO at W 0 100 0 1 | |||||
| Mute0: disable1: enable | MTE at RW 0 1 0 | ||||
| NND0: disable1: enable | NND at RW 0 1 1 | ||||
| Overscan0: disable1: enable | OVS at RW 0 1 | 0 | |||
| Phase | MSS at RW | 0 | 31 | 16 | 1 |
| PiP Input3: video 24: video 3 | PIN at RW 3 4 3 | ||||
| PiP Position0: upper left1: upper right2: lower left3: lower right4: user | PPO at RW 0 4 2 |
| PiP Size Selection0: off1: small2: medium3: large | PSS at RW | 0 3 0 | |||
| Power0: disable1: enable | PWR at RW | 0 1 0 | |||
| Power Save0: disable1: enable | PSV at RW 0 | 0 | |||
| Power-up Source0: computer 11: computer 22: video 13: video 24: video 35: computer 3 | DSC at RW | 0 5 0 | |||
| Presets0: presentation1: photography2: film3: video10: user 111: user 212: user 3 | PST at RW 0 | 2 | c: 0 | v: 3 | |
| Rear0: disable1: enable | REA at RW 0 | 1 0 | |||
| Red Gain | RCG at RW 0 | 100 50 | 2 | ||
| Save User 10: not saved1: saved | US1 at W 0 1 | n/a | |||
| Save User 20: not saved1: saved | US2 at W 0 1 | n/a | |||
| Save User 30: not saved1: saved | US3 at W 0 1 | n/a | |||
| Screen Save0: 5 minutes1: 10 minutes2: 15 minutes3: 20 minutes4: 25 minutes5: 30 minutes | S S | V | a | t | R |
| Sharpness5 = Sharpest6 = Sharper7 = Standard8 = Softer9 = Softest | S H | P | a | t | R |
| Source0: computer11: computer22: video 13: video 24: video 35: computer 3 | SRC at RW 0 | 5 0 |
| Source 10: computer 11: computer 22: video 13: video 24: video 35: computer 3 | SR1 at RW 0 5 0 | |||
| Source 20: computer 11: computer 22: video 1 5 03: video 2 4: video 35: computer 3 | SR2 at RW 0 5 1 | |||
| Source 30: computer 11: computer 22: video 1 9 73: video 2 4: video 35: computer 4 | SR3 at RW 0 5 2 | |||
| Source 40: computer 11: computer 22: video 13: video 24: video 35: computer 5 | SR4 at RW 0 5 3 | |||
| Startup Logo0: blank screen1: default2: captured | DSU at RW 0 2 1 |
| Tint TNT at RW 114 142 128 I | |||||
| Tracking MTS at RW def: | -128 | def:+128 | auto I | ||
| Unit Total Time On ONL at R 0 214748 | 3646 | 0 | |||
| Vertical Keystone DKC at RW 78 178 128 I | |||||
| Vertical Position | VPS at RW | 0 def: | auto x 2 | auto I | |
| Video Standard0: Auto1: NTSC2: PAL3: SECAM | VSU at RW | 0 3 | 0 | ||
| Volume | VOL at RW | 0 | 32 | 16 | I |
INDEX
Numerics
1024x768 resolution 5
A
About 37
Aspect Ratio 37
audio 28
Audio In connector 8, 14
Auto Image 37
Auto Power 35
Autosource 35
B
Blank 37
BNC 9,15
BNC connectors 15
Brightness 13
C
Capture Position 36
Capture Start 36
changing the lens 39
cleaning the dust filter 42
cleaning the lens 39
Color 17
colors are incorrect 23
component cable connector 14
computer 9
computer connections
optional 8
required 8
computer image
optimize 29
troubleshooting 19
connector panel 6
contacting InFocus 25
Contrast 13, 17
custom logo startup screen 36
D
Default gateway 38
DHCP 38
Display Messages 35
displaying
computer image 10
PiP 37
video image 16
Drivers 11
USB 12
Windows 98 12
dust filter, cleaning 42
E
Effect Key 37
elevator foot 13, 16
F
Factory Reset 38
Filter Reset 38
first time use
driver installation 11
focus 13, 17
Freeze 37
fuzzy image 21
H
HDTV sources 14, 15
|
image
display computer 10
display video 16
size 7
image does not fit screen 22
image not centered 25
image not sharp 22
image not square 22
image reversed 23
image size matrix 43
image upside down 23
Info
network 38
IP Address 38
IR Receivers 35
L
lamp replacement 40
Lamp Reset 38
lamp won't turn on 24
Language 38
laptop
connecting 8
external video port 10
LED 18
blinking red 24
solid red 24
lens
changing 39
cleaning 39
Logo Capture 36
Low Power 35
M
Magnify 37
Main menu 31
menu system 31
Monitor connector 9
mouse, using your 8
Mute 37
N
Network 38
Network connector 9
Network Info 38
NND 35
no computer image 20
no startup screen 19
0
only startup screen appears 19
Overscan 34
P
Picture in Picture 37
Picture menu 32
PiP 37
Power button 16
power cable 8, 14
Power Save 35
Power-up Source 35
presentation features 29
projection distance 7
projector
connector panel 6
customizing 30
positioning 7
setting up 7
shutdown 18
troubleshooting problems 18
projector height 13, 16
projector positioning 13, 16
R
Rear 35
remote 8
remote control 27 not working 2
replacing the lamp 40
RS-232 cable 9 connecting 6
S
security lock 42
Serial connection 9
serial connection 6
Service 38
Service Code 38
Settings menu 35
shutdown projector 18
solid red 44
Source 37
Source troubleshooting 19
Sources 35
Subnet mask 38
S-video connector 14
T
Tint 17
Troubleshooting 19
troubleshooting 18
U
USB, using your mouse 8
V
video 15
Video button 16
video connections
optional 14
standard 14
Video connector 14
video images
optimizing 30
Video Standard 34
volume adjustment 17
w
warranty 25
Windows 2000 12
Windows 98 11
Windows ME, XP 12
wired 8
wired remote 8
x
XGA 5
Z
zoom 13, 17
Limited Warranty
Subject to the Limitations, Exclusions and Disclaimers hereof, InFocus Corporation ("InFocus") warrants that the Projector, Lamps and Accessories (hereinafter collectively or individually referred to as "Product" as appropriate) purchased from InFocus, an InFocus distributor, or an InFocus reseller will conform to InFocus' specifications and be free from defects in material or workmanship for the respective Limited Warranty period provided below. This warranty statement applies only to the specific InFocus product purchased. InFocus products are compatible with many systems, however the specific functional implementation by the customers of the product may vary. The suitability of a product for a specific purpose or application must be determined by the customer and is not warranted by InFocus Corporation. If the Product, while subject to this Limited Warranty, is defective in material or workmanship during the warranty period, then InFocus, at its option, will REPAIR or REPLACE the Product.
All exchanged parts and Products replaced under this Limited Warranty will become property of InFocus. InFocus' sole obligation is to supply (or pay for) all labor necessary to repair the Product found to be defective within the Limited Warranty period and to repair or replace defective parts with new parts or, at the option of InFocus, serviceable used parts that are equivalent or superior to new parts performance. Limited Warranty periods are as follows:
- Projector Product Limited Warranty Period (Excluding Lamps) : Two (2) years from date of proof of purchase.
- Lamp Product Limited Warranty Periods: The original installed lamp shall have a ninety (90) day Limited Warranty Period from date of Projector proof of purchase, and replacement Lamps will have a ninety (90) day limited warranty from date of lamp proof of purchase, and replacement lamps purchased at the time of Projector Product purchase will have a ninety (90) day limited warranty from date of first use.
- Accessory Product Limited Warranty Period: ninety (90) days from date of purchase.
WARRANTY LIMITATION AND EXCLUSION
THIS WARRANTY SETS FORTH INFOCUS' MAXIMUM LIABILITY FOR ITS PRODUCT. THIS WARRANTY EXTENDS ONLY TO PRODUCTS PURCHASED FROM INFOCUS OR AN INFOCUS AUTHORIZED RESELLER. InFocus shall have no further obligation under the foregoing Limited Warranty if the Product has been damaged due to abuse, improper ventilation, fire, water, disaster, mispackaging, shipping, lightning or other acts of nature, misuse, neglect, smoke exposure (cigarette or otherwise), accident, unusual physical or electrical stress and/or power surges, unauthorized modifications (including use of an unauthorized mount), tampering, alterations, service other than by InFocus or its authorized agents, or failure caused other than from ordinary use or failure to properly use the Product in the application for which said Product was intended. In addition, failure of the end-user to follow maintenance procedures as outlined in the product's user guide where a schedule is specified for regular cleaning of certain parts (based on usage and environment), will not be covered under this Warranty. Finally, InFocus shall have no further obligation if the Product was subjected to operating conditions outside of the range specified in the user's guide or in this Warranty. Normal operating conditions are defined as use not in excess of 16 hours continuously per day with a minimum 8 hour period of continuous rest in the powered off state. If a claimed defect cannot be identified or reproduced in service, you will be held responsible for the costs incurred. This Limited Warranty excludes Product cleaning, removal or installation of the Product, repair, or replacement of plastics due to cosmetic damage and damage as a result of normal wear. Product repair outside of the terms of the Limited Warranty will be on a time and materials basis. InFocus will not be liable for any rental costs incurred in the event of a failure. The Warranty does not apply to cartons, carrying cases, shipping cases, external cabinets, accessories used in connection with the product, or cosmetic parts, knobs, or batteries. The Warranty period for LCD engines is either 2 years from the date of purchase of the projector or 2500 hours of projector usage, whichever comes first. If the LCD engine requires replacement and the projector has exceeded 2500 hours, but is otherwise eligible for Warranty, this Warranty will cover the cost of labor, but not the cost of parts that require replacement.
The Accessory Product Limited Warranty covers the accessory item only and excludes normal wear. The Lamp Product Limited Warranty excludes expected lamp degradation and InFocus will not be liable for normal decrease in lamp output over time or as lamp is consumed under the Limited Warranty.
Remanufactured Products and Software Products are exempt from the foregoing Limited Warranty. Please refer to the appropriate Remanufactured Product Limited Warranty or Software Product Limited Warranty for applicable Warranty information.
DISCLAIMER OF UNSTATED WARRANTIES
THE WARRANTY PRINTED ABOVE IS THE ONLY WARRANTY APPLICABLE TO THIS PRODUCT. ALL OTHER WARRANTIES, EXPRESS OR IMPLIED, INCLUDING, BUT NOT LIMITED TO, THE IMPLIED WARRANTIES OF MERCHANTABILITY AND FITNESS FOR PARTICULAR PURPOSE ARE DISCLAIMED. THERE ARE NO WARRANTIES THAT EXTEND BEYOND THE DESCRIPTION ON THE FACE HEREOF AND THE FOREGOING WARRANTY SHALL NOT BE EXTENDED. ALTERED OR VARIED EXCEPT BY WRITTEN INSTRUMENT SIGNED BY INFOCUS. SOME JURISDICTIONS DO NOT ALLOW LIMITATIONS ON HOW LONG AN IMPLIED WARRANTY MAY LAST, SO SUCH LIMITATIONS MAY NOT APPLY TO YOU.
Limited Warranty Period
The Limited Warranty periods hereof commence on the date of proof of purchase by the end-user customer. These Limited Warranty provisions shall apply only to the end-user purchaser (first person or entity that purchased a new Product for personal or business use and not for the purpose of distribution or resale). SOME JURISDICTIONS MAY GRANT YOU CONSUMER RIGHTS WITH MINIMUM WARRANTY DURATION THAT DIFFER FROM THE DURATIONS PROVIDED HEREIN, AND INFOCUS WILL HONOR ALL SUCH CONSUMER RIGHTS UPON PROOF OF PURCHASE IN THAT JURISDICTION.
To Be Eligible For Limited Warranty Coverage
Any person exercising a claim under this Limited Warranty must establish to the satisfaction of InFocus both the date of purchase and that the Product was purchased new. The sales receipt or invoice, showing the date of purchase of the Product is the proof of the date of purchase.
To Obtain Warranty Service
During the Limited Warranty period, to exercise this Limited Warranty, the purchaser must first contact 1) InFocus, 2) a service facility authorized by InFocus or 3) the place of original purchase.
InFocus Customer Service in the Americas 1-800-799-9911 or 503-685-8888 or www.infocus.com/service, In Europe, Middle East, and Africa +31 (0) 20 579 2820, and in Asia Pacific +65 6353 9449.
For Warranty service, the purchaser will pay to return or deliver the defective Product and will pay all freight, duty, taxes, VAT, fees, incidental clearance and customs charges to ship the unit to an InFocus Service Center or to a service facility authorized by InFocus. When returning Product to InFocus, a Return Material Authorization Number (RMA #) is required and must be clearly displayed on the outside of the shipping carton or a similar package affording an equal degree of protection. InFocus or the service facility authorized by InFocus will return the repaired/replaced Product freight prepaid to the purchaser.
Products returned for Warranty service must be accompanied by a written letter that: (i) explains the problem; (ii) provides proof of date of purchase; (iii) provides the dealer's name; and (iv) provides the model and serial number of the Product. Upon request of InFocus Corporation or an authorized repair center for InFocus, proof of legal import must accompany the warranty repair Product, otherwise the Product must be returned to the place of original purchase, to the manufacturer (Purchaser must bear all tax, duty and freight), or the Purchaser must bear charges for the warranty repair.
No repair or replacement of Product or part thereof shall extend the Limited Warranty period as to the entire Product. Warranty on the repair part and workmanship shall only be effective for a period of ninety (90) days following the repair or replacement of that part or the remaining period of the Product Limited Warranty whichever is greater. InFocus' or its authorized service center's policies shall apply and the Consumer will be charged accordingly for product returned to an InFocus Authorized Service Center after the expiration of the warranty period.
LIMITATION OF LIABILITY
IT IS UNDERSTOOD AND AGREED THAT INFOCUS' LIABILITY SHALL NOT EXCEED THE RETURN OF THE AMOUNT OF THE PURCHASE PRICE PAID BY PURCHASER Where applicable national law prohibits the exclusion or limitation of liability, InFocus excludes or limits its liability to the maximum extent permitted by national law.
Limitation on Bringing Action - No action, regardless of form, arising out of the agreement to purchase the Product may be brought by purchaser more than one year after the cause of action has accrued.
Governing Law - Any action, regardless of form, arising out of the agreement to purchase the Product is governed by the laws of the state of Oregon, USA.
Mandatory Arbitration – Any action, regardless of form, arising out of the agreement to purchase the Product is subject to mandatory arbitration. THIS WARRANTY DOES NOT AFFECT YOUR LEGAL RIGHTS UNDER APPLICABLE NATIONAL LAWS RELATING TO THE SALE OF CONSUMER PRODUCTS.
IF YOU NEED ASSISTANCE....
For all types of Service and Support information on InFocus products and services please go to our web site at www.infocus.com/ service.
Many resources are available on our website.
Some examples are:
- F r equently Asked Questions about general projector usage and technical issues
- How To Guides with complete details on connecting specific types of equipment like home theater components, digital cameras and gaming consoles
- E-mail support
• Online product registration - Product data sheets
- Optional accessories
- T echnical specifications, interactive image size calculator, laptop activation commands and more!
InFocus®
LP®840/ LP®850/ LP®860
INSTALLATION & INTEGRATION PROJECTOR.
USER'S GUIDE
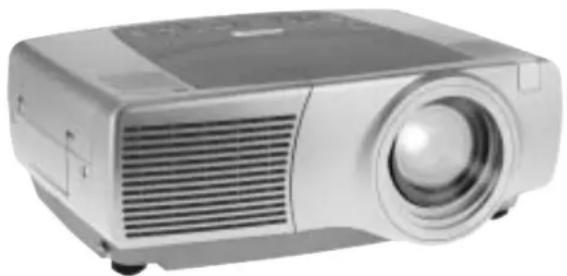
natural_image
Exterior view of a silver projector with a circular lens and ventilation grille (no text or symbols visible)InFocus®
InFocus Corporation
27700B SW Parkway Avenue
Wilsonville, Oregon 97070-9215
1-800-294-6400 · 503-685-8888
Fax: 503-685-8887
http://www.infocus.com
In Europe:
InFocus International BV
Strawinskylaan 585
1077 XX Amsterdam
The Netherlands
Phone: +31 20 579 2000
Fax: +31 20 579 2999
In Asia:
InFocus Systems Asia Pte Ltd.
238A Thomson Road
18-01/04 Novena Square
Singapore 307684
Telephone: (65) 6334-9005
Fax: (65) 6333-4525

010-0512-02

- Declaration of Conformity
- Trademarks
- FCC Warning
- EN 55022 Warning
- Canada
- Remote Control Warning
- Table of Contents
- Important Operating Considerations for Safety
- Introduction
- Product specifications
- Accessories
- Online Registration
- Connector Panel
- Positioning the projector
- Connecting a computer
- Required computer connections
- Optional computer connections
- First-time projector use with Windows 98
- Skip this page if you did not connect a USB mouse cable
- For Windows 98:
- For Windows 2000, Windows ME, and Windows XP:
- Connecting a video device
- Standard video connections
- Optional video connections
- Shutting down the projector
- Screen Save
- Power Save
- Turning off the projector
- Troubleshooting your setup
- Still having problems?
- Using the keypad buttons
- Using the remote control
- Troubleshooting the remote
- Using the audio
- Troubleshooting audio
- Connecting external speakers
- Optimizing computer images
- Presentation features
- Optimizing video images
- Customizing the projector
- Using the menus
- Picture menu
- Advanced settings
- Settings menu
- Maintenance
- Cleaning the lens
- Changing the lens
- Replacing the projection lamp
- WARNINGS:
- Resetting the lamp timer
- Cleaning the dust filter
- Troubleshooting
- Using the security lock
- Appendix
- Projected image size
- RS-232 commands
- Communication Configuration
- Command Format
- Error Conditions
- Limitations
- INDEX
- Numerics
- A
- B
- C
- D
- E
- F
- H
- R
- S
- T
- U
- V
- w
- x
- Z
- Limited Warranty
- WARRANTY LIMITATION AND EXCLUSION
- DISCLAIMER OF UNSTATED WARRANTIES
- Limited Warranty Period
- To Be Eligible For Limited Warranty Coverage
- To Obtain Warranty Service
- LIMITATION OF LIABILITY
- IF YOU NEED ASSISTANCE....
- LP®840/ LP®850/ LP®860
- INSTALLATION & INTEGRATION PROJECTOR.
- USER'S GUIDE
- 18-01/04 Novena Square
Brand : INFOCUS
Model : LP850
Category : Projector