
HD Stick 510se - Digital decoder MEGASAT - Free user manual and instructions
Find the device manual for free HD Stick 510se MEGASAT in PDF.


| Product Type | Digital Satellite Receiver (HD) |
| Brand | Megasat |
| Model | HD Stick 510se |
| Tuner Type | DVB-S/DVB-S2 (MPEG-2/MPEG-4/H.264) |
| Frequency Range | 950 MHz to 2150 MHz |
| Input Connector | F-type, IEC 169-24, Female |
| Signal Level | -25 to -65 dBm |
| LNB Power | Vertical: +13V/14V, Horizontal: +18V/19V, 500 mA max |
| DiSEqC Control | Version 1.0, 1.1, 1.2, 1.3 (USALS) |
| Demodulation | QPSK/8PSK |
| Symbol Rate | 1~45 Ms/s (SCPC, MCPC) |
| Video Resolution | Up to 1080p (HDMI output) |
| Aspect Ratio | 4:3, 16:9 (Pan Vector/Letter Box) |
| Audio Decoding | MPEG / MusiCam Layer I & II, stereo |
| HDMI Output | Yes, with upscale |
| USB Port | USB 2.0 Host |
| SCART | TV SCART (RGB, CVBS, L, R out) |
| Power Supply | 100-240V AC, 50/60Hz, 6W (max 15W) |
| Standby Power | < 0.5 W |
| Weight (Net) | Approximately 130 g |
| Operating Temperature | 0°C to +40°C |
| Accessories | Remote control, HDMI cable, IR cable, Velcro strips, wall mount, batteries |
| Parental Lock | Yes (8 favorite groups) |
| EPG | 7-day Electronic Program Guide |
| Multi-language Menu | Yes |
Frequently Asked Questions - HD Stick 510se MEGASAT
User questions about HD Stick 510se MEGASAT
0 question about this device. Answer the ones you know or ask your own.
Ask a new question about this device
Download the instructions for your Digital decoder in PDF format for free! Find your manual HD Stick 510se - MEGASAT and take your electronic device back in hand. On this page are published all the documents necessary for the use of your device. HD Stick 510se by MEGASAT.
USER MANUAL HD Stick 510se MEGASAT
natural_image
Black MEGASAT USB connector with attached cable, showing port labels and connectors (no readable text beyond branding)4.6 Receiver Informationen....20
Antenneneinstellung
Transponderliste
D: DiSEqC1.0 / DiSEqC1.1
G: Start Kanalsuche
TV Programme
Bewegen
Kindersicherung
natural_image
Black NEGASAT device with USB cable and connector (no visible text or symbols on body)Stand: Januar 2013

Table of Contents Safety Precaution
Safety Precaution....03
1. Reference
1.1 General Features 04
1.2 Accessories....04
2. Basic Function
2.1 Front Panel 05
2.2 Rear Panel 06
2.3 Remote Control Unit 07
3. Installation and Connection
3.1 Connecting to Dish LNB and TV....08
4. Installation and Operation
4.1 Installation 09
4.2 Edit Channel 14
4.3 Setting 16
4.4 Times 18
4.5 Expansion....19
4.6 Set-top-box informations....20
4.7 Other useful information....21
5. Additional Information
5.1 Troubleshooting 23
5.2 Technical Specifications 24
5.3 Informations 25
This STB has been designed and manufactured to satisfy the international safety standards. Please read the following safety precautions carefully before operating this receiver.
Main Supply:
Before operating, please check the units operating voltage is 100\~240V AC 50/60Hz.
Overload:
Do not overload a wall outlet, extension cord or adapter, neither use damaged power cord or touch it with wet hand as this may result in electric shock.
Liquid:
The receiver shall not be exposed to dripping or splashing water, and that no objects filled with liquids, such as base, shall be placed on the apparatus.
Ventilation:
Keep the slots on top of the receiver uncover to allow sufficient airflow to the unit. Do not put the receiver on soft furnishings or carpets. Do not expose the receiver to direct light or do not place it near a heater or in humid conditions. Do not stack other electronic equipments on top of the receiver.
Cleaning:
Plug out the receiver from the wall outlet before cleaning. Clean the receiver by a soft cloth or mild solution of washing-up liquid (no solvents).
Connection:
Disconnect the receiver from the mains when you connect it to satellite LNB or disconnect it from LNB. Failure would possibly cause damage to the LNB.
Location:
Put the receiver indoor in order to avoid lightening, raining or sunlight.
Uncover:
Do not remove the cover, to reduce the risk of electric shock. Contact qualified and licensed service personnel to repair the receiver, or contact your dealer.
Megasat Werke GmbH | Industriestraße 4a | D-97618 Niederlauer | www.megasat.tv | info@megasat.tv
1. Reference 2. Basic Function
1.1 General Features
• DVB-S/DVB-S2 Satellite Compliant (MPEG-II/ MPEG-IV/ H.264)
• DiSEqC 1.0, 1.1, 1.2 & 1.3 (USALS) Compatible
• SCPC & MCPC Receivable from C/Ku Band Satellites LNB Supported
• Universal, Single, Single S & C Band Wide band LNB
- Sensitive Tuner
• PAL / NTSC Conversion
• Variable Aspect Ratio (4:3, 16:9) with Pan Vector or Letter Box
• Output Resolution: 576p & 576i, 720p, 1080i and 1080p
• HDMI with Upscale to Improve Picture Quality
• 8 Favorite Groups and Parental Lock Function
• 5 Kinds of Sort Function for Channels
• Teletext and Subtitle Supported (OSD)
• 7 days EPG (Electronic Program Guide) for On-Screen Channel Information
- Multi Language Menu
• Capacity for Sorting Multi Channel
1.2 Accessories
Unpack the unit and check to make sure that all of the following accessories are included in the packaging.
- 1 x User manual
• 1 x Remote Control Unit (RCU) - 2 x AAA Batteries
- 1 x HDMI cable.
- 2 x Velcro Strip
- 1 x IR cable
• 1 x Wall or TV- Holder
2.1 Front Panel
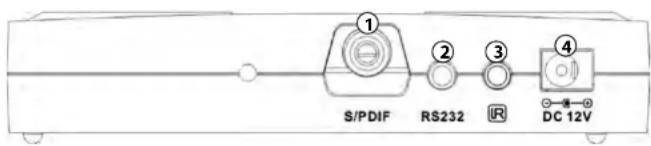
1. S/PDIF
Output for Digital Sound
2. RS-232
Connect to serial port of PC for software upgrade.
3. IR
For External IR Remote Eye
4. DC12V
Output for 12V power adaptor
2. Basic Function2. Basic Function
2.2 Rear Panel
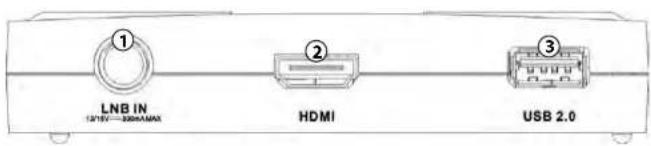
1. LNB IN 13/18V 500mA Max
Connect the Satellite Dish LNB.
2. HDMI
HDMI signal output
3. USB
USB 2.0 Host Port
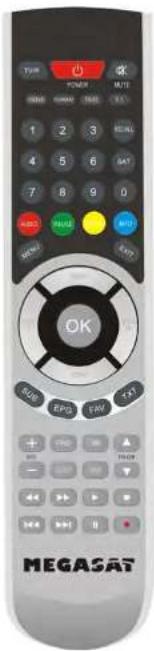
2.3 Remote Control Unit (RCU)
- TV/R Switch between TV and RADIO.
- POWER.....Switch the receiver on or off.
- MUTE.....Turn the sound On/Off.
- HDMI Switch the TV type.
- FORMAT....Switch 4:3 & 16:9 Screen Formats.
- TIME.... Setup event timer.
- SLEEP Setting the time for turning the receiver off
- NUMERIC KEY (0\~9) ... Change program or input number.
- SUB....Showing Subtitle information if the channels contains.
- EPG.....Show the TV/Radio electronic program guide
- FAV....Press to display favorite channel list you set before.
- TXT....Press to Display the current channel's TELETEXT information
- RECALL....Press to show the previous viewed channel.
- SAT.....Show the scanned satellite list.
- MENU....Press to enter main menu or exit to live channel.
- EXIT.....Exit current menu step by step.
- CH +/- Change TV Channels.
- VOL 1/....Change volume in viewing mode.
- OK.....Confirm the highlighted menu item, Open the program list.
- AUDIO.....Select or change the Audio.
- PAUSE.....Pause and Freeze the picture.
- ZOOM....Zoom in current TV channel
- INFO....Show the information of the current channel.
- FIND.....Quickly find channels
- OPT
- PAGE +/- Page up/down on menu.
- FI____Function key.
- USB Enter into USB menu, USB Device must be connected
- ▶ Fast forward.
- Fast backward.
- ▶ Start playing / Release pause.
- ■ Stop recording.
- Play previous item.
- Play next item.
- II Pause/time shift.
- ● Start recording (optional).
3. Installation and Connection
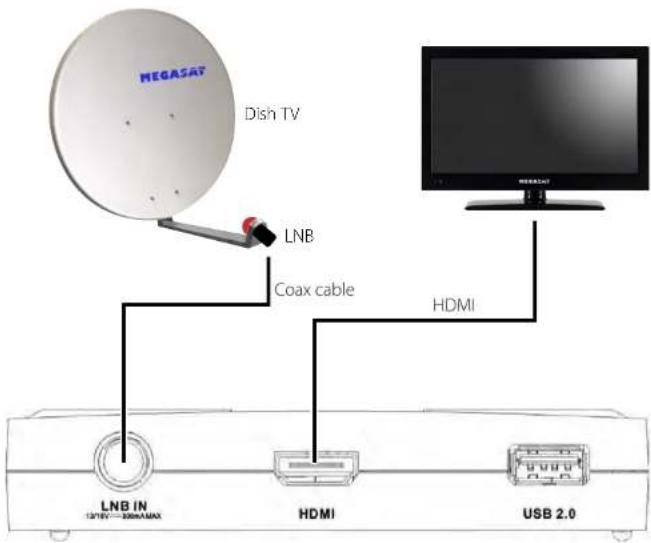
The following diagram shows you how to connect the HD receiver, TV, LNB and other equipment, please read this first if you are not sure about the connection, and it will guide you to the correct connection.
3.1 Connecting to Dish LNB and TV
You can connect one fixed dish LNB directly to the LNB IN, or connect at least two dish LNB by DiSEqC Switch, you can also connect to HH mount dish LNB.
4. Installation and Operation
After connecting the receiver to other required equipment, turn on the receiver, there should be no channel information available at first. You need to follow the procedure to setup your receiver to search the channel.
Main Menu
Press MENU button to activate main menu, main menu consists of Installation, Service organization, Output, System, Timer, USB.
Use UP/DOWN button to select your subject and press OK to confirm your selection and enter that sub menu, press EXIT button you can return to the previous menu.
4.1 Installation
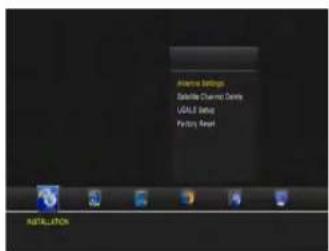
Select Installation, the picture will be displayed like this, here you can do Dish setup, Restore Factory Default, Software Update, Save or Load STB data
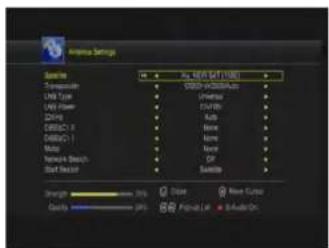
Antenna Settings
Press OK to Enter Dish setup, here you can make Satellite Scan, Satellite Edit, TP Search, TP Edit and other related Functions.
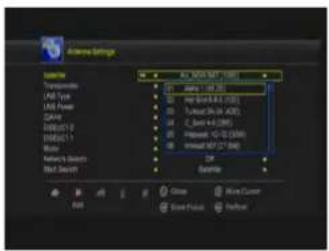
A: Satellite List
This window shows the pre-stored satellite list, in this menu, you can Add, Edit, Delete, Satellites.
4. Installation and Operation4. Installation
Add
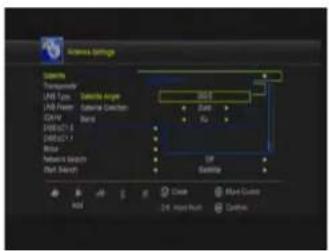
Add satellite by using the Red key. Here you can input new Satellite angle, Satellite Direction (east, west), Band (ku,c). OK to confirm the setting and this new satellite will be added to the end of the Satellite list.
Edit
Select the satellite then press green button. You can change the satellite's name, angle, direction and band. Input the characters which you want to edit using the browser.
Delete
You can delete the user's satellite. Select the satellite that you want to delete from the satellite list. You will be asked to confirm whether delete the satellite or not. If you press ok key, all the channels in the selected satellite and transponder will be deleted, and the selected satellite will disappear.
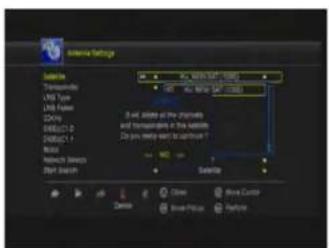
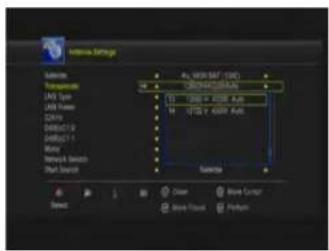
Transponder List
If you change the satellite, the transponder will be changed automatically. You will find the transponder list of selected satellite here. Press the sal button can switch the TP and SAT list. In this menu you can Add, Edit, Delete, Transponder. The Operation similar to the above, you can input the transponder frequency, symbol rate, and choose polarization (Ver, Hor)
Here you need to check the LNB frequency according to your antenna, set the correct frequency or define yourself, and keep LNB power to be 13/18V.
C: 22KHz
In case you are using two antennas connected to a 22KHz tone switch box. You can supply either 22KHz by setting "OFF" to select antenna.
D: DiSEqC1.0 DiSEqC1.1
If you connect antenna to DiSEqC Switch, you need to specify the DiSEqC input to which your selected satellite have been configured.
E: Motor
When you enable this option, and press OK, you will get this window to show you how to adjust position of the dish.
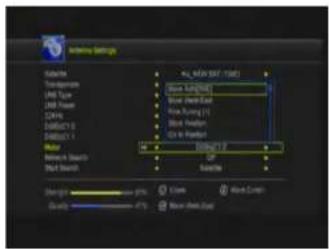
4. Installation and Operation4. Installation
Move Auto [W/E]
Press RIGHT/LEFT button, the dish will be motorized to East/West continuously, it will stop until it find the best signal.
Move Continue
Press RIGHT/LEFT button, the dish will be motorized to East/West continuously until you press LEFT/RIGHT again.
Move Step
Press RIGHT/LEFT button, the dish will be motorized to East/West by step.
Store Position
Save the current position you searched for the selected satellite.
Go to Position
Press OK button to move the dish to the stored position.
Go to Reference
Press OK button to move the dish to 0 position.
Set West Limit
Enable West limit.
Set East Limit
Enable East limit.
Disable Limit
Disable West limit and East limit.
F: Channel search
In this menu, you can select scan mode like TP/blind/network scan, you also can select all Channels & FTA Channels by setting the search option.
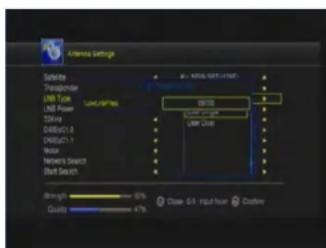
G: Start Search Channels
After set above step, press ok you will be asked whether delete all exist channels if there are existing channels on selected satellites or TPs, you can choose yes or no, will start searching. During searching the TV Channel and Radio Channel will be listed separately.
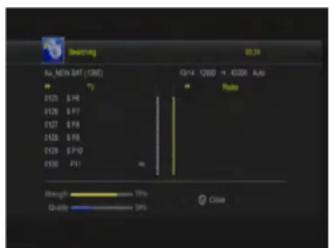
Satellite Channel Delete
In this menu, you can delete the undesired Channel list in different option.
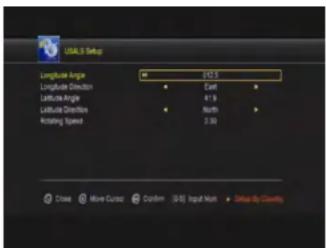
USALS Setup
In this menu, you can set up USALS setting, and then you can use your DISH motor.
Factory Default
You can erase all the channels and settings. If select All, press OK you will be asked to select "start" or "quit". If select "start" all data and setting will be lost. (as well as channel list, radio list and scramble channel list). In the end, you also can save or load default channel list.
4. Installation and Operation4. Installation
4.2 Edit channel
In this menu you can set program edit, like delete, lock, rename, move and swap the selected channel, set FAV and so on.
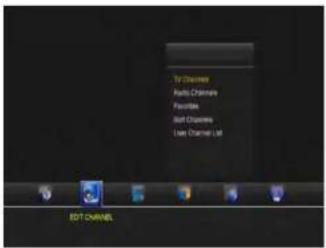
TV Channels
Here you can Select Channel, Delete Channel, Skip Channel, Move Channel, Lock Channel. Select TV Channels, you will get this window.
Move
Press OK to select the channel you want to move, and move to the position you like, or just input the numeric key, the channel you selected will move to that position
Delete
I here you can delete the channel you choose, and press OK to select and press again OK to confirm delete
Lock
Here you can lock one channel, press OK to input password, and you can have a channel with locking.
Rename
Select channel that you want rename from channel list, press F1 button, then using the UP/ DOWN /LEFT /RIGHT keys to select characters which you want to edit. Press OK to confirm your selection. In this menu, you can set the word with the extend. Caps on or off.
Swap
You can select the channel that you want to swap from the channel list, press F2 button, you will be asked to swap the channel to put where, input the destination number and press OK. Then you can swap one channels from one position to another.
NOTE: Radio Channels operation similar to the above
Favorites
Press MENU button, here you can sort the channels in different type, such as news, movies, music, sports. Using the UP/DOWN keys select any sort press OK, then you can set the channels FAV type by pressing FAV key.
NOTE: Radio favors operation similar to the above.
Sort Channels
In this menu, user can sort the channel list in different option
User Channel List
Save User Data
Enter this menu, you can save the STB data to your STB when you press OK on RCU, STB data will be saved automatically
Load User Data
In case you make a factory default, or you delete the channel list by mistake, enter this menu, you can load the STB data for which you already saved from flash to your STB.
4. Installation and Operation4. Installation
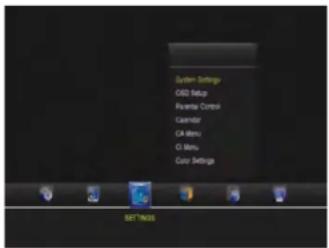
4.3 Settings
Here you can setup TV output and Video output according to the standard of your country.
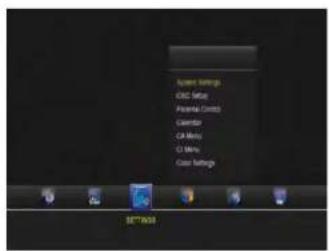
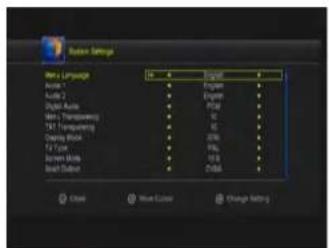
System Settings
In this menu, you can choose MENU LANG, set AUDIO LANG, setting Digital Audio, menu transparency, TXT transparence, Display MODE, TV Type, SCREEN MODE, SCART OUTPUT etc... all in this menu.
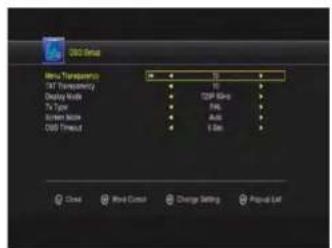
OSD Setup
In this menu, user can setup Menu Transparency, TXT transparency, HDMI DISPLAY Mode, TY Type etc ...
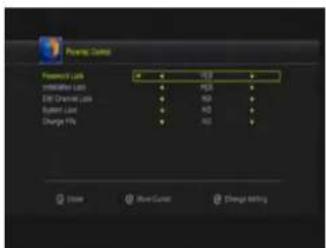
Parental Control
In this menu, you can set the password to Installation, Edit Channel, System, and also you can change the password, this is for the purpose of children misplaying with your STB.
Calendar
In this menu, user can view calendar
CA MENU (CONAX)
In this menu, insert the smart card, and you will get smart card info, and you can watch the scrambled channels.
CIMENU
Insert your CAM card (with Smart Card inside) to CI slot, you can watch scrambled channels.
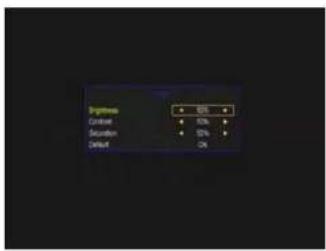
Color Settings
In this menu, user can adjust the brightness, Contrast, Saturation of Video picture.
4. Installation and Operation4. Installation
4.4 Times 4.
Time Settings
In this MENU, you can change the TIME MODE and setting time manually, or adjust GMT time.
The default time setup is auto, but you can select manual and input manually, select the time zone of your country and you will get the correct current time which is based on TDT (Time and Data Table) in the stream of the current channel service.
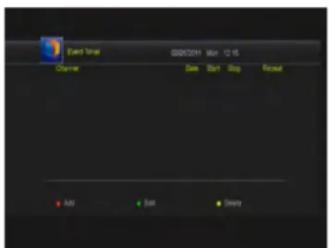
Event Timer
In this menu, you can set up the timer for event you have selected, so the STB will change the channel you already set up when the event time is on due.
Sleep Timer
In this menu, you can set the sleep timer 15min, 30, 45, etc.. 120min, so that the STB will power off automatically on time.
Standby Hour
In this menu, you can set the standby hours of your STB, so that your STB will power off automatically on time.
APD Standby (Automatically Power Down)
Set this menu ON, the receiver will automatically go into Standby Mode if receiver has no any operation executed after 3 hours normal working with power.
Games
Some classic games which will give your some happy times to play with !!
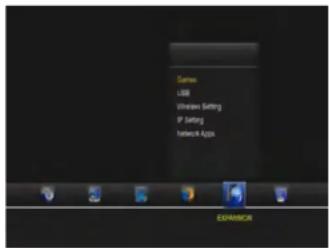
USB (Worked with a USB Device)
USB menu only working when a USB device is connected with your STB!!
A. Tool
Press RED button, you will have tool function, and you can Rename Delete, Move, and Create new Folder, Sort, and Format disk in this menu to the USB device connected to your STB
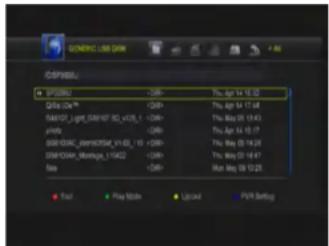
B. Play Mode
Press GREEN button, you will have Loop, and Slideshow Interval, and Photo view mode, to gain the viewing experience of your multimedia pleasure
C. Upload
Press YELLOW button, you will have upload function, and you can upload data to your USB or to your ftp.
D. PVR Setting (optional)
Press PVR Setting, you can set the PVR path, and some other settings, for example, RECORD MODE, RECORD TIME, etc....
Note: USB support FAT & FAT32, NTFS
4. Installation and Operation4. Installation
Wireless Setting (Worked via a Separate WIFI USB DONGLE)
This receiver support WIFI connection via a separate USB WIFI Dongle, you can connect to your WIFI network in this menu (Support only rt5370 chipset USB WIFI DONGLE)
IP Setting
Plug the internet cable into LAN port of STB, and go to this menu, if you connect it first time to internet, please press RED button (AUTO IP), and then press GREEN BUTTON (Test Link), if it is showing "It is ok to connect to internet." means you are successfully connected!
Network APP
In this menu, you can enjoy a lot of internet function via receiver for more interactive fun!!
FTP Download
In this MENU, you can connect the your local PC in the same internet (LAN AREA) and you can visit your ftp server, and download the files from your ftp servers to your USB in STB !!
Weather
In this menu, user can view the daily weather forecast of the city he likes, and Press RED button to edit city name, Press LEFT/RIGHT button to input city name, and Press OK to exit, wait a sec, you will have the city's weather info
RSS
You can view famous RSS news sites in this menu, also user can add and delete the personalized RSS sites
YouTube
User can view the Youtube video in this menu
4.6 Set-top-box Informations
Here you can get general information about the software and hardware version of the set-top-box.
4.7 Other useful information
This will guide you on how to use general info while watching TV program or listening Radio program with some buttons on your RCU.
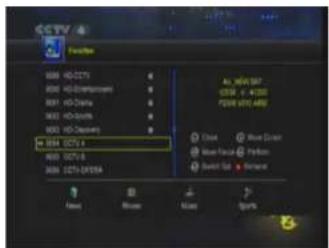
FAV
In viewing mode, you can get the favorite channel group by pressing FAV, press FAV button to change category. If you did not set favorite channel in advance, it will show with no FAV program.
EPG
In this view, you can get the electronic program guide if applicable. You can get the detailed information about that program by pressing OK button
Book
You can Switch Pre/Next Day EPG by Pressing Red/Yellow Key. In this menu, Press Blue key go to Book. Here you can set your favorite channels to begin broadcasting at future time you set, including both TV and Radio, press green button you can get the schedule directly. Here you can Add, Edit and Delete the event which you set.
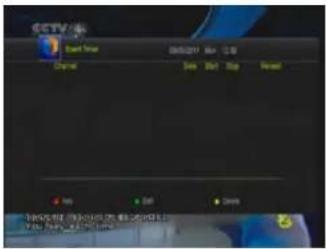
Note: You can add multi-groups event timer.
4. Installation and Operation 5. Additional Information
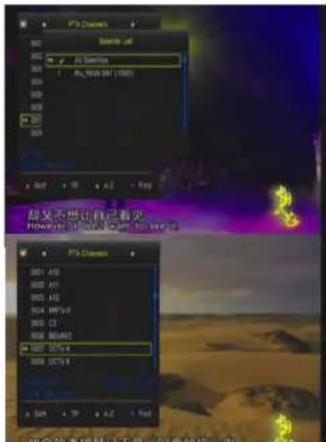
SAT
Press SAT button on the remote control, you will get this menu which contains the satellites you searched and stored, select one satellite and press OK, all channels will be listed under that satellite you selected.
Channel List-OK
In viewing mode press OK button and you will get this window. Press +/- to view channel in different types, ALL, FTA, Scrambled and MPEG4/H264. Press SAT button, select one satellite and press OK, all channels will be listed under that satellite you selected.
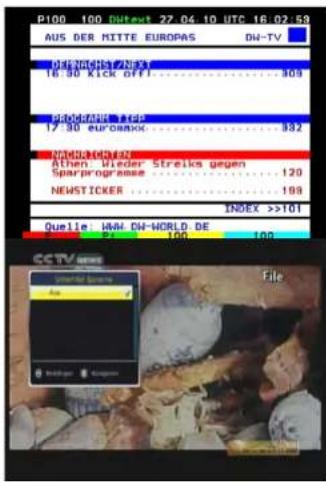
TXT:
Show the teletext content if teletext is transmitted
Subtitle
Press SUB button to show subtitle.
5.1 Troubleshooting
You might meet abnormal working of this STB with various reasons. Check the following which may help you.
| Problem Possible causes | What to do | |
| LHD on the front panel fail to light up/s not lit. | Main supply cable is not connected. | Check if The main supply cable is plugged into the power socket. |
| No picture or sound. | Satellite dish is not aiming to satellite accurately. No signal or weak signal. The LNB is faulty. The cable is faulty. | Adjust the dish. Check the signal strength indicator in one of the channels search submenus. Check the cable connections, LNB and other equipment connected to LNB & receiver, or adjust dish. Replace the LNB. Replace the cable. |
| Bed picture/blocking error | Satellite dish is not aiming to the satellite accurately. Signal too strong. Satellite dish is too small. LNB noise factor too high. The LNB is faulty. | Adjust the dish. Connect an attenuator to LNB input. Change to a larger dish. Change LNB with lower noise factor. Replace the LNB. |
| No startup menu on screen after turning on STB for the first time. | The system is connected by SCART cable and the TV is not in AW/EXT mode. | Switch the TV to the appropriate AV input. |
| the remote control is not working. | Battery exhausted. Remote control is not aimed correctly STB is in standby mode. | Change the batteries (both). Aim the remote control at the STR. Check that nothing blocks the front panel. Check if IFO indicator on the front panel is showing the time, press the power button to switch off standby mode. |
| You have forgotten your password. | Contact the dealer or Service Provider. They will help you set it up again. | |
| Poor picture quality or less channels in scanning. | Low LNB power or signal loss in cable. | Change the LNB power to 14V/13W in Antenna setup menu. |
5. Additional Information 5. Additional Information
5.2 Technical Specification
Tuner & Demodulator
| Frequency Range | 950 MHz to 2150 MHz |
| Input Connector | F-type, IEC 169-24, Female |
| Signal Level | -25 to -65 dBm |
| RF Impedance | 75 , unbalanced |
| IF Band width | 55 MHz/8Hz(Per 5Msps) |
| LNB Power & Polarization | Vertical: +13 V, 14V +/-5%Horizontal: +18 V, 19V +/-5% Current: 500 mA Max. Overload Protection |
| LNB Tone Switch | 22KHz/2KHz, 0.6Vpp+/-0.2V |
| DiSEqC Control | Version 1.0/1.2 Compatible, Tone burst A/B |
| Demodulation | QPSK/8PSK |
| Symbol Rate | 1~45Ms/s/SCPC,MCPC |
| FEC Decode | Convolution Code Rate 1/2, 2/3, 3/4, 5/6 and 7/8with Constraint Length K=7 |
MPEG
| Transport Stream | MPEG-4/II.264, MPEG-2 ISO/ILC 13818 |
| Profile Level | MPEG-4/AVC, MPEG-2 MP@ML, MP@HL |
| Input Rate | 15 Mbit/s Max |
| Aspect Ratio | 4:3, 16:9 |
| Video Resolution | 720 x 5/6, 720 x 480, 1280 x 720, 1920 x 1080 |
| Audio Decoding | MPEG / MusiCam Layer I & II |
| Audio Mode | Single channel/Dual channel/Joint stereo/Stereo |
| Sampling | 32, 44.1 and 48 KHz |
A/V and Data In/Out Connector
| TV SCART | RCB, CVBS, L, R out |
| LNB IF Input | F type, IEC 169-24 Female |
| Power Supply | |
| Input Voltage | 100 - 240V AC, 50/60Hz, |
| Power Consumption | 6W (max. 15 W) |
| Standby Power C | 0,5 W |
| Protection | Separate internal fuse. Input shall have lightening Protection |
Physical Specification
| Weight (Net) | around 130 g |
| Operating Temp | 0^ + 40^ |
| Storage Temp | -40^ to +65^ |
5.3 Information
Hinweis:
Status: January 2013
- Antenneneinstellung
- Transponderliste
- D: DiSEqC1.0 / DiSEqC1.1
- G: Start Kanalsuche
- TV Programme
- Bewegen
- Kindersicherung
- Table of Contents Safety Precaution
- Reference
- Basic Function
- Installation and Connection
- Installation and Operation
- Additional Information
- Main Supply:
- Overload:
- Liquid:
- Ventilation:
- Cleaning:
- Connection:
- Location:
- Uncover:
- Reference 2. Basic Function
- General Features
- Accessories
- Front Panel
- S/PDIF
- RS-232
- IR
- DC12V
- Basic Function2. Basic Function
- LNB IN 13/18V 500mA Max
- HDMI
- USB
- Remote Control Unit (RCU)
- Connecting to Dish LNB and TV
- Main Menu
- Installation
- Antenna Settings
- A: Satellite List
- Installation and Operation4. Installation
- Add
- Edit
- Delete
- Transponder List
- C: 22KHz
- D: DiSEqC1.0 DiSEqC1.1
- E: Motor
- Move Auto [W/E]
- Move Continue
- Move Step
- Store Position
- Go to Position
- Go to Reference
- Set West Limit
- Set East Limit
- Disable Limit
- F: Channel search
- G: Start Search Channels
- Satellite Channel Delete
- USALS Setup
- Factory Default
- Edit channel
- TV Channels
- Move
- Lock
- Rename
- Swap
- Favorites
- Sort Channels
- User Channel List
- Save User Data
- Load User Data
- Settings
- System Settings
- OSD Setup
- Parental Control
- Calendar
- CA MENU (CONAX)
- CIMENU
- Color Settings
- Times 4.
- Time Settings
- Event Timer
- Sleep Timer
- Standby Hour
- APD Standby (Automatically Power Down)
- Games
- USB (Worked with a USB Device)
- Tool
- Play Mode
- Upload
- PVR Setting (optional)
- Wireless Setting (Worked via a Separate WIFI USB DONGLE)
- IP Setting
- Network APP
- FTP Download
- Weather
- RSS
- YouTube
- Set-top-box Informations
- Other useful information
- FAV
- EPG
- Book
- Installation and Operation 5. Additional Information
- SAT
- Channel List-OK
- TXT:
- Subtitle
- Troubleshooting
- Additional Information 5. Additional Information
- Technical Specification
- Information
- Hinweis:
Brand : MEGASAT
Model : HD Stick 510se
Category : Digital decoder