
Deltamat TFG 7400eco - Dishwasher BARTSCHER - Free user manual and instructions
Find the device manual for free Deltamat TFG 7400eco BARTSCHER in PDF.


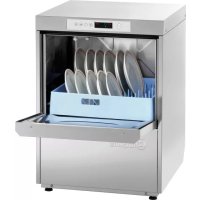
| Product Type | Undercounter Dishwasher |
| Model | Deltamat TFG 7400eco |
| Brand | Bartscher |
| Dimensions (W x D x H) | 600 x 600 x 850 mm |
| Weight | Approx. 55 kg |
| Power Supply | 230 V / 50 Hz / 3.4 kW |
| Water Connection | Cold water, 3/4" hose, max. 60 °C |
| Rack Capacity | 1 rack (GN 1/1 or 500x500 mm) |
| Cycle Time | Approx. 90 seconds (wash + rinse) |
| Programs | 1 wash cycle with final rinse |
| Water Consumption | Approx. 3 L per cycle |
| Detergent Dispenser | Integrated, adjustable |
| Rinse Aid Dispenser | Integrated, adjustable |
| Safety Features | Door safety switch, overload protection, anti-flood system |
| Materials | Stainless steel interior and exterior |
| Spare Parts Availability | Heating elements, pumps, control boards, door seals |
| Repairability | Modular design, accessible components |
| Compliance | CE, GS, EMC |
| Noise Level | < 60 dB(A) |
Frequently Asked Questions - Deltamat TFG 7400eco BARTSCHER
User questions about Deltamat TFG 7400eco BARTSCHER
0 question about this device. Answer the ones you know or ask your own.
Ask a new question about this device
Download the instructions for your Dishwasher in PDF format for free! Find your manual Deltamat TFG 7400eco - BARTSCHER and take your electronic device back in hand. On this page are published all the documents necessary for the use of your device. Deltamat TFG 7400eco by BARTSCHER.
USER MANUAL Deltamat TFG 7400eco BARTSCHER
Instructions for use and maintenance

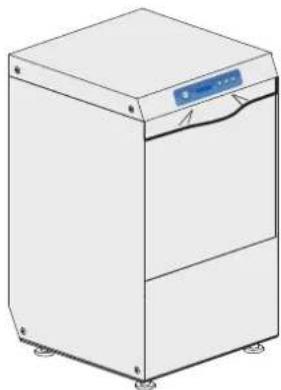
natural_image
Line drawing of a stainless steel kitchen appliance with a blue control panel on top (no text or symbols)
natural_image
Illustration of two hands shaking, no text or symbols presentThank you for choosing our machine.
The instructions for installation, maintenance and use found on the following pages have been prepared to ensure a long life and perfect operation of your unit.
Please, do follow the instructions carefully.
We have designed and built this machine using the latest innovative technologies. Now you shall take good care of it.
Your full satisfaction is our greatest reward.
CONTENTS Page
WARNINGS 27
1. MACHINE DESCRIPTION 28
1.1 Machine description 28
1.2 Machine features 30
2. OPERATION 31
2.1 Control panel and relative symbols 31
2.2 Machine start-up 31
2.2.1 Start-up 31
2.2.2 Operation 32
2.2.3 Switching OFF 33
2.3 Detergent use 33
2.4 Rinse aid use 34
2.5 Drain pump system 34
2.6 Regeneration device (optional) 34
WARNINGS 36
3. ECOLOGICAL ASPECTS 37
3.1 Recommendations for optimal use of energy, water and additives 37
4. H.A.C.C.P. AND HYGIENE REGULATIONS 37
5. MAINTENANCE 38
5.1 Routine maintenance 38
5.2 Extraordinary Maintenance - by qualified Service Personnel 39
6. MACHINE INSTALLATION 40
6.1 Handling 40
6.1.1 Handling the product 40
6.1.2 Storage 40
6.2 Prepare for installation 40
6.2.1 Room features 40
6.2.2 Electrical connection - Characteristics 40
6.2.3 Water supply connection - Characteristics 41
6.2.4 Steam evacuation 41
6.3 Installation 41
6.3.1 Positioning the machine 41
6.3.2 Electrical connection 42
6.3.3 Water connection 42
6.3.4 Start-up 42
-
SIGNALS AND ALARMS 43
-
ENVIRONMENTAL ASPECTS 44
8.1 Packaging 44
8.2 Disposal 44
- TROUBLESHOOTING 45

READ THESE INSTRUCTIONS CAREFULLY BEFORE INSTALLING THE MACHINE.
WARNING: FAILURE TO COMPLY, EVEN PARTIALLY, WITH THE PRESCRIPTIONS IN THIS MANUAL WILL RENDER THE PRODUCT WARRANTY NULL, AND THE MANUFACTURER SHALL NOT BE LIABLE.

WARNINGS
This instruction booklet must be kept with the machine for future consultation. If this machine is sold or transferred to other users, make sure the booklet always goes with the unit so that the new owner can have all the necessary information on operations and all relevant instructions.
The instruction booklet must be carefully read before installation and before starting the machine.
These instructions are supplied to safeguard the users in compliance with Directive 2006/95/CE as amended and the “harmonized product Technical Standard” EN 60335-1 and EN 60335-2-58.
- THE CONNECTION TO THE ELECTRICAL AND WATER NETWORKS, FOR INSTALLING THIS UNIT, MUST BE CARRIED OUT BY QUALIFIED OPERATORS ONLY.
- The user shall not carry out any repair and/or maintenance operations. In any case contact qualified personnel.
- Only qualified personnel can access the control panel, when the main power switch is OFF.
• Servicing of this machine must be performed by authorized personnel only.
N.B.: Use genuine spare parts only. Non-genuine parts will void the warranty and the manufacturer will take no responsibility for any damage.
- Follow the instructions given in the manufacturer's booklet for cleaning operations (chap.5).
- This machine must only be used by adults. This is a professional machine to be used by qualified personnel, installed and repaired exclusively by qualified Technical Personnel. The Manufacturer declines any responsibility for improper installation, use, maintenance or repair.
- The appliance shall not be used by children or persons with reduced physical, sensory or mental capabilities, or lack of experience and knowledge.
• Children must be attended and shall stay away from this machine.
NOTE: The manufacturer declines any responsibility for accidents to people or any damage deriving from failure to observe the above listed instructions.
1. MACHINE DESCRIPTION
1.1 Machine Description
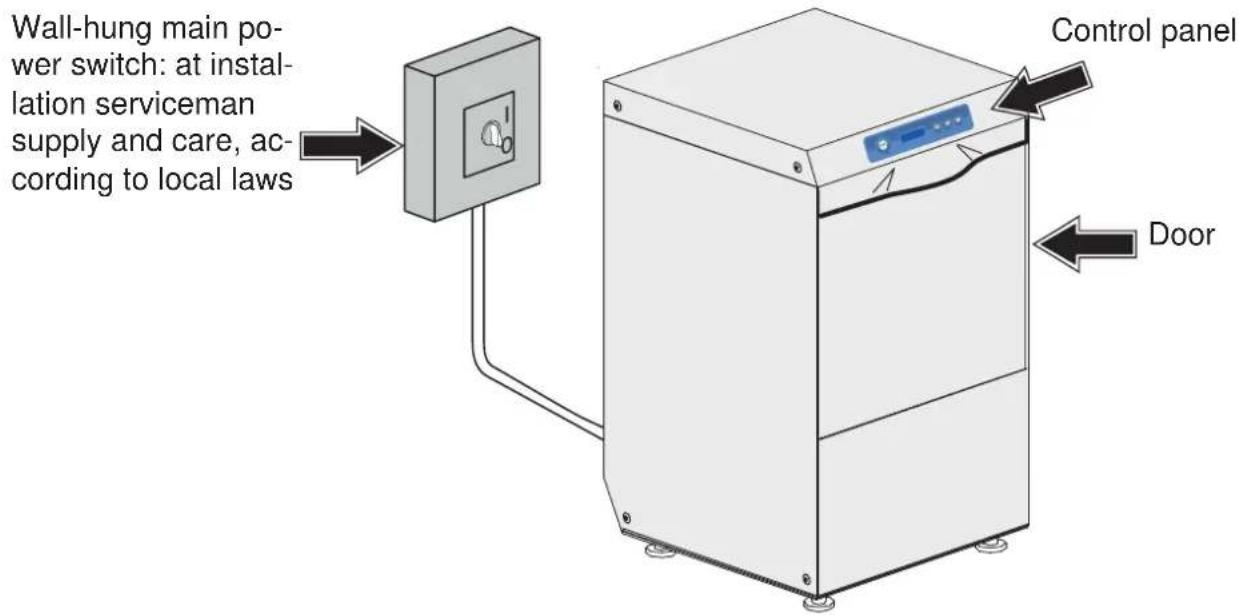
Standard equipment for machine with a 50mm rack:
nr. 1 glasses rack and
nr. 1 plates rack 500x500mm
Capacity per plate rack:
12 soup plates or
18 flat plates
Max ∅ = 400 mm

natural_image
Illustration of two blue plastic storage compartments with coiled and perforated metal components (no text or symbols)
natural_image
Illustration of two storage bins with circular compartments and mesh patterns (no text or symbols)Standard equipment for machine with a rack of 50: nr. 1 cutlery basket

Standard equipment for machine with a 40mm rack:
option A) nr. 2 square glasses racks 400x400mm
or
option B) nr. 2 round racks ∅ 400mm
nr. 1 support for round rack


natural_image
3D diagram of two rectangular plastic crates with circular compartments, one containing a grid pattern (no text or symbols)Standard equipment for machine with a 40mm rack:
nr. 1 cutlery basket and
nr. 1 saucers holder

natural_image
Diagram showing a 3D grid structure and two cylindrical containers with food items (no text or symbols)Optional:
Probe lack
detergent/rinse aid

natural_image
Black and white illustration of a mechanical device with a curved handle and attached lever (no text or symbols)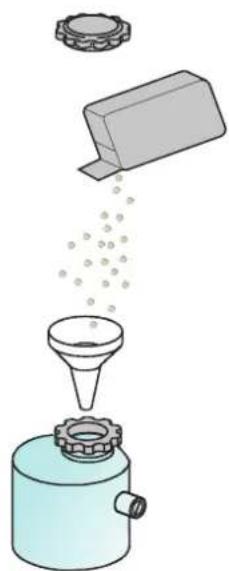
natural_image
Illustration of a funnel pouring liquid into a container with a gear (no text or symbols)Optional:
Water softener
To operate the machine, 3 connections are needed:
- Electrical;
• Water supply; - Water drain.
This is a cycle machine comprising a 60^ wash cycle with detergent, a 90^ rinse cycle with injection of rinse-aid in the boiler hull.
This machine is designed exclusively for washing dishes, glasses and various pots and pans with human food type of residue.
Any other use is deemed improper.
DO NOT wash articles polluted with petrol, paint, chips of steel or iron, fragile objects or material not resistant to the washing process.
Do not use acidic corrosive chemical products or alkaline and solvents or chlorine based detergents.
Do not open the machine door when operating.
In any case, the machine has a special safety device which immediately stops the unit if the door is open, thus preventing water spillage.
Always switch the machine completely off and drain the water tank, before accessing inside.
The machine is equipped with a built-in drain pump device.
The drain pump device is used to keep the correct water level in the wash tank.
To drain completely the wash tank at the end of the day, see chap. 2.5 "Drain pump system".
1.2 Machine features
The machine has a noise level below 65 dB(A).
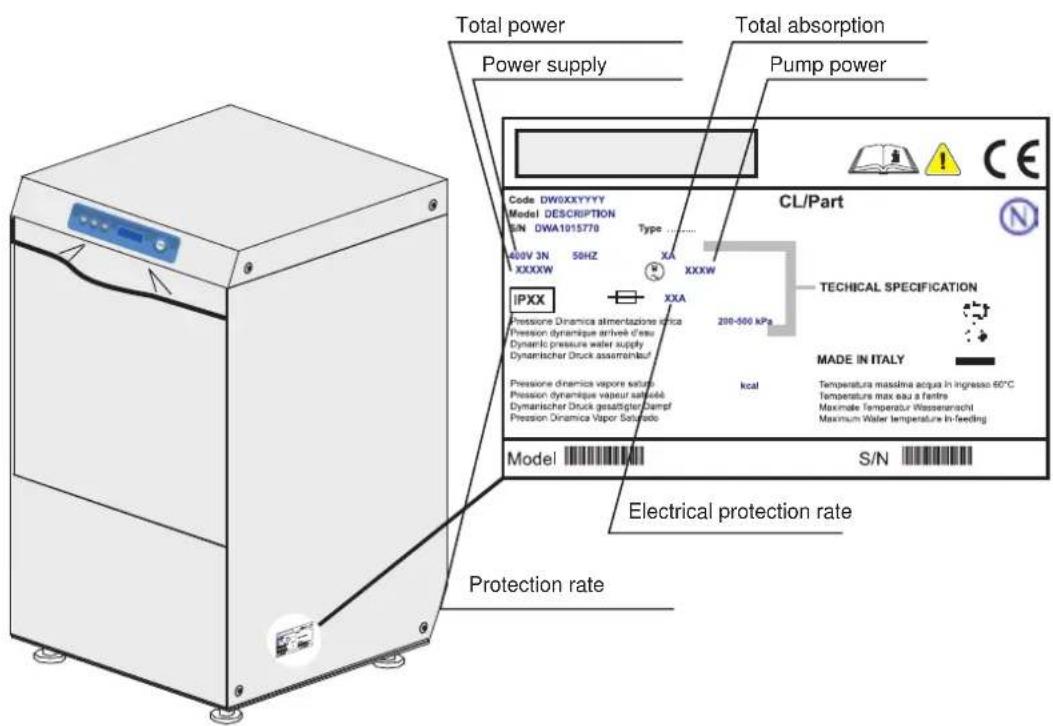

Fig. 1
2. OPERATION
2.1 Control panel and relative symbols

flowchart
graph LR
    A["START"] --> B["B"]
    B --> C["C"]
    C --> D["D"]
    D --> E["E"]

natural_image
Illustration of hands using a cleaning machine to clean or store contents (no text or symbols visible)Fig. 2 (for machine with a 40mm rack)
A) START push-button to start up cycle / select cycle
B) Display
C) Switching – On / STAND BY button
D) Regeneration push-button (optional)
E) Drain Push-button
2.2 Machine start-up
2.2.1 Start-up
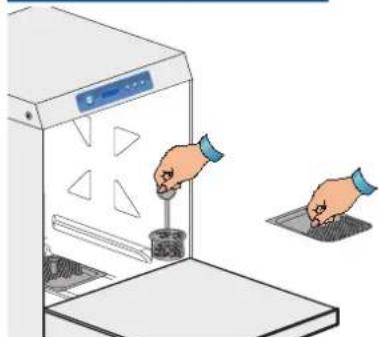
- Check if the pump suction filter is properly inserted in its seat in the wash-tank bottom (see picts. 2 and 3).
This filter must be cleaned every 20 wash-cycles or whenever necessary.
DO NOT use the appliance without the filters.
• Put the surface filters in place (see picts. 2 and 3). - Shut the dishwasher door.
• Turn the water valve "open".
• Turn the main power switch ON.
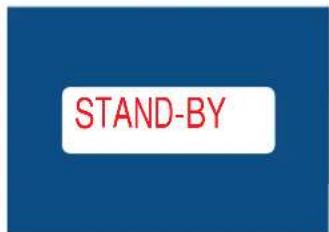
• The machine is on "STAND-BY".
In the "B" display, the message "STAND-BY" will appear.

natural_image
Illustration of hands operating a kitchen appliance with a tray and a control panel (no text or symbols)Fig. 3
(for machine with a 50mm rack)
- Turn the button "C".

The machine start will be active when the "A" button will light.
On the "B" display the "STAND-BY" message will be off.

The button "A" will light in white for a few seconds, while loading the software. After loading is complete, the button will light in red. This happens only at the first start of the day of the machine.
The water filling of the wash-tank is done by pre-heating via the boiler.
On the "B" display, the messages "FILLING WATER" and "HEATING" will alternate.

The display will read "HEATING", till wash-tank and boiler will reach the set temperatures. During this process, the machine will not allow any cycle selection or start.
If the machine is in standard configuration, with hot water in-feed (50°C), with no extra power, the "A" button will light in green after some 20 min.
natural_image
Diagram of a mechanical or electrical setup with a blue component and directional arrows, no visible text or symbols.Fig. 4
2.2.2 Operation
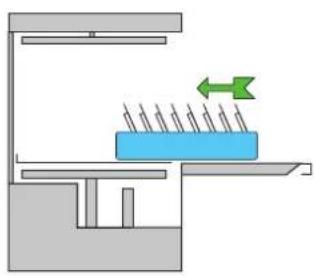
- Insert the rack filled with dishes to wash.
The plates must be correctly placed in the rack (see pict. 4). - Select the wanted washing cycle by pushing the green START button "A".
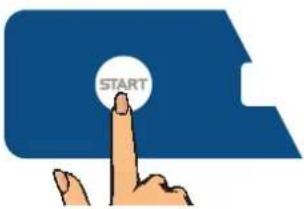
The display will show in sequence all these available programs.
Once the wanted program is displayed, do release the button.
Available programs for machine with a 40 mm rack:

Available programs for machine with a 50 mm rack:

- All wash-time long the display will read the wash-tank temperature and temperature.
Below the temperatures indications line-bar is displayed to show the progression of the wash-cycle.

At the end of the washing cycle, a hot rinse cycle will take place A blue/green flashing on the button "A" will indicate the "CYCLE ENDED".

NB: At cycle-end, keeping the door closed, dishes will not dry. Take out the rack or keep the door open to allow evaporation, helping the drying of the dishes.
When opening the door, the button "A" will turn green, indicating that the machine is ready for a new wash-cycle.
NB: The last cycle used remain in the memory of the electronic board, ready for the next use.
We recommend to change water at least twice a day, or whenever needed.
2.2.3 Switching OFF
- Turn the button "C". The display will show "STAND-BY".

natural_image
Illustration of hands using a tool to clean or store items on a machine (no text or symbols visible)
natural_image
Illustration of hands using a computer to test a test machine (no text or symbols present)- At the end of the day, clean the machine (see chap. 5 "Maintenance").
- Shut the water valve.
- Switch the main power switch OFF.
2.3 Detergent use
The machine has a standard detergent dispenser. The machine automatically sucks the product.
The detergent shall be the NO FOAM type, suitable for industrial dishwashers.
The use of good quality liquid detergents is recommended.
Follow the manufacturer's recommendations for chemical dosage, related to the local water hardness. 1cm. of the product drawn into the tube is equal to about 0.15 g. A correct amount of detergent is very important for a successful wash.


Should the detergent lack, the display will show "DETERGENT LEVEL" (only with optional "Sensor for Chemicals Low Level").

2.4 Rinse aid use
The machine has a standard rinse aid dispenser. The machine automatically sucks the product.
The recommended amount is 2-5 cm of product measured on the suction hose.
1 cm of the product drawn into the hose is equal to about 0.13g. A correct amount of rinse aid is very important for a quick and proper drying.
NB: Excessive amount of chemicals or foam will reduce wash pump efficiency.
Should the detergent lack, the display will show "RINSE-AID LEVEL" (only with optional "Sensor for Chemicals Low Level").

2.5 Drain pump system
Press the key "E" till the display will show "TANK DRAINING".


The discharge pump will automatically drain the wash-tank.
During the drain process, the button "A" will light in blue and will be flashing.
After the draining is complete, the machine will turn automatically in "STAND-BY" mode.


If you want to refi ll the machine for a new cycle, see chap. 2.2.
2.6 Regeneration device (optional)
Should the machine be equipped with a water-softener circuit, this will be fully automatic. When needed, a 120" regeneration cycle will automatically activate. During this phase, the display will show the letter "R".
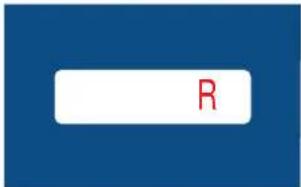
If needed, the "R" cycle can be activated even during the wash-tank loading. If the activation happens during the wash-cycle, this will be elongated.
The circuit board is designed to call periodically for a 20 min. manual regeneration cycle. This regeneration cycle can also be activated by the user, should the rinse quality be dissatisfactory.
When the display shows "PRESS WATER SOFTNER REGENERATION KEY"

or when the users want to activate the “R” regeneration cycle, start the following procedure:
- Should the display show "SALT LEVEL", fill the special container, placed on the inside of the tank, with coarse salt (1-4 mm. grains), being careful not to spill it into the sump. A strong concentration of salt can negatively affect the correct functioning and service life of the machine and generate rust and the steel oxidation. After filling with salt, lock the plug tightly.
- With the machine in "STAND-BY" mode, the water valve open, the wash-tank empty and the door shut, press the "D" button. The button "A" will start flashing in blue.

- During this cycle, the display will show the steps in progress and the time remaining.

• This cycle cannot be interrupted and the normal operation is inhibited.
- At the cycle end, the machine will switch in "STAND-BY" mode, automatically.
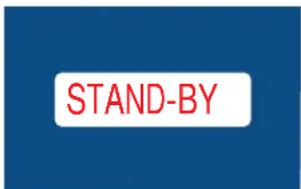
At this moment, it is possible to switch the machine OFF (see par. 2.2.3 Switching OFF) or start a normal operation phase(see 2.2.2 Operation).
In case of water hardness above 35^ f an external water softener is recommended.
WARNINGS:
• Do not slam the door when opening and closing.
• Do not put material or objects on the machine.
- The machine has an IPX3 protection rating against accidental water splashes and is not protected against pressurized water jets. Pressure-cleaning systems shall, therefore, not be used on this machine.
- Do not dip bare hands into water containing detergent. If this should occur, wash them immediately with plenty of water. Check the safety instructions on the detergent container.
• Some important rules must be followed for using this appliance:
1) never touch the appliance with wet hands or feet;
2) never use the appliance when barefooted;
3) do not install the appliance in places exposed to water splashes.
- This machine must be disconnected from the main electrical supply after use at the end of the day and for any service/maintenance operation. Switch off the main switch located on the wall, which shall be installed by a professional installer. Shut the water supply valve(s).
• Do not cover the intake or dissipation grids.
• Do not use water to extinguish fires on electrical parts.
WARNING: INTERNAL CLEANING OF THE MACHINE SHALL BE CARRIED OUT AT LEAST 10 MINUTES AFTER THE POWER SWITCH HAS BEEN TURNED OFF.
WARNING: DO NOT INSERT HANDS AND/OR TOUCH THE PARTS LOCATED AT THE BOTTOM OF THE WASH TANK AND/OR AT THE END OF THE WASH CYCLE.

3. ECOLOGICAL ASPECTS
3.1 Recommendations for optimal use of energy, water and additives
Salt dosing
A pre-set (by the manufacturer) quantity of salt is injected in the resins at each regeneration cycle. It is important to observe the number of regeneration cycles recommended in paragraph 2.6 "Regeneration device" in order to avoid salt spills or lime deposits.
Use the machine fully loaded when possible.
This shall prevent detergent, rinse aid, water and energy consumption waste.
Detergent and rinse-aids
Use detergents and rinse-aid chemicals with high biodegradability, to best respect the environment. Verify proper dosage in relation to water hardness at least three times a year. Excess product pollutes rivers and seas while an insufficient dose results in unsatisfactory dish washing and/or hygiene.
Boiler and Wash-Tank temperatures
The boiler and tank temperatures are set by the manufacturer in order to obtain the best washing results with detergents on the market. The temperatures can be reset by the installer in relation to your detergent.
Pre-washing
Carefully pre-wash with a moderate amount of water at room temperature to facilitate the removal of animal fats. To remove encrusted materials warm water soaking is recommended.
Note:
Wash objects as soon as possible to avoid deposits from drying and compromise effective washing.
For effective washing routine dishwasher cleaning and maintenance is advised (see chap. 5).
Disregarding the points listed above and of any the information contained in this manual can cause energy, water and detergent waste with a subsequent increase in running costs and/or performance reduction.
4. H.A.C.C.P. AND HYGIENE REGULATIONS
- When starting the machine ON, no wash-cycle will be starting until the set boiler and wash-tank temperatures are reached. During operation, the machine will not start the rinse cycle till the set boiler temperature is reached.
- Remove carefully all solids from the objects to be washed, to avoid obstruction of fi Iters, nozzles and piping.
- Drain the wash tank and clean the filters at least twice a day.
- Check if the detergent and rinse-aid dosage are correct (as recommmer manufacturer). In the morning, before starting the machine, check that the quantity of chemicals in the canisters is enough for daily supply.
- Keep your working tables clean.
• Extract the rack with clean hands or gloves to avoid finger marks.
- Do not dry or polish the washed objects with cloths, brushes or ra sterile.


5. MAINTENANCE
5.1 Routine maintenance
WARNING: The machine is not protected against pressurized water jets. Do not use pressure cleaning system against the machine.
It is recommended to contact the seller of chemicals for proper cleaning instructions, in order to have detailed indications on methods and products for the correct periodical machine sanitation.
Do not use bleach or chlorine based detergents.
Daily cleaning is needed to ensure that the machine runs perfectly. The following shall be carried out:
- Turn the machine in "STAND-BY" mode, by pressing the push-button "C" of the control panel (see chap. 2).

- Remove the surface filters and clean them under running water. Drain the sump water (see chap. 2.2.3).

natural_image
Illustration of two hand washing machines in a kitchen, showing different postures (no text or symbols present)- Remove the pump filter and clean with a brush and a water shower.
- Remove the arms by loosening the fi xing screws, and thoroughly clean them, and the nozzles under running water.

natural_image
Illustration of a faucet and a water dispenser with blue liquid, no text or symbols present• Reassemble the parts and reposition the wash pipes firmly in place.
• Clean the tank very carefully, using a water shower.
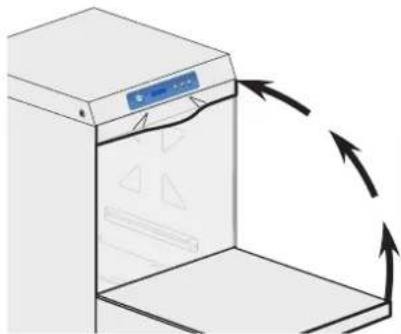
• It is recommended to leave the machine door open at the end of the day.
- Automatic cycle of machine self-cleaning/rinsing: recommended at each day end. The machine should be in "STAND-BY" mode. Push START button "A"; an automatic cycle of 60 seconds will start, after this the machine will be in "STAND-BY" mode.
natural_image
Diagram of a kitchen appliance with arrows indicating rotation or airflow (no text or symbols)

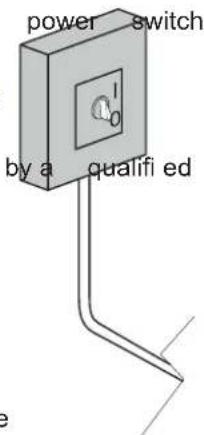
- Shut the water valve.
- Turned off the machine by switching the main OFF.
5.2 Extraordinary Maintenance – by qualified Service Personnel
Once or twice a year have the machine inspected technician, in order to:
1 Clean the solenoid-valve(s) fi Iters;
2 Remove scale from the heating elements;
3 Control the status of the seals;
4 Control for components integrity and/or consumption;
5 Control the dispenser(s) effi ciency;
6 Check the efficiency of the door safety switch.
A qualifi ed electrician, should check all electric connections inside the machine, at least once a year.

Fig. 4
6. MACHINE INSTALLATION
6.1 Handling
6.1.1 Handling the product
The machines must be handled strictly as shown in pict. 4 regarding the grip points indicated for lifting with a lift truck.
Latch the machine in a way that secures no vibration or shocks during transportation.
N.B.: Slinging with ropes not recommended.
After unpacking, make sure the appliance has not been damaged due to transportation. If it has been, do notify the seller about this problem. If the damage might question the machine's safety, do not install the appliance. See chapter 8 for disposal of the packing material.
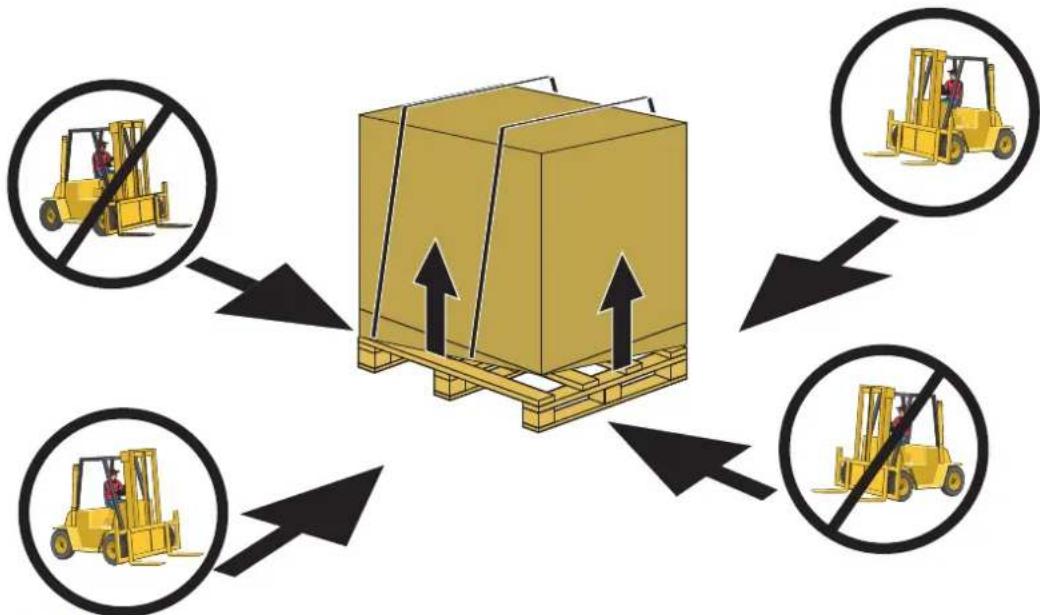
flowchart
graph TD
    A["Forklift"] --> B["Shipment Box"]
    C["No-Forklift"] --> B
    D["Forklift"] --> B
    E["No-Forklift"] --> B
    B --> F["Shipment Box with Up/Down Arrow"]
    style A fill:#f9f,stroke:#333
    style C fill:#f9f,stroke:#333
    style D fill:#f9f,stroke:#333
    style E fill:#f9f,stroke:#333
6.1.2 Storage
Storage temperature: min. +4°C - max +50°C - humidity <90%.
The stored parts should be checked periodically, to detect any sign of deterioration.
Do not put anything on the machine, even if packed in its box.
6.2 Prepare for installation
This is just a guide-line for the machine installation.
The installation must be performed by a qualified engineer.
6.2.1 Room features
Install the machine, in a room closed to weather and with a guaranteed temperature-range between 5 and 35°C.
The machine is equipped with thermostatic sensors to manage the temperatures. To guarantee a proper functionality these sensor shall not operate at a room temperature below 5 C°.
For this reason, it is fundamental that before starting the machine reaches the room temperature.
6.2.2 Electrical connection - Characteristics
The electrical connection to network shall be carried out in accordance to the local laws in force.
Make sure that the supply voltage is the same as reported on the machine plate and that the network can stand the needed power absorption shown on the same plate.
Make sure that the facility is equipped with efficient ground connection.
Table 1
A suitable omni-polar, one-way switch shall be installed and sized according to the absorption provided, with a contact opening of at least 3 mm. This switch shall be solely and exclusively used for this purpose and installed in the immediate vicinity of the machine, installed in full respect of the local laws. Always turn the machine off via this switch. This is the only model of switch that guarantees a total electrical power disconnection.
6.2.3 Water supply connection - Characteristics
| Water characteristics table | Min Max | |
| Static Pressure 200Kpa 600Kpa | ||
| Dynamic Pressure* 150Kpa 400Kpa | ||
| Water hardness** 5°f 20°f | ||
| Cold water-supply temperature | 5°C 15°C | |
| Hot water-supply temperature*** | 45°C 50°C | |
*Should the water supply pressure be more than 400 kPa, a pressure reducer must be installed (only for those versions where it is not a standard supply, already).
**It is compulsory to install a water-softener, in case of water with average hardness above 8^ . Washed objects will be cleaner and the machine will last much longer.
The machine can be equipped with a water softener, on request. If the machine is equipped with a water-softener, a regeneration of the resins shall be done on regular basis (see par. 2.6).
N.B.: Any damage caused by limestone (calcareous water higher-up than 8^ F and without water-softener) will not be covered by warranty.
A periodical check of the supplied water hardness is highly recommended.
***The water supply temperature shall never exceed 55°C.
The drain tube shall always be connected to a siphon in order to prevent the release of odors.
Maximum drain height = cm. 50.
6.2.4 Steam evacuation
In accordance with regulations of environmental hygiene, for the proper functioning of the machine and a healthy environment for the operator who working in there, it should be at least 10 air volume changes per hour in the room where the machine is installed.
For small wash rooms we recommend at least 15 air volume changes per hour
6.3 Installation
6.3.1 Positioning the machine
Remove the packing with care.
Lift the machine as described in chap. 6.1.1 "Handling the product".
Position the machine as shown on the installation diagram (lay-out) approved at the time of the offer.
Maintain a minimum distance of about 50 mm from the walls, so that motors are ventilated. Install suction hoods to assure proper ventilation of the room, in order to eliminate steam and excessive humidity.
Check that the machine is properly levelled, by adjusting the legs.
Make sure the machine is not standing on the power cable or on the filling/drain hoses.
Level the machine flat, by adjusting the support feet.
6.3.2 Electrical connection
The electrical connection shall be carried out in accordance to the local laws in force.
| Nominal range of current per phase (AMPERE) | Cable section mm ^2 |
| 0-10 1 | |
| 10-16 1,5 | |
| 16-25 2,5 | |
| 25-32 4 | |
| 32-50 6 |
Table 2

natural_image
Diagram of a kitchen appliance with a control panel and wiring, labeled Fig. 5 (no text or symbols on the device itself)
Moreover, the machine has a clamp at the back indicated by the symbol that is used as equipotent connection among different apparatuses, to prevent electrostatic currents.
The electrical supply cable must be new, flexible, and according to "har" H07RN-F or a local valid equivalent. The cable size is dimensioned according to the power, as per tab 2.
If the machine is fitted with a three-phase pump, check the correct motor rotation (right rotation as per arrow on the casing). This is not needed if the pump is a single-phase model (standard).

Fig. 6
6.3.3 Water connection
Connect the machine draining hose to the connection located at rear, under the back-panel.
The drain tube shall always be connected to a siphon in order to prevent the release of odors.
Maximum drain height = cm. 50 (see pict. 6).
In those machines equipped with "water softener" the water supply temperature shall not exceed 40C^ , to avoid damages to the filters' resins.
6.3.4 Start-up
At installation engineer's care.

7. SIGNALS AND ALARMS
The alarm messages are displayed, based upon their meaning.
When displaying "PRESS WATER SOFTNER REGENERATION KEY" a total regeneration is needed (only with optional water softener).
When displaying "DETERGENT LEVEL" add detergent in the detergent tank (only with optional "Sensor for Chemicals Low Level").
When displaying "RINSE-AID LEVEL" add rinse-aid chemical in the rinse-aid tank (only with optional "Sensor for Chemicals Low Level").
When displaying "SALT LEVEL" add salt in the container in the wash-tank (only with optional water softener).
When displaying "SHUT DOOR" means that the open door does not allow the maneuver tried, or a wash cycle was in progress, when lifting the door.
When displaying "DRAIN WATER IN WASH TANK" means that a full wash-tank does not allow the maneuver tried.
When displaying "SELF-CLEANING: REMOVE FILTERS AND PRESS START" the machine requires a self cleaning cycle.
When displaying "SELF-CLEANING CYCLE OVER" the machine ended the self-cleaning cycle.
| TYPE OF ALARM CAUSE REMEDIES | ||
| B1 BOILER FILLING FAIL | Open the water supply valve and verify a proper water supply flow. Contact Technical Service | |
| B2 BOILER PROBE FAIL | Contact Technical Service | |
| B3 BOILER HEAT. ALARM | Contact Technical Service | |
| B4 RINSING FAILED | TIME OUT RINSE | Contact Technical Service |
| B5 BOILER OVERHEATING | Contact Technical Service | |
| E1 WATER LOAD FAILED | Open the water supply valve.Contact Technical Service | |
| E2 TANK PROBE FAIL. | Contact Technical Service | |
| E3 TANK HEATING ALARM | Contact Technical Service | |
| E5 TANK OVERHEATING | Contact Technical Service | |
| E6 TANK DRAINING FAIL. | Check the overflow pipe. Contact Technical Service | |
| Z4 TANK SENSOR FAILURE | Contact Technical Service | |
| Z5 TANK HIGH LEVEL Drain and load the tank. | Contact Technical Service | |
| Z6 TANK LOW LEVEL Drain and load the tank. | Contact Technical Service | |
| Z9 REGENERATION FAIL | Contact Technical Service | |
Table 3

natural_image
Silhouette of five green pine trees with no text or symbols
8. ENVIRONMENTAL ASPECTS
8.1 Packaging
Packaging is made of the following components:
• a wooden pallet;
• a nylon sack (LDPE);
• a multi-layer carton;
• polystyrene (PS) strips;
• polypropylene (PP) banding.
All above materials, shall be disposed and treated in accordance with the Local Laws in force.
8.2 Disposal
The symbol WEEE/RAEE used on this product indicates that it cannot be treated as domestic waste. Proper disposal of this product contributes to protecting the environment. For more information on product recycling, contact the local authorities, domestic waste authorities or the dealer where the product was purchased.
For product or parts disposal, follow the Council directives 2002/95/EC and 2002/96/EC as amended and/or application legislative decrees.
The present product or parts cannot be disposed of as urban waste but shall be collected in separate containers (see the waste bin on wheels symbol with an "X" on the product).
At the time of product disposal, the user shall refer to the waste electrical and electronic equipment (WEEE/RAEE) specification.
The manufacturer guarantees the absence of dangerous substances in the EEA used in conformity to the directive 2002/95/EC.
If the user does not comply with the regulations he/she shall be subject to the penalties foreseen by each member state.
Disconnect electricity and water before disposal.
Cut away the electrical cable to ensure that further use is impossible.
All metal parts are recyclable as they are made of stainless steel.
Recyclable plastic parts are marked with the plastic material symbol.
- TROUBLESHOOTING
| Type of Problem Possible Causes Cure | ||
| The machine does not turn on. | Main switch not ON. Turn switch ON. | |
| The machine does not load water. | Water valve shut. Open the hot and/or cold water valve. | |
| Rinse area nozzles or solenoid-valve filter blocked and/or scaled with limestone. | Clean the rinse arm nozzles, conductors and solenoid-valve filter. Check that the water hardness is <10°f. | |
| Defective pressure-switch. Replace pressure-switch. | ||
| START button "A" flashing (red colour) | See chapter 7 "Alarms". --- | |
| Washing results are unsatisfactory. | The washing nozzles are obstructed or the rack does not rotate. | Clean the nozzles carefully, and check the right positioning of the wash-arm, tightening firmly. |
| Foam is present. Use no-foam detergents or reduce the dose in use. Check the rinse-aid dosage. | ||
| Fats or starches not removed. Insufficient detergent concentration. | ||
| Filters are dirty. Remove filters, clean with brush under a jet of water and replace in original position. | ||
| Check tank temperature (which must be between 50°C and 60°C). | Adjust the thermostat or check correct heating element operation. | |
| Wash time insufficient for the type of dirt. | Select a longer wash-cycle, if possible, otherwise repeat the wash cycle. | |
| Wash water is dirty. Drain the tank water, clean the filters; refill the tank and replace the filters correctly. | ||
| Glasses or dishes are not properly dried. | Not enough rinse aid. Increase dosage by turning the dispenser screw (see par. "Rinse aid dispenser"). | |
| The rack is not suitable for the pots or the tools. | Use the suitable rack which gives the pots and tools an inclined position so that water can rinse away. | |
| The washed items may have been sitting in the wash chamber too long. | As soon as the cycle stops, remove the rack with pots and tools so that they can dry more quickly in the air. | |
| Rinse temperature under 80°C. Check the boiler thermostat temperature. | ||
| Surface of dishes and glasses too rough or porous for material wear. | Replace type of dishes and glasses used. If the dirt on the dishes is dry and old, soak before washing. | |
| Streaks and spots on glas-ses and dishes. | Too much rinse-aid chemical. Reduce the rinse aid amount by turning the micrometric dispenser screw (see par. 1.4 "Rinse aid dispenser"). | |
| Too hard water. Check the water quality. Water must not exceed 10°f in hardness. | ||
| For appliances with softener: too little salt in the salt container or the resins have not been properly regenerated. | Fill the salt container (coarse salt: 1-2 mm grains) and regenerate the resins more often. If lime deposits are also observed on the body of the machine, have a qualified technician check the operation of the purifier. | |
| Salt present in dishwasher sump. | Thoroughly clean and rinse the appliance, and avoid spilling salt when filling the container. | |
| The machine suddenly stops during operation. | The machine is connected to an overload device. | Connect the machine on a own overload device (call Service). |
| A machine safety device was triggered. | Check the electrical devices (call Service). | |
| The machine stops during the wash stage and starts refilling water. | The previous day's water was not changed. | Drain the tank totally and refill. |
| Excessive water temperature in tank. | Call Service to check thermostat and pressure-switch. | |
| Defective pressure switch. | ||
N.B.: For any other question, please contact your Service provider. The manufacturer has right to modify any technical characteristics without prior notice.
- Instructions for use and maintenance
- CONTENTS Page
- WARNINGS 27
- MACHINE DESCRIPTION 28
- OPERATION 31
- WARNINGS 36
- ECOLOGICAL ASPECTS 37
- H.A.C.C.P. AND HYGIENE REGULATIONS 37
- MAINTENANCE 38
- MACHINE INSTALLATION 40
- WARNINGS
- N.B.: Use genuine spare parts only. Non-genuine parts will void the warranty and the manufacturer will take no responsibility for any damage.
- MACHINE DESCRIPTION
- Machine Description
- Machine features
- OPERATION
- Control panel and relative symbols
- Machine start-up
- Start-up
- Operation
- Switching OFF
- Detergent use
- Rinse aid use
- Drain pump system
- Regeneration device (optional)
- WARNINGS:
- ECOLOGICAL ASPECTS
- Recommendations for optimal use of energy, water and additives
- Salt dosing
- Pre-washing
- Note:
- H.A.C.C.P. AND HYGIENE REGULATIONS
- MAINTENANCE
- Routine maintenance
- Extraordinary Maintenance – by qualified Service Personnel
- MACHINE INSTALLATION
- Handling
- Handling the product
- Storage
- Prepare for installation
- Room features
- Electrical connection - Characteristics
- Water supply connection - Characteristics
- Steam evacuation
- Installation
- Positioning the machine
- Electrical connection
- Water connection
- Start-up
- SIGNALS AND ALARMS
- ENVIRONMENTAL ASPECTS
- Packaging
- Disposal
Brand : BARTSCHER
Model : Deltamat TFG 7400eco
Category : Dishwasher