
Mediabox Media - Media player MEGASAT - Free user manual and instructions
Find the device manual for free Mediabox Media MEGASAT in PDF.


| Product Type | Media Player |
| Brand | Megasat |
| Model | Mediabox Media |
| Dimensions (approx.) | 150 x 100 x 30 mm |
| Weight (approx.) | 200 g |
| Power Supply | USB 5V DC (via included adapter or USB port) |
| Video Output | HDMI |
| Audio Output | HDMI, 3.5 mm headphone jack |
| Supported Video Formats | AVI, MP4, MKV, MOV, WMV, FLV |
| Supported Audio Formats | MP3, WMA, WAV, AAC, FLAC |
| Supported Image Formats | JPEG, PNG, BMP, GIF |
| Storage | USB host, microSD card slot |
| Main Functions | Playback of media files, image viewer, music player, video player |
| Cleaning and Maintenance | Wipe with a soft dry cloth. Do not use liquids or solvents. |
| Safety Precautions | Keep away from moisture and heat sources. Do not disassemble. |
| Spare Parts and Repairability | No user-serviceable parts. Contact retailer for repairs. |
| General Information | Supports firmware updates via USB. One year warranty. |
Frequently Asked Questions - Mediabox Media MEGASAT
User questions about Mediabox Media MEGASAT
0 question about this device. Answer the ones you know or ask your own.
Ask a new question about this device
Download the instructions for your Media player in PDF format for free! Find your manual Mediabox Media - MEGASAT and take your electronic device back in hand. On this page are published all the documents necessary for the use of your device. Mediabox Media by MEGASAT.
USER MANUAL Mediabox Media MEGASAT
natural_image
Desktop screenshot showing a green tree on a grassy field with a small building in the background (no visible text or symbols)natural_image
Beach scene with waves crashing against a rocky cliff under a clear blue sky (no text or symbols visible)natural_image
Black wired computer keyboard with scrollpad and mouse (no visible text or symbols)Bedienung Bedienung
5. Unicable Konfiguration
natural_image
Three penguins standing on a beach under a cloudy sky (no text or symbols visible)natural_image
Three penguins standing in a desert environment under a cloudy sky (no text or symbols visible)4.5 apk Installation.
Stand: v1.0 April 2013

USER MANUAL
Table of Contents Views
Views 03
Remote Control 04-05
Connections 06
User Operations....07
-
HOME menu 07
-
Application 07
-
Music 08
4.Picture 09
-
Movie 09
-
File Brower 10
-
Web Browser 10
-
Setting 11
-
DVB-S Operations....12
Eshare 17
Specification 23
Safty Instructions
This SIB has been designed and manufactured to satisfy the international safety standards. Please read the following safety precautions carefully before operating this receiver.
Main Supply:
Before operating, please check the units operating voltage is 175\~250V AC 50/60Hz.
Overload:
Do not overload a wall outlet, extension cord or adapter, neither use damaged power cord or touch it with wet Zand as this may result in electric shock.
Liquid:
The receiver shall not be exposed to dripping or splashing water, and that no objects filled with liquids, such as base, shall be placed on the apparatus.
Ventilation:
Keep the slots on top of the receiver uncover to allow sufficient airflow to the unit. Do not put the receiver on soft furnishings or carpets. Do not expose the receiver to direct light or do not place it near a heater or in humid conditions. Do not stack other electronic equipments on top of the receiver.
Cleaning:
Plug out the receiver from the wall outlet before cleaning. Clean the receiver by a soft cloth or mild solution of washing-up liquid (no solvents).
Connection:
Disconnect: the receiver from the mains when you connect it to satellite I NB or disconnect it from I NB. Failure would possibly cause damage to the I NB.
Location:
Put the receiver indoor in order to avoid lightening, raining or sunlight.
Uncover:
Do not remove the cover, to reduce the risk of electric shock. Contact qualified and licensed service personnel to repair the receiver, or contact your dealer.
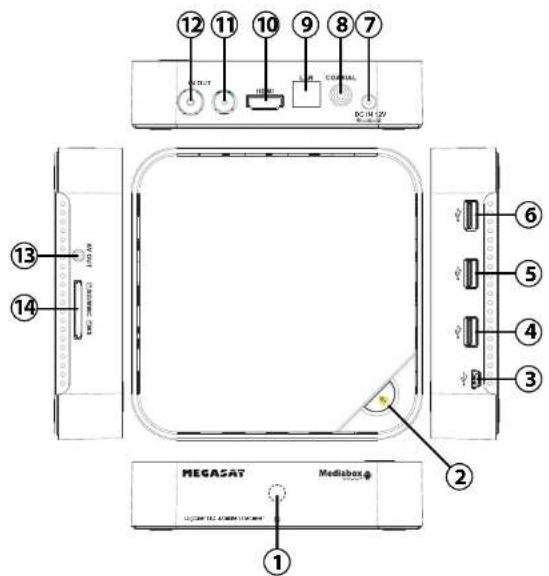
- REMOTE CONTROL SENSOR: Used to receive the signal from the remote controller.
- STAND BY: Switch between standby and operation mode.
- Mini USB Jack with OTG (On-The-Go): allows this box act as a peripheral USB device of a computer.
4-6 USB Jack: Connects to external USB devices such as USB flash drive,
mobile HDD digital audio/video players, mobile phone, mouse, keyboard, etc. - DC IN 12V: Connects to external 12V power supply adapter.
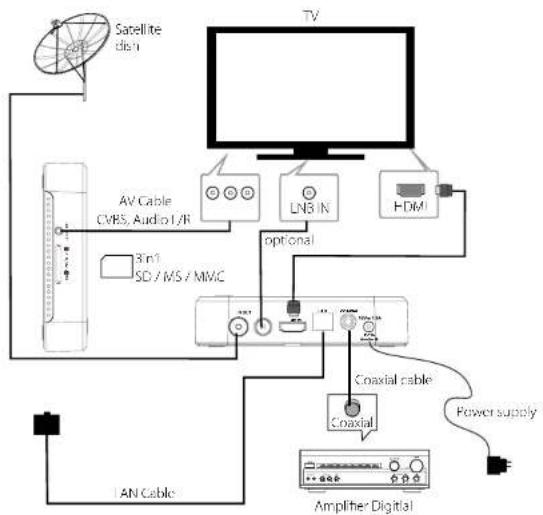
- COAXIAL: Connects to a coaxial socket on your surround sound system.
- LAN RJ45: 10/100M Ethernet interface for local network connection.
- HDMI: Connects to HDTV for HD video input.
- LNB OUT: This socket will by bass the RF signal to another STB.
- LNB I N: Used to connect the LNB to receive the signal.
- AV: Outputs composite video signal (CVBS) and analog audio L/R signal, only available when set Setting->Display->Output mode to 480i or 576i.
- CARD READER: SD/MMC/MS 3 in 1 card slot.
Remote Control Remote Control
-
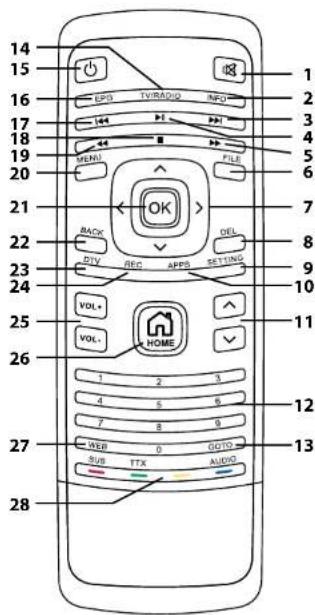
MUTE Tell the sound off, press again to restore the sound.
-
INFO Display Information of the channel being viewed and EPG detail info in EPG.
-
next playback
-
P▲ the current playback.
-
F▶backward a playback
-
FILE Shortcut to the file browser. Only available in home page
-
Move cursors in on-screen menu, or use to change channels in DIV mode. *Also referred to Up/Down/Right/Left throughout the manual.
-
DEL Delete one digit or character during typing, just like the Backspace of PC
keyboard. *Also referred to Up/Down/Right/Left throughout the manual.
-
SETTING Enter the menu in which user can configure the system settings. *Only available in home page.
-
APPS Shortcut to the Applications installed inside the box.
*Only available in home page.
-
📄s page up page down in channel list or some other menu.
-
0-9 Enter value in on-screen menu or channel list or some other menu.
-
GOTO Enter the specified webpage directly after finished the typing by soft keyboard.
-
TV/Radio Switch between TV and radio channels.
-
STANDBY ⏻ Switch between standby and operation mode.
-
EPG Display Information of the channel being viewed and what's on next.
-
Go no previous playback.
-
■op the current playback
-
Forward during a playback
-
MENU Display on-screen menu depends on the application, or switch the focus item in the Search Engine tool bar.
-
OK Activates the highlighted menu item, or displays channel list in OTV mode.
-
BACKReturns to previous menu screen.
-
DTV Shortcut to the digital television broadcasting
*Only available in home page.
-
REC Record the program instantaneously (OPTIONAL)
-
VOL+/- Increase/decrease Volume
-
HOME Enter the home page.
-
WEB Shortcut to the search engine page. *Only available in home page.
-
COLOR KEYS (RED/GREEN/YELLOW/BLUE) Operate different functions in DTV mode.
SUB (RED) Switch subtitle and select the subtitle language.
TTX (GREEN) Display the Teletext
AUDIO (BLUE) Switch audio languages in multilanguage case.
-
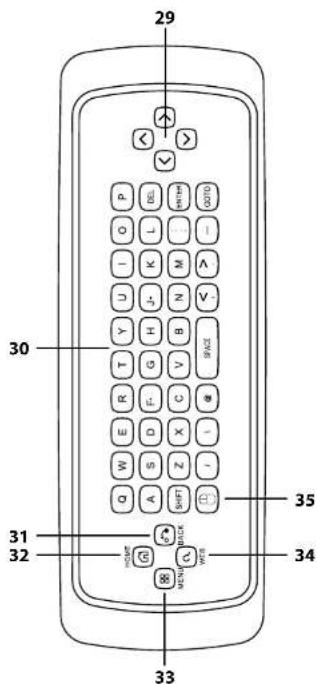
Move cursors in on-screen menu or in web surfing.
-
KEYBOARD for typing in on-screen menu or web-surfing.
-
BACK Returns to previous menu screen.
-
HOME Enter the home page.
-
MENU Display on screen menu depends on the applications, or switch the focus.
-
WEB Shortcut to the search engine page. *Only available in home page.
-
Press the mouse logo button. Press the direction buttons or "ENTER" at back side of RCU, and a mouse icon will show up on screen. Then users can move the mouse icon by the direction buttons and "ENTER". To shut up the mouse function, please press again the mouse logo button.
Connections User Operation
Installing the Batteries
Remove the battery cover from the Remote Control and put 2xAAA size batteries inside the compartment. The diagram inside the Battery Compartment shows the correct way to install the batteries.
Using the Remote Control
To use the Remote Control, point it towards the front of the IP Box. The Remote Control has a range of up to 7 metres from the IP Box at an angle of up to 60 degrees.
The Remote Control will not operate if its path is blocked.
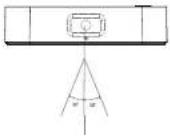

Sunlight or very bright light will decrease the sensitivity of the Remote Control.
flowchart
graph TD
    A["Satellite dish"] --> B["TV"]
    B --> C["LN3 IN"]
    B --> D["HDMI"]
    C --> E["Optional"]
    D --> E
    E --> F["Coaxial cable"]
    F --> G["Coaxial"]
    G --> H["Power supply"]
    H --> I["Amplifier Digital"]
    J["AV Cable CVBS, Audio I/R"] --> K["3n1 SD / MS / MMC"]
    L["AN Cable"] --> M["Power Supply"]
1. HOME Menu
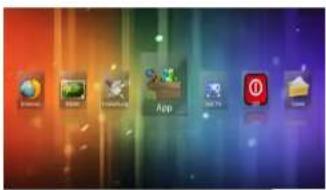
This menu displays all the common items inside the box: Application, Music, Picture, Movie, FileBrowser, Web Browser, Setting.
Note The user can select applications by cursor buttons and open it by OK button,
the user also can pressed below hotkeys in home page:
* Enter Web Browser by pressing WEB hotkey,
* Enter Applications interface by pressing APP hotkey,
* Enter the system Setting menu by pressing SETTING hotkey,
* Enter Movie player by pressing VIDEO hotkey,
* Enter Music player by pressing MUSIC hotkey
* Enter Picture browser by pressing PICTURE hotkey,
* Enter File Browser by pressing FILE hotkey,
2. Application
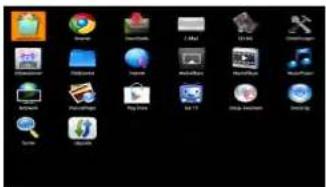
Press APP hotkey or select App item in home page to enter the APP menu.
The user will see all the applications in stalled inside the box like below:
2.1 System built-in Applications
These applications including, but not limited to the following:
MusicPlayer: for music playback
PicturePlayer : for picture browser
MoviePlayer: for movie playback
FileBrowser : for file browser
Settings: System settings
Calendar: Google calendar
Clock: Google clock
Downloads : Google download management.
Email: Email client
Search : Google quick search engine
Upgrade : System upgrade
PPPoL(Optional): point-to-point protocol over ethernet,broad band dialer
User Operation User Operation
2.2 Install Applications
(1) Install the apk file in external mass storage device by File Browser (2) Download and install various applications in Android market or local app market.
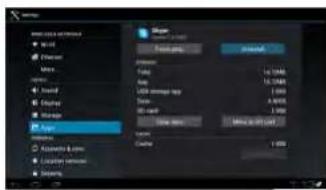
2.3 Uninstall Applications
Enter Settings application, select Apps -> All, then select the application which you want to uninstall then press Uninstall button.
3. Music
Highlight the Music item in home page or press MUSIC hotkey to enter music player, choose the storage device and path which has music files, then start to playback the file.
Press MENU hotkey you will see a tool bar at the bottom of the screen, it allows the users to do the operations as listed below:
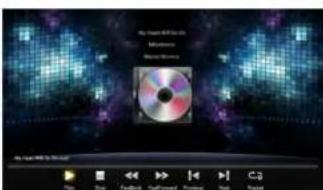
▶ Start or pause the playback
■top the playbck
←st backwards
▶ Fast forwards
←to the previous audio track
▶to the next audio track
Single/folder/random repeat playback
Note: All above operations also can be done by pressing the relevant hotkeys on the remote controller, user can also exit the current menu by pressing BACK button.
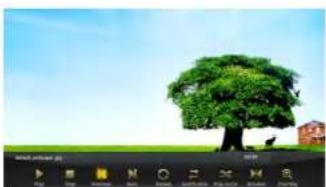
4. Picture
Highlight the Picture item in home page or press PICTURE hotkey to enter picture browser, choose the storage device and path which has picture files, then start to slide show the picture.
Press MENU hockey you will see a tool bar at the bottom of the screen, it allows the users to do the operations as listed below:
▶start or pause the current picture
■stop the playback
▶Auto the previous picture
←to the next picture
Repeat the playback
change the slide show interval
sequence / random playback
Normal, 90/180/270 degree rotation
Zoom in/out the picture
5. Movies
natural_image
Desktop screenshot showing a green tree on a grassy field under a blue sky (no text or symbols visible)Note: All above operations also can be done by pressing the relevant hotkeys on the remote controller, user can also exit the current menu by pressing BACK button.
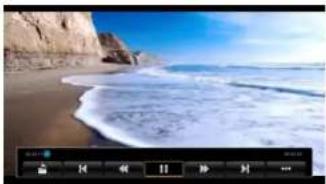
Highlight the Movie item in home page or press VIDEO hotkey to enter movie player, choose the storage device and path which has movie files, then start to playback the movie.
Press MENU hotkey you will see a tool bar at the bottom of the screen, it allows the users to do the operations as listed below:
Back to the folder mode.
←boto the previous video file,
← Fast backwards,
▶Play/pause the current playback,
▶last forwards,
▶Auto the next video file,
• More options: Resume, Repeat, Audio Track, Subtitle, Display Mode, File information.
natural_image
Beach scene with waves crashing against a rocky cliff under a clear blue sky (no text or symbols visible)User Operation User Operation
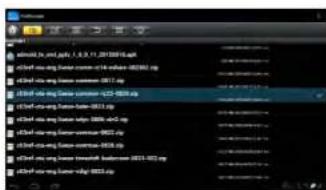
6. File Browser
Highlight the FileBrower item in home page or press FILE hotkey to enter file browser, browser thefiles in the certain storage device and path. User can browse the picture and playback the music/movie, or edit the certain file.
show home page
Select/open mode
edit mode: Cut/Copy/Paste/Delete
ort mode: Name/Date/Size
Back to parent directory
View by thumbnail
② Help
7. Web Browser
There are 3 ways to web browser:
* Highlight the Web item in home page then press OK button
* Highlight the App item in home page then press OK button, then choose Websites->Browser in App menu
* Press WEB hotkey in home page to enter system built-in web browser directly. It will show the soft keyboard
if user pressed OK button in the web browser address column, then user can typing websites to start surfing, the user can also press MENU button to switch focus to the Drop-down bar to select an existed keywords at any time during the typing.
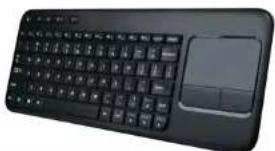
Note: For easier use, you can connect
a Wireless Keboard/Mouse or a Wireless Touch Keyboard on the USB Ports.
natural_image
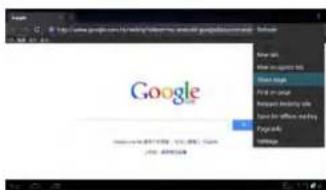
Black computer keyboard with scrollpad and mouse (no visible text or symbols)If the user pressed MENU hotkey when there is no soft keyboard and not in adress typing mode, he will see a tool bar at the bottom of the screen, it allows the users to do the operations as listed below
Refresh: refresh the current web page
Forward: goto the next web page
New tab: create a new web page
New incognito tab: to open a new incognito page
Share Page: share this page by Bluetooth
Find on page: find what you want in this page
Page info: some information about the current page
Settings: some settings about the web browser, such as set the homepage etc.
8. Settings
8.1 Wireless & networks: check mark Wi-Fi option, then choose available Network in Wi-Fi settings, then input the correct password.
8.2 Ethernet: check mark Ethernet option, choose the network type (DHCP and Static IP) in Ethernet settings, user need manual input the IP address/Net mask/DNS address/ Default gateway if it's Static IP, then save it.
8.3 Sound: adjust the volume
8.4 Display: 8.4.1 Support HDMI: 480i, 480p, 576i, 576p, 720p, 1080i, 1080p Support CVBS: 480i, 576i
Note: user can fast switch between HDMI and CVBS output without system reboot
8.4.2 adjust the screen position manually to make sure the box can well display in various TV sets.
8.5 Apps: uninstall the application, check the program running status, debug the USB device
8.6 Accounts & Sync: sync the Google account
8.7 Backup & Reset: backup the data and do factory restore(please note that all the applications you installed will be erased also, so you need reinstall it later)

natural_image
Android robot holding an umbrella over a green grassy field with raindrops (no text or symbols visible)User Operation User Operation
8.8 Storage: check the space information of SD Card and Flash
8.9 Language & Input: setup the system language and keyboard input
8.10 Accessibility: system accessibility setting
8.11 Date & Time: set the date/time/time zone/time format, etc
8.12 About Mediabox: the version of the current system
9. DVB-S Operations
9.1 DVB Install
If it's the first time you got this IP box, or you ever did a factory reset in Settings, follow the instructions on the OSD screen.
9.2 DVB Player
After the DVB Player is installed, there are 3 ways to DVB viewing mode:
(1) Press DTV hotkey in home page
(2) Highlight the DVB item in home page then press OK button.
(3) Highlight the App item in home page then press OK button, then choose DVBPlayer in Applications menu. If it's the first time you enter DTV mode, you will be asked to start an auto scan for all channels. It will start to play the first channel in the list after scan finished.
9.3 Tool Bar
Press the OK button in DVB viewing mode, you will see a pop-up tool bar at the bottom of the screen, it include: Channel List, EPG, Settings, Program Manager, Timeshifting, EP Manager, Pvt Manager, HIDE, allow the users to do the operations as listed below:
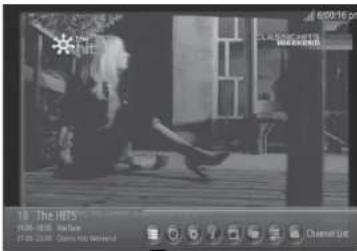
9.3.1 Channel List:
press MENU button in viewing mode or highlight the Channel List icon in the tool bar then press OK button to enter channel list menu, user can change the service or service type in it.
9.3.2 EPG:
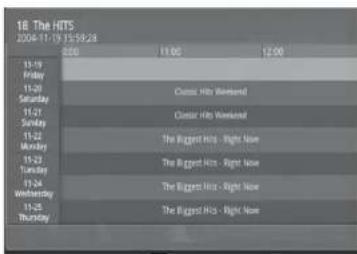
press EPG button in viewing mode or highlight EPG icon in the tool bar to enter EPG menu (set Settings -> Update system time as Auto if the time is incorrect) From this menu, you can check program information, access at most one-week program schedule which details the times and programs for the next several days.
9.3.3 Setting:
User can modify settings for:
Subtitle: set subtitle on/off.
Picture Size: set aspect ratio 4:3,16:9,auto.
Audio Track: set sound mode to Left, Right, Stereo.
Frequency / bandwidth / area selection: in manual mode, then press the OK button to start the scan immediately.
Factory data reset: erase all the settings and channel database.
Set Password: allows user to modify the password, the default password is 1234.
Update system time: set to Auto or off.
Select storage device: choose the storage device for PVR/Time
Timeshifting setting: allows user to choose the TimeShift duration to 10, 30,60 minutes according to the available free space in USB device or I IDD disk.
Parental rating age: set rating age to all, 4 \~ 18.
Antenna Power: it allows the user to active the antenna power supply for external active antenna.
Channel Search Channel Search
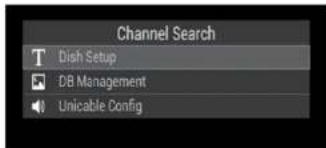
1. Channel Search
To access the menu. The Menu provides some options to adjust the Channel Search settin select an option and press OK to enter the setting, press BACK to exit the menu.
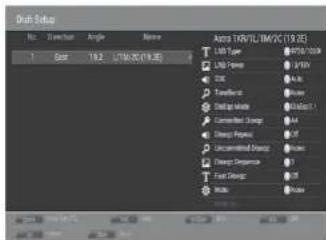
2. Satellite
(a) Add satellites:
- First enter the Dish Setup Menu.
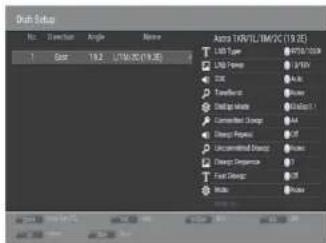
- Secondly press Blue to add a new satellite, in which you must input an unique longitude, and edit the satellite's name with soft-keyboard
![Serial information: ABC Name: 1 Date: 2 Address Name: Description: Text Image: 1/17/03/20 [19:02]](/content/2026/05/1019338/images/e4020f52d52b851fcb6aadb0e10bccb1177e324f546f30effe29a880bf80c81e.jpg)
(b) Configure the settings of satellites:
- Satellite list, Press Up/Down to select a required satellite, whose onfiguration would be shown at right side
- LNB Type: Press Left/Right/OK to show the edit of Lnb Types which is shown as frequencies of the local oscillator. You also can Edit frequency by User Mode
- LNB Power: Press OK to set the Lnb power
- 22K: Press OK to set the 22K on/off which is set with Auto when LNB Type is dual local oscillator
- ToneBurst: Enable or Disable the ToneBurst switcher
-
DisEac Mode : Press OK to select DisEqc1.0 or DisEqc1.1
(1) DisEqc 1.0: Select the correct port up to 4 for the LNB
(2) DisEqc 1.1: Select the correct port up to 16 for the LNB -
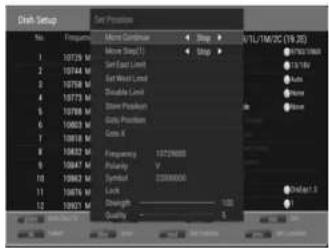
Motor: Press OK to select DisEqc1.2 or DisEqc1.3, then press Next to show the menu to set position in Transponder List;
(1) DisEqc 1.2: Move the motor to a right position so as to lock the signal
(2) DisEqc 1.3: Move the motor according to the local and satellite positions
(3) Set Position
a. Move Continue: Press Left/Right to start to move West/East. It will keep movin until you stop it manually
b. Move Step (1): Press Left/Right to move just a step
c. Store Position: Store the current position of motor
d. Goto Position: Press Left/Right to goto the stored position
e. Goto X: Goto the calculated position from the local and satellite positions.
(c) Edit Satellites: Press Yellow to edit the focused satellite
(d) Delete Satellites: Press Info to delete the focused satellite
(e) Single Satellite Scan:
- Press Blue to Pop the menu of scan mode settings
- Scan Mode: Press OK to select Default, wich scan the preset transponders. Blind Scan that firstly scan the band to get the transponders wich can be locked, after gathering all Transponders, then scan the transpoinders one by one to get the programs. Network wich scan by Nit table
- Crypted: Press OK to select all channels or FTA channels
- Switch to the highlight (OK) and press OK to start scanning with the above settings
(f) Multi-Satellites Scan:
Press OK to select satellites with mark, then press Blue to pop the menu of scanning setting. After configuring like single satellite scan, switch to the highlight (OK) and press OK to start muliti-satellites scan.
Channel Search Eshare
3. Transponder
Press Green to switch the list to show transponders of the focused satellite, also you can back to satellite's list via press Green.
(a) Add transponder: Press Red to add a new transponder. It can't save an existing transponder in the same satellite.
(b) Edit transponder: Press Yellow to edit the focused transponder.
(c) Delete transponder: Press INFO to delete the focused transponder.
(d) Single transponder scan: Press OK to select the focused transponder with mark, then press Blue to pop the menu of scan mode settings.
(e) Multi-Transponder Scan: Be similar to the single transponder scan.
4. DB Management
User may load database which include satellite, transponder and channel list from USB or SD Card to the receiver and vice versa
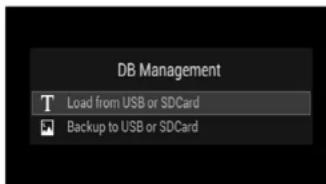
5. Unicable Config
Unicable enables the delivers of broadcast programming to multiple users via a single coaxial cable. It should work with Unicable LNB or SaTCR equipment.
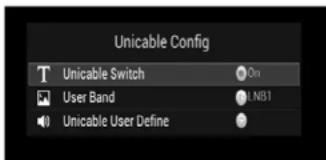
Set the Unicable Switch ON, and select a Unicable User Define (Namely a channel) which isn't occupied by other users.
Dish setup with Unicable: When Unicable is activated, the DiSEqC 1.0, DiSEqC 1.1, DiSEqC 1.2, DiSEqC 1.3 are disabled. Set Pos A/B for satellites if the equipment can support.
Eshare Application Introduction
EShare application is for Mini entertainment PC manual's interaction through Android device (mobile/Tablet) for video, photos, music and files exchanging.
Mobile or Tablet OS requirement: with Android 2.1 system or above.
Mini PC requirement: EShare server application has to be installed on both Smartphone/tablet and Android TV Box.
User Guide
1. The Application Software will be under as following environment:
1.1 The Android of mobile/tablet and Mini entertainment PC need to be connected to the same WIFI router.
1.2 Mini PC Application of EShareServer is running.
- Mini entertainment PC Application Enabled: Enable EshareServer Software 2.1 Click EShareServer application
The following information will be shown:
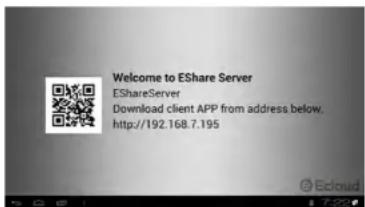
Note the Server name and IP address for device identity.
Eshare Eshare
3. Select device with IP address to click to enable
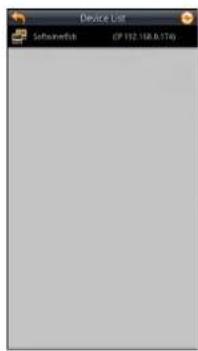
4. The mobile screen will be shown as below (listed are some of the applications).
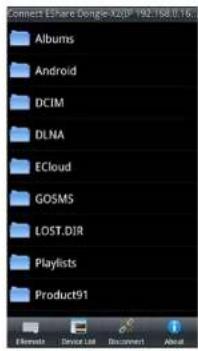
4.1 Music file transmission.
4.1.1. Select the music track to play.
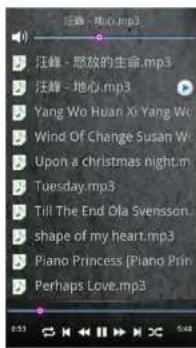
TV will display the music file after clicking. The upper control bar allows the volume control; the lower bar allows the music progress control. The lower control bar enables pause, fast forward, fast rewind, repeated rewind.
4.1.2 TV Interface (picture shown for reference only).
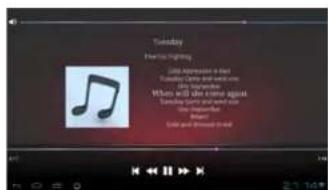
Mini PC can also select music and play, volume control and progress
4.2 Photo Transmission.
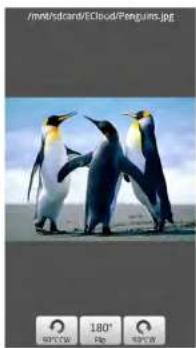
4.2.1. Select the photo; it will be transmitted to Mini entertainment PC automatically.
EshareEshare
natural_image
Three penguins standing on a beach under a cloudy sky, with no visible text or symbols.The control panel is on the lower part of screen. Page left and right, up and down, enlarge or reduce functions will be executed by touching options on the screen.
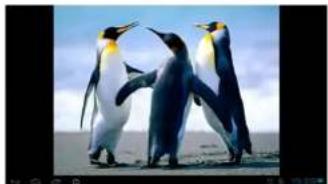
4.2.2 The TV screen will show the interface as below (picture for reference only).
natural_image
Three penguins standing in a desert environment (no text or symbols visible)4.3 Video Transmission
4.3.1 Select video, the control panel is in the lower part of screen.
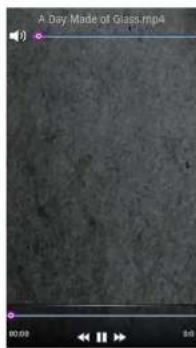
4.3.2 The video will be transmitted directly to the TV (No image will be displayed on the tablet/Smartphone).
4.4 Documents transmission.
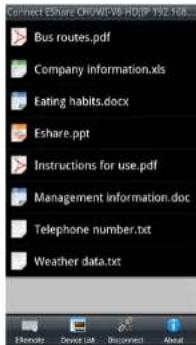
4.4.1 Enter EShare Application, Click Document file.
Eshare
Specifications
4.4.2 Microsoft files can be transmitted to mini pc and played Note: The office document applications must be installed on the mini pc, for example: wps office or document to go or documents viewer.
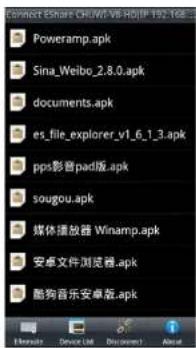
4.5 apk Installation.
4.5.1 Download apk; click an "apk" file to install it into mini pc.
| Key Features CPU ARM, CORTEX A9, 800MHz | ||
| Operation System Andro d 4.0.4 | ||
| System Memory DDR3 4Gbits | ||
| Hash Capacity 4Glytics inside, extondable by external USB, HDD | ||
| Input/Output HDMI 1.3 x1, up to 1980p | ||
| CVBS,Audio L/R x1 only available in 490i or 575i | ||
| Cboxial Audio x1 | ||
| USB Host x3 | ||
| Mini USB OIG x1 | ||
| Card Reader SD/MS/VMC 3 in 1 | ||
| Connectivities Integrated WiFi 802.11 b/g/n | ||
| 10/100M Ethernet interface | RM5 | |
| RF In F connector | ||
| RF Out F connector | ||
| Built-In Decoders Video | MKV (H-264 HP), AVI, RM/KMVB, HIV, MPEG 1/2/4, IDAI, MPEG, MPE, MPG, MP4, M2V, M4V, TS, VOB, MOV, 3GP, 3GPP, P-C, M1S, M71S, M31S, M41S, M51S | |
| Audio | MP3, WMA, APE, AAC, OGG, AC3, WAV, OGA, FLAC, AI AC, WIA, RM. | |
| Image | JPEG, BMP, GIF, PNG | |
| Software | Pledged Applications | Google Browser, Support Hash Player, Photo Browser, Video Player, Audio Player. |
Megasat Werke GmbH | Industriestraße 4a | D-97618 Niederlauer | www.megasattv | info@megasattv
Status: v1.0 April 2013
- Bedienung Bedienung
- Unicable Konfiguration
- Table of Contents Views
- Safty Instructions
- Main Supply:
- Overload:
- Liquid:
- Ventilation:
- Cleaning:
- Connection:
- Location:
- Uncover:
- Remote Control Remote Control
- Connections User Operation
- Installing the Batteries
- Using the Remote Control
- HOME Menu
- Application
- System built-in Applications
- User Operation User Operation
- Install Applications
- Uninstall Applications
- Music
- Picture
- Movies
- File Browser
- Web Browser
- Settings
- DVB-S Operations
- DVB Install
- DVB Player
- Tool Bar
- Channel Search Channel Search
- Channel Search
- Satellite
- Add satellites:
- Configure the settings of satellites:
- Single Satellite Scan:
- Multi-Satellites Scan:
- Channel Search Eshare
- Transponder
- DB Management
- Unicable Config
- Eshare Application Introduction
- User Guide
- The Application Software will be under as following environment:
- Eshare Eshare
- Select device with IP address to click to enable
- The mobile screen will be shown as below (listed are some of the applications).
- TV Interface (picture shown for reference only).
- EshareEshare
- Eshare
- Specifications
Brand : MEGASAT
Model : Mediabox Media
Category : Media player