
KA-73S56ASS-EU - Oven SHARP - Free user manual and instructions
Find the device manual for free KA-73S56ASS-EU SHARP in PDF.


| Brand | Sharp |
| Model | KA-73S56ASS-EU |
| Product Type | Built-in Electric Oven |
| Power Supply | 220-240 V ~, 50/60 Hz |
| Oven Functions | Defrost, Turbo, Static, Fan, Grill, Fast Grill, Double Grill & Fan, Pizza, Manual Steam Aid |
| Control Type | Smart LCD touch display with rotary knobs |
| Display | Color TFT display |
| Steam Aid | Yes, up to 3 steam injections per cycle |
| Water Tank Capacity | 300 ml |
| Cleaning Function | Vapclean+ (steam-assisted cleaning) |
| Safety Features | Air Curtain system, key lock, child lock (key lock), auto-off, double pole switch required |
| Oven Lamp | 230 V, 25 W, Type E14, T300 |
| Accessories Included | Deep tray, shallow tray, small tray, wire grid, wire rack with full extension telescopic rail |
| Installation Type | Built-in under hob or in cabinet |
| Energy Efficiency | Not specified (complies with EU directives) |
| Dimensions (approximate) | Standard built-in size (refer to installation manual) |
Frequently Asked Questions - KA-73S56ASS-EU SHARP
User questions about KA-73S56ASS-EU SHARP
0 question about this device. Answer the ones you know or ask your own.
Ask a new question about this device
Download the instructions for your Oven in PDF format for free! Find your manual KA-73S56ASS-EU - SHARP and take your electronic device back in hand. On this page are published all the documents necessary for the use of your device. KA-73S56ASS-EU by SHARP.
USER MANUAL KA-73S56ASS-EU SHARP
GB-Declaration of conformity
We declare that our products meet the applicable European Directives, Decisions and Regulations and the requirements listed in the standards referenced.
natural_image
Symbol of a trash bin crossed out by two crossed lines, no text or labels presentGB: The symbol on the product or on its packaging indicates that this product may not be treated as household waste. Instead it shall be handed over the applicable collection point for recycling of electrical and electronic equipment. By ensuring this product is disposed of correctly, you will help prevent potential negative consequences for the environment and human health, which could otherwise be caused by inappropriate waste handling of this product. For more detailed information about recycling this product, please contact your local city offices, your household waste disposal service or the shop where you purchased the product.
Our goal is to offer you, high quality products that exceed your expectations. Your appliance is produced in modern facilities and is carefully, particularly tested for quality. This manual is prepared in order to help you use your appliance, which has been manufactured using the most recent technology with confidence and maximum efficiency. Before using your appliance, carefully read this guide which includes basic information to safe installation, maintenance and use. Please contact your nearest Authorized Service centre for the installation of your product.
Contents
Presentation and size of product
Warnings
Preparation for installation and use
Using the oven
Cleaning and maintenance of your product
Service and Transport
PRESENTATION AND SIZE OF PRODUCT
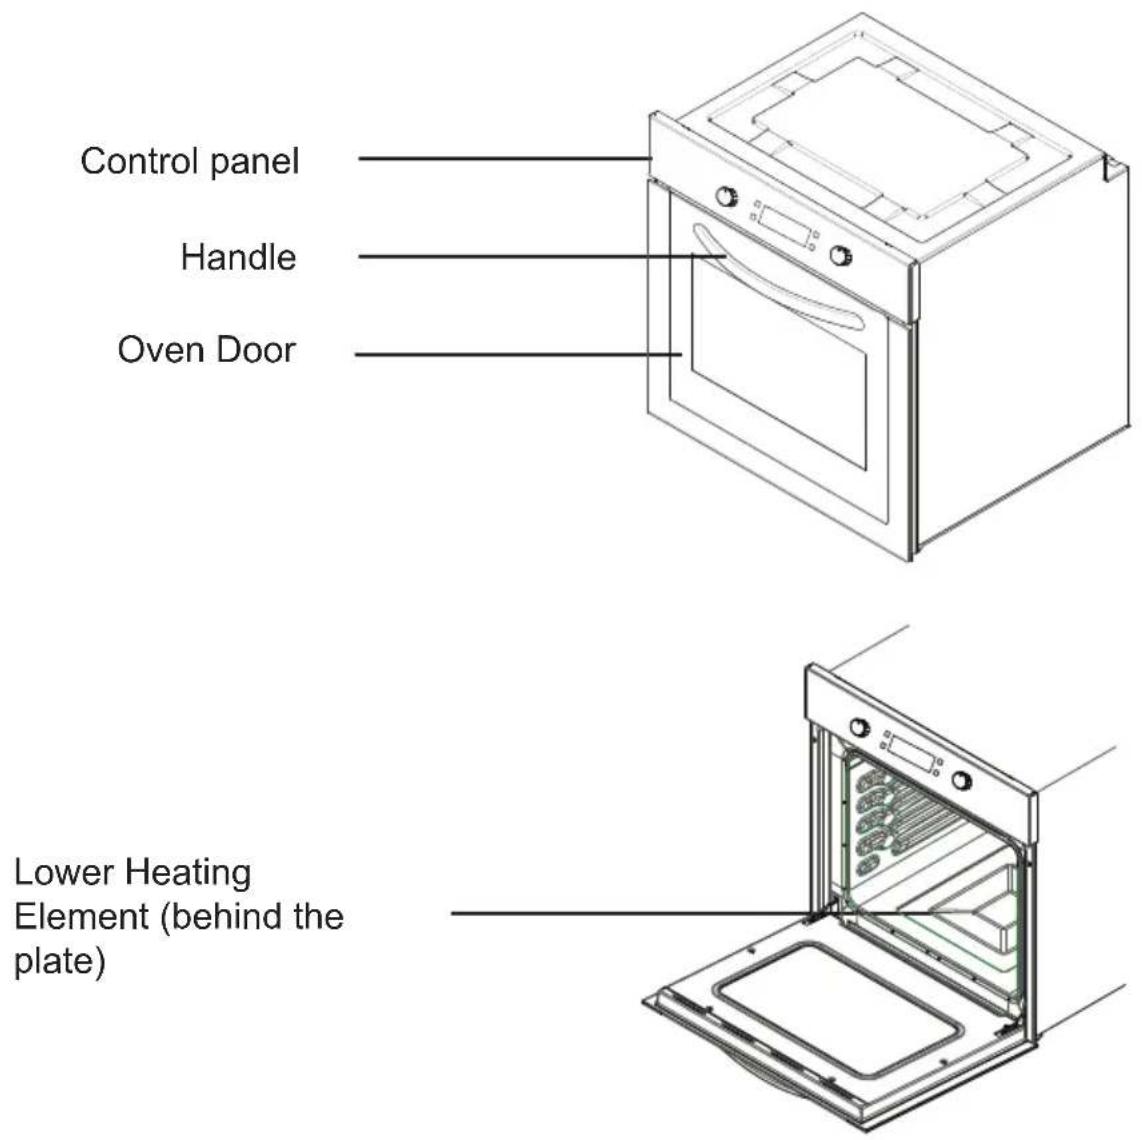
Lower Heating Element (behind the plate)

SAFETY WARNINGS
READ THESE INSTRUCTIONS CARE- FULLY AND COMPLETELY BEFORE USING YOUR APPLIANCE, AND KEEP IT IN A CONVENIENT PLACE FOR RE- FERENCE WHEN NECESSARY.
THIS MANUAL IS PREPARED FOR MORE THAN ONE MODEL IN COMMON. YOUR APPLIANCE MAY NOT HAVE SOME OF THE FEATURES THAT ARE EXPLAINED IN THIS MANUAL. PAY ATTENTION TO THE EXPRESSIONS THAT HAVE FIGURES, WHILE YOU ARE READING THE OPERATING MANUAL.
General Safety Warnings
- This appliance can be used by children aged from 8 years and above and persons with reduced physical, sensory or mental capabilities or lack of experience and knowledge if they have been given supervision or instruction concerning use of the appliance in a safe way and understand the hazards involved. Children
shall not play with the appliance. Cleaning and user maintenance ce shall not be made by children without supervision.
- WARNING: The appliance and its accessible parts become hot during use. Care should be taken to avoid touching heating elements. Children less than 8 years of age shall be kept away unless continuously supervised.
- WARNING: Danger of fire: do not store items on the cooking surfaces.
- WARNING: If the surface is cracked, switch off the appliance to avoid the possibility of electric shock.
- The appliance is not intended to be operated by means of an external timer or se-
parate remote-control system.
- During use, the appliance becomes hot. Care should be taken to avoid touching heating elements inside the oven.
- During use, handles held for short periods in normal use can get hot.
- Do not use harsh abrasive cleaners or sharp metal scrapers to clean the oven door glass and other surface since they can scratch the surface, which may result in shattering of the glass or damage to the surface.
- Do not use steam cleaners for cleaning the appliance.
- WARNING: Ensure that the appliance is switched off before replacing the lamp to
avoid the possibility of electric shock.
- CAUTION: Accessible parts may be hot when the cooking or grilling is in use. Young children should be kept away.
- Your appliance is produced in accordance with all applicable local and international standards and regulations.
- Maintenance and repair work must be made only by authorized service technicians. Installation and repair work that is carried out by unauthorized technicians may endanger you. It is dangerous to alter or modify the specifications of the appliance in any way.
- Prior to installation, ensure that the local distribution conditions (nature of the gas and gas pressure or electricity voltage and frequency) and the requirements of the appliance are compatible. The requirements for this appliance are stated on the label.
- CAUTION: This appliance is designed only for cooking food and is intended for indoor domestic household use only and should not be used for any other purpose or in any other application, such as for non-domestic use or in a commercial environment or room heating.
- Do not try to lift or move the app-
liance by pulling the door handle.
- All possible security measures have been taken to ensure your safety. Since the glass may break, you should be careful while cleaning to avoid scratching. Avoid hitting or knocking on the glass with accessories.
- Ensure that the supply cord is not wedged during the installation. If the supply cord is damaged, it must be replaced by the manufacturer, its service agent or similarly qualified persons in order to prevent a hazard.
- While the oven door is open, do not let children climb on the door or sit on it.
Installation Warnings
- Do not operate the appliance before it is fully installed.
- The appliance must be installed by an authorized technician and put into use. The producer is not responsible for any damage that might be caused by defective placement and installation by unauthorized people.
- When you unpack the appliance, make sure that it is not damaged during transportation. In case of any defect; do not use the appliance and contact a qualified service agent immediately. As the materials used for packaging (nylon, staplers, styrofoam...etc) may cause harmful effects to children, they should be collected and removed immediately.
- Protect your appliance against
atmospheric effects. Do not expose it to effects such as sun, rain, snow etc.
- The surrounding materials of the appliance (cabinet) must be able to withstand a temperature of min 100°C.
During usage
- When you first run your oven a certain smell will emanate from the insulation materials and the heater elements. For this reason, before using your oven, run it empty at maximum temperature for 45 minutes. At the same time you need to properly ventilate the environment in which the product is installed.
- During usage, the outer and inner surfaces of the oven get hot. While opening the oven door, step back to avoid the hot steam coming out of the oven. There may be a risk of burns.
- Do not put flammable or combustible materials, in or near the appliance when it is operating.
• Always use oven gloves to remove and replace food in the oven. - Do not leave the cooker while co-oking with solid or liquid oils. They may catch fire on condition of extreme heating. Never pour water on to flames that are caused by oil. Cover the saucepan or frypan with its cover in order to choke the flame that has occurred in this case and turn the cooker off.
- If you will not use the appliance for a long time, plug it off. Keep the
main control switch off. Also when you do not use the appliance, keep the gas valve off.
- Make sure the appliance control knobs are always in the "0" (stop) position when it is not used.
- The trays incline when pulled out. Be careful not to let hot liquid spill over.
- When the door or drawer of the oven is open, do not leave anything on it. You may unbalance your appliance or break the cover.
- Do not put heavy things or flammable or ignitable goods (nylon, plastic bag, paper, cloth...etc) into the drawer. This includes cookware with plastic accessories (e.g. handles).
- Do not hang towels, dishcloths or clothes from the appliance or its handles.
- It is recommended to use soft water to avoid excess amount of limescale residue in steam generating system over time.
To check the softness of water please use the test paper given with the product and the table below. Test paper is kept in water for 3 seconds, and taken out after a minute stripes become visible on the paper.
| Test Stripes Hardness of the Water | |
| 5-4 blue stripes Soft | |
| 1 red stripe Slightly Hard | |
| 2 red stripes Medium Hard | |
| 3 red stripes Hard | |
| 4-5 red stripes Very Hard | |
- If the correct water hardness level is not set, this could affect appliance operation and its useful life.
- Do not use other liquids than still water.
- Do not use hot water.
- Keep the water tank closed when the oven is operating.
- When oven is hot and oven door is opened, hot air steam may come over so stand away and also keep children away while opening oven door.
- To avoid limescale residual in the cavity, clean the cavity after each use.
- After the cooking process, the remaining water in the system should be removed. To do that please select "Yes" when automatically asked on the screen after cooking process. Do not leave anything in the oven during this operation.
During cleaning and maintenance
- Always turn the appliance off before operations such as cleaning or maintenance. You can do it after plugging the appliance off or turning the main switches off.
- Do not remove the control knobs to clean the control panel.
• TO MAINTAIN THE EFFICIENCY AND SAFETY OF YOUR APPLIANCE, WE RECOMMEND YOU ALWAYS USE ORIGINAL SPARE PARTS AND TO CALL ONLY OUR AUTHORIZED SERVICE
AGENTS IN CASE OF NEED.
PREPARATION FOR INSTALLATION AND USE
Manufactured with best quality parts and materials, this modern, functional and practical oven will meet your needs in all respects. Make sure to read the manual to obtain successful results and not to experience any problems in the future. The information given below contain rules that are necessary for correct positioning and service operations. They should be read without fail especially by the technician who will position the appliance.
CONTACT THE AUTHORIZED SERVICE FOR INSTALLATION OF YOUR OVEN!
CHOOSING A PLACE FOR THE OVEN
- There are several points to pay attention to when choosing a place for your oven. Make sure to take into account our recommendations below in order to prevent any problems and dangerous situations, which might occur later!
-When choosing a place for the oven, attention should be paid that there are no flammable or combustible materials in the close vicinity, such as curtains, oil, cloth etc. which quickly catch fire.
-Furnitures surrounding the oven must be made of materials resistant to heat
more than 50 C° of the room temperature.
Required changes to wall cabinets and exhaust fans above the built-in combined product as well as minimum heights from the oven board are shown in Figure 1. Accordingly, the exhaust fan should be at a minimum height of 65 cm from the hob board. If there is no exhaust fan the height should not be less than 70 cm.

INSTALLATION OF BUILT-IN OVEN
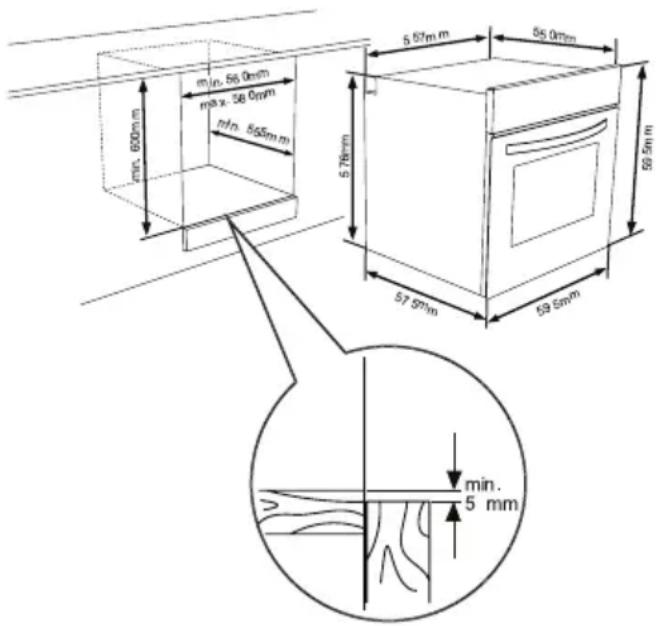

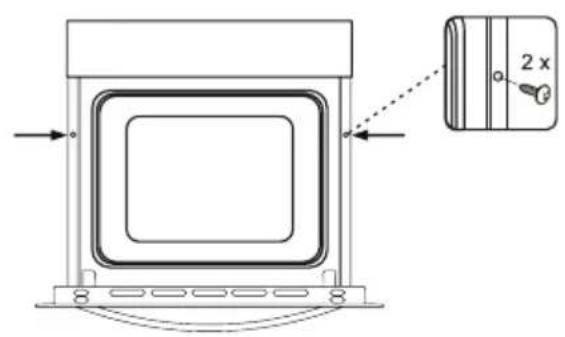
Insert the oven into the cabinet by pushing it forward. Open the oven door and insert 2 screws in the holes located on the oven frame. While the product frame touches the wooden surface of cabinet, tighten the screws.

If the oven is installed under a hob, the distance between the worktop and the top panel of the oven must be minimum 50 mm and the distance between the worktop and the top of control panel must be minimum 25 mm.
WIRING AND SAFETY OF BUILT\_IN OVEN
The instructions given below must be followed without fail during wiring :
-The earthing cable must be connected via the screw with the earthing mark. Supply cable connection must be as shown in Figure 6. If there is no earthed outlet conforming to regulations in the installation environment, call the Authorized Service immediately.
-The earthed outlet must be in close vicinity of the appliance. Never use an extension cord.
-The supply cable should not contact the product's hot surface.
-In case of any damage to the supply cable, make sure to call the Authorized Service. The cable must be replaced by the Authorized Service.
-Wiring of the appliance must be performed by the Authorized Service. H05VV-F type supply cable must be used.
-Faulty wiring may damage the appliance. Such a damage will not be covered under the warranty.
-The appliance is designed to connect
to 220-240V\~ electricity is different than the value given above, call the Authorized Service immediately.
-The Manucaturer Firm declares that its bears no responsibility whatsoever for any kind of damage and loss arising from not complying with safety norms!
-Wiring of the appliance must be performed by the Authorized Service. The appliance is
-designed to connect to 220-240V\~electricity. If the mains electricity is different than the value given, call the Authorized Service immediately. The appliance is designed for using with plug ofor fixed connection to the mains. It is necessary that you install a double pole switch between the product and the electricity supply (ma-ins), with a minimum gap of 3 mm between the switch contacts. (20A rated, delay function type).

3.4. GENERAL WARNING AND PRECAUTIONS
Your appliance is produced in conformity with the relevant safety instructions relating to electrical appliances. Maintenance and repair works must be performed only by Authorized Service technicians trained by the manufacturer firm. Installation and repair works, performed without observing the rules may be dangerous.
The outer surfaces is heated while your appliance is operating. The elements heating the inner surface of the oven and the steam out are extremely hot. These sections will continue to preserve their heat for certain while even if the appliance is switched off. Never touch the hot surfaces. Keep children away.
In order to cook in your oven, the oven function and temperature setting buttons need to be adjusted and the oven timer, needs to be programmed. Otherwise, the oven will not operate.
While the oven door is open, do not place anything on it. You may disturb the balance of the appliance or break the door.
Unplug your appliance when it is not in use.
Protect your appliance from atmospheric effects. Do not leave it under the effects of the sun, rain, snow, dust etc.
Using the oven function control button
Oven Functions
* The functions of your oven may be different due to the model of your product.

Oven Lamp:
Only the oven light will be turned on and
it will remain on in all cooking functions.

Defrost Function:
The oven's warning lights will be turned on, the fan will start operating.
To use the defrost function, take your frozen food and place it in the oven on a shelf placed in the third slot from the bottom. Placing an oven tray under the defrosting food to catch the water accumulated due to the melting ice is recommended. This function will not cook or bake your food, it will only help defrost it.

Turbo Function
The oven's thermostat and warning lights will be turned on, the ring heating element and fan will start operating.
The turbo function disperses the heat in the oven evenly. All foods on all racks will be cooked evenly. Pre-heating the oven for about 10 minutes is recommended.

Static Cooking Function:
The oven's thermostat and warning lights will be turned on, the lower and upper heating elements will start operating. The static cooking function emits heat, ensuring even cooking of the food on the lower and upper shelves. This is ideal for making pastries, cakes, baked pasta, lasagne and pizza. Pre-heating the oven for 10 minutes is recommended and it is best to cook on only one shelf at a time when using this function.

Fan Function:
The oven's thermostat and warning lights will be turned on, the upper and lower heating elements and fan will start operating.
This function is very good for baking pastries. Cooking is carried out by the lower and upper heating element within the oven and by the fan providing air circulation, which will give a slight grilled effect to the food. Pre-heating the oven for about 10 minutes is recommended.

Grilling Function:
The oven's thermostat and warning lights will be turned on, the grill heating element will start operating. The function is used for grilling and toasting foods. Use the upper shelves of the oven. Brush the wire grid lightly with oil to stop foods sticking and place foods in the centre of the grid. Always place a tray beneath to catch any oil or fat drippings. Pre-heating the oven for about 10 minutes is recommended. Warning: When grilling, the oven door must be closed and the oven temperature should be adjusted to 190^ .

Faster Grilling Function:
The oven's thermostat and warning lights will be turned on, the grill and upper heating elements will start operating. The function is used for faster grilling and for covering a larger surface area, such as grilling meats. Use the upper shelves of the oven. Brush the wire grid lightly with oil to stop foods sticking and place foods in the centre of the grid. Always place a tray beneath to catch any oil or fat drippings. Pre-heating the oven for about 10 minutes is recommended. Warning: When grilling, the oven door must be closed and the
oven temperature should be adjusted to 190^ C

Double Grill and Fan Function:
The oven's thermostat and warning lights will be turned on, the grill and upper heating elements and fan will start operating.
The function is used for faster grilling of thicker foods and for covering a larger surface area. Both the upper heating elements and grill will be energised along with the fan to ensure even cooking.
Use the upper shelves of the oven. Brush the wire grid lightly with oil to stop foods sticking and place foods in the centre of the grid. Always place a tray beneath to catch any oil or fat drippings. Preheating the oven for about 10 minutes is recommended.
Warning: When grilling, the oven door must be closed and the oven temperature should be adjusted to 190^ C.

Pizza Function:
The oven's thermostat and warning lights will be turned on, the ring and lower heating elements and fan will start operating.
The fan and lower heating function is ideal for baking food, such as pizza, in a short time. While the fan evenly disperses the heat of the oven, the lower heating element ensures the baking of dough.
Oven door should not be opened often during cooking period.

Warning: When grilling, the oven door must be closed and the oven
temperature should be adjusted to 190^ C.
Manual Aiding Steam Function:
This function can be used any other cooking together with functions.
It is used for cooking all types of vegetables, smaller chunks of meat, fruit, and side dishes (rice, pasta).
The advantages;
- Crispy and shiny surface on foods
• Minimum loss of water - Almost no loss of nutrients
- Low-fat cooking
You can select the desired function and steam density. Steam density table is on the next page.
Filling the Water Tank

natural_image
Close-up of a kitchen appliance control panel with a dial and handle (no visible text or symbols)- The water tank volume is 300 ml. This amount allows 3 cycles of steam aiding. For each cycle around 100 ml water is used.

natural_image
Close-up of a hand pointing at a black industrial control panel (no visible text or symbols)- Push the tank cover to open

natural_image
Close-up of a hand holding a black kitchen control panel with no visible text or symbols on the device itself.- Pull the water tank out slightly.

The tank must not be taken out

natural_image
Hand pouring liquid into a glass bottle on a black stove burner (no text or symbols visible)- Add the minimum 100 ml water into the tank before usage.

The maximum water level is indicated as "MAX" on the tank.
| Steam Density Water | Amounts |
| 1 steam injection Add | 100 ml water |
| 2 steam injection Add | 200 ml water |
| 3 steam injection Add | 300 ml water |
| Auto steam injection Add | 100 ml water |
natural_image
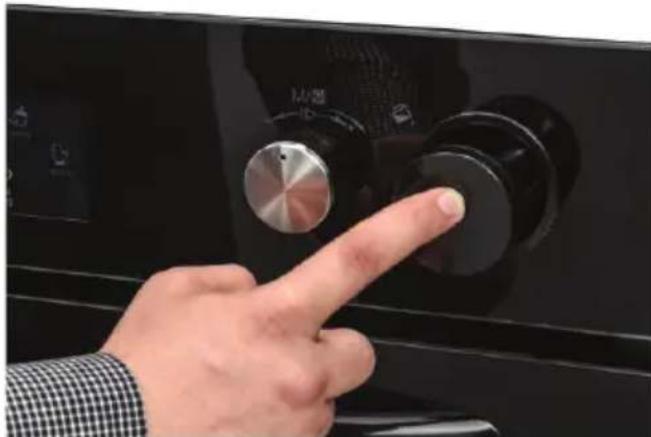
Close-up of a hand pressing a black kitchen control knob with a metallic dial (no visible text or symbols)- Push on the tank cover to close.

Vap clean+ function:
Vapclean+ function provides easy cleaning. You will find this function under 'Cleaning' menu. Before running this function please add 300 ml water into the tank. For adding water please follow the instruction given under title 'Filling Water Tank'.
ENERGY SAVING
Minimize the amount of liquid or fat to reduce cooking times.

natural_image
Three circular gauges with directional arrows and a central screen showing a star, against a dark background (no text or symbols)| Left knobLong push: Switch on / offShort push: Pause cookingTurn right: Key lockTurn left: Undo / Go to previous menu |  |
| Right knobPush: Select / Start Cooking / Start manual steam operationTurn Right: Menu Navigation / Increase TemperatureTurn Left: Menu Navigation / Decrease Temperature | 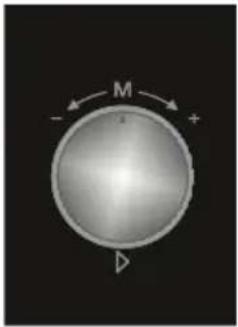 |
USE OF YOUR PRODUCT
Ready Cook is designed on principles such as making
amateur users to be able to implement professional recipes easily
with auto cooking fuctions, also allowing housewives to implement
tehir own inspired recipes with combined manual cooking functions. Using
a user friendly interface with the help of colored TFT display creates the charm of Ready
Cook comparing to existing ovens on the market.
Ready Cook's menus such as manual cooking, auto cooking, favorites cleaning and
settings are described as below.
Manual Cooking:
Every cooking setting can be set by user in the manual cooking. 7 different cooking functions,
temperature, boost function, cooking duration and cooking end time can be selected.
With the flexibility of manuel cooking any cooking can be performed by users
with respect their own taste.
To perform cooking in the manuel cooking menu, below listed steps should be followed.
Use of the Smart LCD Control Unit
Ready Cook is designed to help home users to implement professional cooking recipes easily using the built-in auto cooking functions.
The Ready Cook menus, such as Manual Cooking, Auto Cooking, Favourites, Cleaning, and Settings, are described below.
Manual cooking
You can adjust every cooking setting in Manual Cooking mode, including the 7 different cooking functions, the temperature, the boost function, the cooking duration, and the cooking end time. Follow the steps listed below to navigate the Manual Cooking menu.

The main menu
- Rotate the right knob in either direction until "Manual Cooking" is highlighted.
- Press the right knob to select the highlighted option.

Oven function
- Rotate the right knob in either direction to navigate between the available oven functions.
- Press the right knob to select the highlighted option.

Steam Aid Cooking
- Rotate the right knob in either direction to highlight Steam aid cooking "ON" or "OFF".
- Press the right knob to select the highlighted option.

- Press the right knob to select to "1 steam injection".
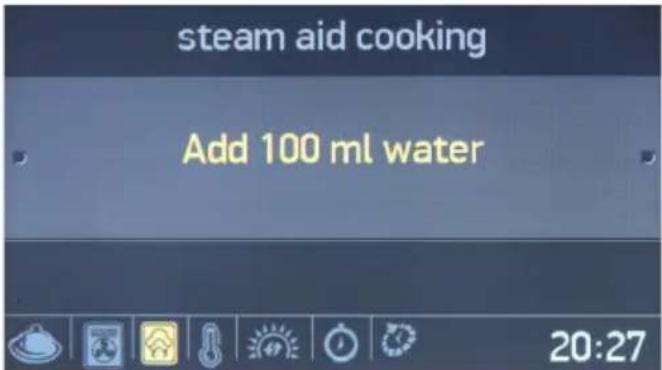
- Add 100 ml of water into the water tank.
- Press the right knob to select to "Add 100 ml water".

- Rotate one times the right knob to 2 steam injection.
- Press the right knob to select the highlighted option.

- Add 200 ml of water into the water tank.
- Press the right knob to Add 200 ml water.
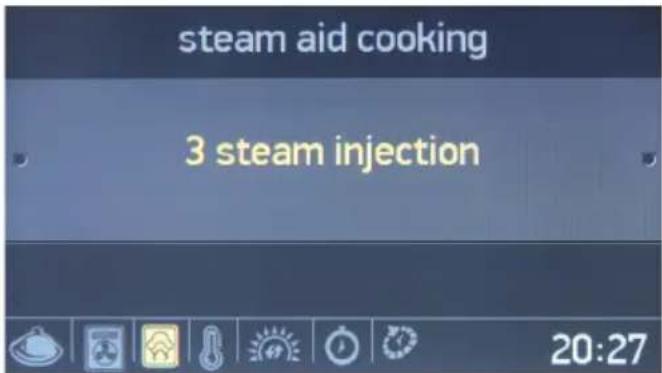
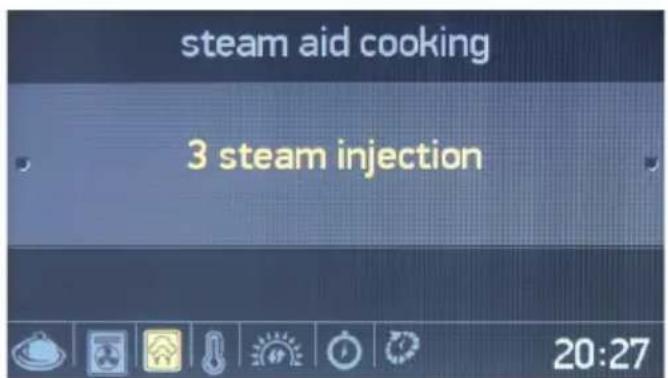
- Rotate two times the right knob to 3 steam injection.
- Press the right knob to select the highlighted option.

- Add 100ml of water into the water tank.
- Press the right knob to Add 100 ml water.

- Add 300 ml of water into the water tank.
- Press the right knob to Add 300 ml water.

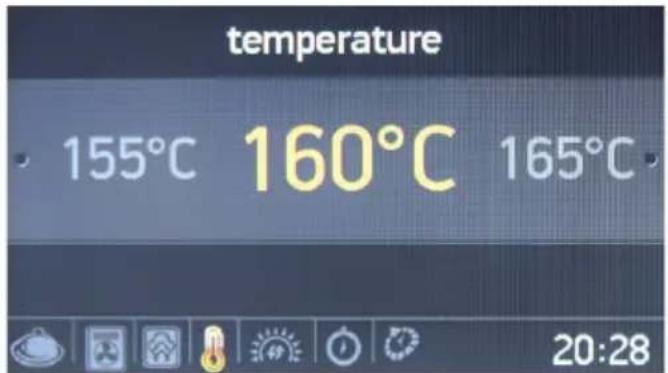
Temperature
- Rotate the right knob in either direction to navigate between the available temperature settings.
- Press the right knob to select the highlighted option.

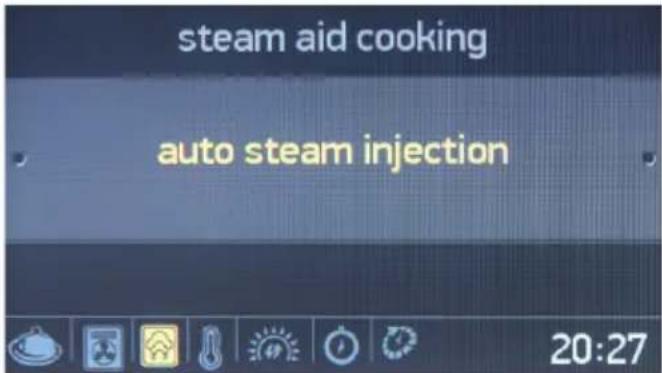
- Rotate two times the right knob to auto steam injection.
- Press the right knob to select the highlighted option.

Boost
- Rotate the right knob in either direction to highlight Boost "ON" or
"OFF".
- Press the right knob to select the highlighted option.

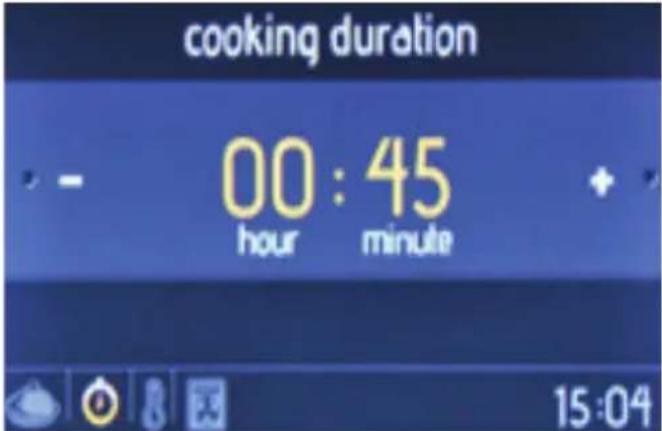
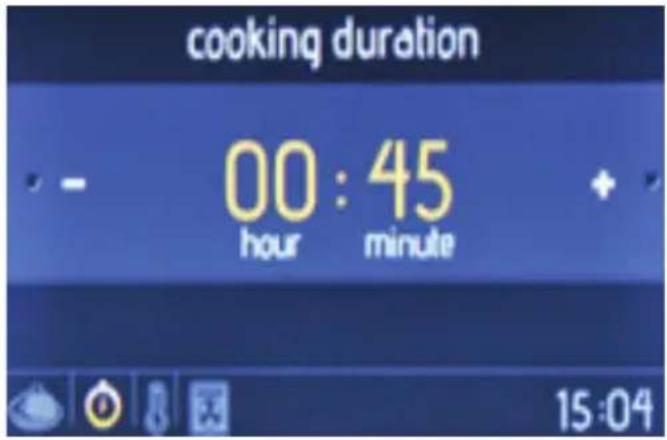
Cooking duration
- Rotate the right knob in either direction to change the cooking duration.
- Press the right knob to set the cooking duration.
- NOTE: If the cooking duration is set to 00:00, cooking will continue until you manually stop it.

Cooking end time
- Rotate the right knob in either direction to change the cooking end time.
- Press the right knob to set the cooking end time.

The information screen
• Cooking will begin within 10 seconds of the last action, or when the right knob is pressed.
- Rotate the left knob anti-clockwise to go back to the previous setting.
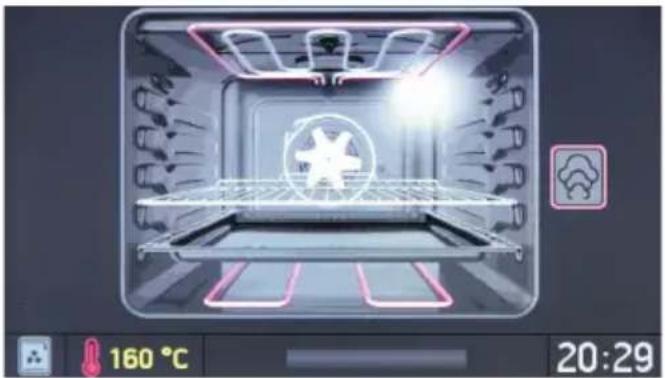
natural_image
Interior view of a modern kitchen oven with illuminated ceiling and ventilation grilles, no visible text or symbols on the main structure.The animation screen displays:
- Cooking time
- Temperature
• Cooking start and end time
• Cooking function information.


The animation screen
- Press the left knob to stop cooking.
- Press the right knob to start / continue cooking.
- Rotate the right knob in either direction to change the temperature.
- Rotate the left knob anti-clockwise, while any cooking function is active, to display the oven function, temperature, and cooking time setting screen.
• To stop cooking and return to the main menu, press the left knob then rotate it anti-clockwise.
Auto Cooking
Ready Cook has built-in, previously determined, recipe functions that can be selected in the Auto Cooking menu. You will only be able to select
the name of the desired meal. It will not be possible to alter any of the recipe settings, including cooking duration and temperature, as these are automatically set by Ready Cook.
Follow the steps below to perform auto cooking.

The main menu
- Rotate the right knob in either direction until "Auto Cooking" is highlighted.
- Press the right knob to select the highlighted option.
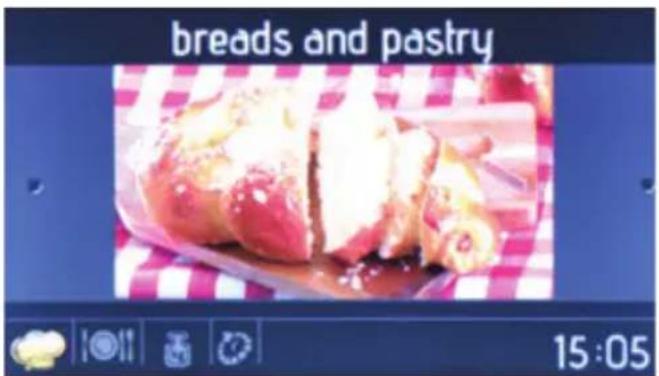
Food categories
- Rotate the right knob in either direction to navigate between the available recipes.
- Press the right knob to select the highlighted option.
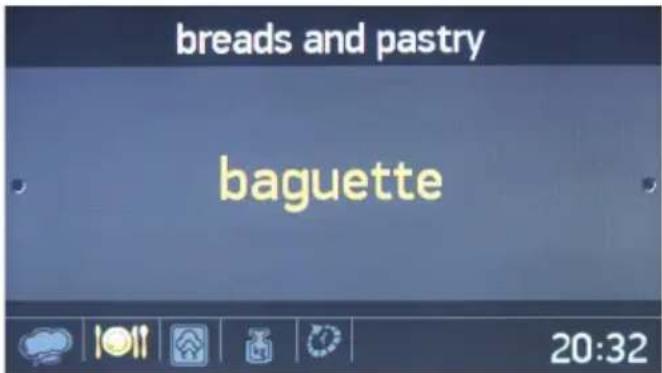
Recipe selection
- Rotate the right knob in either direction to navigate between the available recipes.
- Press the right knob to select the highlighted option.

Steam injection
- Rotate the right knob in either direction to highlight Steam injection On or Off.
- Press the right knob to select the highlighted option.

- Add 200 ml of water into the water
tank.
- Press the right knob to Add 200 ml water.

Food weight
- Rotate the right knob in either direction to change the weight value.
- Press the right knob to set the weight.

Cooking end time
- Rotate the right knob in either direction to change the cooking end time.
- Press the right knob to set the cooking end time.

other
| oven shelf | weight | time | end time | |---|---|---|---| | 5 | 1000g | 01:10 | 21:43 |The information screen
• Cooking will start within 10 seconds of no activity, or when the right knob is pressed.
- Rotate the left knob anti-clockwise to go back through the previous setting screens.
- Place food on the middle shelf to achieve the best cooking results.

natural_image
Interior view of a futuristic kitchen with illuminated ceiling and storage racks (no visible text or symbols)The animation screen
- Press the left knob to stop cooking.
- Press the right knob to start and continue cooking.
- To stop cooking and return to the main menu, press the left knob and rotate it anti-clockwise.
Favourites
It is possible to save your manual cooking settings, allowing you to quickly select the same cooking
settings at any time. At the end of the Manual Cooking menu, after the cooking duration setting, you will be asked whether you want to save the settings to your favourites.
To create a favourite cooking setting, use the edit function in the Favourites menu.
To select and begin a favourite function, follow the steps below.

On the main menu
- Rotate the right knob in either direction until ‘Favourites’ is highlighted.
- Press the right knob to select the highlighted option.
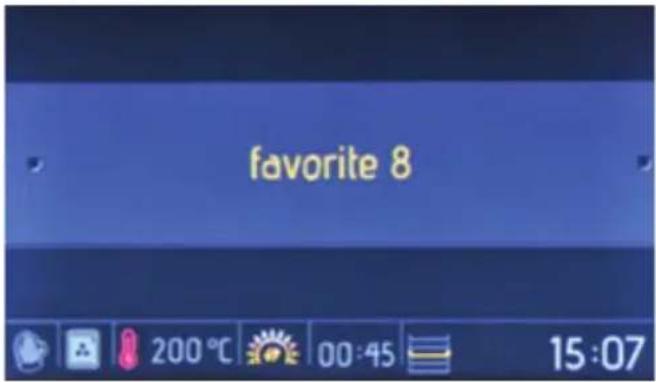
Favourites
- Rotate the right knob in either direction to navigate between the available options.
- Press the right knob to select the highlighted option.
• The settings stored in the favourite
will be displayed at the bottom of the screen.

The run/edit screen
- Rotate the right knob to highlight "Run".
- Press the right knob to select "Run".

Cooking end time
- Rotate the right knob in either direction to change the cooking end time.
- Press the right knob to set the cooking end time.

The information screen
• Cooking will start within 10 seconds of no activity, or when the right knob is pressed.
- Rotate the left knob anti-clockwise to go back through the previous setting screens.
- Place food on the middle shelf to achieve the best cooking results.

natural_image
Interior view of a smart oven with illuminated ceiling and star-shaped vent, no visible text or symbols on the main structure.The animation screen
- Press the left knob to stop cooking.
- Press the right knob to start and continue cooking.
- To stop cooking and return to the main menu, press the left knob and rotate it anti-clockwise.
To edit any Favourites settings, follow the steps below.

The main menu
- Rotate the right knob in either direction until "Favourites" is highlighted.
- Press the right knob to select the highlighted option.
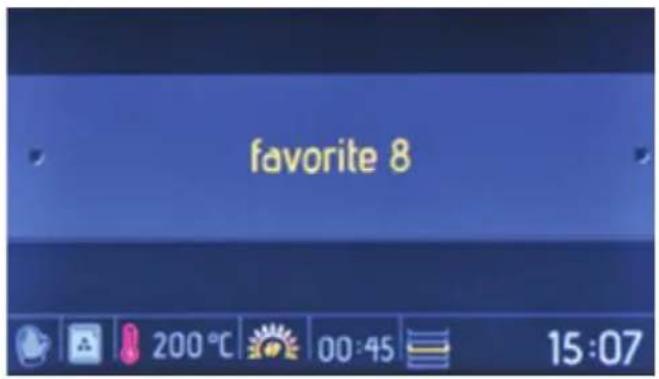
Favourites
- Rotate the right knob in either direction to navigate between the available options.
- Press the right knob to select the highlighted option.
- The settings stored in the selected ‘Favourite’ will be displayed at the bottom of the screen.
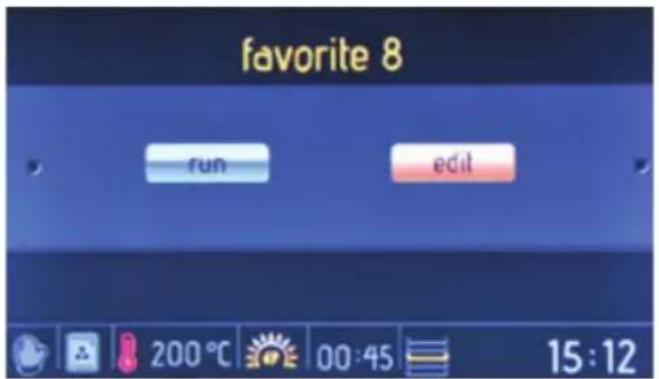
The run/edit screen
- Rotate the right knob to highlight "Edit".
- Press the right knob to select "Edit".

Oven function
- Rotate the right knob in either direction to navigate between the available oven functions.
- Press the right knob to select the highlighted option.

Temperature
- Rotate the right knob in either direction to navigate between the
available temperature settings.
- Press the right knob to select the highlighted option.
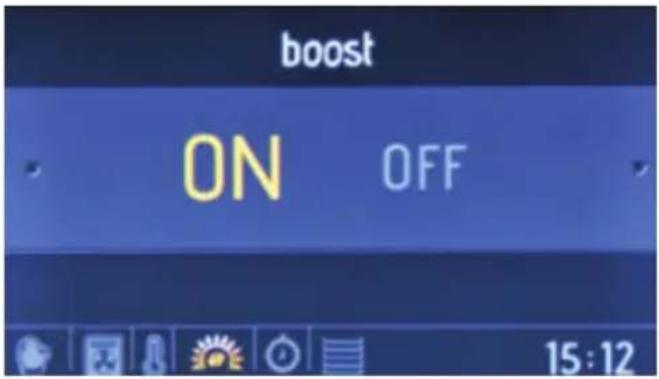
Boost
- Rotate the right knob in either direction to highlight Boost "ON" or "OFF".
- Press the right knob to select the highlighted option.

Cooking duration
- Rotate the right knob in either direction to change the cooking duration.
- Press the right knob to set the cooking duration.
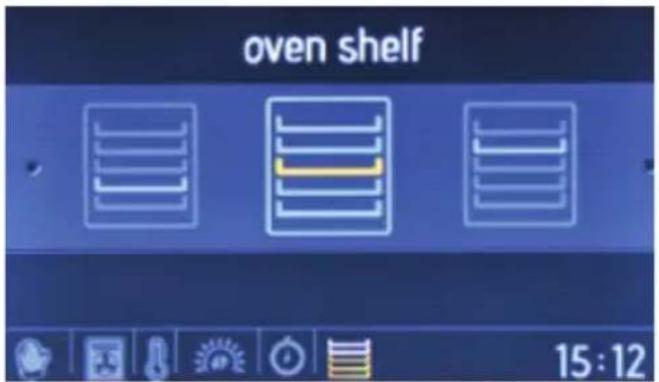
Oven shelf
- Rotate the right knob in either direction to navigate between the available oven shelves.
- Press the right knob to select the shelf
- For the same cooking results each time, oven shelf information is important.

The information screen
- Rotate the left knob anti-clockwise to go back through the previous setting screens.

Save to favourites
- Rotate the right knob to highlight "Save" (to save the settings) or "Cancel" (to discard the settings).
- Press the right knob to select the highlighted option.
Cleaning
With the Vapclean function, dried residue within the oven will be softened with vapour. To perform Vapclean, pour a glass of water onto the oven shelf at the bottom of the oven, then follow the steps listed below.

On the main menu
- Rotate the right knob in either direction until "Cleaning" is highlighted.
- Press the right knob to select the highlighted option.

The function selection screen
Press the right knob to select "Vapclean".
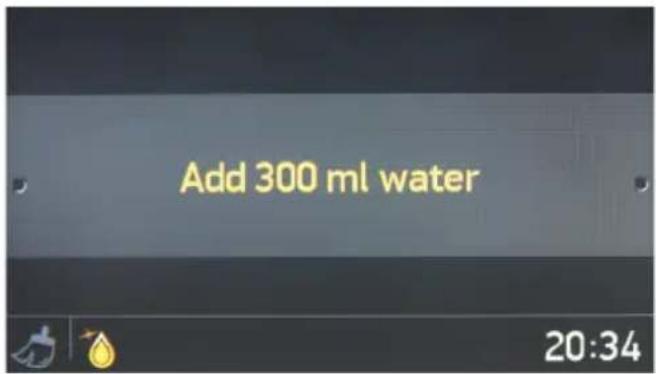
Steam injection
- Add 300 ml of water into the water tank.
- Press the right knob to Add 300 ml water.
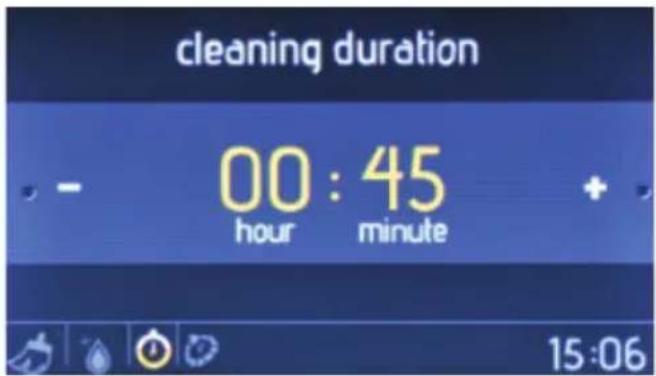
Cleaning duration
- Rotate the right knob in either direction to change the cleaning duration.
- Press the right knob to set the
cleaning duration.

Cleaning end time
- Rotate the right knob in either direction to change the cleaning end time.
- Press the right knob to set the cleaning end time.

The information screen
- Cleaning will start within 10 seconds of no activity, or when the right knob is pushed.
- Rotate the left knob anti-clockwise to go back through the previous setting screens.

natural_image
Interior view of a modern kitchen oven with illuminated tray and ceiling lights (no visible text or symbols)The animation screen
- Press the left knob to stop cleaning.
- Press the right knob to start and continue cleaning.
- To stop cleaning and return to the main menu, press the left knob and rotate it anti-clockwise.
Settings
The settings menu allows you to change and set the date, time, screen brightness, buzzer tone, and language option.

The main menu
- Rotate the right knob in either direction until 'Settings' is highlighted.
- Press the right knob to select the highlighted option.

The languages menu
- Rotate the right knob in either direction to change the language.
- Press the right knob to set the desired language.

The brightness menu
- Rotate the right knob in either direction to change the screen brightness between the levels 0 and 4.
- Press the right knob to set the screen brightness.

The date menu
- Rotate the right knob in either direction to change the date.
- Press the right knob to set the date.
- The date is set in the format: month, day, year.

The clock menu
- Rotate the right knob in either direction to change the clock.
- Push the right knob to set the clock.
- Clock is set in the format: minute and hour.
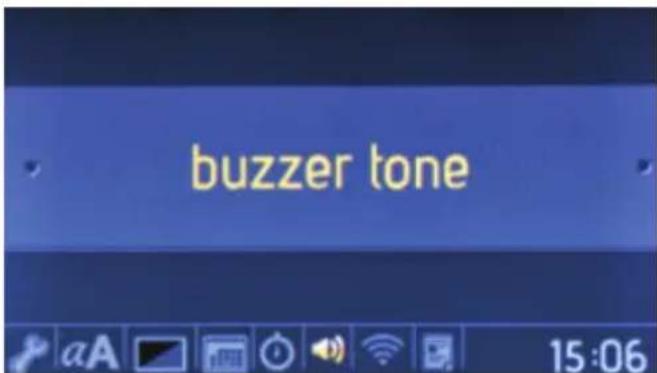
On the buzzer tone menu
- Rotate the right knob in either direction to choose from 3 different buzzer tones.
- Press the right knob to set the desired buzzer tone.

The software version menu
- The software version will be displayed as information only. It cannot be changed.
Key lock
The key lock is used to avoid unintentional changes being made to the oven settings. To activate or deactivate the key lock, rotate the left knob anti-clockwise and hold it for 3 seconds. While the key lock is active, only the “ON/OFF” button can be activated. All other buttons will be locked.
| DISHES | TURBO LOWER-UPPER | LOWER-UPPER FAN GRILL | ||||||||||
| Thermostat pos. (°C) | Rack pos. | Cooking period (min) | Thermostat pos. (°C) | Rack pos. | Cooking period (min) | Thermostat pos. (°C) | Rack pos. | Cooking period (min) | Thermostat pos. (min) | Rack pos. | Cooking period (min) | |
| Layered pastry | 170-190 1-2 | -3 35-45 17 | 0-190 1-2 35-45 | 170-190 1-2 25-35 | ||||||||
| Cake 150-170 | 1-2-3 30-40 17 | 0-190 1-2 | 30-40 150-170 | 1-2-3 25-35 | ||||||||
| Cookie 150-170 | 1-2-3 25-35 | 170-190 1-2 | 30-40 150-170 | 1-2-3 25-35 | ||||||||
| Grilled meatballs | 200 4 10-15 | |||||||||||
| Watery food | 175-200 | 2 | 40-50 | 175-200 | 2 | 40-50 | 175-200 | 2 | 40-50 | |||
| Chicken | 200 | 1-2 | 45-60 | 200 | 1-2 | 45-60 | 200 | * | 50-60 | |||
| Chop | 200 | 3-4 | 15-25 | |||||||||
| Beefstake | 200 4 15-25 | |||||||||||
| Two-tray cake | 160-180 | 1-4 30-40 | ||||||||||
| Two-tray pastry | 170-190 | 1-4 35-45 | ||||||||||
| * Cook with roast chicken skewer... | ||||||||||||
Accessories
The product is supplied with accessories. You can also use accessories you purchase from other sources, but they must be heat and flame resistant. You can also use glass dishes, cake molds and oven trays that are appropriate for use in oven. Follow manufacturer's instructions when using other accessories. In case small size dishes are used, place the dish onto the wire grid, as it will completely be on the middle part of the grid. If the food to be cooked does not cover the oven tray completely, if the food is taken from the deep freezer or the tray is being used for the collection of food's juices that flow during grilling, the form changes can be observed in the tray. This is due to the high temperatures that occur during cooking. The tray will return to its old form when the tray cools down after cooking. This is a normal physical event that occurs during heat transfer. Do not place hot glass trays and dishes into a cold environment straight from the oven to avoid breaking the tray or dish. Do not put onto cold and wet surfaces. Place on a dry kitchen cloth and allow to cool slowly. When using the grill in your oven; we recommend (where appropriate) you use the grid that was supplied with the product. When using the wire grid; put a tray onto one of the lower shelves to enable oil to be collected. Water may be added to the tray to assist cleaning. As explained in the corresponding clauses, never attempt to use the gas operated grill burner without the grill protection lid. If your oven has a gas operated grill burner, but the grill heat shield is missing, or if it is da maged and cannot be used, request a spare part from the nearest service centre.

Oven Accessories
The accessories for your oven may be different due to the model of your product.
The Deep Tray
The deep tray is best used for cooking stews.
Put the tray into any rack and push it to the end to make sure it is placed correctly.

natural_image
Technical line drawing of a square frame with bolt holes and a central circular hole (no text or symbols)The Shallow Tray
The shallow tray is best used for baking pastries.
Put the tray into any rack and push it to the end to make sure it is correctly placed.

natural_image
Technical line drawing of a square frame with bolt holes and a central circular hole (no text or symbols)The Small Tray
The small tray is best used for baking pastry.
Place the tray in the centre of a wire grid.

natural_image
Line drawing of a rectangular tray or container with a central hole and side holes (no text or symbols)The Wire Grid
The wire grid is best used for grilling or for processing food in oven-friendly containers.

natural_image
Line drawing of a corrugated metal tray with ribbed sides (no text or symbols)
WARNING
Place the grid to any corresponding rack in the oven cavity correctly and push it to the end.

natural_image
Technical line drawing of a server rack with cooling unit and ventilation duct (no text or symbols)The Wire Rack with a Full Extension Telescopic Rail
One of the shelves in the wire rack is fully telescopic; it extends out fully on ball bearings to allow for easy access to your food.

natural_image
Technical line drawing of a mechanical assembly with horizontal and vertical components (no text or symbols)FIRST IN THE WORLD
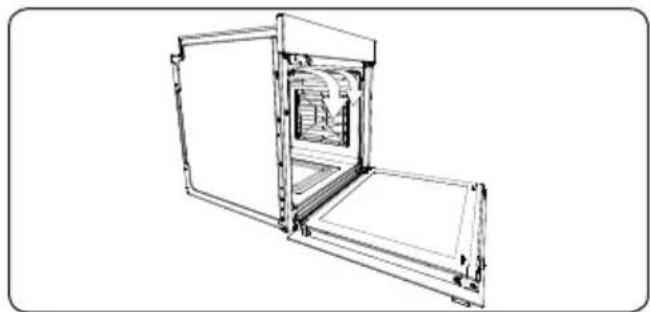
Air Curtain
The patented Air Curtain system prevents hot air from reaching the end user by creating an air curtain when the oven door is opened.
natural_image
Technical line drawing of an open industrial furnace or oven with internal structure (no text or symbols)CLEANING AND MAINTENANCE OF YOUR OVEN
CLEANING
Before starting to clean your oven, be sure that all control buttons are off and your appliance is cooled off. Unplug the appliance.
Do not use cleaning materials containing particles that might scratch the enamelled and
painted parts of your oven. Use cream cleaners or liquid cleaners, which do not contain particles. As they might ahrm the surfaces, do not use caustic creams, abrasive cleaning powders, rough wire wool or hard tools. In the event the excess liquids spilling over your oven should burn, it may cause a damage to the enamel. Immediately clean up the split liquids. Do not use steam cleaners for cleaning the oven.
Cleaning the interior of the oven
Make sure to unplug the oven before starting to clean it. You will obtain best results if you clean the oven interior while the oven is slightly warm. Wipe your oven with a soft piece of cloth dampened with soap water after each use. Then wipe it again, this time with a wetted cloth, and wipe it dry. A complete cleaning using dry and powder type cleaners. For product with catalytic enamel frames, the rear and side walls of the inner frame do not require cleaning. However; depending on usage, it is recommended that you replace them after a certain period of time.
MAINTENANCE
Replacing the Oven Light
The change of oven lamp must be done by authorized technician. The rating of the bulb should be 230V, 25Watt, Type E14,T300 before changing the lamp,the oven should be plugged off and it should be cool.
The lamp design is specific for the use in household cooking appliances and it is not suitable for household room illumination.
SERVICE AND TRANSPORT
REQUIREMENTS BEFORE CONTAINING TO SERVICE
If the oven does not operate :
The oven may be plugged off, there has been a black out. On models fitted with a timer, time may not be regulated.
If the oven does not heat :
The heat may be not adjusted with oven's heater control switch.
If the interior lighting lamp does not light :
The electricity must be controlled. It must be controlled whether the lamps are defective. If they are defective, you can change them as following the guide.
Cooking (if lower-upper part does not cook equally):
Control the shelf locations, cooking period and heat values according to the manual.
Except these, if you still have any problem with your product, please call to the "Authorized Service".
INFORMATION RELATED TO TRANSPORT
If you need any transport :
Keep the original case of product and carry it with its original case when need to be carried. Follow the transport signs on case. Tape the cooker on upper parts, hats and heads and saucepan
carriers to the cooking panels.
Place a paper between the upper cover and cooking panel, cover the upper cover, than tape to the side surfaces of oven.
Tape carboard or paper onto the front cover on interior glass of oven as it will be suitable to the trays, for the wire grill and trays in your oven not damage to the oven's cover during transport. Also tape the oven's covers to the side walls.
If does not have the original case :
Take measure for external surfaces (glass and paintes surfaces) of oven against possible blows.
I dashur klient,
natural_image
Line drawing of an open oven with internal compartments and ventilation grilles (no text or symbols)natural_image
Close-up of a kitchen appliance control panel with a rotary knob and handle (no visible text or symbols)natural_image
Close-up of a hand pressing a black control knob on a kitchen appliance (no visible text or symbols)natural_image
Close-up of a hand holding a black kitchen appliance control knob, with no visible text or symbols on the device itself.• Tërhiqni pak rezervuarin e ujit.

natural_image
Hand pouring liquid into a glass bottle on a black stove burner (no text or symbols visible)natural_image
Hand pressing a finger on a black appliance control panel (no visible text or symbols)Në menynë kryesore
Funksionet e furrës
Gatime me avull
Ekrani i informacionit
natural_image
Interior view of a modern kitchen appliance with illuminated ceiling and storage racks (no visible text or symbols)Ekrani i animacionit shfaq:


Ekrani i animacionit
Menyja kryesore
Injeksion me avull
other
| oven shelf | weight | time | end time | |---|---|---|---| | 5 | 1000g | 01:10 | 21:43 |Ekrani i informacionit
natural_image
Interior view of a modern kitchen oven with illuminated ceiling and storage racks (no visible text or symbols)Ekrani i animacionit
Në menynë kryesore
Preferencat
Ekrani vazhdo/shto;
Ekrani i informacionit
natural_image
Interior view of a futuristic electric oven with illuminated ceiling and star-shaped vent, shown in digital interface (no readable text or symbols)Ekrani i animacionit
Menyja kryesore
Preferencat
Ekrani vazhdo/shto;
Funksionet e furrës
Ekrani i informacionit
Ruani tek preferencat
Në menynë kryesore
Injeksion me avull
Ekrani i informacionit
natural_image
Interior view of a modern kitchen oven with illuminated ceiling and ventilation grilles (no visible text or symbols)Ekrani i animacionit
Menyja kryesore
Menyja e gjuhëve
Menyja e ndriçimit
Menyja e orës
natural_image
Technical line drawing of a square frame with bolt holes and a central hole (no text or symbols)Tava e poshtme
natural_image
Technical line drawing of a square frame with bolt holes and central hole (no text or symbols)Tava e Vogël
natural_image
Line drawing of a rectangular tray or container with a central hole and side holes (no text or symbols)Rrjeti i telave
natural_image
Line drawing of a corrugated metal tray with ribbed sides (no text or symbols)
PARALAJMËRIM
natural_image
Technical line drawing of a server rack with internal components and ventilation duct (no text or symbols)natural_image
Technical line drawing of a mechanical assembly with horizontal and vertical components (no text or symbols)I PARI NË BOTË
Perde Ajri
natural_image
Technical line drawing of a mechanical enclosure or oven with internal compartments and doors (no text or symbols)PASTRIMI DHE MIRËMBAJ-TJA E FURRËS TUAJ
PASTRIMI
natural_image
Line drawing of an open oven with internal compartments and control panel (no text or symbols)
SIKKERHEDSADVARSLER
LÆS DISSE INSTRUKTIONER OM-HYGGELIGT OG FULDSTÆNDIGT F∅R IBRUGTAGNING AF APPARATET, OG LÆG DEM DEREFTER PÅ ET PRAKTISK STED SOM REFERENCE, HVIS DET BLIVER N∅DVENDIGT.
DENNE VEJLEDNING ER UDARBEJ-DET TIL FLERE END ÉN MODEL. DIT APPARAT HAR MÅSKE IKKE ALLE DE FUNKTIONER, SOM ER BESKREVET I DENNE VEJLEDNING. VÆR OP-MÆRKSOM PÅ DE UDTRYK, SOM HAR TAL TILKYTTET, MENS DU LÆ-SER BRUGERVEJLEDNINGEN.
Generelle Sikkerhedsadvarsler
Installationsadvarsler
natural_image
Close-up of a kitchen appliance control panel with a rotary knob and handle (no visible text or symbols)natural_image
Close-up of a hand pressing a black control knob on a kitchen appliance (no visible text or symbols)natural_image
Close-up of a hand holding a black kitchen fan dial and knob, with no visible text or symbols on the device itself.natural_image
Hand pouring liquid into a glass bottle on a black stovetop (no text or symbols visible)natural_image
Hand pointing at a black kitchen control panel with a rotary knob (no visible text or symbols)natural_image
Three circular control panels showing directional arrows and a central game interface (no readable text or symbols)| Venstre knopLangt tryk: Switch on / off (Slå til eller fra)Kort tryk: Pause i tilberedningenHøjredrej: TastaturlåsVenstredrej: Fortryd / Gå til forrige menu |  |
 |
BRUG AF PRODUKTET
Hovedmenuen
Ovnfunktion
Informationsskærmen
natural_image
Interior view of a modern kitchen appliance with illuminated ceiling and storage tray (no visible text or symbols)

Animationsskærmen
Hovedmenuen
Fødevarekategorier
Valg af opskrift
Dampindsprøjtning
other
| oven shelf | weight | time | end time | |---|---|---|---| | 5 | 1000g | 01:10 | 21:43 |Informationsskærmen
- Tilberedning starter inden for
natural_image
Interior view of a futuristic kitchen with illuminated ceiling and storage racks, no visible text or symbolsAnimationsskærmen
I hovedmenuen
Favoritter
Informationsskærmen
- Tilberedning starter inden for
natural_image
Interior view of a futuristic kitchen with illuminated ceiling and platform (no visible text or symbols)Animationsskærmen
Hovedmenuen
Favoritter
Ovnfunktion
Informationsskærmen
Gem i favoritter
I hovedmenuen
Dampindsprøjtning
Informationsskærmen
natural_image
Interior view of a futuristic oven with illuminated ceiling and tray, no visible text or symbolsAnimationsskærmen
Hovedmenuen
Sprogmenuen
Lysstyrkemenuen
Urmenuen
Summertonemenuen
Softwareversionsmenuen
natural_image
Technical line drawing of a square frame with bolt holes and a central circular hole (no text or symbols)Bagepladen
natural_image
Technical line drawing of a square frame with bolt holes and a central circular hole (no text or symbols)Den lille plade
natural_image
Line drawing of a rectangular tray or container with a central hole and side holes (no text or symbols)Trådristen
natural_image
Line drawing of a corrugated metal tray with ribbed sides (no text or symbols)
ADVARSEL
natural_image
Technical line drawing of a refrigerator internal structure with cooling fins and ventilation duct (no text or symbols)natural_image
Technical line drawing of a mechanical assembly with horizontal and vertical components (no text or symbols)DEN F∅RSTE I VERDEN
Air Curtain
natural_image
Technical line drawing of an open industrial furnace or oven with internal structure (no text or symbols)RENG∅RING OG VEDLIGE- HOLDELSE AF DIN OVN
RENG∅RING
natural_image
Close-up of a kitchen appliance front panel showing a rotary knob and control knob (no text or symbols visible)natural_image
Close-up of a hand pointing at a black door handle (no visible text or symbols)natural_image
Close-up of a hand holding a black kitchen appliance with a dial and control knob (no visible text or symbols)natural_image
Hand pouring liquid into a glass bottle on a black stove burner (no text or symbols visible)natural_image
Hand pointing at a black appliance control knob (no visible text or symbols)natural_image
Three circular gauges labeled S, B, and D showing different interface elements (no readable text or symbols)natural_image
Circular mechanical component with directional arrows indicating rotation and fastening (no text or symbols)Rechter Einstellknopf
Hauptmenü
Backofenfunktionen
Kochzeit
natural_image
Interior view of a 3D printer with a star-shaped logo on the screen, showing no readable text or symbols.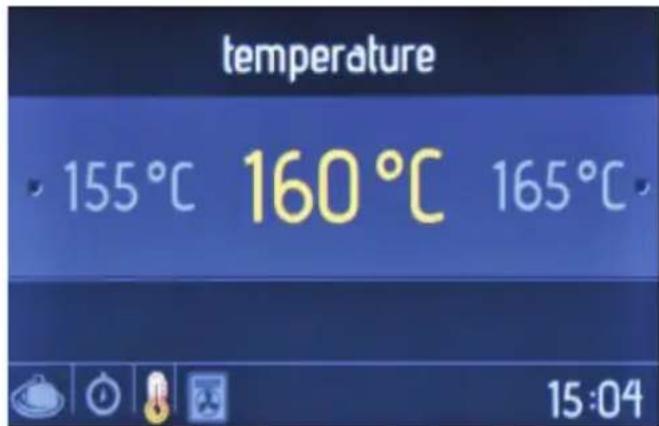
Hauptmenü
Gargutkategorien
Rezeptauswahl
other
| oven shelf | weight | time | end time | |---|---|---|---| | 5 | 840 g | 00:34 | 15 :39 |natural_image
Interior view of a futuristic kitchen with illuminated shelves and ceiling lights (no visible text or symbols)Im Hauptmenü
Favoriten
natural_image
Interior view of a 3D printer or scanner with a star-shaped logo on the screen, showing no readable text or symbols.Hauptmenü
Favoriten
Backofenfunktionen
Kochzeit
Im Hauptmenü
Reinigungsdauer
natural_image
Interior view of a modern kitchen appliance with illuminated ceiling and star-shaped logo (no readable text or symbols)Hauptmenü
Menü „Sprache“
Menü „Helligkeit“
Uhr-Menü
Menü „Signalton“
Hauptmenü
Backofenfunktionen

Kochzeit
natural_image
Interior view of a smart heating room with illuminated ceiling and control panel (no readable text or symbols)Hauptmenü
Kategorien
Rezepte
Dampfeinspritzung
natural_image
Interior view of a futuristic kitchen with illuminated ceiling and storage tray (no visible text or symbols)Im Hauptmenü
Favoriten
natural_image
Interior view of a 3D printer with a star-shaped logo on the screen, showing no readable text or symbols.Hauptmenü
Favoriten
Backofenfunktionen
Kochzeit
Im Hauptmenü
Dampfeinspritzung
Reinigungsdauer
natural_image
Interior view of a modern kitchen oven with illuminated ceiling and tray (no visible text or symbols)Hauptmenü
Menü „Sprache“
Menü „Helligkeit“
Uhr-Menü
Menü „Signalton“
natural_image
Technical line drawing of a square frame with bolt holes and a central circular hole (no text or symbols)Flaches Backblech
natural_image
Technical line drawing of a square frame with bolt holes and a central circular hole (no text or symbols)Kleines Backblech
natural_image
Line drawing of a rectangular tray or container with a central hole and side supports (no text or symbols)natural_image
Technical line drawing of a mechanical assembly with two parallel plates and a central shaft (no text or symbols)ERSTE IN DER WELT
Luftvorhang
natural_image
Line drawing of an open industrial oven or furnace unit with internal compartments (no text or symbols)natural_image
Close-up of a kitchen oven control panel with a rotary knob and a digital display (no visible text or symbols)natural_image
Close-up of a hand pressing a black control knob on a black appliance (no visible text or symbols)natural_image
Close-up of a hand holding a black industrial fan dial with control knob (no visible text or symbols)natural_image
Hand pouring liquid into a glass bottle on a black stovetop (no text or symbols visible)- Добавете минимум 100 ml вода в резервоара преди употреба.

natural_image
Close-up of a hand pressing a black kitchen control knob with a metallic dial (no visible text or symbols)natural_image
Simple diagram of a sphere with directional arrows indicating rotation or movement (no text or symbols)Десен контролен регулатор
natural_image
Circular object with directional arrows labeled M and +, no text or symbols presentНАЧИН НА УПОТРЕБА
Основно меню
Функция на фурната
- Добавете 200 ml вода в резервоара за вода.
- Натиснете десния контролен регулатор, за да добавите 200 ml вода.
- Добавете 300 ml вода в резервоара за вода.
- Натиснете десния контролен регулатор, за да добавите 300 ml вода.
- Добавете 100ml вода в резервоара за вода.
- Натиснете десния контролен регула- тор, за да добавите 100 ml вода.
Температура:
Информационен екран
natural_image
Interior view of a kitchen oven with illuminated ceiling and ventilation grilles (no visible text or symbols)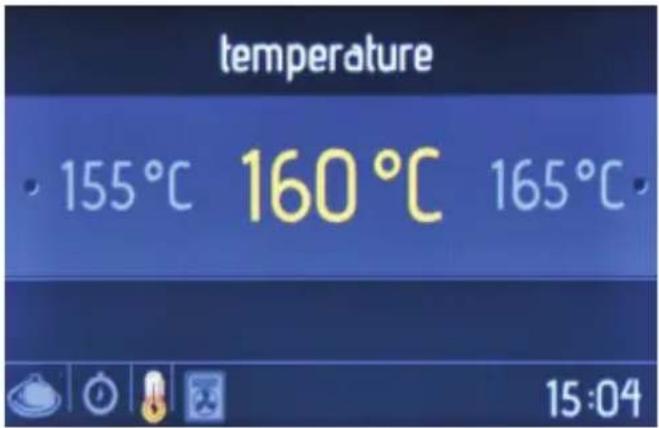
Екранна анимация
Основно меню
Категории храни
Избор на рецепта
Впръскване на пара
• Добавете 200 ml вода в резервоара за вода.
- Натиснете десния контролен регулатор, за да добавите 200 ml вода.

Тегло на храната
other
| oven shelf | weight | time | end time | |---|---|---|---| | 5 | 1000g | 01:10 | 21:43 |Информационен екран
natural_image
Interior view of a futuristic kitchen with illuminated fixtures and a star-shaped emblem on the counter (no readable text or symbols)Екранна анимация
Основно меню
Любими
Информационен екран
natural_image
Interior view of a smart oven with a star-shaped ceiling and illuminated top panel (no readable text or symbols)Екранна анимация
Основно меню
Любими
Функция на фурната
Информационен екран
Основно меню
Впръскване на пара
- Добавете 300 ml вода в резервоара за вода.
• Натиснете десния контролен регулатор, за да добавите 300 ml вода.

Информационен екран
natural_image
Interior view of a modern kitchen oven with illuminated ceiling and window (no visible text or symbols)Екранна анимация
Основно меню
Меню езици
Меню яркост
Меню часовник
natural_image
Technical line drawing of a square frame with bolt holes and a central circular hole (no text or symbols)Плитка тава
natural_image
Technical line drawing of a square frame with bolt holes and a central circular hole (no text or symbols)Малка тава
natural_image
Line drawing of a rectangular tray or container with rounded corners and a small protrusion at the top (no text or symbols)Решетка
natural_image
Line drawing of a corrugated metal tray with ribbed sides (no text or symbols)
ВНИМАНИЕ
natural_image
Technical line drawing of a server rack with internal cooling pipes and ventilation ducts (no text or symbols)natural_image
Technical line drawing of a mechanical assembly with horizontal and vertical components (no text or symbols)ПЪРВА ПО РОДА СИ
Въздушна завеса
natural_image
Technical line drawing of a door oven with internal compartments (no text or symbols)sharphomeappliances.com


- GB-Declaration of conformity
- Contents
- PRESENTATION AND SIZE OF PRODUCT
- SAFETY WARNINGS
- General Safety Warnings
- Installation Warnings
- During usage
- During cleaning and maintenance
- PREPARATION FOR INSTALLATION AND USE
- CONTACT THE AUTHORIZED SERVICE FOR INSTALLATION OF YOUR OVEN!
- CHOOSING A PLACE FOR THE OVEN
- INSTALLATION OF BUILT-IN OVEN
- WIRING AND SAFETY OF BUILT\_IN OVEN
- GENERAL WARNING AND PRECAUTIONS
- Using the oven function control button
- Oven Functions
- Oven Lamp:
- Defrost Function:
- Turbo Function
- Static Cooking Function:
- Fan Function:
- Grilling Function:
- Faster Grilling Function:
- Double Grill and Fan Function:
- Pizza Function:
- Manual Aiding Steam Function:
- Vap clean+ function:
- ENERGY SAVING
- USE OF YOUR PRODUCT
- Manual Cooking:
- Use of the Smart LCD Control Unit
- Manual cooking
- The main menu
- Oven function
- Steam Aid Cooking
- Temperature
- Boost
- "OFF".
- Cooking duration
- Cooking end time
- The information screen
- The animation screen displays:
- The animation screen
- Auto Cooking
- Food categories
- Recipe selection
- Steam injection
- Food weight
- Favourites
- On the main menu
- The run/edit screen
- Oven shelf
- Save to favourites
- Cleaning
- The function selection screen
- Cleaning duration
- Cleaning end time
- Settings
- The languages menu
- The brightness menu
- The date menu
- The clock menu
- On the buzzer tone menu
- The software version menu
- Key lock
- Accessories
- Oven Accessories
- The Deep Tray
- The Shallow Tray
- The Small Tray
- The Wire Grid
- WARNING
- The Wire Rack with a Full Extension Telescopic Rail
- FIRST IN THE WORLD
- Air Curtain
- CLEANING AND MAINTENANCE OF YOUR OVEN
- Cleaning the interior of the oven
- MAINTENANCE
- Replacing the Oven Light
- SERVICE AND TRANSPORT
- REQUIREMENTS BEFORE CONTAINING TO SERVICE
- INFORMATION RELATED TO TRANSPORT
- Në menynë kryesore
- Funksionet e furrës
- Gatime me avull
- Ekrani i informacionit
- Ekrani i animacionit shfaq:
- Ekrani i animacionit
- Menyja kryesore
- Injeksion me avull
- Preferencat
- Ekrani vazhdo/shto;
- Ruani tek preferencat
- Menyja e gjuhëve
- Menyja e ndriçimit
- Menyja e orës
- Tava e poshtme
- Tava e Vogël
- Rrjeti i telave
- PARALAJMËRIM
- I PARI NË BOTË
- Perde Ajri
- PASTRIMI DHE MIRËMBAJ-TJA E FURRËS TUAJ
- PASTRIMI
- SIKKERHEDSADVARSLER
- Generelle Sikkerhedsadvarsler
- Installationsadvarsler
- BRUG AF PRODUKTET
- Hovedmenuen
- Ovnfunktion
- Informationsskærmen
- Animationsskærmen
- Fødevarekategorier
- Valg af opskrift
- Dampindsprøjtning
- I hovedmenuen
- Favoritter
- Gem i favoritter
- Sprogmenuen
- Lysstyrkemenuen
- Urmenuen
- Summertonemenuen
- Softwareversionsmenuen
- Bagepladen
- Den lille plade
- Trådristen
- ADVARSEL
- DEN F∅RSTE I VERDEN
- RENG∅RING OG VEDLIGE- HOLDELSE AF DIN OVN
- RENG∅RING
- Rechter Einstellknopf
- Hauptmenü
- Backofenfunktionen
- Kochzeit
- Gargutkategorien
- Rezeptauswahl
- Im Hauptmenü
- Favoriten
- Reinigungsdauer
- Menü „Sprache“
- Menü „Helligkeit“
- Uhr-Menü
- Menü „Signalton“
- Kategorien
- Rezepte
- Dampfeinspritzung
- Flaches Backblech
- Kleines Backblech
- ERSTE IN DER WELT
- Luftvorhang
- Десен контролен регулатор
- НАЧИН НА УПОТРЕБА
- Основно меню
- Функция на фурната
- Температура:
- Информационен екран
- Екранна анимация
- Категории храни
- Избор на рецепта
- Впръскване на пара
- Тегло на храната
- Любими
- Меню езици
- Меню яркост
- Меню часовник
- Плитка тава
- Малка тава
- Решетка
- ВНИМАНИЕ
- ПЪРВА ПО РОДА СИ
- Въздушна завеса
Brand : SHARP
Model : KA-73S56ASS-EU
Category : Oven