
SBID-GX186-V2 - Interactive whiteboard SMART Technologies - Free user manual and instructions
Find the device manual for free SBID-GX186-V2 SMART Technologies in PDF.


| Product Type | Interactive Whiteboard (Interactive Display) |
| Model Number | SBID-GX186-V2 (IDGX86-2) |
| Screen Size | 86" (218 cm) diagonal |
| Display Resolution | 4K UHD (3840 x 2160) |
| Touch Technology | Optical touch with Object Awareness; supports fingers, pens, and palm/fist erase |
| Pens Included | Two pens with dual nibs (fine and thick); magnetic holders at bottom |
| Integrated Speakers | Two 20 W speakers |
| Network Connectivity | Wi-Fi (2.4/5 GHz), Ethernet (RJ45), Bluetooth |
| Built-in Operating System | Android (provides apps like Whiteboard, Browser, Screen Share, etc.) |
| Front Connector Panel | USB, HDMI, 3.5 mm audio, and other ports for peripherals and computers |
| Ambient Light Sensor | Yes (auto-adjusts screen brightness) |
| Power Status Indicator | LED in Power button (off, red, blue, blinking patterns) |
| Mounting Compatibility | VESA compliant (supports SMART WM-SBID-200 wall mount and stands) |
| Accessory Slot | OPS-compatible (supports SMART OPS PC module; max 100 W) |
| ENERGY STAR Certified | Yes (as shipped; certain settings may increase consumption) |
| Remote Control | Included (infrared; operates display, volume, input, etc.) |
| Safety Warnings | Do not open, avoid liquids, keep away from heat, handle broken glass carefully |
| Physical Cleaning | Use a dry, soft cloth for the screen; avoid liquids and abrasives |
| Software for Connected Computers | SMART Product Drivers 12.20+ and SMART Ink required for full pen/touch functionality |
Frequently Asked Questions - SBID-GX186-V2 SMART Technologies
User questions about SBID-GX186-V2 SMART Technologies
0 question about this device. Answer the ones you know or ask your own.
Ask a new question about this device
Download the instructions for your Interactive whiteboard in PDF format for free! Find your manual SBID-GX186-V2 - SMART Technologies and take your electronic device back in hand. On this page are published all the documents necessary for the use of your device. SBID-GX186-V2 by SMART Technologies.
USER MANUAL SBID-GX186-V2 SMART Technologies
SMART Board®
GX (V2)
series interactive displays
User guide
SBID-GX165-V2 | SBID-GX175-V2 | SBID-GX186-V2
IDGX65-2 | IDGX75-2 | IDGX86-2
Learn more

This guide and other resources for SMART Board GX (V2) series interactive displays are available in the Support section of the SMART website (smarttech.com/support). Scan this QR code to view these resources on your mobile device.

ENERGY STAR is the government-backed symbol for energy efficiency, providing simple, credible, and unbiased information that consumers and businesses rely on to make well-informed decisions. ENERGY STAR-certified products are the simple choice for energy efficiency, making it easy for consumers and businesses to make purchases that save them money and protect the environment. The U.S. EPA ensures that each product that earns the label is independently certified to deliver the quality, performance, and savings that users have come to expect. As shipped, your display delivers ENERGY STAR performance and savings. However, changing some settings may increase energy consumption beyond the limits required for ENERGY STAR certification. For example, increased brightness and contrast will increase power consumption.
Please consider the environment when you choose non-ENERGY STAR settings.
Licenses

The terms HDMI, HDMI High-Definition Multimedia Interface, HDMI trade dress and the HDMI Logos are trademarks or registered trademarks of HDMI Licensing Administrator, Inc.
The Bluetooth word mark is owned by the Bluetooth SIG, Inc. and any use of such marks by SMART Technologies ULC is under license.
Trademark notice
SMART Board, SMART Notebook, SMART TeamWorks, SMART Meeting Pro, Object Awareness, Siktouch, smarttech, the SMART logo and all SMART taglines are trademarks or registered trademarks of SMART Technologies ULC in the U.S. and/or other countries. The Bluetooth word mark is owned by the Bluetooth SIG, Inc. and any use of such marks by SMART Technologies ULC is under license. The Adopted Trademarks HDMI, HDMI High-Definition Multimedia Interface, and the HDMI Logo are trademarks or registered trademarks of HDMI Licensing Administrator, Inc. in the United States and other countries. Microsoft and Windows are either registered trademarks or trademarks of Microsoft Corporation in the United States and/or other countries. All other third-party product and company names may be trademarks of their respective owners.
Copyright notice
© 2023 SMART Technologies ULC. All rights reserved. No part of this publication may be reproduced, transmitted, transcribed, stored in a retrieval system or translated into any language in any form by any means without the prior written consent of SMART Technologies ULC. Information in this manual is subject to change without notice and does not represent a commitment on the part of SMART.
This product and/or use thereof is covered by one or more of the following U.S. patents:
www.smarttech.com/patents
February 16, 2023
Important information
Note
Refer to SMART Board GX (V2) series interactive displays installation and maintenance guide
(smarttech.com/kb/171861) for important information about installing and maintaining the display.

Warning
- Do not open or disassemble the display. You risk electrical shock from the high voltage in casing. Opening the casing also voids the warranty.
- Do not stand (or allow children to stand) on a chair to touch the surface of the display
• To reduce the risk of fire or electric shock, do not expose the display to rain or moisture. - Do not insert objects inside the cabinet ventilation holes, because they could touch dangerous voltage points and cause electric shock, fire, or product damage which may not be covered by the warranty.
- Do not place heavy objects on the power cable. Damage to the cable could cause shock, product damage which may not be covered by the warranty.
- If the glass is broken, do not touch the liquid crystal. To prevent injury, handle glass frag with care when disposing of them.
- Disconnect the display's power cable from the wall outlet and seek assistance from qualified service personnel if any of the following occur:
° The power cable or plug is damaged
- Liquid is spilled into the display
- Objects fall into the display
- The display is dropped
- Structural damage, such as cracking, occurs
° The display behaves unexpectedly when you follow operating instructions
- This product may contain substances that are candidate SVHCs under the EU REACH Regulo (EC) 1907/2006. Check https://echa.europa.eu/scip-database for the latest information.
Contents
Important information 3
Chapter 1 Welcome 6
About this guide 6
About the SMART Board GX (V2) .display 7.
Identifying your specific model 10
Accessories 11
More information 12
Chapter 2 Using basic features 13
Waking the display and putting it in...standby...13.
Using the front control panel 14
Using the remote control 15
On-screen menus and controls 18
Using touch 23
Writing, drawing, and erasing 25
Freezing the screen 27
Chapter 2 Using apps on the display 28
Using Whiteboard 30
Using Browser 38
Using Screen Share 38
Using Palette 59
Using Clean 63
Using Cloud Drive 64
Using WPS Office 65
Using File manager 65
Using SMART Remote Management 70
Using Settings 70
Using Camera 71
Unsupported apps 74
Chapter 2 Using widgets on the display....75
Input Settings menu 77
Using the Overlay widget 77
Using the Timer widget 78
Using Stopwatch 80
Using the Spotlight widget 82
Contents
Using the Record widget...83
Using the Freeze widget...85
Using the PIP widget...86
Using the Split screen widget 88
Using Screen lock...88
Using the Calculator tool 89
Using the Screen Capture widget...89.
Chapter 3 Connecting computers and other...devices...92
Installing and using SMART software...92.
Connecting room computers and guest laptops...93
Connecting a SMART OPS PC module...103
Connecting USB drives, peripherals, and other...devices...104
Chapter 4 Troubleshooting the display...105
Resolving general issues...105.
The display isn't turning on 106
The display is turning off when it shouldn't 106
The screen is blank or there's a problem with the image...on...the...screen.
There's no sound or there's a problem with the sound 109
Touch isn't working as expected 110
The pens aren't working as expected 111
SMART software on connected computers isn't working as...expected....112
The SMART OPS PC module isn't working as expected 112
Contacting your reseller for additional support 112
Chapter 5 Troubleshooting tools and...apps.
Resolving issues with Whiteboard 114
Resolving issues with Browser 115
Resolving issues with Screen Share 115
Resolving issues with File Manager 117
Certification and compliance...118
Chapter 1 Welcome
About this guide...6.
About the SMART Board GX (V2) ..display...7.
Touch ..7.
Display ..7
Mounting hardware...8.
Front control panel...8.
Remote control and infrared sensor...8.
Ambient light sensor...8.
Power status 8
Writing, drawing, and erasing...8
Audio ..9.
Network connectivity....9
Front connector panel...9
Room computers and guest laptops 9
Tools and features 10
Accessory slot 10
Identifying your specific model 10
Accessories 11
SMART OPS PC module 11
Stands 11
USB extenders 12
More information.... 12
The SMART Board ® GX (V2) series interactive display gives you everything you need to get started with interactivity. This chapter introduces the features of your GX series display.
About this guide
This guide explains how to use SMART Board GX (V2) series interactive displays.
This guide is for people who use SMART Board interactive displays. Documentation and resources those who install and maintain displays is also available in information page 12).
About the SMART Board GX (V2) display
The SMART Board GX (V2) series gives you everything you need to get started with interactivity.
The display includes a comprehensive set of features and components.

Touch
You can do everything on the display that you can do at your computer—open and close app meet with others, create new documents or edit existing ones, visit websites, play and manipulate and so on—by touching the display's surface.
You can use an array of gestures within applications, including panning, scaling, rotating, and zc in and out.
For more information, Using touchn page 23.
Display
The 4K ultra-high-definition LED display provides optimal image clarity and wide viewing angles.
The display size varies by model:
| Models Size (diagonal) | |
| SBID-GX165-V2 65" | |
| SBID-GX175-V2 75" | |
| SBID-GX186-V2 86" | |
Mounting hardware
You can use VESA compliant wall mounts, such as SMART's WM-SBID-200 wall mount (not include mount the display on a wall.
You can also mount the display on a mobile accessories (seepage 11).
Front control panel
The front control panel provides buttons for turning the display on and off, controlling the volun freezing the screen, and displaying the Home screen.
For more information about the front control Upingel, the eefront control page 14.
Remote control and infrared sensor
The display's infrared sensor is located in the control panel in the bottom-right corner of the c frame.
You can use the remote control to turn the display on and off, adjust display settings, and sc
For more information, Using the remote control page 15.
Ambient light sensor
The ambient light sensor is located in the bottom-right corner of the display's frame. The senso the brightness of the room and adjusts the screen's brightness accordingly.
To enabled or disabled this feature, go to Input > Advanced settings > Screen > AutoLight.
See the SMART Board GX (V2) series interactive displays installation and maintenance guide (smarttech.com/kb/171861).
Power status
The power status indicator light is located in the Power button in bottom-right of the display's
For more information, Using the front control page 14.
Writing, drawing, and erasing
The display comes with two pens you can use to write or draw on the screen. Each end of assigned to write or draw in a different color when using the Whiteboard app. You can erase by moving your fist or palm over the digital ink.
With Object Awarelessthe display responds automatically to the tool or object you're using, wheth it's a pen, finger, or palm.
For more information, writing, drawing, and erasing page 25.
Audio
The display includes two 20 W integrated speakers.
Network connectivity
The display requires a network and internet connection for downloading software and firmware updates. Some applications also require a network and internet connection (for example, the web browser).
The display requires a network and internet connection for downloading software and firmware updates.
You can connect the display to a network using Wi-Fi or an Ethernet cable.
- The Wi-Fi module supports both 2.4 and 5 GHz bands.
- The two RJ45 jacks allow you to connect the display and an external device, such as a can Ethernet network.
See the SMART Board GX (V2) series interactive displays installation and maintenance guide (smarttech.com/kb/171861).
Front connector panel
The front connector panel includes connectors for USB peripherals and a computer or other input.
For more information, Connecting room computers and guest device page 93 connecting USB drives, peripherals, and other devices page 104.
Room computers and guest laptops
You can connect room computers and guest laptops to the display and view and interact with
The display comes with SMART software that you can install on connected computers to take full advantage of the display's features.
For more information, Connecting room computers and guest daptpage 93.
Tools and features
The display's built-in Android computing provides apps that enable you to browse the web, use a whiteboard, share your screen, and more without using a connected device.
For more information, Chapter 2 Using apps on the display 28.
Accessory slot
You can install an OPS-compatible device, such as a SMART OPS PC module, in the accessory SMART OPS PC modules provide a complete® Window installation.
For more information on SMART OPS PC nSMART, GPS PC module the next page.

Caution
- The accessory slot's maximum available power is 100 W. The slot is not a limited power reduce the risk of fire, make sure that accessories connecting to the slot satisfy the fire e requirements of IEC 62368-1.
- Do not remove the OPS PC or other devices from the accessory slot while they are turned
- Do not install or remove the OPS PC or other devices in the accessory slot while the di-turned on.
Identifying your specific model
SMART offers several models of the SMART Board GX (V2) series interactive displays.
For help identifying your model, see the labels on the back or left side of the display.
Tip
The label features the display's base model number (for example, SBID-GX075-V2). Please note that number is different from the actual model/SKU number (for example SBID-GX175-V2).

| Model Screen | size (approximate) |
| SBID-GX165-V2 | 65" (165 cm) |
| SBID-GX175-V2 | 75" (190 cm) |
| SBID-GX186-V2 | 86" (218 cm) |
Accessories
Accessories for the display include:
• SMART OPS PC module
• SMART wall mount (WM-SBID-200) for SMART Board displays
- Stands
- USB extenders
Note
For more information about these and other accessories, see smarttech.com/accessories.
SMART OPS PC module
SMART Open Pluggable Specification (OPS) PC modules provide a hassle-free Windows Pro installation based Corentprocessors and are designed specifically to work with a SMART Board interactive display. All OPS PC modules are fully licensed with Windows Pro. Install the OPS PC module in a display's accessory slot to provide a complete 4K UHD Windows installation at your fingertips, without the need for an external PC or additional cables.
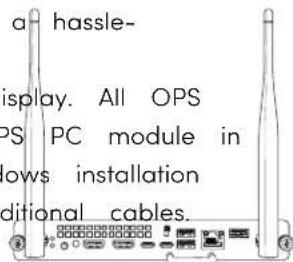
Install familiar Windows applications, such as SMART®Notebook
SMART TeamWorks™, and SMART Meeting Pro® software, and access the
internet directly through your display's network connection. Upgrades and service for the OPS PC module are easy to perform without removing the display from its mounting.
Stands
If you want to move the display from place to place, you can install it on a SMART mobile are installing the display on a wall that cannot support the display's full weight, you can install on a SMART floor stand.
Note
If you want to use the 86" model (SBID-GX186-V2) with a variety of SMART's electric height-ac stands, you must first attach a SMART wall mount (model WM-SBID-200, part #1031766, smarttech.com/kb/171405) to the display before mounting the display to the stand. (This applies to FSE-400, FSE-410, and FSE-420 models of mobile stand and the WSE-400 and WSE-410 models wall stand).
USB extenders
As noted in the display's specifications, the USB connection between the display and computer sh no longer than 16' (5 m). If you need to connect a computer that is more than 16' (5 m) from the display, use the following USB extender:
Extender Specifications
USB-XT smarttech.com/kb/119318
Note
For more information about extending USB connections, see USB cable extenders.
More information
SMART provides a variety of other documents for this display in the Support section of the SN website (smarttech.com/support). Scan the QR code on this guide's cover for links to SMART Board GX (V2) series interactive display documents and other support resources.
Chapter 2 Using basic features
Waking the display and putting it in standby 13.
Using the front control panel...14
Using the remote control...15
On-screen menus and controls...18
Notification icons (network, audio, and so on) 18
Side Toolbar buttons...19.
Toolbar ..19.
Favorite widget shortcuts...21
Shortcuts ..22
Adding shortcuts to the Home screen...22
Managing shortcuts...22.
Apps ..23
Swipe-up menu 23
Using touch 23
Writing, drawing, and erasing 25
Writing and drawing in digital ink 25
To erase digital ink 26
Using the SMART Ink dynamic (floating)...toolbar 26
Changing a pen's default color, thickness, and other properties 26
Freezing the screen 27
Waking the display and putting it in standby
If the display is in Standby mode, you can wake it by pressing the Power button ⏻ on the front control panel or remote control.
To return the display to Standby mode, press and hold the Power power button ⏻ on the front control panel for three seconds to begin a 10 second countdown before the display enters Standby mo
OR
Press the Power power button ⏻ on the remote control to begin a 10 second countdown before the display enters Standby mode.
Note
When the display is connected to an external input that has had no active signal for 5 minu begins a 10 second countdown before it enters Standby mode.
For information about turning off the display/MARTE Boded GX (V2) series interactive displays installation and maintenance (quidertech.com/kb/171861).
Using the front control panel
The front control panel contains buttons for turning the display on and off, controlling the volum freezing and unfreezing the screen, and going to the Home screen.
The front control panel also includes a light that indicates the display's current power state.
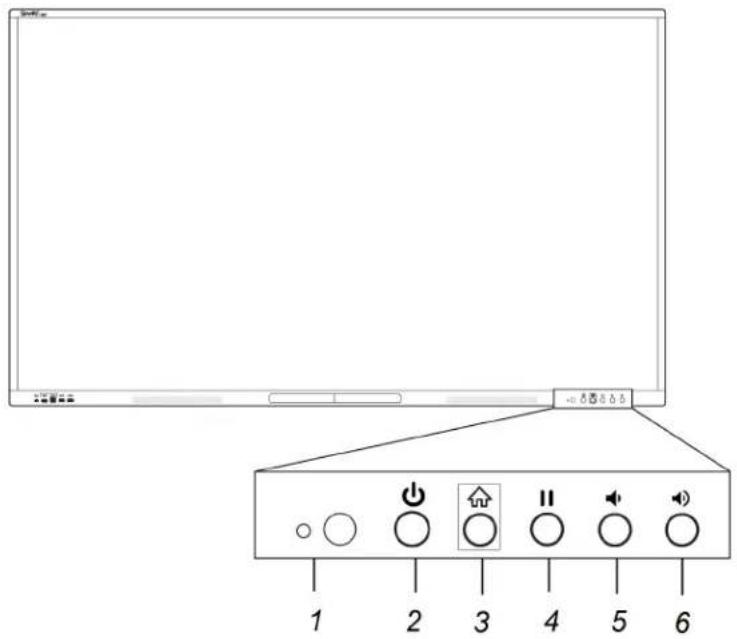
No. Name Procedure
1 Remote control receiver and ambient light sensor [N/A]
| No. | Name | Procedure |
| 2 | Power, and status light | Enter or exit Ready mode.Press and hold for three seconds to begin a 10 second countdown before the display enters Standby mode. |
| 3 | Home | Return to the Home screen. |
| 4 | Freeze | Freeze and unfreeze the screen. |
| 5 | Volume | decrease Decrease the volume. |
| 6 | Volume | increase Increase the volume. |
The Power button's color indicates the display's status:
| Power button Display status | |
| Off | Not receiving power |
| Red (solid) | Standby mode |
| Red/blue (blinking, slow) | Ready mode |
| Blue | Normal operating mode |
| Red/blue (flashing, rapid) | Background process running (for example, a firmware update is in progress or display is turning off) |
Using the remote control
Use the remote control to turn the display on or off, change the input, control the volume, and can also use the remote control to open the on-screen menus and change the display's settings:
Important
- Do not subject the remote control to strong shock.
- Keep the remote control away from liquids. If it gets wet, wipe it dry immediately.
- Do not expose the remote control to heat or steam.
- Do not open any part of the remote control other than the battery compartment.
This image and table list the remote control's functions.

| No. | Name | Description | |
| 1 | Power | Press to begin | a 10-second countdown before the display enters Standby mode. |
| 2 | Home | Open the Home | screen. |
| 3 | Up and down buttons | Move selection up or down. | |
| 4 | OK | Select a menu option in the settings, or enable selected items in apps. | |
| 5 | Left and right buttons | Move selection left or right. | |
| 6 | Back | Return to the previous item in the current application or to the previous application. | |
| 7 | Input | Switch inputs. | |
| No. | Name | Description | |
| 8 | Settings | Show or hide | display settings menu while viewing the Home screen.Show or hide the Input settings dialog when viewing a connected input. |
| 9 | Screen | shade Hide screen contents behind a screen shade. | |
| 10 | Freeze frame | Freeze and unfreeze the screen. | |
| 11 | Volume increase | Increase the volume. | |
| 12 | Volume decrease Decrease the volume. | ||
| 13 | Volume mute Mute the volume. | ||
| 14 | Share screen Show or hide the screen share floating connection code information bar. | ||
On-screen menus and controls
The SMART Board GX (V2) series display features a number of on-screen menus and controls.

Notification icons (network, audio, and so on)
The notification icons provide information about the display's network connection, speaker status, or connected USB drives.
| Icon | Description Notes | |
| Connected to a wireless network and signal strength | The Wi-Fi signal strength being received by the display. Tap the on to open the Wi-Fi settings. | |
| Disconnected from a wireless network | Indicates the display is not connected to a wireless network.NoteThe display cannot connect to an Ethernet and wireless network simultaneously.Tap to open the Wi-Fi settings page. | |
| Connected to a wired network | Indicates the display is connected to an Ethernet network. | |
| Disconnected from a wired network | Indicates the display is not connected to an Ethernet network. | |
| Speakers are on The display's speakers are turned on. | ||
| Speakers are off The display's speakers are turned off. | ||
| Icon | Description | Notes |
| USB drive connected Indicates a USB drive is connected to the display. Tap the icon to open a connected USB drive in File Manager. | ||
Side Toolbar buttons
See Toolbar below.
Toolbar
From the Toolbar, you can access a number of commonly used display controls and widgets, in the widgets menu.
To open the Toolbar, tap either of the side Toolbar menu buttons on either side of the scree

| No. | Command | Description Notes | |
| 1 | Back | Return to the previous screen or menu item in the embedded Android system. | [N/A] |
| 2 | Home | Open the Home screen. [N/A] | |
| 3 | Task | view Shows a preview of each running app.Swipe up or down to view of running apps.To open a running appTap the tile to open the selected item or tap the Back icon in the Toolbar menu to return to the current screen.TipTap the Split screen iconin the top-right corner of an app's tile to see a list of apps that can be opened in split screen mode with the app.To close an appTap the Close icon to close an app.TipYou can also press and hold then left-swipe an app to close itORTap Close all tasks to close all running apps. | See the SMART Board GX (V2) series interactive displays installation and maintenance guide(smarttech.com/kb/171861) |
| No. | Command | Description | Notes | |
| 4 | Favorite | widgets | If you have a widget that you use regularly, you can pin the Tool bar menu to make it easy to find from the Home screen. | See Favorite widget shortcuts below. |
| 5 | More | (widgets menu) | In the widgets menu, you can access the calculator, timer, stopwatch, and other tools. | See Chapter 2 Using widgets on the display page 75. |
Favorite widget shortcuts
You can pin up to four of your favorite widgets to the Toolbar to make them easier to find screen.
To pin a widget to the Toolbar
-
Open the Toolbar (see Toolbar on page 19).
-
Tap the Moreicon .
The widgets menu appears.
-
Tap Edit or tap and hold on any widget icon until the + and - symbols appear next to the widget icons.
-
Tap + or press and drag a widget to pin it to the Toolbar.
You can pin a maximum of four widgets to the Toolbar.
To remove a widget from the Toolbar
-
Open the Toolbar.
-
Tap the More icon.
The widgets menu appears.
-
Tap Edit or press and hold any widget icon until the + and - symbols appear next to the widget icons.
-
Tap - or drag a widget back to the widgets menu.
You can also tap Reset to display the default list of widgets in the Toolbar.
Shortcuts
You can add shortcuts to your favorite apps, frequently used files, web pages, and more to me easier to find on the Home screen.
Adding shortcuts to the Home screen
You can add shortcuts to your favorite Chapter (see Using apps on the display 28),
frequently used files, web pages, and more to make them easier to find on the Home screen.
Tip
To move a shortcut on the Home screen, press and hold the shortcut, then drag it to a ne
To add an application shortcut
- From the Home screen, tap the Appsicon.
- Press and drag an app to add it as a shortcut to the Home screen.
To add a web page shortcut
- Tap the Browsericon and browse to a web page.
- At the top right, tap the More icon.
The options menu appears
- Tap Send the quick-link to Desktop, type a name for the shortcut, and tap Add.
The web page shortcut is added to the Home screen.
To add a file shortcut
- From the Home screen, tap the Apps icon.
- Tap the File Manager icon and browse to the file you want to add as a shortcut.
- Tap on a file to select it, tap Send in the bottom menu, and then tap Shortcut.
The file shortcut is added to the Home screen.
Managing shortcuts
You can move or delete the shortcuts you've added to the Home screen.
To move a shortcut on the Home screen
Press and hold a shortcut until its options menu appears, and then drag the shortcut to a position on the Home screen.
To delete a shortcut
- Press and hold an app icon until the Remove option appears.
- Tap Remove.
The app shortcut is removed from the Home screen.
Apps
Open a menu of additional Android apps installed on the display, such as Palette, Camera, Cle Drive, WPS Office, File manager, Settings, and SMART Remote Management.
Swipe-up menu
Swipe up from the bottom edge of the screen to open the TJobbon manage (see or Input settings menu, depending on the current Swipe-up menu setting.
For more information about changing the swipe up settings, see the Display settings > Personalization section of the SMART Board GX (V2) series interactive displays installation and maintenance guide (smarttech.com/kb/171861).
Using touch
You can do everything on the display that you can do at your computer—open and close app meet with others, create new documents or edit existing ones, visit websites, play and manipulate and so on—by touching the display's surface.
Note
Some applications don't support all the gestures. Not all gestures work in all applications. Refer application's documentation to learn which gestures it supports.
Pan (one finger) Pan (two fingers) / scroll

natural_image
Illustration of a hand holding a four-petal flower with a green center, no text or symbols present
natural_image
Hand interacting with a blue abstract flower-like shape (no text or symbols)Pinch to zoom in / scale (enlarge) Pinch to zoom out / scale (reduce)

natural_image
Illustration of two hands pointing at a screen with three green circles and blue arrows indicating motion (no text or symbols)
natural_image
Illustration of two hands interacting with a touchscreen display (no text or symbols)Rotate Flick

natural_image
Illustration of two hands pointing at a curved blue shape with a plus sign, no text or symbols present
natural_image
Simple line drawing of a hand holding a device emitting green motion arrows (no text or symbols)Erase with palm Erase with fist
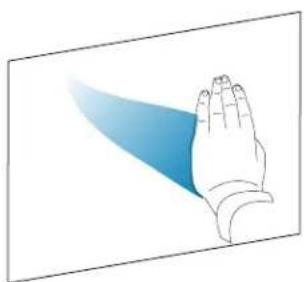
natural_image
Illustration of a hand with a blue highlight on the palm (no text or symbols)
natural_image
Illustration of a hand holding a blue abstract shape (no text or symbols)Writing, drawing, and erasing
The display comes with two pens, which you can use to write or draw in digital ink. Each pen nib and a thick one. The default pen behavior, including writing style and ink color, varies by
The display has magnetic holders for the pens at the bottom of the display's frame. Return the their holders when you're done with them.

Caution
When you return a magnetic pen to the holder, make sure it's centered in its holder to keep falling and being damaged.
Writing and drawing in digital ink
- Pick up one of the display's pens.
- Write or draw in digital ink on the screen.

Important
Use only pens designed for SMART Board GX (V2) series interactive displays. Pens for other SM products aren't compatible with SMART Board GX (V2) series (see Comparing SMART product pe
Tips
- When writing, the smaller tip on the display's pens writes in digital ink and the larger tip finger or pointer. The action of the pen's larger tip will vary depending on which app is the display or connected computer.
- When writing or drawing in the Whiteboard app, you can change a pen's color, thickness, writing style (using Whiteboard on page 30). When using the Overlay widget to write or draw on overlays, you can write or draw in pen or highlighter mode with color options available each mode (or more information using the Overlay widget page 77).
- Use the Pair mode feature in the Whiteboard app pair(semoden page 33) to enable 2–4 participants to write or draw simultaneously in separately partitioned areas of the screen.
To erase digital ink
Move your palm or fist over digital ink to erase.
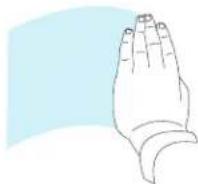
You can also use the eraser feature in some apps to change the display's pen tips to ac eraser.
Using the SMART Ink dynamic (floating) toolbar
If you touch a pen to the display's screen while viewing a connected computer's input, the SMART dynamic (floating) toolbar appears. You can use this toolbar to temporarily change the pen's color, thickness, or other properties, and you can also access SMART Ink's tools, such as screen capture, spotlight, screen shade, and so on.
To learn more about SMART Ink and its toolbar, visit the SMART Ink support page. Here are a few quick links to get you started:
- Turning SMART Ink on or off
- Opening the dynamic (floating) toolbar
• Closing (hiding) the toolbar
• Using SMART Ink presentation tools
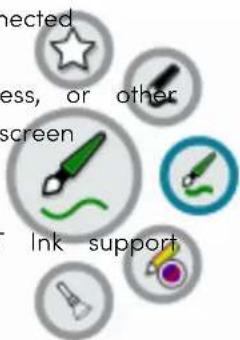
Changing a pen's default color, thickness, and other properties
While you're viewing a connected computer's input, you can use the SMART Ink dynamic (floating toolbar to change a pen's color, thickness, and other properties.
To change the pen's default color, thickness, and other properties, see Changing pen, eraser, and settings.
Freezing the screen
You can temporarily freeze the screen by pressing the Freeze button ⚙️ on the front control panel or the remote control. This is particularly useful when no other controls are available to pause a video animation, or other moving images.
When the image is frozen, a menu appears at the bottom of the screen featuring zoom, full close options. A magnifying glass icon also appears in the top-right corner of the screen.
Note
Freezing the screen does not pause applications that are running on the connected computer. I simply freezes the displayed image.
To unfreeze the screen, press the Freeze button again.
Chapter 2 Using apps on the display
Using Whiteboard...30
Whiteboard tools and controls 30
Writing and erasing notes...32
Starting a new whiteboard...33
Changing the background 33
Navigating in the whiteboard 34
Opening an existing whiteboard...35
Saving a whiteboard...35
Importing or exporting a whiteboard...36.
Exporting a whiteboard file to cloud storage 37.
Email a whiteboard .file 38
Changing whiteboard settings 38
Using Browser 38
Using Screen Share 38
Main Screen Share interface features 39
Main Screen Share interface 39
Connection code 39
Menu options 40
Device management 40
# connected devices 40
User guide 40
Floating menu (normal/mini) 40
Active Screen Share 40
Screen Share name and Bytello share website address 41
Annotation menu 41
Screen copy, Settings, About, and exiting the app 41
Screen copy 41
Settings 41
About 43
Exit 43
Screen share features available with each screen share...method 43
Bytello Share App 43
AirPlay 43
Miracast 44
Chromecast 45
Webcast 45
Connecting a device to the display 46
Verifying the network...46
Connecting your device to the display 47
Managing connected devices...47.
Minimizing and rearranging screens...49
Stopping a session...51
Using the Bytello Share app 51
Device requirements for using Bytello...Share...51.
Downloading and using the Bytello Share...app...52
Using the Bytello Share app to interact with...the...display...53
Using Desktop Sync...54
Using Remote...55
Device Sync...55
Using native streaming (AirPlay, Miracast, or Chromecast) 56
Connect using Webcast 57
Using Palette 59
Palette tools and controls 59
Writing and drawing on a palette 59
Starting a new palette 61
Changing the background 61
Writing and drawing on a palette 61
Exiting a palette 62
Using Clean 63
Opening and closing the Clean app 63
Using the One Key Optimize tool 63
Using the Clean Memory tool 63
Using the Clean Trash tool 64
Using Cloud Drive 64
Adding a Google Drive or OneDrive account 64
Using WPS Office 65
Opening the WPS Office app 65
Using the WPS Office app 65
Using File manager 65
Opening File manager 65
Viewing files 66
Moving or copying files 66
Using a USB drive 66
Using a Google Drive or OneDrive account 68
Installing apps using File Manager 69
Supported file formats 70
Using SMART Remote Management 70
Using Settings 70
Using Camera 71.... Viewing, annotating, and saving screen capturesshots from a connected camera. 71 Exiting Camera .74....
Unsupported apps 74....
This chapter introduces the apps on SMART Board GX (V2) series interactive displays.
Using Whiteboard

You can view and erase notes, open a saved note, and save your notes to the disp USB drive, or cloud account. You can also email a copy of your notes.
Whiteboard tools and controls
The Whiteboard app has a number of tools and controls for accessing and managing whiteboard sessions.
| Tool Icon Description | ||
| Menu tools | ||
| Tap the Menu icon in the lower left corner to open the menu of tools for saving and share | ||
| New Start a new whiteboard. | ||
 | ||
| Open Open a whiteboard saved | on the display, from a USB drive, or a Google Drive or OneDrive account. | |
| Save |  | Save a new whiteboard file to the display, to a USB drive, a Google Drive or OneDrive account. Saves all pages into one whiteboard file in .enb format.Saving the current whiteboard file will replaces previously saved versions. |
| Save As |  | Rename the current whiteboard and save it without overwriting a previously saved version. |
| Import |  | Import a file from a USB drive or a Google Drive or OneD account onto the whiteboard page. Supported file formats are .img, .pdf, .svg, and .iwb. |
| Export |  | Export all the whiteboard pages into sequentially-numbered .png files or as a single .pdf file. Support file formats are .i .pdf, .svg, and .iwb. |
| Cloud Storage Sc | [WW2C7] | contents directly to a Google Drive or OneDrive account. When you are signed in, the files upload in .png format directly to a date- and time-stamped folder. |
| NoteTo add a Google Drive or OneDrive account to the display, select the drive type when prompted and sign in. | ||
| Theme Add temp |  grids, preset lines, or a background image to the whiteboard, or change the background's color. grids, preset lines, or a background image to the whiteboard, or change the background's color. | |
| Send an Email |  a copy of a copy of | the current whiteboard session. (The email account must first be configured in display settings.)See the SMART Board GX (V2) series interactive displays installation and maintenance guide (smarttech.com/kb/171861) |
| Settings Access o |  for configuring the eraser mode, enabling multi-finger writing, enabling the display brightness to adjust automatically when writing, and customizing which tools appear in the toolbar. for configuring the eraser mode, enabling multi-finger writing, enabling the display brightness to adjust automatically when writing, and customizing which tools appear in the toolbar. | |
| Other controls | ||
| Exit Exits the Wf | rd app. | |
 | ||
| List Shows a list | of whiteboard | files created and saved. You can also create a new whiteboard session. |
| Navigation tools | ||
| Add a page Ad |  new page new page | to the current whiteboard. |
| Next Advance to | the next page. | |
| Previous Return to |  previous page. previous page. | |
| Page number |  1 1 | Shows the current page number and enables you to go to specific page or delete pages. Tap the box to expand and see all pages in the file. |
Writing and erasing notes
The Whiteboard has several tools for drawing and erasing.
| Tool Icon Description | ||
| Select Select objects and | manipulate them by moving, rotating, resizing,copying, or deleting them. Options are also available for adding colorto an object, converting objects to text, to text, changing an object'sorientation, arranging the order of objects, copying or deleting anobject, and more.Select images to enable cropping, changing a picture's orientation,arranging the order of pictures, copying pictures, and deleting pictures,or converting to .svg file format. | |
| Pen Change ink | color and choose from a variety of pen styles. | Tap the Pen tool to select it, then tap again to change its color.You can select a different color and style for each end of the pen.You can use a pen or finger to write or draw on the whiteboard.NotesDual-pen writing is supported when multi-finger writing isenabled in settings (Settings on the previous page), allowingusers to write with different colors or pen styles at the same tirin partition mode.When the Pen tool is selected, a finger acts as the pen's thick |
| Eraser Use the | Eraser tool to erase digital ink and objects on a whiteboard.You can use a pen or finger to erase ink.Tap on the Eraser to select it, then tap again to show the slider. Dthe slider to change the eraser size.From the Menu, tap Settings to change the eraser mode. | |
| Clear all Delete | all the | current whiteboard page's contents with one touch. TapClean All only when you are sure you want to clear the board: youwon't be prompted to confirm this selection before the board iscleared. This feature also clears any objects you've added (except forrulers). |
| Ruler Add a ruler or protractor to a whiteboard. Change the size andorientation of the tools as needed. | ||
| Shape Add a range of | two-and three-dimensional geometric shapes to awhiteboard. You can also fill and change the color of the shapes.Select the shape and the color, then press and hold as you draw thshape. | |
Table Add tables  | a | whiteboard. Select the size and then insert the table.Draw within the table to change cell sizes. |
Pair mode Partiticane  | ne | screen into equal non-overlapping parts. Each participant has their own space for writing and drawing. You can have up to f partitions. |
Mind map Add  | ind | map to a whiteboard.Add text to a node and then drag it into position.Tap + to add more nodes.To delete a node, tap ... and tap Delete. |
Sticky notes Add  | sticky | note to a whiteboard. You can move notes around as needed. The Clear All feature deletes the notes. |
Preview  | Tap the Preview tool to select it, then tap again to display and inse image of the total whiteboard. You can pan and zoom the inset ima using finger gestures. | |
Grid Add a grid  | the | whiteboard and convert handwriting to text. The handwritten font is also searchable. Tap the Select tool, tap the grid, and then tap Search. |
Undo Reverse the effect  | of the last action. | |
Redo Reinstate the last  | action reversed with the Undo command. | |
Starting a new whiteboard
On the display's Home screen, tap the Whiteboard icon.
OR
Tap New in an open whiteboard.
A new whiteboard appears.
Changing the background
You can change the whiteboard's background. If a whiteboard has multiple pages, each page c a different background. When you export or share the whiteboard, the background you've selected appears.
To change the whiteboard's background
-
Tap the Menu icon .
-
Tap the Theme icon .
-
Tap Template and select a background from the templates provided.
OR
Tap Background and change the whiteboard's background color, or upload an image to the background.
The background appears.
Notes
The whiteboard will save the image background for later use. Delete unused images by tapping the Trash icon in the corner of the image.
- When adding a new page, the background theme of the current page applies to the page.
Navigating in the whiteboard
Tap the Preview tool to select it, then tap again to see the complete whiteboard.
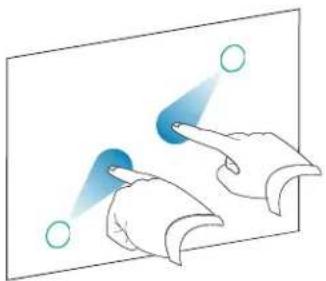
Use two fingers to pinch to zoom in.

natural_image
Illustration of two hands pointing at a screen with three green circles and blue gradient arrows (no text or symbols)Use two fingers to pinch to zoom out.
natural_image
Illustration of two hands interacting with a touch point, showing blue arrows pointing to the finger (no text or symbols)Opening an existing whiteboard
You can easily continue from where you left off in a saved whiteboard.
-
Tap the Whiteboard icon .
-
Tap the Menu icon .
-
Tap the Open icon .
The Storage dialog appears.
- Browse to and tap the whiteboard you want to open.
You can open a file from the display, a USB drive, or a Google Drive or OneDrive accou
- Tap OK.
Saving a whiteboard
You can save a whiteboard.
To save a new whiteboard
- Tap the Save icon .
The Storage dialog appears.
- Browse to where you want to save the new file.
Notes
- You can save a file to the display, a USB drive, or to a Google Drive or OneDrive
The Whiteboard pages are saved as an .enb file. To convert the file into a different tap Export.
The Save all pagialog appears.
-
Type a name for the file in the File name box.
-
Tap OK.
To save an existing whiteboard
Tap the Save icon .
To save an existing whiteboard with a new name or location
- Tap the Save As icon .
The Storage dialog appears.
- Browse to where you want to save the new file.
Notes
- You can save a file to the display, a USB drive, or to a Google Drive or OneDrive - The Whiteboard pages are saved as an .enb file. To convert the file into a different tap Export.
The Save all pagialog appears.
-
Type a name for the file in the File name box.
-
Tap OK.
Importing or exporting a whiteboard
You can import or export a whiteboard.
To import a whiteboard
-
Tap the Menu icon.
-
Tap the Import icon.
-
Select the file type you want to import (supported formats are img, .pdf, .svg, and .iwb).
-
Browse to and select the file.
You can open a file from the display, a USB drive, or from a Google Drive or OneDrive account.
- Tap OK
Note
The imported file is added to the existing whiteboard file as an image.
To export a whiteboard
-
Tap the Menu icon.
-
Tap the Export icon.
-
Select the file type for the export (supported formats are .img, .pdf, .svg, and .iwb).
-
Browse to where you want to save the file.
You can save a file to the display, a USB drive, or to a Google Drive or OneDrive account.
Note
You can rename a file by tapping the name and using the on-screen keyboard.
- Tap OK.
Exporting a whiteboard file to cloud storage
-
Tap the Menu icon.
-
Tap the Cloud Storage icon.
-
If this is the first time uploading a file to a cloud account from the display, you're prompt to a Google Drive or OneDrive account.
OR
Select an account in/ptbd to box you can rename a file by tapping the name and using the on-screen keyboard.
Note
° If you're already signed in to a cloud account and have selected a folder destination, is uploaded automatically.
The pages are uploaded as sequentially numbered .png files into a time-stamped folder.
° To change the file format, tap Export and select Cloud Drive.
- You can manage your cloud accounts using the display's Cloud Drivingapp (see Cloud Driven page 64).
- Tap OK
Email a whiteboard file
Note
To enable this feature, you must first add an email account to the display in Settings.
For more information, SMART Board GX (V2) series interactive displays installation and maintenance guide(smarttech.com/kb/171861).
- Tap the Menuicon .
- Tap the Send Emailicon .
Changing whiteboard settings
In whiteboard settings, you can change the eraser mode, enable multi-finger writing or automatic brightness, customize the toolbar, and more.
To change a whiteboard setting
- Tap the Menuicon.
- Tap the Settingsicon and browse to the setting you want to change.
Using Browser

The display includes a web browser that you can use as you would on your computer mobile device. Refer to the Help in the browser.
Tip
Tap the + icon in the top-right corner to open a new web browser tab.
Note
The browser doesn't support the installation of plug-ins and add-ons.
Using Screen Share

You can wirelessly share images, videos, or your computer or mobile device's desktop display.
Notes
- Bytello Share is a third-party application. SMART's support for this application may vary depending on the inquiry.
- For the best performance, use the Bytello Share app to connect.
• Make sure your computer or mobile device is connected to the same network as the disp - Some Bytello features are not available on some mobile devices of DevComputers (see requirements for using Bytello Share page 51).
Main Screen Share interface features
The main Screen Share interface features a number of menus and controls.

Main Screen Share interface
This is the main screen for the Screen Share app. You can see whether the display is using Ethernet network connection (tap the connection status to see the display's network settings), the share name, and connection code.
Connection code
Both the Bytello Share app and the Bytello Share website require a 6-digit connection code for connecting to the display. Depending on the Screen Share app's settings, the code changes at interval for security purposes. Always use the current code to connect Settings or display (see page 41).
You'll find the connection code on the Screen Share app's main interface or in the floating met top of the display (if it's set to Normal size).
Menu options
See Screen copy, Settings, About, and exiting on the appext page.
Device management
Device Management lists the connected devices, their status, device permissions, and options (see Device management above).
# connected devices
Shows the number of devices that are currently connected.
User guide
The Screen Share app has a built-in user guide that can help you connect or troubleshoot at
Floating menu (normal/mini)
The floating menu appears at the top of the display when the Screen share app is running. to expand it and see a variety of information:
- the network name
- the Screen Share name for AirPlay, ChromeCast, and Miracast connections, if enabled in settings (see Settings on the next page).
• the 6-digit connection code - access to the main interface
Wi-Fi network
Screen Share name
BS7 A97
View the main interface
Tip
You can change the floating menu's size or disable it in the Screen short menu app's settings (see options above).
Active Screen Share
The orange dot appears on the floating menu to indicate that a screen sharing session is active devices are connected to the display.
Screen Share name and Bytello share website address
This Screen Share name identifies the current screenshare session (for use when connecting via Chromecast, or Miracast) and the website address participants can use to connect via the Bytello website. Participants can use the website to connect without downloading and installing apps or software. The address appears on the screen only when screen share via website is enabled in Screen Share app's settings Settings below).
Annotation menu
An annotation toolbar is available when using the Desktop Sync option in the Bytello Share app this floating toolbar allows users to access tools for drawing over the display on an overlay, en taking screen captures, sharing files, and more.
If connected devices have touchback permissions enabled, its also possible for those users on share devices to access this menu.
For more information, Toeannotaten page 55.
Screen copy, Settings, About, and exiting the app
Access the Screen Share app's menu options to use Screen copy, customize the app's settings, the app. Expand the sections below to learn more about each option.
Screen copy
For displays only
!
The Screen copy feature enables a SMART Board GX (V2) display's screen to be mirrored on a SMART Board GX (V2) display screens. Access this feature from the Menu on the Screen Share main interface (set menu options on the previous page).
Screen Share
Tap Start sharing to share you display's screen to other displays.
Join sharing
Tap Join now to mirror another display's screen on your display.
Settings
Access Settings from the Menu on the Screen Share app's main interface. Change the display and set your permissions, mirroring, and general preferences.
To customize settings
Tap to turn a setting on or off.
OR
Tap the arrow to open a drop-down menu and change the setting.
| Setting Description | |
| Allow this device be discovered | Allows the bytello Share app to discovered this ScreenShare the name. |
| Permission mode | When enabled Screenshare requires permissibows when participants are requesting to cast to the display and requires approval. |
| Support Chromecast device | Makes the server discoverable for Chromecast-supported devices, including connecting via Cast... through the Chrome browser. |
| Support Airplay device | Makes the server discoverable for AirPlay-supported devices. |
| Support Miracast device | Makes the server discoverable for Miracast-supported devices.NoteThis feature is turned off by default to reduce network congestion. |
| Share screen via website | Allows devices to connect to Screen Share via the Bytello Share website.Enter the URL:https://share.bytello.com in the address bar of your computer's browser. |
| Device name | Change theScreenShare name of the display by tapping . Type a custom name using the on-screen keyboard. |
| Start automatically on boot | When enabled, the Screen Share application will run when the system starts.floating menu shows at the top of the display to show that the app is run |
| Code refresh rate | Sets the interval at which a new connection code is generated. |
| Floating window size | You can change the size of the floating window at the top of the display.Normalshows the connection code with icon.Smallshows only the icon of the floating window.Minimize disables the floating window |
| Product User Experience Plan | Choose whether to send operational behavior data from the Screen Share app to the app's developer. The data is then used by the developer to help imthe Screen Share app's user experience. |
| Log Feedback | If you encounter an issue while using the Screen Share appLogyou can use tFeedbackfeature to send the Screen Share app's developer the app's log file aid with troubleshooting. |
About
① About contains information about the software version and legal agreements
When there is a new version, click or tap Update to upgrade.
Exit
Exit the Screen Share app.
Screen share features available with each screen share method
Some features of the display's Screen Share app are available only when using certain screen methods. Expand the sections below to see a summary of what's available for each method.
Bytello Share App
| Feature Windows MacOS iOS Android Chrome | OS | ||||
| Screen sharing | ☑ | ☑ | ☑ | ☑ | ☑ |
| Touchback | ☑ | ☑ | ☐ | ☐ | ☐ |
| Audio sharing | ☑ | ☑ | ☑ | ☑ | ☐ |
| Desktop Sync | ☑ | ☑ | ☑ | ☑ | ☑ |
| Device Sync | ☑ | ☑ | ☐ | ☐ | ☐ |
| Annotation | ☑ | ☑ | ☑ | ☑ | ☑ |
| Camera sharing | ☐ | ☐ | ☑ | ☑ | ☑ |
| Document sharing | ☐ | ☐ | ☐ | ☑ | ☑ |
| Photo sharing | ☐ | ☐ | ☑ | ☑ | ☑ |
| Video/Audio sharing | ☐ | ☐ | ☑ | ☑ | ☑ |
| Remote control | ☐ | ☐ | ☑ | ☑ | ☑ |
| Pause screen sharing | ☑ | ☑ | ☐ | ☐ | ☐ |
| No app install required | ☐ | ☐ | ☐ | ☐ | ☐ |
AirPlay
| Feature MacOS iOS | ||
| Screen sharing | √ | √ |
| Touchback | □ | □ |
| Audio sharing | √ | √ |
| Desktop Sync | □ | □ |
| Device Sync | □ | □ |
| Annotation | □ | □ |
| Camera sharing | □ | □ |
| Document sharing | □ | □ |
| Photo sharing | □ | □ |
| Video/Audio sharing | □ | □ |
| Remote control | □ | □ |
| Pause screen sharing | □ | □ |
| No app install required | √ | √ |
Miracast
| Feature Android Windows | ||
| Screen sharing | √ | √ |
| Touchback | √ | √ |
| Audio sharing | √ | √ |
| Desktop Sync | □ | □ |
| Device Sync | □ | □ |
| Annotation | □ | □ |
| Camera sharing | □ | □ |
| Document sharing | □ | □ |
| Photo sharing | □ | □ |
| Video/Audio sharing | □ | □ |
| Remote control | □ | □ |
| Pause screen sharing | □ | □ |
| No app install required | √ | √ |
Chromecast
| Feature PC only (Win/Mac/Chrome) | |
| Screen sharing | ☑ |
| Touchback | ☐ |
| Audio sharing | ☑1 |
| Desktop Sync | ☐ |
| Device Sync | ☐ |
| Annotation | ☐ |
| Camera sharing | ☐ |
| Document sharing | ☐ |
| Photo sharing | ☐ |
| Video/Audio sharing | ☐ |
| Remote control | ☐ |
| Pause screen sharing | ☐ |
| No app install required | ☑ |
Webcast
| Feature Windows MacOS | Chrome OS | ||
| Screen sharing | ☑ | ☑ | ☑ |
| Touchback | ☐ | ☐ | ☐ |
| Audio sharing | ☑2 3 4 | ☑ | ☑ |
| Desktop Sync | ☐ | ☐ | ☐ |
| Device Sync | ☐ | ☐ | ☐ |
| Annotation | ☐ | ☐ | ☐ |
| Camera sharing | □ | □ | □ |
| Document sharing | □ | □ | □ |
| Photo sharing | □ | □ | □ |
| Video/Audio sharing | □ | □ | □ |
| Remote control | □ | □ | □ |
| Pause screen sharing | □ | □ | □ |
| No app install required | √ | √ | √ |
Connecting a device to the display
The Screen Share app on GX (V2) displays enables you to share a computer or mobile device the display.
The display's Screen Share app supports devices configured with the Bytello Share App and native streaming from devices (Airplay, Miracast, and Chromecast). Regardless of the method you choose sharing a device's screen, the steps for starting and managing a screen share session are the
- Verify the network
- Connect devices to the display
- Manage connected devices
- Minimize and rearrange screens
- Stopping a screen share session
Expand the sections below to learn more about each step.
Verifying the network
Your device must be on the same network as the display to connect using the Bytello Share streaming from devices (Airplay, Miracast, and Chromecast). Use the following procedure to verify your device and the display are connected to the same network.
- From the display's Home screen, tap Screen Share .
The main Screen Share interface opens.
OR
Tap the floating menu icon ZWB J9V at the top of the Home screen of the display if Screen Share is running.
- Make a note of the network the display is connected to. The name ® appears beside the ice
- Verify that your device is connected to the same network. Consult your device's user guide information.
Connecting your device to the display
-
From the display's Home screen, tap Screen Share.
The main Screen Share interface opens. -
Verify that your device and display are connected to the same Verifyingnetwerk (see network on the previous page).
Notes
° If you're using the Bytello Share app, make a note of the 6-digit connection code.
° If you're using a method other than the Bytello Share app (such as AirPlay, Chromeca: Miracast), make a note ScreenSharename next to the icon.
- Choose from one of these connection methods listed below.
- Bytello Share app (using the Bytello Shareonappage 51).
Tip
For the best performance, use the Bytello Share app to connect.
- Native streaming services
- Airplay (available on iOS and Mac devices) use See AirPlay page 56.
- Miracast (available on Android and Windows devices) use SeeMiracast page 56.
- Chromecast (available on Chrome OS, Mac, and Windows computers). See Chromecast to connect from a Chrome browser or Chromebook.
- Webcast (with a URL).Connect using Webcast page 57.
-
Wait for the device to automatically connect or for the host to accept your request to join
-
Pause or exit the screen share at any time.
Managing connected devices
View all connected device, their status, available device permissions, and options.
To manage devices
- On the display's Home screen, tap Screen Share .
OR
Tap the floating menu at the top of the display, then tap View main screen. The main screen opens.
- Tap in the bottom left-corner to open the devices list. You can see which devices are connected and how they are sharing to the display. Tap the blue and red icons on the assign or change permissions and connections.
| Tool Icon Description | ||
| Airplay Device |  connected via AirPlay. connected via AirPlay. | |
| Miracast Device | [05W7] connected via Miracast. | |
| Mobile connection via app | [7H22] | Mobile device is connected via Bytello Share app. |
| Computer connection via app |  | Computer is connected via Bytello Share app. |
| Computer connection via Cast |  | Computer is connected via Cast from the Chrome browser. |
| Computer connection via URL |  | Device is connected via Bytello Share URL/website |
| Invite to share | Invite connected devices to cast their desktop from the display. This happens automatically for a PC. | |
| Tool Icon Description | |
| Touchback permissions | |
| File sharing Send files | from the display to any connected device. |
| Admin authorization | |
| Preview device screen5 | |
| Stop sharing Stops devices from sharing their screen. Devices remain connected. | |
| Disconnect Disconnects devices from the display. You can disconnect individually, or tap the top-most Disconnect icon to disconnect all devices. | |
Minimizing and rearranging screens
It's possible to share up to nine screens on the display depending on the method used to share. You can connect using a combination of methods as well.
| Mirroring method Maximum number of devices | |
| Bytello Share app 9 | |
| AirPlay 9 | |
| Miracast 2 | |
| Chromecast/Chrome browser 1 | |
| Webcast | 2 |
When devices are sharing their screens to the display, you can access a tool bar of controls shared screen. The controls available include ending a screen sharing session, minimizing a screer controlling the volume of a shared screen.
To access the shared screen tool bar
- Tap anywhere on the display's screen. The toolbar appears in the bottom left corner of ec screen.
- Tap a toolbar icon in the toolbar to perform one of the actions in the table below:
Note
The availability of each tool bar control depends on the connection method and the connected device's type.
| Tool Icon Description | ||
| End End the current |  en en | sharing session. |
| Minimize Minimize the |  een een | sharing session to access other areas of the display's screen.You can also press the display's Home button.NoteYou can view the screen sharing session at any time by tapping the floating toolbar on the top of the display's screen, then tapping View the screen share |
| Floating window mode |  w w | the shared screen in a floating window. You can move a window on the display by tapping and dragging the window. Touchback is not supported in floating windows. |
| Volume Mute or unmu |  the the | shared audio. Some devices don't support audio, so this button might not always appear. See Features. |
| Screen view Switch be |  en en | screen views. The blue icon in the corner shows how many screens are currently sharing their screen to the display. |
When multiple devices are sharing screens to the display, you can move them.
To rearrange screens
- On the display, press and hold the screen that is sharing, then drag the window to adjust
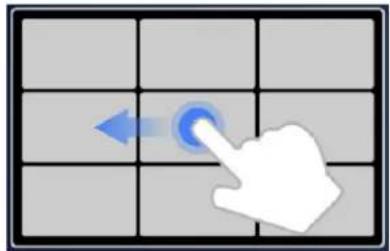
- Release to change positions.
Stopping a session
Participants can stop sharing their screen by tapping . The host can also disconnect a participa
To disconnect a device as a participant
The process for disconnecting a device as a participant varies depending on your device and the connection method. Consult your device's user guide for more information.
To disconnect a participant as the host
Tip
You can disconnect all devices by tapping at the top of the list.
- Tap Devices Devices (3) on the Screen Share app's main screen.
The Device management screen open managing connected devices page 47).
-
Choose a device from the list and tap to disconnect it.
-
Tap Disconnect to confirm.
Using the Bytello Share app
For the best performance, use the Bytello share app to connect your device to the display.
Device requirements for using Bytello Share
Device Requirement
iOS devices (iPhone 6 or later) iOS 10.0 and later
| Device Requirement |
| Android devices Android 5.0 and later (Android 10.0 recommended) |
| Windows computers Windows 7, 8, 10 and later |
| Mac computers Mac OS X 10.11, 11 and later |
| Chrome browser Chrome 38 and later |
| Linux Ubuntu 12.04 and later |
Downloading and using the Bytello Share app
You can use the Bytello Share app to mirror your device, sync with the display, share files, a Begin by downloading and installing the app on your device. For deviceDerequirements, see requirements for using Bytello Share the previous page.
To download the Bytello Share app
- From the display's Home screen, tap Screen Share .
The main Screen Share interface opens.
-
Tap the User Guide icon.
-
In your device's browser, enter the URL specified on the display//section in the (https://ssp.bytello.com/download).
OR
Use a QR code scanning app on your device to scan the QR code on the display's screen.
- Download and install the Bytello Share app for your device.
To connect your device to the display
-
Verify that your device and display are connected to the same VerifyingNetwork (see network on page 46).
-
Open the Bytello Share app on your computer or mobile device.
-
Enter the 6-digit connection code shown on the Screen Share app's main interface or in the menu at the top of the display.
OR
Click or tap ScreenShare name (see Screen Share name and Bytello share websites address page 41) of the display you want to connect rising false connectable deviation.
- Wait for the device to automatically connect or for the host to accept your request to join
The features available after connection depend on the device you are using. See the table belc
To share your device's screen to the display
-
Open the Bytello Share app on your device and connect to the display.
-
Wait for the device to automatically connect or for the host to accept your request to join
-
The app provides the following options to share your screen (options will depend on the d are using):
| Option Description Devices | ||
| Screen Share | Share your device's screen to the display using one of the Desktop, Window, extend screen, and so on).NoteIf Permission Mode is enabled, the host at the display will have to accept your request to join. Otherwise, your device will share its screen automatically.TipIf you'd like to disable Touchback at the display, use the menu at the top of your computer screen to change permissions. | |
| Media Share | a video from your mobile device to the display. In the Media and select the video to share. | Mobile tap |
| Photo Share | a photo from your mobile device to the display. In the Photo and select the image to share. | Mobile tap |
| Document | Share a document from your mobile device to the display. Tap Document and select the file to share. | Mobile app, |
| Camera Share | a live view from your mobile device's camera to the app tap Camera, then Record. | Mobile. In the |
| Remote Your mobile device behaves as a large touchpad, with a left- Mobile and back button, to control a pointer on the display. | ||
-
When you're done sharing, click or tap CloScreen the menu on your device.
-
Tap to disconnect.
Using the Bytello Share app to interact with the display
You can interact with the display using the Bytello Share app on your device, including controlli whether Touchback permissions are enabled (nanging connected devices page 47). Select whether you want to use the remote control feature or duplicate the display's screen to your
| Option Description Devices | ||
| Desktop Sync | Mirror the display's screen on your device. If Touch permissions are enabled for your device (e connected devices on page 47), you can control the display and open and close files, manage apps, and annotate on the display's screen. Annotations can be saved to the display or shared to devices connected with the Bytello Share app (e annotation the next page). | All |
| Remote Your mobile device behaves as a large touchpad, with a left-click Mobile back button, to control a pointer on the display. | ||
| Device Sync | Sync your device to the display's externally connected camera P6r microphone, creating a virtual camera and microphone. Use this feature for meetings in third-party conference software. | |
Using Desktop Sync
When you use the Desktop Sync feature, the display's screen appears on your device. If Touchb permissions are enabled for your device, you can control the display and open and close files, apps, and use a pen to draw on the display's screen.
Note
The Desktop Sync feature's performance can vary depending on the number of devices connected. Image quality can be affected if more than two devices are connected to the display and us feature at the same time.
To use Desktop Sync
- Open the Bytello Share app on your device and connect to the display.
- On your device, tap Desktop Sync.
Note
- For security purposes, touchback is automatically disabled, but you can enable it from the Device management page of the display's Screen Share Management connected devices on page 47).
-
Touchback is available only on the maximized screen/docked screen.
-
Wait for your host to accept the request to sync your device's desktop to the display. The screen appears on your device.
In Desktop Sync mode, users can write on the display at the display itself and from the connected
devices (if permissions are enabled). You can take a screen capture of the annotations and show with devices connected with the Bytello Share app.
To annotate
-
Make sure your device is in Desktop Sync mode.
-
From the floating menu on the display, tap the icon to open the annotation toolbar.
| Tool Icon Description | |
| Pen Touch behaves like | a pen, drawing digital ink on the screen overlay.Tap the pen icon to change color. Use the pen feature to annotat over the screen sharing session. Devices with Touchback permissions enabled can also make annotations. |
| Erase Touch behaves like | an eraser, erasing digital ink drawn on the screen overlay. |
| Clean Clears all of the | annotations. |
| Save Save the current | screen to an image file on the display. |
| Insert Insert an annotated | screen capture into a whiteboard file on the display. |
| Share Share annotations | with devices that are connected with the Bytello Share app in Desktop Sync mode. Tap Share, select the device, an tap Confirm. The display sends a screen capture in .png format. |
Using Remote
For mobile devices only.
-
Open the Bytello Share app on your device.
-
Connect to the display using the app.
-
On your device, tap Remote in the app.
-
Control the display using the touchscreen on your mobile device.
Tip
Tap the More menu to switch between mode and Touchpad mode
Device Sync
For PC only.
The Device Sync feature enables you to connect your computer to a camera and microphone (optionally) to the display, creating a virtual camera and microphone. Use this feature for meeting third-party conference software.
-
Open the Bytello Share app on your device and connect to the display.
-
In the app, click Device Sync.
-
Select whether to connect to the camera and microphone.
If a camera is connected to the display, you can see its view on your device's screen. If microphone, you can hear the audio in the room with the display.
Using native streaming (AirPlay, Miracast, or Chromecast)
On networks that are configured to support AirPlay, Miracast, or Chromecast, participants can use native screen sharing without installing software or worrying about admin rights.
Streaming via AirPlay and Chromecast are enabled by default, but streaming via Miracast must enabled iSettings (see Settings on page 41).
To use AirPlay
- From the display's Home screen, tap Screen Share.
The main Screen Share interface opens.
Note
Make a note of Screen Share name next to the icon.
-
Verify that your device and display are connected to the same Verifying Network (see network on page 46).
-
Follow the instructions for your device to use Airplay (see Apple support).
Note
Ensure that your Firewall settings are not blocking the Screen Share, Airplay, or the Apple service from connecting. Refer to your device's user manual for more information.
To use Miracast
Note
The steps to connect from an Android device vary depending on the device. The most common are using Smart view, Screen mirroring, and Quick Connect. Consult your Android device's user for details.
- From the display's Home screen, tap Screen Share . The main Screen Share interface opens.
Note
Make a note of ScreenShare name next to the icon.
- Verify that your device and display are connected to the same Verifying network (see network on page 46).
- Follow the instructions for your device to use Miracast, (see Microsoft support or your Android device's user guide).
To use Chromecast to connect from a Chrome browser or Chromebook
- From the display's Home screen, tap Screen Share . The main Screen Share interface opens.
Note
Make a note of ScreenShare name next to the icon.
-
Verify that your device and display are connected to the same VerifyingNetwork (see network on page 46).
-
Follow the instructions for your computer to use Chromecast (see Chrome support).
Note
With this connection method, other devices can end the screen sharing session without warn
Connect using Webcast
Participants can connect via the Bytello Share website without downloading and installing apps or software. Make sure the Screen Share app is configured to allow Miracast connections (see setti
- From the display's Home screen, tap Screen Share .
The main Screen Share interface opens.
OR
Tap the floating menu ZWB J9V icon at the top of the Home screen of the display if Screen Share is running.
- Verify that your device and display are connected to the same VerifyingNetwork (see network on page 46).
-
On your device, open your preferred browser and enter the URL share.bytello.com.
-
Enter the 6-digit connection code shown on the Screen Share app's main interface or in the menu at the top of the display.
OR
Tap the display's name you want to connect to a pin devection.
- Wait for the device to automatically connect or for the host to accept your request to join You can pause the screen share at any time.
- When you're finished sharing, click the icon or close or refresh the tab.
Using Palette

The Palette app lets you paint or draw on a digital canvas using a variety of tools toolbox, colors from a color box, and a color mixing palette.
Palette tools and controls
The Palette app has several tools and controls for creating and sharing your palettes.
| Tool Icon Description | ||
| Menu tools | ||
| Tap the Menu icon in the lower left corner to open the menu of tools for saving and shar | ||
| Save Save the image as a .png file. | ||
| Import Import .png, jpg, or .bmp image file onto the digital canvas. The image will be stretched to fill the background of the canvas. | ||
| Exit Exit the .image app. | ||
| Other controls | ||
| Clear Clear .digital ink. | ||
| Undo Reverse effect of the last action. | ||
| Redo Reinstat last action reversed with the Undo command. | ||
| Sample Samp color from the image on the screen. | ||
Fill  Fill a bounded area with the currently selected color. Fill a bounded area with the currently selected color. | ||
Writing and drawing on a palette
The Palette app has several tools for painting, drawing, and erasing on the digital canvas. Tool toolbox support multitouch painting and drawing.
| Tool Purpose Description | ||
| Toolbox | ||
| Pencil | Write or draw digital ink in the style of a pencil. | The pencil can be used for most writing applications. |
| Pen | Write or draw digital ink in the style of a pen. | The pen is useful for teaching students handwriting. |
| Crayon | Write or draw digital ink in the style of a wax crayon. | The crayon works best with artistic work, such as painting and coloring pictures, rather than writing. |
| Paintbrush 1 | Write or draw digital ink in the style of a narrow paintbrush. | The narrow paintbrush works best with artistic work, such as painting and coloring pictures, rather than writing. |
| Paintbrush 2 | Write or draw digital ink in the style of a wider paintbrush. | The wider paintbrush works best with artistic work, such as painting and coloring pictures, rather than writing. |
| Charcoal pencil | Write or draw digital ink in the style of charcoal pencil. | The charcoal pencil works best with artistic work, such as painting and coloring pictures, rather than writing. |
| Air brush | Write or draw digital ink in the style of an airbrush. | The air brush works best with artistic work, such as painting and coloring pictures, rather than writing. |
| Eraser | Use a pen or as an eraser | if Engise ink from the screen as needed. Multitouch is not supported. |
| Palette | ||
 | Customize an existing color. | Use the palette tool to create a new color by customizing a color from the ColorBox. Select a color to be blended with the currently selected color, then slowly mix the palette until you achieve the desired color blend. |
Tool Purpose Description
ColorBox
| ColorBox Select a color touse when youpaint or draw onthe digital canvas. | Choose a range of colors to draw or paint with. You can also mix and customize colors in the Palette tool. |
Starting a new palette
- On the display's Home screen, tap the Apps icon.
The Apps menu appears.
- Tap the Palette icon .
The Palette app opens.
Changing the background
-
Tap the Menu icon .
-
Tap the Import icon .
-
Browse to the image you want to use from the display's storage or a USB drive.
-
Tap OK to import the image. The image appears on the digital canvas.
Note
The only way to delete the background is to start a new session.
Writing and drawing on a palette
- Select a painting or drawing tool.
If you want, use the slider to customize the line thickness.

natural_image
Row of colored pencil icons on a white background, no text or symbols present- Select a color from the ColorBox.
If you want, use the Palette tool to customize the selected color. Start by choosing two co

natural_image
Color palette with circular and square buttons, no text or symbols present- Use the display's pens or your finger to paint or draw in digital ink.
Exiting a palette
When you're done, tap the Menu icon, then tap the Exit icon.
Tip
If you want to keep the file, save your work before you exit.
Using Clean

Use the Clean app to optimize the display's system memory and delete files in the tr
Opening and closing the Clean app
To open the Clean app
-
On the display's Home screen, tap the Apps icon.
-
Tap the Clean icon .
The Clean app's main interface appears.
Note
To check the version information of the Clean app, tap the Info icon in the lower-left corner.
To close the Clean app
To exit the Clean app, tap the Exit icon in the lower-left corner.
Using the One Key Optimize tool
Use the One Key Optimize tool to clear the display's system memory, detect hardware issues, a the display's deleted files (trash) at the same time.
-
Tap One Key Optimize to start.
-
Wait for the app to finish.
You can Optimize Again or exit the app when finished.
Using the Clean Memory tool
Use the Clean Memory tool to clear the display's system RAM.
-
Tap the Clean Memory icon .
-
Wait for the app to finish.
You can Optimize Againor exit the app when finished
Using the Clean Trash tool
Use the Clean Trash tool to clear the display's deleted files (trash).
- Tap the Clean Trash icon .
2.1. Wait for the app to finish.
You can Clean Again, or exit the app when finished.
Using Cloud Drive
Use the Cloud Drive app to set up the display to save or retrieve items from a Go OneDrive account (requires an existing Google Drive or OneDrive account).
Adding a Google Drive or OneDrive account
To open the Cloud Drive app
- On the display's Home screen, tap the Apps icon.
- Tap the Cloud Drive icon .
To add an account
- Tap Add Account.
- Choose an account type by tapping Google Drive or OneDrive.
- Enter your account email and password, and Allow permissions when prompted.
If you want, repeat steps 1 to 3 to add more accounts.
- To set an account as the display's default account, select the account and tap Set as default.
If you want to make the account no longer the default, tap Cancel the default.
If you want to sign out from an account, tap Logout.
- Tap the Close icon to exit.
Using WPS Office

You can use the Writer, Presentation, and Spreadsheet features of this office suite to or view a variety of document types. WPS Office can also open and edit documents with a variety of other software, including Microsoft Office, Google Docs, and Adobe Acrobat.
Note
WPS is a third-party application. SMART's support for this application may vary depending on the inquiry.
Opening the WPS Office app
-
On the display's Home screen, tap the Apps icon.
-
Tap the WPS Office icon .
The WPS Office welcome screen appears.
Using the WPS Office app
For information about using WPS office, see the help.wps.com/ support site.
Using File manager

Use the File manager to access files saved on the display, on USB drives, or in Goc or OneDrive cloud storage. Sign into the cloud account and grant permissions before u File manager to access that account.
You can also open saved whiteboard .enb or .png files in the File manager.
Opening File manager
-
On the display's Home screen, tap the Apps icon.
-
Tap the File icon .
The File manager appears.
Viewing files
To view a whiteboard file saved from the Whiteboard app
- In File manager, browse to the folder that contains the saved whiteboard file and double-tc
Note
The default folder location for saving Whiteboard files in WhiteBoarderSeUsing Whiteboardon page 30.
- Double-tap the Whiteboard file (.enb) to open it.
To view a picture, play an audio file, or watch a video
- In File manager, browse to and double-tap the file.
Tip
Common storage locations for picture and video files are the DCIM, Pictures, Video Presente Movies, and Palette folders.
- The file opens in the appropriate application.
Tip
Swipe the screen left or right to see view all the images in that folder.
To stop viewing the file
On the display's Toolbar, tap the Home ic toolbar See page 19.
Moving or copying files
Using a USB drive
To move or copy a file from a USB drive to the display
- Connect a USB drive to the display on the front connector panel.

- On the display's Home screen, tap the Apps icon.
-
Tap the File icon .
-
Tap the name of the connected USB Drive.
-
Browse to the files you want to move or copy.
-
Tap a file to select it.
OR
Tap Select to select multiple files. A check box appears next to the selected files.
- Tap Cut or Copy in the bottom menu.
Note
Cut will remove the file from the USB drive, whereas Copy will leave the file on the USB drive.
-
Tap Storage.
-
Browse to the folder you want to move the file to.
-
Double-tap the folder to open it.
-
Tap Paste.
The file is copied or moved to the display.
To move or copy a file from the display to a USB drive
- Connect a USB drive to the display on the front connector panel.

-
On the display's Home screen, tap the Apps icon.
-
Tap the File icon .
-
Tap Storage.
-
Browse to the files you want to move or copy.
-
Tap the file to select it.
OR
Tap Select to select multiple files. A check box appears next to the selected files.
- Tap Cut or Copy in the bottom menu.
Note
Cut will remove the file from the display, whereas Copy will leave the file on the display.
-
Tap the name of the connected USB Drive.
-
Browse to the folder you want to move or copy the file to.
-
Double-tap the folder to open it.
-
Tap Paste.
The file is copied or moved to the USB drive.
Using a Google Drive or OneDrive account
The following procedures require that you first set up the display to save or retrieve items from Drive or OneDrive account. For more information, Coud Drive page 64.
To move or copy a file from a cloud drive to the display
-
On the display's Home screen, tap the Apps icon.
-
Tap the File icon .
-
Tap Cloud Drive.
-
Browse to the files you want to move or copy.
-
Tap the file to select it.
OR
Tap Select to select multiple files. A check box appears next to the selected files.
- Tap Cut or Copy in the bottom menu.
Note
Cut will remove the file from the Cloud drive, whereas Copy will leave the file on the USB drive.
-
Tap Storage.
-
Browse to the folder you want to move the file to.
-
Double-tap the folder to open it.
-
Tap Paste.
The file is copied or moved to the display.
To move or copy a file from the display to a cloud drive
-
On the display's Home screen, tap the Apps icon.
-
Tap the File icon .
-
Tap Storage.
-
Browse to the files you want to move or copy.
-
Tap the file to select it.
OR
Tap Select to select multiple files. A check box appears next to the selected files.
- Tap Cut or Copy in the bottom menu.
Note
Cut will remove the file from the display, whereas Copy will leave the file on the display.
-
Tap Cloud Drive.
-
Browse to the folder you want to move or copy the file to.
-
Double-tap the folder to open it.
-
Tap Paste.
The file is copied or moved to the Cloud drive.
Installing apps using File Manager
You can use File manger to install third-party apps on the display.
Important
The installation of third-party apps works only if you've enabled the sources. Display Settings > System > Security > Install from unknown sources (it is disabled by default).
See SMART Board GX (V2) series interactive displays installation and maintenance guide (smarttech.com/kb/171861).
To install apps using File Manager
-
Download and save Android Package files (.apk) to a USB Drive.
-
Connect the USB drive to the display on the front connector panel.

-
On the display's Home screen, tap the Apps icon.
-
Tap the File icon .
-
Tap the name of the connected USB Drive.
-
Browse to and double-tap the .apk file you want to install.
Follow the on-screen instructions to install the app on the display.
Supported file formats
For more information regarding supported file formats, see Supported Media Formats.
Using SMART Remote Management

You can use SMART Remote Management on the display.
For more information, SMARTe Board GX (V2) series interactive displays installation and maintenance gui(denarttech.com/kb/171861).
Using Settings

Access the display's settings to configure network and Wi-Fi settings, user interface control toolbar display options, and input and output device connection settings. You can also configure apps, see system settings, view regulatory information, and more.
For more information, SMARTe Board GX (V2) series interactive displays installation and maintenance guide(dearttech.com/kb/171861).
Using Camera

You can display the video image from a connected Android compatible USB video class (UVC) camera and take a screen capture, which you can modify and annotate before it to the display as a .jpg image. You can then import the image into other applica Whiteboard and Palette apps.
Viewing, annotating, and saving screen capturesshots from a connected camera
Connecting a camera and viewing its input
-
Connect an Android compatible UVC camera to one of the display's USB Type-A connectors.
-
On the display's Home screen, tap the Apps icon.
-
Tap the Camera icon .
The Camera app's main interface appears.
-
Tap the Setting icon .
-
Select a connected camera and choose an image resolution.
The video from the connected camera appears.
Taking a screen capture and adding annotations
- Tap the Capture picture icon .
The camera's video changes to Replay mode and the image is saved to the display.
Note
Images are saved on the display in Storage > VideoPresenter > Photograph > [Dated Folder].
-
If you want to go back to the camera preview mode, tap the Back icon .
-
Tap any of the these options on the menu bar to adjust the image:
| Menu option Description | ||
 | Normal | Picture mode. This is the default preview mode without any visual effects. |
 | Enhance | Text mode. |
 | Adjustment | Select options for adjusting the camera's image is displayed, including full screen or auto mode (fixed aspect ratio), changing the size of the image, rotating the image.You can also select from the following image display options:Tap N to switch to normal modeTap T to reduce color usage and improve text display quality.Tap P to reduce contrast and increase saturation to improve picture quality.Tap Advanced Options to access controls for dynamically adjusting brightness, contrast, saturation, and sharpness. |
- If you want to make notes on the screen capture, tap the Mark icon .
The Mark menu bar appears.
- Tap any of the following options on the menu bar to write or draw in digital ink and s annotated screen capture. You can also insert a screen capture into a whiteboard file or up a screen capture to Google Drive or OneDrive cloud storage.
| Menu option Description | ||
 | Select | Exit Pen or Highlighter mode to resume touch functions. For example, tap c hold the image to move its position. |
 | Pen | Use the display's pens or your finger to write or draw in digital ink. |
 | Highlighter | Use the Highlighter tool to add emphasis to text or objects. |
 | Save | Save the current screen capture. |
 | More | Select from the following options:Tap theFileicon to switch to the File manager app to to locate and view previously saved pictures.Tap theInserticon to open a new whiteboard and insert the current screen capture.Tap theCloudicon to save the current screen capture directly to a Google Drive or OneDrive account. |
- Tap the Close icon to exit the Mark menu and return to the screen capture.
Viewing the camera input and previously captured images simultaneously
- Tap the View icon in the bottom-right corner of the screen.
- Tap any of these options on the menu bar in the bottom-right corner of the screen.
| Menu option Description | ||
 | Double | Show the current camera preview on the left half of the screen and a previously saved picture on the right half. |
 | Four | Show the current camera preview in the top-left quadrant of the screen ar up to three previously saved pictures in the other three quadrants. |
 | Preview | Load a different, previously captured picture into this preview location. |
- Tap the Close icon to exit the view menu and return to the video from the connected cc
Exiting Camera
When you're done, tap the Exit icon in the bottom-left corner of the screen.
Unsupported apps
Some apps can cause issues with GX (V2) displays and are not supported on these displays as a result.
| Icon Notes | |
| Launchers Launcher apps can interfere with the home screen app and cause the Input, Screen Share, and other apps to stop working. | |
| Web browsers Third-party web browsers allow users to download APKs and other files from the internet. | |
| File managers File managers can allow access to hidden system files and settings. | |
| Keyboards Third-party keyboards can cause a wide variety of issues with the embedded Android experience. | |
| Setup wizards, system These apps grant access to the operating system and can cause a wide setting tuners, and app variety of issues.that allow the system to be rooted | |
| Online music players Online music players can operate in the background. The interface is hidden and you can't stop unintended music from playing. | |
| Apps requiring Google Play Services Google's policies do not permit Google Play Services to be used on interactive display products. Apps requiring Google Play Services will not run on SMART Board GX (V2) interactive displays with embedded Android, and attempts to run them could cause problems. | |
| Apps with GPS Hardware limitations prevent apps from working. | |
| Apps with NFC Hardware limitations prevent apps from working. | |
| Apps that require portrait orientation Apps that require portrait orientation don't fit the landscape screen. Install only apps that allow landscape orientation. | |
Chapter 2 Using widgets on the disp
Input Settings menu...77
Using the Overlay widget...77
Overlay tools and controls...78
Using the Timer widget...78
Using Stopwatch...80.
Using the Spotlight widget...82
Using the Record widget...83
Using the Freeze widget...85
Using the PIP widget...86
Using the Split screen widget...88
Using Screen lock.
Using the Calculator .tool
Using the Screen Capture widget
88
89
89
This chapter introduces the widgets on the SMART Board GX (V2) series interactive displays.
To open the widget menu, open the ToolbarOnscreen(seenus and controlspage 18) and tap the More icon.
You can also pin the widgets you use regularly to favorToolwidgetsShortcuts page 21).
Note
Widgets always appear on top of other open windows, programs, and connected devices.
The tools menu features the following tools and controls:
| Icon | Widget | Function | Notes |
 Icon Icon | InputWidget Function Notes | Select an input and adjust brightness and volume. You also access advanced option for configuring input settings. | See the SMART Board GX (V2) series interactive displays installation and maintenance guide (smarttech.com/kb/171861). |
 | Overlay Write on an | overlay on top of any app, video, website, document, or image, including input from a connected computer.Saving to cloud storage is supported. | See Using the Overlay widget on the next page. also |
 | Timer Start a countdown timer. See | Using the Timer widget page 78. | |
 | Stopwatch Start a stopwatch that counts up from zero for measuring elapsed time. | See Using Stopwatchpage 80. | |
 | Spotlight Use the Spotlight widget during a presentation to draw attention to an area of a | See Using the Spotlight widget on page 82. screen. | |
 | Record Use the Record widget to record your actions on the display. | See Using the Record widget page 83. | |
 | Freeze Freeze and zoom the current image on the screen. | See Using the Freeze widget page 85. | |
 | PIP Use the picture-in-picture (PIP) widget to show a different in a smaller floating window while using other apps on display. | See Using the PIP widget page 86. the | |
 | Split screen | Use the Split screen widget divide the screen into two allowing you to use two different apps or widgets simultaneously. | SetoUsing the Split screen widget on page 88. |
 | Screen lock | Lock the screen. See | Using Screen lock page 88. |
 | Calculator | Open an on-screen calculator. | Using the Calculator tool page 89. |
| Icon Widget Function Notes | |||
 | Screen Capture Capture | screen captures ofanything on the screen,including content from apps,websites, and videos.Select Freedom, Full, andwindow mode.You can add captured screeensto a whiteboard and edit them. | See Using the Screen Captu widget on page 89. |
Input Settings menu
Select an input and adjust brightness and volume. You can also access advanced options for a screen, display, and image adjustment.
See thSMART Board GX (V2) series interactive displays installation and maintenance guide (smarttech.com/kb/171861).
Using the Overlay widget
Use the Overlay widget to write or draw over the currently displayed screen contents. After you you can save the overlay to the Files library. You can also save overlays directly to a Google OneDrive account.
To write or draw on an overlay
-
Tap the Overlay Icon .
-
Use the display's pens or your finger to write or draw in digital ink.
-
If you want to keep the overlay, tap the Save icon 📋 to save the image file to the display in .png format.
OR
Tap More ® and then to save the file to your Google Drive or OneDrive account. This is will also save a copy of the .png file locally.
- When you're done, tap the Close icon to exit the overlay.
To erase ink on an overlay
Erase ink by moving your fist or palm over the digital ink.
OR
Tap the Clean icon and erase all the ink.
Overlay tools and controls

No Tool
| 1 | Select tool. When the Select tool is active, your touch passes through the overlay and interacts with the screen contents behind it. |
| 2 | Pen tool. When the Pen tool is active, your touch draws digital ink on the overlay. C available for pen size and color. |
| 3 | Highlighter tool. When the Highlighter tool is active, your touch draws transparent digital on the overlay. Options are available for pen size and color. |
| 4 Erase | all digital ink on the overlay. |
| 5 Save | the current overlay. |
| 6 Open | File manager, insert an image, and access cloud storage. |
| 7 Remove | the overlay and close the Overlay widget. |
Using the Timer widget
Use the Timer widget to display a countdown timer on the screen.
To use the Timer widget
- Tap the Timer Icon .
The Timer widget opens:

No Tool
| 1 Timer | display (left to right): hours, minutes, seconds. Slide your finger up or down on the numbers to customize the countdown timer. |
| 2 Start | the countdown timer. |
| 3 | (Optional) Enable the PLAY A SOUND WHEN THE COUNTDOWN FINISHES option to add an audible ring tone that sounds when the timer ends. |
- Tap Start to start the countdown timer.
This image and table describe the options available after the timer has started:

No Tool
4 Pause the countdown timer.
5 Reset the countdown timer.
6 Make the countdown timer full screen. Tap again to return to normal size.
Tap the screen anywhere other than the timer to make the timer a moveable float window and move it around.
To close the Timer widget
Tap Close.
Using Stopwatch
Use the Stopwatch widget to count up from zero and measure elapsed time.
To use the Stopwatch widget
- Tap the Stopwatch icon .
The Stopwatch tool opens:
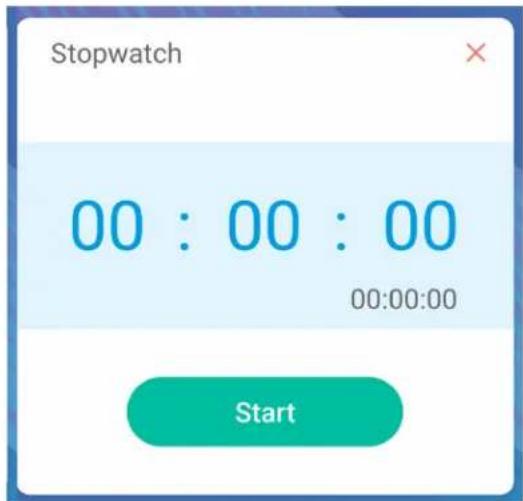
- Tap Start to start the stopwatch.
This image and table describe the options available after the stopwatch has started:
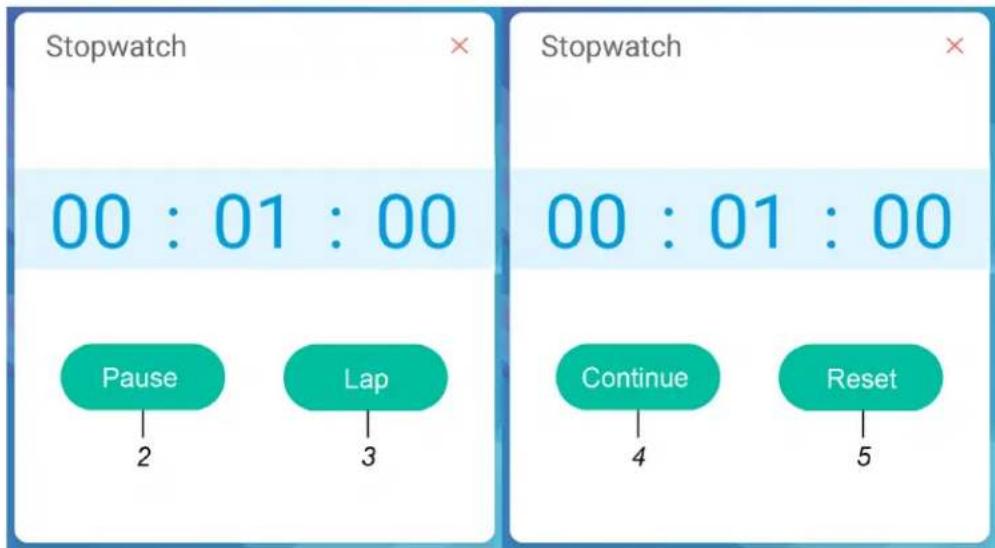
No Tool
2 Pause the stopwatch.
3 Record the current time and display it in a list of other times you've recorded.
4 Resume the stopwatch after pausing.
5 Reset the stopwatch to zero.
Tip
You can turn the Stopwatch widget into a moveable floating menu by tapping a different part screen.
To close the Stopwatch widget
Tap Close.
Using the Spotlight widget
You can use the Spotlight widget during a presentation to draw attention to a particular screer
To use the Spotlight widget
- Tap the Spotlight icon .
The Spotlight widget is activated:

flowchart
graph TD
    A["1"] --> B["Settings"]
    C["2"] --> D["Close"]
    B --> E["02:43"]
No Tool
1 Open Settings for controls that change the spotlight's size and transparency. Tip You can also use finger gestures to change the size of the spotlight area. 2 Close the Spotlight widget.
- Press and drag the Spotlight window to highlight an area of the screen.
To close the Spotlight widget
Tap Close.
Using the Record widget
You can use the Record widget to record a video of the on-screen activity.
To use the Record widget
- Tap the Record Icon .
The Record widget opens:

No Tool
| 1 | Begin | recording. |
| 2 | Open | Settings for controls that change the video's resolution and to select a location for the saved recording. |
| 3 | Close | the Record widget. |
- (Optional) Tap Settings and change the default resolution and the location of the saved recording.
- Tap the Rec icon to begin recording your actions on the display.

- If you want to pause the recording, tap the Pause icon .
To resume recording, press the Resume icon .
- To stop the recording, tap the Stop icon .
The recording is saved to the display.
To close the Record widget
Tap Exit.
Using the Freeze widget
You can use the Freeze widget to temporarily freeze the screen.
Note
Freezing the screen does not pause running applications on the connected computer. It simply t the display of those applications.
To use the Freeze widget
1. Tap the Freeze icon .
The Freeze widget appears and the screen is temporarily frozen:

No Tool
1 Zoom into the current screen.
Tip
You can also use pinch-to-zoom finger gestures to zoom in or out.
2 Zoom out from the current screen.
3 Return to the default screen size.
4 Close the Freeze widget.
- Press and drag the frozen image to move it on the screen, and use the zoom controls to specific detail.
To close the Freeze widget
Tap Close.
Using the PIP widget
The picture-in-picture (PIP) widget enables you to show a different input in a smaller floating w you can position anywhere on the screen. The floating window appears on top of open apps, you to continue viewing the second input while interacting with other apps or websites.
To use the PIP widget
- Tap the PIP icon .
The PIP widget opens:
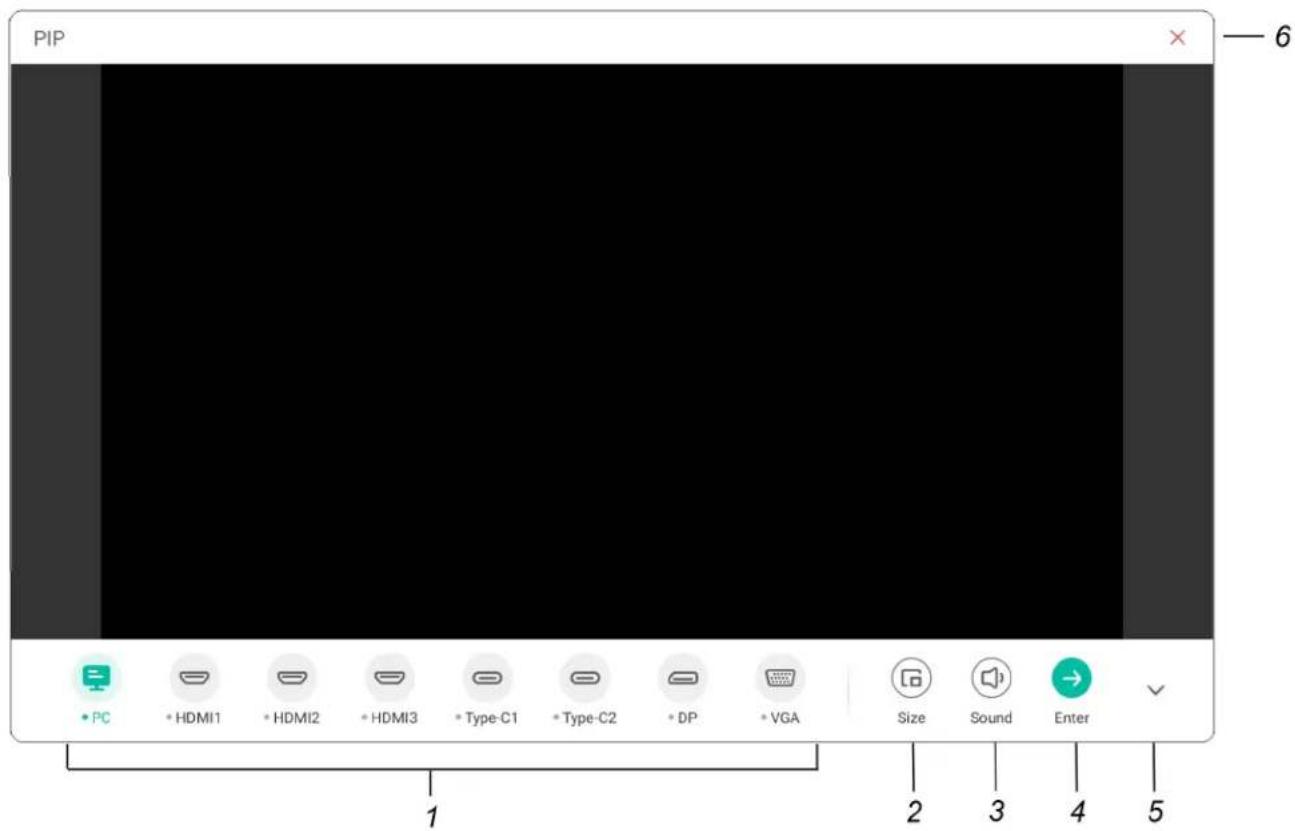
No Tool
1 Select an input.
2 Choose a size for the floating window (small, medium, or large).
3 Increase, decrease, or mute the input volume.
4 Display the input in full screen.
5 Hide the menu items.
6 Close the PIP widget.
-
Tap an input to appear in the second window.
-
Tap the Enter icon to view the selected input in full screen.
Note
If selected input also has a USB cable connected for touch, you can control this input via directly within the PIP window.
To close the PIP widget
Tap Close.
Using the Split screen widget
The Split screen widget divides the screen into two parts, allowing you to use two different apps or
widgets simultaneously. Display two documents or images side-by-side, or play a video on one h the screen while taking notes on the other half.
Note
The Split screen widget doesn't support simultaneous digital ink in the two apps.
To use the Split screen widget
- Tap the Split screen icon .
A list of apps that support the Split screen feature appears. - Select an app.
The selected app opens on one half of the screen. - Select a second app.
The second app opens beside the first open app.
To close the Split screen widget
Use the controls in the open apps to close each app.
Using Screen lock
Use the Screen lock feature to secure the display's screen. When the Screen lock is enabled, a passcode must be entered to unlock the screen.
Note
Creation of a Screen lock passcode is part of the display's initial set up. You can also config Screen lock feature in display settings.
See the SMART GX (V2) series interactive displays installation and maintenance guide (smarttech.com/kb/171861).
To lock the screen
Tap the Screen lock icon
A passcode must now be entered to unlock the screen.
Using the Calculator tool
Open an on-screen calculator that appears on top of applications running on the display.
To use the Calculator widget
Tap the Calculator icon .
To close the Calculator widget, tap Close.
Using the Screen Capture widget
The Screen Capture toolbar enables you to take a screen capture of a rectangular area or the screen.
To use the Screen Capture tool
- Tap the Screen Capture icon .
The Screen Capture tool opens:

No. Tool
1 Capture window resize handles.
2 Select a resizable rectangular window.
3 Select the entire screen.
4 Save the selected window or screen.
5 Insert the selected window or screen into a new whiteboard.
6 Close the Screen Capture widget
- Select the area or screen you want to capture.
- Tap the Save icon to save the selected window or screen.
The captured image is saved on the display to the default folder.
-
Tap Finish to continue working on the display, or Open to see the save image in the destination folder.
-
If you've opened the destination folder, you can move or copy the file to a USB drive or your Google Drive or OneDrive accoMoving(see or copying of iespage 66).
OR
Tap the Insert icon to insert the selected window or screen into a new whiteboard.
To close the Screen Capture widget
Tap Close.
Chapter 3 Connecting computers and other devices
Installing and using SMART software 92
Downloading and installing SMART software...93.
Using SMART software...93.
Connecting room computers and guest laptops...93
Viewing a connected computer or other device's input 100.
Setting a connected computer's resolution and refresh...rate...101.
Using recommended cables...102.
Sharing USB Type-B receptacles...103
Connecting a SMART OPS PC module 103
Connecting USB drives, peripherals, and other devices...104

Warning
Ensure that any cables that cross the floor to the display are properly bundled and marked the trip hazard.
Installing and using SMART software
The display comes with the following software, which you can install on connected computers:
| Software Description | Notes | |
| SMART Notebook | Free software designed for use with SMART Board interactive display. SMART Notebook software comes with many features that you can use to create, edit, and deliver engaging lessons for your students. | See SMART Notebook. |
| SMART Product Drivers | Software that enables the computer detected input from the display. | Included with SMART Notebook. |
| SMART Ink | Software that enables you to write and draw in digital ink over applications, files, websites, and any other open window. | Included with SMART Notebook. |
The following software is also available but sold separately:
| Software Description | Notes | |
| SMART Learning Suite | A suite of desktop and online software combines lesson delivery, activities, assessments, and collaborative workspaces. Includes SMART Notebook Plus software and Lumio by SMART. | For more information, see SMART Learning Suite. |
| SMART Meeting Pro | Software that enables you to capture in a virtually unlimited interactive workspace. | Fide as more information, see SMART Meeting Pro. |
| SMART TeamWorks Room | Software that simplifies meetings and facilitates deeper, more natural interactions with on-site and remote participants. | For more information, see SMART TeamWorks. |
| SMART Remote Management | Cloud-based mobile device management software for remotely maintaining, supporting, controlling, and securing the display and your other devices. | For more information, see SMART Remote Management. |
Contact your authorized SMART reseller (smarttech.com/where) for information about purchasing SMART software.
Downloading and installing SMART software
You can download SMART software from smarttech.com/downloads.
Using SMART software
For information about using SMART software, see the following pages in the Support section of the SMART website:
• SMART Notebook
• SMART Product Drivers and Ink
Connecting room computers and guest laptops
You can connect room computers and guest laptops to the display to view and interact with t
Notes
- Install SMART software on computers you connect to the installed app (see using SMART software on the previous page).
-
Make sure SMART Product Drivers 12.20 or later are installed on any connected computers.
-
Your organization's installers might have connected cables to the display and run the cables behind a wall or under the floor to a desk or table where you can place your computer
- As shown below, HDMI 1, HDMI 2, VGA, and Display Port share the Touch USB Type-B on the side connector panel, and HDMI 3 uses the Touch USB Type-B receptacle on the connector panel (Sharing USB Type-B receptacle page 103).
- The USB Type-C connector on the front connector panel provides up to 15 W of power f charging connected devices.
The following are the locations of the connectors and the connector and cable information for the display's inputs.
- USB Type-C 1
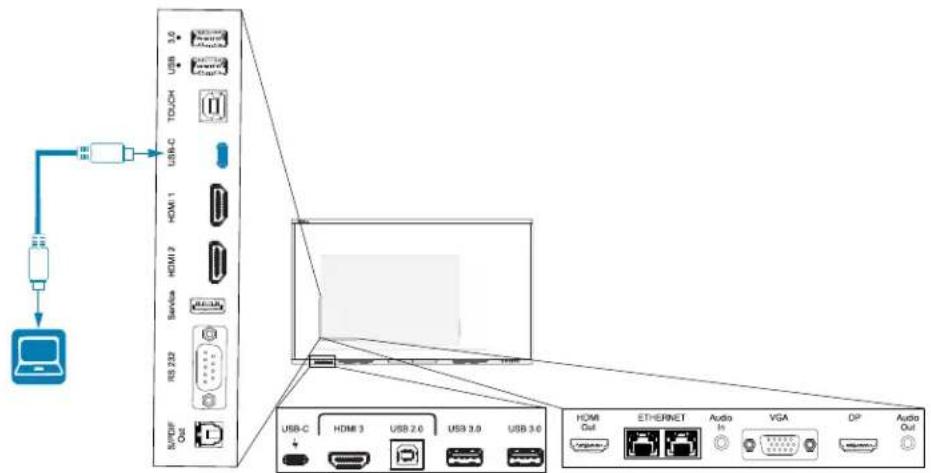
Connector Standard Connection type Cable
USB Type-C 1 USB-C Video/audio/touch SuperSpeed USB Type-C
- USB Type-C 2

Connector Standard Connection type Cable
USB Type-C 2 USB-C Video/audio/touch SuperSpeed USB Type-C
- HDMI 1

| Connector | Standard | Connection | type | Cable | |
| HDMI | 1 | HDMI | 2.0 | Video/audio | Premium High Speed HDMI (18Gbps) |
| Touch | USB | 2.0 | Type-B | Touch High Speed (480 Mbps) | USB 2.0 |
- HDMI 2

| Connector | Standard | Connection | type | Cable | |
| HDMI | 2 | HDMI | 2.0 | Video/audio | Premium High Speed HDMI (18Gbps) |
| Touch | USB | 2.0 | Type-B | Touch High Speed (480 Mbps) | USB 2.0 |
- HDMI 3
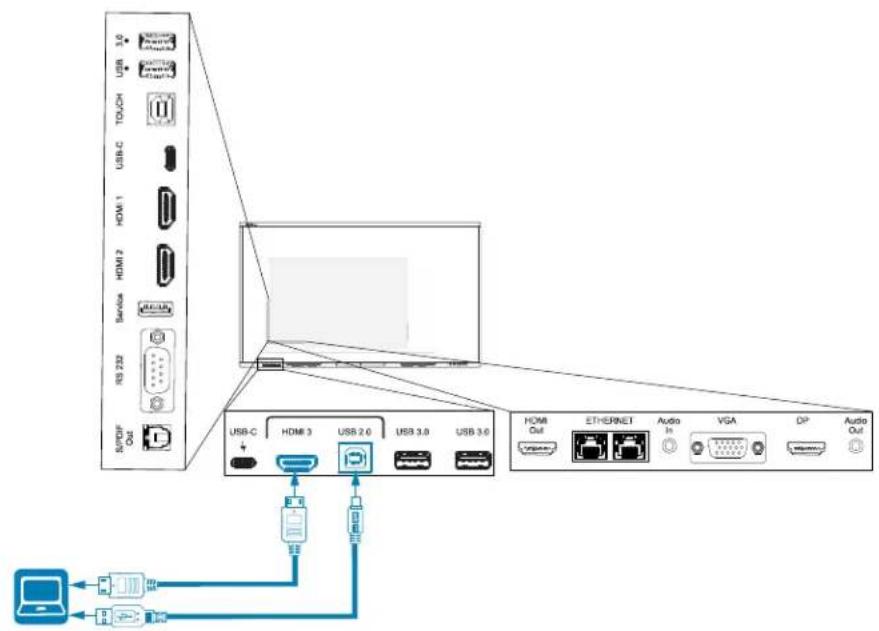
| Connector | Standard | Connection | type | Cable | |
| HDMI | 3 | HDMI | 2.0 | Video/audio | Premium High Speed HDMI (18 Gbps) |
| Touch | input | USB | 2.0 | Type-B Touch | High Speed (480 Mbps) USB 2.0 |
- Display Port

Connector Standard Connection type Cable
Display Port Display Port 1.2 Video/audio Display Port
Touch USB 2.0 Type-B Touch High Speed (480 Mbps) USB 2.0
• VGA

flowchart
graph TD
    A["User"] --> B["USB 3.0"]
    B --> C["USB-C"]
    C --> D["USB-C 1"]
    D --> E["USB-C 2"]
    E --> F["USB-C 3"]
    F --> G["USB-C 4"]
    G --> H["USB-C 5"]
    H --> I["USB-C 6"]
    I --> J["USB-C 7"]
    J --> K["USB-C 8"]
    K --> L["USB-C 9"]
    L --> M["USB-C 10"]
    M --> N["USB-C 11"]
    N --> O["USB-C 12"]
    O --> P["USB-C 13"]
    P --> Q["USB-C 14"]
    Q --> R["USB-C 15"]
    R --> S["USB-C 16"]
    S --> T["USB-C 17"]
    T --> U["USB-C 18"]
    U --> V["USB-C 19"]
    V --> W["USB-C 20"]
    W --> X["USB-C 21"]
    X --> Y["USB-C 22"]
    Y --> Z["USB-C 23"]
    Z --> AA["USB-C 24"]
    AA --> AB["USB-C 25"]
    AB --> AC["USB-C 26"]
    AC --> AD["USB-C 27"]
    AD --> AE["USB-C 28"]
    AE --> AF["USB-C 29"]
    AF --> AG["USB-C 30"]
    AG --> AH["USB-C 31"]
    AH --> AI["USB-C 32"]
    AI --> AJ["USB-C 33"]
    AJ --> AK["USB-C 34"]
    AK --> AL["USB-C 35"]
    AL --> AM["USB-C 36"]
    AM --> AN["USB-C 37"]
    AN --> AO["USB-C 38"]
    AO --> AP["USB-C 39"]
    AP --> AQ["USB-C 40"]
    AQ --> AR["USB-C 41"]
    AR --> AS["USB-C 42"]
    AS --> AT["USB-C 43"]
    AT --> AU["USB-C 44"]
    AU --> AV["USB-C 45"]
    AV --> AW["USB-C 46"]
    AW --> AX["USB-C 47"]
    AX --> AY["USB-C 48"]
    AY --> AZ["USB-C 49"]
    AZ --> BA["USB-C 50"]
    BA --> BB["USB-C 51"]
    BB --> BC["USB-C 52"]
    BC --> BD["USB-C 53"]
    BD --> BE["USB-C 54"]
    BE --> BF["USB-C 55"]
    BF --> BG["USB-C 56"]
    BG --> BH["USB-C 57"]
    BH --> BI["USB-C 58"]
    BI --> BJ["USB-C 59"]
    BJ --> BK["USB-C 60"]
    BK --> BL["USB-C 61"]
    BL --> BM["USB-C 62"]
    BM --> BN["USB-C 63"]
    BN --> BO["USB-C 64"]
    BO --> BP["USB-C 65"]
    BP --> BQ["USB-C 66"]
    BQ --> BR["USB-C 67"]
    BR --> BS["USB-C 68"]
    BS --> BT["USB-C 69"]
    BT --> BU["USB-C 70"]
    BU --> BV["USB-C 71"]
    BV --> BW["USB-C 72"]
    BW --> BX["USB-C 73"]
    BX --> BY["USB-C 74"]
    BY --> BZ["USB-C 75"]
    BZ --> CA["USB-C 76"]
    CA --> CB["USB-C 77"]
    CB --> CC["USB-C 78"]
    CC --> CD["USB-C 79"]
    CD --> CE["USB-C 80"]
| Connector | Standard | Connection | type | Cable | |
| VGA | VGA | Video VGA | — | ||
| Audio | In | Stereo 3.5 mm Audio | Stereo | 3.5 mm | — |
| Touch | USB | 2.0 Type-B Touch | High Speed (480 Mbps) USB 2.0 | ||
Viewing a connected computer or other device's input
- Connect a device to the display's HDMI 1, HDMI 2, HDMI 3, USB Type-C 1, USB Type-C 2, Display Port, or VGA connectors.
Note
To enable touch control of the device, connect a USB cable to the associated USB connection Devices connected to the USB Type-C connector don't require an additional USB connection enable touch.
- Select the source using one of the following methods:
Using the Input settings menu Using the remote control
a. Open the Toolbar by tapping one of the Press the Input . side Toolbar buttons (on either sides of the screen).
b. Tap the Input .
Note
A green circle appears around the currently selected input (PC, Android, HDMI1, HDMI2, HDMI3, Type-C1, Type-C2, DP, or VGA). Inputs with a connected source have a green dot the input name, rather than a gray dot. The input name also appears in green text rath gray when an input is connected.
- Tap the computer's input or use the navigation keys on the remote control to select the s then press the OK button.
The device's output appears on the display's screen.
Tip
You can rename inputs, enable or disable inputs, configure the display to turn on when video signal is connected, and automatically switch the input when an active video signal is connected.
See thSMART Board GX (V2) series interactive displays installation and maintenance guide (smarttech.com/kb/171861).
Setting a connected computer's resolution and refresh rate
This table presents the recommend resolutions and refresh rates for the display's inputs:
| Input Maximum resolution | Refresh rate | |
| USB Type-C, Display Port Alternate Mode | 3840 × 2160 | 60 Hz |
| HDMI 11 | 3840 × 2160 | 60 Hz |
| HDMI 2 | 3840 × 2160 | 60 Hz |
| HDMI 3 | 3840 × 2160 | 60 Hz |
| VGA | 1920 × 1080 | 60 Hz |
| Display Port | 3840 × 2160 | 60 Hz |
| PC2 | 3840 × 2160 60 Hz |
If possible, set connected computers to these resolutions and refresh rates. See the computers' o system documentation for instructions.
Using recommended cables
SMART recommends the following varieties of cable:
| Cable type | Maximum length | Recommendation |
| Display Port 23' | (7 m) 3 | Use only certified Display Port 1.4 cables that have been tested to support the performance standard you require. |
| HDMI 23' (7 m) | Use only certified premium high-speed HDMI cables that have been tested to support the performance standard you require. | |
| VGA | 23' (7 m) Use VGA | cables with all pins in their connectors fully populated and wired. |
| Stereo 3.5 mm | 20' (6 m) | Use only shielded 3.5 mm cables ⚠ Important Use only a 3.5 mm stereo jack (15 mm long barrel) to connect to the display. |
| USB 2.0 | 16' (5 m) | Use a Hi-Speed (480 Mbps) USB 2.0 USB extender if the distance between the computer and the display is greater than 16' (5 m). For more information, see extenderson page 12. |
| USB 3.0 | 9' (3 m) | SMART supports only installations that use directly connected video and USB cables, AC-powered extenders, or USB extenders purchased from SMART. You might be able to use higher-grade cables that exceed the recommended length. If you have problems with such a cable or an extender of any type, test the connection with a shorter cable before contacting SMART Support. |
Cable type Maximum length Recommendation
| USB Type-C 6' | 6" (2 m) for SuperSpeed 5Gbps cables | USB-IF certified USB 3.2 Gen 1 Type-C cable, SuperSpeed (5 Gbps) supportTo use a USB Type-C cable for video, you need:A full-featured cable that supports SuperSpeed 5Gbps (or faster) data rates.A computer that supports Display Port Alternate Mode via USB Type-CNoteThe USB Type-C connector in the display's front connector panel can supply up to 15 W of power to connected devices. |
Using cables that exceed these maximum lengths may produce unexpected results, intermittent loss picture, or degraded picture quality and USB connectivity.
Sharing USB Type-B receptacles
The HDMI, VGA, and Display Port connectors on the rear connector panels (back of the display) a single USB Type-B receptacle on the rear, side panel. This means the touch system can be only one device connected to these video inputs.
The touch system can still be used with a device connected to USB Type-B receptacle even with the video connectors is connected to another display.
USB Type-B receptacle Video connectors
| Touch | HDMI 1 |
| HDMI 2 | |
| VGA | |
| Display Port |
Connecting a SMART OPS PC module
If your organization has purchased a SMART OPS PC module, you or your organization's installers can install the OPS PC module in the display's accessory slot following the OPS PC module's installation instructions (smarttech.com/kb/171775 or smarttech.com/kb/171544). You can then view the OPS PC module's input on the display.


Caution
Do not insert or remove the OPS PC from the accessory slot while the display is turned on.
For more information about SMART OPS PC modules, SMARTseeOPSe PC modules user guide (smarttech.com/kb/171747).
Connecting USB drives, peripherals, and other devices
The display includes two USB 3.2 Gen 1 Type-A receptacles on the front connector panel and 3.2 Gen 1 Type-A receptacles on the side connector panel. You can connect USB drives, peripheral as keyboards), and other devices to the USB 3.2 Gen 1 Type-A receptacles and use these device display's embedded OS or OPS slot computer. The display's USB 3.2 Gen 1 Type-A receptacles to the active input.

flowchart
graph TD
    A["Computer"] -->|USB 3.0| B["USB 2.0"]
    B --> C["USB 3.0"]
    C --> D["USB 3.0"]
    D --> E["USB 3.0"]
    E --> F["USB 3.0"]
    F --> G["USB 3.0"]
    G --> H["USB 3.0"]
    H --> I["USB 3.0"]
    I --> J["USB 3.0"]
    J --> K["USB 3.0"]
    K --> L["USB 3.0"]
    L --> M["USB 3.0"]
    M --> N["USB 3.0"]
    N --> O["USB 3.0"]
    O --> P["USB 3.0"]
    P --> Q["USB 3.0"]
    Q --> R["USB 3.0"]
    R --> S["USB 3.0"]
    S --> T["USB 3.0"]
    T --> U["USB 3.0"]
    U --> V["USB 3.0"]
    V --> W["USB 3.0"]
    W --> X["USB 3.0"]
    X --> Y["USB 3.0"]
    Y --> Z["USB 3.0"]
    Z --> AA["USB 3.0"]
    AA --> AB["USB 3.0"]
    AB --> AC["USB 3.0"]
    AC --> AD["USB 3.0"]
    AD --> AE["USB 3.0"]
    AE --> AF["USB 3.0"]
    AF --> AG["USB 3.0"]
    AG --> AH["USB 3.0"]
    AH --> AI["USB 3.0"]
    AI --> AJ["USB 3.0"]
    AJ --> AK["USB 3.0"]
    AK --> AL["USB 3.0"]
    AL --> AM["USB 3.0"]
    AM --> AN["USB 3.0"]
    AN --> AO["USB 3.0"]
    AO --> AP["USB 3.0"]
    AP --> AQ["USB 3.0"]
    AQ --> AR["USB 3.0"]
    AR --> AS["USB 3.0"]
    AS --> AT["USB 3.0"]
    AT --> AU["USB 3.0"]
    AU --> AV["USB 3.0"]
    AV --> AW["USB 3.0"]
    AW --> AX["USB 3.0"]
    AX --> AY["USB 3.0"]
Chapter 4 Troubleshooting the display
Resolving general issues 105
The display isn't turning...on...106.
The display is turning off when it...shouldn't...106.
The screen is blank or there's a problem with the image on the screen 107.
There's no sound or there's a problem with the sound 109
Touch isn't working as expected...110
The pens aren't working as expected...111.
SMART software on connected computers isn't working as...expected...112
The SMART OPS PC module isn't working as...expected..112
Contacting your reseller for additional support...112.
This chapter explains how to resolve a variety of common issues with the display and the option SMART OPS PC module. If the symptoms you're encountering aren't addressed below or the solutions don't work, refer to the SMART knowledge base for additional troubleshooting information.
community.smarttech.com/s/topic/0TOU0000000kAJ0OAM/interactive-displays
Resolving general issues
| Symptom Troubleshooting steps | |
| You've forgotten the lock screen passcode or settings passcode. | Contact SMART Support. |
| The display can't connect to a 5 GHz wireless network. | The wireless network may be operating on bands that the display doesn't support.Contact your network administrator.Ensure both antennas are correctly installed on the display.Ensure Wi-Fi is enabled in the display's settings.See SMART Board GX (V2) series interactive displays user's guide(smarttech.com/kb/171862).NoteThe range of a 5 GHz wireless connection is more limited than that of a 2.4 GHz connection. 5 GHz connections are also more susceptible to interference from obstacles between the access point and the display, such as large metallic objects. |
| The pen is broken. | Contact SMART Support. |
| You need to identify the display. | See Identifying your specific model on page 10. |
Symptom Troubleshooting steps
An app is missing or not available.
The app might not be included with the SMART Board GX (V2) series interactive display. See Chapter 2 Using apps on the diploma 28.
Note
Apps that require Google Play Services (such as the Google Play store) cannot be used on the display.
The display isn't turning on
Symptom Troubleshooting steps
The status light isn't lit.
- Make sure the power cable is securely fastened to the power outlet and the displ
Note
If the power cable is connected to a power bar, make sure the power bar is securely connected to the power outlet and turned on.
- Make sure the switch beside the AC power inlet is in the ON (I) position.
• Make sure the power outlet is working by testing it with a different device.
• Make sure the power cable is working by testing it with a different device.
The status light is lit red and screen is blank.
the Press the Power button on the front of the display or on the remote control.
The status light is lit blue, but screen is blank.
- Restart the display.
the Wait up to 30 seconds, or press the Power button to determine if the problem is an external video source.
- Press the Home button on the front control panel. If the Home screen is displayed, check the external video source and connecting cables.
- Disconnect any cables from the display's HDMI Output connectors (if used) to determine whether equipment connected to the HDMI output port is causing the problem.
The display is turning off when it shouldn't
Symptom Troubleshooting steps
The display turns off or enters Standby mode when it shouldn't.
- Check the timer switch settingsStartuphe and shutdown section of the display's settings to see whether shutdown tasks have been scheduled, and adjust them as needed.
See the SMART Board GX (V2) series interactive displays installation and maintenance guide(smarttech.com/kb/171861).
- If the display is connected to a room control system via the RS-232 connection, disconnect it to determine if the problem is being caused by the room control system.
The screen is blank or there's a problem with image on the screen
| Symptom Troubleshooting steps | |
| The screen is blank when the light is blue. | statusMake sure the screen is working by pressing the Home button on the front control panel.Make sure any connected computers are on and not in Standby mode.Restart the display and any connected computers.Replace the video cables that connect any computers to the display to determine if the issue is with the cables.Ensure video cables that connect any computers to the display meet the recommended specifications.See Using recommended cables page 102.Ensure that any connected computer's external video port is enabled, and is set to output a supported display resolution.NoteThe recommended resolutions are 3140 × 2160 @ 60Hz or 1920 × 1080 @ 60Hz. |
| A computer is connected to the display, but only a "No signal" message appears on the screen. | Make sure the computer is connected to the currently selected input.If the currently selected input is a computer, make sure the computer is not in Standby mode.If the currently selected input is a laptop, make sure that the laptop's external display port is enabled.Ensure video cables that connect any computers to the display meet the recommended specifications.See Using recommended cables page 102. |
| The image on the screen is distorted. OR There are lines, snow or, other visual noise on the screen.OR The image is flickering or flashing.OR The image is dim. | Press the Home button on the front control panel. If the Home screen appears correctly, the issue is with the video input.Switch to a different input and then back to the first input.Make sure any connected computers are on and not in Standby mode.Restart the display and any connected computers.Make sure the computer's display output is configured to a recommended resolution and refresh rate for the display's inputs.NoteThe recommended resolutions are 3140 × 2160 @ 60Hz or 1920 × 1080 @ 60Hz.See Using recommended cables page 102.Replace the video cables that connect computers to the display to determine if the issue is with the cables.Ensure video cables that connect computers to the display meet the recommended specifications.See Using recommended cables page 102. |
| There are bright spots on the screen. | Press the Home button on the front control panel. If it appears correctly, the issue is with the video input.Take a photograph of the screen and send it to SMART support. If SMART support determines that the issue is with the screen and the display is under warranty, you may be eligible for a replacement.EnablePixel shift the system section of the display's settings to reduce the risk of pixel burn-in when a static image is displayed for long periods.See thSMART Board GX (V2) series interactive displays installation and maintenance guidetmarttech.com/kb/171861). |
| Colors don't appear correctly. | Check the Display settings in Input settings (Inputs > Advanced settings > Display).See thSMART Board GX (V2) series interactive displays installation and maintenance guidetsmarttech.com/kb/171861).Press the Home button to determine whether the color issue occurs on the Home screen only. If the Home screen appears normal but a specific video input does n test the connection cables and video source equipment by temporarily replacing them.Be aware that if two or more displays are mounted side-by-side, there will be minor differences in colors across the displays. This issue is not unique to SMART products.If the screen is completely lacking one primary color (red, green, or blue) or the color problems occur on the Home screen, provide a photo of the screen to SMA support.If you're using the VGA analog video input, use a different cable or connect a different source to see if the issue is with the cable or input. |
| The image is cut off or shifted left or right. | Atjust any connected computer's video settings, particularly zoom, crop, and underscan.See the computer's operating system documentation.If any connected computers' desktops are entirely black, change them to dark gray or a different color.If any connected computers' desktops are extended across multiple screens, duplicate the desktops across the screens or set the display as the only screen. |
| The image doesn't fill the entire screen. | Adjust any connected computers' video settings, particularly overscan.See the computer's operating system documentation.Make sure the connected computer's video connector is configured to output a supported video signal. See No video display output from a laptop. |
| A persistent image appears on the display. | See Image persistence or burn in on LCD displays.EnablePixel shift is system section of the display's settings to reduce the risk of pixel burn-in when a static image is displayed for long periods.See thSMART Board GX (V2) series interactive displays installation and maintenance guidetsmarttech.com/kb/171861). |
| The video from a device connected to the display's USB Type-C connector doesn't appear on the display's screen. | Make sure the connected device supports Display Port Alternate Mode via USB Type-C. If there DPlago beside the USB Type-C connector on the device, it might not support Display Port Alternate Mode.Make sure the cable connecting the device to the display supports SuperSpeed USB data speeds of 5 Gbps (or above). The cable should be marked with the SuperSpeed USB logo. The absence of this logo may indicate the cable doesn't support a SuperSpeed USB data connection that's required for Display Port Alternate Mode. |
| Symptom Troubleshooting stepsThe image suddenly moves up down, and then is stable again. | and This is normal behavior Pif the shift setting is enabled in system section of the display's settings. This can help reduce the risk of screen burn-in when a stati image is displayed for very long periods. Adjust the feature's timing, or turn off shift if this is undesirable.See the SMART Board GX (V2) series interactive displays installation and maintenance guide (smarttech.com/kb/171861). |
There's no sound or there's a problem with the sound
| Symptom Troubleshooting steps | |
| There's no sound.ORThere is sound, but the volume is ORThe sound is distorted or muffled. | If you're using an external audio system, make sure it is turned on. Use of an external audio system must also be enabled in display settings.See the SMART Board GX (V2) series interactive displays installation and maintenance guide (smarttech.com/kb/171861).Make sure the cables connecting the display to the computer are securely fastened.NotesThe display's stereo 3.5 mm in connector works with the VGA input only.Connecting an audio cable to the display's stereo 3.5 mm out connector disables the internal speakers Sound the output setting (display settings > Input and output > Audio output settings) is set toSee the SMART Board GX (V2) series interactive displays installation and maintenance guide (smarttech.com/kb/171861).If you're using the display's stereo 3.5 mm out connector, adjust the volume on both the display and the connected computer and make sure neither is muted.Adjust the display's audio settings.See the SMART Board GX (V2) series interactive displays installation and maintenance guide (smarttech.com/kb/171861).If you're using the integrated speakers, set the volume for the computer and any running applications to 80%, and then adjust the display's volume.ORIf you're using an external audio system, set the volume for the computer, any running applications, and the display to 80%, and then adjust the external audio system's volume. |
| There is a whine or buzzing coming from the back of the | sound Be aware that these sounds are normal. All displays emit some electrical noise. display such sounds may be more noticeable with some displays than with others.However, if you hear noise from the front of the display, further investigation is required.Connect all devices to the same power outlet or power bar. |
Touch isn't working as expected
| Symptom Troubleshooting steps | |
| The display doesn't respond to on the Home screen with no computer connected. | touchRemove infrared sources, such as incandescent or arc lights, desk lamps, and infrared audio devices, or move the display to another location in the room.Ensure that there are no physical obstructions (such as holiday decorations) on the display's frame.Restart the display.See the SMART Board GX (V2) series interactive displays installation and maintenance guide smarttech.com/kb/171861). |
| The display doesn't respond to when viewing the input from a connected computer. | touchMake sure SMART Product Drivers 12.20 or later are installed and running on the connected computer.Make sure the USB cable between the display and the computer doesn't exceed the supported maximum cable length using erecommended cables page 102.Make sure any connected computers have detected the display's USB connection and SMART Product Drivers 12.20 or later are installed.For Mac computers with macOS Mojave, ensure your MAC OS security settings allow the SMART Board to control applications. See How to resolve issues with installing and using SMART Learning Suite software on macOS Mojave. |
| When viewing the image from connected computer, the display responds to touch intermittently.ORWhen you touch the screen, the pointer doesn't appear in the correct position. | a Restart the display.See the SMART Board GX (V2) series interactive displays installation and maintenance guide smarttech.com/kb/171861).Make sure SMART Product Drivers and SMART Ink are installed and running on any connected computers.Update SMART product drivers.Update the firmware.Confirm with the installers that the computer is connected to the display with only single cable.Make sure the USB cable between the display and the computer doesn't exceed the maximum supported cable length using erecommended cables page 102.Remove any USB extenders to help isolate the USB cable.If using USB extenders, ensure they support High Speed 480Mbps USB 2.0 (or faster) data rates.Make sure the video and USB cables that connect any computers to the display of connected using the correct connectors on the display.Remove infrared sources, such as sunlight, incandescent or arc lights, desk lamps, and infrared audio devices, or move the display to another location in the room. |
The pens aren't working as expected
| Symptom Troubleshooting steps | |
| The display doesn't respond to or writing with a pen when the input from a connected computer. | touchMake sure any connected computers have detected the display's USB connection and SMART Product Drivers 12.20 or later are installed.Make sure you are using the correct pens for the display, and are using an application that supports drawing with the pens.Reinstall or update SMART Product Drivers and SMART Ink on any connected computers.Make sure the video and USB cables connecting any computers to the display are connected using the correct connectors on the display.Make the sure the touch system is oriented to the correct display by orienting the display. See Orienting your SMART interactive product using SMART Product Drivers 12.Make sure the USB cable between the display and the computer doesn't exceed the supported maximum cable length using see recommended cables page 102. |
| The display responds to touch but not to writing with a pen when viewing the image from a connected computer. | Reinstall or update SMART Product Drivers and SMART Ink on any connected computers.Make sure you are using a SMART Board GX series interactive display pen.Make sure SMART Product Drivers 12.20 or later is installed on any connected computers.Make sure you are using the correct pens for the display, and are using an application that supports drawing with the pens. |
| When viewing the input from a connected computer and writing on the screen, the ink appears in wrong place.ORWriting is intermittent.ORInk disappears as you write. | Restart the display.Make sure SMART Product Drivers 12.20 or later is installed on any connected computers.Orient the display. See Orienting your SMART interactive product using SMART Product Drivers 12.Remove infrared sources, such as sunlight, incandescent or arc lights, desk lamps, and infrared audio devices, or move the display to another location in the room.Update the firmware.Avoid wearing any jewelry or other reflective objects when using the optical touch system.Make sure that clothing or other objects are not touching the screen where you're touching or writing. |
| You can't write or draw in Microsoft Office when viewing the input connected computer. | Make sure Microsoft Office 2013 or later is installed. Reinstall or update SMART Product Drivers and SMART Ink. |
SMART software on connected computers isn't working as expected
| Symptom Troubleshooting steps | |
| SMART Notebook software isn't working as expected. | See Troubleshooting SMART Notebook. |
| Lumio by SMART isn't working expected. | as See Troubleshooting common issues in Lumio by SMART. |
| SMART Ink isn't working as expected. | See Troubleshooting SMART Ink. |
| SMART Product Drivers isn't working as expected. | See Troubleshooting SMART Product Drivers. |
The SMART OPS PC module isn't working as expected
| Symptom Troubleshooting steps |
| The SMART OPS PC module isn't See the SMART OPS PC modules user(sporttech.com/kb/171747). working as expected. |
Contacting your reseller for additional support
If an issue you're experiencing with the display persists or isn't addressed in this chapter or the knowledge base, contact your authorized SMART_reseller (smarttech.com/where) for support.
Your reseller might ask you for the display's serial number. The serial number is on a label of the display.

Tip
Scan the QR code on the label to view the SMART Board GX (V2) series interactive display support pages on the SMART website.
Chapter 5 Troubleshooting tools and apps
Resolving issues with Whiteboard 114
Resolving issues with Browser...115.
Resolving issues with Screen Share...115.
Resolving issues with File Manager...117.
Note
For hardware troubleshooting information SMART Board GX (V2) series interactive displays installation and maintenance gsdarttech.com/kb/171861).
Resolving issues with Whiteboard
| Issue Solutions | |
| The pen doesn't write digital ink. | Ensure the Pen tool is selected on the Whiteboard toolbar at the bottom of the screen.Make sure no other objects (such as your hand or clothing) are touching the scre close to the pen nib.A worn pen nib may act as a finger rather than a pen. Replacement pens are available from the Store for SMART Parts (seesmarttech.com/Support/PartsStore). |
| Your finger draws ink instead of selecting an object. | Use the toolbar at the bottom of the Whiteboard app to change the active tool something other than Pen. |
| Multiple fingers draw multiple lines instead of performing pan, zoom, rotate gestures. | Use the toolbar at the bottom of the Whiteboard app to change the active tool orPreview rather than Pen.You can also turn off Multiple-finger writing in Settingson(seage 31).See SMART Board GX (V2) series interactive displays user guide (smarttech.com/kb/171862). |
| You can't set an image as the background. | Tap Menu > Theme > Background and then press the + icon in the image section |
| The display can't open a saved Whiteboard. | Whiteboards are saved in .enb format. The file the display is trying to open might not be saved in a SMART Board GX (V2) Whiteboard file format. |
| The display can't open a SMART Notebook file. | The Whiteboard app on SMART Board GX (V2) series interactive displays doesn't support SMART Notebook files. Use SMART Notebook software on the connected computer to open a SMART Notebook file. |
Resolving issues with Browser
| Issue Solutions | |
| Browser isn't working correctly. | Make sure the display is connected to a properly configured network and the network is connected to the internet.See SMART Board GX (V2) series interactive displays installation and maintenance guide(smarttech.com/kb/171861).Make sure Ethernet or Wi-Fi is enabled in Settings under Network settings.See SMART Board GX (V2) series interactive displays installation and maintenance guide(smarttech.com/kb/171861).If Browser can't visit secure (https) websites, ensure the display's date and time are correct.See SMART Board GX (V2) series interactive displays installation and maintenance guide(smarttech.com/kb/171861).Browser doesn't support Flash or Java applets and will not function correctly if a web page features these objects.Contact your network administrator. |
| You can't find your downloads. | Check the Downloads folder in File Manager.The display's storage might be full. Delete files or move them to a USB drive for backup. |
| There is an issue with audio. | Make sure the volume isn't muted on the display's remote control.See Using the remote control page 15.See SMART Board GX (V2) series interactive displays user guide(smarttech.com/kb/171862).Turn up the volume.See Using the front control page 14.See SMART Board GX (V2) series interactive displays user guide(smarttech.com/kb/171862). |
Resolving issues with Screen Share
Issue Solutions
Touchback isn't working. Make sure:
- you are using the Bytello Share app to connect to the display.
- Touchback is enabled for your device in Device management.
Touchback is unavailable:
- when another device is casting with Desktop Sync.
• on mobile devices (Android and iOS) due to system limitations.
Note
When using Miracast on Android, the person at the display can interact with the device's screen.
- when the screen is in floating window mode.
| Issue Solutions | |
| YouTube doesn't show the screen using AirPlay. | When to content protection, YouTube cannot display the screen.For the best user experience, connect to the display with the Bytello Share app. |
| YouTube video doesn't play after when using AirPlay. | Drive videos time out after 10 seconds and are not available for playback when scre sharing.If the video has ads, tap or clickSkip Ad or Nextfrom your device to start playback (the display does not have this option). |
| I can't control the audio from the display system limitations, YouTube does not allow for audio control at the display on YouTube when using AirPlay. | When connect with AirPlay. Use the AirPlay media control instead.For the best user experience, connect to the display with the Bytello Share app. |
| Browser doesn't play sound when casting from MacOS via Webcast. | Check that your browser has permission to access audio.For the best user experience, connect to the display with the Bytello Share app. |
| Chromebook doesn't play sound during to system limitations, Chromebook cannot play the sound from the display during screen sharing. | For the best user experience, connect to the display with the Bytello Share app. |
| The display's screen share code make sure the network is configured properly.appear in the list of available devices.SmartTech.com/kb/171861). | |
| Your device or computer can't connect Make sure your computer or device is on the same network as the display.to the display.Make sure the network is configured properly.See SMART Board GX (V2) series interactive displays installation and maintenance guide(smarttech.com/kb/171861).Make sure that your sharing device is on the same network subnet as the display.If you're using the Bytello Share app, use the alphanumeric code shown on the display.If you're using Apple AirPlay or Google Chromecast, look for the ScreenShare######name you can see on the display when you expand the screen share window.Make sure your computer or device is on the same subnet as the display.Contact your network administrator.Make sure the Bytello Share app is installed on your device.See Chapter 5 Troubleshooting tools and page 114 | |
| No sound is heard from your shared device.Make sure your device isn't muted.Turn up the device's volume.Turn up the display's volume.See Using the front control page 14.Make sure that the display's speakers are enabled in the display's settings.See SMART Board GX (V2) series interactive displays installation and maintenance guide(smarttech.com/kb/171862). | |
Resolving issues with File Manager
Issue Solutions
| You can't open files using File Manager. |
| You can't read from or write connected USB drive. |
| Make sure an app is installed on the display that supports the file type you're tr to open. |
| to •aConnect the drive to the USB port for the display. |
| See Connecting USB drives, peripherals, and other dependence page 104. |
• Make sure the USB drive is FAT formatted.
• Make sure the USB drive isn't encrypted or partitioned.
- The USB drive is full. Delete files before copying more files onto it.
Recovery of deleted files is not supported.
You can't recover deleted files.
Certification and compliance
Accessing the display's e-label information
An electronic (e-label) version of the GX (V2) display's regulatory information is available in the display's setting
From the Home screen, tap icon > Regulatory Information

Apps icon

settings
For more information, see SMHET Board GX (V2) series interactive displays user gindarttech.com/kb/171862
Federal Communication Commission interference statement
FCC
Supplier's Declaration of Conformity
47 CFR § 2.1077 Compliance Information
Responsible Party - U.S. Contact Information
SMART Technologies Inc.
2401 4th Ave, 3rd Floor
Seattle, WA 98121
compliance@smarttech.com
This device complies with Part 15 of the FCC Rules. subject to the following two conditions:
- This device may not cause harmful interference, and
- this device must accept any interference received, including interference that may cause undesired operation.
Note
This equipment has been tested and found to comply the limits for a Class A digital device, pursuant to the FCC Rules. These limits are designed to provide reasonable protection against harmful interference when the equipment is operated in a commercial environment. This equipment generates, uses, and can radiate radio frequency energy and, if not installed and used in accordance with the instruction manual, may cause harmful interference to radio communications. Operation of this equipment in a residential area is likely to cause harmful interference in which case the user will be correct to correct the interference at his own expense.

Caution
Any changes or modifications not expressly approved by the party responsible for compliance could void the user's authority to operate this equipment.
Restriction
Operations in the 5.15-5.25 GHz band are restricted to indoor usage only.
IEEE 802.11b or 802.11g operation of this product in the USA is firmware limited to channels 1 through 11.
Radiation exposure statement
This equipment complies with FCC radiation exposure limits set forth for an uncontrolled environment. This equipment should be installed and operated with minimum distance of 20 cm between the antenna of this device and all nearby persons. This transmitter must not be co-located or operated in conjunction with any other antenna or transmitter.
Innovation, Science and Economic Development Canada statement
This device complies with RSS-210 of the Innovation, Science and Economic Development Canada Rules. Operation is subject to the following two conditions:
- This device may not cause harmful interference, and peration is
- this device must accept any interference received, including interference that may cause undesired operation.
Caution
(i) the device for operation in the band 5150-5250 MHz is only for indoor use to reduce the potential for harmful interference to co-channel mobile satellite systems;
(i) with the maximum antenna gain permitted for devices in the brands 5250-5350 MHz and 5470-5725 MHz shall comply with the e.i.r.p. limit; and
(iii) the maximum antenna gain permitted for devices in the band 5725-5825 MHz shall comply with the e.i.r.p. limits specified for point-to-point and non point-to-point operation as appropriate.
(iv) Users should also be advised that high-power radars are allocated as primary users (i.e., priority users) of the cause bands 5250-5350 MHz and 5650-5850 MHz and that these required radars could cause interference and/or damage to LE-LAN devices.
Radiation exposure statement
This equipment complies with ISED radiation exposure set forth for an uncontrolled environment. This equipment should be installed and operated with minimum distance between the antenna of this device and all need. This transmitter must not be co-located or operated by conjunction with any other antenna or transmitter.
The full text of the EU declaration of conformity is available at the following Internet address: smarttech.com/compliance
de ofWarning
by persons of this equipment in a residential environment could cause radio interference.
The frequency band and the maximum transmitted power in EU are listed below:
Regulatory models: IDGX65-2, IDGX75-2, IDGX86-2
| Transmitting aux | Band (MHz) | Maximum dBm | Transmit | Power |
| 2402-2483.5 | 16 | |||
| 5150-5350 | 15 | |||
| comeris | ||||
| 3476-3725 | 15.5 | |||
| 5725-5850 | 12 | |||
Avertissement
Regulatory model: PCM11250
| Transmitting | Band (MHz) | Maximum dBm | Transmit Power |
| les2402-2483.5 | 20 | ||
| sifis0-5350 | 23 | ||
| 725 MHz5470-5725 | 23 | ||
| sifis5-5850 | 13.9 |
Hardware environmental compliance
SMART Technologies supports global efforts to ensure that electronic equipment is manufactured, sold, and disposed of in a safe and environmentally friendly manner.
Waste Electrical and Electronic Equipment (WEEE)
Electrical and electronic equipment and batteries contain substances that can be harmful to the environment and to human health. The crossed-out wheeled bin symbol indicates that products should be disposed of in the appropriate recycling stream and not as regular waste.
EU Declaration of Conformity
Hereby, SMART Technologies ULC declares that the radio equipment type Interactive Display IDGX65-2, IDGX75-2, IDGX86-2 and the PCM11 are in compliance with Directive 2014/53/EU.
Troubleshooting tools and apps
Batteries
The display contains a CR2032 coin cell battery. The remote contains two AAA batteries. Recycle or dispose of batteries properly.
Perchlorate
The coin cell battery contains perchlorate material. Special handling may apply. See dtsc.ca.gov/hazardouswaste/perchlorate.
material
More
See smarttech.com/compliance for more information.
information
SMART Technologies
smarttech.com/support
smarttech.com/contactsupport

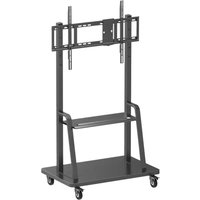


- SMART Board®
- GX (V2)
- User guide
- Learn more
- Licenses
- Trademark notice
- Copyright notice
- Important information
- Note
- Warning
- Contents
- Chapter 3 Connecting computers and other...devices...92
- Chapter 4 Troubleshooting the display...105
- Chapter 5 Troubleshooting tools and...apps.
- Certification and compliance...118
- Chapter 1 Welcome
- About this guide
- About the SMART Board GX (V2) display
- Touch
- Display
- Mounting hardware
- Front control panel
- Remote control and infrared sensor
- Ambient light sensor
- Power status
- Writing, drawing, and erasing
- Audio
- Network connectivity
- Front connector panel
- Room computers and guest laptops
- Tools and features
- Accessory slot
- Caution
- Identifying your specific model
- Tip
- Accessories
- SMART OPS PC module
- Stands
- USB extenders
- Extender Specifications
- More information
- Chapter 2 Using basic features
- Waking the display and putting it in standby
- Using the front control panel
- No. Name Procedure
- Using the remote control
- Important
- On-screen menus and controls
- Notification icons (network, audio, and so on)
- Side Toolbar buttons
- Toolbar
- Favorite widget shortcuts
- To pin a widget to the Toolbar
- To remove a widget from the Toolbar
- Shortcuts
- Adding shortcuts to the Home screen
- To add an application shortcut
- To add a web page shortcut
- To add a file shortcut
- Managing shortcuts
- To move a shortcut on the Home screen
- To delete a shortcut
- Apps
- Swipe-up menu
- Using touch
- Writing and drawing in digital ink
- Tips
- To erase digital ink
- Using the SMART Ink dynamic (floating) toolbar
- Changing a pen's default color, thickness, and other properties
- Freezing the screen
- Chapter 2 Using apps on the display
- Using Whiteboard...30
- Using Whiteboard
- Whiteboard tools and controls
- Writing and erasing notes
- Starting a new whiteboard
- Changing the background
- To change the whiteboard's background
- Notes
- Navigating in the whiteboard
- Opening an existing whiteboard
- Saving a whiteboard
- To save a new whiteboard
- To import a whiteboard
- To export a whiteboard
- Exporting a whiteboard file to cloud storage
- Email a whiteboard file
- Changing whiteboard settings
- To change a whiteboard setting
- Using Browser
- Using Screen Share
- Main Screen Share interface features
- Main Screen Share interface
- Connection code
- Menu options
- Device management
- # connected devices
- Floating menu (normal/mini)
- Active Screen Share
- Screen Share name and Bytello share website address
- Annotation menu
- Screen copy, Settings, About, and exiting the app
- Screen copy
- For displays only
- Settings
- To customize settings
- About
- Exit
- Screen share features available with each screen share method
- Connecting a device to the display
- Verifying the network
- Connecting your device to the display
- Managing connected devices
- To manage devices
- Minimizing and rearranging screens
- To access the shared screen tool bar
- To rearrange screens
- Stopping a session
- To disconnect a device as a participant
- To disconnect a participant as the host
- Using the Bytello Share app
- Device requirements for using Bytello Share
- Device Requirement
- Downloading and using the Bytello Share app
- To download the Bytello Share app
- To connect your device to the display
- To share your device's screen to the display
- Using the Bytello Share app to interact with the display
- Using Desktop Sync
- To use Desktop Sync
- To annotate
- Using Remote
- Device Sync
- Using native streaming (AirPlay, Miracast, or Chromecast)
- To use AirPlay
- To use Miracast
- To use Chromecast to connect from a Chrome browser or Chromebook
- Connect using Webcast
- Using Palette
- Palette tools and controls
- Writing and drawing on a palette
- Tool Purpose Description
- ColorBox
- Starting a new palette
- Exiting a palette
- Using Clean
- Opening and closing the Clean app
- To open the Clean app
- To close the Clean app
- Using the One Key Optimize tool
- Using the Clean Memory tool
- Using the Clean Trash tool
- Using Cloud Drive
- Adding a Google Drive or OneDrive account
- To open the Cloud Drive app
- To add an account
- Using WPS Office
- Opening the WPS Office app
- Using the WPS Office app
- Using File manager
- Opening File manager
- Viewing files
- To view a whiteboard file saved from the Whiteboard app
- To view a picture, play an audio file, or watch a video
- To stop viewing the file
- Moving or copying files
- To move or copy a file from a USB drive to the display
- To move or copy a file from the display to a USB drive
- Using a Google Drive or OneDrive account
- To move or copy a file from a cloud drive to the display
- To move or copy a file from the display to a cloud drive
- Installing apps using File Manager
- To install apps using File Manager
- Supported file formats
- Using SMART Remote Management
- Using Settings
- Using Camera
- Connecting a camera and viewing its input
- Taking a screen capture and adding annotations
- Viewing the camera input and previously captured images simultaneously
- Exiting Camera
- Unsupported apps
- Chapter 2 Using widgets on the disp
- Input Settings menu
- Using the Overlay widget
- To write or draw on an overlay
- To erase ink on an overlay
- Overlay tools and controls
- Using the Timer widget
- To use the Timer widget
- No Tool
- Using Stopwatch
- To use the Stopwatch widget
- To close the Stopwatch widget
- Using the Spotlight widget
- To use the Spotlight widget
- To close the Spotlight widget
- Using the Record widget
- To use the Record widget
- Using the Freeze widget
- To use the Freeze widget
- Tap the Freeze icon .
- To close the Freeze widget
- Using the PIP widget
- To use the PIP widget
- To close the PIP widget
- Using the Split screen widget
- To use the Split screen widget
- To close the Split screen widget
- Using Screen lock
- To lock the screen
- Using the Calculator tool
- To use the Calculator widget
- Using the Screen Capture widget
- To use the Screen Capture tool
- No. Tool
- Chapter 3 Connecting computers and other devices
- Installing and using SMART software
- Downloading and installing SMART software
- Using SMART software
- Connecting room computers and guest laptops
- - USB Type-C 2
- Connector Standard Connection type Cable
- - HDMI 1
- - HDMI 2
- - HDMI 3
- Viewing a connected computer or other device's input
- Using the Input settings menu Using the remote control
- Setting a connected computer's resolution and refresh rate
- Using recommended cables
- Sharing USB Type-B receptacles
- Connecting a SMART OPS PC module
- Connecting USB drives, peripherals, and other devices
- Chapter 4 Troubleshooting the display
- Resolving general issues
- Symptom Troubleshooting steps
- The display isn't turning on
- The display is turning off when it shouldn't
- The screen is blank or there's a problem with image on the screen
- There's no sound or there's a problem with the sound
- SMART software on connected computers isn't working as expected
- The SMART OPS PC module isn't working as expected
- Contacting your reseller for additional support
- Chapter 5 Troubleshooting tools and apps
- Resolving issues with Whiteboard
- Resolving issues with Browser
- Resolving issues with Screen Share
- Issue Solutions
- Resolving issues with File Manager
- Certification and compliance
- Accessing the display's e-label information
- Federal Communication Commission interference statement
- FCC
- Restriction
- Radiation exposure statement
- Innovation, Science and Economic Development Canada statement
- Avertissement
- Hardware environmental compliance
- EU Declaration of Conformity
- Troubleshooting tools and apps
- Batteries
- Perchlorate
- material
- More
- information
Brand : SMART Technologies
Model : SBID-GX186-V2
Category : Interactive whiteboard