
VCE01SFABKR - Vacuum Cleaner GORENJE - Free user manual and instructions
Find the device manual for free VCE01SFABKR GORENJE in PDF.


| Product Type | Vacuum Cleaner |
| Brand | Gorenje |
| Model | VCE01SFABKR |
| Color | Black/Red |
| Type | Cylinder (Canister) |
| Power Consumption | 2000 W |
| Dust Capacity | 2.0 L |
| Filtration System | HEPA 13 |
| Cord Length | 6.0 m |
| Noise Level | 78 dB |
| Weight | 5.2 kg |
| Dimensions (LxWxH) | 40 x 30 x 28 cm |
| Power Cord Type | Retractable |
| Accessories Included | Floor nozzle, crevice tool, brush |
| Warranty | 2 years |
| Energy Class | Class A |
| Overheat Protection | Yes |
| Filter Type | Washable HEPA |
| Cleaning Method | Dry vacuuming |
| Telescopic Tube | Yes |
Frequently Asked Questions - VCE01SFABKR GORENJE
User questions about VCE01SFABKR GORENJE
0 question about this device. Answer the ones you know or ask your own.
Ask a new question about this device
Download the instructions for your Vacuum Cleaner in PDF format for free! Find your manual VCE01SFABKR - GORENJE and take your electronic device back in hand. On this page are published all the documents necessary for the use of your device. VCE01SFABKR by GORENJE.
USER MANUAL VCE01SFABKR GORENJE
S·FORCEAIR

SI Navodila za uporabo....4
EN Instruction manual....20
Power button
Cable rewind button

Filter replacement
STORAGE
Switch off the appliance. // Remove the mains plug from the wall socket. // Wind the mains cable back into the appliance by pressing the cable rewind button. // Attach the lower hose to the vacuum cleaner.
TROUBLESHOOTING
Insufficient suction power?
Check the dust bag (dust container) and empty it. // Check whether the nozzle or any of the hoses is blocked. // Remove the obstruction and let air flow through the hose in the opposite direction.
IMPORTANT SAFETY PRECAUTIONS
To connect the suction hose: insert the suction hose into the opening.
To disconnect the suction hose: press the buttons on both sides of the suction hose and pull it out.

Optional for upgraded version


DUST BAGS, DUST CONTAINER AND FILTERS
Replacing the filters
Replace the motor protection filter when you insert the first new dust bag.
![graph LR A["Raw Material"] --> B["Add Waste"] B --> C["Add Waste"] C --> D["Add Waste"] D --> E["Finished Product"]](/content/2026/05/1013205/images/24f6095e0b0ecfea2c783f3721ff24790fd1eb32967d012bdac75dd8c0f37898.jpg)
Remove the holder. // Correctly insert the lower edge of the new filter into the grooves of the holder. // Close the holder by gently pressing it into place. Make sure that the filter fits completely into the holder.
![graph TD A["Start"] --> B["Add to device"] B --> C["Recycle into storage unit"] C --> D["Packaging with grid box"] D --> E["End"]](/content/2026/05/1013205/images/95fd45a64864abf611a4ac50aa9e0998042ad2fe093d9c540439390a1849a59d.jpg)
STORAGE
Switch off the appliance. // Pull the plug out of the wall socket. // Wind up the mains cable by pressing the cable rewind button. // Attach the lower tube to the vacuum cleaner.
TROUBLESHOOTING
Insufficient suction power?
Check the dust bag (or dust container) and empty it. // Check whether the nozzle, tube or hose are blocked. // Remove any obstructions and allow air to pass through the hose and/or tube in the opposite direction.
IMPORTANT SAFETY MEASURES

Optional for upgraded version


DUST BAGS, DUST CONTAINER AND FILTERS
Cleaning the dust container
Replacing the filters
Replace the motor protection filter when you put in the first new dust bag.
![graph LR A["Raw Material"] --> B["Add Box"] B --> C["Add Box"] C --> D["Add Box with Flows"] D --> E["Finished Product"]](/content/2026/05/1013205/images/211c0749bb1a950c8423a0e5527773bc856a379533952cd8074d8d2fe7b87b0c.jpg)
Remove the holder. // Correctly insert the bottom edge of the new filter into the slots of the holder. // Close the holder by gently pressing it into place. Make sure the filter fits completely into the holder.
![graph TD A["Car with Camera"] --> B["Add Camera to Box"] B --> C["Remove a trash bin into Box"] C --> D["Car with Box containing Waste Bar"]](/content/2026/05/1013205/images/5cb603c344fb46a32e6398be3e7c4bb65afdbad9789f6fe5c33f075f4ea6a566.jpg)
STORAGE
Turn off the appliance. // Unplug it from the wall outlet. // Wind the power cord by pressing the cord rewind button. // Attach the lower tube to the vacuum cleaner.
TROUBLESHOOTING
Insufficient suction power?
Check the dust bag (or dust container) and empty it. // Check if the nozzle, tube, or hose is blocked. // Remove any obstructions and allow air to pass through the hose and/or tube in the opposite direction.

Replacing the filters
STORAGE
IMPORTANT SAFETY INSTRUCTIONS
When using the vacuum cleaner, always observe the following basic safety precautions: Carefully read this instruction manual and only use the appliance in accordance with the instructions herein. // Before using the appliance, carefully assemble all of its parts. Only use the appliance with the parts recommended by the manufacturer. // Never leave the appliance unattended during use. // Before connecting the appliance to the power mains, make sure the specified voltage matches the voltage of the power mains in your home. // If the power cord is damaged, replace it with a suitable power cord or a power cord reel assembly. The power cord or the power cord reel assembly may only be replaced by Gorenje, Gorenje's authorized service and repair centre, or an adequately trained professional. // Only use and keep the appliance in dry indoor areas and out of reach of children. // Do not use the appliance if it has been dropped, if it is damaged, if it has been kept outdoors, or if it has been dropped or immersed in water. // Do not use the appliance with an unsuitable attachment or extension. // To prevent injury, make sure your hair, loose parts of your garments, fingers or other parts of the body do not come into contact with the vents or moving parts of the appliance. // This appliance may be used by children aged 8 years or more, and by persons with reduced physical, sensory or mental capabilities or lack of experience and knowledge, if they are supervised during the use of the appliance or if they have been provided relevant instructions regarding the use of the appliance in a safe way, and they understand the hazards involved. Keep children under supervision while they are using the appliance and make sure they do not play with it. // Children should not perform any cleaning or maintenance tasks on the appliance, unless they are at least 8 years old and they do so under supervision. // Do not leave the appliance unattended while it is connected to the power mains. After use or during maintenance, put down the appliance, switch it off, and unplug the power cord from the electrical outlet. // Never unplug the appliance by pulling on the power cord. // The appliance is only intended for household use.
DANGER
Do not immerse the appliance in water or any other liquid, and do not rinse it under running water. Also, do not touch the power cord or the plug with wet hands.
SPECIAL WARNINGS
Always switch off the appliance before attaching or replacing the suction tube, suction hose, or attachments. Never use the vacuum cleaner without a bag or the cyclone dust bin (depending on the vacuum cleaner type), or without inlet and exhaust filters. Keep the vents free from dust, hair, or any other impurities that could clog the vents, decrease the air flow, and reduce suction power. Do not move the vacuum cleaner across the room by pulling the power cord or the suction hose. Protect the power
cord from hot surfaces and any other damage, and avoid kinking it. When using the automatic power cord reel, use your hand to guide the power cord. In case of extended use, unwind at least 2/3 of the power cord to prevent overheating and damage. When using the vacuum cleaner for several hours, completely unwind the power cord. Keep the suction tube, open part of the appliance, and attachments away from your face and body. Never use the vacuum cleaner to clean up embers or filings, cigarette butts, matches, liquids (e.g., carpet cleaning foam), or sharp or pointed objects (broken glass, etc.). Also, do not use the vacuum cleaner to pick up toner dust. Do not use the vacuum cleaner to pick up construction material (such as fine sand, lime, cement powder, etc.). This can cause damage to the appliance. Be extra careful when cleaning stairs.
The appliance complies with the following European directives: 2014/35/EU; 2014/30/EU; 2009/125/ES; 2011/65/EU. 666/2013/EU (EU model)
ENVIRONMENT
After the expiry of its useful life, do not discard the appliance with common household waste. Rather, take it to an authorized recycling centre. This will help preserve the environment.
This equipment is labelled in compliance with the European Directive 2012/19/EC on waste electric and electronic equipment – WEEE. The Directive specifies the requirements for collection and management of waste electric and electronic equipment effective in the entire European Union.
WARRANTY AND REPAIR
For more information or in case of problems, please contact the Gorenje Call Centre in your country (phone number listed in the International Warranty Sheet). If there is no such centre in your country, please contact the local Gorenje dealer or Gorenje's small domestic appliance department.
For personal use only!
GORENJE WISHES YOU A LOT OF PLEASURE USING YOUR VACUUM CLEANER
For easier transport, some appliance parts have been packed separately and placed safely in the main packaging unit.
Before first use, read and observe the instructions for assembly and safe use. The appliance is intended for household use, specifically for dry vacuum cleaning.
APPLIANCE PARTS
1 Vacuum cleaner
2 Suction tube
3 Telescopic tube
4 Floor brush
5 Crevice nozzle
6 Dust nozzle
Additional nozzles
APPLIANCE ASSEMBLY

To connect the suction hose: insert the suction hose into the opening.
To disconnect the suction hose: press the buttons on both sides of the suction hose and pull it out.
Connect the tube to the handgrip
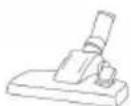
Attach the floor brush to the tube
Rotary knob for speed regulation
USING THE VACUUM CLEANER

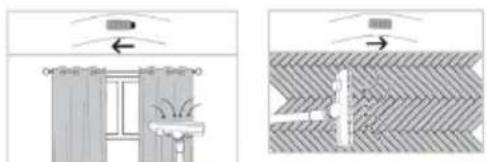


Optional for upgraded version


BAGS, DUST CONTAINER AND FILTERS
Cleaning the dust container
If you use a dust container instead of a paper dustbag, this can be used and emptied repeatedly. When the 'dust container full' indicator reaches the middle of the window, clean the dust container. Do not use a washing machine to rinse filters. Harsh or abrasive detergent will damage the outer surface. You can empty the dust container in the following ways: Hold the dust container over a dustbin. Open the dust container. Shake the contents of the dust container into the dustbin. Close the dust container.

Replacing the filters
Replace the motor protection filter when you insert the first of a new set of dustbags.
![graph LR A["Raw Material"] --> B["Add Waste"] B --> C["Add Fiber"] C --> D["Add Sand"] D --> E["Add Cover"] E --> F["Add Starch"]](/content/2026/05/1013205/images/13a9b210c20764d61b2b86d0292a8e2868ec4ac26f6db0bfd78f9a204de9b0fd.jpg)
Remove the holder. Insert the bottom edge of the new filter properly into the ridges of the holder. Close the holder by pressing it back into place gently. Make sure that the filter fits completely into the holder.
![graph TD A["Hand positioning"] --> B["Grid recycling"] B --> C["Recyclable waste"] C --> D["Recyclable storage box"] D --> E["Recyclable cardboard box"]](/content/2026/05/1013205/images/930653ac5b0c5742e11b8a621a0a63378f807aa3fc21721f8b615da77abaa77a.jpg)
STORAGE
Switch the appliance off. Remove the mains plug from the wall socket. Rewind the mains cord by pressing the cord rewind button. Attach the lower tube to the vacuum cleaner.
TROUBLESHOOTING
Insufficient suction power?
Check dustbag (or dust container) and empty it. Check if the nozzle, tube or hose is blocked. Remove any obstructions and let the air flow through the hose and/or tube in the opposite direction.


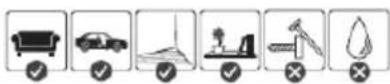


Filter replacement
STORAGE

Filter replacement
STORAGE

BAGS, DUST CONTAINERS AND FILTERS
Filter replacement
STORAGE

Filter replacement
STORAGE

Optional for upgraded version


Filter replacement


Filter replacement
STORAGE

Filter replacement


Filter replacement
CAKTAY


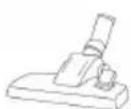


STORAGE
ASSEMBLING THE DEVICE


Accessories for upgraded version


BAGS, DUST CONTAINER AND FILTERS
STORAGE


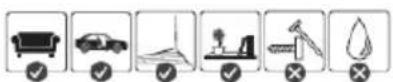
Replacing the filters
STORAGE


Replacing the filter
STORAGE
USING THE VACUUM CLEANER

On/off button

USING THE VACUUM CLEANER


STORAGE

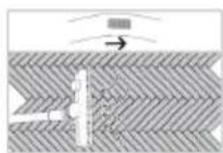
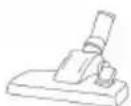


Replacing the filters


Nominal filter
CLEANING
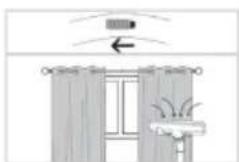


Filter replacement
STORAGE


STORAGE
- FILTER REPLACEMENT
- STORAGE
- TROUBLESHOOTING
- INSUFFICIENT SUCTION POWER
- IMPORTANT SAFETY PRECAUTIONS
- DUST BAGS, DUST CONTAINER AND FILTERS
- REPLACING THE FILTERS
- IMPORTANT SAFETY MEASURES
- CLEANING THE DUST CONTAINER
- IMPORTANT SAFETY INSTRUCTIONS
- DANGER
- SPECIAL WARNINGS
- ENVIRONMENT
- WARRANTY AND REPAIR
- APPLIANCE PARTS
- APPLIANCE ASSEMBLY
- USING THE VACUUM CLEANER
- BAGS, DUST CONTAINER AND FILTERS
- BAGS, DUST CONTAINERS AND FILTERS
- CAKTAY
- ASSEMBLING THE DEVICE
- REPLACING THE FILTER
- NOMINAL FILTER
- CLEANING
Brand : GORENJE
Model : VCE01SFABKR
Category : Vacuum Cleaner