
VESA05 - Fan DCG - Free user manual and instructions
Find the device manual for free VESA05 DCG in PDF.


| Product Type | Fan |
| Brand | DCG |
| Model | VESA05 |
| Color | White/Grey |
| Dimensions (H x W x D) | 120 x 40 x 40 cm |
| Weight | 5 kg |
| Power Consumption | 50 W |
| Voltage | 220-240 V, 50 Hz |
| Number of Speed Settings | 3 |
| Oscillation | Yes, 90° |
| Timer | 1-8 hours |
| Remote Control | Yes, with battery included |
| Adjustable Height | Yes, up to 130 cm |
| Blade Diameter | 40 cm |
| Safety Features | Overload protection, stable base |
| Cleaning Instructions | Use soft damp cloth; do not immerse in water |
| Spare Parts Availability | Blades, motor, remote available from DCG |
| Warranty | 2 years |
Frequently Asked Questions - VESA05 DCG
User questions about VESA05 DCG
0 question about this device. Answer the ones you know or ask your own.
Ask a new question about this device
Download the instructions for your Fan in PDF format for free! Find your manual VESA05 - DCG and take your electronic device back in hand. On this page are published all the documents necessary for the use of your device. VESA05 by DCG.
USER MANUAL VESA05 DCG
natural_image
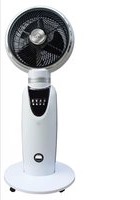
Exterior view of a DCG air conditioner on a stand (no text or symbols visible)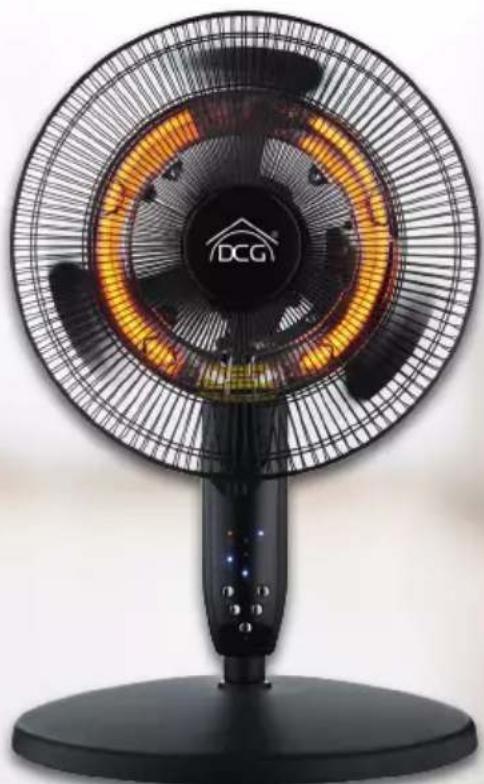
natural_image
Black and white photo of a DCG air conditioner fan with visible heat dissipation and cooling effect (no text or symbols on the fan itself)STUFA/VENTILATORE 2 IN 1
2 IN 1 HEATER/FAN
MANUALE D'USO
USER MANUAL
PER LA VOSTRA SICUREZZA E PER UN CORRETTO USO DELL'APPARECCHIO LEGGERE ATTENTAMENTE E CONSERVARE QUESTO MANUALE
ISTRUZIONI PER LA SICUREZZA
ISTRUZIONI PER IL MONTAGGIO

natural_image
Black rectangular object with five circular icons arranged vertically: plus, @, @, clock, and smile (no text or symbols)
Timer.
FOR YOUR SAFETY PLEASE READ CAREFULLY AND KEEP THIS INSTRUCTION OF USE
SAFETY INSTRUCTION
- This appliance can be used by children aged from 8 years and above and persons with reduced physical, sensory or mental capabilities or lack of experience and knowledge if they have been given supervision or instruction concerning use of the appliance in a safe way and understand the hazards involved. Children must never play with the appliance. Cleaning and user maintenance must never be carried out by children without supervision.
- Children should be supervised to ensure that they do not play with the appliance.
- Keep the appliance and the cable cord out of the reach of children less than 8 years old.
- WARNING: In order to ensure your children's safety, please keep all packaging (plastic bags, boxes, polystyrene etc.) out of their reach.
- If the supply cord is damaged it must be repaired by the Authorized Service Agent.
- Never pull on the cord when unplugging.
- Do not use the unit with a damaged cord or plug, or if it is not working properly.
- Do not handle the appliance with wet hands.
- Never immerse the appliance in water or any other liquid.
- Make sure the appliance has been unplugged before cleaning.
- This appliance must be installed following the national regulations for electrical installations.
- This appliance is for household use only.
- In case that you need a copy of the instruction manual, you can find it in www.orbegozo.com.
-
WARNING: In case of misuse, there is a risk of possible injury.
-
Make sure to keep the fan far away from humidity, chemical articles and oil.
- Use fan only for intended use as described in instruction Manual.
- Do not hang or mount fan on a wall or ceiling.
- While cleaning, be sure to not splash water and do not use oil, alcohol or chemical articles as they may cause distortion of fan body and cause electrical hazards.
- Keep away from curtain, clothing or other something may affect the fan's working.
• Never use the fan before finishing assembly to avoid any hurts.
• Never insert fingers, pencils or any other object through the grille when fan is running. - Disconnect the plug when moving from one location to another.
- Be sure fan is on a stable, even surface when operating to avoid overturning.
- DO NOT USE fan in window. Rain may create an electrical hazard. Do not leave the fan operating adjacent to an area where water has been collected to avoid the potential of electrical hazard.
DESCRIPTION
- Front grill
2a. Front grill ring
2b. Rear grill ring - Blade's nut
- Blade
- Plastic nut for motor
- Rear grill
- Motor and motor shaft
- Fan's body
- Control panel
- Fixing screw 11. Cord and plug
- Extensible tube
- Height adjustment nut
- Lower tube
- Inner base
- Outer base
- Base support (Table fan)
- Remote control

ASSEMBLY INSTRUCTIONS

For stand fan
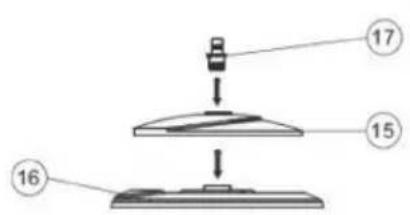
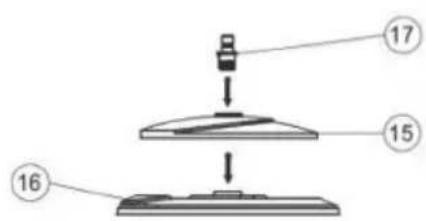
- Remove parts from packaging. Place the outer base (16) on the floor, set the inner base (15) on the outer base and align the slots to fit them. Insert lower tube (14) in the hole of base and screw it tightly.
- Loosen the height adjustment nut (13) and pull up extensible tube (12) until desire height, tighten the nut to set desire height.
- Place the fan's body (8) in the extensible tube and tighten the fixing screw (10) to be fit in that position.
For table fan
-
Place inner base and outer base (15 y 16) on a table, screw the base support (17) in the base.
-
Place the fan's body (8) on the support (17) and tighten the screw (10).
ASSEMBLY OF BLADE AND GRILLS
- Remove plastic sleeve of motor, grills and blade. Place rear grill (6) on the motor frontal through motor shaft (7). Ensure the handle at the rear grill is facing up and that all guiding pegs on the motor housing are lined up with cutouts on the rear grills.
- Secure the rear grill into the place with the plastic nut (5). Fasten the plastic nut firmly onto the motor housing by tightening it in a clockwise direction.
- Install the fan blade (4) onto motor shaft (7) with the cutouts fitted. Place blade's nut (3) on the motor shaft after the blade. Fasten it by tightening in a counter clockwise direction.
- Fit front grill (1) with front grill ring (2a) against rear grill ring (2b) by aligning the alignment mark on the top of the grill ring, closing them together by the hooks on front grill ring and slots on the rear grill ring, twisting the front grill clockwise to the lock position, the snapping lock pin (20) should pop in. Tighten the lock screw (21) to secure the snapping lock pin.

OPERATING INSTRUCTIONS
Using the control panel and remote control
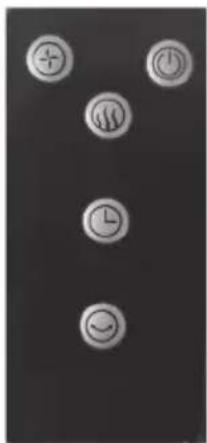
This fan is equipped with 4 speeds, heater, timer, oscillation and remote control. For your convenience, the buttons on control panel and remote control are the same.
natural_image
Close-up of a black surface with five circular icons arranged vertically (no text or symbols visible)
Timer.
Each time you press this button, the timer increase 30 minutes from minimum 30 minutes to maximum 7.5 hours. After the time runs out, the fan will automatically shut off. Control panel shows 4 lights (0.5h, 1h, 2h, 4h) some of them will light and the time of timer will be their sum. Examples: 0.5h lights, 30 min of timer. 0.5h and 2h light, 2h and 30 min of timer.

Mode.
Press this button to start heater function.

Speed.
This button set the speed.

Oscillation.
To activate the oscillation function press this button, to deactivate it, press it again.

ON/OFF.
Press this button to turn on or turn off the fan.
SPECIFICATIONS
MODEL VESA05
VOLTAGE 220-240V\~ 50/60Hz
POWER 40W FAN 2000W HEATER
CLEANING AND MAINTENANCE
- Always disconnect the cord from electrical oultet when cleaning your fan.
- You can clean the accumulated dust in rear grill with a soft cloth.
- Wipe the other parts of fan and blade occasionally with a damp cloth and dry thoroughly with soft dry cloth before operating the fan.
STORAGE
- Before store your fan, clean it following cleaning instructions and disassemble it.
- To conserve it better, store the fan in the original packaging.
- Always store it in a dry place.
- Never store it while still plugged in.
- Never wrap cord tightly around the fan body, it could break.
- Do not use harsh cleaners, so will cause damages to

- PER LA VOSTRA SICUREZZA E PER UN CORRETTO USO DELL'APPARECCHIO LEGGERE ATTENTAMENTE E CONSERVARE QUESTO MANUALE
- ISTRUZIONI PER LA SICUREZZA
- ISTRUZIONI PER IL MONTAGGIO
- Timer.
- FOR YOUR SAFETY PLEASE READ CAREFULLY AND KEEP THIS INSTRUCTION OF USE
- SAFETY INSTRUCTION
- DESCRIPTION
- ASSEMBLY INSTRUCTIONS
- For stand fan
- For table fan
- ASSEMBLY OF BLADE AND GRILLS
- OPERATING INSTRUCTIONS
- Using the control panel and remote control
- Mode.
- Speed.
- Oscillation.
- ON/OFF.
- SPECIFICATIONS
- MODEL VESA05
- CLEANING AND MAINTENANCE
- STORAGE
Brand : DCG
Model : VESA05
Category : Fan