
Electronic Parking Disc II - Alarm Clock Jacob Jensen - Free user manual and instructions
Find the device manual for free Electronic Parking Disc II Jacob Jensen in PDF.


| Product Type | Alarm Clock |
| Brand | Jacob Jensen |
| Model | Electronic Parking Disc II |
| Display | Digital LCD with large digits |
| Alarm Type | Beep alarm with gradual increase |
| Snooze Function | Yes, 9 minutes |
| Backlight | Adjustable brightness |
| Power Source | 3 x AAA batteries (not included) or AC adapter (optional) |
| Dimensions (approx) | 10 x 10 x 5 cm |
| Weight (approx) | 200 g |
| Material | Plastic casing with metallic finish |
| Color | White and silver |
| Time Format | 12-hour or 24-hour selectable |
| Calendar | Day and date display |
| Temperature Display | No |
| Radio | No |
| Additional Features | Parking disc design inspired by traffic disc |
| Maintenance | Wipe with a soft, dry cloth |
| Safety | Keep away from water and moisture |
| Spare Parts | Batteries, AC adapter (if desired) |
| Repairability | Repair by qualified technician only |
Frequently Asked Questions - Electronic Parking Disc II Jacob Jensen
User questions about Electronic Parking Disc II Jacob Jensen
0 question about this device. Answer the ones you know or ask your own.
Ask a new question about this device
Download the instructions for your Alarm Clock in PDF format for free! Find your manual Electronic Parking Disc II - Jacob Jensen and take your electronic device back in hand. On this page are published all the documents necessary for the use of your device. Electronic Parking Disc II by Jacob Jensen.
USER MANUAL Electronic Parking Disc II Jacob Jensen
Electronic Parking Disc II
Benutzerhandbuch
Electronic Parking Disc II
User manual
PLEASE BE AWARE THAT IT IS ALWAYS THE DRIVER'S RESPONSIBILITY TO ENSURE THAT THE CLOCK AND THE TIME OF PARKING ARE SET CORRECTLY BEFORE LEAVING THE CAR.
PLEASE NOTE THAT THE PARKING DISC AUTOMATICALLY SWITCHES BETWEEN SUMMER TIME AND WINTER TIME.
PLEASE NOTE THAT IN SOME EUROPEAN COUNTRIES, E.G. DENMARK, REGULATION DICTATES THAT A CAR MUST NOT FEATURE MORE THAN ONE PARKING DISC. MAKE SURE TO REMOVE ANY OTHER PARKING DISC PRIOR TO INSTALLING THE JACOB JENSEN ELECTRONIC PARKING DISC.
English
Introduction
Product overview 17
Activation & clock setting 18
Mounting the device 19
Manual setting 20
Troubleshooting & good advice 21
Maintenance 22
Warranty 22
Certificates & approvals 23
JACOB JENSEN™ products 24
Certificate of Authenticity 27
UK
16
Introduction
JACOB JENSEN™ Electronic Parking Disc II automatically registers and displays when your car was parked. The disc is attached to the inside of the windscreen.
The time of parking is shown on the LCD display but may also be set manually if needed. See page 20 for details.
The JACOB JENSEN™ Electronic Parking Disc II expresses the characteristic clean form language developed by Jacob Jensen and refined by his son Timothy Jacob Jensen – a form language that has brought the company recognition and distinction all over the world. For more than 50 years, these two generations of Danish designers have proved that watches, clocks, smoke alarms, phones, kitchen appliances and all the other things that we surround ourselves with in our daily lives may be full of inspiration, serene aesthetics and pure beauty.
For further information, please visit jacobjensen.com
16 | UK
Product overview

pie
| Category | Value (%) | |---|---| | ACCB ENSEN | 100 | | Other | 95 |Seen from inside the car
LED Indicator

Seen from outside the car
Adhesive pads holding the product in place on the windscreen. LCD display showing the clock or time of parking. 'P' icon next to the displayed time indicates parking mode.
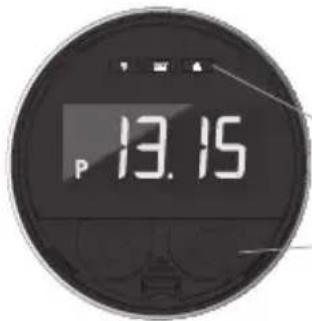
Under the front cover
Keys for setting (See page 18 to 20 for details). Battery compartment
UK | 17
Activation & clock setting
- Remove the front cover, then remove the battery cover.
- Remove the plastic strips from the battery compartment.
- The LCD display now flashes the year, set the correct year using ▼or ▲
- Press SET to change the month ('M'), set the correct month using ▼ or ▲.
- Press SET to change the day ('D'), set the correct date using ▼ or ▲.
- Press SET to change the time, set the hour and minutes using ▼ or ▲.
- Press SET to exit.
Now the parking disc is set and ready for mounting.
View the current time: Press the SET and time will be shown for 3 seconds. Set the clock: Press SET until display flashes. Promptly press SET 3 times and follow steps 6 and 7 above.
Force parking time: Press either ▼ or .▲
18 | UK
Mounting the device
- Clean the window using the cleaning cloth provided. Do not use any window cleaning solutions as they may contain lubricants.
- Carefully remove the red film from the adhesive pads using the slicer provided.
- Mount the front cover of the parking disc in the corner of the passenger side windscreen. Keep it at a fair distance from the edges to ensure readability from the outside. Apply light pressure to remove air bubbles from the adhesive pads. Then mount the parking disc on the front cover and finally, remove the protective film from the backside of the parking disc.
Positioning is important
For the product to serve as a valid parking disc, the Danish Road Safety and Transport Agency requires that it is correctly fitted in the lower right-hand corner on the windscreen of the car.
Reset
Press ▼ + ▲. The parking disc resets to default. To reactivate the disc, please read the activation section on page 18.
UK | 19
Manual setting
If the time of parking is different from the automatically set time, the parking time can be manually adjusted by ▼ or ▲. The time of parking will be displayed on the unit immediately. See Quick Guide.
When the car is moved
When you start the engine and drive the car, the LCD display will change back to clock time once driving mode is detected. The LCD display will switch off one minute later and remain so till the next parking.
Time Registration
The electronic Parking disc automatically registers when the car is being driven and parked.
When the car is parked
Every time the car is parked and the engine switched off, the Electronic Parking Disc LED indicator will flash blue four times and the time of parking automatically rounded up to the next half hour. For example, if you park the car at 14:05, the LCD display will set the time of parking at 14:30.
20 | UK
Troubleshooting & good advice
If the frontplate cannot be attached to the windscreen, it may be because:
- The windscreen is dirty. Clean the windscreen thoroughly (See page 19).
- The windscreen is exposed to extreme temperatures or moisture. For best results temperature should exceed 10^ C.
If you need to change the windscreen or if the parking disc needs is to be moved from one car to another, blow hot air on the outside of the windscreen, e.g. with a hairdryer before removing the frontplate. This makes it easier to release the disc and ensures that no marks from the adhesive pads remain.
Change of batteries
When the batteries are out of power, the LED indicator will flash red for 5 times and the LCD screen display 📁 Open the battery cover. Flip out the batteries using e.g. a small flat-head screw driver. Insert two new batteries (CR2450 batteries) correctly as shown in the battery compartment. Repeat from step 3 from page 18.
Note You will have to reset the clock and reactivate the parking function every time you replace the batteries!
UK | 21
Maintenance
- Avoid handling the product roughly or exposing it to violent impact, dust, moisture or extreme temperatures ( ≤ -20^ or ≥ +70^ ).
- Avoid exposing the product to water.
- Do not clean the product with abrasive or corroding agents.
- The product is designed to break if tampered with.
- Use only new batteries (CR2450 batteries). Do not mix old and new batteries.
- For environmental reasons, the product should not be disposed of together with domestic waste. It should be taken to the nearest recycling plant.
Warranty
Find out more about warranty in the "Certificate of Authenticity" section on page 27.
Note
The provider will not reimburse any parking fines.
22 | UK
Certificates & approvals
The product is certified by the German Road Traffic Authority for public transport under the number E1 10 R-057830.
WEEE Electrical and electronic equipment (WEEE) contains materials, components and substances that may be dangerous and hazardous to human health and to the environment when waste from electrical and electronic equipment (WEEE) is not disposed of correctly.
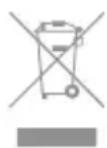
Products labelled with the ‘crossed-out rubbish bin’ logo (left) constitute electrical and electronic equipment. The crossed-out rubbish bin logo means that waste from electrical and electronic equipment should not be disposed of together with unsorted domestic waste, but should be disposed of separately.
The contents of this manual may change without notice.
UK | 23
JACOB JENSEN™ Products
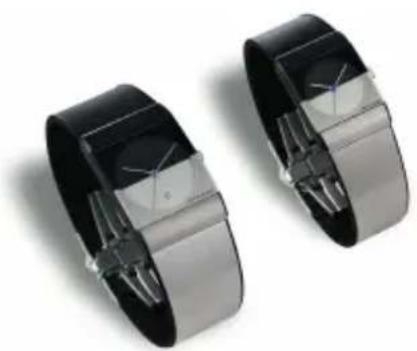
The first product to bear the brand JACOB JENSEN™ was a wrist watch. Shortly after its introduction on the market it was included in the Design Study Collection of The Museum of Modern Art in New York. This was more than 30 years ago. The JACOB JENSEN™ 510 and 520 watches are still in production today, and their enduring character continues to appeal.
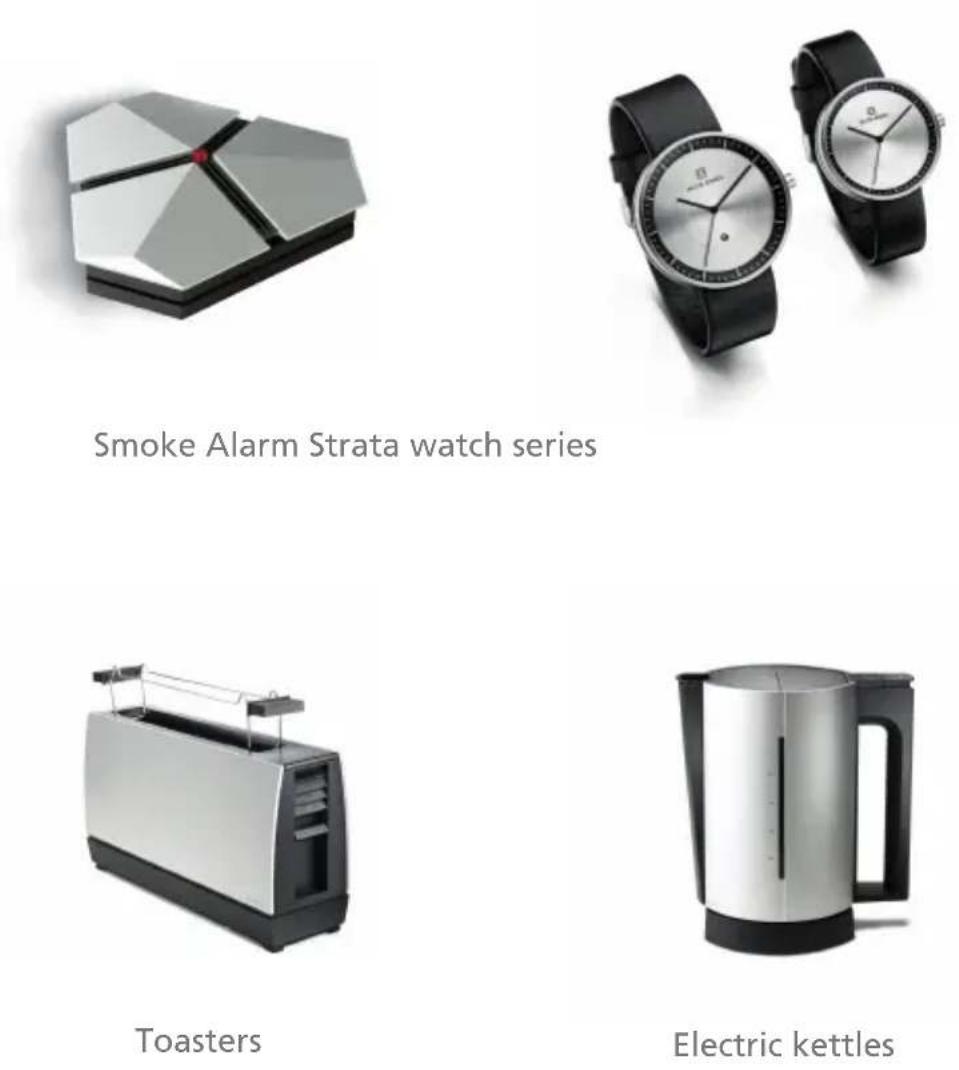
The range of JACOB JENSEN™ products currently includes collections of watches and clocks, telephones, weather station displays, timer clocks, smoke alarms, kitchen appliances and smart home products.
natural_image
Two black and silver wristband clips with metallic contacts, shown against white background (no text or symbols)JACOB JENSEN™ Classic watch series | Model No. 510 & 520 | 1986
Certificate of authenticity
This is your guarantee of an authentic JACOB JENSEN™ product.
Your product has gone through rigorous testing in order to live up to the highest quality standards and carries a 2-year limited international warranty. This warranty is only valid with the stamp of an authorized JACOB JENSEN™ dealer, as well as the date of purchase.
Dealer's stamp:
Product ID number can be found on the product.
Date of purchase:
Product:
For more information about our products, please visit our website
jacobjensen.com
JACOB JENSEN™ is trademark of JACOB JENSEN HOLDING A/S and is used under license by JACOB JENSEN DESIGN A/S. © 2015 JACOB JENSEN HOLDING A/S
- Electronic Parking Disc II
- English
- Introduction
- Product overview
- Activation & clock setting
- Mounting the device
- Positioning is important
- Reset
- Manual setting
- When the car is moved
- Time Registration
- When the car is parked
- Troubleshooting & good advice
- Change of batteries
- Maintenance
- Warranty
- Note
- Certificates & approvals
- JACOB JENSEN™ Products
- Certificate of authenticity
Brand : Jacob Jensen
Model : Electronic Parking Disc II
Category : Alarm Clock