
INN-858 - Beer dispenser Innoliving - Free user manual and instructions
Find the device manual for free INN-858 Innoliving in PDF.


| Product Type | Beer Dispenser / Kegerator |
| Brand | Innoliving |
| Model | INN-858 |
| Dimensions (Approx.) | 350 x 200 x 400 mm |
| Weight (Approx.) | 5 kg |
| Power Supply | 220-240 V, 50 Hz, 100 W |
| Cooling Type | Compressor or thermoelectric |
| Temperature Range | 2-8 °C (adjustable) |
| Keg Compatibility | 5 L mini kegs |
| Dispensing System | Manual tap with CO2 pressure |
| CO2 Cartridge | 16 g or 8 g threaded cartridge |
| Functions | Cooling, dispensing, adjustable temperature, LED display |
| Cleaning and Maintenance | Clean tap and drip tray regularly; descale every 3 months |
| Safety Features | Overheat protection, non-slip feet, unplug before cleaning |
| Spare Parts Available | Tap, CO2 regulator, keg connector, drip tray |
| Repairability | Modular design; user-replaceable parts available |
| General Information | For home use; compact countertop design |
Frequently Asked Questions - INN-858 Innoliving
User questions about INN-858 Innoliving
0 question about this device. Answer the ones you know or ask your own.
Ask a new question about this device
Download the instructions for your Beer dispenser in PDF format for free! Find your manual INN-858 - Innoliving and take your electronic device back in hand. On this page are published all the documents necessary for the use of your device. INN-858 by Innoliving.
USER MANUAL INN-858 Innoliving
innoliving easy tech, easy life
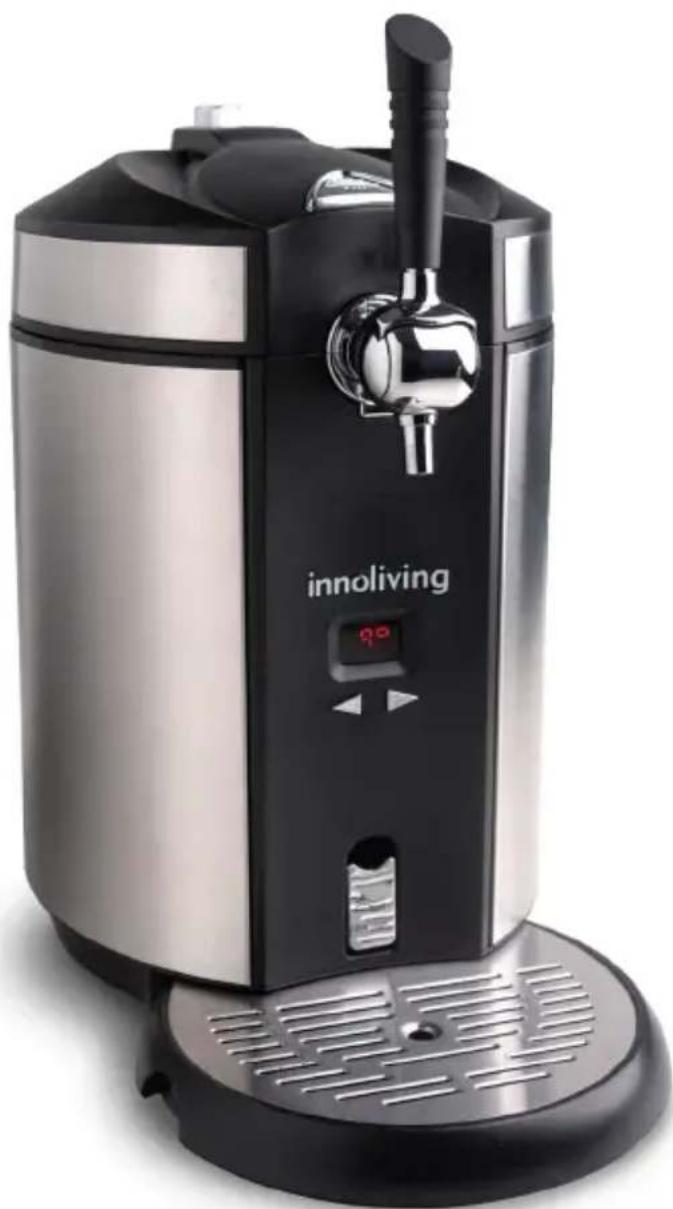
natural_image
Exterior view of a black and silver instant water dispenser with a digital display (no text or symbols on the device itself)SPILLATORE PER BIRRA
INN-858
MANUALE D'USO
USER MANUAL
natural_image
Close-up of a metallic ring with a central hole (no text or symbols visible)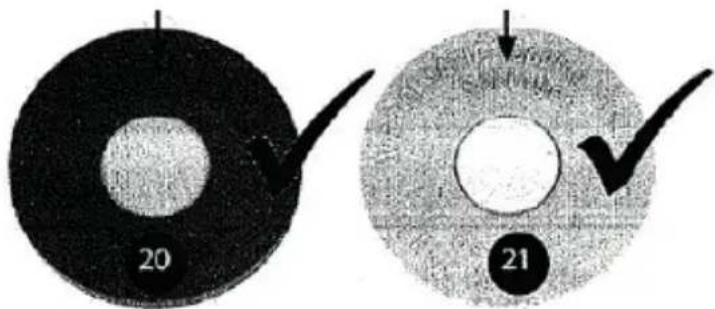
natural_image
Close-up of a metallic circular component with concentric rings and central hole (no text or symbols visible)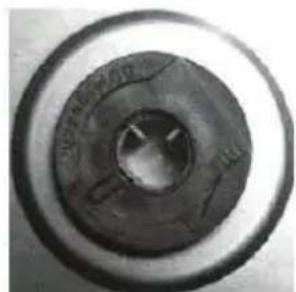
natural_image
Close-up of a circular mechanical component with central hole and concentric rings (no visible text or symbols)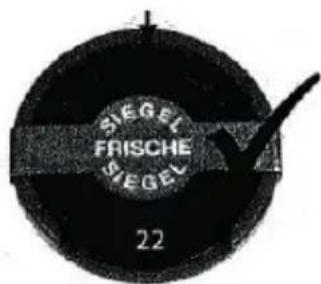
natural_image
Technical line drawing of a mechanical component inside a housing (no text or symbols)Note:
natural_image
Technical line drawing of a mechanical assembly with no visible text or symbolsnatural_image
Technical line drawing of a mechanical assembly with no visible text or symbols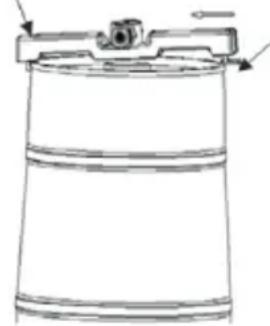
natural_image
Line drawing of a cylindrical container with a lid and side panel, no text or symbols presentnatural_image
Mechanical assembly diagram showing a valve and shaft assembly (no text or labels)AVVERTENZA:
Thank you for purchasing INOLIVING Beer dispenser INN-858.
Read all the instructions and warnings carefully and keep this manual safe for future references.
SAFETY INSTRUCTIONS AND WARNINGS
This is a home beer dispenser equipped with a pressure system that can be used with a CO2 cartridge.
The appliance brings the beer to the optimal temperature for storage (from 0 to 4°C) within 19-21 hours.
The Beer Dispencer will keep the 5L keg fresh for a long time. However, It is advisable to put the beer keg for at least 12 hours in the refrigerator before inserting it into the appliance.
When using an electrical appliance, it is necessary to comply with the safety rules:
-
Read the instruction and safety and safety norms before using the appliance and follow these at all times. Keep this manual safe for future references for all the product life. Failure to comply with the use and maintenance instructions provided in this user manual could lead to an accident and will void the warranty.
-
Before connecting the appliance, check that the voltage indicated on the rating label corresponds to the main voltage in your home.
-
Keep all packing material (plastic bags, cardboard, polyester, etc..) out of reach of children, since they are potential sources of danger and must be disposed of as provided by law.
-
After having removed the appliance from its packaging, verify its integrity based on the drawing and any presence of damage caused by transport. If in doubt, do not use the appliance and contact an authorized service center
-
If the power cable is damaged, it must be replaced by an authorized
after sales service, so as to prevent all risks.
- ATTENTION: when placing the product, make sure the power cable is not trapped or damaged.
- Do not force the electrical connection wire. Never use the electric wire to lift up, carry or unplug the appliance. Ensure that the electric cable does not get trapped or tangled.
- ATTENTION: Do not position multiple sockets or portable power supplies behind the unit
- Do not over turn the product
- To avoid the risk of electric shock, do not immerse the product in water or other liquids.
- Do not allow the cord to come into contact with hot surfaces flames, hot pots other utensils.
- Connect the plug from the mains after use and before proceeding with cleaning or maintenance
- Keep 10 cm of distance between the appliance and any other object around in order to grant a good heat release
- Do not use accessories different form those supplied
- In case of fault or malfunctioning of the appliance, switch it aff and do not tamper with it. If the device needs to be repaired, contact an authorized after sales center.
- This appliance is not intended for use by persons with reduced physical, sensory or mental capabilities, or lack of experience and knowledge, unless they have been given supervision or instruction concerning use of the appliance by a person responsible for their safety and understand the hazards involved.
-
This product is not a TOY. Children should be supervised to ensure that they do not play with the appliance. Keep this product out of reach of children.
-
Cleaning and maintenance operations must not be carried out by children without supervision.
- Do not use the appliance near flames, plates, stoves, or other heat sources.
- It is not allowed to insert foreign objects into the appliance to avoid fires and short circuits
- Do not use outdoors
- Do not use aggressive or abrasive detergents to clean the product.
- This appliance is for HOUSEHOLD use only, not professional or industrial use:
- kitchen areas for staff in shops, offices and other work environments: Farmhouses
- By customers in hotels, motels, B&B and other residential settings
- Do not connect or disconnect the plug with wet hands.
- Place the beer cooler on a dry, flat horizontal surface.
- Never put the beer dispenser under sunlight
- Never cover the beer dispenser with any other object when it is in operation.
- The appliance must be installed in an area protected from atmospheric agents, such as wind, rain, water spray or drops of water
- Do not remove the beer keg from the appliance if the king is not completely empty
- Do not take out the CO2 cartridge before all the CO2 inside is gone
- Do not use the CO2 cartridge if the ambient temperature is above 49°C/120°F. Failure to do so can result in an explosion or death
- Do not store explosive substances, such as aerosols, in this appliance.
- Regularly clean the surfaces that come into contact with food
CAUTION: Keep all ventilation openings clear of obstructions. In the event
of leaks, avoid using open flames or flammable materials and ventilate the room where the product was used for a few minutes.
PRODUCT DESCRIPTION:
INN-858 is a home beer dispenser equipped with a pressure system that can be used with a CO2 cartridge. The appliance brings the beer to the optimal temperature for storage (from 0 to 4°C) within 19-21 hours.
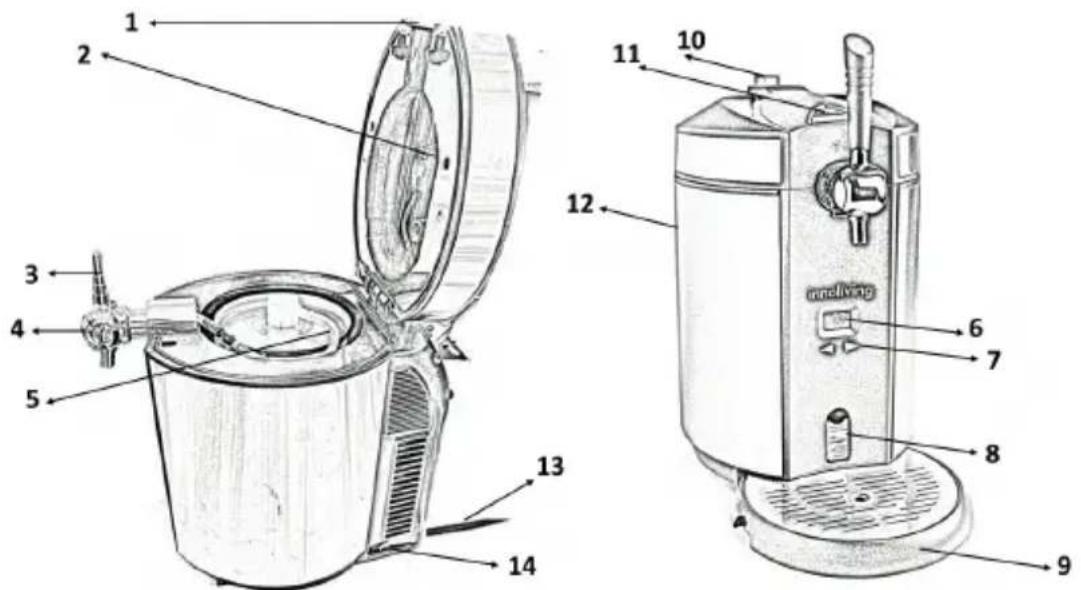
- Top cover
- Support CO2
- Handle Stapler
- Stapler
- Keg lifter
- Led screen
-
Digital controls button
-
Drain switch
- Collection tray
- CO2 pressure and release valve
- Door closing button
- Rear cover
- Power cord and plug
- AC switch
HOW TO CHOOSE BEER KEGS
- Sealed 5L universal keg and pressurized keg applies only
- Pay close attention to safety and storage messages about the keg / on the keg.
- Check the keg is neither damaged nor beer out-of-date before purchasing.
- Protect the top surface from being damaged. Otherwise it could be difficult of accession for the suction tube.
- Keep the keg in a rather cold for 12 hours but not too cold place (e.g. refrigerator) until next use.
- Never shake the keg before use
- Never put the beer keg under the sunlight
SEALANT FOR KEGS
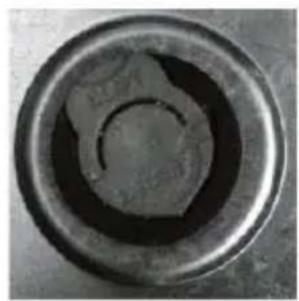
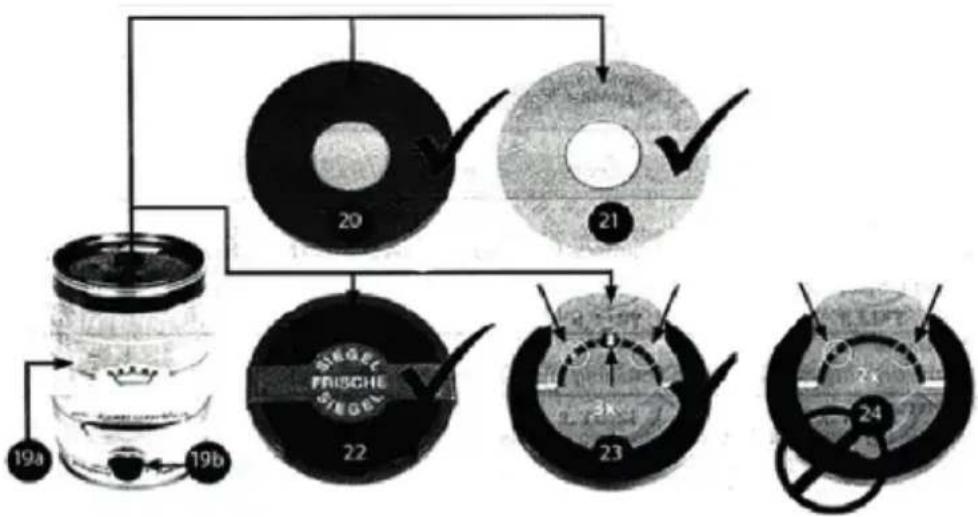
All 5 Liter beer keg with the below various appearance sealants can apply to the beer cooler, however, you should follow the information as below:
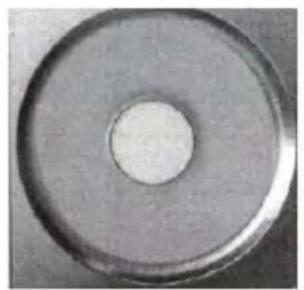
*The sealants with code No. 20 and 21 can be pierced simply by the cooler piercing pin.
natural_image
Circular metallic object with a central hole, resembling a washer or disc (no text or symbols visible)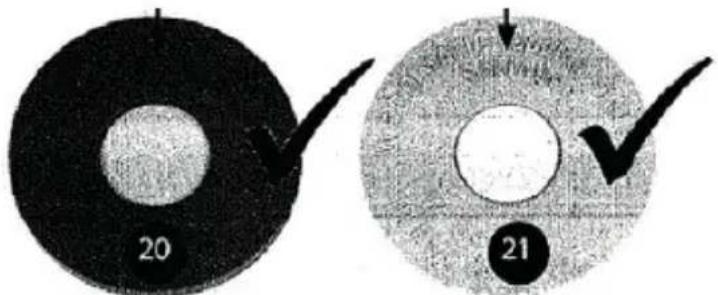
*The sealants with code No. 22 need to be removed off the marking ring from the sealant and pierce the keg by cooler piercing pin
natural_image
Close-up of a metallic circular component with concentric rings and a central hole (no visible text or symbols)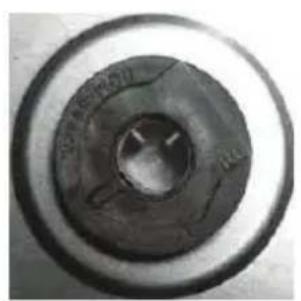
natural_image
Close-up of a circular mechanical component with central hole and concentric rings (no visible text or symbols)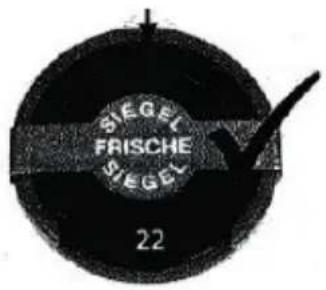
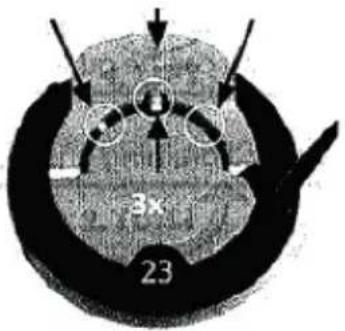
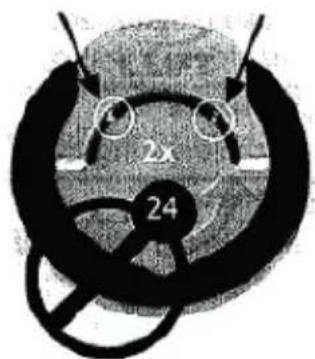
*The difference between code No 23 and 24 is the safety clasp quantity.
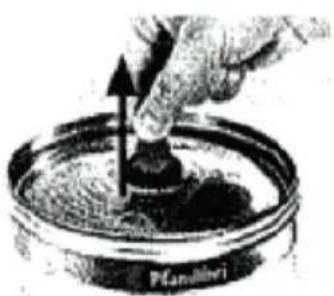
Pull up the safety clasp carefully, turn around and take it out from the keg; replaced it by the sealant (like code No 2 sealant) provided in the beer cooler, attach it to the beer keg, and pierce it by cooler piercing pin.
natural_image
Hand using a tool to apply liquid in a petri dish (no text or symbols visible)Important: Before replacing the sealants or piercing the cooler kit, you must always follow the instructions marked on the keg to eliminate the excess gas and ensure that the keg has rested long enough to avoid foam coming out through the cooler piercing pin /tap faucet. And it is no need to release the gas and replace the seal rubber if you use pressurized keg, because Heineken keg has its own CO2 pressure inside, and no need to be provided from outer CO2 pressure system.
flowchart
graph TD
    A["19a"] --> B["20"]
    B --> C["21"]
    C --> D["22"]
    D --> E["23"]
    E --> F["24"]
    style A fill:#f9f,stroke:#333
    style B fill:#ccf,stroke:#333
    style C fill:#cfc,stroke:#333
    style D fill:#fcc,stroke:#333
    style E fill:#cff,stroke:#333
    style F fill:#ffc,stroke:#333
INSTALLATION AND OPERATIONS
INSTALLATION
- Remove the appliance from the packaging and place it on a stable and horizontal surface, and make sure it has at least 5 inches/10 cm away from other appliances or from the wall on each side in order to allow proper ventilation and achieve better performance.
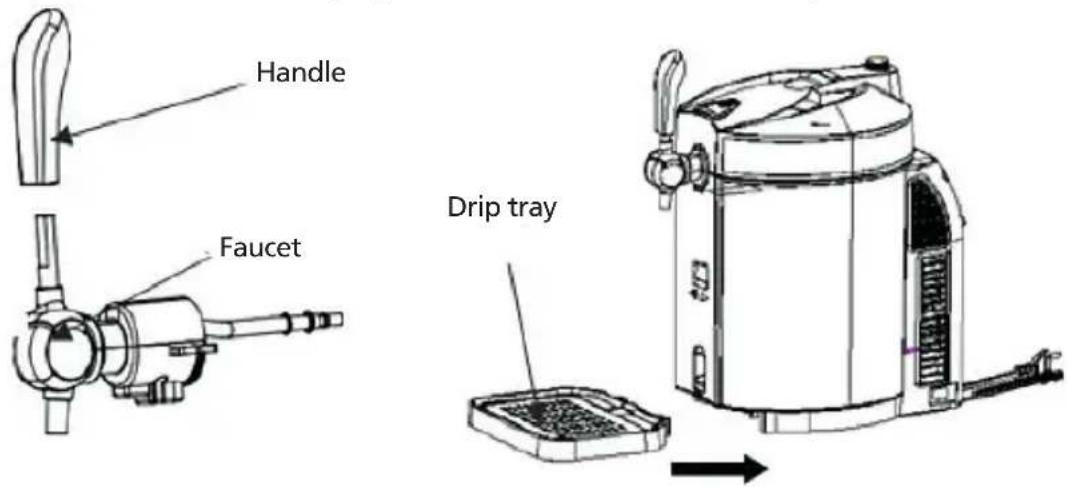
- Install the tap handle connect the tap, make sure both end fit together perfectly.
Set the water drip tray into the notch provided.
Plug in the plug
Note: Do not connect or disconnect the power plug with wet hands. Before using the appliance, make sure that the electrical voltage complies with the plate on the plug. Check if the power cable is well connected or not; if not, please don't use it and call the service center.
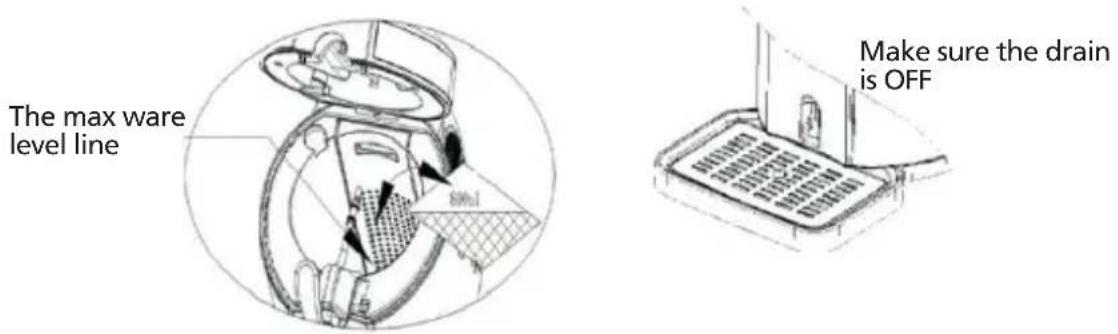
- Put 800 ml of water in the cooling cavity or pour the water up to the max mark. It can also work without water but not with the best performance.
NOTE: Make sure that the drain switch is in the "OFF" position and that there is no object in the cooling cavity.
OPERATIONS
Universal 5 liter kegs
- Before piercing the cap on the top of the keg, it is always necessary to follow the instructions on the keg to eliminate excess gas and make sure that the keg has rested long enough to prevent foam from escaping from the tap.
- Insert the pin vertically against the sealant in the middle and top of the drum (sometimes you will need to detach the marking ring or change the sealant), press the pin / drum lifter to drive the sealant and then push the pin and dip into the barrel quickly. When you assemble the faucet mechanism correctly you will hear a click which will indicate correct assembly.
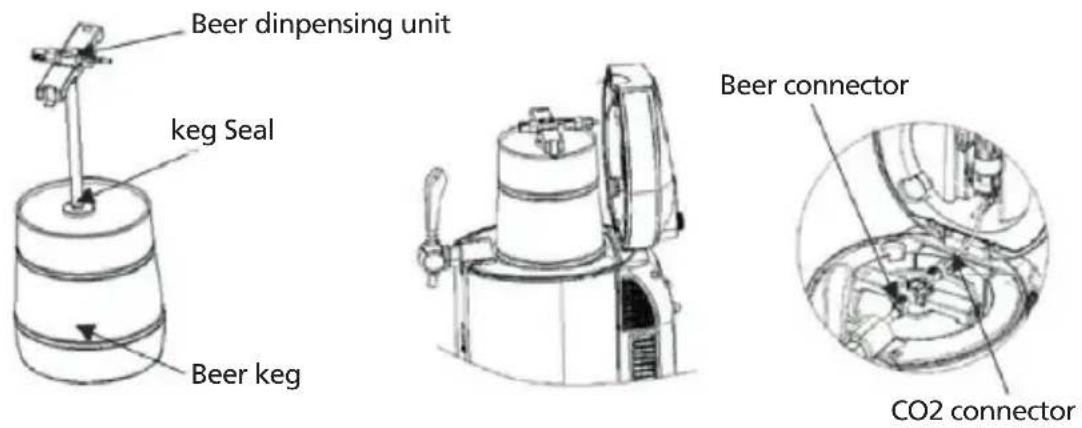
- Open the beer dispenser and place the well assembled keg in the cooling cavity. Connect the CO2 connector hose and the beer drain hose to the keg lifter hose connector.
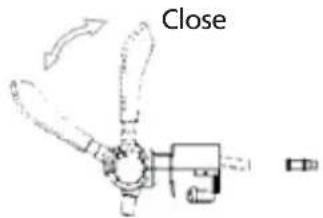
NOTES: Make sure that all connections of the faucet mechanism are well connected and without damage. Make sure the faucet valve is closed and the CO2 pressure adjustment knob is set to "Off".
Open
natural_image
Diagram of a mechanical device with multiple blades and a close button, no text or symbols present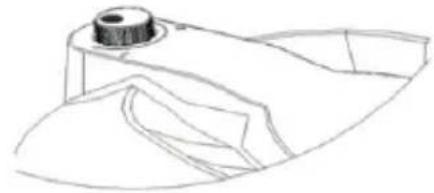
natural_image
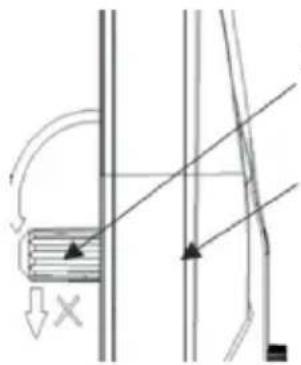
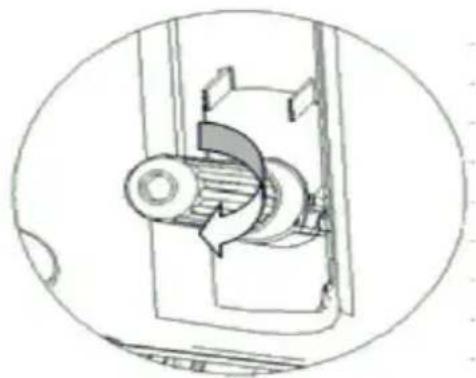
Line drawing of a mechanical component with a central cylindrical feature (no text or symbols)Loosen the sheath of the CO2 bottle (as shown in Figure A), insert a 16g CO2 cartridge into the sheath (Figure B), and screw the tight sheath until you hear a "click" (Figure C), which indicates that the cartridge seal has been pierced and that the CO2 gas can flow freely into the drum. Make sure that the cylinder sheath is firmly fixed in order to prevent CO2 from escaping. After that, put the sheath of the CO2 bottle in the top cover.
Fig. A
Not exceed 90°
natural_image
Pure mechanical diagram showing a lever mechanism with arrows and cross symbols, no text or labels presentRegulator assembly
Cover assembly
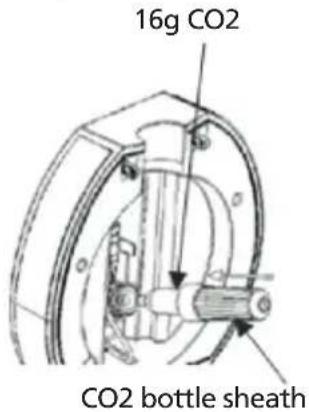
Fig. C
natural_image
Technical line drawing of a mechanical component inside a circular frame (no text or symbols)Fig. B
Notice:
*Turn off the CO2 knob when cooling the beer
*Turn off the CO2 knob when the beer flow is paused
*Turn off the CO2 knob when changing the CO2 cartridge
*When the beer cannot be tapped out (there is still beer in keg), or beer foams are not enough, turn the knob to "+" position for 5 seconds, then turn off it again.
- Close the top cover of the appliance. When pouring beer, turn the knob on the top lid to the "+" position to release the CO2, and turn it to "-" when you stop or stop pouring the beer to shut off the CO2. Please refer to the warning on the top cover label.
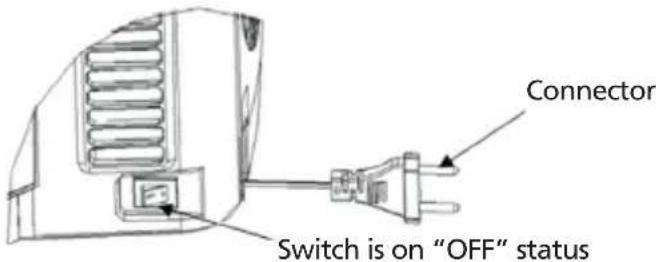
- To turn on the appliance, simply set the power switch to the "I" position. (While in position "0" to turn it off).
NOTES: To avoid electric shock, when using the appliance, please make sure your hands are dryng.
-
It will take 19-21 hours to cool the beer to 2 - 4^ C , when the ambient temperature is 22 - 24^ C . Subsequently, the device will maintain the temperature set and displayed on the screen. However, initially, we suggest letting the beer keg cool for at least 12 hours in the refrigerator before placing it in the appliance, especially when the ambient temperature is above 25^ C .
-
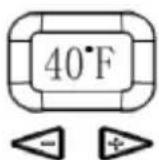
You can set the temperature according to your personal taste by pressing the buttons on the front panel. The temperature can be set from 36 °F to 54 °C (2 °C to 12 °C), using the temperature adjustment button (+ and -) located on the side of the temperature screen.
The PCB is equipped with memory, when the cooler is turned on, it remembers the temperature set last time
The display will show the actual temperature of the beer. To see the set temperature, just press the "+" button for 1 second after about 3 seconds. the display will show the actual temperature again.
The beer cooler has 6 preset temperatures.
Press and hold the “-” button to access the 6 preset temperatures, then you can press the “-” button to choose a certain preset temperature, 40^ F ( 4^ C), 46^ F ( 8^ C), 48^ F ( 9^ C), 50^ F ( 10^ C), 52^ F ( 11^ C) and 54^ F ( 12^ C).
By pressing and holding the "+" button, the device will convert degrees Fahrenheit (° F) into Celsius (° C).
- Adjust the CO2 pressure regulator knob to the "+" position, to pour the beer by pulling down the tap mechanism at approximately 45°. You can adjust the pressure regulator knob to control the beer flow and bubbles (Figure 13).
Note: Clean the glass before pouring the beer; if the beer or the glass it is poured into has a high temperature or if the beer is not cool enough, there will be a lot of bubbles.
-
When tapping the beer, place the glass against the spout and slowly straighten as the beer advances, then fully open the tap mechanism to avoid many bubbles. It is recommended to pour half a glass, take a short break and then continue pouring. NOTES: Do not immerse the spout in the glass of beer to avoid many bubbles. Remember to turn off the tap after you have finished pouring the beer.
-
It is normal for there to be more bubbles when pouring the first 3 glasses.
- There will be a sharp, high-speed jet as you pour the last glass of beer from the keg. Adjust the CO2 pressure adjustment knob to the "-" position to close and save the CO2 supply.
PRESSURIZED DRUMS
Pressurized drums are already loaded with CO2, and do not require the use of the regulator and it is not necessary to install the CO2 cartridge. Also, the knob on the top cover does not work.
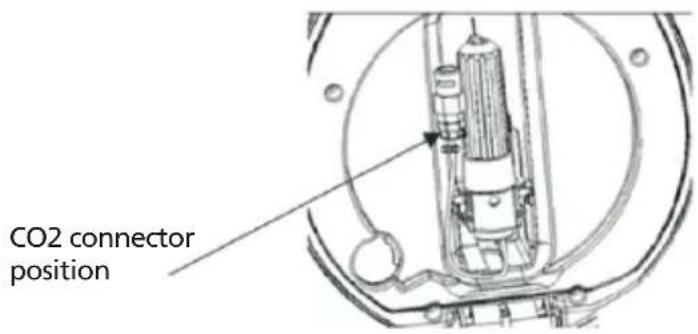
-
The connector for pressurized kegs supplied with the beer cooler can work with all pressurized 5 liter kegs. However, it is necessary to use a flat head screwdriver to remove the green base from the barrel to install the new connector, supplied with the appliance.
-
When installing the new connector to the pressurized keg, first of all, you need to install the beer hose with one end to the connector and the other to the tap mechanism, then install the connector to the pressurized keg.
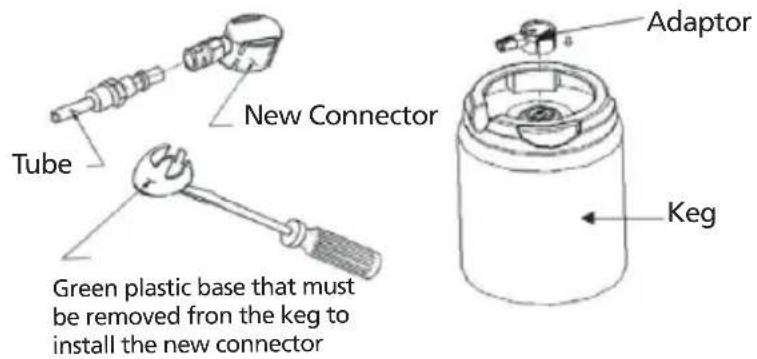
Note: Please take out the Heineken adaptor with collect ways. Press it according the arrow indication, or will damage the fastener.
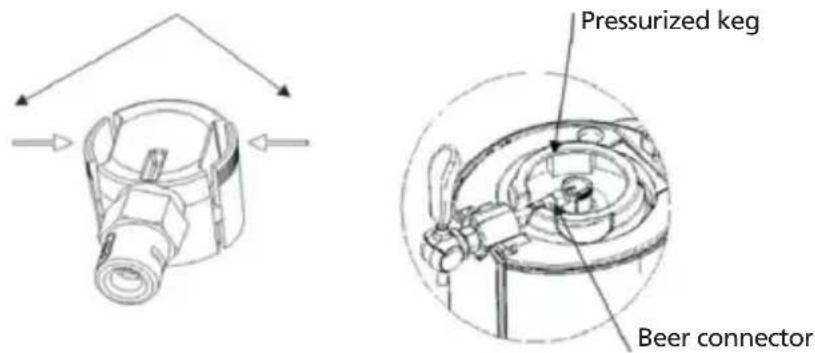
- Close the top cover; operate as described above from step 6 to 12, as if it were a 5 liter universal drum, only step 9 is an exception.
HOW TO LOAD A NEW DRUM
(5 L universal keg) When the beer in the keg runs out, before changing a new keg of beer it is advisable to:
- Adjust the CO2 pressure adjustment knob to "-" to shut off the CO2 flow saving the gas cartridge.
- Open the top cover of the beer cooler, pull the tap handle down to release the residual gas in the keg (probably with a little foam).
- Then put the drilling pin in the new barrel and insert into the appliance. Connect the gas hose and the beer hose from the keg lifter by pressing the white parts.
- Disconnect the gas hose and the beer hose from the keg lifter.
- Pull the keg out of the keg lifter and pull the pin out of the keg.
- It is recommended to clean the tap mechanism every time the beer keg is changed.
By following the instructions below:
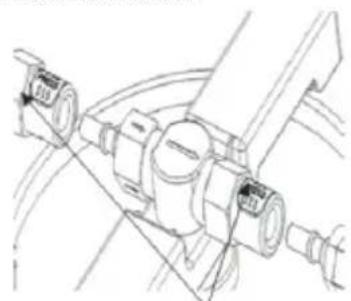
When you take out the fasetner of beer dinspensig unit, you can move this unit towards arrow indication.
natural_image
Technical line drawing of a mechanical assembly with no visible text or symbols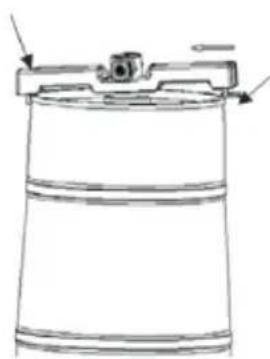
natural_image
Line drawing of a cylindrical container with a lid and side arm, no text or symbols presentYou must take out the right fastener at first, then push the left fastner aout as arrow inidcation, you can pull out the dispensing unit finally.
When you take out the beer connector and CO2 connector, please press the white button down
HOW TO LOAD A NEW CO2 CARTRIDGE (Not needed for pressurized kegs)
Please change the CO2 cartridge if it is not possible to pour beer when the CO2 pressure knob is in the "on" position and there is still beer in the keg.
- Turn the CO2 pressure knob to the “-” position to stop the CO2 flow.
-
Open the top cover, lose the cartridge sheath, and take out the empty CO2 cartridge. Insert a new 16g CO2 cartridge into the holder and screw the tight sheath until a “click” is heard, indicating that the cartridge seal has been punctured and the CO2 gas can flow freely into the keg. Make sure that the cylinder sheath is firmly fixed in order to prevent CO2 from escaping. After that, put the sheath of the CO2 bottle in the top cover.
-
Close the top cover of the device.
-
Turn the CO2 pressure knob to the "+" position to activate the CO2 flow; at this point the appliance is ready to pour the beer.
Reminder: Each 16g CO2 cartridge can be used to brew more than 5L beer.
WARNING:
Please use suitable CO2 cartridges; do not play with cartridges as it may cause danger. Below, you will find the information you need to know the type of CO2 cartridge to use. Never use nitrogen cartridges with this appliance to avoid explosion due to its much higher pressure than it should be.
New CO2 cartridges need to be stored with caution; playing with them is forbidden as it could pose risks.
Cartridges CO2 from 16 g
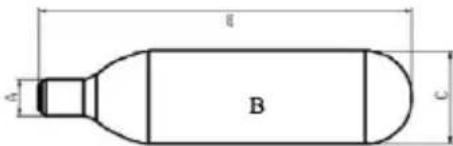
| NWg | Volumeml | GWg | Pesog | Amm | Bmm | Cmm | Dmm | PressioneKg/cm2 | Pressionegetto bar |
| 15,51 | 20 | 57,01 | 42,01 | ø 8,61 | 88,01 | ø 21,71 | 101 | 60 450 | |
| 16,5 | 58,6 | 42,6 | ø 8,9 | 89,0 | ø 22,0 | 11 |
HOW TO REPLACE THE WATER INSIDE THE COOLING CAVITY
It is recommended to replace the water inside the cavity once a week. (It is not necessary to change the water for each keg of beer, it is recommended once a week)
Open the drain switch water flow into the "S" shape drainpipe from this end
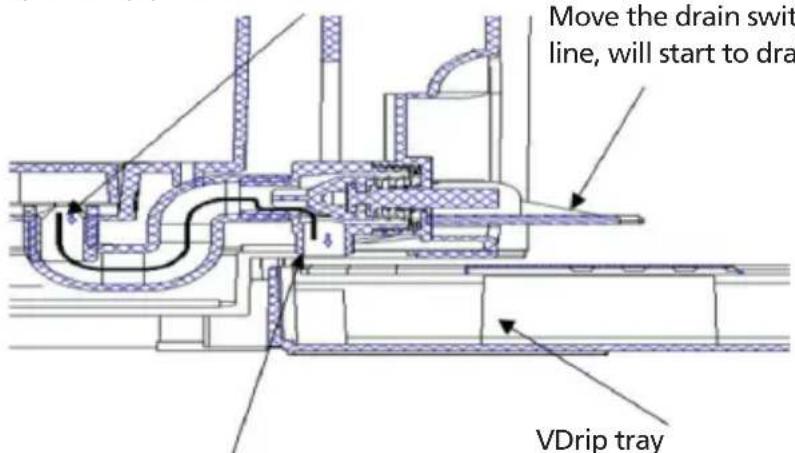
Move the drain switch to horizontal line, will start to drain water
Ater flow into drip tray from this
- Open the drain switch to drain the water from the drip tray cavity. Make sure that the drip tray is properly inserted into the slot to prevent the water flow from going onto the table. The drip tray is able to collect 450 ml of water.
- After all the water has drained off, close the drain switch and put 800ml of fresh water into the cavity.
- Open the drain switch (drag the switch forward at a 90 degree angle), and drain the water inside the cavity into the drip tray. It will be necessary to drain the water twice.
ATTENTION:
1) You must always use clean water:
2) Make sure that the drip tray is inserted correctly in the slot to prevent the water flow from going to the table.
3) The drip tray is able to collect 450ml of water.
TAP CLEANING MECHANISM
This appliance complies with the rules of hygiene, it is therefore necessary to clean it before using it for the first time and after a long period of inactivity, clean the whole machine with a dry cloth. If not, perform the cleaning operations as follows:
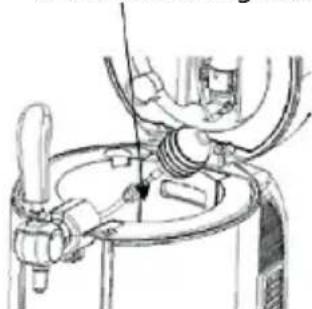
- Fill the cleaning kit with hot water.
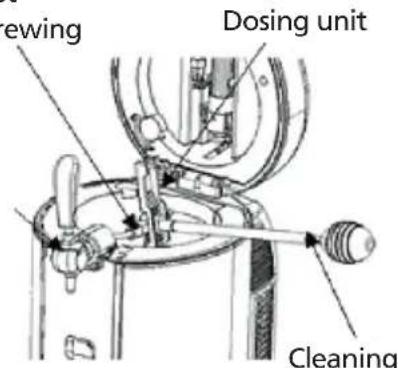
- Connect the end of the piercing pin, run the water into the pin to clean the pin tube, and push the water out of the beer tube at the opposite end. Repeat these cleaning operations until the beer pipe is clean (at least 3 bottles of hot water will be needed), please clean the
beer tap mechanism. Note: Please disassemble the tap when cleaning operations are carried out.
Beer connector must connect with the brewing unit
Open the tap when cleaning the hose
Beer connector must connect with the cleaning bottle
natural_image
Technical line drawing of a mechanical assembly with no visible text or symbolsCleaning bottle
WARNING:
Never put parts of the faucet mechanism in a washing machine or dishwasher;
Never use chemical detergents to clean the parts, it is recommended to use warm or purified water.
ACCESSORIES INCLUDED WITH THE APPLIANCE
| Art Name Pcs Installation Picture Spare parts | |||||
| 1 Connector Gasket 6 Regulating valve 5 pz |  | ||||
| 2 CO2 Connector 2 Regulating valve | 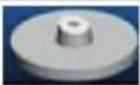 | 1 pz | |||
| 3 Beer pipe 2 | Connector beer outlet | 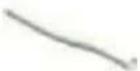 | 1 pz | ||
| 4 Seal circle of the tube | 4 Beer pipe in ticket | 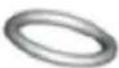 | 3 pz | ||
| 5 Barrel seal 2 Standard barrel | 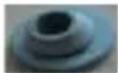 | 2 pz | |||
| 6 Pressurized adapters 3 Pressurized barrel | 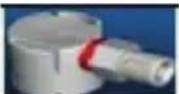 | 1 set | |||
| 7 Cleaning bottle 1 | Cleaning Pipe | 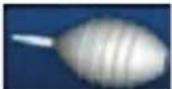 | 1 pz | ||
REPLACE THE CO2 CONNECTOR AND SEALING WASHER
The CO2 connector and sealing washer can be damaged when used incorrectly or for other reasons other than those intended, if so, please replace them with new ones.
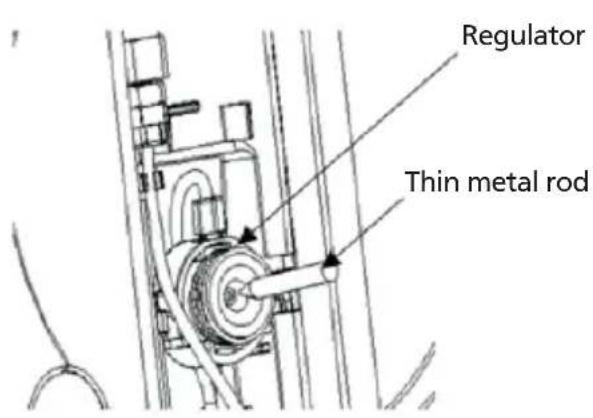
- First of all, choose the sealing washer with a very small metal stick (as shown in figure 31) and take out the CO2 connector (if only the sealing washer is to be replaced, this operation can be omitted). Be careful not to damage the other parts of the regulator.
- Install a new CO2 connector into the regulator (leave the tip out) and install the sealing washer (as shown in Figure 32). When replacing, do not remove the other parts of the regulator.
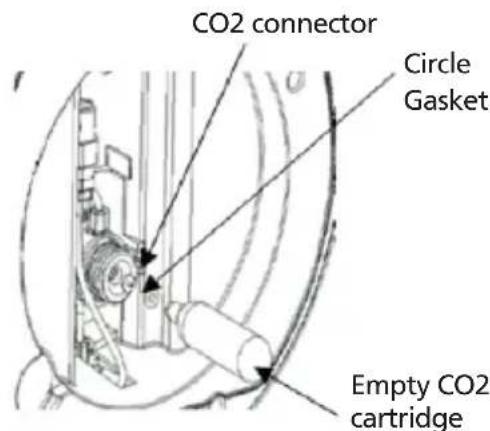
Warning: Remember to press the seal circle with empty cartridge instead of a new cartridge, or it will cause danger.
TO CHANGE THE BEER TUBE
Please replace the beer hose in case it is damaged and there is a leak.
- Lower the beer tube lock and pull the tube out.
- Unscrew the pipe joint nut and pull it out.
- Replace with a new tube and install it in reverse.
NOTE: Do not touch the other screws when replacing the tube, otherwise it could cause beer or gas leaks.
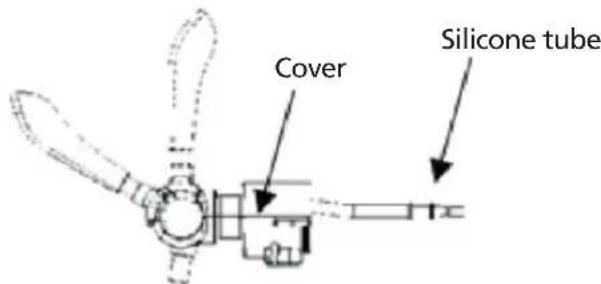
1) Turn the tap to the release state, and then open the lid to clear silicone tube.
2) Replace a new silicone beer tube, and install it according to with the reverse procedure.
REPLACE THE SEALING CIRCLE OF THE BEER TUBE
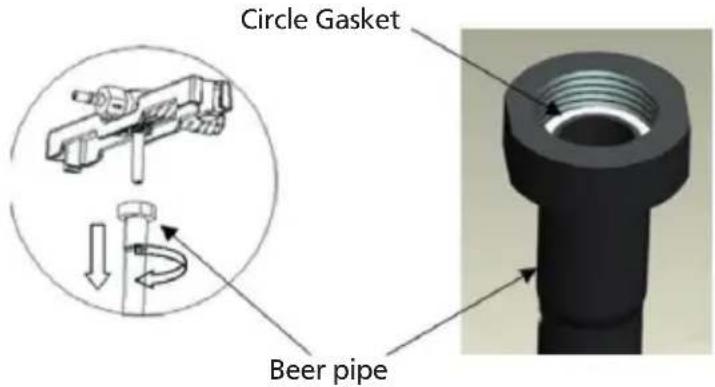
If the connector is leaking, replace the sealing circle of the beer tube with a new one.
- Rotate the beer tube as shown in the figure below
- Pull out the sealing ring of the beer tube
- Replace the rim with a new one in the same position
- Rotate the sealing circle tightly to avoid leakage
MAINTENANCE
If the appliance does not work properly, please call the service center; To save time and money, please check the "Troubleshooting" section below before contacting technical support as it lists possible causes and minor malfunctions that can also be repaired by the user.
PROBLEM SOLVING
| PROBLEM CAUSES TROUBLESHOOTING | ||
| The tap does not work / the beer cannot be poured | 1. The casting tube is incorrectly connected or the CO2 flow is turned off;2. No kegs or no beer in keg;3. There is no gas in the CO2 cartridge;4. The CO2 pressure adjustment knob is closed. | 1. Connect the casting tube tightly and turn on the CO2 flow2. Insert a new keg3. Insert a new CO2 cartridge4. Turn the CO2 pressure regulator knob to the “+” position |
| Too many bubbles | 1. Beer is being tapped incorrectly;2. The temperature of the beer is high (preferably 3-5 °C)3. The keg was shaken before use;4. There is very little beer left in the keg;5. There is too much pressure in the barrel. | 1. Tap the beer correctly;2. Let the beer cool until it reaches 3-5 °C;3. Remove the keg from the appliance and let it rest for a while until there is no more foam;4. Insert a new keg5. Adjust the “-” direction pressure knob to decrease the pressure or close the knob. |
| The beer flows too slowly | 1. The internal pressure of CO2 is not high enough;2. Connection pipe or casting pipe is leaking | 1. Adjust the pressure knob to release more CO2 pressure or replace the cartridge.2. Check whether the hose is leaking or not, if so, replace the tube. |
RATING LABEL
Innoliving Spa
Via Merloni 2/B - 60131 Ancona - Italy
INN-858 SPILLATORE PER BIRRA - BEER DISPENCER
Class II
Climate Type N/SN
Capacity 5L
AC Voltage 220-240V\~ · Frequency 50Hz · AC Power 65W
Cyclopentane C5H10


The product complies with all the applicable
regulations

Read carefully the user manual

Food contact

Class II insulated electrical appliance
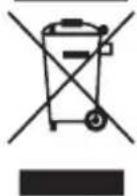
INFORMATION TO USERS according to Legislative Decree No. 49 of March 14, 2014 "2012/19/UE Implementation of the Directive on Waste Electrical and Electronic Equipment (WEEE)"
The crossed-out dustbin symbol indicates that the product at the end of its life must be collected separately from other waste. The user should, therefore, take the equipment with the essential components at the end of its useful life to the separate collection center of electronic and electrical waste, or return it to the retailer when purchasing new equipment of equivalent type, in ratio of one to one, or one to zero for devices with larger side less than 25 CM. The separate collection for the decommissioned equipment for recycling, treatment and environmentally compatible disposal contributes to avoid possible negative effects on the environment and human health and promotes recycling of the materials. Improper disposal of the product by the user entails the application of administrative sanctions according to Legislative Decree No. 49 of 14 March 2014.
GB
innoliving easy tech, easy life
Innoliving Spa Via Merloni, 2/B 60131 Ancona Italy Tel 071 2133550 www.innoliving.it
MADE IN CHINA
CE
- innoliving easy tech, easy life
- Note:
- AVVERTENZA:
- SAFETY INSTRUCTIONS AND WARNINGS
- PRODUCT DESCRIPTION:
- HOW TO CHOOSE BEER KEGS
- SEALANT FOR KEGS
- INSTALLATION AND OPERATIONS
- INSTALLATION
- OPERATIONS
- Notice:
- PRESSURIZED DRUMS
- HOW TO LOAD A NEW DRUM
- HOW TO LOAD A NEW CO2 CARTRIDGE (Not needed for pressurized kegs)
- WARNING:
- HOW TO REPLACE THE WATER INSIDE THE COOLING CAVITY
- ATTENTION:
- TAP CLEANING MECHANISM
- REPLACE THE CO2 CONNECTOR AND SEALING WASHER
- TO CHANGE THE BEER TUBE
- REPLACE THE SEALING CIRCLE OF THE BEER TUBE
- MAINTENANCE
- RATING LABEL
- Innoliving Spa
- INN-858 SPILLATORE PER BIRRA - BEER DISPENCER
Brand : Innoliving
Model : INN-858
Category : Beer dispenser