EasyFinger V2 - Fingerprint Reader EasyAccess - Free user manual and instructions
Find the device manual for free EasyFinger V2 EasyAccess in PDF.


| Product Type | Biometric Fingerprint Door Lock |
| Brand | EasyAccess |
| Model | EasyFinger V2 |
| Dimensions (Approx.) | 170 mm (H) x 70 mm (W) x 30 mm (D) |
| Weight (Approx.) | 500 g |
| Power Supply | 4 x AA batteries (1.5V each) |
| Battery Life (Estimated) | 6-12 months depending on usage |
| Fingerprint Capacity | Up to 99 users |
| PIN Code Capacity | Up to 99 users (10 digits max, no 6-digit sequences) |
| Opening Modes | Fingerprint Only, PIN Only, or Fingerprint + PIN |
| Auto Lock-Back Interval | Programmable from 0 to 255 seconds (default 6s) |
| Temporary Unlock Mode (TUM) | Yes, programmable |
| Anti Malicious Use Function | Locks for 3 minutes after 5 failed attempts (programmable) |
| Override Key | Mechanical key override included |
| Scanner Type | Optical fingerprint sensor |
| Indicators | Blue scanner light, red/green LED on keypad |
| Audible Feedback | Beeps for success/failure |
| Material | Zinc alloy, plastic |
| Color | Black/Silver (typical) |
| Operating Temperature | -10°C to 60°C |
| Humidity | Up to 95% non-condensing |
| Maintenance | Clean scanner with soft dry cloth; replace batteries as needed |
| Spare Parts / Repairability | Batteries, screws; contact dealer for internal components |
| Certifications | CE, RoHS (typical) |
Frequently Asked Questions - EasyFinger V2 EasyAccess
User questions about EasyFinger V2 EasyAccess
0 question about this device. Answer the ones you know or ask your own.
Ask a new question about this device
Download the instructions for your Fingerprint Reader in PDF format for free! Find your manual EasyFinger V2 - EasyAccess and take your electronic device back in hand. On this page are published all the documents necessary for the use of your device. EasyFinger V2 by EasyAccess.
USER MANUAL EasyFinger V2 EasyAccess
SE INNEHÅLLSFÖRTECKNING
PROGRAMERINGANVISNING 22 - 29
Fingerprint User Programming....32
PIN Code User Programming......33
Program Opening Modes ....35
Auto Lock-back Interval....37
Anti Malicious Use Function ....37
Inside lock Prog. Instructions....38
Outside lock use Instructions......38
Inside lock use Instructions ....39
Notes 19 and 30
TAKK FOR AT DU HAR VALGT ET EASY ACCESS PRODUKT.
VI HÅPER DU BLIR FORN∅YD.
TACK FÖR ATT DU HAR VALT EN EASY ACCESS PRODUKT.
VI HOPPAS DU BLIR NÖJD.
THANK YOU FOR CHOOSING EASY ACCESS.
WE HOPE YOU WILL BE SATISFIED WITH OUR PRODUCT.

EasyAccess
FINGERPRINT TECHNOLOGY
MONTERINGSVEILEDNING

natural_image
Abstract illustration of white interlocking gears on a black dotted grid background, with a red square marker labeled '4' in the bottom right corner.natural_image
Yellow and black electric drill with red diagonal lines (no text or symbols)natural_image
Close-up of a red-orange glass tube being heated by a black electronic device with two metallic connectors (no visible text or symbols)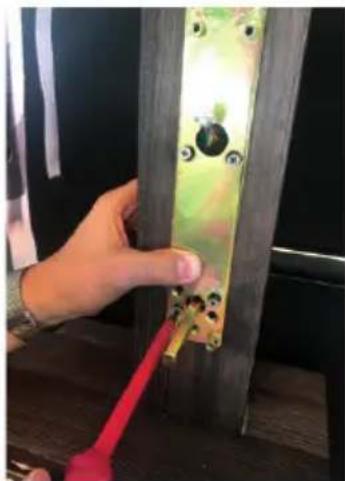
natural_image
Hand adjusting a mechanical component with a red tool, no visible text or symbols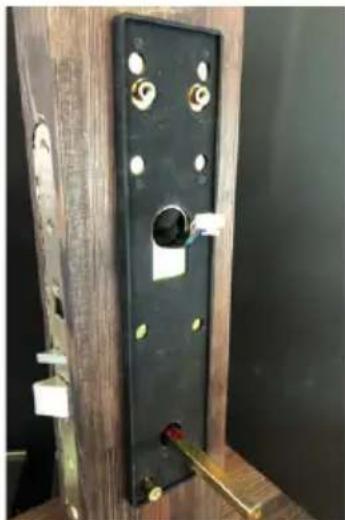
natural_image
Close-up of a black double door with circular cutouts and a metal bracket inserted, mounted on a wooden wall (no text or symbols visible)
MONTERINGSVEILEDNING
3. Innvendig enhet
natural_image
Close-up of a hand inserting a green electronic component into a device (no visible text or symbols)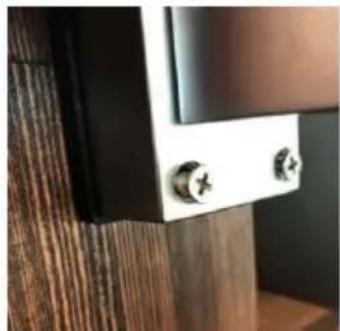
natural_image
Close-up of a wooden door handle with two buttons and textured wood paneling (no text or symbols visible)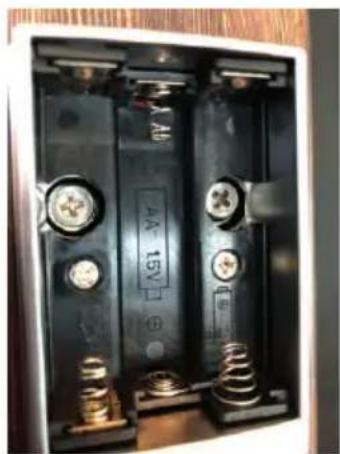
natural_image
Close-up of a black battery pack with two side panels, each containing a resistor and a metal spring (no visible text or symbols)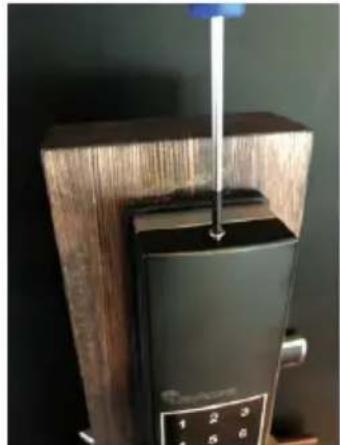
natural_image
Close-up of a black thermosier with a blue screwdriver inserted into a wooden frame (no visible text or symbols)SJEKKLISTE
natural_image
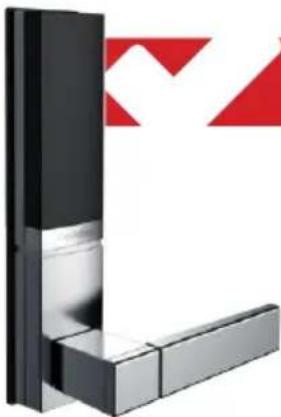
3D rendering of a metallic L-shaped object with a red triangular logo in the background (no text or symbols)SJEKKLISTE
VIKTIG! F∅R DU LUKKER D∅REN, SJEKK AT LÅSEN OPPF∅RER SEG NORMALT.
natural_image
Close-up of a metallic mechanical device with wooden frame and keychain, no visible text or symbols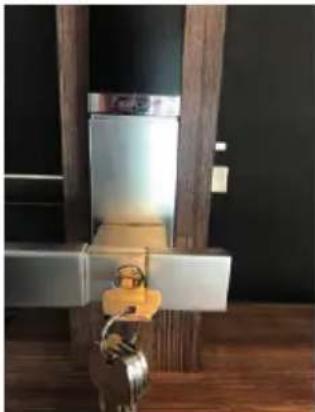
natural_image
Close-up of a metallic mechanical component mounted on a wooden floor, with no visible text or symbols.VIKTIG! PR∅V ALLTID LÅSEN F∅R DU LUKKER D∅REN. For å legge inn nye brukerer/masterkoder, se egen manual.
SLIK BRUKER DU KODELÅSEN
SLIK BRUKER DU FINGERAVTRYKSLÅS
natural_image
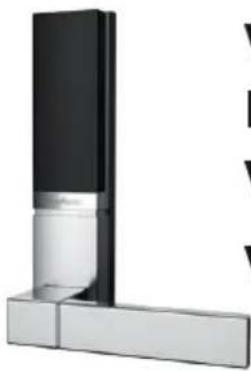
Modern minimalist design with black and silver vertical panels mounted on a gray base (no text or symbols)Velkommen til en introduksjon i bruken av EasyAccess' biometriske adgangssystemer. VÅRE SYSTEMER GIR ADGANG VIA FINGERAVTRYKK.
Husk!
natural_image
3D rendering of a black EasyAccess container with a white L-shaped base, set against a perforated wall (no text or symbols on the main object)PROGRAMMERINGSVEILEDNING TIL EASYFINGER v2
PROGRAMMERE FINGERAVTRYKK
Available on the iPhone
App Store
natural_image
3D rendering of a modern modular device with a perforated wall and a labeled 'EasyAccess' section (no other text or symbols visible)PROGRAMERINGSANVISNING TILL EASYFINGER v2
PROGRAMMERING AV FINGERAVTRYCK
natural_image
3D rendering of a modern modular device with a perforated wall and a labeled 'EasyAccess' section (no other text or symbols visible)PROGRAMMING THE EASYFINGER v2
FINGERPRINT USER PROGRAMMING
1. Program Master Fingerprint User #1
Fully lift the black sliding cover up. Press ## on the touch screen keypad, and then place the finger on the scanner when the blue scanner lights up, and then move the finger away and plase it one moer time on the scanner. The programming succeeds when one long beep is heard. The default User ID of Master Fingerprint User #1 is 01.
2. Program Master Fingerprint User #2 & #3
Press ## on the touch screen keypad. Place the finger of Master User #1's on the scanner when the blue scanner lights up. When one long beep is heard and the green LED on the keypad lights up, the verification succeeds. Enter the User ID 02 or 03 and * button. Place the finger on the scanner when the scanner lights up again for enrollment, remove the finger and plase it one more time on the scanner. When one long beep is heard, the programming succeeds.
3. Program general fingerprint users
The users with ID from #4 to #99 are all general users.
Press ## on the touch screen keypad. Place one of the master fingers on the scanner when the blue scanner lights up. When one long beep is heard and the green LED on the keypad lights up, the verification succeeds. Enter the User ID (for example 08) and * button. Place the finger on the scanner when the scanner lights up again for enrollment, remove the finger and plase it one more time on the scanner.. When one long beep is heard, the programming succeeds.
NOTES!
-
During the above operations, whenever the red LED flashes three times, the operation fails. Please follow the previous steps to try again. If it keeps failing, please change the fingers and try again.
-
As soon as one user is programmed, the keypad and green LED will light on for 5 seconds. Programming for the other fingerprint users can be proceeding without any more master fingerprint verification. If you want to quit from programming, just press any non-numeric button on the outside keypad and close the black cover.
4. Delete Fingerprint Users
Fully lift the black cover up and press ## on the touch screen keypad. Place one of the master fingers on the scanner for verification when the blue scanner lights up. When one long beep is heard and the green LED on the keypad lights up, the verification succeeds.
Enter the ID number of the user that you want to delete (for example 07) and # button. When the green light on the keypad flashes three times and three long beeps are heard, the user has
PROGRAMMING THE EASYFINGER v2
been removed successfully. Sequence: ##master fingerprint07#
NOTE! As soon as one user is deleted, the red LED and the keypad will light on for 5 seconds. Other users can be deleted without any more master fingerprint verification. If you want to quit from the processes, just press any non-numeric button on the outside keypad and close the black cover.
PIN CODE USER PROGRAMMING
NOTES:
- The PIN code can be 10 digits max. and one digit min. each with no 6 digits allowed. It can be any combination from 0 to 9 each.
- There are totally 99 PIN code users that can be enrolled.
- The default factory-set master PIN code is 123.
- PIN codes can be enrolled one after another with the same sequence as long as the keypad lights on. If you want to quit, just press any non-numeric button at the outside keypad.
- PIN Code #1 and #2 are both master codes.
1. Program Master PIN Code User #1
Enter * 123 * (red LED flashes one time and green LED flashes three times) 01 (green LED flashes one time) New Master PIN PIN Code * (green LED flashes one time)+ New Master PIN Code again *.
FOR EXAMPLE
If the new Master PIN code of User ID 01 is 12345, here is the programming sequence.
* 123 * 0112345 * 12345 *
When the red LED flashes one time, the green LED lights on and one long beep is heard, the new #1 Master PIN Code is programmed successfully. If the red LED flashes one time following any of the above operations, the programming fails. Please check it and repeat the previous operation steps.
2. Program Master PIN Code User #2
Enter * Master PIN Code #1 * (red LED flashes one time green LED flashes three times) 02 (green LED flashes one time) + Master Code #2* (green LED flashes one time) Master Code #2 again *.
PROGRAMMING THE EASYFINGER v2
FOR EXAMPLE
If Master PIN code #1 is 12345, and Master PIN code #2 is 45678, here is the programming sequence. * 12345* 0245678 * 45678 *
When the red LED flashes one time, the green LED turns on and one long beep is heard, the new PIN code is enrolled successfully. If the red LED flashes one time following any of the above operations, the setting fails. Please check it and repeat the previous operation steps.
3. Program general PIN code Users
NOTE! Users with ID from 03 to 99 are all general users.
Enter * Master Code* (red LED flashes one time green LED flashes three times) General User ID (green LED flashes one time) General User Code* (green LED flashes one time) General User Code again *
FOR EXAMPLE
If the Master Code 12345, the General User ID is 08 and the General User Code is 32433, here is the programming sequence. * 12345*0832433 *32433*
When the red LED flashes one time, the green LED turns on and one long beep is heard, the new PIN code is enrolled successfully. If the red LED flashes one time following any of the above operations, the setting fails. Please check it and repeat the previous operation steps.
4. Change PIN codes
Enter *Master PIN Code *User ID + New User code * New User code again *
FOR EXAMPLE
If the Administrator PIN code 12345, the User ID is 06 and the user code is going to be changed to 85000, here is the correct sequence for the change.
* 12345* 0685000 *85000*
When the red LED flashes one time, the green LED turns on and one long beep is heard, the User PIN code is changed successfully. If the red LED flashes one time following any of the above operations, the setting fails. Please check it and repeat the previous operation steps.
PROGRAMMING THE EASYFINGER v2
5. Delete PIN Code Users
Enter *Master PIN Code# (red LED flashes one time and green LED flashes three times) User ID to delete.
FOR EXAMPLE
If the Master code 12345, and the User ID to delete is 08, here is the programming sequence. *12345#08
When the red LED flashes one time, the green LED flashes three times and three beeps are heard, the User PIN code is deleted successfully. If the red LED flashes one time following any of the above operations, the deletion fails. Please check it and repeat the previous operation steps.
NOTES!
- PIN Code Users can be deleted one after another as long as the keypad lights on. If you want to quit, just press any non-numeric button at the outside keypad.
- Neither of the Master Code Users can be deleted individually, but it can be done with the lock being reset. Contact the local dealer or the manufacturer for the instructions.
PROGRAM OPENING MODES
There are two opening modes with the EasyFinger V2 that people can choose to open the lock.
- PIN Code or Fingerprint. When this mode is selected, PIN Code or Fingerprint is required for opening the lock.
- PIN code and Fingerprint. When this code is selected, PIN Code and fingerprint are both required for opening the lock.
1. PIN Code or Fingerprint Mode Programming
Enter #3 (green LED flashes one time) Master PIN code # (red LED flashes one time and green LED flashes three times) 0
FOR EXAMPLE
If the Master code 12345, here is the programming sequence.
312345#0
When the green LED turns on and one long beep is heard, the lock is successfully programmed to PIN Code or Fingerprint opening mode. If the red LED flashes three times, the programming fails.
PROGRAMMING THE EASYFINGER v2
2. PIN code and Fingerprint Mode Programming
Enter #3 (green LED flashes one time) Master PIN code # (red LED flashes one time and green LED flashes three times) 2
FOR EXAMPLE
If the Master code 12345, here is the programming sequence. #312345#2
When the green LED turns on and one long beep is heard, the lock is successfully programmed to PIN code & Fingerprint opening mode. If the red LED flashes three times, the setting fails.
NOTE! The default factory-set opening mode is PIN Code or Fingerprint.
AUTO LOCK-BACK MODE (ALM) & TEMPORARY UNLOCK MODE
1. TUM Programming
Enter #1 (green LED flashes one time) Master PIN code # (red LED flashes one time and green LED flashes three times) 1. When the green LED turns on and one long beep is heard, the lock has been programmed to TUM.
FOR EXAMPLE
If the Master code 12345, here is the programming sequence. #112345#1
2. ALM Programming
Enter #1 (green LED flashes one time) Master PIN code # (red LED flashes one time and green LED flashes three times) 0. When the green LED turns on and one long beep is heard, the lock has been programmed to ALM.
FOR EXAMPLE
If the Master code 12345, here is the programming sequence. #112345#0
NOTES!
- TUM or ALM will begin to work from the moment that people uses fingerprint or PIN code to open the lock after the programming is done.
- The default factory-set mode is ALM.
PROGRAMMING THE EASYFINGER v2
AUTO LOCK-BACK INTERVAL PROGRAMMING
Enter #4 (Green LED flashes one time) Master PIN Code# (Red LED flashes one time and green one flashes three times) Auto Lock-back Interval (000\~255 seconds).
FOR EXAMPLE
If the Master code 12345 and the auto lock-back interval is 9 seconds, here is the programming sequence. #412345#009
NOTES!
- If the auto lock-back interval is 9 seconds, that means the outside handle will be locked back in 9 seconds after the lock is opened.
- The default factory-set auto lock-back interval is 6 seconds.
ANTI MALICIOUS USE FUNCTION PROGRAMMING
1. Activate the Anti Malicious Use function
Enter #2Mater PIN code # (red LED flashes one time and green LED flashes three times)1. When the green LED turns on and one long beep is heard, the function has been activated.
FOR EXAMPLE
If the Master code 12345, here is the programming sequence. #212345#1
2. Deactivate the Anti Malicious User function
Enter #2 Master PIN code # (red LED flashes one time and green LED flashes three times) 0. When the green LED turns on and one long beep is heard, the function has been deactivated.
FOR EXAMPLE
If the Master code 12345, here is the programming sequence. #212345#0
NOTES!
- When the Anti Malicious User function is activated, the lock will enter the temporary sleeping mode if there are 5 continuous access attempts with non-enrolled fingerprints or PIN codes with the lock.
- This condition will last 3 minutes once it happens.
- The Anti Malicious Use function is deactivated from the factory.
PROGRAMMING THE EASYFINGER v2
INSIDE LOCK PROGRAMMING INSTRUCTIONS
Program the Inside PIN Code
Notes:
- The default factory-set inside PIN code is 123.
- There's only one unlock code (from 1\~9 digits) that can be programmed to the inside lock.
On the touch screen keypad of the inside lock, enter *123* (Green LED flashes three times) New Inside Code* (Green LED flashes one time) New Inside Code again*
FOR EXAMPLE
If the new inside code 123456, here is the programming sequence. *123*123456*123456*
Inside unlock mode programming
When the inside lock is in lock mode, enter the programmed Inside Code* or # on the inside keypad to switch the inside lock to unlock mode
Inside lock mode programming
When the inside lock is in unlock mode, enter the programmed Inside Code * or # on the inside keypad to switch the inside lock to lock mode.
OUTSIDE LOCK USE INSTRUCTIONS
1. Unlock with programmed fingerprints
When the black cover closes: Lift the black cover up to the first step (or fully lift the cover up to the top of the lock). Rest the programmed finger on the scanner when blue light turns on. When one single beep is heard, the green LED turns on and motor running is heard, push down on the outside handle to unlock. If three beeps are heard and the red LED flashes, the verification fails and the access is rejected.
When the black cover opens: Press *# to activate the scanner. Rest the programmed finger on the scanner when blue light turns on. When one single beep is heard, the green LED turns on and motor running is heard, push down on the outside handle to unlock. If three beeps are heard and the red LED flashes, the verification fails and the access is rejected.
PROGRAMMING THE EASYFINGER v2
2. Unlock with programmed PIN codes
Fully lift the black cover up to the top of the lock. And then enter the programmed PIN code and # or * directly on the touch screen keypad. When one single beep is heard, the green LED turns on and motor running is heard, push down on the outside handle to unlock. If three beeps are heard and the red LED flashes, the verification fails and the access is rejected.
3. Unlock with PIN Code & Fingerprint
Enter the programmed PIN code and # on the outside touchscreen keypad. When the blue scanner turns on, rest the finger under the same User ID on it. When one single beep is heard, the green LED powers on and the motor running is heard, push down on the outside handle to unlock. If three beeps are heard and the red LED flashes, the verification fails and the access is rejected.
4. Unlock with the override keys
Slide open the keyhole cover on the outside handle, and then insert the key vertically. Turn the key 90 degrees clockwise, and then push down on the outside handle to unlock. After the lock is open, turn the key 90 degrees anti-clockwise to get it out of the keyhole.
INSIDE LOCK USE INSTRUCTIONS
When the inside lock is in unlock mode:
1) Press the # button on the inside keypad to run the outside motor, then push down on the inside handle to unlock.
OR
2) Just directly push down on the inside handle to unlock without activating the outside motor.
When the inside lock is in lock mode:
Enter the inside code and * or # to switch the inside handle to unlock mode.
When the inside motor running is heard, push down on the inside handle to unlock.

EasyAccess
FINGERPRINT TECHNOLOGY
Smiegata 2
2750 Gran
Norge
Tlf. +47 45 49 29 23
- SE INNEHÅLLSFÖRTECKNING
- PROGRAMERINGANVISNING 22 - 29
- TAKK FOR AT DU HAR VALGT ET EASY ACCESS PRODUKT.
- TACK FÖR ATT DU HAR VALT EN EASY ACCESS PRODUKT.
- EasyAccess
- FINGERPRINT TECHNOLOGY
- MONTERINGSVEILEDNING
- Innvendig enhet
- SJEKKLISTE
- VIKTIG! F∅R DU LUKKER D∅REN, SJEKK AT LÅSEN OPPF∅RER SEG NORMALT.
- SLIK BRUKER DU FINGERAVTRYKSLÅS
- Velkommen til en introduksjon i bruken av EasyAccess' biometriske adgangssystemer. VÅRE SYSTEMER GIR ADGANG VIA FINGERAVTRYKK.
- Husk!
- PROGRAMMERINGSVEILEDNING TIL EASYFINGER v2
- PROGRAMMERE FINGERAVTRYKK
- PROGRAMERINGSANVISNING TILL EASYFINGER v2
- PROGRAMMERING AV FINGERAVTRYCK
- PROGRAMMING THE EASYFINGER v2
- FINGERPRINT USER PROGRAMMING
- Program Master Fingerprint User #1
- Program Master Fingerprint User #2 & #3
- Program general fingerprint users
- NOTES!
- Delete Fingerprint Users
- PIN CODE USER PROGRAMMING
- NOTES:
- Program Master PIN Code User #1
- Program Master PIN Code User #2
- FOR EXAMPLE
- Program general PIN code Users
- Change PIN codes
- Delete PIN Code Users
- PROGRAM OPENING MODES
- PIN Code or Fingerprint Mode Programming
- 312345#0
- PIN code and Fingerprint Mode Programming
- AUTO LOCK-BACK MODE (ALM) & TEMPORARY UNLOCK MODE
- TUM Programming
- ALM Programming
- AUTO LOCK-BACK INTERVAL PROGRAMMING
- ANTI MALICIOUS USE FUNCTION PROGRAMMING
- Activate the Anti Malicious Use function
- Deactivate the Anti Malicious User function
- INSIDE LOCK PROGRAMMING INSTRUCTIONS
- Program the Inside PIN Code
- Inside unlock mode programming
- Inside lock mode programming
- OUTSIDE LOCK USE INSTRUCTIONS
- Unlock with programmed fingerprints
- Unlock with programmed PIN codes
- Unlock with PIN Code & Fingerprint
- Unlock with the override keys
- INSIDE LOCK USE INSTRUCTIONS
- When the inside lock is in lock mode:
Brand : EasyAccess
Model : EasyFinger V2
Category : Fingerprint Reader