Stellar NX ODY-2017BF2 - Drone Odyssey - Free user manual and instructions
Find the device manual for free Stellar NX ODY-2017BF2 Odyssey in PDF.

| Product Type | Quadcopter Drone |
| Brand | Odyssey |
| Model | Stellar NX ODY-2017BF2 |
| Dimensions (Unfolded) | 35 x 35 x 8 cm |
| Dimensions (Folded) | 18 x 12 x 8 cm |
| Weight | 245 g (including battery) |
| Maximum Flight Time | 25 minutes |
| Battery Capacity | 3.7V 1800mAh Li-Po |
| Charging Time | 90 minutes |
| Camera Resolution | 4K UHD (3840x2160) with 110° FOV |
| Video Stabilization | Electronic Image Stabilization (EIS) |
| Maximum Video Resolution | 4K@30fps |
| Photo Resolution | 12 MP |
| Control Range | Up to 800 meters |
| GPS Mode | GPS + GLONASS |
| Obstacle Avoidance | Forward and downward sensors |
| Flight Modes | Follow Me, Waypoints, Altitude Hold, Return-to-Home |
| Maximum Speed | 15 m/s (54 km/h) |
| Frequency Band | 2.4 GHz |
| SD Card Support | Micro SD up to 64 GB (Class 10) |
| Controller | 2.4 GHz remote controller with smartphone holder |
| App Compatibility | Odyssey Fly (iOS and Android) |
| Material | High-strength ABS plastic |
| Maintenance and Cleaning | Use a soft brush to remove dust; wipe with a dry cloth; store in a cool, dry place |
| Safety Features | Low battery automatic return, loss of signal return, propeller guards |
| Spare Parts and Repairability | Available: propellers, landing gear, camera module, battery; user-replaceable with basic tools |
Frequently Asked Questions - Stellar NX ODY-2017BF2 Odyssey
User questions about Stellar NX ODY-2017BF2 Odyssey
0 question about this device. Answer the ones you know or ask your own.
Ask a new question about this device
Download the instructions for your Drone in PDF format for free! Find your manual Stellar NX ODY-2017BF2 - Odyssey and take your electronic device back in hand. On this page are published all the documents necessary for the use of your device. Stellar NX ODY-2017BF2 by Odyssey.
USER MANUAL Stellar NX ODY-2017BF2 Odyssey
natural_image
Blue quadcopter drone with four propellers and camera lens (no text or symbols visible)Thank you for your purchase of the Stellar NX Camera Drone. You're just moments away from creating stunning aerial acrobatics!
WHAT'S IN THE BOX!
1 Stellar NX Drone Unit
2 2.4 GHz Transmitter
3 USB Charging Cable
4 3.7V Rechargeable Lithium Battery
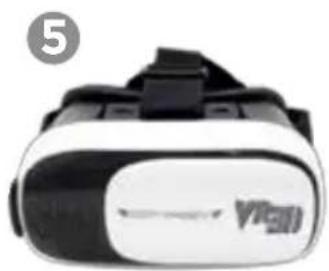
5 VR 3D Headset
6 Spare Propellers
7 Smartphone Holder (not shown)
2
natural_image
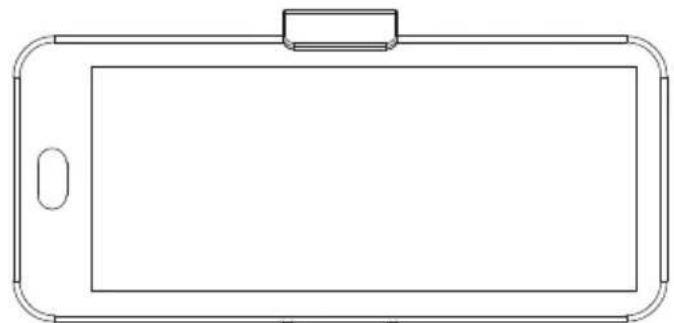
Line drawing of a smartphone with rounded corners and a rectangular top (no text or symbols)4
natural_image
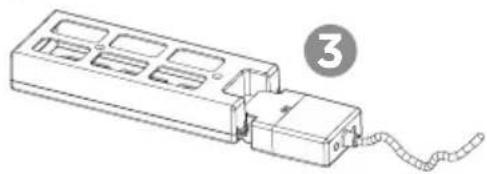
Line drawing of a mechanical device with a coiled cable and labeled component (no text or symbols)SPEED SWITCH LONG PRESS: HEADLESS MODE
LEFT JOYSTICK CONTROLS ALTITUDE & ROTATION
AUTO TAKE-O F F/ AUTO LANDING
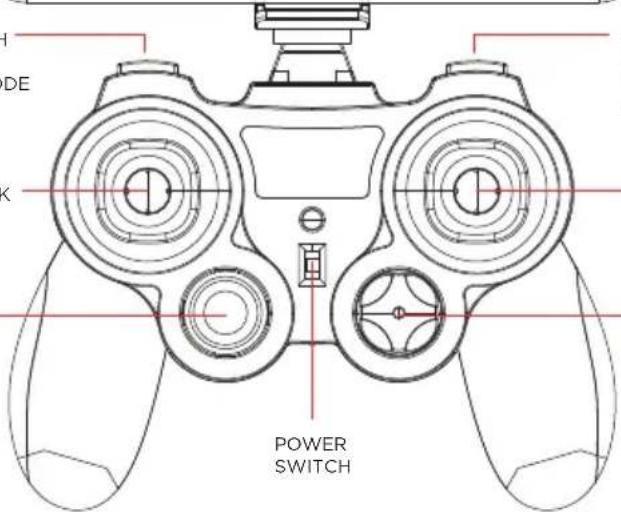
SHORT PRESS: CAPTURE PHOTO LONG PRESS: CAPTURE VIDEO
RIGHT JOYSTICK CONTROLS YAW, DIRECTION & FLIPS
TRIM ADJUSTMENTS
natural_image
Black and white VR headset with visible branding (no text or symbols on body)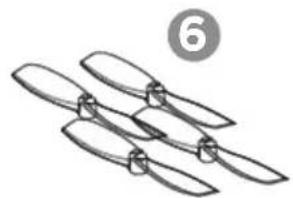
natural_image
Illustration of three propeller blades with a numbered circle (6) above, no text or symbols present.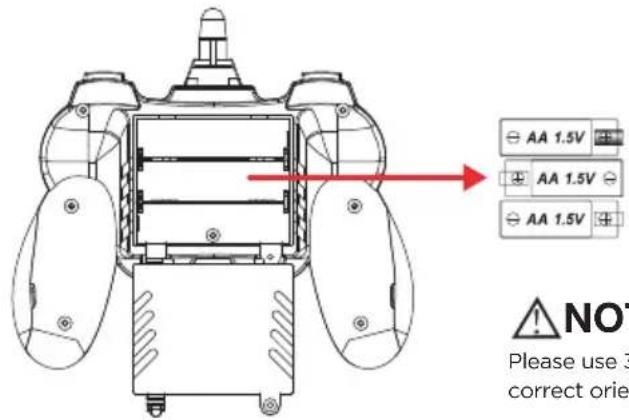
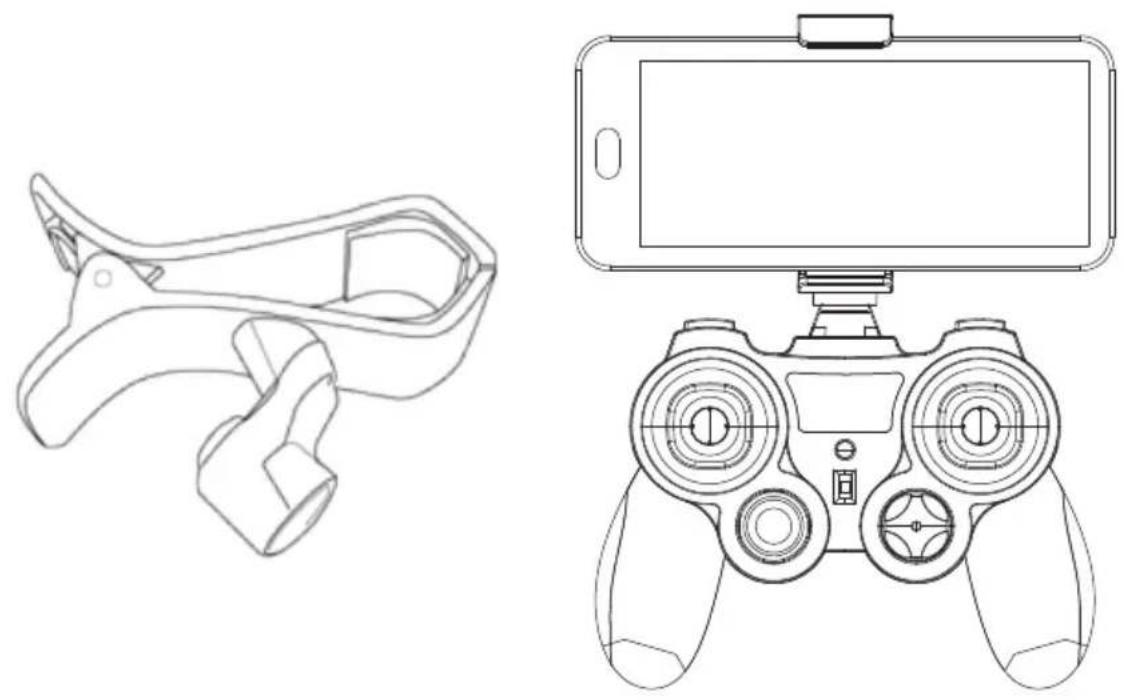
Unscrew the screw holding the battery lid to the body. Then lightly pull the clip down to pull the lid away from the transmitter body.
Insert 3 x AA batteries into the battery compartment, making sure to match the polarities. Then replace the lid and firmly tighten the screw to secure the battery compartment.
NOTICE
Please use 3 AA batteries. Use the polarity markings to install in the correct orientation. Do not mix batteries of different types.

CAUTION
If the Radio Control Transmitter will not be used for extended periods of time, please remove the batteries.

WARNING
Please check the AA batteries routinely. If the AA batteries are left within the Radio Control Transmitter, potential leakage and/or corrosion may occur, which can damage the transmitter and create a fire hazard.
CHARGING THE Stellar NX DRONE
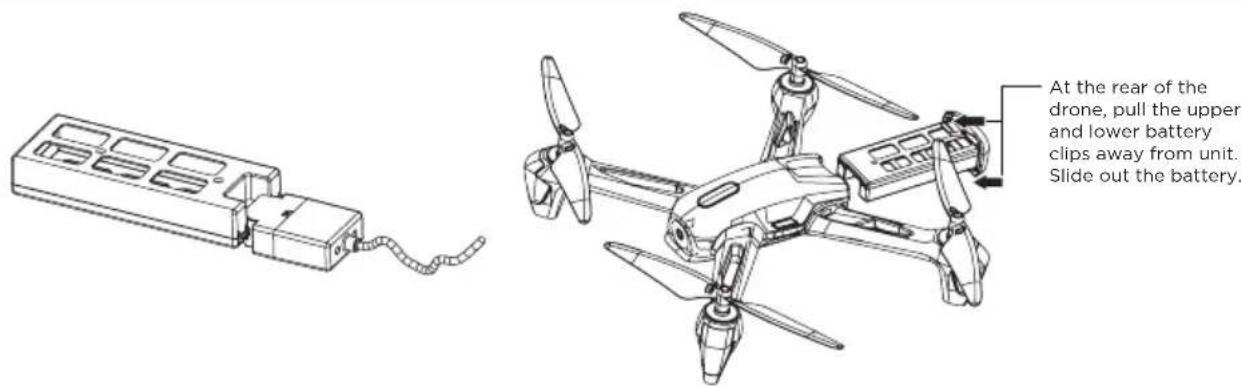
- At the rear of the drone, pull the upper and lower battery clips away from unit. Slide out the battery.
- Connect the USB charging cable and the battery.
- Insert the USB connection of the charging cable into a powered USB computer port. Please note: Not all USB ports provide power. Typically, only ports directly on a computer, and not through a peripheral, will provide enough power for charging.
- A complete charge will take approximately one hour. The LED on the battery will turn off when charging is complete.
- When the battery is fully charged, immediately disconnect the charging cable from the battery and reinstall the battery into the Stellar NX drone.

NOTICE
When charging with the included USB cable, the LED light will light up red, indicating it is charging. Once charging is complete, the LED light will turn off. Discontinue charging immediately.
WE RECOMMEND!
The Stellar NX battery comes partially charged and is ready to fly. Refer to Remote Control Battery Installation section and use your Stellar NX now. Use this charge completely before charging the Stellar NX battery for the first time.
Your Stellar NX Camera Drone comes with a plastic smartphone holder equipped with a compression clip that lets you view the Stellar NX's footage as it flies. This is done via the ODY Stellar NX app that you can download for free. Please refer to the ODY Stellar NX App Menu & Guide included in your package for further instructions on how to utilize the free app with your drone.
natural_image
Line drawings of a handheld gaming device and a smartphone controller (no text or symbols)Take your smartphone and insert it into the clip until it has a secure hold. Attach the smartphone holder to your remote control transmitter, start up the ODY Stellar NX App and you are good to go!
PAIR THE UNIT WITH THE REMOTE CONTROL & START TO FLY
Step 1: Switch on the Drone. The LED lights will start to blink.
Step 2: Turn on the Remote Transmitter. Its power light will illuminate. Wait 5-7 seconds for the electronic gyro to stabilize*.
Step 3: Push the throttle (left) stick up to the 12 o'clock position and then down to the 6 o'clock position. As the remote transmitter searches for the Drone, the power light on the transmitter blinks rapidly.
Step 4: Connection is complete once the power light and the LEDs on the Drone stop blinking. The video feed will also come up on the screen. You're ready to fly!

NOTICE
*Be sure to place the quadcopter on a level surface to ensure a proper and neutral alignment of the gyro.
GOING TO FLIGHT SCHOOL • CONTROLLING THE STELLER NX UNIT
| ASCEND/DESCEND | Ease the throttle(left stick) upward in order to make the Stellar NX go higher.Ease the throttle(left stick) downward in order to make the Stellar NX lower in altitude. | 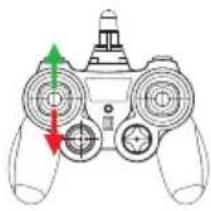 | 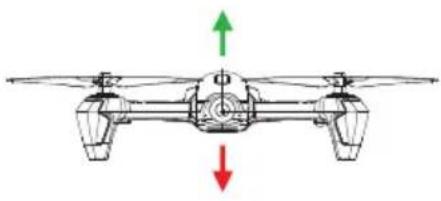 |
| FLYING,DIRECTIONS,& TURNING | Use the right stick,(Directional Stick) to move forward or backward. Normally, the Stellar NX's "front" is the cockpit.Push the throttle stick left or right to make the Stellar NX rotate in that particular direction. | 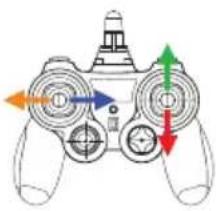 | 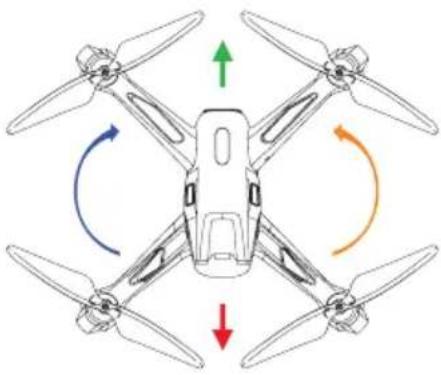 |
| Pressing Right or Left on the Directional stick will strafe the Stellar NX in that direction according to the cockpit. | 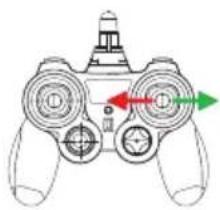 | 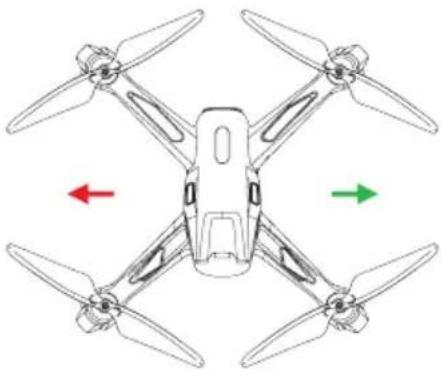 |
ADVANCED FEATURES • ALWAYS-ON AUTO HOVER & 360°F FLIPS
ALWAYS-ON AUTO HOVER
Your Stellar NX Drone features an Always-On Auto Hover mode. Just launch the Drone into the sky, take it up to your desired altitude using the left joystick and then release the joystick. The Stellar NX will stay at the desired altitude without further commands needed.
360° FLIP
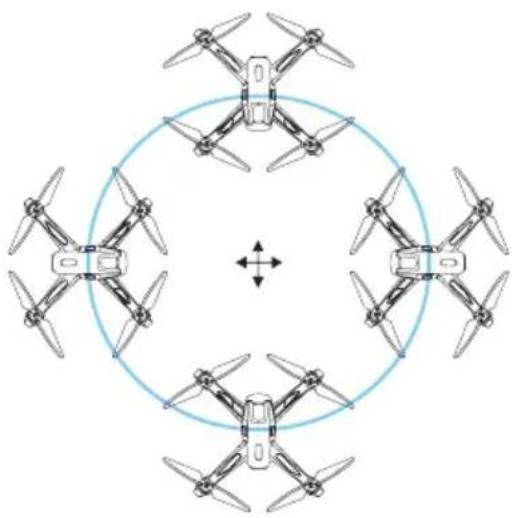
Press the 360 button once on the bottom right of the radio control transmitter to have it perform 360° flip maneuvers!
To protect your unit from crashes, execute flips at an altitude of 10 feet or more. Your Stellar NX will better perform 360° flips when its drone battery is fully charged.

natural_image
Line drawing of a quadcopter drone with propellers and rotor blades (no text or symbols)Stellar NX VIDEO DRONE · ADVANCED FEATURES
natural_image
Symmetrical diagram of six identical drones arranged in a circular pattern with central bidirectional arrow (no text or symbols)
SMARTFLYTECH
HEADLESS FLIGHT
To initiate this mode, hold down the SmartFly button on the left front of the Remote Transmitter until the drone's 4 LED lights begin to flash. To terminate the mode, press the button again until the light turns off.
TIP: Before entering SmartFly Tech Headless Flight, please place on a level surface and confirm that the cockpit at the front of your drone is facing forward in flight.
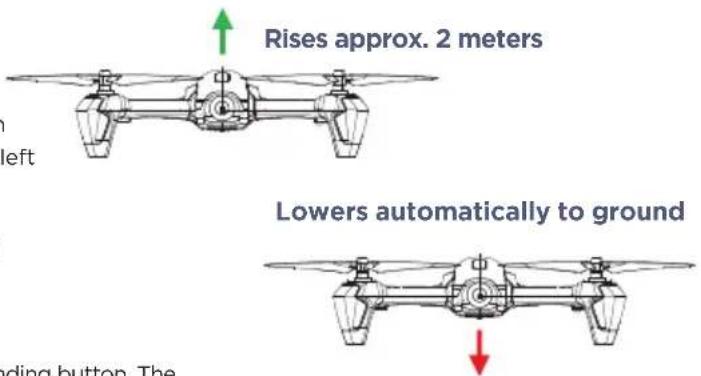
ONE KEY TAKE-OFF & LANDING
To Take Off:
When your drone is ready for takeoff, push the Throttle (left) stick to the top and then release upward and downward until the flashing lights stop flashing, and then position both sticks in their outside diagonal position- left stick bottom left, and right stick bottom right. The propeller will rotate slowly. Then press the Auto Takeoff button. The drone will rise to a height of approximately 6 feet.
To Land :
When your drone is hovering, press the Auto Takeoff/Landing button. The drone will automatically descend to the ground.
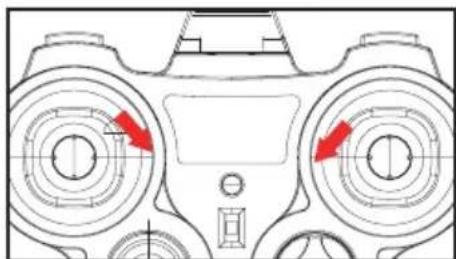
CALIBRATING YOUR REMOTE CONTROL
If the Stellar NX drone tilts to the left or right in flight when it should be hovering, you may need to calibrate trim. To do so:
- Place your drone on a level surface.
- Push both joysticks at the same time to the 5 o'clock position (see diagram) and hold the sticks there for 3 seconds.
- The light indicator will blink rapidly and then return to normal status in about 5 seconds. Your drone trim has been calibrated.

natural_image
Technical diagram of a game controller with two circular gauges and directional arrows indicating motion (no text or labels)FORCE-STOPPING YOUR Stellar NX IN AN EMERGENCY
In case of an emergency, pushing the Throttle (left) joystick to the lower right and the Directional (right) joy stick to the lower left (as shown in the diagram) will stop the drone propellers immediately.
natural_image
Technical line drawing of a vehicle front view with two large circular components and red directional arrows indicating motion or flow (no text or symbols)Please Note: There are faint letters on the underside of the propellers which will help you distinguish blade from blade. The top left and back right blades are A1 and match with the A1 blades and the bottom left and top right are B1 and match with the B1 blades.
Please ensure proper installation of the propellers to fly the drone.
STEP 1: The drone comes with four replacement propellers which should be used in case a propeller is lost or breaks due to an accident.
STEP 2: Match your propellers to each wing by the corresponding letter: A, B, and B, A
STEP 3: Place each propeller on the small pin on the corresponding wing.
RECEIPT PLACEMENT FOR WARRANTY
Adhere your purchase receipt to this section for future reference:
TROUBLESHOOTING
| PROBLEM POS STBSE SOLUTIONS | |
| Transmitter won't power on | Check to make sure the power switch is in the ON position. If set to OFF, move to the ON position. |
| Check to make sure the batteries are installed correctly. Check to make sure they match the polarity markings. | |
| If the batteries are installed correctly, they may be exhausted. Replace with new and fresh batteries. | |
| Lack of control | If your Drone can't be controlled accurately:Make sure the radio control transmitter is set to the ON positionMake sure the battery on the vehicle is installed correctlyThe vehicle may fly erratically if wind conditions are too strong. Fly the vehicle under calm conditions.Make sure the radio control transmitter has paired correctly with the vehicle. If not, power down the vehicle and the radio control and start over. |
| Failure to gain altitude | If the unit fails to go up in altitude or goes up too slowly, try the following:The rotor speed may be too slow to lift the quadcopter sufficiently. Make sure the throttle is being raised sufficiently. If the unit still does not go up or goes up too slowly, the battery of the quadcopter might be too discharged for safe or satisfactory operation. Charge the battery before continuing to fly the unit. |
| Avoid crash landings! | Landing the unit takes skill and practice. If your Drone comes down too fast, it could be damaged. Ease the Drone down by slowly lowering the throttle (left) stick until the unit is safely on the ground. |
TRIM ADJUSTMENT ON THE RADIO CONTROL TRANSMITTER
Correct trim adjustment is required for error and erratic-free flying of the quadcopter. The adjustment is simple to do on the radio control transmitter, but it requires some patience. Please follow the instructions precisely. For best results, move the throttle up and raise the quadcopter approximately 2-3 feet (0.5-1 meter) in altitude.
If the quadcopter moves by itself is slowly or quickly to the left night:
Press the trim control for banking incrementally in the opposite direction of movement.
If the quadcopter moves by itself is slowly quickly based on its row-axis axis:
Press the trim control for rotation incrementally in the opposite direction of movement.
If the quadcopter moves by itself slowly or quickly forwards or backwards:
Press the trim control for forwards and backwards flight incrementally in the opposite direction of movement.
CARE & MAINTENANCE
- Do not submerge the unit in any liquids.
- Keep the unit dry.
-
Disconnect the unit and monitor from USB power sources when not in use.
-
Do not place the unit near powerful, unshielded magnets.
- Do not expose the unit to extreme hot or cold temperatures.
- Do not hit, drop, or smash the unit.
- Do not disassemble the unit for any reason.
NOT FOLLOWING THESE PRECAUTIONS WILL VOID YOUR WARRANTY.
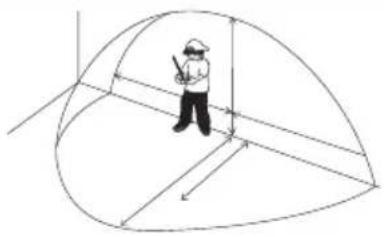
FLYING SAFE - BE AWARE OF YOUR ENVIRONMENT and SURROUNDINGS
Always fly on a sunny, bright day with as little wind as possible. Flying in extreme heat or cold can adversely affect your flying control and response of the vehicle.
natural_image
Illustration of a person standing inside a dome-shaped structure with radial lines (no text or symbols)CAUTIONS & WARNINGS
- Suitable for ages 14 and up. Adult supervision is always recommended.
- This product contains small parts which are a choking hazard. Keep away from small children.
- Keep drone at least 10 feet away during use.
- Accurately assemble the quadcopter and fly it under the guidelines of this manual. Small parts should be installed by an adult.
• Manufacturers and dealers disclaim all responsibility for damage caused by misuse. - Keep hands, hair and loose clothing away from rotors when powered on to prevent damage to the vehicle or serious injury to oneself or others.
- The quadcopter should never be flown in high winds in excess of 5 MPH or near a pool.
- Never leave the device unattended when being charged.
TECHNICAL SPECIFICATIONS & PARAMETERS
Charging Time: Approximately 60 minutes (dependent on usage)
Flying Time: Approximately 13-15 minutes (dependent on flying conditions)
Radio Control monitor viewing distance limit: Approximately 30 meters (\~98 feet)
NOTICES
This device complies with part 15 of the FCC Rules. Operation is subject to the following two conditions: (1) This device may not cause harmful interference, and (2) this device must accept any interference received, including interference that may cause undesired operation.
This drone does not require FAA registration.

Follow us at

ODYSSEYTOYS
A division of Odyssey Toys Miami, FL 33179 United States
For Customer Service please email: Care@OdysseyToys.com Please note the unit's model number and name in your email.
Model no. ODY-2017BF2 Stellar NX Camera Drone
Extra Parts Available!
Visit Odyssey
online to order:
www.OdysseyToys.com
- Extra Batteries
- New Rotor blades
• X-Guard Components