
Dis HU-3W - Air conditioner WILFA - Free user manual and instructions
Find the device manual for free Dis HU-3W WILFA in PDF.


| Product Type | Portable Air Conditioner |
| Brand | Wilfa |
| Model | Dis HU-3W |
| Cooling Capacity | 7000 BTU/h |
| Power Consumption (Cooling) | 800 W |
| Airflow | 300 m³/h |
| Noise Level | 52 dB(A) |
| Refrigerant | R410A |
| Dimensions (H x W x D) | 700 x 450 x 350 mm |
| Weight | 25 kg |
| Power Supply | 220-240 V ~ 50 Hz |
| Controls | Remote control and touch panel |
| Timer | 24-hour timer |
| Modes | Cool, Fan, Dehumidify |
| Fan Speeds | 3 speeds |
| Filter Type | Washable pre-filter |
| Auto Swing | Vertical louver oscillation |
| Self-Evaporation | Yes (most of condensate evaporated) |
| Exhaust Hose Length | 1.5 m |
| Window Kit Included | Yes |
| Energy Efficiency Class | A |
| Maintenance | Clean filter every 2 weeks; drain when necessary |
| Safety Features | Overheat protection, auto restart |
| Warranty | 2 years |
Frequently Asked Questions - Dis HU-3W WILFA
User questions about Dis HU-3W WILFA
0 question about this device. Answer the ones you know or ask your own.
Ask a new question about this device
Download the instructions for your Air conditioner in PDF format for free! Find your manual Dis HU-3W - WILFA and take your electronic device back in hand. On this page are published all the documents necessary for the use of your device. Dis HU-3W by WILFA.
USER MANUAL Dis HU-3W WILFA
natural_image
White portable water heater with control knob and 'wiffa' logo (no visible text or symbols on body)Dis
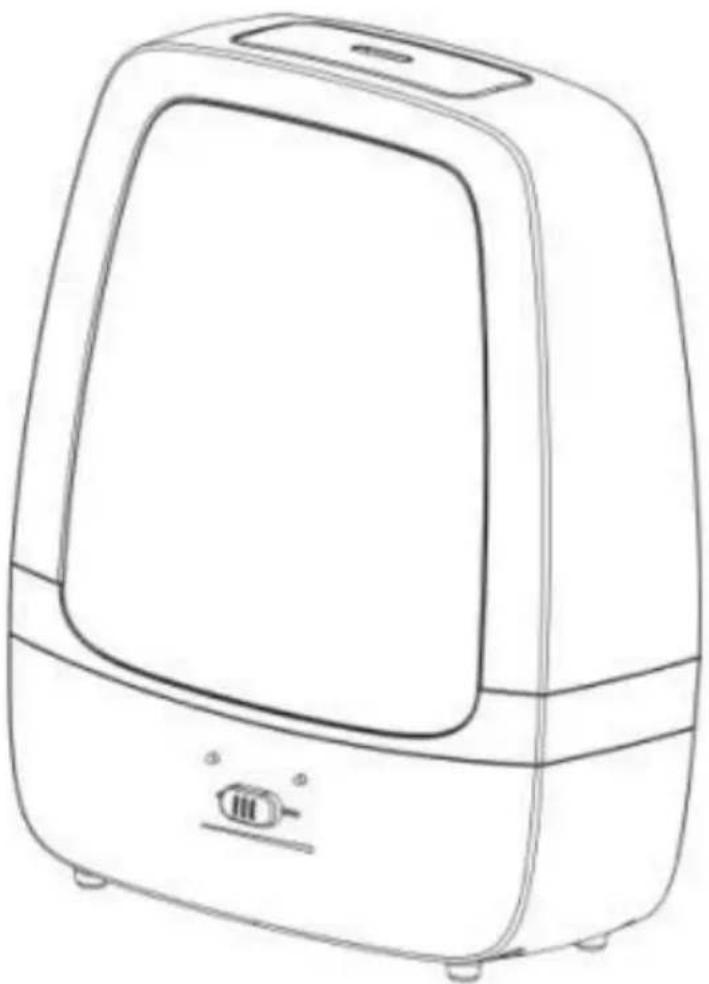
Air humidifier
Bruksanvisning
Bruksanvisning
Brugsanvisning
Käyttöohje
Instruction manual
natural_image
Line drawing of a portable air fryer device with front panel and control buttons (no text or symbols)DELER:
-
Forstøvning/damputløp
-
Deksel
-
Vanntank
-
Forstøvningskammer
-
Indikator lys
-
Nivå kontroll
-
Hovedenhet med av/på bryter
Spenning:
230V / 50Hz
Effekt: 35W
Vanntank: 3,31
Max fuktig volum: 300ml/t
Sikkerhet
natural_image
Simple line drawing of a washing machine with a circular arrow indicating rotation (no text or symbols)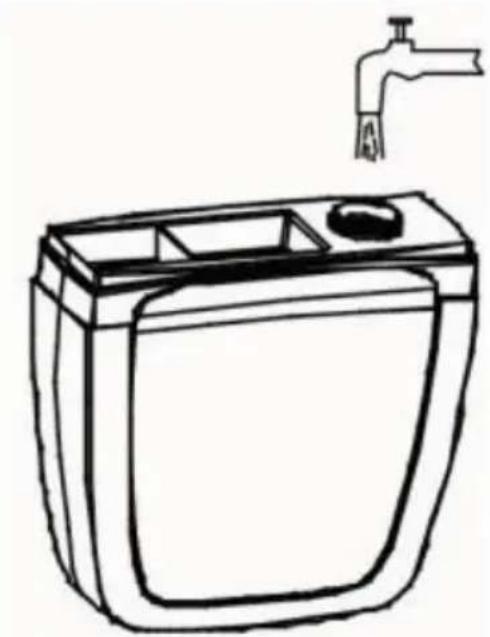
natural_image
Line drawing of a washing machine with a faucet above it (no text or symbols)Fig. 1 Fig. 2
natural_image
Line drawing of a portable air fryer device with control panel and buttons (no text or symbols)DELAR:
natural_image
Line drawings of a water dispenser with a valve and a side sink, showing mechanical components (no text or symbols)Fig. 1 Fig. 2
natural_image
Line drawing of a portable air fryer device with front panel and control buttons (no text or symbols)DELE:
natural_image
Simple line drawing of a washing machine with a knob and circular arrow indicator (no text or symbols)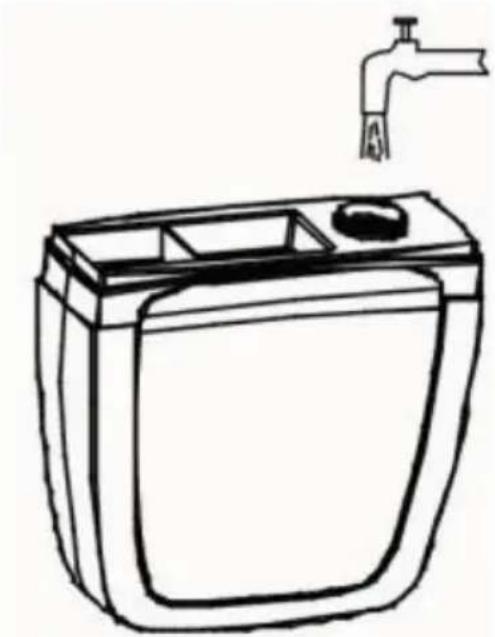
natural_image
Line drawing of a washing machine with a faucet above it (no text or symbols)Fig. 1 Fig. 2
natural_image
Line drawing of a portable air fryer device with control panel and display (no text or symbols)OSAT:
Please read this instruction manual carefully before use .....3
Safety 5
Operation 6
In use 6
Safety precautions ....7
Maintenance and cleaning 7
Troubleshooting 8
natural_image
Line drawing of a portable air fryer device with control panel and display screen (no text or symbols)Please read this instruction manual carefully before use.
PARTS:
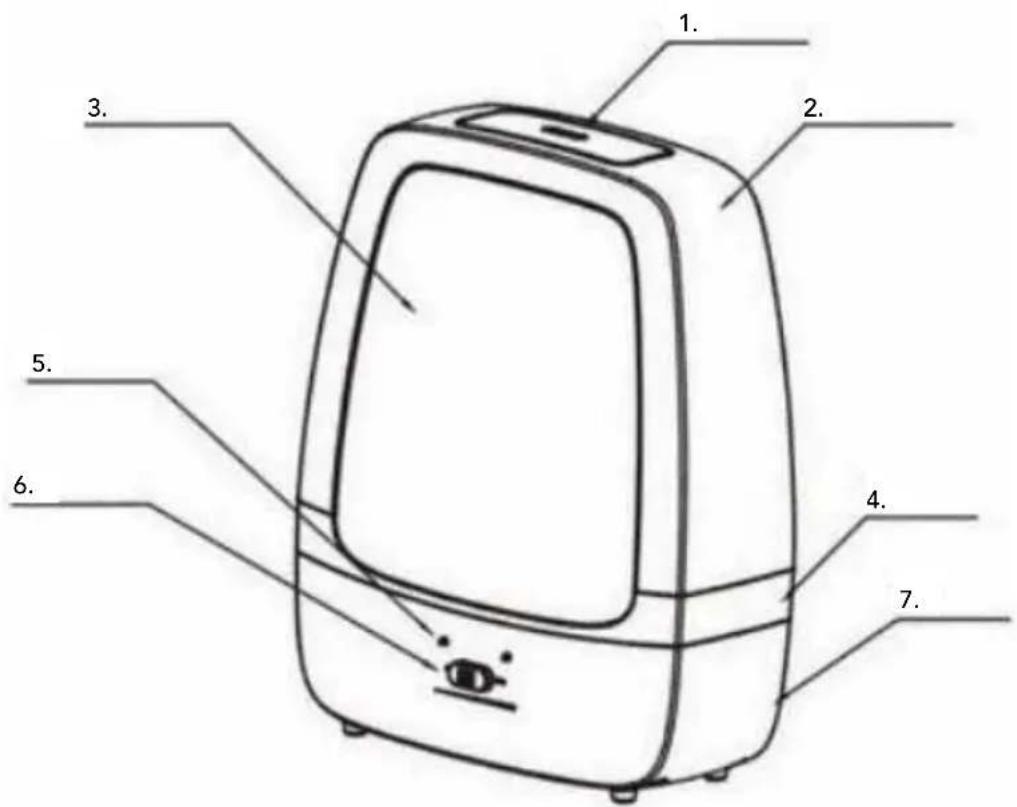
- Atomisation/steam outlet
- Cover
- Water tank
- Atomisation chamber
- Indicator lights
- Level control
- Main unit with on/off switch
Voltage:
230V/50Hz
Output: 35W
Water tank: 3.31
Max. volume of moisture: 300ml/h
Safety
This unit is not intended for use by persons (including children) with reduced physical, sensory or mental capabilities or who have limited experience and knowledge, unless they are under the supervision of or have been trained to use the unit by a person responsible for their safety. Supervise children to ensure that they do not play with the appliance.
Carefully check the voltage to ensure that the voltage on-site corresponds with the marking label on the product.
Check that the plug is fully inserted into the socket. Otherwise there is a risk of fire as a result of overheating or electric shock.
Do not use damaged plug sockets.
Do not disassemble the main unit for repairs or troubleshooting yourself.
Do not replace the power cable yourself.
Grip the plug, do not pull the cable.
If the unit is damaged or is not working: Please return the appliance to an authorised service department or to the store in which you purchased the unit.
Do not clean the appliance whilst in use. Turn off and unplug the appliance. Use a dry cloth without any soap or chemicals for cleaning.
Never immerse the appliance in water or other fluids.
Do not use sharp items inside the atomisation chamber.
To avoid damage to the internal components, do not allow water to flow or spray into the base.
■ Position the unit on a level surface to avoid tilting and to allow water to run out.
■ Position the unit away from sources of heat, such as heaters, and avoid direct sunlight.
■ Position the unit away from furniture and electrical appliances, avoid direct spraying of steam onto furniture and electrical appliances, otherwise they will become damp.
■ The unit shall be used at normal room temperature.
Operation
Prior to use
natural_image
Simple line drawing of a washing machine with a knob and circular arrow indicator (no text or symbols)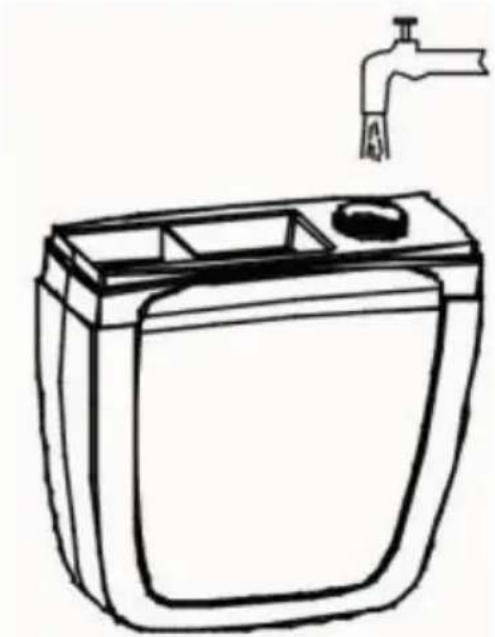
natural_image
Line drawing of a washing machine with a faucet above it (no text or symbols)Fig. 1 Fig. 2
■ Position the appliance horizontally at a suitable place.
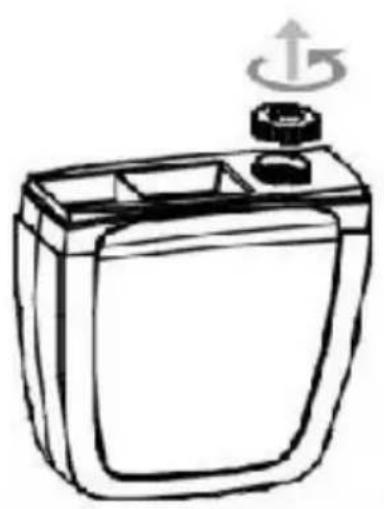
■ Remove and rotate the water tank, remove the lid (fig.1) and fill using clean water from the tap (fig.2).
■ Replace the lid for the water tank. Wipe the water tank dry before installing on the main unit.
■ Connect the unit to a power socket. Turn the power on and the "On" indicator will light up.
■ The capacity can be adjusted using the level control, which will reduce the dryness in the room.
■ When the water tank in the unit is empty, the "Fill water" indicator will light up.
In use
■ Do not fill hot water above 40^ C into the water tank.
■ Do not pour water into the steam outlets on the top of the water tank.
■ When the room temperature is below 0^ C, please empty the water tank and water bath to prevent damage to components.
■ Atomisation/steam only has the desired effect using clean water, please do not use chemicals and cleaning products in the water bath and water tank.
■ The unit should not be moved whilst in use as water could enter the main unit, resulting in problems.
■ Do not place the unit at a location where it is exposed to bright light or direct hot air or radiation.
■ To avoid spotting or damage, please do not place the steam outlet adjacent to furniture or walls.
■ Do not add water directly to the water bath.
■ Remove the plug from the power socket when the unit is not in use.
■ Do not pour remaining water out of the water bath without first turning off the power and removing the plug.
■ When the water tank is full, the unit can run continuously for 7-12 hours without refilling.
Safety precautions
■ Do not insert the plug with wet hands, otherwise there could be a risk of electric shock.
■ Do not touch the steam outlet whilst the appliance is in use.
In order to avoid electric shock, do not dismantle the unit without first removing the plug.
■ Do not replace the power cable.
Maintenance and cleaning
Turn the power off and remove the plug before cleaning.
■ Cleaning the water tank (once every 2-3 weeks)
Remove the lid for the water tank and rinse well using clean water.
■ Cleaning the water bath (once per week) Wipe down using a moist cloth.
■ Cleaning the exterior of the air humidifier Wipe down using a damp cloth.
■ Storing the air humidifier
When the unit is not to be used for a prolonged period, clean and dry the unit and store in a dry place.
Troubleshooting
| Problem Reason Solution | ||
| The indicator does not light up, no air, no steam | The power cable is not connectedThe power switch is not turned on | Make sure that the plug is properly connectedTurn the power switch on |
| The indicator lights up, no steam | There is no water in the water tank | Fill up the water tank |
| Bad smell New unitThe water in the tank is not clean | Open the water tankClean and replace the water in the water tank | |
| Small amounts of steam | The water is dirty or has been stored for too long | Clean the water tankReplace with clean water |
According to the Waste Electrical and Electronic Equipment (WEEE) Directive, this type of waste must be collected and treated separately. If it becomes necessary to dispose of this product at some point, kindly make sure that it is not discarded with your everyday household refuse. Instead, bring the product to your closest WEEE collection centre.

Brand : WILFA
Model : Dis HU-3W
Category : Air conditioner