
CH-1 - Air conditioner WILFA - Free user manual and instructions
Find the device manual for free CH-1 WILFA in PDF.


| Brand | Wilfa |
| Model | CH-1 |
| Product Type | Portable Air Conditioner |
| Cooling Capacity | 9000 BTU/h |
| Power Supply | 220-240V ~ 50Hz |
| Dimensions (WxDxH) | 30 x 30 x 70 cm |
| Weight | 25 kg |
| Functions | Cooling, Fan, Dehumidify |
| Remote Control | Yes |
| Timer | 1-24 hours |
| Fan Speeds | 3 (Low, Medium, High) |
| Noise Level | ≤ 55 dB(A) |
| Filter Type | Washable mesh filter |
| Refrigerant | R290 |
| Drainage | Continuous or manual drain |
| Energy Class | A |
| Safety Features | Overload protection, auto shut-off |
| Maintenance | Clean filter every 2 weeks; drain condensation |
| Spare Parts | Filter, remote control |
| General Information | Includes exhaust hose and window kit |
Frequently Asked Questions - CH-1 WILFA
User questions about CH-1 WILFA
0 question about this device. Answer the ones you know or ask your own.
Ask a new question about this device
Download the instructions for your Air conditioner in PDF format for free! Find your manual CH-1 - WILFA and take your electronic device back in hand. On this page are published all the documents necessary for the use of your device. CH-1 by WILFA.
USER MANUAL CH-1 WILFA
Wall mounting mod.TL150 only
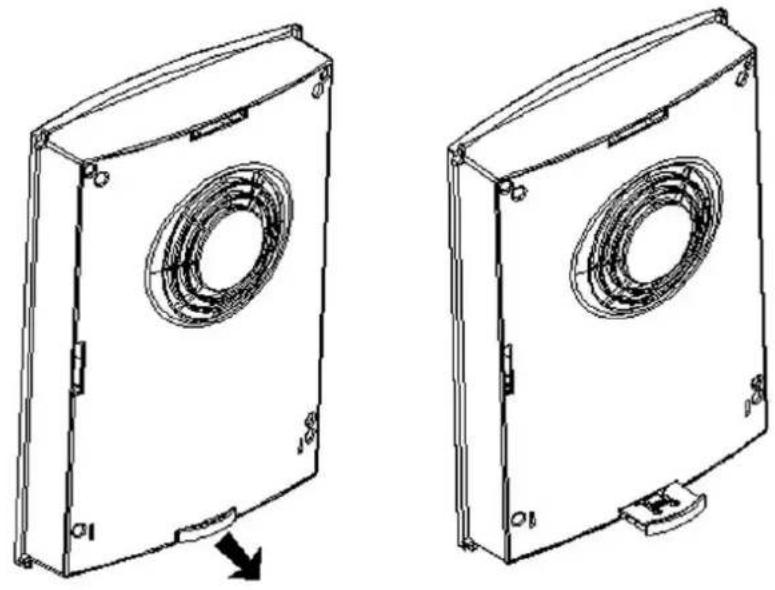
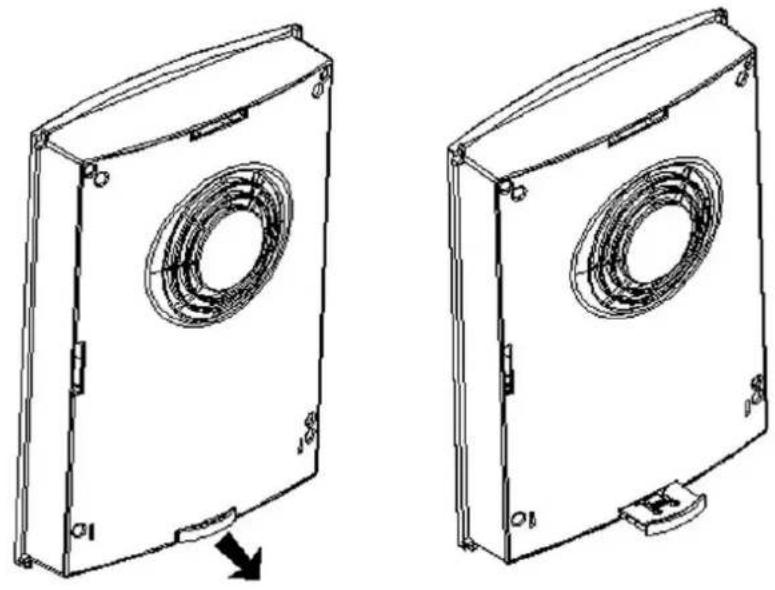
- Insert the supporting foot levering the blocking-hook and insert the spacers, too.
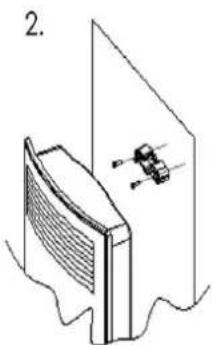
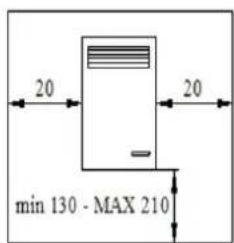
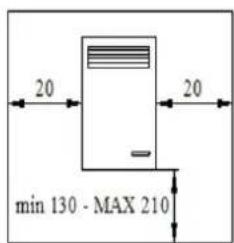
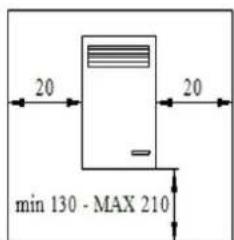
- Fix the hook to the wall keeping the safety distance.
Wall mounting. Only models 50 = FH-1 and FH-2
- Hang the appliance and fix it through the safety screw.
ATTENTION
- the appliance is fitted up with a pull-out foot to lean on the floor; pull the foot out till it clicks.
OBS:
Wall mounting mod.TL150 only
- Insert the supporting foot levering the blocking-hook and insert the spacers, too.
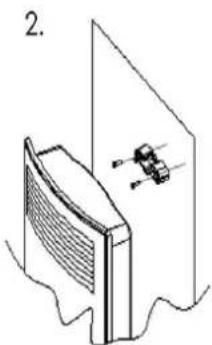
- Fix the hook to the wall keeping the safety distance.
- Hang the appliance and fix it through the safety screw.
ATTENTION
- the appliance is fitted up with a pull-out foot to lean on the floor; pull the foot out till it clicks.
OBS:
Wall mounting mod.TL150 only
- Insert the supporting foot by levering the blocking hook, and insert the spacers as well.
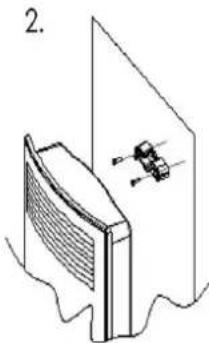
- Fix the hook to the wall, maintaining the safety distance.
- Hang the appliance and secure it with the safety screw.
ATTENTION
- The appliance is equipped with a pull-out foot to rest on the floor; pull the foot out until it clicks.
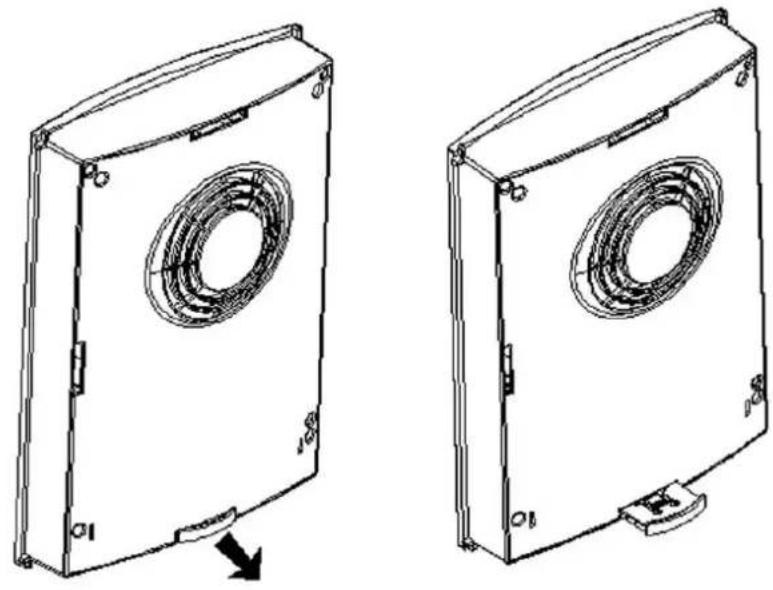
NOTE:
Wall mounting mod.TL150 only
- Insert the supporting foot by levering the blocking hook, and insert the spacers as well.
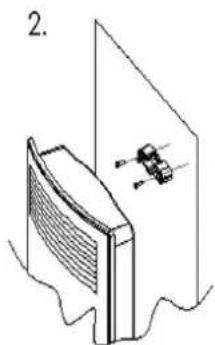
- Fix the hook to the wall, maintaining the safety distance.
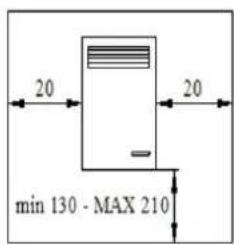
- Hang the appliance and secure it with the safety screw.
ATTENTION
- The appliance is equipped with a pull-out foot to rest on the floor; pull the foot out until it clicks.
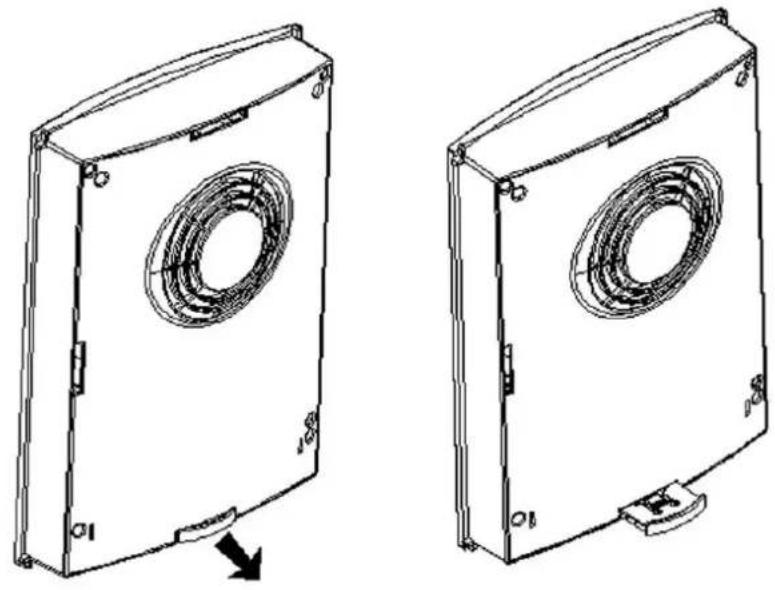
NOTE:
- Before operating the heater, please read these instructions thoroughly to avoid damage and hazardous situations.
- Connect the heater to a 230 V, 10A socket.
- Never turn the heater on if the lead is damaged, if the heater's casing is obviously damaged or was damaged subsequent to being dropped.
- The fan heater is excellent to provide additional heating: it should not be considered as a centralized central heating unit.
- Make sure that the heater never comes into contact with water.
- Do not let children play with the heater. Do not poke anything through the ventilating slits.
- Always use the heater in the horizontal position; stand it on a firm, solid, horizontal base (not on thick pile carpets). Leave plenty of room around the heater (at least 50 cm on top and round the sides, 120 cm at the front).
- Leave nothing hanging above or in front of the heater (e.g. clothes or fabrics). Be sure that the air inlets and outlets on the heater are unhindered otherwise it will overheat. Dust these openings every now and again.
- Do never position the appliance under an outlet.
- For substitution of the cable please refer to service centers only.
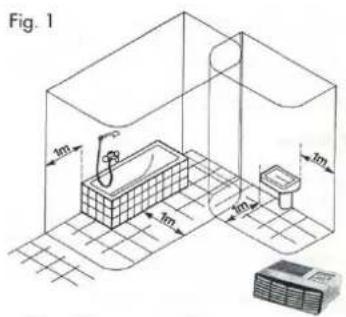
- WARNING: Never install or use the appliance close to bath tubs, showers, wash basins, swimming pools. If the appliance is installed in a bathroom, always comply with safety distances as indicated by CEI-EC regulations (see Fig. 1).
- This appliance must not be used in any kind of vehicle (lifts, motor vehicles, cars, cable cars, etc.)
Do not cover the heater up. (Symbol on the heater). This can lead to overheating, fire or electric shock. Do not use the heater on soft, elastic surfaces like beds, where air-inlets and air-outlets may be obstructed
OVERHEATING SAFETY DEVICE
To avoid overheating problems the safety device will interrupt electricity as soon as the heating elements become too hot.
If this should happen:
- Take the plug out of the mains.
- Let the heater cool down for 10 minutes.
- Check that the heater is positioned correctly.
- See that there is no dust or other obstacles hindering the air flow.
- Clean the grids with a hoover if necessary.
CLEANING
- Put the switch on "0". Let the heater cool down.
- Take the plug out of the mains.
- Clean the outside of the heater with a damp cloth.
- Do not let any water drip inside it.
- Do not dip the heater in water.
- Clean the air openings regularly with a hoover (about twice a year).
INSTALLING THE HEATER
Position the heater so that incoming and outgoing air is not hindered in any way. Choose a safe place to avoid fire hazards (also see the chapter "IMPORTANT"). See also special installation for each unit later in the instruction manual.
STARTING UP
You have the choice of different functions:
0-off
Off (both the fan and heating element are off);
• 1000W
Hot air;
• •2000W
Very Hot air
*
NO-FROST
"NO-FROST" FUNCTION pos.:
the appliance starts heating automatically when the room temperature falls below +5°C.
This appliance conforms to the basical requirements of EEC-
Attention! (only for CH-1)
- This heater is hot when in use. To avoid burns, do not let bare skin touch hot surfaces. Always use the handle when moving this heater. Keep combustible materials, such as furniture, pillows, bedding, papers, clothes, and curtains at least 2 m from the front of the heater and at least 0.5 m from the sides and rear.
- A heater has hot and arcing or sparking parts inside. It must not be used in potentially dangerous locations such as flammable, explosive, chemical-laden, or wet atmospheres.
WARNING: REDUCE THE RISK OF FIRE OR ELECTRIC SHOCK. DO NOT USE THIS HEATER WITH ANY SOLID STATE SPEED CONTROL DEVICES.
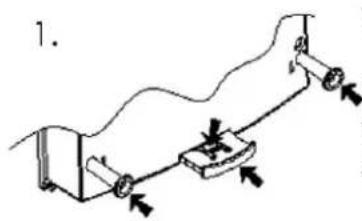
For FH-1 and FH-2 only
Wall mounting mod. TL150 only
- Insert the supporting foot by levering the blocking hook and insert the spacers as well.
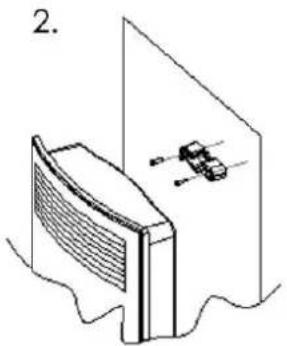
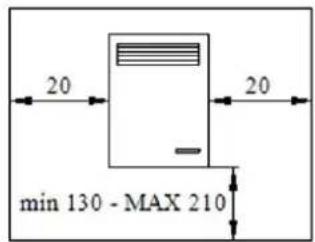
- Fix the hook to the wall, keeping the safety distance.
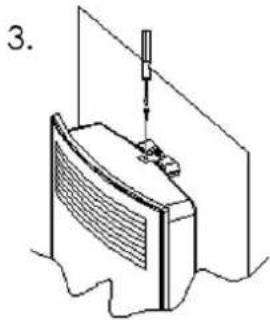
- Hang the appliance and fix it with the safety screw.
ATTENTION
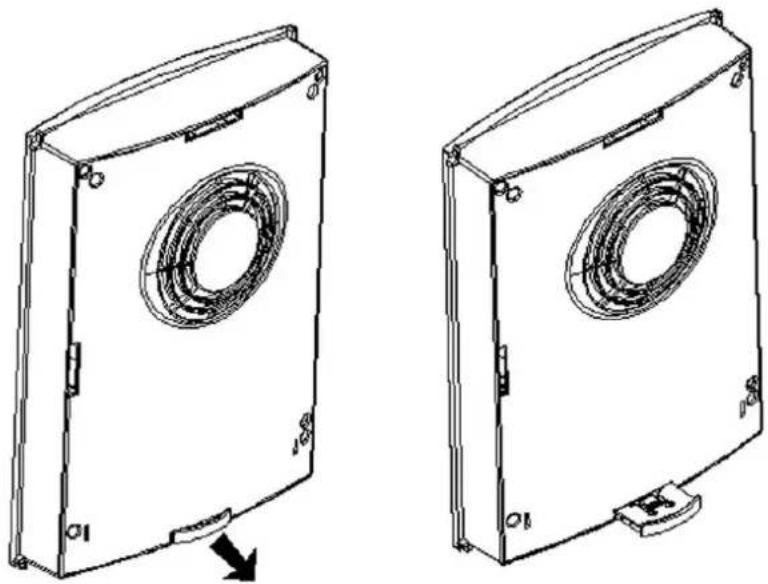
- The appliance is fitted with a pull-out foot to lean on the floor; pull the foot out until it clicks.
According to the Waste of Electrical and Electronic Equipment (WEEE) directive, WEEE should be separately collected and treated. If at any time in the future you need to dispose of this product, please do NOT dispose of this product with household waste. Please send this product to WEEE collecting points where available.
Marketed in England by:
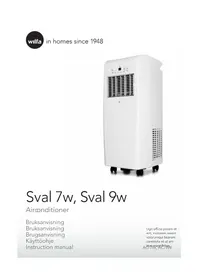
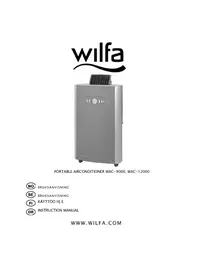

Brand : WILFA
Model : CH-1
Category : Air conditioner