
FQV213G001 - Oven SAMSUNG - Free user manual and instructions
Find the device manual for free FQV213G001 SAMSUNG in PDF.


| Product Type | Electric Oven |
| Brand | Samsung |
| Model | FQV213G001 |
| Installation Type | Built-in |
| Width | 60 cm |
| Height | 60 cm |
| Depth | 55 cm |
| Weight | 40 kg |
| Power Supply | 220-240 V ~ 50/60 Hz |
| Rated Power | 3.5 kW |
| Oven Capacity | 73 L |
| Heat Sources | Top, Bottom, Grill, Fan |
| Cooking Functions | Convection, Fan Grill, Pizza, Slow Cook, Keep Warm |
| Cleaning Type | Pyrolytic Self-Cleaning |
| Control Type | Touch + Rotary Dial |
| Display | Digital LED |
| Safety Features | Child Lock, Auto Shut-off, Cool Touch Door |
| Energy Efficiency Class | A+ |
| Spare Parts Availability | Via Samsung Service Network |
| Repairability Index | 8.4/10 (estimated) |
| Warranty | 2 years (standard) |
Frequently Asked Questions - FQV213G001 SAMSUNG
User questions about FQV213G001 SAMSUNG
0 question about this device. Answer the ones you know or ask your own.
Ask a new question about this device
Download the instructions for your Oven in PDF format for free! Find your manual FQV213G001 - SAMSUNG and take your electronic device back in hand. On this page are published all the documents necessary for the use of your device. FQV213G001 by SAMSUNG.
USER MANUAL FQV213G001 SAMSUNG
Informacje ogólne
Dane techniczne


- PRZYCISK OSZCZĘDZANIA ENERGII
- WYŚWIETLACZ
- PRZYCISK WYBORU FUNKCJI GOTOWANIA
- TRYB CZYSZCZENIA PAROWEGO
-
PRZYCISK CZASU PRZYGOTOWANIA
-
PRZYCISK CZASU ROZPOCZĘCIA
- PRZYCISK PAMIĘĆ
- PRZYCISK WYBORU
- PRZYCISKI STERUJĄCE
- PRZYCISK ZATRZYMANIA/ANULOWANIA
- PRZYCISK START



kody błędów
KODY BŁęDÓW
Általános
Müszaki adatok




hibakódok
HibAKÓDOK
Všeobecné


Obr. 1 Kombinovanú parnu rúru čiastočne zasuňte do skrinky. Pripájací kábel privedte k zdroju napájania.
1 Prepnite tlačidlo zastaviČ/žrušič do stavu „off (vyp.)“.

1 Prepnite tlačidlo zastaviT/zrušiT do stavu „off (vyp.)“.


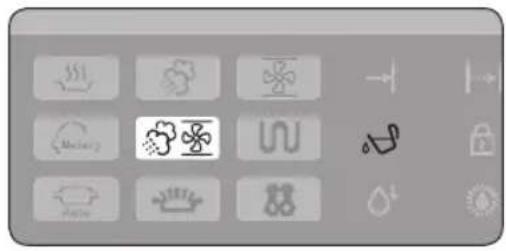

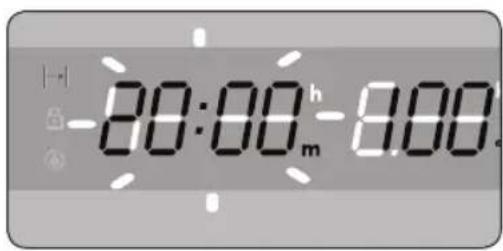
2 Prepnite tlačidlo výBeru funkcie varenia do polohy parného režimu 🌿 (predvolená doba varenia: 20 min.; teplota: 100 °C). Čas bliká.

3 Počas blikania stláčajte ovláDacie tlačidlo a nastavte požadovanú dobu varenia.
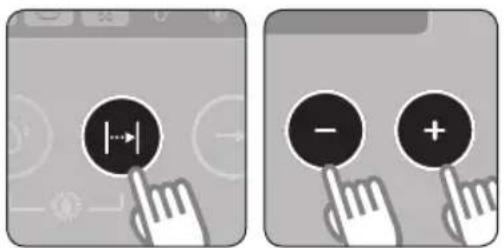
5 Stláčajte ovláDacie tlačidlo a nastavte teplotu.

Ak je počas varenia k dispozícii príliš málo vody, na displeji sa zobrazí symbol 🚫 a zaznie pípnutie. Do nádržky dolejte vodu a stlačením tlačidla SPUSTIŤ pokračujte vo varení v pare.
1 Nádržku na vodu naplňte po čiarku maxima a dajte ju spät. Potom umiestnite jedlo do varného priestoru.

3 Počas blikania stláčajte OVLÁDACIE tlačidlo a nastavte požadovanú teplotu.

2 Prepnite tlačidlo VÝBER FUNKCIE VARENIA do polohy režimu Steam Combi 📋 (predvolene: 180 °C). Teplota bliká.

5 Počas blikania stláčajte OVLÁDACIE tlačidlo a nastavte požadovanú dobu varenia.
1 Nádržku na vodu naplňte po čiarku maxima a dajte ju spät. Potom umiestnite jedlo do varného priestoru.

3 Počas blikania stláčajte OVLÁDACIE tlačidlo a nastavte požadovanú dobu varenia.
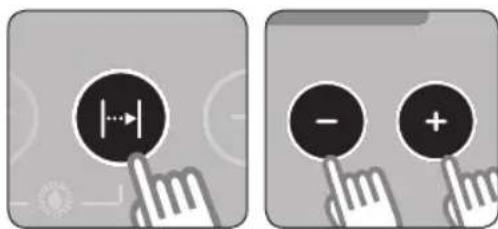
2 Počas blikania stláčajte OVLÁDACIE tlačidlo a nastavte požadovanú teplotu.

1 Prepnite tlačidlo VÝBER FUNKCIE VARENIA do polohy režimu grilu UN (predvolene: 1:00 min.). Čas bliká.
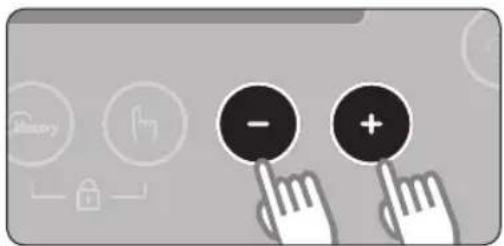
3 Počas blikania stláčajte ovláDacie tlačidlo a nastavte požadovanú dobu varenia (2:00).
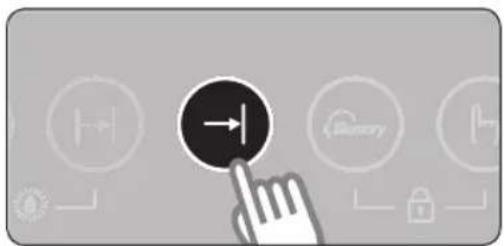
2 Ak sa na displeji zobrazí symbol, nádržku na vodu doplňte po max. úroveň a vložte ju späť. Potom umiestnite jedlo do varného priestoru.

3 Stláčaním ovláDacieho tlačidla vyberte funkciu automatického varenia (vid. tabulka na strane 35).
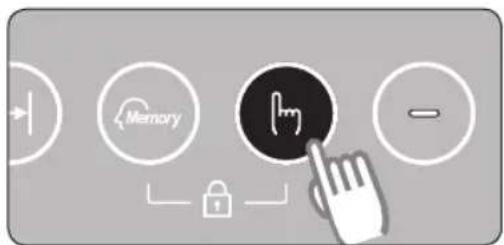
2 Prepnite tlačidlo VÝBER FUNKCIE VARENIA do polohy režimu rozmrazovania ... (predvolene: 20:00 min.). Čas bliká.

3 Stlačte tlačidlo spustiT.
POUŽÍVANIE REŽIMU PAMÄTE
1 Prepnite tlačidlo VÝBERU FUNKCIE VARENIA do polohy „Varenie v pare“

1 Prepnite tlačidlo zastaviT/zrušiT do polohy „off (vyp.)“.
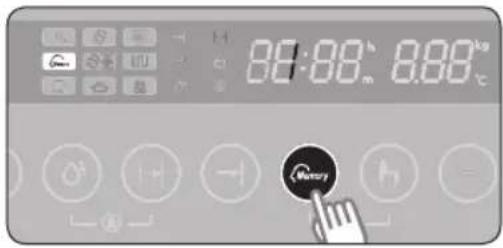
3 Prepnite tlačidlo zastaviT/zrušiT do polohy „off (vyp.)“.
8 Otvorte dvierka a vnútro priestoru na varenie utrite suchou handrou.
1 Nádržku na vodu naplňte po čiarku maxima a dajte ju spät.

2 Prepnite tlačidlo ZASTAVIČ/ZRUŠIČ do polohy „OFF (VYP.)“.

3 Stlačte tlačidlo ČISTENIE PAROU a stlačte tlačidlo SPUSTIŤ

4 Po dokončení procesu: otvorte dvierka a vnútro priestoru na varenie utrite suchou handrou.

Dôležité
1 Prepnite tlačidlo zastaviT/zrušiT do polohy „off (vyp.)“.

1 Prepnite tlačidlo zastaviT/zrušiT do polohy „off (vyp.)“.

1 Prepnite tlačidlo zastaviČ/zrušič do polohy „off (vyp.)“. Naraz stlačte tlačidlo pamČ a vyBraČ a podržte ich 3 sekundy.


Namontovanie dvierok priestoru na varenie
- Dvierka priestoru na varenie úplne otvorte a zaistovaciu páčku prehnite nahor.
- Zatvorte dvierka priestoru pre varenie.
05 ODSTRANOVANE VODNEHO KAMENA A CISTEINE
kódy chyby
KóDY CHYBY
Obecné
Technické informace

instalace trouby


kódy chyb
KóDY ChYB
Installation and Operating Instruction
CE
The data concerning cooking and baking are informative. The product is for household use. Guarantee commitments are ceased if the appliance is used on purposes other than household e.g. on industry, catering trade or trade activities.
imagine the possibilities
Thank you for purchasing this Samsung product. To receive more complete service, please register your product at
www.samsung.com/register
Planet First
100% Recycled Paper
This manual is made with 100% recycled paper.
SAMSUNG
using this manual
Thank you for purchasing a SAMSUNG microwave oven.
Your Owner's Manual contains important safety instructions and essential information on using and caring for your new speed cook oven.
Before using your microwave oven, please read all the information in this manual and keep it for future reference.
SAFETY INFORMATION
- Before operating the appliance, please read this manual thoroughly and retain it at a safe place near the appliance for your future reference.
- Use this appliance only for its intended purpose as described in this instruction manual. This appliance is not intended for use by persons (including children) with reduced physical, sensory or mental capabilities, or lack of experience and knowledge, unless they have been given supervision or instruction concerning use of the appliance by a person responsible for their safety. Warnings and Important Safety Instructions in this manual do not cover all possible conditions and situations that may occur. It is your responsibility to use common sense, caution, and care when installing, maintaining, and operating your appliance.
- Because these following operating instructions cover various models, the characteristics of your microwave oven may differ slightly from those described in this manual and not all warning signs may be applicable. If you have any questions or concerns, contact your nearest service center or find help and information online at www.samsung.com.
IMPORTANT SAFETY SYMBOLS AND PRECAUTIONS.
The following symbols are used in the text of this Owner's Manual:
| WARNING | Hazards or unsafe practices that may result in severe personal injury or death. |
| CAUTION | Hazards or unsafe practices that may result in minor personal injury or property damage. |
| CAUTION | To reduce the risk of fire, explosion, electric shock, or personal injury when using your microwave oven, follow these basic safety precaution. |

Do NOT attempt.
| Do NOT disassemble. | |
| Do NOT touch. | |
| Follow directions explicitly. | |
| Unplug the power plug from the wall socket. | |
| Make sure the machine is grounded to prevent electric shock. | |
| Call the service center for help. | |
| Note | |
| Important |

SEVERE WARNING SIGNS FOR INSTALLATION
Plug the power cord into the proper wall socket or higher and use the socket for this appliance only. Plug the power plug into the wall socket firmly. In addition, do not use an extension cord.
- Failure to do so and sharing a wall socket with other appliances using a power strip or extending the power cord may result in electric shock or fire.
- Do not use an electric transformer. It may result in electric shock or fire.
The installation of this appliance must be performed by a qualified technician or service company.
- Failing to do so may result in electric shock, fire, an explosion, problems with the product, or injury.
The microwave oven is intended to be used on the counter or counter top use only, the microwave oven shall not be placed in a cabinet.
Do not install this appliance near a heater, inflammable material.
Do not install this appliance in a humid, oily or dusty location, in a location exposed to direct sunlight and water (rain drops).
Do not install this appliance in a location where gas may leak.
- This may result in electric shock or fire.
The appliance is not intended for installing in road vehicles, caravans and similar vehicles etc.
This appliance must be properly grounded. Do not ground the appliance to a gas pipe, plastic water pipe, or telephone line.
- This may result in electric shock, fire, an explosion, or problems with the product.
- Never plug the power cord into a socket that is not grounded correctly and make sure that it is in accordance with local and national codes.
2_ safety information


2.1.2.1.2.
Caution signs for installation
This appliance should be positioned in such a way that it is accessible to the power plug.
- Failure to do so may result in electric shock or fire due to electric leakage.
Install your appliance on a level and hard floor that can support its weight.
- Failure to do so may result in abnormal vibrations, noise, or problems with the product.
Install the appliance while maintaining the proper distance from the wall.
- Failure to do so may result in fire due to overheating.
The minimum height of free space necessary above the top surface of the oven.

Severe warning signs for electric
Remove all foreign substances such as dust or water from the power plug terminals and contact points using a dry cloth on a regular basis.
- Unplug the power plug and clean it with a dry cloth.
- Failure to do so may result in electric shock or fire.
Plug the power plug into the wall socket in the right direction so that the cord runs towards the floor.
- If you plug the power plug into the socket in the opposite direction, the electric wires within the cable may be damaged and this may result in electric shock or fire.
Plug the power plug into the wall socket firmly. Do not use a damaged power plug, damaged power cord or loose wall socket.
- This may result in electric shock or fire.
Do not pull or excessively bend the power cord. Do not twist or tie the power cord.
Do not hook the power cord over a metal object, place a heavy object on the power cord, insert the power cord between objects, or push the power cord into the space behind the appliance.
- This may result in electric shock or fire.
Do not pull the power cord, when unplugging the power plug.
- Unplug the power plug by holding the plug.
- Failure to do so may result in electric shock or fire.
When the appliance or the cord is damaged, contact your nearest service centre.

Caution signs for electric
Unplug the power plug when the appliance is not being used for long periods of time or during a thunder/lightning storm.
- Failure to do so may result in electric shock or fire.

Severe warning signs for using
In the event of a gas leak (such as propane gas, LP gas, etc.), ventilate immediately without touching the power plug. Do not touch the appliance or power cord.
- Do not use a ventilating fan.
- A spark may result in an explosion or fire.
Take care that the door, heater or any of the other parts do not come into contact with the body while cooking or just after cooking.
- Failure to do so may result in burns.
During use the appliance becomes hot. Care should be taken to avoid touching heating elements inside the oven.
When moving heating elements, make sure to use the equipment designed to move heating element while wearing safety gloves provided with the product, and see if temperature drops sufficiently (at least 10 minutes after grill or combination cooking operation) after operation.
ALWAYS use oven gloves when removing a dish from the oven to avoid unintentional burn.
Stand at arms length from the oven when opening the door.
Reason : The hot air or steam released may cause scalding.
Microwave heating of beverages can result in delayed eruptive boiling, therefore care must be taken when handling the container; To prevent this situation ALWAYS allow a standing time of at least 20 seconds after the oven has been switched off so that the temperature can equalize. Stir during heating, if necessary, and ALWAYS stir after heating. In the event of scalding, follow these FIRST AID instructions:
- Immerse the scalded area in cold water for at least 10 minutes.
- Cover with a clean, dry dressing.
- Do not apply any creams, oils or lotions.
- Contact a doctor
If the supply cord is damaged, it must be replaced by the manufacturer, its service agent or similarly qualified persons in order to avoid a hazard.
Children should be supervised to ensure that they do not play with the appliance.
Eggs in their shell and whole hard-boiled eggs should not be heated in microwave ovens since they may explode even after microwave heating has ended.
WARNING: The contents of feeding bottles and baby food jars shall be stirred or shaken and the temperature checked before consumption, in order to avoid burns.
WARNING : Only allow children to use the oven without supervision when adequate instructions have been given so that the child is able to use the oven in a safe way and understands the hazards of improper use.
WARNING: When the appliance is operated in the combination mode, children should only use the oven under adult supervision due to the temperatures generated.
The appliance is not intended for use by persons (including children) with reduced physical, sensory or mental capabilities, or lack of experience and knowledge, unless they have been given supervision or instruction concerning use of the appliance by a person responsible for their safety.
safety information _3


WARNING : Accessible parts may become hot during use. To avoid burns young children should be kept away.
WARNING : Ensure that the appliance is switched off before replacing the lamp to avoid the possibility of electric shock.

Do not touch the power plug with wet hands.
- This may result in electric shock.
Do not turn the appliance off by unplugging the power plug while an operation is in progress.
- Plugging the power plug into the wall socket again may cause a spark and result in electric shock or fire.
Keep all packaging materials well out of the reach of children, as packaging materials can be dangerous to children.
- If a child places a bag over its head, it may result in suffocation.
This appliance is not intended for use by persons (including children) with reduced physical, sensory or mental capabilities, or lack of experience and knowledge, unless they have been given supervision or instruction concerning use of the appliance by a person responsible for their safety.
- Failing to do so may result in electric shock, burns or injury.
Never use this appliance for purposes other than cooking.
- Failure to do so may result in fire.
Open sealed containers (baby bottles, milk bottles, etc.) and make a hole in food items such as shells or nuts (eggs, chestnuts, etc) with a knife, before cooking them.
- Failure to do so may result in burns or injury due to the item bursting.
Do not touch the inside of the appliance immediately after cooking, because the inside of the appliance is hot after being heated for a long time or heating a small amount of food.
- Failure to do so may result in burns.
Do not use aluminium foil, metal objects (such as containers, forks, etc.) or containers with golden or silver trims.
- This may result in sparks or fire.
Never heat plastic or paper containers and do not use them with the oven function.
- Failure to do so may result in fire.
Take care that food does not come into contact with the heater when cooking food with the oven.
- This may result in fire.
Do not over-heat food.
- This may result in fire.
Do not heat food wrapped in paper such as magazines or newspaper.
- This may result in fire.
Do not use or place inflammable sprays or objects near the oven.
4_ safety information

- This may result in fire or an explosion.
Do not open the door when the food in the cooking compartment is burning. - If you open the door, an inflow of oxygen occurs and this may result in fire.
Do not insert fingers, foreign substances or metal objects such as pins or needles into the inlet, outlet, water supply cartridge input and output parts, and holes. If foreign substances are inserted into any of these holes, unplug the power plug from the wall socket and contact your product provider or nearest service centre.
- Failure to do so may result in electric shock or injury.
NEVER fill the container to the top and choose a container that is wider at the top than at the bottom to prevent the liquid from boiling over. Bottles with narrow necks may also explode if overheated.
NEVER heat a babys bottle with the teat on, as the bottle may explode if overheated.
DO NOT touch heating elements or interior oven walls until the oven be cooled down.
Do not immerse the power cable or plug in water and keep the power cable away from heated surfaces.
Do not operate this appliance if it has a damaged power cable or plug.
DO NOT operate the microwave oven when it is empty. The power will be cut off automatically for safety. You can operate normally after letting it stand for over 30 minutes. It is best to leave a glass of water inside the oven at all times. The water will absorb the microwaves energy if the oven accidentally started.
WARNING: If the door or door seals are damaged, the oven must not be operated until it has been repaired by a competent person.
WARNING : Liquids and other foods must not be heated in sealed containers since they are liable to explode.

If the appliance is flooded cut the power immediately and please contact your nearest service centre.
- Failure to do so may result in electric shock or fire. If the appliance generates a strange noise, a burning smell or smoke, unplug the power plug immediately and contact your nearest service centre.
- Failure to do so may result in electric shock or fire.

Do not attempt to repair, disassemble, or modify the appliance yourself.
- Since a high voltage current enters the product chassis, it may result in electric shock or fire.
- You may be exposed to electromagnetic waves.
- When repairing the appliance is required, contact your nearest service centre.
WARNING : It is hazardous for anyone other than a competent person to carry out any service or repair operation that involves the removal of a cover which gives protection against exposure to microwave energy.

If any foreign substance such as water has entered the appliance, unplug the power plug and contact your nearest service centre.
- Failure to do so may result in electric shock or fire. If smoke is observed, switch off or unplug the appliance and keep the door closed in order to stifle any flames;

Caution signs for using
Only use utensils that are suitable for use in microwave ovens; DO NOT use any metallic containers, Dinnerware with gold or silver trimmings, Skewers, forks, etc. Remove wire twist ties from paper or plastic bags.
Reason: Electric arcing or sparking may occur and may damage the oven.
When heating food in plastic or paper containers, keep an eye on the oven due to the possibility of ignition;
Small amounts of food require shorter cooking or heating time.
If normal times are allowed they may overheat and burn.
You may notice a Clicking sound during operation (especially when the oven is defrosting).
Reason: This sound is normal when the electrical power output is changing.
Young children should NEVER be allowed to use or play with the microwave oven. Nor should they be left unattended near the microwave oven when it is in use. Items of interest to children should not be stored or hidden just above the oven.
Children should be supervised to ensure that they do not play with the appliance.
Take care as beverages or food may be very hot after heating.
- Especially when feeding a child, check that it has cooled sufficiently.
Take care when heating liquids such as water or other beverages.
- Make sure to stir during or after cooking.
- Avoid using a slippery container with a narrow neck.
- Remove the container at least 30 seconds after heating.
- Failing to do so may result in an abrupt overflow of the contents and cause burns.
Do not hold food or any part there of during or immediately after cooking.
- Use cooking gloves because it may be very hot and you could burn yourself.
- If you pull the ceramic dish or well-being multi-purpose pan forwards, food may spill and this may result in burns.
When the surface is cracked, turn the power switch of the appliance off.
- Failure to do so may result in electric shock.
Do not scratch the glass of the oven door with a sharp object.
- This may result in the glass being damaged or broken.
Do not stand on top of the appliance or place objects (such as laundry, oven cover, lighted candles, lighted cigarettes, dishes, chemicals, metal objects, etc.) on the appliance.
- Items, such as a cloth, may be caught in the door.
- This may result in electric shock, fire, problems with the product, or injury.
Do not operate the appliance with wet hands.
- This may result in electric shock.
Do not spray volatile material such as insecticide onto the surface of the appliance. - As well as being harmful to humans, it may also result in electric shock, fire or problems with the product.
Do not apply excessive pressure or impact to the door or to the inside of the appliance.
- This may result in deformation to the product or injury due to electric wave leakage.
- Hanging onto the door may result in the product falling and causing injury.
- If the door is damaged, do not use the appliance and contact your nearest service centre.
Do not place the appliance over a fragile object such as a sink or glass object.
- This may result in damage to the sink or glass object.
Use the appliance only after closing the door.
- If you use the appliance when it is contaminated by foreign substances such as food waste, it may result in problems with the appliance.
Take care when removing the wrapping from food that has just been taken out of the appliance. - If the food is hot, hot steam may be emitted abruptly when removing the wrapping and you may burn yourself.
Do not unplug the appliance by pulling at the power cord, always grip plug firmly and pull straight out from the outlet.
- Damage to the cord may cause short-circuit, fire and/or electric shock.
Do not put your face or body close to the appliance while cooking or when opening the door just after cooking.
- Take care that children do not come close to the appliance.
- Failure to do so may result in burns from the heat.
Do not place food or heavy objects over the door when opening the door.
- The food or object may fall and this may result in burns or injury.
Do not abruptly cool the door, the inside of the appliance, or the dish by pouring water over it during or just after cooking. - This may result in damage to the appliance. The steam or water spray may result in burns or injury.
Appliances are not intended to be operated by means of an external timer or separate remote-control system.
safety information _5


WARNING Severe warning signs for cleaning

Do not clean the appliance by spraying water directly onto it.
Do not use benzene, thinner or alcohol to clean the appliance.
- This may result in discoloration, deformation, damage, electric shock or fire.
Before cleaning or performing maintenance, unplug the appliance from the wall socket and remove food waste from the door and cooking compartment.
- Failure to do so may result in electric shock or fire.
Do not use harsh abrasive cleaners or sharp metal scrapers to clean the oven door glass since they can scratch the surface, which may result in shattering of the glass.
Do not use your microwave oven to dry papers or clothes.
For your safety, do not use high-pressure water cleaners or steam jet cleaners.

Caution signs for cleaning

The oven should be cleaned regularly and any food deposits removed.
Failure to maintain the oven in a clean condition could lead to deterioration of the surface that could adversely affect the life of the appliance and possibly result in a hazardous situation.

Take care not to hurt yourself when cleaning the appliance (external/internal).
- You may hurt yourself on the sharp edges of the appliance.
Do not clean the appliance with a steam cleaner.
- This may result in corrosion.
PRECAUTIONS TO AVOID POSSIBLE EXPOSURE TO EXCESSIVE MICROWAVE ENERGY
Failure to observe the following safety precautions may result in harmful exposure to microwave energy.
(a) Under no circumstances should any attempt be made to operate the oven with the door open or to tamper with the safety interlocks (door latches) or to insert anything into the safety interlock holes.
(b) Do not place any object between the oven door and front face or allow food or cleaner residues to accumulate on sealing surfaces. Ensure that the door and door sealing surfaces are kept clean by wiping after use first with a damp cloth and then with a soft dry cloth.
(c) Do not operate the oven if it is damaged until it has been repaired by a qualified microwave service technician trained by the manufacturer. It is particularly important that the oven door closes properly and that there is no damage to the:
(1) Door (bent)
(2) Door hinges (broken or loose)
(3) door seals and sealing surfaces
(d) The oven should not be adjusted or repaired by anyone other than a properly qualified microwave service technician trained by the manufacturer.
This product is a Group 2 Class B ISM equipment. The definition of group 2 which contains all ISM equipment in which radio-frequency energy is intentionally generated and/or used in the form of electromagnetic radiation for the treatment of material, and EDM and arc welding equipment. For Class B equipment is equipment suitable for use in domestic establishments and in establishments directly connected to a low voltage power supply network which supplies buildings used for domestic purposes.
6_ safety information

contents
INSTALLING THE OVEN

OVEN FEATURES

11 Oven
12 Oven controls
13 Accessories
BEFORE YOU BEGIN

14 Setting the clock
15 Filling the water tank
16 Setting the water hardness
17 Default settings
OVEN USE

18 Setting the cooking function mode
20 Using the steam mode
21 Steam mode setting
23 Using the steam combi mode
25 Using the regeneration/reheat mode
26 Using the fan oven mode
28 Using the grill mode
30 Cooking time reservation function
31 Using the auto cook mode
32 Using the auto cook features
36 Using the defrost mode
38 Using the keep warm mode
39 Using the memory mode
41 Test dishes
DESCALING AND CLEANING

42 Descaling
44 Using the steam clean feature
45 Cleaning
46 Switching off the beeper/Reading out the temperature
46 Display current oven temperature
47 Child safety lock
48 Cleaning and care
49 Changing the lamp
50 Error codes
ERROR CODES

TECHNICAL DATA

51 Technical data
contents _7

installing the oven
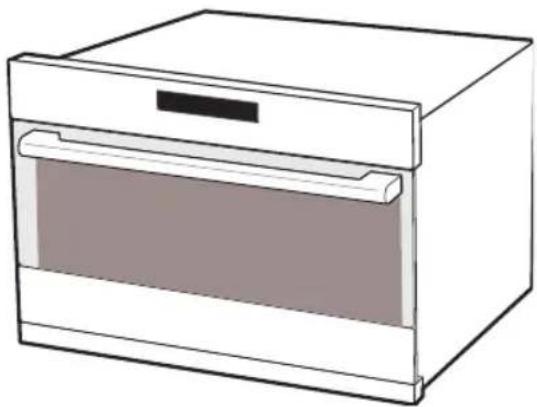
General
Technical Information
Electrical Supply: 230 V - AC, 50 Hz
Power consumption: 3200 W
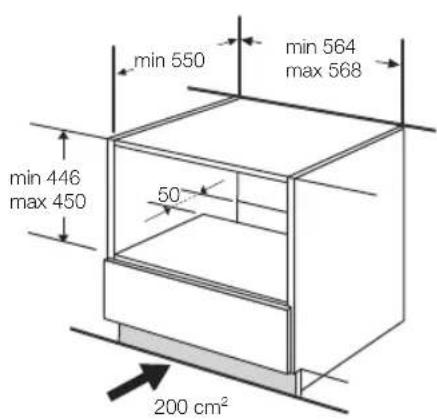
Dimensions (w x h x d): 596 X 460 X 472 mm
This appliance complies with EU regulations
Disposal of Packaging and Appliance
Packaging is recyclable.
Packaging may consist of the following materials:
-cardboard;
- polyethylene film (PE);
- CFC-free polystyrene (PS rigid foam).
Please dispose of these materials in a responsible manner in accordance with government regulations.
The authorities can provide information on how to dispose of domestic appliances in a responsible manner.
Safety
This appliance should only be connected by a qualified technician.
The combi steam oven is NOT designed for use in a commercial cooking setting. It should be used exclusively for cooking food in a home setting.
The appliance is hot during and after use. Exercise caution when young children are present.
Electrical connection
The house mains to which the appliance is connected should comply with national and local regulations.
If you wish to make a fixed connection, ensure that a multipolar switch with a minimum contact spacing of 3 mm is fitted in the supply line.
8_ installing the oven


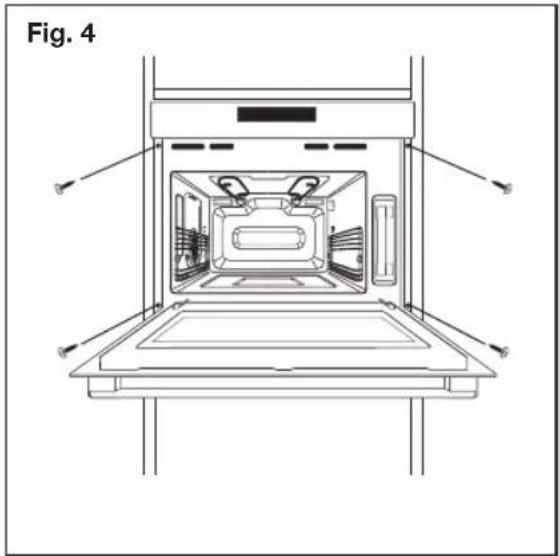


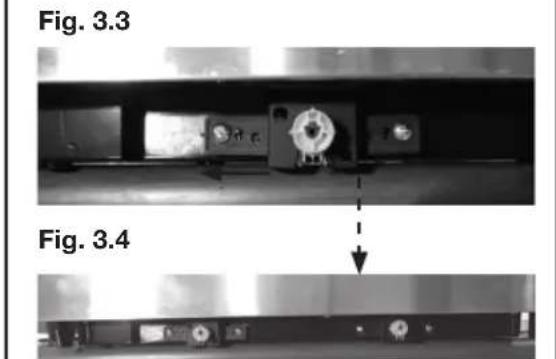
Fig. 3.5
installing the oven _9
Fig. 1 Slide the combi steam oven partly into the cabinet. Lead the connection cable to the power source.
Fig. 2 Slide the combi steam oven completely into the cabinet.
Fig. 3 Heigt adjustment of the combi steam oven in combination with other appliances!
The top-side of the combi steam oven must be equal to the other appliances.
Fig. 3.1 If the bottomstrip does not align with the other appliances, you can adjust it. By removing the strip, the adjustable blocks with each 2 screws appear.
Fig. 3.2 In the highest position of the adjustable blocks, all 4 screws are located in the inner holes.
Fig. 3.3 Relocate the first screw to the outer (slot) hole.
Fig. 3.4 After that, relocate the second screw to the outer (slot) hole and push the adjustable block downwards.
Fig. 3.5 After the left and right adjustable blocks are on the correct hight, you can push on the bottomstrip again.
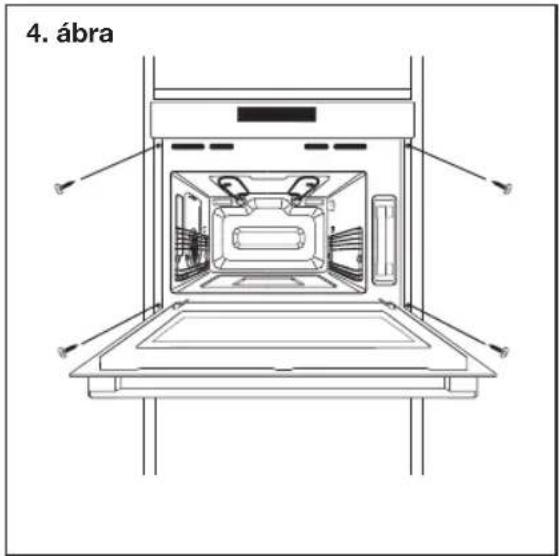
Fig. 4 Fasten the combi steam oven by using the four screws (4 x 16 mm) provided.
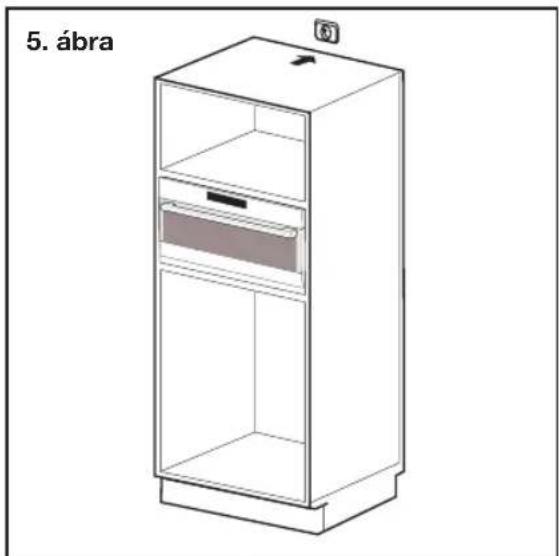
Fig. 5 Make the electrical connection. Check that the appliance works correctly.


10_ installing the oven
oven features
OVEN


Note
- Shelf levels are numbered from the bottom up.
- The levels 4, 5 and 6 are mainly used for the grill function.
• Levels 1 is mainly used for baking and roasting. - Please refer to the Cooking Guides provided throughout this booklet to determine the appropriate shelf level for your dishes.
oven features _11
OVEN CONTROLS

- POWER SAVE BUTTON
- DISPLAY
- COOKING FUNCTION SELECT BUTTON
- STEAM CLEAN BUTTON
-
COOKING TIME BUTTON
-
START TIME BUTTON
- MEMORY BUTTON
- SELECT BUTTON
- CONTROL BUTTON
- STOP/CANCEL BUTTON
- START BUTTON

Power save button
- If you press the power save button, the lights for the button are turned off, As a result, all buttons other than the power save button are deactivated
- Press the power save button again will turn the lights of the other buttons on Consequently, all buttons are reactivated.
- If you don't press any button during 5 minutes, it will be changed to power save mode.
12_ oven features
ACCESSORIES
The following accessories are provided with your Combi Steam Oven:

1 Multi pan. (for level 1 or 6)

2 Oven rack. (for all levels)

3 Steam container, perforated, 40 mm deep, GN 2/3. (useful for steam mode, for level 2, 3, 4 and 5)

oven features _13

before you begin
SETTING THE CLOCK
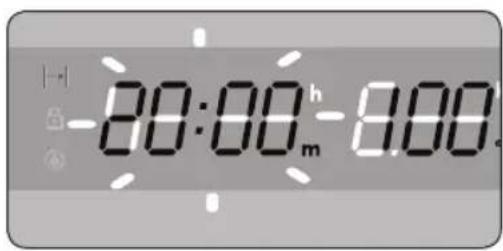
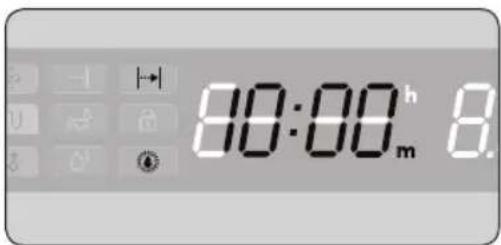
When the appliance is first plugged in, the display lights up. (example 15:15)
When connecting the power for the first time, please use the product after setting the time.

1 Press the STOP/CANCLE button to the "OFF" state.

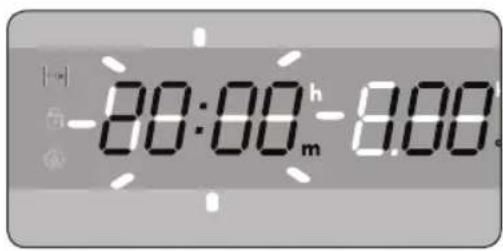
2 Press SELECT button. The "12" starts blinking.

3 Press the CONTROL button to set the hour.
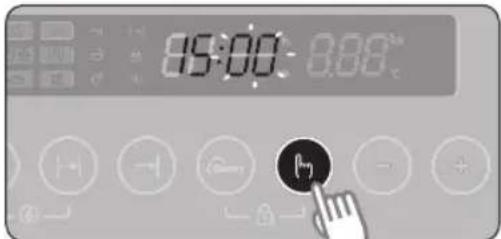
4 Press SELECT button again. The "00" starts blinking.
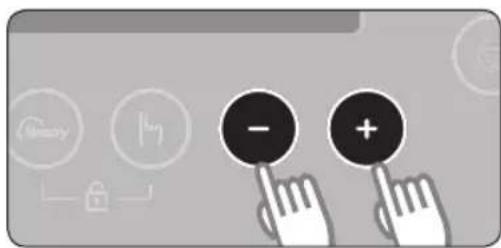
5 Press the CONTROL button to set the minutes.
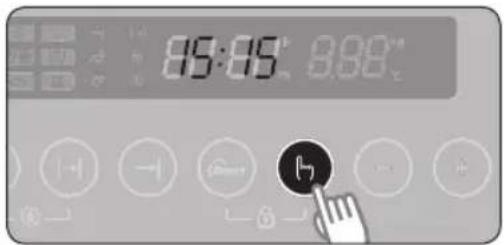
6 Press SELECT button again. The clock sets by itself within 5 seconds.
14_ before you begin
FILLING THE WATER TANK
When you open the cooking compartment door, you will see the water tank on the right-hand side. Only fill the tank with fresh tap water or with still bottled water. If your water is very hard, we recommend that you use softened water (see also "Water hardness).
Caution Do not fill the water tank with distilled water or any other liquids.
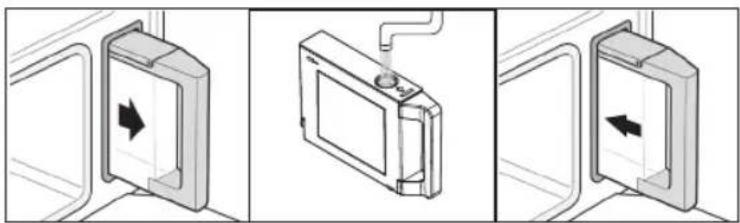
Fill the water tank before each use
Lift the water tank over the interlock and pull the tank out of the appliance. Fill the water tank with cold water up to the "max." mark. Close the lid until you feel it engage. Slide the water tank back until it engages.
Empty the water tank after each use
Pull the water tank out of the appliance slowly. Pulling it out quickly may cause water to spill. Hold the water tank horizontally, so that no remaining water can drip out of the valve seat. Empty out the water. Thoroughly dry the water tank in the appliance and the seal in the lid.
"Fill water tank" display If the water tank is empty, a signal sounds.
A symbol appears in the display. The operation is interrupted.
1. Open the cooking compartment door carefully. Steam will escape.
2. Take out the water tank, fill to the "max" mark and reinsert.
3. Press the START button.
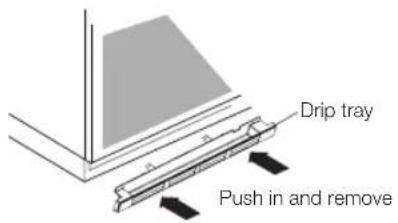
Removing drip tray Empty drip tray at regular intervals. Push drip tray in until you hear a click, and remove tray from locked position.
before you begin _15
SETTING THE WATER HARDNESS
It is necessary to descale your appliance at regular intervals. This is the only way to prevent damage.
Your appliance has a system that automatically displays when it needs descaling. It is preset to a water hardness 4. Change the value if your water is softer.
Checking the water hardness
Information on the hardness of the water in your area can be obtained from the local water board.
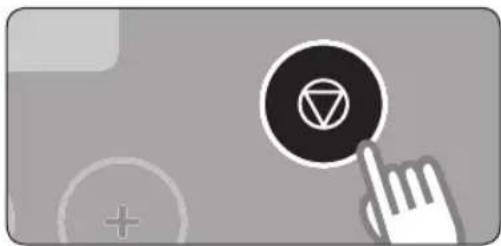
1 Press the STOP/CANCLE button to the "OFF" state.
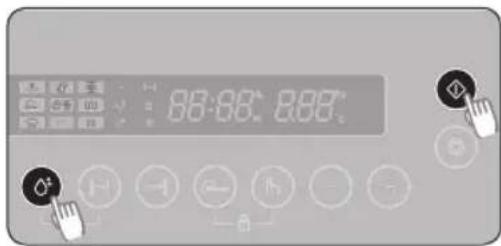
2 Press the STEAM CLEAN button and the START button at the same time and hold for 3 seconds.

3 Press the CONTROL button to the desired water hardness. 4

Press the SELECT button.
The appliance is now programmed to provide the descaling warning when necessary, based on the actual hardness of the water.
16_ before you begin
DEFAULT SETTINGS
During blinking of the default cook time or default temperature (after you have chosen a setting with the COOKING FUNCTION SELECT button), you can change the time or temperature by press the COOKING TIME or SELECT button.

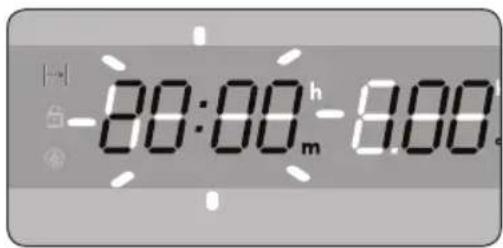

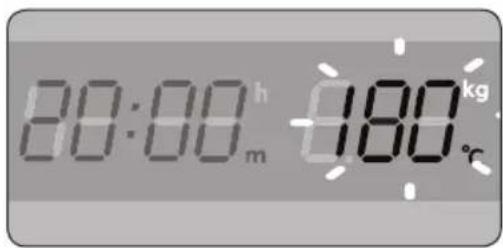
A Press the COOKING FUNCTION SELECT button to choose the function you want to use.
B The default time or default temperature starts to blink.

C While the default time/temperature is blinking. Press the CONROL button to set the desired time/temperature.
If the blinking has stopped, you can change the settings by following the steps as described later in this manual.

Note
1) During cooking, COOKING TIME and TEMPERATURE can be changed.
- Cooking time: press the COOKING TIME button and then press the CONTROL button.
- Temperature: press the SELECT button and then press the CONTROL button.
before you begin _17
oven use
SETTING THE COOKING FUNCTION MODE
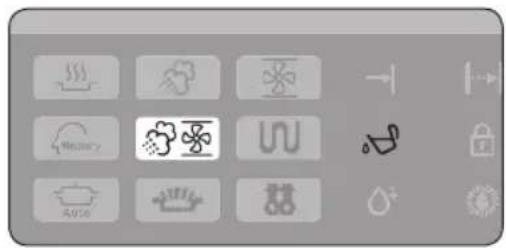
Press the COOKING FUNCTION SELECT to select the desired oven function.

Oven Modes
The following table represents the various oven modes and settings of your oven. Use the cooking guide tables for those modes as guidelines for cooking.
| Mode Description | |
 | Steam ModeFood is cooked by steam provided by the steam generator and injected into the cavity by several jet nozzles.This mode is suitable for steaming food like vegetables, fish, eggs, fruits and rice. When cooking by using this mode, always fill the water tank with fresh water.Temperature range: 40~100 °C |
 | Steam Combi ModeFood is cooked by fan oven mode and the help of steam. The steam is provided by the steam generator and injected into the cavity by interval. This mode is suitable for baking pastries, such as puff pastry, apple pies, brioches, yeast buns, bread rolls, croissants, baguettes and yeast cakes. The superheated steam will provide a nice crisp, shiny surface and fluffy structure. Meat roasts and fish will keep a more juicy texture inside. When cooking with this mode always fill the water tank with fresh water.Temperature range: 100~230 °C |
 | Regeneration/Reheat ModeFood is reheated by fan oven mode and the help of steam. The steam is provided by the steam generator and injected into the cavity by interval. This mode is suitable for plated meals. Dishes can be gently reheated without dry out. When reheating with this mode always fill the water tank with fresh water.Temperature: 120 °C |
18_ oven use
| Mode Description | |
 | Fan Oven ModeFood is heated by two heating elements on top of cavity and one bottom heating element, while the fan from side distributes the hot air evenly.This setting is suitable for roasting meat, baking gratins and cake.Temperature range: 40~230 °C |
 | Grill ModeFood is heated by the top heating elements. We recommend this mode for grilling steaks and sausages as well as cheese toasts. |
 | Defrost ModeFrozen food is defrosted by steam. The steam is provided by the steam generator and injected into the cavity by interval.This mode is suitable for frozen meat, poultry, fish and fruit. When defrosting with this mode always fill the water tank with fresh water.Temperature range: 40~70 °C |
 | Keep warm ModeThe food will be kept warm by help of the heat, provided by the bottom heating element (Do not keep food warm for longer than 2 hours. Warm food spoils more quickly.)Temperature: 70 °C |
Automatic Functions
The following table represents additional programmes and functions.
| Mode Description | |
 | Auto Cook Programmes40 pre-programmed auto cook settings can be selected for your convenience. Time and temperature will be set automatically.You simply select programme and weight your dish and start the steam cooking process. |
 | Steam CleanBy the help of hot steam the surface of the oven cavity will be soaked and you can easily clean your oven. The steam clean programme takes only 10 minutes time. |
USING THE STEAM MODE
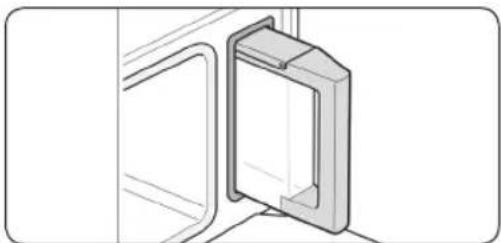
1 Fill the water tank up to the maximum line and place it back. Then place your food into the cooking cavity.

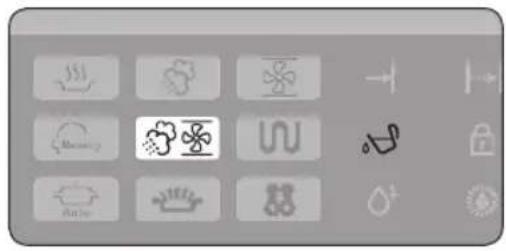
2 Press the COOKING FUNCTION SELECT button to Steam mode position 🌐 (default cook time 20 min. temperature 100 °C). The time is blinking.

3 During blinking, press the CONTROL button and set the desired cooking time.

If the blinking has already stopped before you have set the time, press the COOKING TIME button first and then press the CONTROL button.

4 Press the SELECT button. The temperature is blinking.

5 Press the CONTROL button and set the temperature.

6 Press the START button. ▶ The temperature indicator (°C) on the display will blink. After the temperature is reached, it stops blinking.
20_ oven use

If there is too little water while cooking, you will see the symbol
in the display along with a beep being played. Add water into the tank and press START to continue with the steaming.
- You can add water into the tank at any time while cooking.

Note
1) During cooking, COOKING TIME and TEMPERATURE can be changed.
- Cooking time: press the COOKING TIMER button and then press the CONTROL button.
• Temperature: press SELECT and then press the CONTROL button.
2) In Steam mode settings, the top and bottom steam heating elements switch off and on throughout cooking to regulate the temperature.
3) Be careful when removing the plate as it is hot. First leave the door a little open to allow the hot steam to escape. Pay attention to the steam outlets as well.
4) When you have finished cooking, pour out the water in the drip tray and empty the tank.
5) Dry the cooking cavity with a dry cloth if there is any remaining water.
6) The cooling fan always works for 3 minutes after a steaming process. However, this is not a malfunction and you do not need to worry about this.
STEAM MODE SETTING
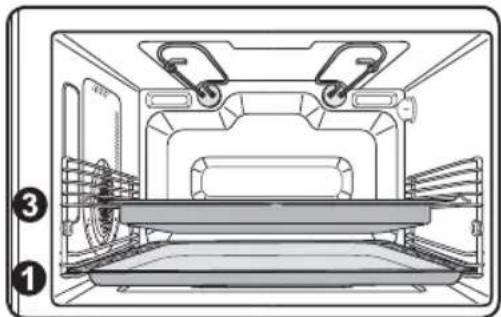
Food is cooked by steam provided by the steam generators and injected into the cavity by two jet nozzles.
Steam container are usually placed on level ③
Insert the multi pan on level 1
oven use _21
Cooking Guide

Use settings and times in this table as guide lines for steaming.
We recommend to always fill the water tank with fresh water to the maximum level.
| Food item | Shelf level | Steam mode (°C) | Accessory | Time (min.) |
| Broccoli Florets | 3/1 100 °C | Steam container/multi pan 12-16 | ||
| Sliced Vegetables(pepper, courgettes, fennel, onions) | 3/1 100 °C | Steam container/multi pan 9-14 | ||
| Green Beans | 3/1 100 °C | Steam container/multi pan 28-33 | ||
| White Asparagus | 3/1 100 °C | Steam container/multi pan 20-25 | ||
| Whole Vegetables(Artichokes, Whole Cauliflower, Corn on the cob) | 3/1 100 °C | Steam container/multi pan 30-35 | ||
| Peeled Potatoes(cut into quarters) | 3/1 100 °C | Steam container/multi pan 30-35 | ||
| Fish Fillets | 3/1 100 °C | Steam container/multi pan 15-18 | ||
| Blue Prawns | 3/1 100 °C | Steam container/multi pan 12-15 | ||
| Chicken Breast | 3/1 100 °C | Steam container/multi pan 23-28 | ||
| Boiled Eggs | 3/1 100 °C | Steam container/multi pan 15-20 | ||
| Food item | Shelf level | Steam mode (°C) | Accessory | Time (min.) |
| 2-level cooking:Dual Meal(fish fillets/sliced vegetables) | 4/1 100 °C | Steam container/multi pan 15-20 | ||
| White Parboiled Rice(use a pyrex bowl, add 375 ml hot boiling water, when cooking 250 g rice) | 1 100 °C | Oven rack 25-30 | ||
| Milk Rice(use a flat pyrex dish, add double quantity of milk) | 3 100 °C | Oven rack 40-50 | ||
| Frozen Yeast Dumplings | 3 100 °C | Steam container/multi pan 23-28 | ||
| Flan/Crème(6 x dessert dishes, each 100 ml) | 3 90 °C | Steam container/multi pan 20-25 | ||
| Egg Custard(Use a large flat glass pyrex dish) | 3 90 °C | Oven rack 37-42 | ||
| Fruit Compote(use a flat round glass pyrex, add 1 teaspoon sugar and 2 tbsp. water) | 3 100 °C | Oven rack 10-15 | ||
1 Fill the water tank up to the maximum line and place it back. Then place your food into the cooking cavity.
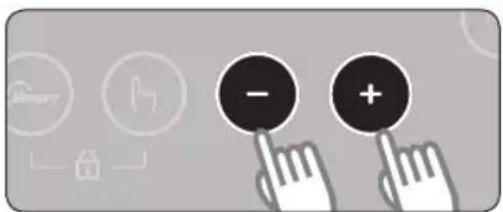
3 During blinking, press the CONTROL button and set the desired temperature.
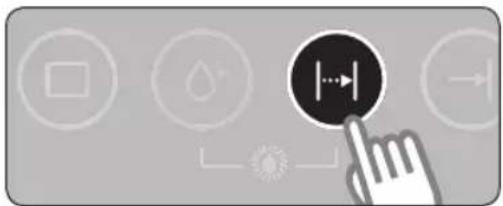
4 Press the COOKING TIME button to set the desired cooking time. The time is blinking.

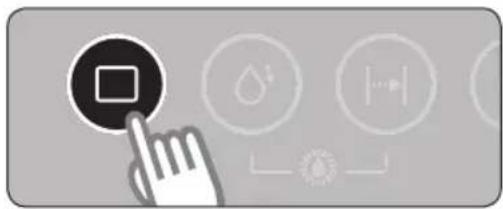
2 Press the COOKING FUNCTION SELECT button to Steam Combi mode position (default: 180 °C). The temperature is blinking.

If the blinking has already stopped before you have set the temperature, press the SELECT button first and then press the CONTROL button.

5 Press the CONTROL button and set the desired cooking time.
6 Press the START button.
The temperature indicator (°C) on the display will blink. After the temperature is reached, it stops blinking.

Note
1) During cooking, COOKING TIME and TEMPERATURE can be changed.
- Cooking time: press the COOKING TIME button and then press the CONTROL button.
- Temperature: press the SELECT button and thenPress the CONTROL button.
2) In Steam Combi Mode settings, the top bottom and steam heating elements switch off and on throughout cooking to regulate the temperature.

Important
- When using the Steam Combi mode, be sure that the baking dishes are suitable for 100-230 °C cooking temperatures.
Combi Steam Setting
Food is cooked by Fan Oven Mode and the help of steam. The steam is provided by the steam generators and injected into the cavity by interval.

Place the multi pan on level ①
Cooking Guide

Use settings and times in this table as guide lines for baking and roasting. You do not need to pre-heat the oven.
We recommend to always fill the water tank with fresh water to the maximum level.
| Food item | Shelf level | steam Combi mode (°C) | Accessory | Time (min.) |
| Croissants/ Rolls 1 | 170 °C | Multi pan 17-23 | ||
| Puff Pastry Stripes (add grated cheese) | 1 200 °C | Multi pan 15-20 | ||
| Frozen Apple Pie 1 | 190 °C | Multi pan 35-40 | ||
| Homemade Bread 1 | 180 °C | Oven rack 40-50 | ||
| Brownies 1 150 °C | Oven rack | 35-45 | ||
| Vegetable Gratin/ Potato Gratin | 1 170-180 °C | Oven rack 35-50 | ||
| Homemade Pizza 1 | 230 °C | Multi pan 20-25 | ||
| Frozen Self-Rising Pizza | 1 230 °C | Multi pan 15-20 | ||
| Pork Roast (1.0 kg) | 2/1 | 1. stage: 180°C steam-combi mode2. stage: 180°C fan-oven mode | Oven rack/Multi pan | 1st stage: 40-502nd stage: 40-50 |
| Oven Fish 1 200 °C | Multi pan | 15-20 |
24_ oven use
USING THE REGENERATION/REHEAT MODE

1 Fill the water tank up to the maximum line and place it back. Then place your food into the cooking cavity.
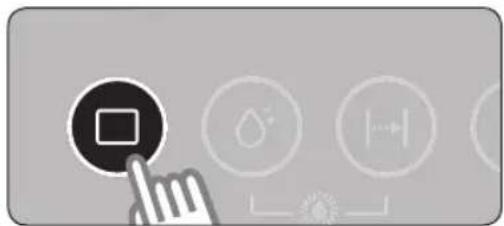
2 Press the COOKING FUNCTION SELECT button to Regeneration/Reheat Mode position 📋 (default: 20 min.). The time is blinking.

3 During blinking, press the CONTROL button and set the desired cooking time.

If the blinking has already stopped before you have set the time, press the COOKING TIME button first and then press the CONTROL button.
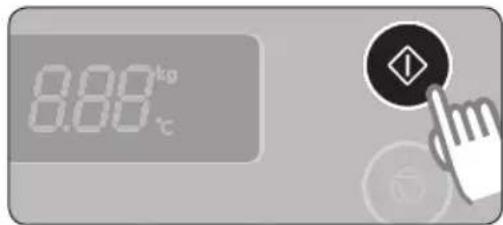
4 Press the START button. ▶ The Regeneration/Reheat Mode starts. When the Regeneration/Reheat Mode has finished, the oven will beep and "End" will flash four times. The oven will then beep one time per minute.
Regeneration/Reheat Setting
Use settings and times in this table as guide lines for reheating by gentle steaming. We recommend to always fill-up the water tank with fresh water to the maximum level. This mode is suitable to reheat and keep warm meals.
| Food item Shelf level Mode Accessory | Time (min.) | ||
| Reheating: Plated Meal (250-450 g) 3 | Reheat Oven rack 15-18 | ||
| 2-level Reheating: Plated Meals(Two plated meals, each 250-450 g) | 3/1 Reheat | Oven rack/Multi pan | 17-23 |
| Keeping warm:Plated meals/ Meat Roasts/Ceramic dishes | 3 Reheat Oven rack | 15-30 | |
USING THE FAN OVEN MODE

1 Press the COOKING FUNCTION SELECT button to Fan Oven Mode position (default: 180 °C). The temperature is blinking.

2 During blinking, press the CONTROL button and set the desired temperature.

If the blinking has already stopped before you have set the temperature, press the SELECT button first and then press the CONTROL button.


3 Press the COOKING TIME button to set the desired cooking time. The time is blinking.

4 Press the CONTROL button and set the desired cooking time (the maximum cooking time is 10:00 h).
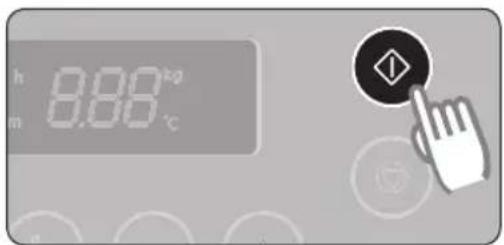
5 Press the START button.
The temperature indicator (°C) on the display will blink. After the temperature is reached, it stops blinking.

Note
1) During cooking, COOKING TIME and TEMPERATURE can be changed.
- Cooking time: press the COOKING TIME button and then press the CONTROL button.
• Temperature: press the SELECT button and then press the CONTROL button.
2) In Fan Oven Mode settings, the top and bottom heating elements switch off and on throughout cooking to regulate the temperature.

Important
- When using the Fan Oven Mode, be sure the baking dishes are suitable for 40 - 230 °C cooking temperatures
oven use
Fan Oven Mode Setting
Food is heated by two heating elements on top of the cavity and one bottom heating element, while the fan on the side distributes the hot air evenly.
Place

1
Cooking Guide

Use settings and times in this table as guide lines for baking and roasting. We recommend to preheat the oven with fan oven mode to the desired temperature.
| Food item | Shelf level | Fan Oven Mode (°C) | Accessory | Time (min.) |
| Frozen Pizza(350 g) | 1 220°C | Multi pan 14-15 | ||
| Frozen French Fries(450 g) | 1 200°C | Multi pan 18-20 | ||
| Frozen Bread Roll(250 g) | 1 160°C | Multi pan 7-9 | ||
| Homemade Pizza(1300 g) | 1 200°C | Multi pan 20-25 | ||
| Sponge Cake(500 g) | 1 150°C | Oven rack 25-30 | ||
| Marble Cake(700 g) | 1 150°C | Oven rack 50-60 | ||
| Muffins(300 g) | 1 170°C | Oven rack 17-19 | ||
| Cookies(200 g) | 1 160°C | Multi pan 8-12 |
USING THE GRILL MODE

1 Press the COOKING FUNCTION SELECT button to Grill mode position ∪ (default: 1:00 min.). The time is blinking.

2 During blinking, press the CONTROL button and set the desired cooking time (the maximum cooking time is 1:30 h).

If the blinking has already stopped before you have set the time, press the COOKING TIME button first and then press the CONTROL button.
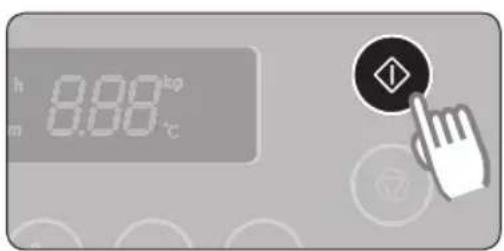
3 Press the START button.


Important
- Always use oven gloves when touching the recipients in the oven, as they will be very hot.
- Check that the heating elements are in the horizontal position.
Grill Mode Setting
Food is heated by the top heating elements (horizontal position).
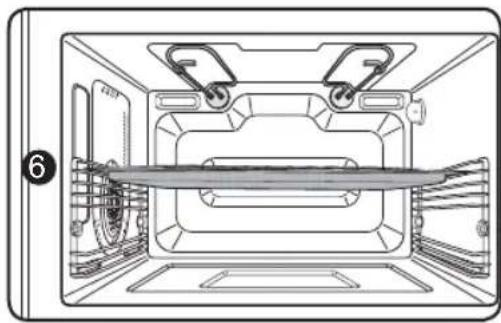
For grilling, multi pan is usually placed on level 6
Cooking Guide ∪
Use settings and times in this table as guide lines for grilling.
We recommend to preheat the oven with Grill Mode for 3-4 minutes.
| Food item | Shelf level | Mode Accessory Time (min.) | |
| Toast(4 slices) | 6 Grill Multi pan | 1st side: 2-32nd side: 2-3 | |
| Cheese Toast(4 pcs) | 6 Grill Multi pan 7-8 | ||
| Beef Steaks(500 g) | 5/1 Grill | Oven rack/Multi pan | 1st side: 9-112nd side: 5-7 |
| Lamb chops(400 g) | 5/1 Grill | Oven rack/Multi pan | 1st side: 8-102nd side: 6-8 |
| Fresh Vegetables(250 g) | 6 Grill Multi pan 12-15 |
COOKING TIME RESERVATION FUNCTION
Example by using the Fan Oven Mode : Current time: 12:05
Cook time: 2:00
Start time: you wish to start cooking at 16:00

1 Press the COOKING FUNCTION SELECT button to Fan Oven Mode position

2 Press the COOKING TIME button to set the desired cooking time. The time is blinking.

3 Press the CONTROL button and set the desired cooking time (2:00).

4 Press the button START TIME button. The current time is displayed.

5 Press the CONTROL button to set the desired START TIME (16:00). The start time is displayed.
30_ oven use
USING THE AUTO COOK MODE
The 40 Auto Cook features include/provide pre-programmed cooking times. You do not need to set either the cooking times or the temperature.

1 Press the COOKING FUNCTION SELECT button to "AUTO COOK" position.

2 If you see the symbol in the display, fill the water tank up to the maximum line and place it back. Place your food into the cooking cavity.

3 Press the CONTROL button to choose auto cook feature (see the table on page 35).
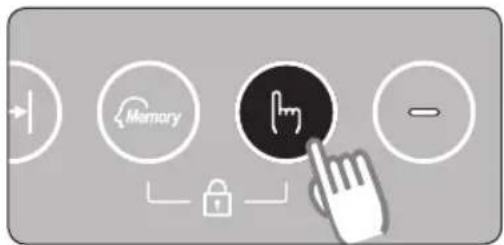
4 Press SELECT button. The weight range starts blinking.

5 If you want to change the weight press the CONTROL button. 6
Press the START button.
▶ Auto cooking starts. When the cooking has finished, the oven will beep and "End" will flash four times. The oven will then beep one time per minute.
USING THE AUTO COOK FEATURES
The following table presents 40 Auto Programmes for Steam cooking, Baking, Grilling, Roasting, Defrost & Cook and Defrosting. It contains its quantities and appropriate recommendations.
Before using those programmes always fill water tank up to maximum level with fresh water.
Programme number S-1 to S-12, b-6, d-1 to d-3 and d5 are running with steam only mode. Programmes number b-5, b-7, r-1 to r-4 and d-4 are running with a combination of steam and fan oven mode. The other programmes are running with fan oven mode or grill mode. Use oven gloves while taking out!
| Code | Food | Serving Size (kg) | Recommendations |
Steaming
| S-1 Sliced Vegetables 0.2-0.6 | Fill water tank with fresh water up to maximum level. Put sliced vegetables, such as courgettes, broccoli florets, pepper, carrots into the steam container. Put steam container in shelf level 3. Insert multi pan, shelf level 1. | |
| S-2 Whole Vegetables 0.2-0.6 | Fill water tank with fresh water up to maximum level. Put whole vegetables or big pieces of vegetables, such as cauliflower, broccoli, corn on the cob and artichokes into the steam container. Put steam container in shelf level 3. Insert multi pan, shelf level 1. | |
| S-3 Fish Fillets 0.2-1.0 | Fill water tank with fresh water up to maximum level. Put fish fillets, such as pollock, rose-fish and cod fish side by side into the steam container. Put steam container in shelf level 3. Insert multi pan, shelf level 1. | |
| S-4 Fish Steak 0.2-1.0 | Fill water tank with fresh water up to maximum level. Put fish steaks, such as salmon and tuna steaks side by side in the steam container. Put steam container in shelf level 3. Insert multi pan, shelf level 1. | |
| S-5 Prawns 0.2-0.5 | Fill water tank with fresh water up to maximum level. Put the raw prawns into the steam container. Put steam container in shelf level 3. Insert multi pan, shelf level 1. | |
| S-6 Chicken Breast 0.2-1.0 | Fill water tank with fresh water up to maximum level. Put chicken breasts side by side into the steam container. Put steam container in shelf level 3. Insert multi pan, shelf level 1. | |
| S-7 Eggs 0.1-0.6 | Fill water tank with fresh water up to maximum level. Pierce middle sized eggs (each about 50-60 g). Put 2-10 eggs into the steam container. Put steam container in shelf level 3. Insert multi pan, shelf level 1. | |
| S-8 Peeled Potatoes 0.2-0.8 | Fill water tank with fresh water up to maximum level. Peel potatoes and cut into quarters, or use small potatoes. Put into the steam container. Put steam container in shelf level 3. Insert multi pan, shelf level 1. | |
| S-9 White Rice 0.1-0.5 | Fill water tank with fresh water up to maximum level. Distribute the parboiled white rice evenly in a flat glass pyrex dish. Add 1.5 x hot boiling water (for 250 g rice add 375ml hot water). Put dish on the oven rack, shelf level 1. |
32_ oven use

| Code | Food | Serving Size (kg) | Recommendations |
| S-10 | Flan 0.4-0.6 | Fill water tank with fresh water up to maximum level. Pour the flan mixture into 6 dessert dishes, each 100 ml. Put dishes side by sides on oven rack, shelf level 3. Cook uncovered. | |
| S-11 | Fruit Compote 0.2-0.5 | Fill water tank with fresh water up to maximum level. Put slices of apples, pears, pineapple, or apricots in a flat glass pyrex dish. Add on tablespoon sugar. Put dish on oven rack, shelf level 3. Cook uncovered. | |
| S-12 | Melting Chocolate 0.1-0.3 | Fill water tank with fresh water up to maximum level. Break chocolate icing (35% cacao) for cakes into pieces and put in a small glass pyrex dish, cover with heat-resistant cling film. Put dish on the oven rack, shelf level 1. Keep covered during programme. Stir well after taking out. | |
| Baking | |||
| b-1 | Marble Cake 0.7-0.8 | Preheat the oven, using fan oven mode to 150°C. Put fresh dough (marble or lemon batter) into suitable sized rectangular metal baking dish. Put dish lengthways to the door, on the oven rack, shelf level 1.This programme is suitable for batter, such as lemon cake, hazelnut cake and marble cake. | |
| b-2 | Fruit Cake Base 0.3-0.5 | Preheat the oven, using fan oven mode to 150°C. Put batter into metal flan base dish on the oven rack, shelf level 1. | |
| b-3 | Muffins 0.5-0.7 | Preheat the oven, using fan oven mode to 170°C. Put muffin dough into metal muffin dish, suitable for 12 muffins. Set dish in the middle of oven rack, shelf level 1. | |
| b-4 | Sponge Cake 0.3-0.5 | Preheat the oven, using fan oven mode to 160°C. Put 300 g dough into 18cm, 400 g into 24cm and 500 g into 26cm diameter round black metal baking dish. Set dish in the middle of oven rack, shelf level 1. | |
| b-5 | Croissants/ Bread Rolls | 0.2-0.6 | Prepare small yeast buns, croissants or filled puff pastries (each 50-100 g). Put them on baking paper on multi pan, shelf level 1.Keep a distance of 3-4 cm to each other. |
| b-6 | Yeast Dough Fermentation | 0.3-0.6 | Prepare yeast dough for pizza, cake or bread.Put into a large round heat-resistant dish. Do not cover. Put dish on oven rack, shelf level 1. |
| b-7 | Frozen Apple Pie (-18°C) | 0.4-0.8 | Put roll of apple pie diagonally on baking paper on the multi pan, shelf level 1. |
| b-8 | Homemade Pizza 0.6-1.0 | Fill water tank with fresh water up to maximum level. Prepare pizza on baking paper on multi pan, shelf level 1. | |
Grilling
| G-1 Beef Steak | 0.3-0.60.6-0.8 | Put beef steaks side by side in the middle of oven rack. Insert oven rack in shelf level 5, multi pan in shelf level 1.Turn over as soon as the oven beeps.Push start button to continue process.The first setting is for thin beef steaks, the second setting is for thick beef steaks. |
| G-2 Chicken Pieces 0.4-0.8 | Brush chilled chicken pieces, such as drumsticks and wings with oil and spices. Put skin-side down on oven rack. Insert oven rack in shelf level 4, multi pan in shelf level 1.Turn over, as soon as the oven beeps. Push start button to continue process. | |
| G-3 Fish Steak 0.3-0.6 | Marinate Fish steaks, such as salmon steaks or tuna steaks. Put side by side on multi pan, shelf level 6. Turn over, as soon as the oven beeps. Push start button to continue process. | |
| G-4 Fish Fillets 0.3-0.6 | Marinate Fish fillets, such as salmon steaks or tuna steaks. Put side by side on multi pan, shelf level 6. Turn over, as soon as the oven beeps. Push start button to continue process. | |
| G-5 Sausages 0.3-0.6 | Put sausages side by side on multi pan, shelf level 6. Turn over, as soon as the oven beeps. Push start button to continue process. | |
| G-6 Hamburger 0.5-1.0 | Put raw hamburger side by side on multi pan, shelf level 6. Turn over, as soon as the oven beeps. Push start button to continue process. |
Roasting
| r-1 Whole Chicken | 1.2-1.31.4-1.5 | Brush chilled chicken with oil and spices.Put breast-side-down, in the middle of oven rack. Insert oven rack in shelf level 2, multi pan in shelf level 1. Turn over, as soon as the oven beeps. Push start button to continue process. |
| r-2 Roast Beef 1.1-1.3 | Brush the beef/ lamb with oil and spices (pepper only, salt should be added after roasting). Put it on the oven rack, with the fat-side down.Insert oven rack in shelf level 2, multi pan in shelf level 1.Turn over, as soon as the oven beeps. Press start to continue cooking process.After roasting and during standing time of 5-10 minutes it should be wrapped in aluminium foil. | |
| r-3 Pork Roast 0.8-1.2 | Fill water tank with fresh water up to maximum level. Put pork roast, brushed with oil and spices, with the fat-side down on the oven rack.Insert oven rack in shelf level 2, multi pan in shelf level 1.Turn over, as soon as the beep sounds. Press start to continue cooking process. | |
| r-4 Whole Fish 0.4-0.8 | Brush skin of whole fish with oil and add herbs and spices. Put fish side by side, head to tail, widthways on multi pan, shelf level 6.Turn over, as soon as the beep sounds. Push start button to continue process. |
34_ oven use

| Code | Food | Serving Size (kg) | Recommendations |
| r-5 | Roast Vegetables 0.2-0.5 | Slice vegetables, such as courgettes, pepper, egg plants and onions. Add cherry tomatoes and mushrooms. Brush with a mixture of olive oil, herbs, salt and pepper.Put vegetables on multi pan, shelf level 6. | |
| r-6 | Oven Potatoes 0.4-0.8 | Use middle sized potatoes. Rinse and clean potatoes. Brush skin with a mixture of olive oil, salt pepper and herbs. Put potatoes side by side on multi pan, shelf level 1. |
Convenience
| C-1 | Frozen Pizza (-18°C) | 0.3-0.350.4-0.45 | Place one frozen pizza on themulti pan, shelf level 1. |
| C-2 | Frozen Oven Chips (-18°C) | 0.4-0.45 | Distribute frozen oven chips evenly on themulti pan, shelf level 1. |
| C-3 | Frozen Fish Fingers (-18°C) | 0.3-0.5 | Distribute frozen fish fingers evenly on themulti pan, shelf level 1. |
Defrosting
| d-1 | Defrost Frozen Meat(-18°C) | 0.3-0.50.8-1.5 | Always shield the edges with aluminium foil. This programme is suitable for beef, lamb, pork, steaks, chops, minced meat. Put the meat on the oven rack. Insert oven rack in shelf level 2, multi pan in shelf level 1. |
| d-2 | Defrost Frozen Poultry(-18°C) | 0.3-0.60.9-1.3 | Always shield the leg and wing tips with aluminium foil. This programme is suitable for whole chicken as well as for chicken portions.Put poultry on the oven rack. Insert oven rack in shelf level 2, multi pan in shelf level 1. |
| d-3 | Defrost Frozen Fish(-18°C) | 0.3-0.8 | Always shield the tail of a whole fish with aluminium foil. This programme is suitable for whole fishes as well as for fish fillets.Put fish on the oven rack. Insert oven rack in shelf level 2, multi pan in shelf level 1. |
| d-4 | Defrost Frozen Bread(-18°C) | 0.1-0.30.4-0.6 | Put bread horizontally, lengthways to the door on the multi pan, shelf level 1.This programme is suitable for all kinds of sliced bread, as well as for bread rolls and baguettes. |
| d-5 | Defrost Frozen Fruit(-18°C) | 0.2-0.6 | Distribute fruits evenly into multi pan, shelf level 1. This programme is suitable for all kinds of sliced fruits or berries. |
USING THE DEFROST MODE

1 Fill the water tank up to the maximum line and place it back. Then place your food into the cooking cavity.
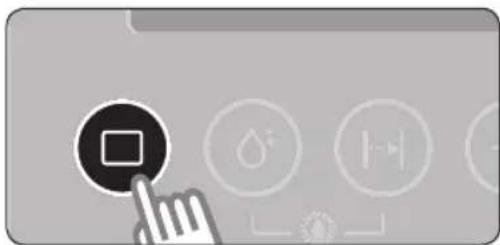
2 Press the COOKING FUNCTION SELECT button to the Defrost mode position ⚪ (default: 20:00 min.). The time is blinking.

3 During blinking, press the CONTROL button and set the desired defrosting time (the maximum defrosting time is max. 10:00 h).

If the blinking has already stopped before you have set the time, press the COOKING TIME button first and then press the CONTROL button.
4 Press the START button.

Note
1) During defrosting, COOKING TIME and TEMPERATURE can be changed.
- Cooking time: press the COOKING TIME button and then press the CONTROL button.
• Temperature: press the SELECT button and then press the CONTROL button.
2) When you have finished defrosting, pour out the water in the tray and wash out the tank.
3) Dry the cooking room with a dry cloth if there is any remaining water.
4) The cooling fan always works for 3 minutes after defrost mode. However, this is not a malfunction and you do not need to worry about this.
Defrosting Setting 😊
Use settings and times in this table as guide lines for defrosting by gentle steaming.
We recommend to always fill-up the water tank with fresh water to the maximum level.
This mode is suitable to defrost food such as small pieces of meat, fish poultry and fruits.
| Food item | Shelf level | Defrost mode | Accessory | Time (min.) |
| Frozen Steaks/Minced Beef (-18°C) | 2/1 50°C | Oven rack/Multi pan 25-35 | ||
| Frozen Fish Fillets (-18°C) | 2/1 50°C | Oven rack/Multi pan 15-25 | ||
| Frozen Chicken Pieces (-18°C) | 2/1 40°C | Oven rack/Multi pan 20-30 | ||
| Frozen Chicken (-18°C) | 2/1 50°C | Oven rack/Multi pan 55-65 | ||
| Frozen Berries (-18°C) | 1 50°C | Multi Pan 10-15 |

Important
- After defrosting meat (particularly poultry), operate the empty oven about 10 minutes in the Fan Oven Mode (200 °C) for killing bacteria in the cavity.
- Do not refreeze food once it has thawed.
USING THE KEEP WARM MODE

1 Press the COOKING FUNCTION SELECT to the "KEEP WARM" position.

2 During blinking, press the CONTROL button and set the desired cooking time (the maximum cooking time is 10:00 h).

If the blinking has already stopped before you have set the time, press the COOKING TIME button first and then press the CONTROL button.
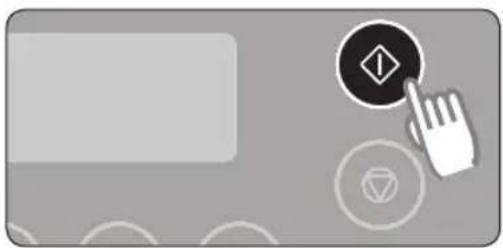
3 Press the START button.
USING THE MEMORY MODE
You can store 3 individual programmes in the memory and call them up at any time. The memory is useful if you prepare one dish particularly frequently.
You can also store one dish from the automatic programmes.
Example: Steam 20 min., 100 °C

1 Press the COOKING FUNCTION SELECT button to "Steam" position.

2 Press the CONTROL button and Set the temperature and the time as described before.
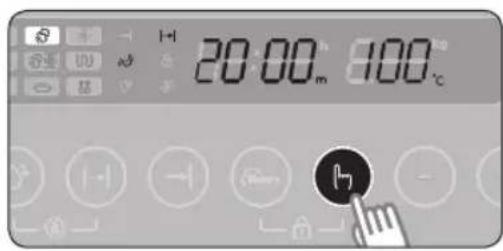
3 Press the SELECT button.
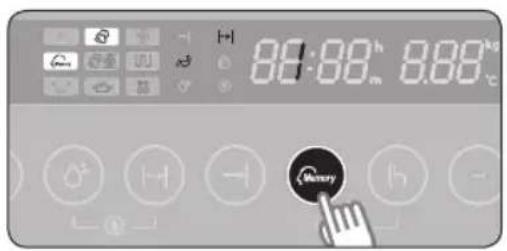
4 Press the MEMORY button (press one time for code 1, two times for code 2 or three times for code 3).

5 Press the SELECT button (the memory code is saved).
You can always store a new individual program:
1) Select the mode, temperature and time.
2) Press the SELECT button.
3) Press the MEMORY button (code 1, 2 or 3).
4) Press the SELECT button.
5) The 'old' program is now replaced by the new one.
Starting The Memory Function
It is very easy to start the stored programme at any time.
Example in the picture: Memory location 1 (steam 20 min., 100 °C)
Place the dish in the steam oven.

1 Press the STOP/CANCLE button to "OFF" position.

2 Press the MEMORY button (one time for code 1).

If you see the symbol √h the display, fill the water tank up to the maximum line and place it back.

3 Press the START button.
TEST DISHES
According to standard EN 60350 and DIN44547
1. Baking
The recommendations for baking refer to preheated oven.
| Type of food | Dish & Notes | Shelf level | Cooking mode | Temp. (°C) | Cooking time (min.) |
| Shortbread | Multi pan 1 Fan oven 160-170 20-30 | ||||
| Small cakes | Multi pan 1 Fan oven 150-170 20-30 | ||||
| Fatless sponge cake | Oven rack + Springform cake tin (Dark coated, ø 26 cm) | 1 Fan | oven 150-170 25-35 | ||
| Apple yeast tray cake | Multi pan 1 Fan oven 150-170 50-70 | ||||
| Apple pie | Oven rack + Springform cake tin (Dark coated, ø 20 cm) | 1 Fan | oven 170-190 80-100 |
2. Grilling
Preheat the empty oven for 5 minutes using Grill function.
| Type of food | Dish & Notes | Shelf level | Cooking mode | Temp. (°C) | Cooking time (min.) |
| White bread toasts | Multi pan(Center area/Except drain) | 6 Grill | - | 1st 2 1/2-32nd 2 1/2-3 | |
| Beef burgers | Oven rackMulti pan(to catch drippings) | 51 | Grill - | 1st 9-122nd 9-12 |
oven use _41
descaling and cleaning
DESCALING
When you see the message 🙏 on the control panel, the machine needs to be descaled.
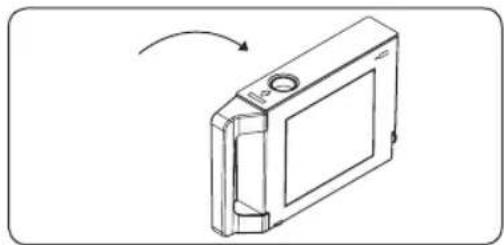
1 Dilute and uses according to description of bying citric acid. 2

Close the lid of water tank before installing into main unit close the lid before installing it into the main unit.
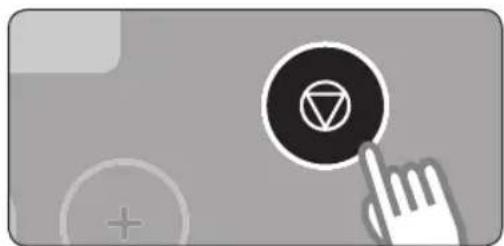
3 Press the STOP/CANCLE button to "OFF" position.

4 Close the door and press and hold down both the COOKING TIME and STEAM CLEAN buttons for 3 seconds. The machine displays "40:00" and starts descaling.

5 When it has progressed for about 30 minutes, the machine displays "10:00" and stops operating with a beep. Remove the tank and empty any remaining water. Wash the tank with water and fill it with 1 litre water. Close the lid and install it into the main unit.

6 Press the START button. A rinsing process takes place with clean water.
42_ descaling and cleaning

7 When done, the machine will make a beep. Empty both the tank and the drip tray and clean the tank with water.
8 Open the door and wipe inside the cooking cavity with a dry cloth.

Note
- We advise to use Citric acid when you descale the machine. Citric acid is a highly effective descaler made exclusively from natural, totally biodegradable substances.
It is non-corrosive, non-aggressive and has no environmental impact. As well as being an affective descaler, it also has an antimicrobial sanitising action, thus helping to ensure the hygiene of the machine's internal components, preserve the taste of the food over time and extend the working life of the machine. - Water is used for steam cooking, which contains calcium and magnesium. Through heating, water evaporates and only the floating materials (minerals) remain (not harmful to humans).
- If the descaling cycle is interrupted before completion, the programme must be started again from the beginning.
USING THE STEAM CLEAN FEATURE
The Steam Clean feature allows you to sanitize your oven in just 10 minutes. The STEAM CLEAN process takes 7 minutes, and the standby time for the process is 3 minutes. In these 3 minutes the steam will soak all the leftovers and you can wipe them from the ceiling or walls with a soft cloth.
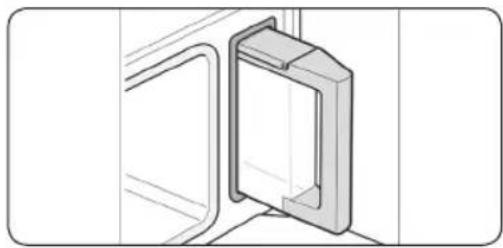
1 Fill the water tank up to the maximum line and place it back. 2
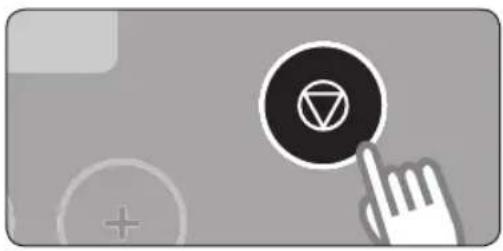
Press the STOP/CANCLE button to "OFF" position.

3 Press the STEAM CLEAN button and press the START button 4
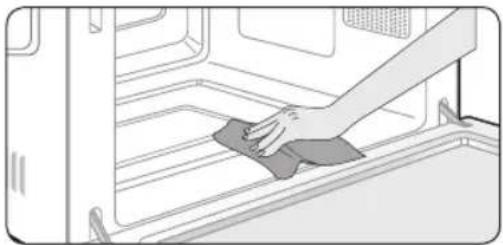
When the process is finished: open the door and wipe inside the cooking cavity with a dry cloth.

Important
- Use this feature only when the oven has cooled completely to room temperature.
• DO NOT use distilled water. - DO NOT use high-pressure water cleaners or steam jet cleaners for safety reasons.
44_ descaling and cleaning
CLEANING


1 Cleaning the top grill.
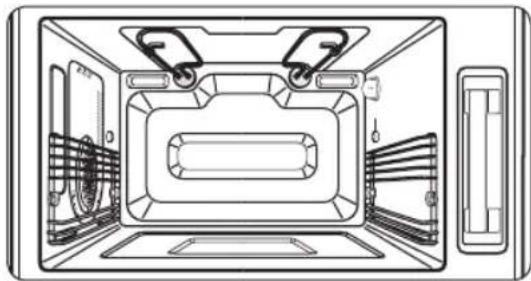
▶ Opening the top grill to the left or right, as shown in the figure, will facilitate cleaning. (When cleaning is finished, make sure to close the grill).

2 Cleaning inside the cavity.
▶ Lift up both left and right shelves at the front (1). Move them towards the middle (2) and pull them out. Wipe any leftovers from the ceiling or walls using a neutral cloth dipped in detergent.
When completed, install both shelves back into the correct positions.
Even solid, difficult stains or dry leftovers can be removed by using the steam clean process.
4 Cleaning the water tank and the tray.
▶ Wipe them with a sponge dipped in a neutral detergent and then rinse them with water.
3 Cleaning the oven surface, control panel and window.
The surface of the ov.en can be wiped with a wet dish towel, followed by a dry cloth to remove the water completely.
▶ Do not use force when cleaning the control panel as it can be damaged while cleaning.
Clean the transparent window with a neutral detergent-dipped dish towel and then with a dry cloth until no water remains.

5 Cleaning the accessories.
▶ Wipe them with a neutral detergent and dry them before inserting them back into the cooking cavity.
▶ Do not use force on the accessories when wiping them with a scrubber, as this may damage the coated surface.
WARNING:
- NEVER use benzene, thinner or a metal scrubber to clean. Otherwise, it can cause discoloration or damage to the surface.
- Do not spray water onto the machine when cleaning it. This can lead to electric shock or fire.
- Do not expose the water tank or tray to direct sunlight to dry it. This can result in mal formation or damage.
SWITCHING OFF THE BEEPER/READING OUT THE TEMPERATURE

1 Press the STOP/CANCLE button to "OFF" position.

2 To switch the beeper off, press STOP button and START button at the same time and hold for one second. "OFF" appears in the display.

3 To switch the beeper back on, press STOP button and START button again at the same time and hold for one second. "ON" appears in the display.
DISPLAY CURRENT OVEN TEMPERATURE
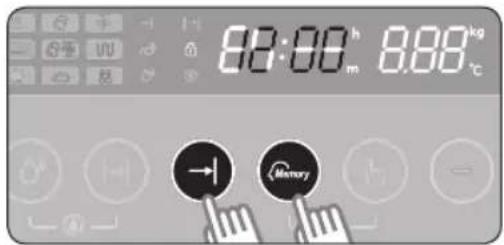
1 If the temperature indicator (°C) on the display is blinking, the programmed temperature hasn't been reached yet. You can read out the current temperature on the display by pressing the START TIME button and MEMORY button at the same time.
46_ descaling and cleaning
CHILD SAFETY LOCK
The oven's Child Safety Lock allows you to lock the control panel to protect the oven against unintended use.
To Lock the Oven

1 Press the STOP/CANCLE button to "OFF" position.

2 Press the MEMORY button and SELECT button at the same time and hold for 3 seconds.
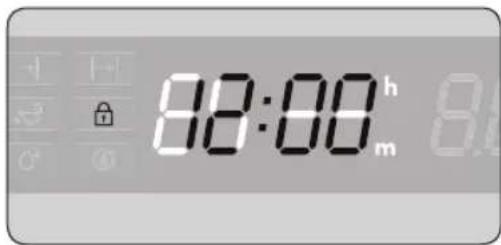
3 A lock symbol appears in the display, indicating that all functions are locked.
To Unlock the Oven

1 Press the STOP/CANCLE button to "OFF" position. Press the MEMORY and SELECT button at the same time and hold for 3 seconds.
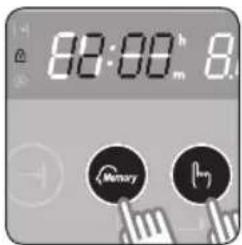

2 The Lock symbol disappears in the display, indicating that all functions are unlocked.
CLEANING AND CARE
Removing the Cooking Compartment

You can remove the oven door for easier cleaning.
Do not reach into the door hinges. There is a risk of injury.
- Open the cooking compartment door fully.
- Move the two locking levers up on the left and right-hand sides.
- Close the cooking compartment door halfway. With both hands, grip the top of the door on the left and right-hand sides. Close the door a little more and pull it out.
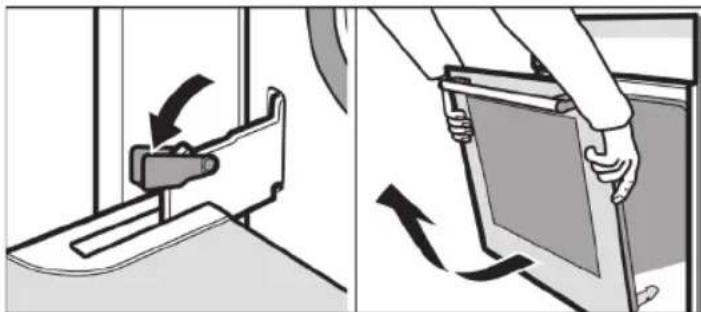
Fitting the Cooking Compartment Door
Refit the cooking compartment door after cleaning.
- Insert the door hinges straight into the openings on the left and right-hand sides of the cooking compartment. The notch on the hinge must engage on both sides.

- Open the cooking compartment door fully and fold the locking lever upwards.
- Close the cooking compartment door.
48_descaling and cleaning
CHANGING THE LAMP
Replacing the rear oven lamp and cleaning the glass cap
- Take off the cap by turning counterclockwise.
- Remove the metal ring and the sheet ring and clean the glass cap.
- If necessary, replace the bulb with a 25 watt, 230 V, 300 °C heat - resistant oven light bulb.
- Fit the metal and the sheet ring to the glass cap.
- Replace the glass cap.


error codes
ERROR CODES
| Error Code General Functions | |
 | TEMP SENSOR OPENIn case the value of the temperature sensor is more than 250 °C during operation / cancellation. |
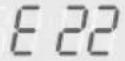 | TEMP SENSOR SHORTIn case the value of the temperature sensor is less than 5 °C during operation / cancellation. |
 | UNFINISHED PREHEATIn case the oven has not reached the desired temperature although a certain amount of time has passed (unfinished preheating). |
 | OVER 250 °C DURING OPERATION OF CONVECTIONIn case the temperature rises over 250 °C during operation of convection mode. |
 | STEAM SENSOR OPENIn case the value of the temperature sensor is less than 30 °C after operation of the steam heater for a certain time. |
 | STEAM SENSOR SHORT |
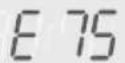 | DESCALE MAX. TIME OVER (or STEAM USE MAX TIME OVER)In case the steam operating time after the descaling message has been passed. |
If any of these errors occur, please contact SAMSUNG Customer Service.
50_ error codes
technical data
TECHNICAL DATA
| Model FQV213 | |
| Power Source 230 V ~ 50 Hz | |
| Power ConsumptionMaximum PowerGrillConvectionSteam | 3200 W1530 W2050 W1700 W - 2200 W |
| Cooling Method Cooling fan motor | |
| Dimensions (W x H x D)OutsideOven Cavity Net. | 596 X 460 X 472 mm400 X 215 X 385 mm |
| Volume 30 liter | |
| WeightNetShipping | 25 kg approx31 kg approx |
English
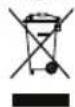
Correct Disposal of This Product (Waste Electrical & Electronic Equipment)
(Applicable in the European Union and other European countries with separate collection systems)
This marking on the product, accessories or literature indicates that the product and its electronic accessories (e.g. charger, headset, USB cable) should not be disposed of with other household waste at the end of their working life. To prevent possible harm to the environment or human health from uncontrolled waste disposal, please separate these items from other types of waste and recycle them responsibly to promote the sustainable reuse of material resources.
Household users should contact either the retailer where they purchased this product, or their local government office, for details of where and how they can take these items for environmentally safe recycling.
Business users should contact their supplier and check the terms and conditions of the purchase contract. This product and its electronic accessories should not be mixed with other commercial wastes for disposal.
technical data _51
SAMSUNG
QUESTIONS OR COMMENTS
| COUNTRY | CALL | OR VISIT US ONLINE AT |
| ALBANIA | 42 27 5755 | www.samsung.com |
| BOSNIA | 05 133 1999 | |
| BULGARIA | 07001 33 11 | |
| CROATIA | 062 - SAMSUNG (062-726-7864) | |
| CZECH | 800 - SAMSUNG (800-726786) | |
| HUNGARY | 06-80-SAMSUNG(726-7864) | |
| KOSOVO +381 0113 | 216899 | |
| MACEDONIA | 023 207 777 | |
| MONTENEGRO 020 | 405 888 | |
| POLAND | 0 801 1SAMSUNG(172678)022-607-93-33 | |
| RUMANIA | 08010 SAMSUNG (08010 726 7864)only from landline,local network Romtelecom- local tariff / 021 206 01 10 for landlineand mobile,normal tariff | |
| SERBIA | 0700 Samsung (0700 726 7864) | |
| SLOVAKIA | 0800-SAMSUNG(0800-726-786) | |
| LITHUANIA | 8-800-77777 | |
| LATVIA | 8000-7267 | |
| ESTONIA 800-7267 |
Code No.: DE68-03870C
- INFORMACJE OGÓLNE
- DANE TECHNICZNE
- KODY BŁĘDÓW
- ÁLTALÁNOS
- MÜSZAKI ADATOK
- HIBAKÓDOK
- VŠEOBECNÉ
- POUŽÍVANIE REŽIMU PAMÄTE
- DÔLEŽITÉ
- NAMONTOVANIE DVIEROK PRIESTORU NA VARENIE
- KÓDY CHYBY
- OBECNÉ
- TECHNICKÉ INFORMACE
- KÓDY CHYB
- INSTALLATION AND OPERATING INSTRUCTION
- USING THIS MANUAL
- SAFETY INFORMATION
- IMPORTANT SAFETY SYMBOLS AND PRECAUTIONS
- SEVERE WARNING SIGNS FOR INSTALLATION
- 2.1.2.1.2
- CAUTION SIGNS FOR INSTALLATION
- SEVERE WARNING SIGNS FOR ELECTRIC
- CAUTION SIGNS FOR ELECTRIC
- SEVERE WARNING SIGNS FOR USING
- 4_ SAFETY INFORMATION
- CAUTION SIGNS FOR USING
- WARNING SEVERE WARNING SIGNS FOR CLEANING
- CAUTION SIGNS FOR CLEANING
- PRECAUTIONS TO AVOID POSSIBLE EXPOSURE TO EXCESSIVE MICROWAVE ENERGY
- 6_ SAFETY INFORMATION
- CONTENTS
- INSTALLING THE OVEN
- OVEN FEATURES
- BEFORE YOU BEGIN
- OVEN USE
- DESCALING AND CLEANING
- ERROR CODES
- TECHNICAL DATA
- GENERAL
- TECHNICAL INFORMATION
- DISPOSAL OF PACKAGING AND APPLIANCE
- SAFETY
- ELECTRICAL CONNECTION
- 8_ INSTALLING THE OVEN
- OVEN
- NOTE
- OVEN CONTROLS
- POWER SAVE BUTTON
- ACCESSORIES
- SETTING THE CLOCK
- FILLING THE WATER TANK
- FILL THE WATER TANK BEFORE EACH USE
- EMPTY THE WATER TANK AFTER EACH USE
- SETTING THE WATER HARDNESS
- CHECKING THE WATER HARDNESS
- DEFAULT SETTINGS
- SETTING THE COOKING FUNCTION MODE
- OVEN MODES
- AUTOMATIC FUNCTIONS
- USING THE STEAM MODE
- STEAM MODE SETTING
- COOKING GUIDE
- IMPORTANT
- COMBI STEAM SETTING
- USING THE REGENERATION/REHEAT MODE
- REGENERATION/REHEAT SETTING
- USING THE FAN OVEN MODE
- FAN OVEN MODE SETTING
- USING THE GRILL MODE
- GRILL MODE SETTING
- COOKING GUIDE ∪
- COOKING TIME RESERVATION FUNCTION
- USING THE AUTO COOK MODE
- USING THE AUTO COOK FEATURES
- USING THE DEFROST MODE
- DEFROSTING SETTING 😊
- USING THE KEEP WARM MODE
- USING THE MEMORY MODE
- YOU CAN ALWAYS STORE A NEW INDIVIDUAL PROGRAM
- STARTING THE MEMORY FUNCTION
- TEST DISHES
- BAKING
- GRILLING
- DESCALING
- USING THE STEAM CLEAN FEATURE
- CLEANING
- 1 CLEANING THE TOP GRILL
- 2 CLEANING INSIDE THE CAVITY
- 4 CLEANING THE WATER TANK AND THE TRAY
- 3 CLEANING THE OVEN SURFACE, CONTROL PANEL AND WINDOW
- 5 CLEANING THE ACCESSORIES
- WARNING
- SWITCHING OFF THE BEEPER/READING OUT THE TEMPERATURE
- DISPLAY CURRENT OVEN TEMPERATURE
- CHILD SAFETY LOCK
- TO LOCK THE OVEN
- TO UNLOCK THE OVEN
- CLEANING AND CARE
- REMOVING THE COOKING COMPARTMENT
- FITTING THE COOKING COMPARTMENT DOOR
- CHANGING THE LAMP
- REPLACING THE REAR OVEN LAMP AND CLEANING THE GLASS CAP
- CORRECT DISPOSAL OF THIS PRODUCT (WASTE ELECTRICAL & ELECTRONIC EQUIPMENT)
- SAMSUNG
Brand : SAMSUNG
Model : FQV213G001
Category : Oven