Aquos ZVC722SP - Vacuum Cleaner Zelmer - Free user manual and instructions
Find the device manual for free Aquos ZVC722SP Zelmer in PDF.


| Type | Vacuum Cleaner |
| Brand | Zelmer |
| Model | Aquos ZVC722SP |
| Bagless | Yes (cyclonic) |
| Dust Capacity | 2.0 L |
| Filtration | HEPA 13 washable filter |
| Power Consumption | 1200 W |
| Voltage | 220-240 V / 50-60 Hz |
| Cord Length | 6.0 m |
| Noise Level | 78 dB(A) |
| Weight | 5.2 kg |
| Dimensions (LxWxH) | 300 x 250 x 400 mm |
| Suction Power Adjustment | Electronic (3 levels) |
| Attachments Included | Crevice tool, brush, upholstery nozzle |
| Wheels | Rubber (swivel front) |
| Dust Indicator | LED fill indicator |
| Washable Filter | Yes - rinse under water |
| Replacement Filter Part | Zelmer ZVC722FP |
| Energy Class | A |
| Annual Energy Consumption | 28.0 kWh |
Frequently Asked Questions - Aquos ZVC722SP Zelmer
User questions about Aquos ZVC722SP Zelmer
0 question about this device. Answer the ones you know or ask your own.
Ask a new question about this device
Download the instructions for your Vacuum Cleaner in PDF format for free! Find your manual Aquos ZVC722SP - Zelmer and take your electronic device back in hand. On this page are published all the documents necessary for the use of your device. Aquos ZVC722SP by Zelmer.
USER MANUAL Aquos ZVC722SP Zelmer
Figure: Power control
- Умітмінів розяйня
Qunimutro náduy
Výstelsléte ránzón
HE Kowshel's tarkiyok
60 Redziecta detagab
RU. Съжениститаліні
Harmoreda containers
2
zelmer
NOTE 2013
zelmer
natural_image
Blue and silver vacuum cleaner with black handle and orange logo (no visible text or symbols)zelmer
golden service
BOTTAGE AUTHORITY
正切124
-
-
-
-
-
-
-
-
-
-
-
-
-
-
-
-
-
-
-
-
-
-
-
-
-
-
-
-
-
-
-
-
-
-
-
-
-
-
-
-
-
-
-
-
-
-
-
-
-
-
-
-
-
-
-
-
-
-
-
-
-
-
-
-
-
-
-
-
-
-
-
-
-
-
-
-
-
-
-
-
- 99.
-
-
-
-
-
-
-
-
-
-
-
-
-
-
-
-
-
-
-
-
-
-
-
-
-
-
-
-
-
-
-
-
-
-
-
-
-
-
-
-
-
-
-
-
-
-
-
-
-
-
-
-
-
-
-
-
-
-
-
-
-
-
-
-
-
-
-
-
-
-
-
-
-
-
-
-
-
-
-
HANIEL
Note
21-59
(1)
ПРЕХСИМУ/Н.А. ТОЛНЕМЕЯ
C.
10.5% 20.4% 7.6%
2012
Tal50 61-20 Do50 14-0

m = 311
m = 311
。
Aquos
Odkurzacz
natural_image
Product diagram of a purple and silver vacuum cleaner with labeled parts, shown in two views (no text or symbols present)
natural_image
Collection of industrial cleaning and repair components (no visible text or labels)


PL
Szenami Elland
Przygromu wrocyte, wrocyte, wrocyte, wrocyte, wrocyte, wrocyte, wrocyte, wrocyte, wrocyte, wrocyte, wrocyte, wrocyte, wrocyte, wrocyte, wrocyte, wrocyte, wrocyte, wrocyte, wrocyte, wrocyte, wrocyte

The quick brown fox jumps over the lazy dog.
Ohmex adya pheu dian pihu ma
ISO 23 - SANSOBERG EXERCISENT
10.4
The following table is in Chinese:
2.40%
The following described text is:
The following table is in English:
[Unreadable]
He did not know what was, as it is
2017年1月1日
The following table is in Chinese:
The following section is a reference to the
dennikson zukor vijai xionid p#p#e#on
2017年1月1日
davon: as bieghs rei
(1)
The following table is in English:
2014年6月17日
5.4.102
The following table is in English:
2016, 1983, 2015, 2017, 2018, 2019, 2020, 2021, 2022, 2023, 2024, 2025, 2026, 2027, 2028, 2029, 2030, 2031, 2032, 2033, 2034, 2035, 2036, 2037, 2038, 2039, 2040, 2041, 2042, 2043, 2044, 2045, 2046, 2047, 2048, 2049, 2050, 2051, 2052, 2053, 2054, 2055, 2056, 2057, 2058, 2059, 2060, 2061, 2062, 2063, 2064, 2065, 2066, 2067, 2068, 2069, 2070, 2071, 2072, 2073, 2074, 2075, 2076, 2077, 2078, 2079, 2080, 2081, 2082, 2083, 2084, 2085, 2086, 2087, 2088, 2089, 2090, 2091, 2092, 2093, 2094, 2095, 2096, 2097, 2098, 2099, 2100
2.40 1985
The work is a good, well-stable work. He has been very hard to find the work with
The following table is provided in the image.
- 2017年1月1日
Time and time are removed policies, 00026789
-
-
-
-
-
-
-
-
-
-
-
-
-
-
-
-
-
-
-
-
-
-
-
-
-
-
-
-
-
-
-
-
-
-
-
-
-
-
-
-
-
-
-
-
-
-
-
-
-
-
-
-
-
-
-
-
-
-
-
-
-
-
-
-
-
-
-
-
-
-
-
-
-
-
-
-
-
-
-
-
-
-
-
-
-
-
-
-
- 90.
-
-
-
-
-
-
-
-
-
-
-
-
-
-
-
-
-
-
-
-
-
-
-
-
-
-
-
-
-
-
-
-
-
-
-
-
-
-
-
-
-
-
-
-
-
-
-
-
-
-
-
-
-
-
-
-
-
-
-
-
-
-
-
-
-
-
-
-
-
-
-
-
-
-
-
-
-
-
-
-
-
-
-
-
-
-
-
to suvenofo fucuara eoris zukonbu. Vocilov
to spovocna 272000 o novodaj total vody ra
.
[Unreadable due to severe distortion and noise]
[Unreadable]
The system character is a dynamic symbol.
reduyantou
The following table is in English:
(1) 2020年1月1日
Theorem 1.2. (A) Let (r) be a finite set of (r) such that (r) = (r) .
2018年1月1日
The following table is in English.
In the case of the
(2) 3.07 A P120010 (PTB219/2010)
- 10:29, 11:30, 2020. 11:30, 11:31.
This company is the largest company
1/4/2023
1954.2023
The following table is in English:
1.2.1
3,488.01
The Ground Truth image displays a single, solid horizontal line. According to Rule 2 (UNDERSCORE & LINE RULES), if the GT contains lines used for stylistic emphasis or as background elements (like ruled paper), the OCR result must ignore them. The line in the GT is clearly a stylistic or background line, not a placeholder for text. Therefore, the OCR should not have output any underscores. Outputting \`\_\_\_\_\` constitutes an error under Rule 2, as it hallucinates placeholder symbols where none are semantically intended. Hence, the OCR result is inconsistent with the Ground Truth.
bencal terpitylus ed
(1) 12 ①
1.25%
-
2016年1月1日
-
2015年1月1日
[Unreadable]
(五) 2017年
Jose technolone
16.0000
in 2017, we have been a company PTU.
-
2014年1月1日
-
2017年1月1日
公
11
18201079.2003 21 May 2014
(3) 100% of the stock price is \$0.45 (10%)
-2015.8.13
3045(87)
2014年1月1日
[Unreadable due to severe distortion]
cance S#### 123406 15 drive
Notes
(1) 本说明仅供参考。
[Non-Text]
(1)
(二)交易对方
(1)
(No text)
(二) 2017年
Please read this instruction manual carefully. Pay special attention to important safety instructions. Keep this instruction manual for future reference.
Important safety instructions
Connect the vacuum cleaner only to a 230 V mains supply equipped with a 16 A fuse.
Do not unplug by pulling on cord.
Do not operate the appliance if it has a damaged cord or if the housing is visibly damaged.
If the supply cord is damaged, it must be replaced by the manufacturer, a service agent or a qualified person in order to avoid a hazard.
The appliance can only be repaired by qualified service personnel. Improper servicing may cause a serious hazard to the user. In case of defects please contact a qualified service center.
Make sure the tubes and the hose are not clogged! Remove larger items that clog the appliance before operating the vacuum cleaner. If such items remain inside the suction tubes, it may cause damage to the motor or other parts of the appliance.
Do not allow the plug to have contact with water.
Do not touch the appliance with wet hands when it is connected to the mains supply.
Periodically clean the wheels. The dirt which accumulates on the wheel axis may cause diffi culties in the wheel movement.
Do not run the vacuum cleaner or the brushes over the cord, it may cause damage to the cord insulation.
Always unplug the appliance before cleaning, assembling or dismantling.
Switch off the appliance before changing attachments or before contact with movable parts.
Do not use the vacuum cleaner to clean people or animals, pay special attention to keep the nozzles away from eyes and ears.
Do not pick up: matches, cigarette butts, hot ash. Avoid picking up sharp objects.
Do not vacuum fine dust such as: flour, cement, gypsum, toners for printers and copy machines etc.
Do not pick up corrosive and toxic materials, petrol, kerosene and other fl ammable or explosive liquids.
During operation pay attention not to knock the vacuum cleaner over or to spill water on the appliance.
move the vacuum cleaner carefully on doorsteps and uneven surfaces, not to cause an excessive rippling of the water inside the tank. This might lead to a slight water overflow.
During storage, the suction hose may be rolled up, but not bent.
Do not expose the vacuum cleaner to atmospheric conditions (rain, frost).
Do not use the vacuum cleaner without the foam filter installed in the filter unit.
During operation, do not remove the tank lid and do not take out the water filter unit from the tank.
Do not leave a switched on and operating vacuum cleaner unattended.
This appliance is not intended for use by persons (including children) with reduced physical, sensory or mental capabilities, or lack of experience and knowledge, unless they have been given supervision or instruction concerning use of the appliance by a person responsible for their safety.
Children should be supervised to ensure that they do not play with the appliance.
ATTENTION! The vacuum cleaner may only operate in a natural position i.e. when it is placed with four wheels on the surface.
Appliance features
The vacuum cleaner 829 is intended to pick up dirt from fl oors, carpets, ceramic tiles, slots in wood paneling, skirting boards, heaters. The vacuum cleaner is also used to vacuum furniture and curtains and to pick up liquids.
VACUUM CLEANER 829 TYPES
| Workmanship and equipment option: Type | Electronic power control | Dust bag/amount | Outlet filter | Suction tube | Combination brush | Small nozzle | Crevice nozzle | Small brush | Turbo brush | Parquet brush “BNB” | Water pick up nozzle |
| 1 2 3 4 5 6 7 | 8 9 10 11 12 | ||||||||||
| 829.0 ST | + | SAFBAG 2 pcs. | HEPA | Telescopic | + | + | + | + | + | + | + |
| 829.0 SP | + | SAFBAG 2 pcs. | HEPA | Telescopic | + | + | + | + | - | + | + |
| 829.5 SK | - | SAFBAG 2 pcs. | HEPA | Telescopic | + | + | + | + | - | - | + |
Technical parameters
The type of the vacuum cleaner and the technical parameters are indicated on the rating label. Mains protection 16 A.
Does not interfere with radio and TV reception.
Does not require grounding ☐
ZELMER vacuum cleaners meet the requirements of the applicable norms.
The appliance is in conformity with the requirements of the directives:
Low voltage appliance (LVD) - 2006/95/EC.
Electromagnetic compatibility (EMC) - 2004/108/EC.
Noise level: 80 dB/A.
The appliance was marked by a CE sign on the rating label.
Appliance elements

1 ON/OFF button
2 Handle
3 Plug and cord
4 Cord rewind button
5 Power adjustment button ⊕(type 829.0)
6 Power level indicator (type 829.0)
⑦ Accessory compartment cover
8 Motor filter (installed in the vacuum cleaner)
9 Foam fi Iter II (installed in the vacuum cleaner)
10 HEPA outlet fi lter (installed in the vacuum cleaner)
11 Foam fi Iter III (installed in the vacuum cleaner)
12 Anti-foam agent
13 Inlet fi Iter (installed in the vacuum cleaner)
14 Foam fi Iter I (installed in the vacuum cleaner)
15 Suction hose
16 Telescopic suction tube
17 SAFBAG dust bag
18 Crevice nozzle
19 Small brush
20 Small nozzle
21 Water pick up nozzle
22 Parquet brush "BNB"
Is used to clean and polish hard, scratch sensitive surfaces such as wooden floors, floor panels, parquet, marble, tiles, etc. Delicate and soft natural bristles ensure maximum vacuum effectiveness and protects against scratching the cleaned surface.
23 Combination brush. The vacuum cleaner is equipped with only one type of combination brush (A or B)
A Switchable combination brush
B Combination brush with a small item separator
24 Turbo brush (type 829.0 ST)
25 Dry fi Itration module with SAFBAG dust bag
26 Water filter module (filtration unit + partition)
Preparing the vacuum cleaner for operation

① Install the appropriate module in the vacuum cleaner (dry filtration module with the SAFBAG dust bag or the water filter module) (see section C and E).
② Insert and snap the tank lid shut.
③ Insert the end of the suction hose to the vacuum cleaner opening so that the hose interlock is in the protrusion of the opening. A characteristic click indicates that the hose has been properly installed.
④ Connect the other end of the hose (handle) with the telescopic suction tube.
⑤ Adjust the length of the telescopic suction tube by sliding the slider according to the arrow and pull out/pull the tube together.
⑥ Assemble the appropriate nozzle or brush to the other end of the suction tube.
⑦ You may assemble a basket for picking up small objects in the combination brush with small item separator. In order to do so remove the basket cover and insert the basket.
⑧ To clean hard surfaces – wooden floors, plastic floors, ceramic tiles etc. pull out the brush by pressing the switch on the nozzle according to the figure
⑨ The vacuum cleaner is equipped with an accessory compartment. The compartment is located in the front lid of the appliance. To open/close the compartment lift/close the lid and take out/put away the desired nozzle.
⑩ Grab the plug (3) and pull the cord out of the vacuum cleaner.
ATTENTION! While pulling out the cord pay attention to the yellow stripe which signals the end of the cord. Further attempts (pulling on cord) may result in damaging the cord.
⑪ Plug in the appliance.
ATTENTION! Before operation, make sure that all fi liters as well as the appropriate module are installed in the appliance.
⑫ Switch on the vacuum cleaner by pressing the "on/off" button (1).
Vacuum cleaner functions
TRADITIONAL CLEANING WITH SAFBAG DUST BAG

① Press the "PRESS" button and remove the tank lid.
② Remove the water fi Iter module from the container (fi Itration unit and partition).
ATTENTION! The water filter module/the dry filtration module with the SAFBAG dust bag may only be removed and inserted when the end of the hose is removed from the vacuum cleaner opening.
③ Insert the dry filtration module with the SAFBAG (25) dust bag to the container.
Prepare the vacuum cleaner for operation according to section B.
④ The vacuum cleaner starts up with default setting of the highest power range. One diode will light on the power level indicator (6). Set the desired power value (this function is only available in vacuum cleaners type 829.0) by pressing the power adjustment buttons +, (5).
ATTENTION! It is strictly prohibited to vacuum without the dust bag and the inlet fi Iter or with a damaged dust bag. It may cause a failure of the vacuum cleaner motor.
SAFBAG dust bag disassembly/assembly

Remove the dry fi ltration module with the SAFBAG(25) dust bag from the container.
ATTENTION! The water filter module/the dry filtration module with the SAFBAG dust bag may only be removed and inserted when the end of the hose is removed from the vacuum cleaner opening.
① Pull the SAFBAG dust bag interlock fastening and pull the interlock aside.
② Pull the fastening which attaches the SAFBAG dust bag to the basket to release the dust bag plate.
③ Remove the dust bag.
④ Insert the SAFBAG dust bag according to the arrow printed on the bag so that the lower part of the bag plate is in the slot of the housing. Press the upper part of the bag plate to the fastening until you hear a characteristic click and close the SAFBAG dust bag interlock.
Insert the dry fi ltration module with the SAFBAG(25) dust bag to the container.
VACUUM CLEANING WITH THE USE OF THE WATER FILTER MODULE

① Press the "PRESS" button and remove the tank lid.
② Insert the partition to the grooves in the container so that the shutters are directed downwards. Make sure the partition is correctly mounted in the container i.e. the partition fins should cover the protrusion in the container.
③ Fill the container with 1,2 liter of water. The water level should be in the range marked on the tank wall.
ATTENTION! Do not operate the appliance with an empty container while vacuum cleaning with the use of the water fi lter module.
④ Insert the filtration unit to the tank, make sure that the two air stub pipes are in the openings of the vacuum cleaner body.
Prepare the vacuum cleaner for operation according to section B.
The vacuum cleaner starts up with default setting of the highest power range. One diode will light on the power level indicator (6). Set the desired power value (this function is only available in vacuum cleaners type 829.0) by pressing the power adjustment buttons ⊕(5).
ATTENTION! Do not operate the appliance for too long without replacing the water in the container. In case of long-term or very intensive vacuuming of large amounts of dirt, the water in the tank which constitutes the first filtration level may in whole or in a considerable part be absorbed by the dirt. In such a case, exchange the water and continue vacuuming.
Avoid vacuuming surfaces covered with substances which may favor an excessive foaming of the water inside the tank. If you notice that the water is heavily foamed, add a foam neutralizer recommended by the manufacturer of the appliance e.g. "G 478 Entschäumer D" in the amount indicated on the packaging. It can be purchased in stores which offer ZELMER S.A. products or by mail order.
ATTENTION! Vacuuming with the amount of water in the tank which exceeds the marked, permissible level may cause the water to spill to the outside of the appliance. If this situation repeats often, it may lead to a fast clogging of the outlet HEPA fi Iter.
ATTENTION! The vacuum cleaner is equipped with a fl oat which will automatically block the suction if the foam fi liter II (9) is heavily dirty or the liquid exceeds the maximum level. In such a case switch off the vacuum cleaner by pressing the on/off button (1), unplug the appliance, clean the fi liter and empty the container.
PICKING UP WATER
If you want to use the vacuum cleaner to vacuum liquid, the vacuum cleaner should be prepared as in the case of vacuum cleaning with the use of the water filter module except that:
① The container should be empty (without water).
② You should use the nozzle for picking up water (21).
ATTENTION! Do not operate the vacuum cleaner with a full container! Do not vacuum large amounts of liquid at a time (e.g. with the hose immersed into water).
If the water exceeds the maximum level during vacuuming, the fl oat will automatically block the suction. The maximum capacity of the container is about 4,0 l. In such a case proceed in the manner described above in the part concerning the blocking of suction caused by a dirty foam fi liter.
End of operation cleaning and maintenance
Switch off the vacuum cleaner by pressing the on/off button (1) and unplug the appliance.
Wind the cord by pressing the cord rewind button (4). While doing this hold the cord to make sure it is not tangled and the plug does not hit the vacuum cleaner housing.
Dress the interlock on the hose end and remove the hose from the opening.
Disconnect the telescopic tube from the hose and the nozzle or brush.
case of vacuuming or picking up water with the use of the water filter module, remove the dirty water from the tank.
is recommended to wash the container, filters (disassembly below) and partition thoroughly after each use – changing water several times.
ATTENTION! If you do not clean the above-mentioned parts or clean them insufficiently it may lead to the loss of the filtration capabilities of the inserts and foam and cause the formation of bacteria and mites.
Dry all the cleaned parts thoroughly before reassembly.
Filter disassembly
FOAM FILTER I

① Open the lid of the filter unit – press the handle and lift the lid.
② Take out the filter, wash it under running water, dry and reinsert.
- lose the fi Iter unit lid by pressing it until you hear a characteristic click.
FOAM FILTER II

It is recommended to wear rubber protective gloves while dismantling the filter.
① Grab the foam filter with your fingers and remove it from the filter unit body.
② Wash under running water, dry and reinsert.
ATTENTION! Do not hand wash the fi lter foam, do not wring it, do not wash it in washing machines. Avoid crumpling, stretching and deforming. After cleaning dry the foam in room temperature. Never dry the foam on heaters, stoves, etc.
INLET FILTER

① Press the "PRESS" button and remove the tank lid.
② Remove the SAFBAG (25) dust bag module from the container.
③ Take out the SAFBAG dust bag from the module (see chapter TRADITIONAL CLEANING WITH SAFBAG DUST BAG – disassembly/assembly of the SAFBAG dust bag).
④ Release the fastening hook which fixes the lid of the SAFBAG dust bag module with the basket and pull the basket aside.
⑤ Take out the filter, wash it under running water, dry and reinsert.
⑥ Close the basket of the SAFBAG dust bag module by pressing it until you hear a characteristic click.
⑦ Insert SAFBAG dust bag (see chapter TRADITIONAL CLEANING WITH SAFBAG DUST BAG – disassembly/assembly of the SAFBAG dust bag).
⑧ Insert the dry filtration module with the SAFBAG (25) dust bag into the tank.
Insert and snap the tank lid shut.
MOTOR FILTER

A filtration fabric is inserted in the motor cooling cycle which is to catch the coal dust which arises due to the natural wear and tear of the brushes and the commutator in the motor.
① Remove the tank from the vacuum cleaner.
② Place the vacuum cleaner with the "wheels upwards" so that the upper sloping surface and the handle are rested on the floor. Insert a flat, narrow tool e.g. a screwdriver into the special slot of the filter lid; pry the fastening with an upward hand movement (lever principle) which will release the lid latch while being bent.
③ If the motor filter (8) is dirty, it is possible to rinse the filter (8) under running water. Remember to dry the above mentioned filter before reassembly.
④ Insert the new/rinsed motor filter (8), make sure that the filter edges do not remain outside the outline of the section. Snap the filter lid shut by first inserting the lower fastening and then pressing the fastening so that the upper fastening clicks into place at the edge of the appliance body.
OUTLET HEPA FILTER AND FOAM FILTER III

The HEPA outlet fi lter should be replaced after about 30 hours of operation (6 months) or earlier in case of heavy dirt.
① Remove the tank from the vacuum cleaner.
② Place the vacuum cleaner with the "wheels upwards" so that the upper sloping surface and the handle are rested on the floor.
③ Slide the slider of the filter cover interlock to the "open" position and remove the filter lid.
④ Remove the foam filter III (11). Rinse or replace if the filter becomes dirty. Remember to dry the filter before reassembly.
⑤ Remove the foam filter III (11) and next remove the HEPA fi Iter by grabbing the handle. Replace with a new one if the fi Iter becomes dirty.
It is recommended to periodically inspect the condition of the filter, especially if there was a water overflow to the outside of the vacuum cleaner. In case of detecting damage (a break) in the filter layer or if the layer is evenly covered with dust, the filter should be replace with a new one.
⑥ If the HEPA filter is dirty, replace it with a new one or rinse under running water. Remember to dry the filter before reassembly.
⑦ Reinsert the filters, insert the filter lid and press firmly.
⑧ Slide the slider of the filter cover interlock to the "closed" position.
Turn the vacuum cleaner to its natural position (on four wheels).
Ecology – environment protection
Each user can protect the natural environment. It is neither diffi cult nor expensive.
In order to do it: put the cardboard packing into recycling paper container; put the polyethylene (PE) bags into container for plastic.
When worn out, dispose the appliance to particular disposal centre, because of the dangerous elements of this appliance, which can be hazardous for natural environment.
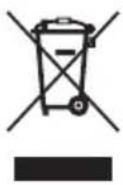
Do not dispose into the domestic waste disposal!!!
The manufacturer does not accept any liability for any damages resulting from unintended use or inappropriate handling. The manufacturer reserves his rights for modifying the product any time in order to adjust it to law regulations, norms, directives, or due to construction, trade aesthetic or other reasons, without notifying it in advance.

- PL
- Szenami Elland
- The Ground Truth image displays a single, solid horizontal line. According to Rule 2 (UNDERSCORE & LINE RULES), if the GT contains lines used for stylistic emphasis or as background elements (like ruled paper), the OCR result must ignore them. The line in the GT is clearly a stylistic or background line, not a placeholder for text. Therefore, the OCR should not have output any underscores. Outputting \`\_\_\_\_\` constitutes an error under Rule 2, as it hallucinates placeholder symbols where none are semantically intended. Hence, the OCR result is inconsistent with the Ground Truth.
- bencal terpitylus ed
- (五) 2017年
- Jose technolone
- Important safety instructions
- Appliance features
- Technical parameters
- Appliance elements
- Preparing the vacuum cleaner for operation
- Vacuum cleaner functions
- TRADITIONAL CLEANING WITH SAFBAG DUST BAG
- SAFBAG dust bag disassembly/assembly
- VACUUM CLEANING WITH THE USE OF THE WATER FILTER MODULE
- PICKING UP WATER
- End of operation cleaning and maintenance
- Filter disassembly
- FOAM FILTER I
- FOAM FILTER II
- INLET FILTER
- MOTOR FILTER
- OUTLET HEPA FILTER AND FOAM FILTER III
- Ecology – environment protection
Brand : Zelmer
Model : Aquos ZVC722SP
Category : Vacuum Cleaner