
MP8750 - Projector 3M - Free user manual and instructions
Find the device manual for free MP8750 3M in PDF.


| Product Type | Video Projector |
| Brand | 3M |
| Model | MP8750 |
| Dimensions (W x D x H) | 11.2 x 8.7 x 3.5 inches |
| Weight | 4.9 lbs |
| Power Consumption | 200W (typical) |
| Display Technology | DLP |
| Native Resolution | XGA (1024x768) |
| Brightness | 2000 lumens |
| Contrast Ratio | 2000:1 |
| Lamp Life | 3000 hours (Normal), 4000 hours (Eco) |
| Inputs | VGA, S-Video, Composite, Audio, USB |
| Built-in Speaker | 1 x 3W |
| Keystone Correction | +/- 30 degrees (vertical) |
| Projection Distance | 3.9 - 29.5 feet |
| Screen Size | 30 - 300 inches |
| Noise Level | 32 dB (Normal), 28 dB (Eco) |
| Maintenance | Clean air filter every 100 hours; replace lamp as needed |
| Safety | Class 1 Laser Product, Overheat protection |
| Repairability | User-replaceable lamp and air filter |
| Warranty | 2 years limited |
Frequently Asked Questions - MP8750 3M
User questions about MP8750 3M
0 question about this device. Answer the ones you know or ask your own.
Ask a new question about this device
Download the instructions for your Projector in PDF format for free! Find your manual MP8750 - 3M and take your electronic device back in hand. On this page are published all the documents necessary for the use of your device. MP8750 by 3M.
USER MANUAL MP8750 3M
natural_image
Line drawing of a portable air conditioner unit with ventilation slots and control panel (no text or symbols)MP8750 Table of Contents
SAFEGUARDS....II
WARRANTY IV
SECTION 1: UNPACK....1
1-1. CONTENTS OF SHIPPING BOX....1
1-2. KEEP YOUR PACKING MATERIALS.... 1
1-3. WHAT'S NEXT? 1
SECTION 2: PRODUCTION DESCRIPTION....2
2-1. MACHINE CHARACTERISTICS ...... 2
2-2. PARTS IDENTIFICATION LIST 2
SECTION 3: SET UP/CONNECTIONS ....3
3-1. TERMINAL CONNECTION PANEL 3
3-2. OPERATOR TOUCH PANEL KEYPAD 3
3-3. MOUSE CONNECTION....4
3-4. CABLE CONNECTIONS....4
3-5. IMAGE SIZE (PROJECTOR-TO-SCREEN DISTANCE)....6
3-6. IMAGE HEIGHT 6
SECTION 4: OPERATING INSTRUCTIONS....7
4-1. POWER UP PROJECTOR....7
4-2. STANDBY MODE....8
4-3. PROJECTOR POWER DOWN 8
4-4. USING SYSTEM MENUS 8
4-5. MENU ADJUSTMENTS/SETTINGS....9
SECTION 5: REMOTE CONTROL....14
5-1. REMOTE CONTROL FUNCTIONS 14
5-2. BATTERY REPLACEMENT 15
SECTION 6: MAINTENANCE....16
6-1. REPLACING THE AIR FILTER 16
6-2. REPLACING PROJECTION LAMP....17
6-3. LAMP LIFE INDICATOR....18
6-4. CLEANING THE PROJECTOR 18
SECTION 7: TROUBLESHOOTING ....19
7-1. TROUBLESHOOTING PROBLEMS AND SOLUTIONS.... 19
7-2. SERVICE INFORMATION....19
SECTION 8: PRODUCT SPECIFICATIONS ...... 20
8-1. TECHNICAL SPECIFICATIONS ...... 20
8-2. ACCESSORY & SPARE PARTS LIST 21
8-3. HOW TO ORDER....21
Safeguards
INTENDED USE
Before operating the machine, please read the entire manual thoroughly. The 3M Multimedia Projector MP8750 was designed, built, and tested for use indoors, using 3M lamps, 3M ceiling mount hardware and nominal local voltages. The use of other replacement lamps, outdoor operation, operation in environments containing heavy cigarette smoke or different voltages has not been tested and could damage the projector or peripheral equipment and/or create a potentially unsafe operating condition.
IMPORTANT SAFEGUARDS
- Read and understand all instructions before using. Pay particular attention to areas where this symbol ⚠ is shown.

Indicates a potentially hazardous situation which, if not avoided, could result in death or serious injury.
Caution - Indicates a potentially hazardous situation which, if not avoided, could result in minor or moderate injury. It may also be used to alert against unsafe practices.
√ Note - Used to emphasis important conditions or details.
- Close supervision is necessary when any appliance is used by or near children. Do not leave appliance unattended while in use.
-
Never look directly into the projector lens when the lamp is on. The metal halide lamp produces a strong light that could damage your eyesight.
-
Care must be taken as burns can occur from touching hot parts.
- Do not operate appliance with a damaged cord or if the appliance has been dropped or damaged - until it has been examined by a qualified service technician.
- Position the cord so that it will not be tripped over, pulled or contact hot surfaces.
- If an extension cord is necessary, a cord with an earth/ground and a current rating at least equal to that of the appliance should be used. Cords rated for less amperage than the appliance may overheat.
- Always unplug appliance from electrical outlet before cleaning and servicing and when not in use. Grasp plug and pull to disconnect.
- To reduce the risk of electric shock, do not immerse this appliance in water or other liquids.
- To reduce the risk of electric shock, do not disassemble this appliance or attempt to service it yourself. Take it to a qualified technician when service or repair work is required. Incorrect reassembly can cause electric shock when the appliance is subsequently used.
- The use of an accessory attachment not recommended by the manufacturer may cause a risk of fire, electric shock, or injury to persons.
- Connect this appliance to a grounded outlet.
- This unit is equipped with optical lenses and should not be exposed to direct sunlight.
- Keep ventilation openings free of any obstructions.
- Always operate machine on a flat, sturdy surface.
- The projection lamp contains mercury. Always dispose of it in a proper manner according to local regulations.
- To avoid premature lamp failure, do not change the mounting position of the projector (desktop ceiling mount or ceiling mount desktop mount) and continue to use the same lamp.
- To avoid deposits from forming on internal components, do not operate projector in extremely humid environments (RH > 80%) or near any type of fine mist.
PRODUCT SAFETY LABELS
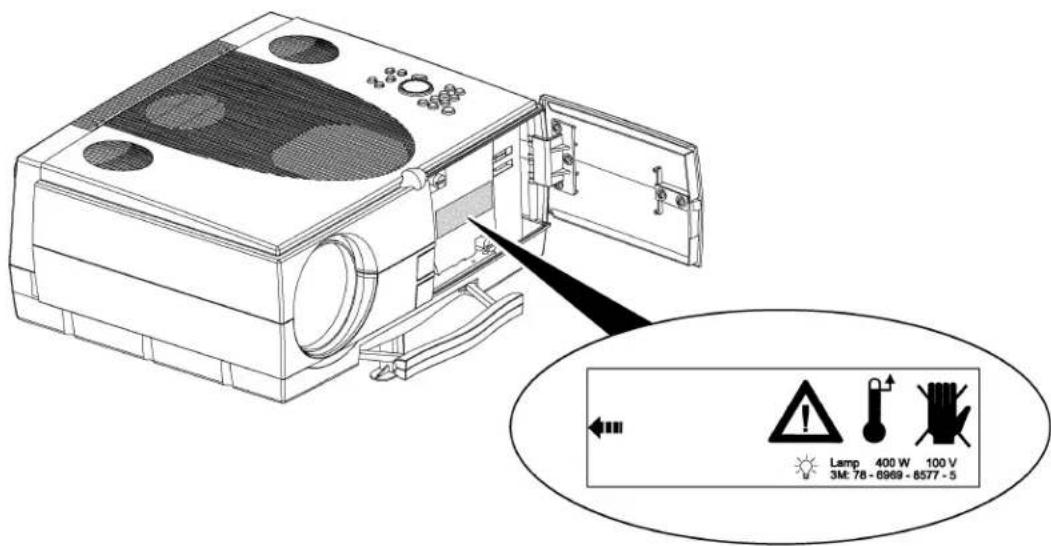
The following safety labels are used on or within the MP8750 projector to alert you to items or areas requiring your attention:
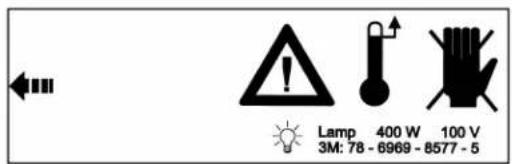
Inside of projector gets very HOT! Allow internal parts to cool before replacing the lamp.
LOCATION OF LABELS
SAVE THESE INSTRUCTIONS
The information contained in this manual will help you operate and maintain your 3M MP8750 Multimedia Projector.
Warranty
LIMITED WARRANTY
3M warrants this product against any defects in material and workmanship, under normal use and storage, for a period of two years from date of purchase. Proof of purchase date will be required with any warranty claim. In the event this product is found to be defective within the warranty period, 3M's only obligation and your exclusive remedy shall be replacement of any defective parts (labor included).
To obtain warranty service, immediately notify the dealer from which you purchased the product of any defects. In the USA call 1-800-328-1371 for warranty or repair service.
LIMITATION OF LIABILITY
THE FOREGOING WARRANTY IS MADE IN LIEU OF ALL OTHER WARRANTIES, EXPRESSED OR IMPLIED, AND 3M SPECIFICALLY DISCLAIMS ANY IMPLIED WARRANTY OF MERCHANTABILITY AND FITNESS FOR A PARTICULAR PURPOSE. 3M SHALL NOT BE LIABLE FOR ANY DAMAGES, DIRECT, CONSEQUENTIAL, OR INCIDENTAL, ARISING OUT OF THE USE OR INABILITY TO USE THIS PRODUCT.
Important: The above warranty shall be void if the customer fails to operate product in accordance with 3M's written instructions. This warranty gives you specific legal rights and you may have other rights that vary from state to state.
FCC STATEMENT - CLASS A: This equipment generates, uses and can radiate radio frequency energy, and if not installed and used in accordance with the instruction manual may cause interference to radio communications. It has been tested and found to comply with the limits for a Class “A” computing device pursuant to Subpart B of Part 15 of the FCC Rules, which are designed to provide reasonable protection against such interference when operated in a commercial environment. Operation of this equipment in a residential area is likely to cause interference in which case the user at his/her own expense will be required to take whatever measures may be required to correct the interference.
EEC STATEMENT: This machine was tested against the 89/336/EEC (European Economic Community) for EMC (Electro Magnetic Compatibility) and fulfills these requirements.
Video signal cables: Only use cables delivered by the manufacturer.
Video inputs: The input signal amplitude must not exceed the specified level.
PATENTS, TRADEMARKS & COPYRIGHTS
IBM and PS/2 are registered trademarks of International Business Machines Corporation. Apple Macintosh and ADB are registered trademarks of Apple Computer, Inc. Microsoft Windows is a trademark of the Microsoft Corporation. DLP is a trademark of Texas Instruments Incorporated. All other products are trademarks or registered trademarks of their respective companies.
Section 1: Unpack
1-1. Contents of Shipping Box
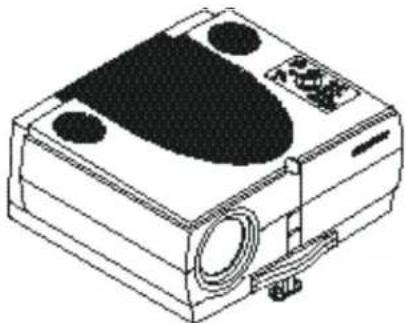
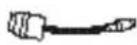
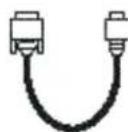
The MP8750 is shipped with the necessary cables required for standard VCR, PC or laptop computer connections. Carefully unpack and verify that you have all of the items shown below in Figure 1–1. If any of these items are missing, please contact your place of purchase.
Item Quantity
- MP8750 Multimedia Projector 1
- IR Remote control transmitter 1 (Two AAA batteries included) 2
- Power cord set (US, UK, Europe) 1
- VGA cable (2m) 1
- RCA Video/ Audio (3m) 1
Item Quantity
- S-VHS video cable (3m) 1
- PS/2-Mouse-Adapter 1
- Serial Mouse cable 1
- Operator's Guide, 7 languages(not shown) 1
- Registration card 1
- Telephone (800#) stickers 2
natural_image
Technical line drawing of a mechanical device with no visible text or symbols1
2
√√ Note
A set of cables/adapters for connection to Apple Macintosh computers is available as an option.
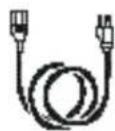
3
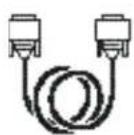
4
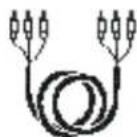
5
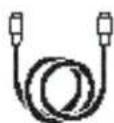
6
7
8
Figure 1-1. Packing List
1-2. Keep Your Packing Materials
Save the shipping box and packing materials in the event the MP8750 should require shipping to a 3M Service Center for repair. Use packing material to protect projector.
1-3. What's Next?
Take a few minutes to review Section 2 to familiarize yourself with the MP8750 machine characteristics and then turn to Section 3 to set up the projector.
We hope you will enjoy using this high performance product in your meetings, presentations and training sessions. This product has been produced in accordance with 3M's highest quality and safety standards to ensure smooth and trouble-free use in the years to come.
Section 2: Production Description
2-1. Machine Characteristics
The MP8750 integrates metal halide lamp and Digital Light Processor (DLP) technology. It accepts input from computer and/or video sources and projects a super bright image.
The MP8750 Multimedia Projector is easy to set up and use. It offers the following features:
- Extremely light weight and portable
• Metal halide projection lamp 350W
• VGA (640 x 480) expansion
• SVGA (800 x 600) expansion
• XGA (1024 x 768) native resolution
• NTSC, PAL, SECAM compatible - Ability to display 16.7 million colors
- Two computer input connections each with a separate audio-in connection
• Built-in serial, PS/2 and ADB mouse emulation
• Three video/audio input connections
• Power focus and zoom
• Full function remote control
- Surround sound system
• Horizontal and vertical image inverting function allows rear screen and ceiling mounted projection
- On-screen menu for easy projector set up
- Menus display in English, French, Spanish, Italian, Dutch, Swedish, German
• 0-12 degree adjustable keystone correction
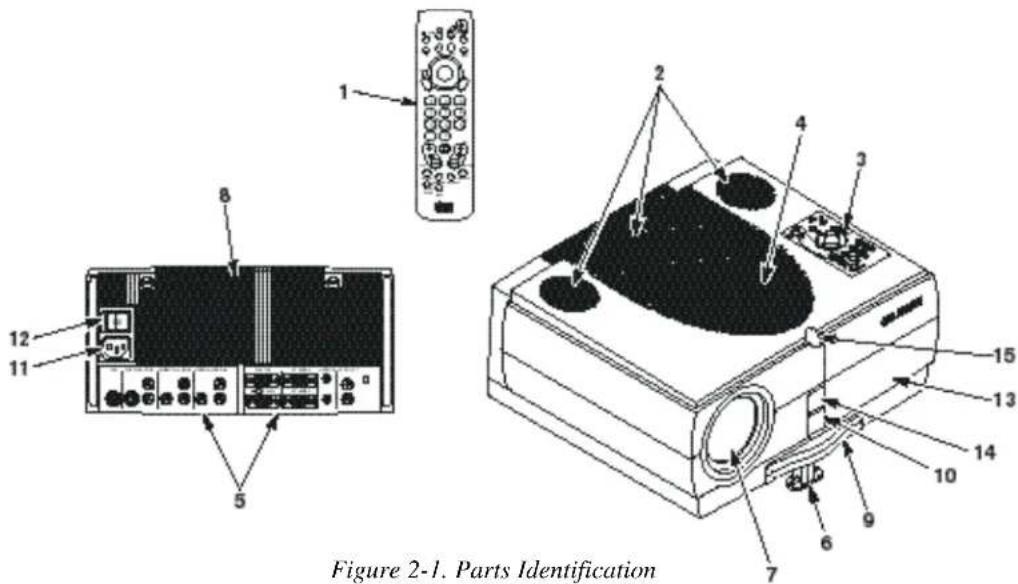
2-2. Parts Identification List
- Infrared Remote Control Transmitter
- 3 Speakers (Surround Sound System)
- Operator Touch Panel
- Exhaust Fan
- Terminal Connections
- Height Adjustment Foot
- Projection Lens
-
Air intake/air filter
-
Carry Handle
- Release Button (height adjustment foot)
- AC Power Connection
- AC Power Switch
- Lamp Door
- Lamp Door Release Button
- Infrared Sensor
Section 3: Set Up/Connections
3-1. Terminal Connection Panel
The MP8750 projector has terminal connections on the backside of the projector. Refer to Section 3.4-Cable Connections for more detail.
- AUX: Only compatible with 3M devices.
- SVHS/AUDIO IN: SVHS and audio input.
- VIDEO1/AUDIO IN: Video1 and audio input.
- VIDEO2/AUDIO IN: Video2 and audio input.
- RS-232C: Mouse emulation/external projector control.
- MONITOR: Output to external monitor.
- PC/RGB1: Video input #1 from computer.
- PC/RGB2: Video input #2 from computer.
- AUDIO IN2: Audio L/R input from computer #2
- AUDIO IN1: Audio L/R input from computer #1.
- AUDIO OUT: Audio L/R output to external audio system.
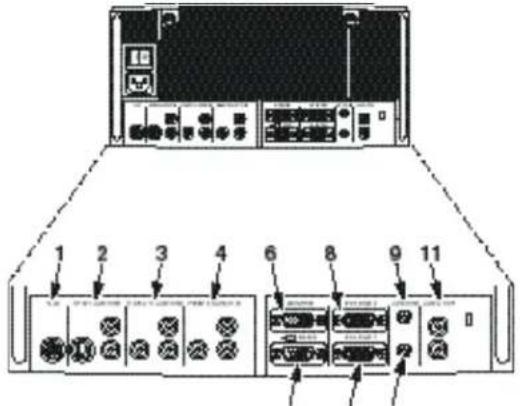
Figure 3-1. Input Connection Terminals
3-2. Operator Touch Panel Keypad
The MP8750 operator touch panel keypad (Figure 3-2) is located on top of the projector. Refer to Section 4 for more detail on using the keypad.
- Zoom: Adjust (increase/decrease) image size.
- Video: Select Video1, Video2 or S-VHS input
- PC: Select PC/RGB 1/2 input.
- Enter: Initiate drop windows, toggle check box (on/off), display Info sub-menu or press and hold then use Disc Pad to reposition menu location.
- Volume (+/-): Adjust (increase/decrease) audio level.
- Mute: Toggle speakers on/off.
- Brightness (+/-): Adjust image brightness. (See Menu.)
- Disc/Pad: Move cursor up/down, left/right.
- Menu: Display/remove menus. Menu (+/-): Increase/decrease menu value.
- Aux: Toggle On/Off a 3M compatible device.
- Focus: Adjust image focus.
- Standby: Switch between standby mode (lamp off, fan off after cool down) and projection mode (lamp on, fan on).
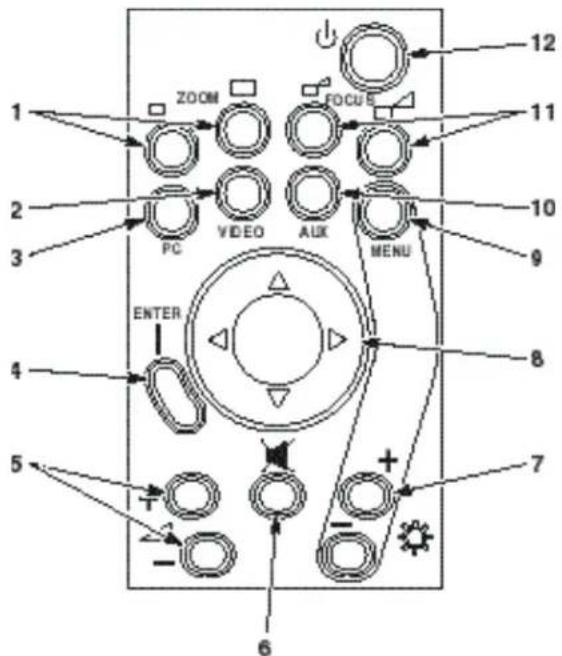
Figure 3-2. Operator Panel
3-3. Mouse Connection
The MP8750 has mouse emulation capability. Connect your computer mouse to the MP8750 and control computer mouse functions using the remote control.
- Power down the computer and projector.
- Remove the mouse cable connection from your computer mouse port.
- Connect the 9-pin D-Sub plug on the mouse cable to the RS-232 port on the projector.
- RS-232 Serial Mouse: Connect 9-pin D-Sub plug on mouse cable to the serial port on the computer.
PS/2 Mouse: Connect 9-pin D-Sub plug on mouse cable to PS/2 adapter and connect the 6-pin Mini-DIN adapter plug to the PS/2 port on the computer.
MAC ADB: Connect 9-pin D-sub plug on mouse cable to the Mac ADB adapter and connect the 4-pin Mini-DIN plug on ADB adapter to the ADB port on the computer.
(The Mac ADB adapter is an accessory item that must be ordered separately)
√√ Note
For serial mouse connections to a laptop computer, refer to the manufacturer's operating instructions. The internal pointing device or serial port configurations may need to be changed.
- First, power on the projector, then power on the computer.
√√ Note
Mouse emulation only works, when all cable connections are established and the proper start up sequence is followed. See section 4–1.
√√ Note
The recommended mouse drivers for mouse emulation is the Standard Microsoft Mouse, Serial or PS/2.
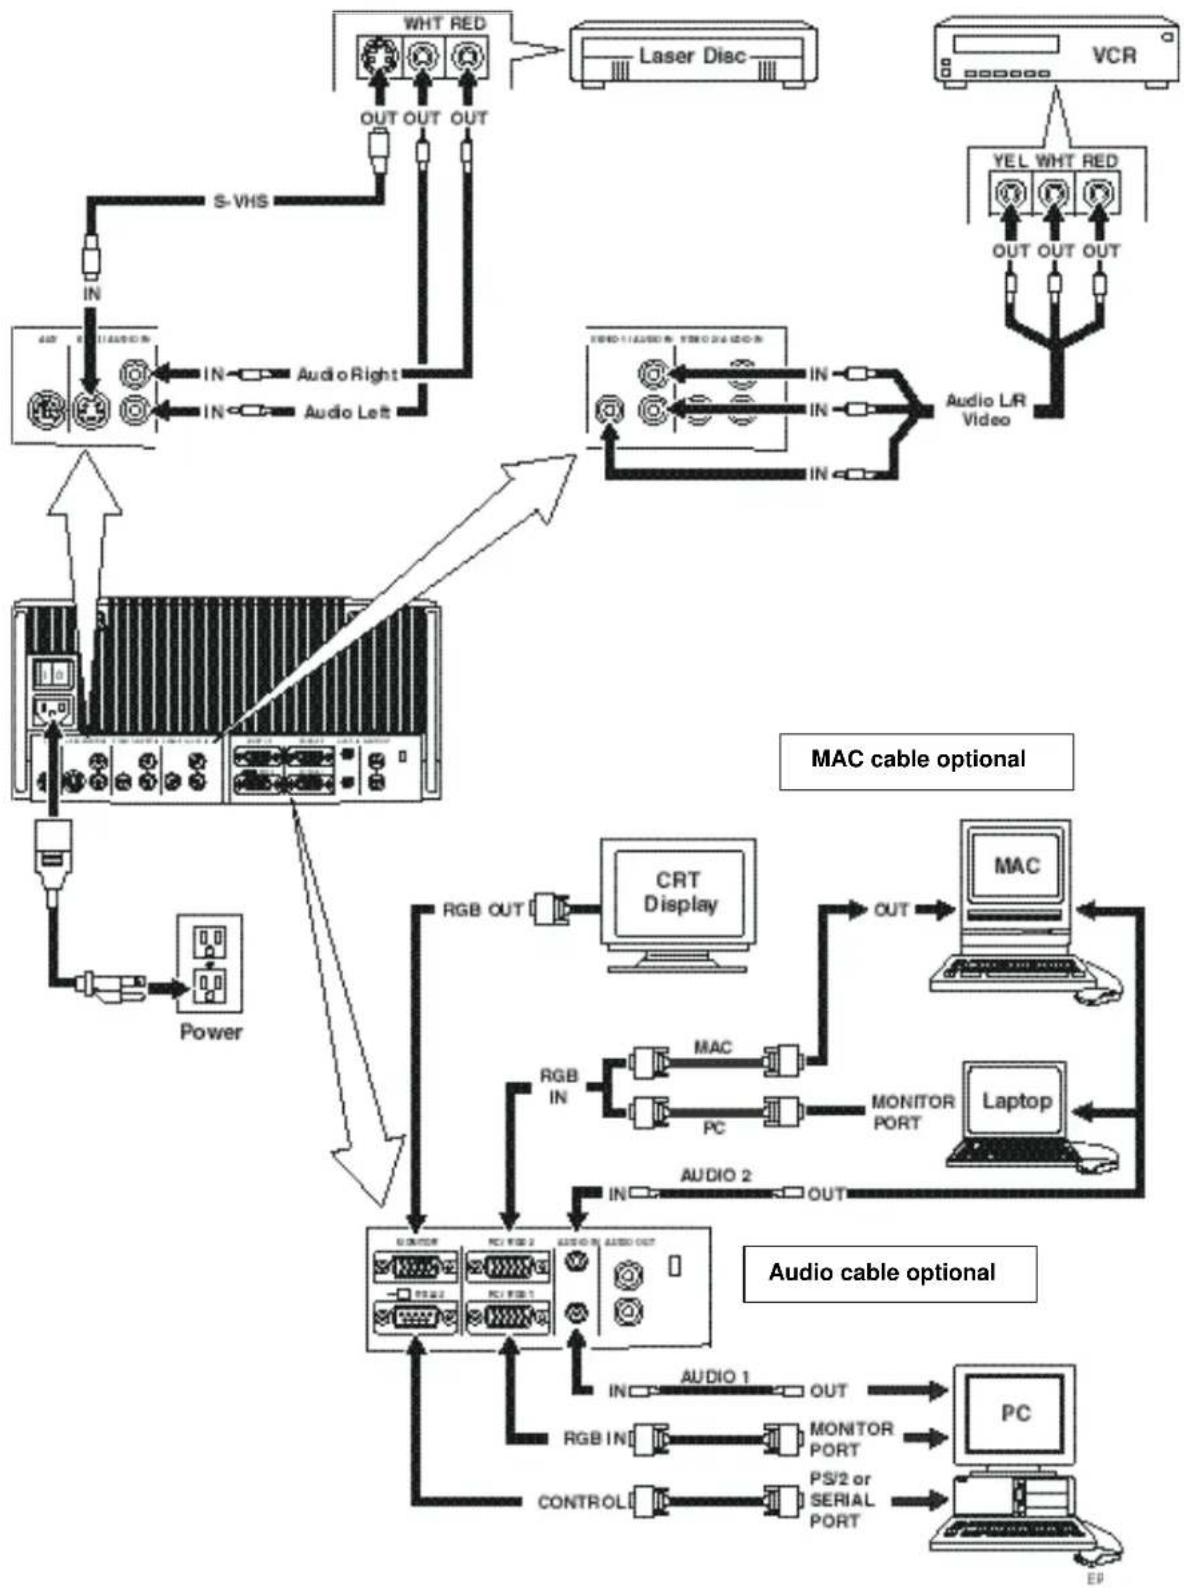
3-4. Cable Connections
- Turn off all power to the projector and input sources during cable hook up.
Caution
To prevent damage to equipment, all power to MP8750 and input sources must be turned OFF during cable hook up.
- Connect cables being careful not to bend any pins in the cable plug or input terminal (Figure 3-1).
- Start up projector then start up input sources. Section 4-1.
Cable Connection, continued
flowchart
graph TD
    A["Power"] --> B["AC System"]
    B --> C["RGB OUT"]
    B --> D["RGB IN"]
    B --> E["PC"]
    B --> F["AUDIO 2"]
    B --> G["AUDIO 1"]
    B --> H["CONTROL"]
    B --> I["PS/2 or SERIAL PORT"]
    B --> J["MONITOR PORT"]
    B --> K["MAC Display"]
    B --> L["Laptop"]
    B --> M["VCR"]
    B --> N["Laser Disc"]
    B --> O["Audio L/R Video"]
    B --> P["S-VHS"]
    B --> Q["OUT OUT OUT"]
    B --> R["IN"]
    B --> S["Audio Right"]
    B --> T["IN"]
    B --> U["Audio Left"]
    style A fill:#f9f,stroke:#333
    style B fill:#ccf,stroke:#333
    style C fill:#cfc,stroke:#333
    style D fill:#fcc,stroke:#333
    style E fill:#cff,stroke:#333
    style F fill:#ffc,stroke:#333
    style G fill:#cfc,stroke:#333
    style H fill:#fcc,stroke:#333
    style I fill:#cfc,stroke:#333
    style J fill:#fcc,stroke:#333
    style K fill:#cfc,stroke:#333
    style L fill:#fcc,stroke:#333
    style M fill:#cfc,stroke:#333
    style N fill:#fcc,stroke:#333
    style O fill:#cfc,stroke:#333
    style P fill:#fcc,stroke:#333
Figure 3-4. Cable Connections
3-5. Image Size (Projector-to-Screen Distance)
Adjust the size of the projected image using the zoom control buttons. The projected image size values, as they relate to the distance-to-screen value, are shown for focal lengths of f=25mm and f=45mm. Also shown is the maximum image height shift value that can vary depending on the focal length and the distance-to-screen. Figure 3.4.
| Distance to Screen m (ft.) | Maximum (f=25mm) Minimum (f=45mm) | |||||
| Image Width m (in.) | Image Height m (in.) | Max Height m (in.) | Image Width m (in.) | Image Height m (in.) | Max Height m (in.) | |
| 2.00(6.56) | 1.42(56) | 1.06(41.7) | .43(16.9) | .80(31.5) | .60(23.6) | .24(9.5) |
| 2.50(8.2) | 1.76(69.3) | 1.32(52) | .54(21.3) | .99(39) | .74(29.1) | .30(11.8) |
| 3.00(9.84) | 2.11(83.1) | 1.57(61.8) | .64(25.2) | 1.18(46.5) | .89(35) | .36(14.2) |
| 5.00(16.4) | 3.48(137) | 2.60(102.4) | 1.06(41.7) | 1.96(77.2) | 1.47(57.9) | .60(23.6) |
| 7.00(22.97) | 4.85(191) | 3.62(142.5) | 1.47(57.9) | 2.73(107.5) | 2.05(80.71) | .83(32.7) |
| 10.00(32.81) | 6.90(271.7) | 5.16(203.2) | 2.10(82.7) | 3.88(152.8) | 2.92(115) | 1.18(46.5) |
Figure 3.4. Image Size/Maximum Image Height
3-6. Image Height
Use the Picture menu/Height option to shift (upward) the projected image. The center of the projected image can be shifted a maximum of 12 degrees without incurring any keystoning. Figure 3.5.
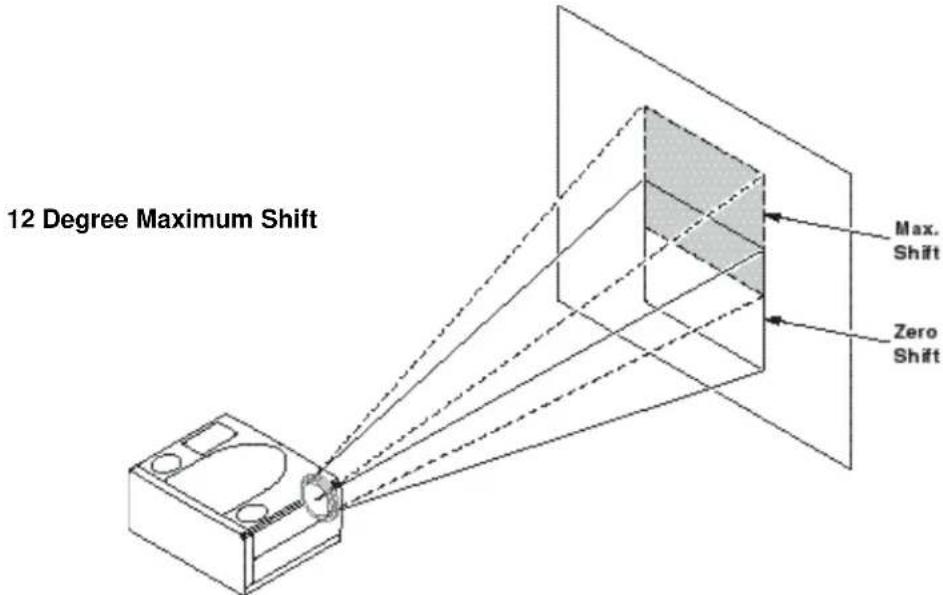
Figure 3.5. Maximum Image Shift
Section 4: Operating Instructions
4-1. Power Up Projector
Read the Important Safeguards before operating the MP8750 projector. After all cable connections have been completed, the projector can be powered up. During operation, keep the exhaust and intake air vents clear of obstructions to allow proper cooling.
Caution
Allow a projector that has been stored in a cold place to warm up to room temperature before applying power.
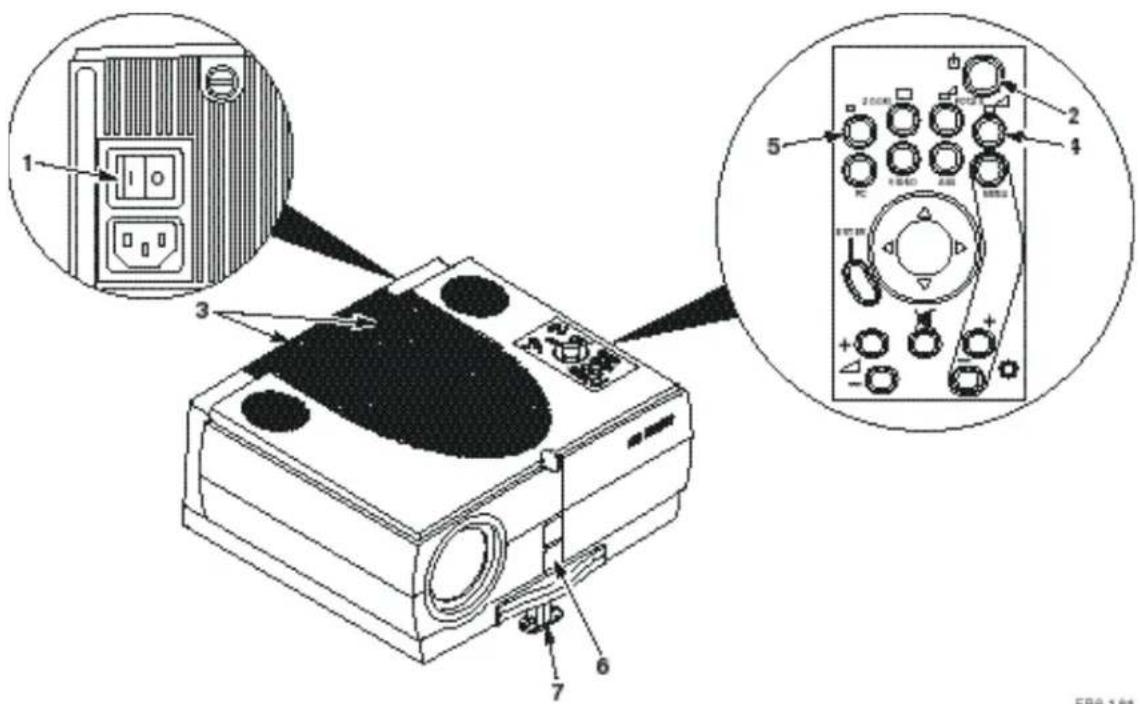
Figure 4-1. Power Up Projector
- Press the Main Power switch (1) to ON. A red LED indicator will illuminate to indicate there is power.
- Press the Standby button (2) to illuminate the lamp. A red LED indicator will turn green as an image appears and grows brighter on the screen.
- Check all ventilation slots (3) and clear away all obstructions.
√√ Note
Ventilation vents are located on the top and back of the projector. Do not block airflow by placing objects on top of the projector.
- Adjust the Focus (4) and Zoom (5) for best image.
- Press the Foot Release button (6) to release the height adjustment foot (7).
- Power up your computer and video source(s).
√√ Note
In most cases, the projector will automatically adjust to the graphic mode of your computer by selecting a pre-programmed setting.
4-2. Standby Mode
When the projector is not being used, place it into standby mode.
- Press the Standby button.
- The lamp will switch off and the red LED will illuminate.
√√ Note
The fan motor will continue to run for a few minutes until the projector cools down and then the fan will turn off.
- Press the Standby button again to illuminate the lamp and project an image on the screen.
4-3. Projector Power Down
- Press the Standby button to place the projector in the standby mode (red LED illuminates).
- Wait until the cooling fan motor cycles off and the lamp LED turns off.
√√ Note
Switching the main power off before the fan has cycled off will decrease the life of the projection lamp.
- Press the Main Power switch to Off.
- Turn off the power to your input devices.
- Install lens cap to protect projection lens.
- To transport the projector, disconnect all power and connection cables.
4-4. Using System Menus
Main Menu: Press the Menu button on the operator touch panel keypad (Figure 3-3) or the remote control keypad (Figure 5-1) to display the Main Menu.
| Main Menu | |
| Picture | (1) |
| Audio | (2) |
| Tools | (4) |
| Signal source PC/RGB1 | |
| User Interface | (3) |
| Advanced Setup | |
| Info | |
The menu name (1) is on the top line.
An arrowhead (2) at the right of a menu line indicates that this item is a sub-menu that can be selected.
A text field (3) at the right of a line indicates that this is a value that you can change in a drop down window.
Info: Press Enter to display the Info window.
To select a sub-menu, press the Disc Pad up or down to highlight (select) the desired sub-menu (4). Then press the Disc Pad to the right or the Enter button to display the sub-menu (see Sub-Menu).
To change a text field value, press the Disc Pad up or down to highlight (select) the menu line (3). Then press the Disc Pad to the right or the Enter button to display a drop down window of all the possible values. Use the Disc Pad to select a value and press Enter to initiate the selection.
To exit a sub-menu, press the Disc Pad to the left.
To completely exit the menu system and return to the projected image, press the Menu button.
Sub-Menu: Select the desired sub-menu (see Main Menu). Press the Disc Pad to the right or the Enter button to display the sub-menu.
| Picture | |
| Height | |
| Brightness | |
| Contrast | |
| Optimize | |
| Hor. Position | |
| Ver. Position | |
| Tracking | 1312 |
| Sync | |
| ModeVESA | 1024 x 768 75Hz |
| Resolution | 1024 x 768 |
The sub-menu name (1) is on the top line.
A slider bar (2) at the right of a sub-menu line indicates you can increase or decrease the value.
A number field (3) at the right of a sub-menu line indicates that you can change it.
A check box field ☑ at the right of a sub-menu line indicates that you can toggle that value On/Off by pressing the Enter button.
To change a slider bar value, it must be highlighted. Press the +/- button on the remote control or Bright +/- button on the operator touch panel to increase or decrease the value.
To change a number field, press the Disc Pad up or down to highlight (select) the menu line (3). Then press the +/- button on the remote control or Bright +/- button on the operator touch panel to increase or decrease the amount of the value.
4-5. Menu Adjustments/Settings
The following charts lists all the menu items that can be adjusted along with the default settings.
| Main Menu Description / Action Default | Setting | |
| Picture Display picture submenu | ||
| Audio Display audio submenu | ||
| Tools Display tools submenu | ||
| Source(drop down window) | Select input source(PC/RGB1 / PC/RGB2 / SVHS /VIDEO 1 / VIDEO 2 / AUX) | According to search procedure |
| User Interface Display user interface submenu | ||
| Advanced Setup Display advanced setup submenu | ||
| Info Display information window(press Enter) | ||
| Main Menu | |
| Picture | |
| Audio | |
| Tools | |
| Signal source | PC/RGB1 |
| User Interface | |
| Advanced Setup | |
| Info | |
| Picture (PC/RGB) Submenu Items | Description / Action Default | Setting |
| Height | Adjust projected image height | |
| Brightness Adjust the brightness | -|—j|—|+ | |
| Contrast Adjust the contrast | -|—j|—|+ | |
| Optimize Set best brightness for image | ||
| Hor. Position Adjust horizontal position of image | |—|| | |
| Ver. Position Adjust vertical position of image | ||—| | |
| Tracking Adjust number of pixels per line | ||
| Sync Adjust phase synchronization | |—| | |
| Mode Select data mode to adjust within this menu (Predefined modes / User Mode 1...3) | ||
| Resolution(drop down window) | Select pixel resolution (640x350 / 640x400 / 720x400 / 640x480 / 800x600 / 832x624 / 1024x768 / 1280x1024) | |
| Picture | |
| Height | |
| Brightness | |
| Contrast | |
| Optimize | |
| Hor. Position | |
| Ver. Position | |
| Tracking | 1312 |
| Sync | |
| ModeVESA 1024 x 768 75Hz | |
| Resolution | 1024 x 768 |
4-5. Menu Adjustments/Settings, continued
| Picture (Video) Submenu Items | Description / Action Default | Setting | |
| Height | Adjust projected image height  | ||
| Brightness Adjust the brightness | 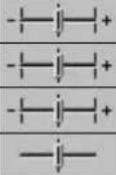 | ||
| Contrast Adjust the contrast | |||
| Color Adjust color saturation | |||
| Tint Adjust HUE for NTSC | |||
| Audio Submenu Items | Description / Action Default | Setting |
| Volume Adjust volume |  | |
| Audio | Audio mute ☑-on / ○-off | ☑-on |
| Speaker | Speakers ☑-on / ○-off | ☑-on |
| Balance Adjust balance | 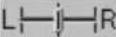 | |
| Treble Adjust treble |  | |
| Bass | Adjust bass | -|—|—|+ |
| Surround | Adjust surround sound level | 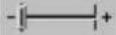 |
| Tools Submenu Items | Description / Action Default | Setting |
| Freeze | Freeze frame ☑-on / ○-off | ○-off |
| Magnify | Magnify mode ☑-on / ○-off | ○-off |
| Factor Adjust magnification factor | 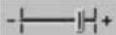 | |
| Timer | Select timer mode (off / small / large) | off |
| Minutes | Adjust timer countdown(1 to 90 minutes) | 10 minutes |
| User Interface Submenu Items | Description / Action Default | Setting |
| Language(drop down window) | Select user interface language(English / Deutsch / Français /Español / Italiano / Nederlands /Svenska) | English |
| Graphics Activate on-screen status barindicators and icons. (e.g. [IMAGE])☑-on / ☑off | ☑-on | |
| Reset Window Position | Reset all menu window position to default | |
| Help(drop down window) | Select Help window mode(immediate / 1, 3, or 5 seconds / off) | 3 seconds |
| Picture | |
| Height | |
| Brightness | |
| Contrast | |
| Color | |
| Tint | |
| Audio | |
| Volume | |
| Audio | |
| Speaker | |
| Balance | |
| Treble | |
| Bass | |
| Surround | |
| Tools | |
| Freeze | ○ |
| Magnify | ○ |
| Factor | |
| Timer | off |
| Minutes | 10 |
| User Interface | |
| Language | English |
| Graphics | |
| Reset Window Position | |
| Help | 3 seconds |
4-5. Menu Adjustments/Settings, continued
| Advanced Setup(PC/RGB) Submenu Items | Description / Action Default | Setting |
| Projection (drop down window) | Select projection orientation(standard / Rear / Rear/Ceiling / Ceiling) | standard |
| Remote Control | Remote control receiver ☑-on / ☐-off |  |
| RC Address Select rem | ote control address(1 / 2 / 3 / 4) | 1 |
| Sync Mode1(drop down window) | Select Sync Mode for PC/RGB1(separate TTL / composite TTL / separate ana. / composite ana. / sync on green) | separate TTL |
| Sync Mode2(drop down window) | Select Sync Mode for PC/RGB2(separate TTL / composite TTL / separate ana. / composite ana. / sync on green) | separate TTL |
| SOG Level Adjust level | for sync on green synchronization | 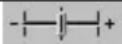 |
| Reset Data Modes Set | all data modes to factory default settings. | |
| Reset lamp display Resets the lamp hours displayed on the Info window | ||
| Test Display test submenu | ||
| Advanced Setup (Video) Submenu Items | Description / Action Default | Setting |
| Projection (drop down window) | Select projection orientation (standard / Rear / Rear/Ceiling / Ceiling) | standard |
| Remote Control | Remote control receiver ☑-on / ○-off | ☑-on |
| RC Address Select remote control address (1 / 2 / 3 / 4) | 1 | |
| Video standard (drop down window) | Select Video standard (PAL B,G,H,I / NTSC M / SECAM / NTSC 44 / PAL M / PAL N / PAL 60 / NTSC COMB / automatic) | automatic |
| Reset lamp display Resets the lamp hours displayed on the info window | ||
| Test Display test submenu | ||
| Test Submenu Items | Description / Action Default | Setting |
| Parameter display Parameter display window ☑-on / ☑-off | ○-off | |
| Color test picture Display color test picture | ||
| Frame test picture Display frame test picture | ||
| Info (display only) | Description / Action | |
| Hardware | Current hardware level | |
| Firmware | Current firmware level | |
| VESA xxxxxxxxxxxx | Current video mode | |
| Lamp (bar indicator) | Lamp life hours (Green: lamp good / red: lamp needs replacement) | |
| OK! | Closes the Info display by pressing the Enter button | |
| Advanced Setup | |
| Projection | standard |
| Remote Control | |
| RC Address | 1 |
| Sync Mode1 | separate TTL |
| Sync Mode2 | separate TTL |
| SOG level | |
| Reset Data Modes | |
| Reset lamp display | |
| Advanced Setup | |
| Projection | standard |
| Remote Control | |
| RC Address | 1 |
| Video standard | automatic |
| Reset lamp display | |
| Test | |
| Test | |
| Parameter display | ○ |
| Color test picture | |
| Frame test picture | |
3M
MP8750
Hardware: xxx-x.xx-x
Firmware: xxx-x.xx
VESA 1024 x 768-75 Hz Lamp
OK!
Section 5: Remote Control
5-1. Remote Control Functions
Aim the remote control toward the projection screen or at the sensor. Press desired remote button to send a signal to the projector.
*Zoom: Increase (+) or decrease (-) size of displayed image.
*Video: Switch displayed image to video input.
*PC: Switch to PC mode. In PC mode, toggles between RGB 1 and 2.
*Enter: Mouse emulation ON, left mouse button. Mouse emulation Off, Enter button for confirmation of a selection.
Drag: Lock left mouse button.
Text: Not used.
Blank: Replace projected image with white background. Press again to return image.
Optimize: Adjust brightness and contrast for best picture.
Reveal: Press Reveal to cover the image on the screen with a gray mask. Use the Disc Pad to reveal the image. Press Reveal again to return full screen projection of image.
*Volume: Increase (+) or decrease (−) speaker volume.
Mouse: Toggle mouse emulation on/off. ON: The L & R buttons operate left & right mouse key functions. Drag-an-drop functions are possible by pressing the Drag button.
OFF: L button is the Enter confirmation
Mode 1,2,3,4: Toggle between remote control addresses 1, 2, 3, 4.
Info: Display information window.
An icon will display to indicate a presentation tool is active.
*Standby: Switch the projector between Standby mode (lamp off, fan off) and operation mode (lamp on, fan on).
*Focus: Adjust focus (+/-) of displayed image.
Aux: Toggle ON/OFF a 3M compatible device.
*Menu: Display system menus.
Disc Pad (mouse pointer): Move (point) the cursor on the projected image. Navigate menus. See Pointer.
Window: Toggle between full screen and centered display mode (non-AGA modes only)
Timer: Displays timer (window in lower part of screen). Repeated operation of key toggles on/off
*Mute: Toggle ON/OFF the audio sound.
*Bright: Increase (+) or decrease (-) brightness of displayed image.
Freeze: Stores (freezes) the projected image. Press again to return the projection of the current image.
Magnify: Press to enable magnification mode. Press +/- buttons to increase/decrease the magnification factor. Move Disc Pad to displace the magnified area within the image. Press Magnify again to toggle back to normal presentation. In video mode (NTSC only), press Magnify to toggle between scaled and unscaled representation.
Pointer: Place a pointing device on the screen. Use Disc Pad to move pointer.

Pointer

Freeze

Mouse

Mute On

Magnify

Reveal
Image
The buttons marked with an asterisk (*) also appear on the operator touch panel keyboard.
√√ Note
5-2. Battery Replacement
The remote control uses two AAA batteries. The battery cover is located on the back of the remote control.
- Press the locking tab (1) to release door. Figure 5-1)
- Lift up on the door (2) to remove it and set it to the side.
- Remove old batteries.
- Install new batteries (3). Make sure the polarity (+/-) on each battery matches the decal.
- Replace battery compartment door.
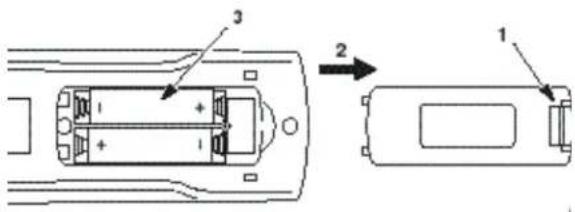
Figure 5-1. Replacing Batteries
Section 6: Maintenance
6-1. Replacing The Air Filter
For best performance, replace the air filter each time the projection lamp is changed.
√√ Note
Periodically check air filter for excess dust or dirt. Replace or clean as needed.
- Unplug the power cord (1) of the projector.
- Unscrew two screws (2) securing back panel.
- Remove the back panel (3).
- Separate the air filter from the back panel (4).
- Vacuum (5) the air filter to remove the dust and dirt.
- Insert the air filter in the back panel.
- Insert the back panel and secure with screws (2).
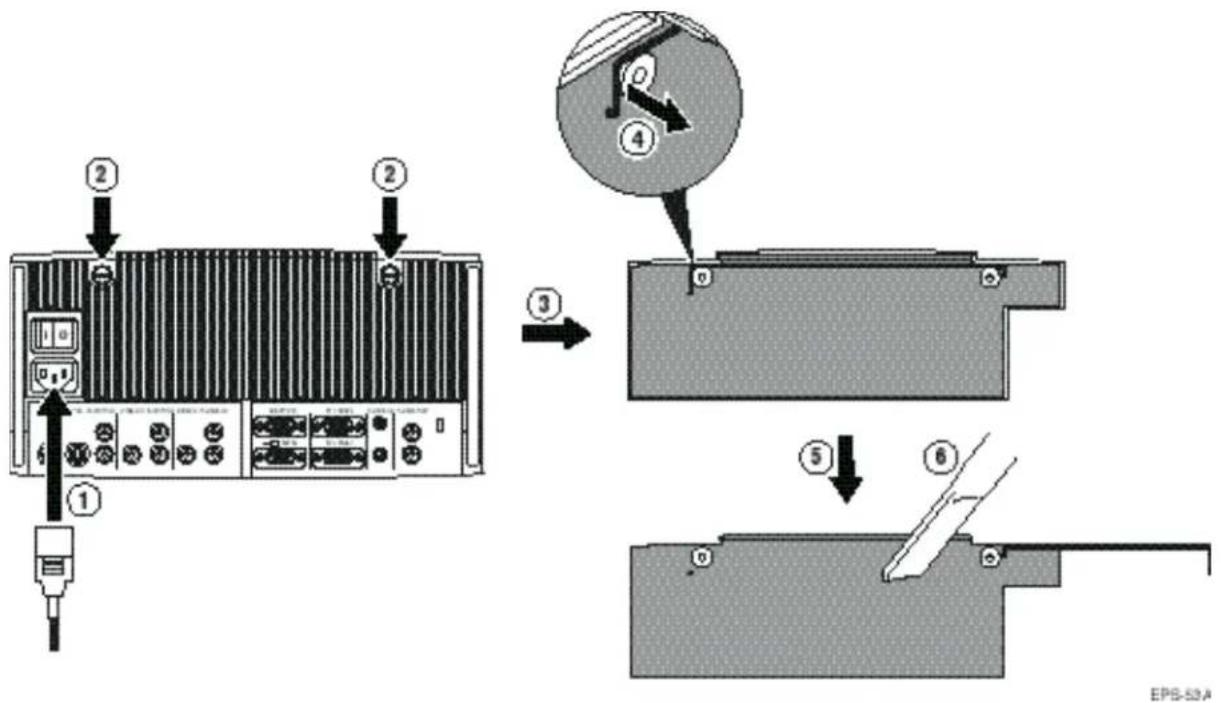
Figure 6-1. Removing Air Filter Door
6-2. Replacing Projection Lamp
The metal halide lamp of the projector has a limited lifetime of approximately 2000 hours. If the projected image appears dark or a red lamp life indicator bar displays during projector startup, you should change the lamp and air filter.
√√ Important Note
This lamp contains mercury. Consult your local hazardous waste regulations and dispose of this lamp in a proper manner.
Caution
Always unplug the projector when changing the lamp. There are high voltage parts inside the cabinet that may cause electric shock.
Caution
Allow the projector to cool down for 30 minutes. Lamp and adjacent metal parts become extremely hot and can cause burns to your fingers.
- Press the Standby/On button on the operator touch panel or remote control. Wait for the fan motor to cycle off.
- Turn the main power switch to OFF and unplug the projector power cord.
- Set the projector on a sturdy surface with the front of the projector facing you.
- Press and hold the lamp door button (1) with your index finger. Slide your finger to the right and depress the lock tab (2). Pull outward on the lamp door (4) to hinge it to the right side and access the lamp cartridge (5).
- Unscrew two retaining screws (3) securing the lamp cartridge (5).
- Grasp handle (6) and carefully pull the lamp cartridge (5) out of the projector.
- Carefully insert the new lamp cartridge (5) and secure with retaining screws (3).
- Close the lamp door (4) tightly until the lock tab (2) slides into the locked position.
- Go to the Advanced Setup menu and reset the lamp life display to zero.
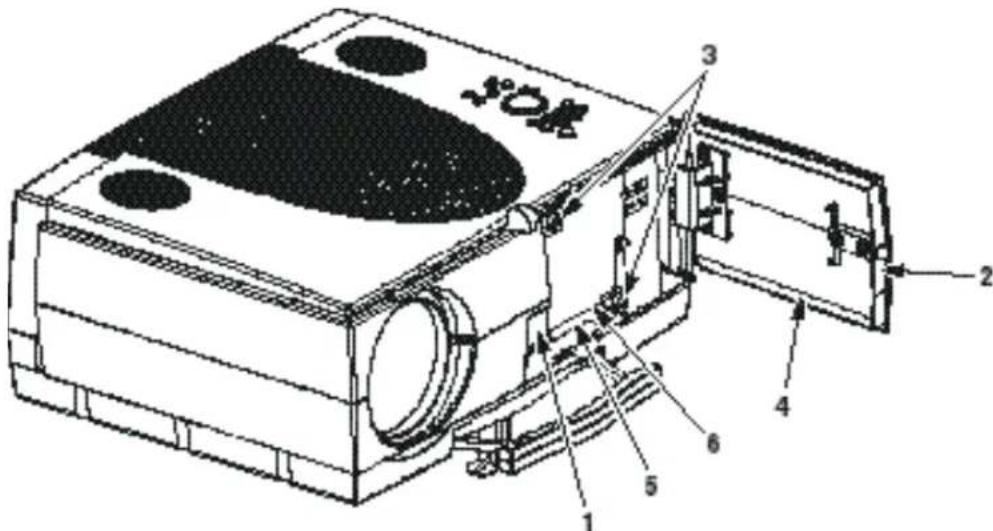
Figure 6-2. Changing the lamp cartridge
6-3. Lamp Life Indicator
The elapsed operating time of the lamp is displayed on the Info sub-menu. From the Main menu, select INFO to display the lamp life. As long as the lamp indicator bar is green, the lamp is good. When the bar changes to red, the lamp should be changed.
After changing the projection lamp, the lamp life indicator must be reset to zero.
To reset the lamp life indicator:
- Press the Menu button to display the main menu.
- Select the Advanced Setup sub-menu using the Disc Pad.
- Select Reset lamp display and press the Enter button.
- The following message will display: "Really reset lamp life display? OK! / Cancel"
- Using the Disc Pad, select OK! and press Enter to acknowledge the change.
- Press Menu to exit the menu system.
√√ Note
To view the used/remaining lamp life: (1) Go to the Main Menu. (2) Select "Info". (3) Press the Enter button.
6-4. Cleaning the Projector
For best performance, keep your projector free of excess dust and surface dirt. Use a soft cloth to remove dust from the projector housing. Use 3M☐ Overhead Cleaner 676 to remove surface dirt and smudges from the projection lens.
Caution
Always unplug the projector when cleaning. Take care that no liquids get inside the projector. There are high voltage parts inside the cabinet that may cause electric shock.
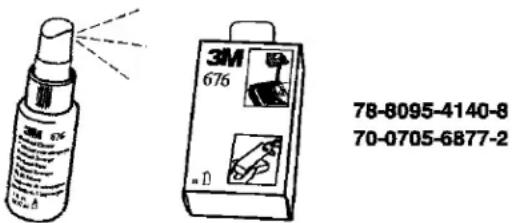
Figure 6-3. Overhead Cleaner
Section 7: Troubleshooting
7-1. Troubleshooting Problems and Solutions
| Problem Probable Cause Possible Solution | ||
| Image is disturbed or unstable. | Wrong Sync setting.Wrong Tracking value. | Set tofactory default setting.(See below!)Change Sync setting in thePicturemenu for optimum performanceFor vertical interference stripes, change theTrackingin thePicturemenu for optimum performance. |
| No computer image projected. Message “Looking for signal ...” displays. | Loose cable.No power to computer.Wrong synchronization mode. | Check and secure cable connections.Turn on computer.Adjust synchronization mode of the projector to the synchronization mode of the computer viaAdvanced Setupmenu. |
| No video image projected. | Loose cable.No signal from video source. | Check and secure cable connections.Check video picture on TV. |
| Mouse does not work. | Loose cable.Wrong connection.Wrong power up sequence. | Check and secure cable connections.For PS/2 and ADB (Apple) mouse a special adapter is necessary. Only use adapters from the original manufacturer (Section 8-2).The mouse emulation operates correctly only if the correct power up sequence has been used (refer to section 3-5.) |
| Image off-center. | Image position. | Center image with the Disc Pad of the control panel or on the remote control transmitter. |
| Cannot get entire image on the screen. | Wrong Tracking value.Compatibility problem. | If vertical interference stripes occur, change theTrackingvalue in thePicturemenu for optimum performance.Refer to the documentation for your graphic card. Change theResolutionsetting in thePicturemenu to the resolution of the video mode output from the computer graphic card. |
| Washed out image. | Wrong Contrast setting.Wrong Brightness setting. | ChangeContrastsetting in thePicturemenu. The bar should be in the middle position.LowerBrightnesssetting in thePicturemenu. Choosing Brightness and pressing Enter can perform an automatic adjustment. |
| Humming noise.Slowly passing horizontal bars. | Signal sources are connected to different power sources.VCR connected to aerial system and to projector.Bad signal. | Locate the source of disturbance. Disconnect the sources one after another from the projector. Connect all sources to a common power source.Remove antenna connection from VCR. If the disturbance disappears, use a by-pass filter (isolating transformer) to connect the antenna to the VCR.Try different input source. |
The factory default settings of the projector can be restored by pressing Enter and Mute simultaneously on the control panel when switching on the main power switch of the projector and pressing the Standby button afterwards.
The projector will start immediately and the message “Parameter factory settings restored” displayed in the starting screen will indicate the default settings are reset.
7-2. Service Information
For product information, product assistance, service information, or to order accessories or spare parts, please call: In U.S. or Canada: 1-800-328-1371
In other locations, contact your local 3M Sales office.
Section 8: Product Specifications
8-1. Technical Specifications
| Display Technology | Single DMD |
| Resolution | 1,024 x 768 (total 2,359,296 pixels)625 (PAL) / 525 (NTSC) video lines to full screen size magnification |
| Brightness | 1,500 ANSI lumens |
| Colors | 16,770,000 colors |
| Contrast Ratio | 150:1 (on/off) |
| Zoom / Focus / Height shift | Power control |
| Projection Lens | Throw Ratio=1.44 - 2.59 / f=25 - 45 mm Power Zoom / Power Focus, 0° - 12° Power Height Shift |
| Picture Size | 1.0 - 8.7 m (38 - 340 in.) diagonal,2.6 m diagonal at 3.0 m distance and f=25 mm |
| Projection Lamp | 350 W DC metal halide lamp |
| PC Compatibility | Resolution 640 x 400 (magnified), 1024 x 768 (native) and 1280 x 1024 (compressed) (sync on green is available) |
| Video Compatibility | NTSC / NTSC 4.43 / PAL (including PAL-M, N) / SECAM, PAL-60 |
| Input Terminals | PC/RGB: RGB x 2 (D-Sub 15-pin)PC/RGB: PC-Audio x 2 (3.5 mm stereo mini jack)Video: RCA x 2 + SVHS x 1 + Camera/Aux x 1Video: Audio x 3 (2 x RCA left/right) |
| Output Terminals | RGB-Monitor: RGB x 1 (D-Sub 15-pin)Audio: Audio x 1 (2 x RCA left/right) |
| Communication Terminals | RS-232C (D-Sub 9-pin) |
| Scanning Rates | Hor.: 15-86 kHz, Vert.: 50-160 Hz |
| Audio Speakers | 20 Watts stereo surround sound |
| Height Adjuster | Front leg (additional 0°... 9°, variable) |
| Unique Features | Digital magnification,Wireless infrared remote control |
| Remote Control Transmitter | Projector control, PC/MAC mouse cursor control |
| Dimension (WxHxD) | 331 x 137 x 272 mm |
| Weight | 7.6 kg (17 lb.) |
| Power Requirements | AC 100-240 V ±50/60 Hz |
| Power Consumption | 450 W |
| Regulatory Approvals | FCC Part 15, Class A, CE, UL |
| Warranty | Two years limited warranty on parts and labor |
8-2. Accessory & Spare Parts List
| Part Description Part Number | |
| Projection Lamp Kit- Metal Halide Lamp (350W)- Air Filter | 78-6969-8586-6 |
| Air Filter (included in lamp kit 78-6969-8577-5) | 78-8118-3476-7 |
| Power Cords (U.S., UK, Europe)For special power cords. See Appendix D-3 | DY-0205-1356-9 (U.S.)DY-0205-1355-1 (UK)DY-0205-1354-4 (Europe) |
| VGA Cable (15-15 pin male/male) DY-0205-1271-0 | |
| Video Cable (S-Video Mini-DIN-4pin) DY-0205-1010-2 | |
| Composite Video Cable (RCA to RCA) DY-0205-1008-6 | |
| Audio Cable (RCA to 3.5 mm stereo) DY-0205-1359-3 | |
| PC Serial Cable (PC mouse connection) DY-0205-1007-8 | |
| Remote Control 78-8118-3475-9 | |
| Mac Cable Set (optional) DY-0205-1361-9 | |
| Carry Case (optional) 78-6969-8587-4 | |
| Shipping Case (optional) 78-6969-8588-2 | |
| Mouse Y-Cable (optional) DY-0205-1507-7 | |
| Extension Cable Kit (optional) XX-0034-1714-2 | |
| Audio Cable (3.5 mm stereo to 3.5 mm stereo)(optional) | 26-1012-0683-2 |
| Ceiling Mount Kit (optional) 78-6969-8591-6 |
Mac Cable Set (optional), Part number DY-0205-1361-9: This kit contains a Mac mouse adapter and a Mac video cable.
Extension Cable Kit (optional), Part number XX-0034-1714-2: The extension cable kit includes a video amplifier and 20 m (65 ft.) video cable. The kit increases the allowable distance between the projector and the video source without burdening the video source.
Mouse Y-Cable (optional), Part number DY-0205-1507-7: This cable provides user with the option to simultaneously operate the MP8750 remote mouse and a PC mouse (only works with Microsoft serial mouse).
8-3. How to Order
Please order these parts through your dealer, or contact 3M Customer Service at the following number:
• In U.S. or Canada: 1-800-328-1371
• In other locations, contact your local 3M Sales office.
(Intentionally Blank)
IMPORTANT NOTICE:
All statements, technical information, and recommendations related to Seller's products are based on information believed to be reliable, but the accuracy or completeness thereof is not guaranteed. Before utilizing the product, the user should determine the suitability of the product for its intended use. The user assumes all risks and liability whatsoever in connection with such use.
Any statements or recommendations of the Seller which are not contained in the Seller's current publications shall have no force or effect unless contained in an agreement signed by an authorized officer of Seller. The statements contained herein are made in lieu of all warranties, expressed or implied, including but not limited to the implied warranties of merchantability and fitness for a particular purpose which warranties are hereby expressly disclaimed.
SELLER SHALL NOT BE LIABLE TO THE USER OR ANY OTHER PERSON UNDER ANY LEGAL THEORY, INCLUDING BUT NOT LIMITED TO NEGLIGENCE OR STRICT LIABILITY, FOR ANY INJURY OR FOR ANY DIRECT, INDIRECT, INCIDENTAL OR CONSEQUENTIAL DAMAGES SUSTAINED OR INCURRED BY REASON OF THE USE OF ANY OF THE SELLER'S PRODUCTS.
Let us help you make the most of your next presentation. We offer every thing from presentation supplies to tips for better meetings. And we're the only transparency manufacturer that offers a recycling program for your used transparencies. For late-breaking news, handy references and free product samples, visit our Internet Website.

http://www.mmm.com/meetings e-mail: presentations@mmm.com
3M Austin Center Building A145-5N-01 6801 River Place Blvd. Austin, TX 78726-9000
3M Canada P.O. Box 5757 London, Ontario, Canada N6A 4T1
3M Mexico. S.A. de C.V. Apartado Postal 14-139 Mexico, D.F. 07070 Mexico
3M Europe Boulevard de l'Oise 9500 Cerge Pontoife Cedex France
Printed on 50% recycled wastepaper, including 10% post-consumer wastepaper ☐ 3M 1999 78-6970-8976-7 Rev. A
- MP8750 Table of Contents
- SAFEGUARDS....II
- WARRANTY IV
- SECTION 1: UNPACK....1
- SECTION 2: PRODUCTION DESCRIPTION....2
- SECTION 3: SET UP/CONNECTIONS ....3
- SECTION 4: OPERATING INSTRUCTIONS....7
- SECTION 5: REMOTE CONTROL....14
- SECTION 6: MAINTENANCE....16
- SECTION 7: TROUBLESHOOTING ....19
- SECTION 8: PRODUCT SPECIFICATIONS ...... 20
- Safeguards
- INTENDED USE
- IMPORTANT SAFEGUARDS
- PRODUCT SAFETY LABELS
- LOCATION OF LABELS
- SAVE THESE INSTRUCTIONS
- Warranty
- LIMITED WARRANTY
- LIMITATION OF LIABILITY
- THE FOREGOING WARRANTY IS MADE IN LIEU OF ALL OTHER WARRANTIES, EXPRESSED OR IMPLIED, AND 3M SPECIFICALLY DISCLAIMS ANY IMPLIED WARRANTY OF MERCHANTABILITY AND FITNESS FOR A PARTICULAR PURPOSE. 3M SHALL NOT BE LIABLE FOR ANY DAMAGES, DIRECT, CONSEQUENTIAL, OR INCIDENTAL, ARISING OUT OF THE USE OR INABILITY TO USE THIS PRODUCT.
- PATENTS, TRADEMARKS & COPYRIGHTS
- Section 1: Unpack
- 1-1. Contents of Shipping Box
- Item Quantity
- √√ Note
- 1-2. Keep Your Packing Materials
- 1-3. What's Next?
- Section 2: Production Description
- 2-1. Machine Characteristics
- 2-2. Parts Identification List
- Section 3: Set Up/Connections
- 3-1. Terminal Connection Panel
- 3-2. Operator Touch Panel Keypad
- 3-3. Mouse Connection
- 3-4. Cable Connections
- Caution
- 3-5. Image Size (Projector-to-Screen Distance)
- 3-6. Image Height
- Section 4: Operating Instructions
- 4-1. Power Up Projector
- 4-2. Standby Mode
- 4-3. Projector Power Down
- 4-4. Using System Menus
- 4-5. Menu Adjustments/Settings
- 4-5. Menu Adjustments/Settings, continued
- Section 5: Remote Control
- 5-1. Remote Control Functions
- 5-2. Battery Replacement
- Section 6: Maintenance
- 6-1. Replacing The Air Filter
- 6-2. Replacing Projection Lamp
- √√ Important Note
- 6-3. Lamp Life Indicator
- 6-4. Cleaning the Projector
- Section 7: Troubleshooting
- 7-2. Service Information
- Section 8: Product Specifications
- 8-2. Accessory & Spare Parts List
- 8-3. How to Order
- IMPORTANT NOTICE:
Brand : 3M
Model : MP8750
Category : Projector