MM282 - Audio recorder Manta - Free user manual and instructions
Find the device manual for free MM282 Manta in PDF.


| Product Type | Audio Recorder |
| Brand | Manta |
| Model | MM282 |
| Dimensions | 95 mm x 26 mm x 12 mm |
| Weight | 32 g ~ 33 g |
| Power Supply | Built-in rechargeable lithium battery, 3.7 V 220~280 mAh |
| Flash Memory | 1 GB |
| Recording Modes | LP (ACT), SP (WAV), HP (WAV) |
| Recording Bit Rate | LP 8 Kbps / SP 32 Kbps / HP 64 Kbps |
| Maximum Recording Time | LP 280 h / SP 70 h / HP 33 h |
| Frequency Response | 20 Hz ~ 20 KHz |
| Signal-to-Noise Ratio | 80 dB |
| Maximum Output | > 5 mW |
| Speaker Diameter | 23 mm |
| FM Radio Frequency Range | 87.5 ~ 108 MHz |
| Supported Systems | Windows 98/SE/Me/2K/XP, Mac OS X10.3+, Linux Red Hat 8.0+ |
| Recording Formats | ACT, WAV |
| Music Playback Formats | MP3, WMA, WAV, ASF |
| Key Features | One-touch recording, VAR/VOX voice activation, telephone recording, external microphone, color backlit LCD, MP3 player, A-B repeat, time stamp |
| Battery Indication | Low-battery indication; auto-save and shut-off when battery low |
| Maximum Files | 200 recording messages |
| Automatic Section Break | Every 4 hours of recording |
Frequently Asked Questions - MM282 Manta
User questions about MM282 Manta
0 question about this device. Answer the ones you know or ask your own.
Ask a new question about this device
Download the instructions for your Audio recorder in PDF format for free! Find your manual MM282 - Manta and take your electronic device back in hand. On this page are published all the documents necessary for the use of your device. MM282 by Manta.
USER MANUAL MM282 Manta
Appearance and buttons....31
Operation 33
Record 35
Play/stop playing recording files ....37
Connect the recorder with the computer ....43
Recording telephone conversation ....44
Install driver to computer 45
Recharge the battery....47
Solutions to the problems ....48
Specification 49
natural_image
Simple line drawing of a rectangular box with a handle and internal pattern (no text or symbols)natural_image
Simple line drawing of a rectangular frame with three small circles inside, no text or symbols present.natural_image
Simple line drawing of a rectangular box with internal vertical lines, no text or symbols present.One-touch recording. ●
High quality recording. ●
Three recording modes. ●
VAR/VOX System (Voice Activated recording.) ●
Recording via high grade built-in microphone. ●
Playing via high quality speaker. ●
Recording telephone conversation. ●
Recording via external microphone. ●
LCD screen with color backlight. ●
Work as drive free USB flash disk. ●
FM Radio (Selectable). ●
● Built-in rechargeable lithium battery.
● Low-battery indication function.
●Work as MP3 Player.
● Sectional automatic break & repeat from A to B.
●/olume adjusting.
●Time stamp.
USER'S MANUAL
Important Notice
Please switch off the recorder if do not use the recorder for – long time. It is to avoid power consumption.
Please change the batteries properly when the low-battery – indication showing on the screen.
-Please read the instruction manual carefully before operating.
Please keep it from moisture and high temperature, and don't put it near the fire.
Please avoid collision when using the recorder. Do not push – the screen.
- Otherwise it may cause damage of the LCD screen and it may cause improper work of the screen display.
If there's problem with the recorder, please contact with our – company or your local distributor. Please don't remove the battery or replace the internal parts.
-Please backup the files before sending the recorder for repair.
We are not responsible for the lost of files which caused by repair.
We are not responsible for the users' recording without others' approval.
- We reserve the right to modify the design and specifications. We have no responsibility to give separate notice for the modification.
USER'S MANUAL
Appearance and buttons
- Menu (M)
- Play/Stop playing
- Volume +
- Volume –
- Rec/Stop recording
- Delete
- Forward
- Backward
-
Power ON/OFF
-
Earphone jack
- Signal in jack
- Screen
- Speaker
- USB jack
USER'S MANUAL

USER'S MANUAL
Operation
Turn on
Push the power Power Switch to ON side. The recorder will turn on in 3 seconds. If the recorder is off under sleep mode and the power switch is at ON side. Long time press Play/stop playing button, the screen lightens up, the recorder is turned on.
natural_image
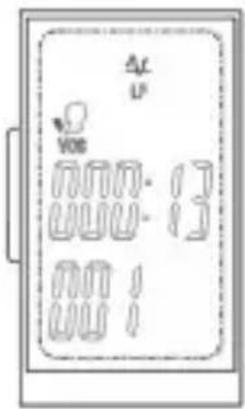
Simple line drawing of a rectangular box with a handle and internal symbols (no text or labels)If there's no recording file in the recorder, the recorder will automatically enter in the main menu which the recorder was turned off previous time. (Recording modes: LP/SP/HP. Play recording file: .Music: , FM Radio: .) Screen show one of the below interface:


If there are recording files in the recorder, the recorder will automatically enter in Recording file playback standby condition. Screen shows:
USER'S MANUAL
Turn off
Step 1: Long-time press „Play/Stop playing” key in the standby condition, screen shows „OFF”, the recorder is turned off.
Attention: After turn off the recorder, please make sure the power power ON/OFF button is pushed to OFF side to avoid power consumption.
Low battery indicates function
Recorder will show if the battery is low. If you are fail to notice the indication of low battery during recording. The recorder will automatically save the present recording file and automatically turn off within 30 seconds. Please recharge the in time and back up the recording files.
USER'S MANUAL
Attention: Please don't push the „Power ON/OFF” key to OFF side (Don't shut off the power) during recording. It may cause the losses of message & the recorder being frozen. The frozen condition caused by misuse should be formatted on the computer.
The recorder can only be used normally agter formatting. Please select FAT system to format the recorder.
Record
Setting recording mode
Press „Menu” button to enter in main menu. Press „Forward/backward” buttons to Setting recording mode: select the recording modes. Press „M” button to confirm the selection.
Following are the screens of recording modes: (the sign of recording mode twinkles on the screen when we come to different modes)

One key recording
Press „Rec“ key in any standby condition, screen shows, and the twinkles. The recorder enters in SP recording mode. It begins VAT (Voice Activated Recording). will twinkle when there’s no sound input. The recording time stop stamping. Record pauses. It will automatically start recording when there’s sound input. Screen shows:
USER'S MANUAL

LP: Long time recording (ACT format)
SP: Standard recording. (WAV format)
HP: High quality recording (WAV format)
Only SP recording mode has Voice Activated function.
Attention:
When screen shows „FULL”, it indicates the disk is full. Then some files should be deleted to keep enough space for saving new recording files & other information. If the recorder is in low battery condition it should be recharged.
The recorder can only be work properly after recharging. The recorder can save 200 pieces of recording messages.
Automatic section-break
When record for full 4 hours, it will automatically save the recording message to next file.
Stop recording
Repress „Rec“ key, record stops.
Adjusting the sensitivity of VAR: ●
After entering the SP recording mode. Press the “REC” button to record and stop recording, then press ◀◀ or ▶▶ to select the levels of VAR on the basis of your needs, minimum is 1 and the maximum
USER'S MANUAL
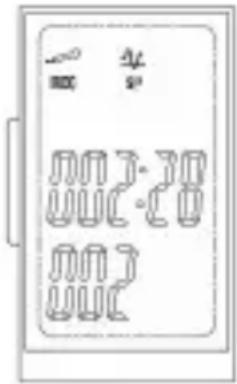
is 4. Repress the “REC” to continue recording after finishing adjustment, will twinkle when there’s no sound input. The recording time stop stamping. The recording pauses. It will automatically start recording when there’s sound input. Screen shows:
Recording monitor: ●
Insert the earphone when the recording is proceeding, you can hear what you are recording, and you can also adjust the volume in the earphone: press the “REC” to stop the recording and then press the “VOLUME+” or “VOLUME-” to select the volume in your need, the minimum is 0 and the maximum is 31. After finishing the adjustment, press “REC” to continue recording.
Play/stop playing recording files
Play recording files immediately after recording
Press Play button in record ceasing condition to start playing the recording files. The recording files will play one by one. Repress Play button to stop playing.
Play recording files
Step 1: Press M button (1) to enter main menu.
Step 2: Press Forward/Backward button (7)/(8) to select the main menu until the screen comes to below interface.
USER'S MANUAL
Step 3: Press „M” button (1) to enter in. Press „forward/backward” button (7)/(8) to select the recording files you want to play. Please Play button (2) to play.
A–B repeat
Set AB repeating
Press „REC” button (5) when playing to confirm point „A”, re-press REC button (5) to confirm point „B”. The recorder starts to repeat from A to B.
Stop repeating
The recorder will automatically stop repeating after repeating for 3 times when repeating music. And it will repeat all the time when repeating recording files. Or press „REC” button (5) to stop repeating.
Adjust volume
Press volume+/volume—" button (3)/(4) to adjust the volume.
Select segment
Press „Forward” button (7) in standby condition to select the next segment, press „Backward” button (8) for previous order. Long time press „Forward/Backward” button (7)/(8) to skip the messages and select one to be played.
Loop playing
It is defaulted as loop playing when play recording files (It plays from the first file to the last file, then stop playing. If there's ACT recording files which recorded at LP mode, it is defaulted the ACT file as the last file.)
USER'S MANUAL
Music
Enter into Music mode
Press „M” button (1) in standby condition to enter into main menu. Press „Forward/Backward” button (7)/(8) until the screen show like picture (1) below. Repress „M” button (1) to confirm and enter in music mode. Then the recorder enters in Music standby condition (if there are music files in the recorder, the screen shows like picture 2).

Play/stop playing
Press „Play/stop playing” button (2) to start playing in MUSIC standby condition. Repress Play/stop playing to stop playing.
A-B repeat
The same operation with A-B repeat in playing recording files.
Select the segment
The same operation with select segment in playing recording file.
Loop playing
It is defaulted as loop playing when playing music. It plays from the first file to the last, then stop.
USER'S MANUAL
Attention: As playback of this recorder adopts Dual Audio stereo, we suggest listen with the stereo earphone due to listening with the speaker can't get the best sound.
Delete
In the recording and playing ceasing condition, select the file 1. should be deleted.
Short time press „C (Cancel)” button (6) for deleting the one 2. you select. The screen shows like below: picture 1.
Long time press „C (Cancel)” button (6) for deleting all. The 3. screen shows like below: picture 2.

Press „M (Menu)” button (1) to confirm the delete. If successful in delete, the screen shows:

natural_image
Simple line drawing of a rectangular frame with three small circles on the front face (no text or symbols)40
USER'S MANUAL
Attention: After entering in the „Delete” condition, no further operations on the recorder with in 3 second, the recorder will automatically exit delete mode.
Attention: Please backup the important files in the computer before delete or format the recorder.
FM Radio
Remark: This function is only for the recorders which have FM radio.
Enter in FM Radio
Press „M” button (1) in standby condition to enter in main menu. Press „Forward/Backward” button (7)/(8) until the screen shows like picture 1 below. Press „M” button (1) to confirm and enter in FM Radio. Then the screen shows like picture 2.

Manual Scan Channel:
Press „Forward & Backward” button (7)/(8) for manual scanning. If the channel is scanned, the recorder will stop to play the channel. Press „M” button (1) to play the radio.
USER'S MANUAL
Automatic scan channel
Long time press „Forward & Backward” button (7)/(8) for automatic scanning.
Save the channel
Press „REC” button (5) to save the channel when recorder scans the channel. After saving the channels, press lay button to select the saved channels. Press „Forward/Backward” button (7)/(8) to continue scan channel.
Delete the saved channel
Press „Delete” button (6) to delete the saved channels.
Remark: Please use earphone which accompanying with the recorder when listening to FM radio (earphone used as an aerial).
Setting Time
Enter into time-setting mode:
Long-time press „M” button (1) at any standby condition to enter into main menu. Press „Forward/Backward” button (7)/(8) to select the time-setting mode. The screen shows (see picture below), When it comes to the time setting mode, press „M” button (1) to enter in.

natural_image
Simple line drawing of a rectangular box with four vertical cylindrical shapes inside, no text or symbols present.42
USER'S MANUAL
Press „Forward/Backward" button (7)/(8) to select the part which should be adjusted. The selected part will twinkle. Press „VOL+/VOL-” button (3)/(4) to adjust the part. The press „Forward/Backward" button (7)/(8) comes to next part.


After finish setting the time and date, press „M” button (1) to confirm the setting. Or, the recorder will automatically confirm the setting within 5 seconds. The recorder comes back the time-setting mode menu.
Connect the recorder with the computer
Please insert the USB cable with the recorder into the „USB Jack” (14) and connect the USB cable with the computer. It comes to the below interface.

43
USER'S MANUAL
The recorder has the full function of standard USB flash disk. It can support windows 98 system (But should install the driver), Windows 2000 or above (no need to install driver), Mac OS X10.3 or above, Linux Red hat 8.0 or above.
Attention:
When using the recorder as USB flash disk, please compress the files before copy & save them into the recorder. Please avoid the files which are not audio files in „WAV” format saving in the recorder. Otherwise the recorder will have a file named „000”, and the time will show: 000:00. The file name „000” can not playback. At this circumstance, the recorder can work normally. But the working speed will be very slow. Please remove the file and save in computer or other USB flash disk. Then the recorder can work properly. We are sorry for the inconvenience caused.
This recorder can be power supplied by USB. Press „M” button (1) to exit USB function. The recorder can work properly for recording and playing.
Attention:
In USB power supply condition, the recorder can not playback with loud speaker. Please use earphone to listening to playback music or recording file.
Recording telephone conversation
- Insert the telephone line and phone connecting line in the telephone adaptor.
- Insert one end of the line-in cable into the telephone adaptor, the other end insert to the signal jack (11).
USER'S MANUAL
- Turn on the recorder and press „REC” button (5) to start recording.

flowchart
graph TD
    A["Device"] --> B["Adapter"]
    B --> C["Telephone line"]
    B --> D["Telephone"]
Hand free/Autamatic recording telephone conversation
Please use „VAR” voice activated recording mode for hand free recording telephone conversation. The recorder can automatically record telephone conversations in voice activated recording mode.
Recording through external Microphone
Insert the external Microphone in the „Signal in” Jack (11). Turn on the recorder and press "Rec" to start recording.
Install driver to computer
Place the accompanying CD into the CD ROM of PC (or manually operate the set up. exe in the CD), enter in installation interface, click „Next” button, click Next button after selecting installation
USER'S MANUAL
path. Click Next to start installing the program. After successful installation, click „Close” button to fulfill software installation. To start from PC's „Start“ „Program“ „MP3 Player Upgrade Sound Convert“.
MP3 Player Upgrade is an upgrade tool and Sound Convert is for converting the Voice Files, MP3 player Disk Tool is for setting the password for the disk.
Convert ACT recording file into \*WAV format
The ACT format file recorded by the player can be converted into WAV format via the accompanying installation program tool kit.
- Run „Sound Converter" program, and click „Open" button
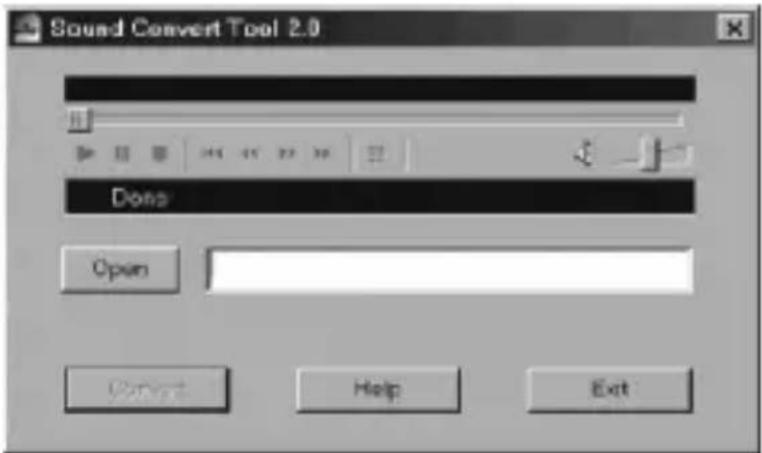
- Select ACT file to be converted

USER'S MANUAL
- Click „Convert” button to start converting into WAV file
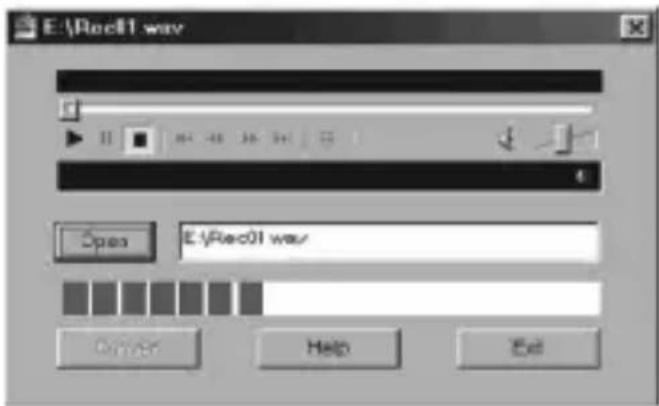
Attention:
Before converting the ACT file, please rename or backup the recording file in WAV format which has same code with ACT format need to convert.
For example:
We want to convert „REC001 ACT” to WAV format. Before converting it, we have to rename the „REC001”. Otherwise the new file „REC001” created by converting will replace the original „REC001”.
Recharge the battery
Please insert one end of USB cable with the accompanying adaptor, and the oteher end with recorder. Insert the adaptor to the DC socket. Red instruction light indicates power recharge is proceeding. Green instruction light indicates recharge is over.
Please use up the power before the first time of battery recharging. And recharge the battery for more than 6 hours, then the battery lige will prolonged.
USER'S MANUAL
Attention:
Please push the „Power Switch” button (9) on „OFF” side before recharge. Please pay be careful when use AC source.
Solutions to the problems
The recorder can not turn on
- Please check the power switch is at „ON” side or check whether there’s not enough battery, please recharge the battery.
No sound when playing files
●Please adjust the volume or check the file to see whether the file is damaged.
It can not record sometimes
●Please format the recorder at FAT system. But please backup the important files before formatting.
The recorder is frozen, can not response
Please take out the battery and put them back after 3 second. Then connect the recorder with PC via USB cable. Format the recorder at FAT system. But please backup the important files before formatting.
Can not connect with PC
- Please check whether there’s something wrong with the USB cable. Please check whether the driver was installed properly. Please check whether the recorder and the PC were connected in right way.
USER'S MANUAL
Specification
Dimension: 95 mm x 26 mm x 12 mm.
Weight: 32g \~ 33g
Power supply: 3,7 V 220\~280 mAh
Flash memory: 1GB
Record bit ratio: LP 8 Kbps / SP 32 Kbps / HP 64 Kbps
Recording time: LP 280 h/SP 70 h/HP 33 h
FM Radio: 87,5 \~ 108MHz
Frequency response: 20Hz \~ 20 KHz
Signal noise ratio: 80dB
Maximum output: > 5 mW
Diameter of speaker: 23 mm
Support system:
Windows98/SE/Me/2K/XP.MacOS10./Linux2.4.2
Recording audio format: ACT, WAV
Music audio format: MP3, WMA, WAV, ASF
HASZNÁLATI ÚTMUTATÓ
Használati útmutató
HASZNÁLATI ÚTMUTATÓ
natural_image
Simple line drawing of a rectangular box with a handle and internal geometric pattern (no text or symbols)natural_image
Simple line drawing of a rectangular frame with dashed border and internal dashed lines (no text or symbols)natural_image
Simple line drawing of a rectangular box with four vertical cylindrical objects inside (no text or symbols)
NÁVOD K OBSLUZE
Používání diktafonu
Zapínání a vypínání
natural_image
Simple line drawing of a rectangular box with a handle and internal pattern (no text or symbols)Vypínání
natural_image
Simple line drawing of a rectangular frame with three small circles inside, no text or symbols present.natural_image
Simple line drawing of a rectangular box with four vertical cylindrical shapes inside, no text or symbols present.85
NÁVOD K OBSLUZE
natural_image
Simple line drawing of a rectangular box with a handle and internal symbols (no text or labels)natural_image
Simple line drawing of a door with three dots on the front face (no text or symbols)ybara:
natural_image
Simple line drawing of a door with three vertical slots inside, no text or symbols present- USER'S MANUAL
- Important Notice
- Appearance and buttons
- Operation
- Turn on
- Turn off
- Low battery indicates function
- Record
- Setting recording mode
- One key recording
- Attention:
- Automatic section-break
- Stop recording
- Play/stop playing recording files
- Play recording files immediately after recording
- Play recording files
- Set AB repeating
- Stop repeating
- Adjust volume
- Select segment
- Loop playing
- Music
- Enter into Music mode
- Play/stop playing
- A-B repeat
- Select the segment
- Delete
- FM Radio
- Enter in FM Radio
- Manual Scan Channel:
- Automatic scan channel
- Save the channel
- Delete the saved channel
- Setting Time
- Enter into time-setting mode:
- Connect the recorder with the computer
- Recording telephone conversation
- Hand free/Autamatic recording telephone conversation
- Recording through external Microphone
- Install driver to computer
- Convert ACT recording file into \*WAV format
- For example:
- Recharge the battery
- Solutions to the problems
- The recorder can not turn on
- No sound when playing files
- It can not record sometimes
- The recorder is frozen, can not response
- Can not connect with PC
- Specification
- HASZNÁLATI ÚTMUTATÓ
- NÁVOD K OBSLUZE
- Používání diktafonu
- Zapínání a vypínání
- Vypínání
- ybara:
Brand : Manta
Model : MM282
Category : Audio recorder