
Micro M2 - Video projector AAXA Technologies - Free user manual and instructions
Find the device manual for free Micro M2 AAXA Technologies in PDF.


| Product Type | Video Projector |
| Brand | AAXA Technologies |
| Model | Micro M2 |
| Display Technology | DLP |
| Native Resolution | 854 x 480 pixels |
| Brightness | 300 ANSI Lumens |
| Light Source | LED |
| Light Source Life | Up to 30,000 hours |
| Inputs | HDMI, USB, MicroSD |
| Audio | Built-in speaker |
| Dimensions (W x D x H) | 4.5 x 2.5 x 1.0 inches |
| Weight | 0.5 lbs |
| Power Source | Rechargeable battery (built-in) and AC adapter |
| Battery Life | Up to 2 hours |
| Throw Ratio | 1.5:1 |
| Keystone Correction | Digital (vertical) |
| Focus | Manual |
| Mounting | Tripod mount |
| Operating Temperature | 32°F to 95°F |
| Included Accessories | AC adapter, remote control, HDMI cable, carry case |
| Cleaning | Wipe lens with soft cloth; clean vents with compressed air |
| Safety | Do not look directly into lens; avoid water; use in ventilated area |
| Spare Parts & Repairability | Replacement LED module available; user-serviceable filter; professional repair for other issues |
| General | Compact portable projector for home entertainment and presentations |
Frequently Asked Questions - Micro M2 AAXA Technologies
User questions about Micro M2 AAXA Technologies
0 question about this device. Answer the ones you know or ask your own.
Ask a new question about this device
Download the instructions for your Video projector in PDF format for free! Find your manual Micro M2 - AAXA Technologies and take your electronic device back in hand. On this page are published all the documents necessary for the use of your device. Micro M2 by AAXA Technologies.
USER MANUAL Micro M2 AAXA Technologies
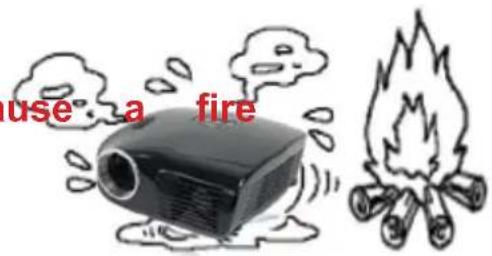
*Do not operate the Projector in direct sun-light or near heat sources such as heaters, fires, and stoves as this may c hazard.
*Do not operate the projector close to sources of steam or oil such as a humidifier as this may cause electric shock.
*Do not operate the projector near water such as by the sink or bathtub as this may cause electric shock.

natural_image
Illustration of a showerhead falling into a bathtub with a diagonal line and lightning bolts, no text or symbols present.*Do not block or restrict airflow from ventilation holes as this may cause the projector to overheat.
*Do not place inflammable materials beside the projector as this may cause a fire hazard.

natural_image
Illustration of industrial equipment including a projector, battery pack, and rolled documents (no text or symbols)*Do not drop the projector or allow heavy impacts or shock as this will damage the projector.
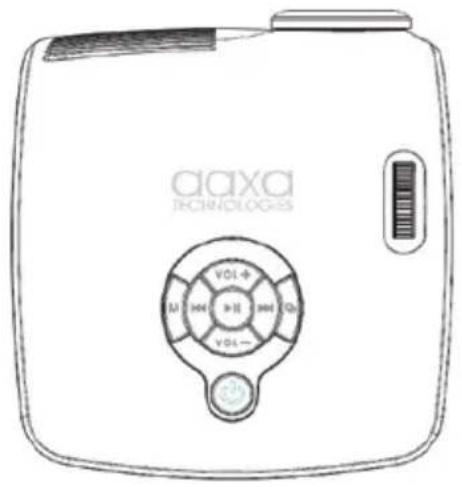
Projector
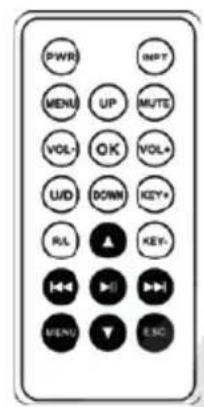
Remote Control

natural_image
Black tripod-mounted device with three vertical rods (no visible text or symbols)Tripod

natural_image
Diagram of a multi-pin connector with multiple leads (no text or symbols)Composite A/V Cable

natural_image
Illustration of two USB connectors tied together with coiled cables (no text or symbols)USB Cable
natural_image
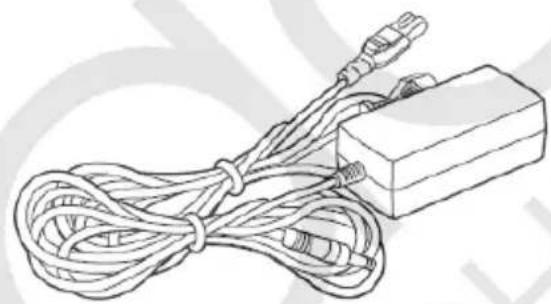
Line drawing of a cable and plug assembly (no text or symbols)Power Cord VGA Cable

natural_image
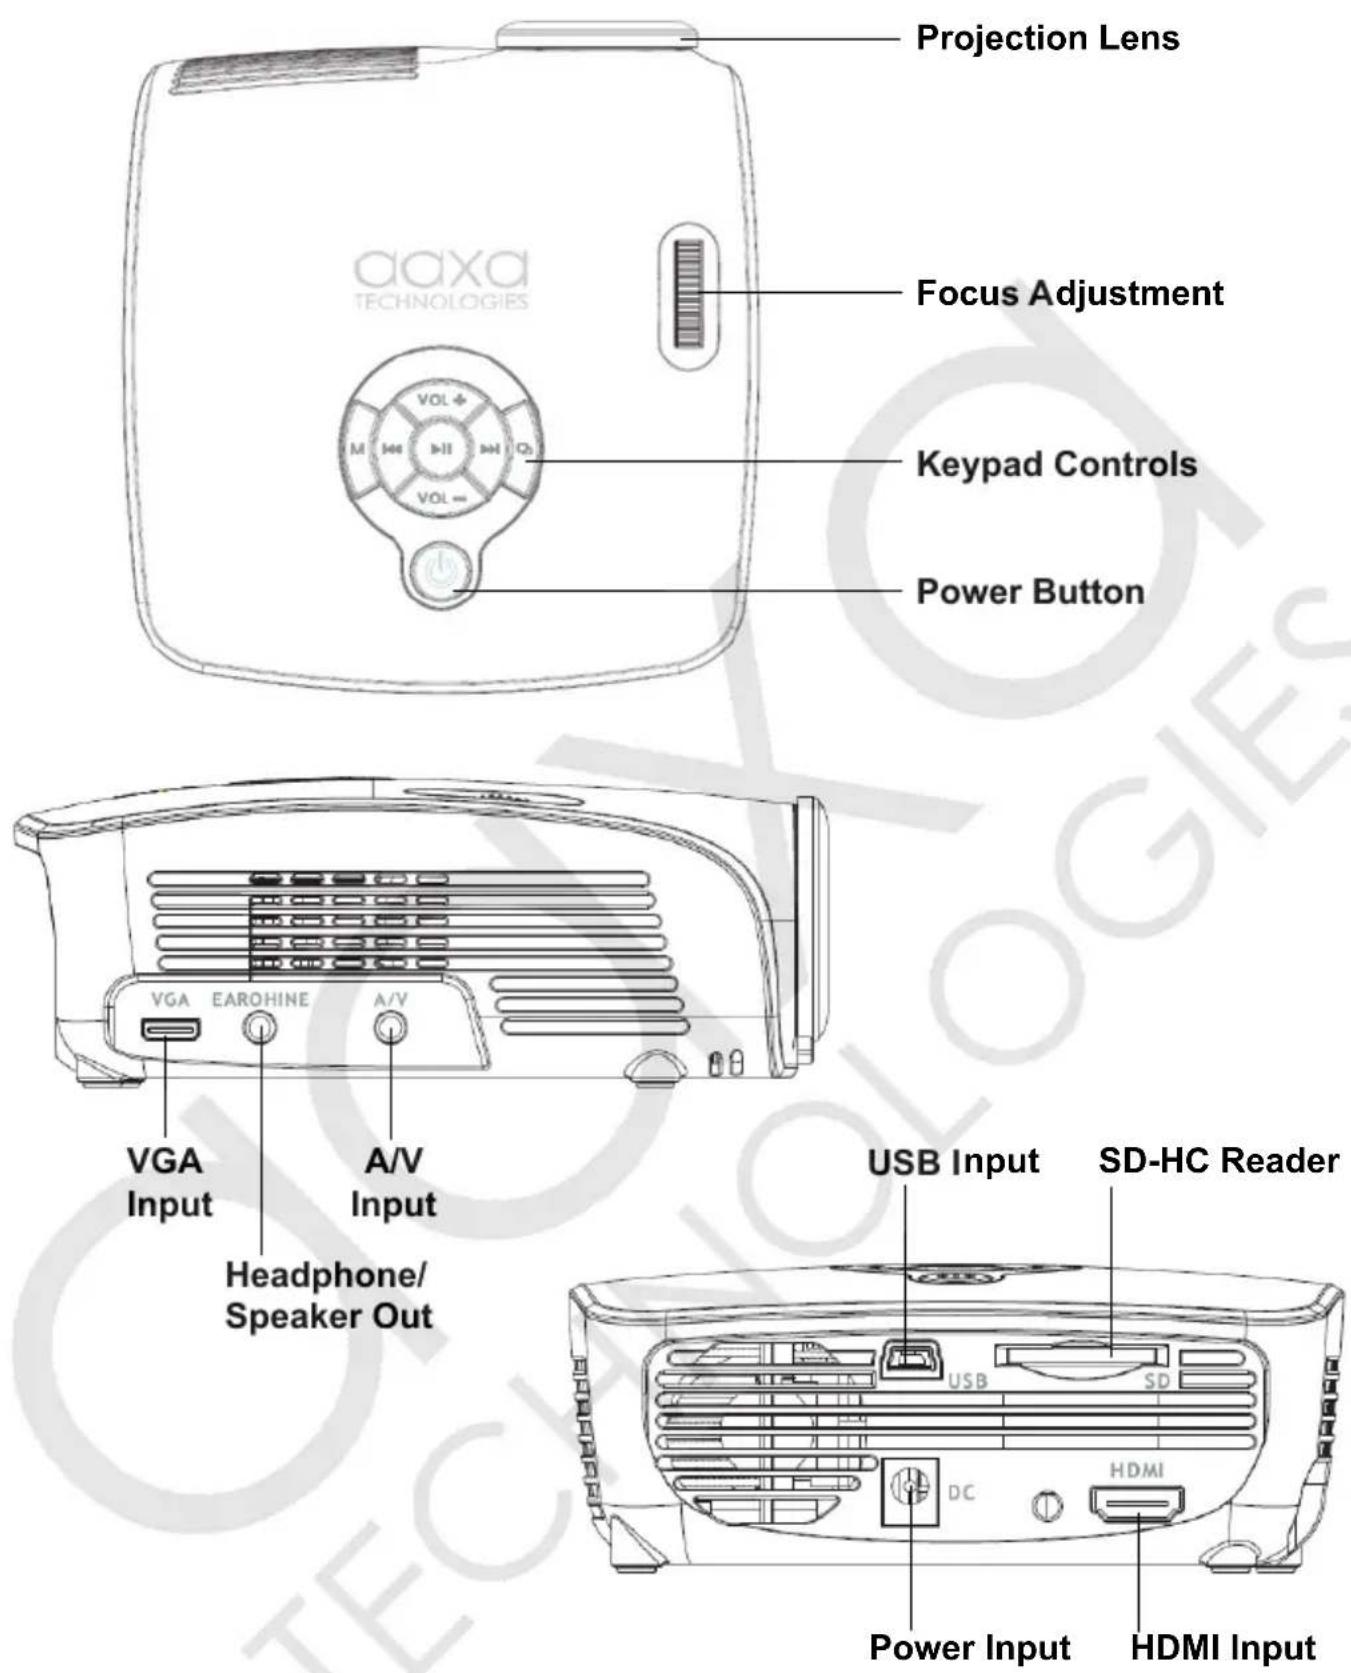
Line drawing of a V12 connector with two leads (no text or symbols)Product Overview
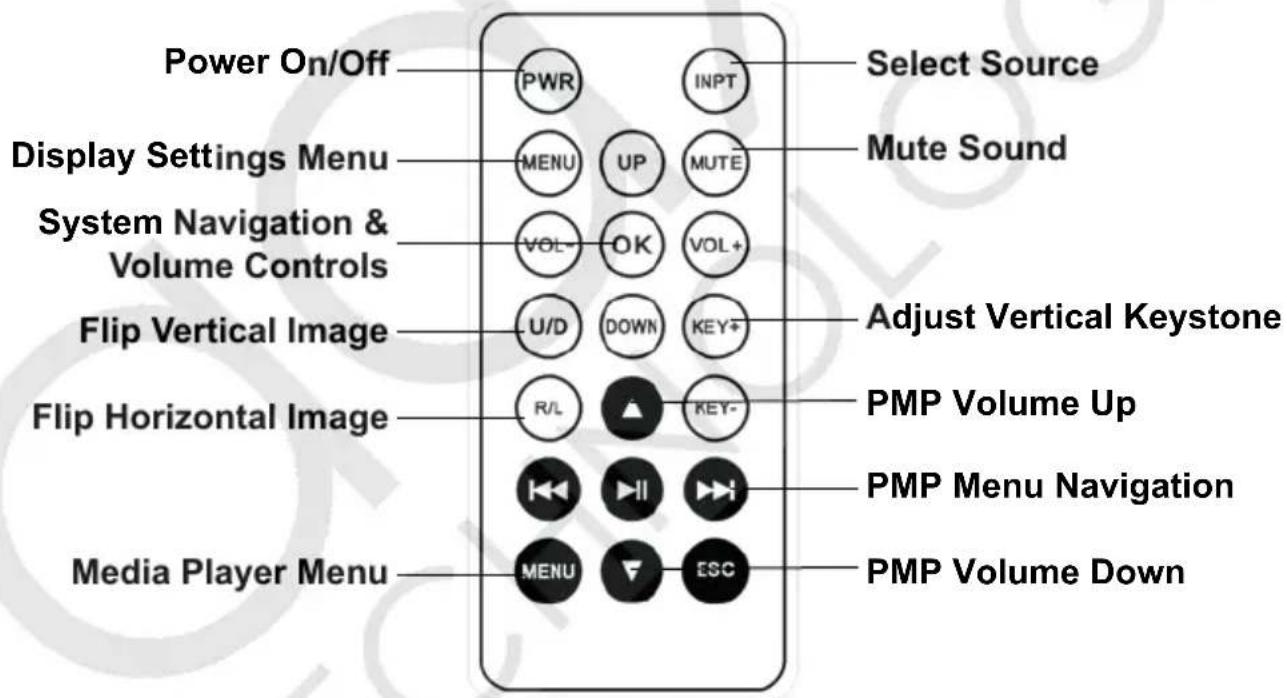
Keypad & Remote Control Functions

General Operation
Turning on the projector
To turn on the projector first plug the power supply into a suitable wall outlet and to the rear of the projector. Then power the projector on by holding the power button for 3 seconds until the optical engine turns on.
Shutting down the projector
To shut down the projector, press and hold the power button for 3 sec. The optical engine should shut off and the fan should stop spinning.

natural_image
Simple line drawing of a comb and two parallel rods (no text or symbols)Adjusting focus
To adjust the focus, spin the focus wheel up or down until the image becomes clear. The recommended focus distance for this projector is 18" to infinity.
Projection lens
The projection lens emits the image from the projector. Make sure there is nothing obstructing the lens to obtain a clear image.
Keypad Controls
Use the keypad control buttons to navigate through each menu. The control panel behaves differently in each submenu. Controls for submenus are explained later in this manual.
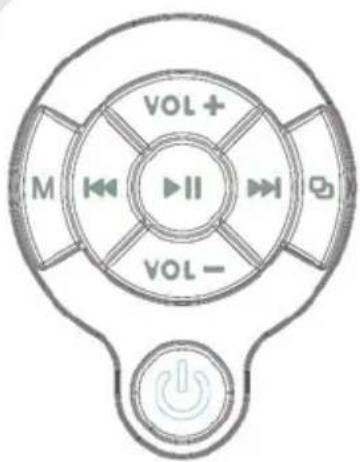
Accessing the Onboard Memory
The M2 Micro Projector includes 1GB of onboard memory. To access this memory, connect a USB cable from your computer to the back of the projector in the slot that reads "USB". A folder will appear on your computer screen after the projector is detected. You can store any type of supported photos, video and/or files in this folder to view.

natural_image
Technical line drawing of a computer rear panel with USB port and ventilation slots (no text or symbols)Note: If your computer fails to detect the projector, check to make sure the cable is securely inserted on both sides. If you're still unable to view the folder, please consult with your operating system's owner manual.
Accessing a SD Memory Card
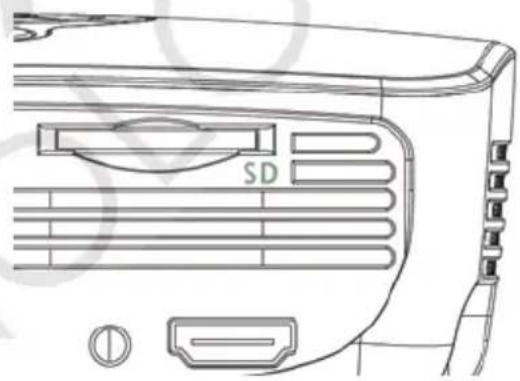
Multimedia file can also be accessed via an SD memory card. To access your SD card, insert it into the back of the projector in the slot that reads "SD". Once your SD card has been inserted, you can navigate through the main menu to select what you want to view under each submenu.
natural_image
Line drawing of a device rear panel with ventilation slots and ports (no text or symbols)*Review the Specifications section of this manual to read about supported file formats.
General Operation
Accessing a USB Storage Device
In addition to data transfer with the onboard memory, the M2 has the ability to read data from a USB storage devices (such as memory sticks, cell phones, USB hard drives, etc). This allows the user to view the data stored on the USB storage device through the onboard media player.

To access data on your USB storage device,
plug your USB device into the USB slot on the back of the M2. The supplied mini USB adapter cable may be required for some USB thumbdrives.
Once the connection is made, select USB Host Mode in one of the PMP media players submenus (Videos, Photos, etc). After selecting USB Host Mode you should now be able to access the data on the USB device through the onboard media player. If the data does not appear, check the formatting of the file system on the USB device and also confirm that the device is compatible with a USB On-The-Go host device.
The M2 micro projector can be toggled to accept different types of inputs. This includes VGA (Mini VGA), HDMI and Composite Video (3.5mm jack). To toggle through the sources, press the far right button 📋 on touchpad or the input button INPT on the remote control to select the appropriate source.
natural_image
Line drawing of a computer chassis with VGA ports and rack-mounted slots (no text or symbols)To Connect to a VGA Source
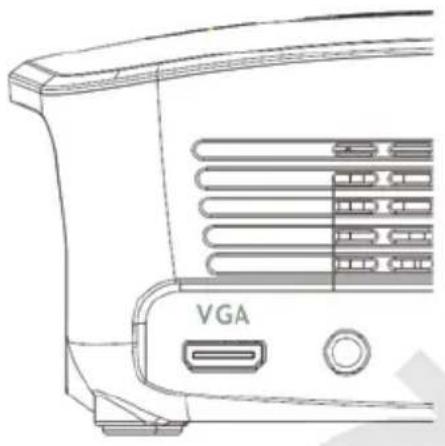
The projector can accept a VGA input signal. Connect the VGA cable to your source and the other end should be inserted in the slot on the side of the projector that reads 'VGA'. Toggle through the input sources and once you select VGA input, your display should appear.
Important: Be sure to setup the computer to enable a video signal output. On some laptops this is done by pressing and holding Function F5 Key. If using the M2 as an external monitor on Windows based systems, this can be done by selecting “extend my desktop to this monitor”. The native resolution of the M2 projector is XGA (1024 x 768) and it accepts up to a 1600x1200 signal. Depending on the video driver different resolutions many need to be selected for proper output.
Note: Each computer system is different - please check with your owner's manual for how to properly output video signals. Some Apple computers may require a DVI to VGA adapter.
To Connect to a Composite Video Source
natural_image
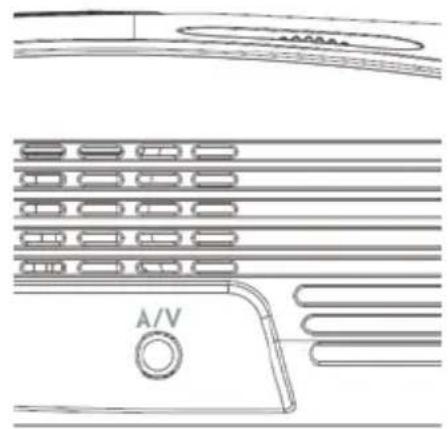
Line drawing of a refrigerator front panel with ventilation slots and a labeled A/V button (no text or symbols beyond basic line art)The projector can accept a composite video signal. This signal is comes through the 3.5mm composite A/V cable. Connect the composite A/V able to the projector and the other end into the video source. Toggle through the input sources and once you select AV input, your display should appear.
To Connect to an HDMI Source
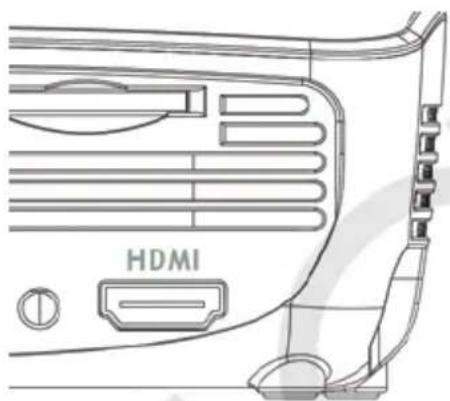
The projector can accept a digital HDMI input signal. This is done by connecting the HDMI cable to the HDMI input port of the projector. Toggle through the input sources and once you select HDMI input, your display should appear. The M2 accepts up to a HDMI 1.2 signal.
The M2 projector features a built-in PMP (Portable Media Player) function. This function allows the projector to play videos, pictures, music files, and text. To access the Main Menu, simply turn on the projector. The screen displayed below will appear. To navigate through the Main Menu, follow these directions:
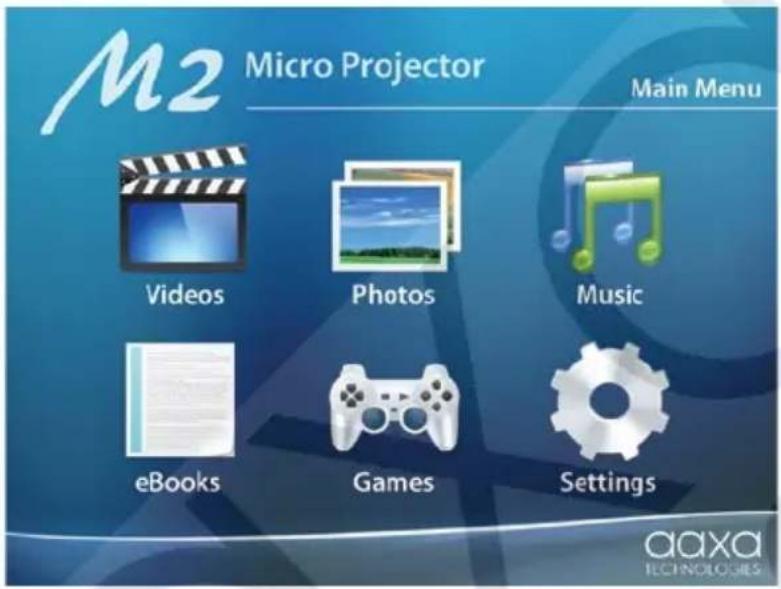
- Scroll left/right by pressing the rewind/fastforward buttons.
- To select a submenu, highlight the desired submenu and press the Play/Pause button ▶ located in the middle of the keypad or remote.
- To go back to the previous page while in a submenu, press the (M) button on the far left of the keypad or the menu button MENU on the remote.
Note: If the projector starts in VGA, HDMI or A/V mode, simply press the far right button on the control panel to toggle through the input sources until you see the picture displayed above. The projector will turn on with the input source that was previously selected before shutting down. To read more about input sources, please review out Input Selection section in this manual.
PMP System - Videos
The M2 micro projector's PMP system supports direct playback of a wide variety of video formats. To access videos in memory, a SD Card, or an USB storage device, first select the “Videos” item in the main menu:

Once in the Videos menu, there are three items that can be selected to access the device on which videos files are stored:

Playing Videos
- To play/pause a video, press the play button button ▶ in the middle of the keypad or remote control.
- To rewind, press and hold the left arrow 📄 button .
- To fast-forward, press and hold the right arrow ▶ button
- To jump forward to the next video, press the right arrow button.
- To jump back to the prior video, press the left arrow button
- To adjust the volume, press Vol+ (▲ on the remote) to increase and Vol- (● the remote) to decrease the volume.
Note: If the video is large, please allow the projector a moment to process the file. If the after a few minutes the projector does not play a video, it means the file is not compatible.
Video Settings Menu
To access the Video Settings Menu, press and hold down the Menu button (M) on the keypad or at the bottom of the remote MENU. The options are:
Play Mode - Adjusts how the video player loops single or multiple tracks
Zoom - Adjusts how the video is placed within the screen
File Info - Provides detailed information about the current video file
Vision Effect - Adjusts the sharpness of the video image
Subtitle Display - Turns on/off subtitle display during video playback
Subtitle List - Displays a list of available subtitle files
*Review Specifications section of this manual for supported video formats.
PMP System - Photos
The M2 micro projector's PMP system supports direct playback of a wide variety of image formats. To access photos in memory, a SD Card, or an USB storage device, first select the “Photos” item in the main menu:

Once in the Photos menu, there are three items that can be selected to access the device on which image files are stored:
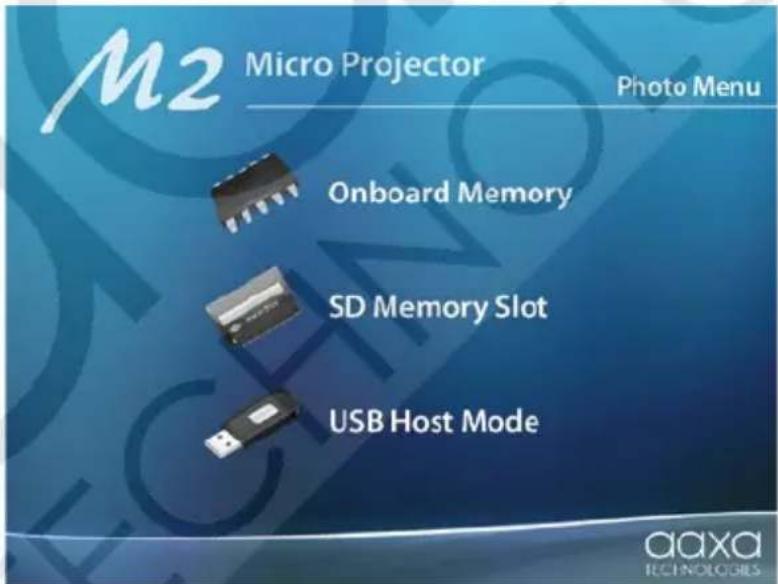
Viewing Pictures
The M2 Micro Projector allows you to view pictures individually or in a slide-show. To view individual photos, select the file you want to view in the file menu for the particular storage device on which the image file is stored. You can press the arrow buttons 🎊️ 🎋️ on the touchpad or remote to flip through the pictures you have in the present folder.
Viewing Pictures in a Slideshow
To view your pictures in a slideshow, select a file and press Play when the picture appears, will appear in the middle of the screen, which notifies you that the slideshow has started.
Photo Settings Menu
To access the Photo Settings Menu, press and hold down the Menu button on the keypad (M) or at the bottom of the remote MENU. The options available are:
Time Slot - Adjusts how quickly the slideshow transitions to the next file Switch Mode - Changes the transition animation between photos Sequence - Adjusts the order in which photos are displayed Image Info - Provides detailed information about the current image file Zoom - Adjust the size and placement of the image on the screen Rotate - Changes the vertical and horizontal orientation of the image
*Review Specifications section of this manual for supported image file formats.
PMP System - Music
The M2 micro projector's PMP system supports direct playback of a wide variety of music formats. To access music in memory, a SD Card, or an USB storage device, first select the “Music” item in the main menu:
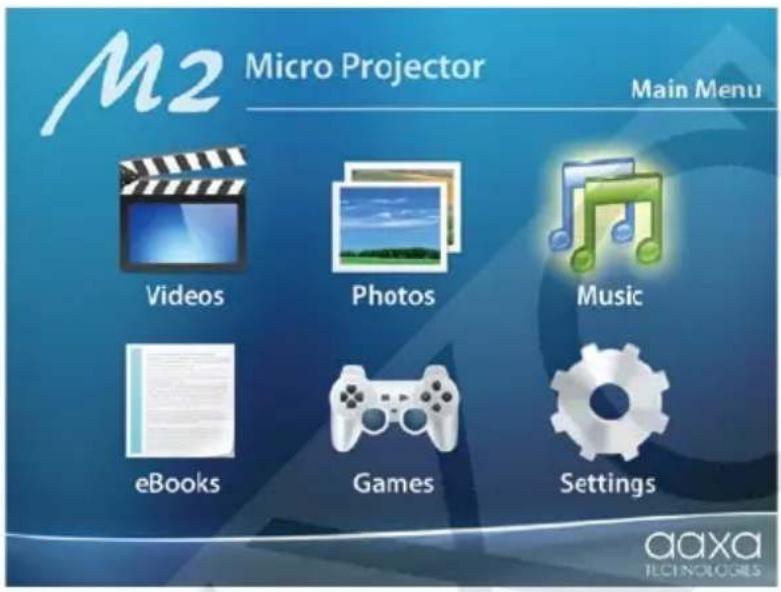
Once in the Music menu, there are three items that can be selected to access the device on which music files are stored and two items for playback options:

Listening to Music
The M2 Micro Projector allows you to playback music as singles or in sequence. To begin music playback, select the file you want to play in the file menu for the particular storage device on which the music file is stored.
- To play/pause a song, press center button of the touchpad or remote.
- To rewind, press and hold the left arrow 🖼 button.
- To fast-forward, press and hold the right arrow ▶ button.
- To jump forward to the next track, press the right arrow ➤ button.
- To jump back to the prior track, press the left arrow 📁 button.
- To adjust volume, press Vol+ ( ▲ on the remote) to increase and Vol- ( ▼ on the remote) to decrease the volume.
Music Settings Menu
To access the Music Settings Menu, press and hold down the Menu button on the keypad (M) or at the bottom of the remote MENU. The options are:
Play Mode - Changes the sequence or repeat mode of playback
Speed - Changes the speed of playback
Live Sound - Adjusts the tone of the music
Show Mode - Adjust the format of text lyrics (if available)
On Text Color - Changes the active text color
Off Text Color - Changes the inactive text color
File Info - Provides detailed information about the current music file
*Review Specifications section of this manual for supported music file formats.
PMP System - Music
Library
The music library can be accessed through the Music Menu. This library sorts all your music by artist, album, genre, star, year and all items. To access your library, follow the directions below:
- Select Music from the main menu
- Select Library from the music menu
- Select which category you want to search your song
- Select the file you want to play
Last Track
The Last Track item in the music menu will play the most recent track that was in progress before you shut off your projector. To access this icon, follow the same directions for “Library” but click instead on “Last Track” instead for the second step.
The M2 micro projector's PMP system supports direct playback of written text from pages of an ebook or text file. To access eBooks in memory, a SD Card, or an USB storage device, first select the “eBooks” item in the main menu:

Once in the eBooks menu, there are three items that can be selected to access the device where text files are stored (Note: eBook files must be in .txt format).
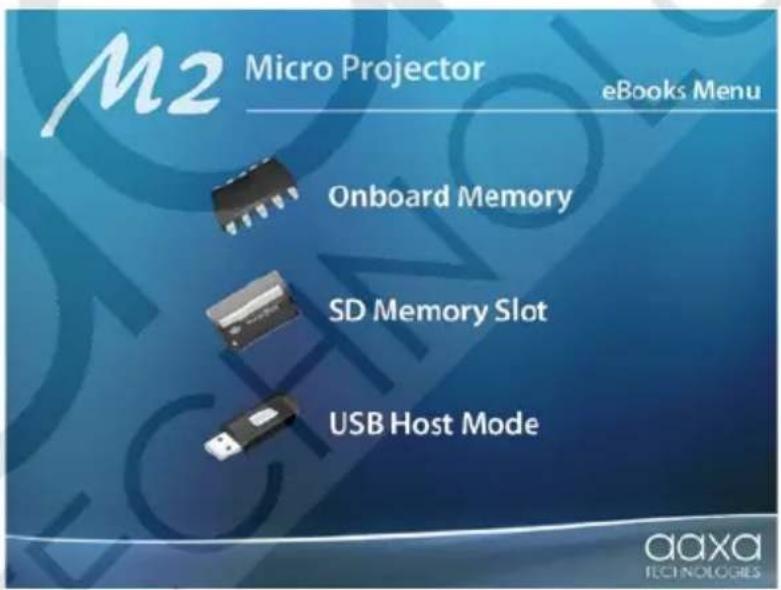
Reading eBooks
The controls for ebooks is different from the other onboard programs. Please follow the directions below to better understand how to use ebooks with the M2.
- To go to the next page, press the Vol-button (▼ on the remote).
- To go to the previous page, press the Vol+ button (▲ on the remote).
- To exit the book and go back to the previous menu, press the (M) button on the far left of the control panel or MENU at the bottom of the remote.
Note: When you exit your ebook, the projector will "bookmark" the page you left off on. The next time you select the same book to read, the system will ask if you want to continue from your last page. Select Yes to start where you left off, select No to start from the beginning of the ebook.
eBooks Settings Menu
To access the eBooks Settings Menu, press and hold down the Menu button on the keypad (M) or at the bottom of the remote MENU. The options are:
Add Bookmark - Creates a bookmark on the current page
Open Bookmark - Access and open bookmarks in the current file
Font - Changes the font size
Color - Select the color of the text on screen
Transition - Turns on/off slide transitions between pages
Rotate - Changes the orientation of the page on screen
Browse Speed - Adjusts the speed of page changes when browsing
Background - Changes the background image behind the page text
The M2 micro projector's PMP system lets you play games through the projector. To access games in memory, a SD Card, or an USB storage device, first select the “Games” item in the main menu:

Once in the Games menu, there are three items that can be selected to access the device on which games are stored:
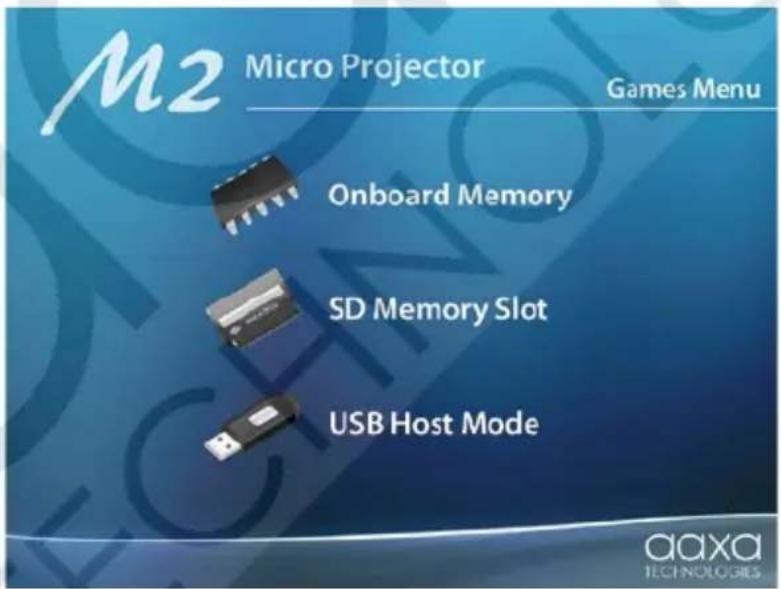
PMP System - Games
There are three pre-uploaded games in the projector for your entertainment - Chess, Pick Block and Russia Block. Other games can be added to the onboard memory and you can also play games saved on a SD card or USB device.
*Unfortunately new games are currently unavailable for purchase
Chess Game
After selecting Chess Game from the game menu, you will be shown the following four options before starting your game:
- New Game: Select to start a new game
- Level Setting: Select to set the difficulty of the computer
- Mode Setting: Select to set if you or the computer makes the first move in the game. Also a choice for two player mode.
- Exit: Select to go back to game menu
Chess Game Controls
- To move up, press the Vol+ button (▲ on the remote).
- To move down, press the Vol-button (▼ on the remote).
- To move left, press the left arrow/rewind button.
- To move right, press the right arrow/fasforward button.
- To put down a stone, press the play/pause ▶ button.
Pic Block
After selecting Pick Block from the game menu, you will be shown the following four options before starting your game:
- New Game: Select to start a new game
- Level Setting: Select to set the difficulty of the puzzle, from 9 to 49 blocks
- Select Picture: Select from five different puzzles to unscramble.
- Exit: Select to go back to game menu
The goal to this game is to unscramble the scrambled picture by moving pieces of the puzzle into the right position to form a complete picture. For experienced players, try playing this game on maximum difficulty.
Pick Block Controls
- To move up, press the Vol+ button (▲ on the remote).
- To move down, press the Vol-button (▼ on the remote).
- To move left, press the left arrow/rewind button.
- To move right, press the right arrow/fasforward ▶ button.
Note: Which block will move depends on where the blank space is on the board.
PMP System - Games
Russia Block
After selecting Russia Block from the game menu, you will be shown the following four options before starting your game:
- New Game: Select to start a new game
- Level Setting: Select to set the difficulty of the game
- Exit: Select to go back to game menu
Russia Block Controls
- To rotate piece, press the Vol+ button (▲ on the remote).
- To move piece left, press the left arrow/rewind button
- To move piece right, press the right arrow/fastforward button
- To quickly drop piece, press and hold the Vol-button (▼ on the remote).
The Settings Menu can be accessed by selecting "Settings" on the main menu.
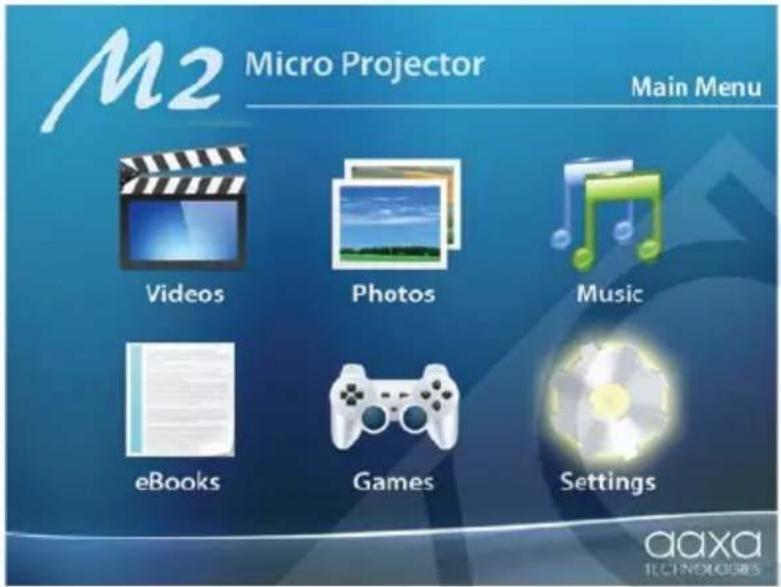
Once in the Settings menu, there are four items that can be selected to adjust the basic PMP system settings:
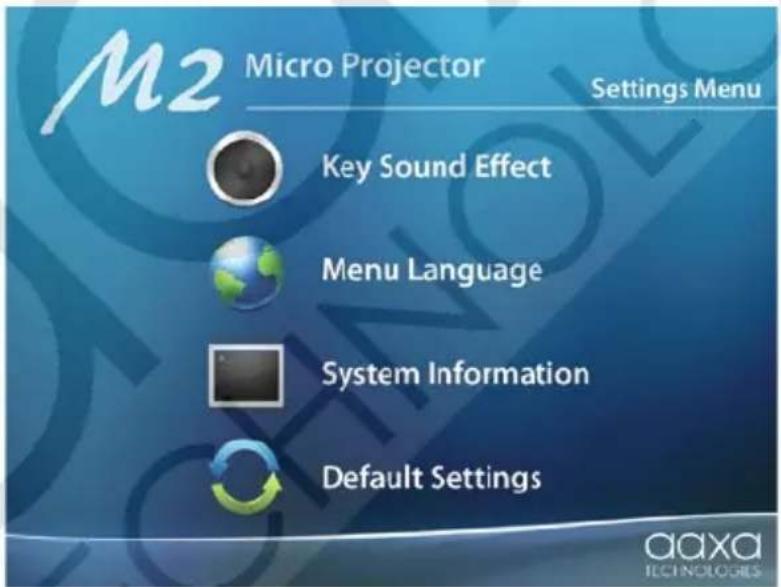
PMP System - Settings
Key Sound Effect
The key tone is the subtle “beep” your projector makes each time you press a button within the menu and submenus. To turn this sound on/off, select Key Sound Effect from the Settings Menu. From there you will have the option to change your preference.
Menu Language
The projector allows you to choose from three different languages - Chinese, English and Simplified Chinese. To select your desired language, select Menu Language from the Settings Menu. From there you will be able to select which language you want by highlighting and then pressing the play/pause button.
System Info
When this icon is selected, the projector will display the following system information - Software Version, Udisk Memory and Udisk Free (available Udisk memory). To access this icon, select System Info from the Settings Menu.
Reset
When this icon is selected from the Settings Menu, it will prompt you if you want to reset the projector to the manufacturer default. Select 'Yes' to reset, select 'No' to keep current setting.
THE PROJECTOR DOES NOT TURN ON
Possible Causes
There is no power Check to ensure the power outlet or
battery source is good. Check the
power adapter to ensure a proper
connection with wall outlet as
well as the p Confirm that
Solution
the
rojector.
the unit is charged and has enough
power.
NO PICTURE / FILE NOT SUPPORTED
Possible Causes
The video source is not properly connected or selected
Incorrect file extension / Video is encoded with incorrect codec
Solution
Check the video source signal to ensure that it is properly connected.
Select the correct input source by choosing the input desired from the main menu.
Please refer to "Specifications" page to see which file types and codecs are supported. Verify that the file was encoded properly.
IMAGE IS BLURRED
Possible Causes
The projector is not in focus
Image appears stretched when connected to an external device
Solution
Adjust the focus with the focus adjustment dial until the image comes into focus.
Verify the output setting on device is configured to 4:3 aspect ratio
Specifications
Brightness: 110 ANSI-Lumen
Resolution: XGA (1024x768)
Contrast Ratio: 2000:1
Noise: <30 dB
Projection Lens: Manual Focus
Image Size: 10 \~ 100 inch
Lamp: 15,000 hour RGB Triple LEDs
Video In: Com
V
es
15,000 hour RGB Triple LEDs
posite A/V
GA (mini-VGA)
HDMI 1.2 (mini-HDMI)
Audio Output: 1.5 W stereo speakers
3.5 mm audio jack
Storage Capacity: 1 GB Flash
SD Card: SD-HC Card Slot
(16GB maximum)
USB: USB OTG (On-the-Go)
(Memory Sticks)
USB Data Transfer
Dimensions: 132x125x47mm
Weight: 1.0lbs
Supported File Formats:
AVI, MPG, MP4, MKV, MP3, WAV, RMVB, RM, JPG, TXT
- Product Overview
- Keypad & Remote Control Functions
- General Operation
- Turning on the projector
- Shutting down the projector
- Adjusting focus
- Projection lens
- Keypad Controls
- Accessing the Onboard Memory
- Accessing a SD Memory Card
- Accessing a USB Storage Device
- To Connect to a VGA Source
- To Connect to a Composite Video Source
- To Connect to an HDMI Source
- PMP System - Videos
- Playing Videos
- Video Settings Menu
- PMP System - Photos
- Viewing Pictures
- Viewing Pictures in a Slideshow
- Photo Settings Menu
- PMP System - Music
- Listening to Music
- Music Settings Menu
- Library
- Last Track
- Reading eBooks
- eBooks Settings Menu
- PMP System - Games
- Chess Game
- Chess Game Controls
- Pic Block
- Pick Block Controls
- Russia Block
- Russia Block Controls
- PMP System - Settings
- Key Sound Effect
- Menu Language
- System Info
- Reset
- THE PROJECTOR DOES NOT TURN ON
- Possible Causes
- Solution
- NO PICTURE / FILE NOT SUPPORTED
- IMAGE IS BLURRED
- Specifications
Brand : AAXA Technologies
Model : Micro M2
Category : Video projector