
ICD-SX25VTP - Dictaphone SONY - Free user manual and instructions
Find the device manual for free ICD-SX25VTP SONY in PDF.
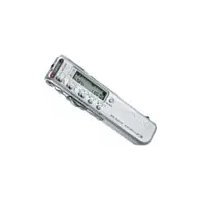


| Product Type | Digital Voice Recorder |
| Model | Sony ICD-SX25VTP |
| Dimensions (approx.) | 1.2 x 4.0 x 0.6 inches (30 x 101 x 15 mm) |
| Weight | 0.9 oz (26 g) including battery |
| Power Source | 1.5V AAA battery (alkaline or NiMH) |
| Memory Capacity | 1 GB internal flash memory |
| Recording Format | MP3 (up to 192 kbps), Linear PCM (44.1 kHz/16 bit) |
| Playback Format | MP3, WMA, AAC, Linear PCM |
| Key Features | Voice-activated recording, A-B repeat, noise reduction, long battery life |
| Input | Built-in stereo microphone, 3.5mm external mic jack |
| Output | 3.5mm earphone jack, built-in speaker |
| Connectivity | USB 2.0 (micro-B) for data transfer |
| Maintenance & Cleaning | Wipe with soft dry cloth. Do not use solvents. |
| Safety Precautions | Do not disassemble, avoid moisture and extreme temperatures. |
| Spare Parts & Repairability | Battery user-replaceable. No official spare parts list; contact Sony support. |
| General Information | Supports microSD card for expansion (not included). |
Frequently Asked Questions - ICD-SX25VTP SONY
User questions about ICD-SX25VTP SONY
0 question about this device. Answer the ones you know or ask your own.
Ask a new question about this device
Download the instructions for your Dictaphone in PDF format for free! Find your manual ICD-SX25VTP - SONY and take your electronic device back in hand. On this page are published all the documents necessary for the use of your device. ICD-SX25VTP by SONY.
USER MANUAL ICD-SX25VTP SONY
Operating Instructions
IC Recorder
ICD-SX25/SX35/SX45/SX55
For customers in the United States
Owner's Record
The model number is located on the rear panel, and the serial number is located inside the battery compartment. Record the serial number in the space provided below. Refer to these numbers whenever you call upon your Sony dealer regarding this product.
Model No. ICD-SX25/SX35/SX45/SX55 Serial No.
INFORMATION
This equipment has been tested and found to comply with the limits for a Class B digital device, pursuant to Part 15 of the FCC Rules. These limits are designed to provide reasonable protection against harmful interference in a residential installation. This equipment generates, uses, and can radiate radio frequency energy and, if not installed and used in accordance with the instructions, may cause harmful interference to radio communications.
However, there is no guarantee that interference will not occur in a particular installation. If this equipment does cause harmful interference to radio or television reception, which can be determined by turning the equipment off and on, the user is encouraged to try to correct the interference by one or more of the following measures:
- Reorient or relocate the receiving antenna.
- Increase the separation between the equipment and receiver.
- Connect the equipment into an outlet on a circuit different from that to which the receiver is connected.
- Consult the dealer or an experienced radio/TV technician for help.
You are cautioned that any changes or modifications not expressly approved in this manual could void your authority to operate this equipment.
If you have any questions about this product, you may call: Sony Customer Information Services Center 1-800-222-7669 or http://www.sony.com/
Declaration of Conformity
Trade Name: SONY
Model: ICD-SX25
Responsible Party: Sony Electronics Inc.
Address: 16450 W. Bernardo Dr, San Diego, CA 92127 USA
Telephone Number: 858-942-2230
This device complies with part 15 of the FCC Rules. Operation is subject to the following two conditions: (1) This device may not cause harmful interference, and (2) this device must accept any interference received, including interference that may cause undesired operation.
The validity of the CE marking is restricted to only those countries where it is legally enforced, mainly in the countries EEA (European Economic Area).
Notice for users
Program © 1999, 2000, 2001, 2002, 2003, 2004 Sony Corporation
Documentation ©2004 Sony Corporation
All rights reserved. This manual or the software described herein, in whole or in part, may not be reproduced, translated or reduced to any machine readable form without prior written approval from Sony Corporation.
IN NO EVENT SHALL SONY CORPORATION BE LIABLE FOR ANY INCIDENTAL, CONSEQUENTIAL OR SPECIAL DAMAGES, WHETHER BASED ON TORT, CONTRACT, OR OTHERWISE, ARISING OUT OF OR IN CONNECTION WITH THIS MANUAL, THE SOFTWARE OR OTHER INFORMATION CONTAINED HEREIN OR THE USE THEREOF.
Sony Corporation reserves the right to make any modification to this manual or the information contained herein at any time without notice.
The software described herein may also be governed by the terms of a separate user license agreement.
- This software is for Windows and cannot be used for Macintosh.
- The supplied connecting cable is for the IC recorder ICD-SX25/SX35/SX45/SX55. You cannot connect other IC recorders.
Information
IN NO EVENT SHALL SELLER BE LIABLE FOR ANY DIRECT, INCIDENTAL OR CONSEQUENTIAL DAMAGES OF ANY NATURE, OR LOSSES OR EXPENSES RESULTING FROM ANY DEFECTIVE PRODUCT OR THE USE OF ANY PRODUCT.
Trademarks
- "LPEC" and are the trademarks of Sony Corporation.
- IBM and PC/AT are registered trademarks of International Business Machines Corporation.
- Microsoft, Windows and Outlook are trademarks of Microsoft Corporation, registered in the USA and other countries.
Copyright ©1995 Microsoft Corporation.
All rights reserved.
Portion Copyright ©1995 Microsoft Corporation
- Apple and Macintosh are trademarks of Apple Computer Inc., registered in the USA and other countries.
- Pentium is a registered trademark of Intel Corporation. • US and foreign patents licensed from Dolby Laboratories.
- NaturallySpeaking, Dragon Systems are trademarks owned by ScanSoft, Inc. and are registered in the United States and/or other countries.
- All other trademarks and registered trademarks are trademarks or registered trademarks of their respective holders. Furthermore, “TM” and “®” are not mentioned in each case in this manual.
The "Digital Voice Editor" uses software modules as shown below:
Microsoft® DirectX®
©2001 Microsoft Corporation. All rights reserved.
Table of Contents
Getting Started
Step 1: Installing the Batteries .... 6
Replacing the Batteries 7
Step 2: Setting the Clock 8
Basic Operations
Recording Messages ...... 10
Tips for Using the Built-in Microphone 13
Using Convenient Functions while Recording 14
Recording with an External Microphone or Other Equipment 16
Recording with an External Microphone.... 16
Recording from Other Equipment 16
Recording with Other Equipment 17
Playing Back Messages 18
Using the Display Window 23
Selecting the Display Mode 26
Turning off the Display 28
Various Ways of Playback
Adjusting the playback sound by amplifying inaudible sound — Digital Voice Up function ...... 29
Adjusting the Playback Speed — DPC (Digital Pitch Control) .... 30
Adding a Bookmark 32
Playing Back the Specified Section Repeatedly — A-B Repeat .... 33
Editing Messages
Adding a Recording 34
Adding a Recording to a Previously Recorded Message 34
Adding an Overwrite Recording during Playback 35
Erasing Messages 36
Erasing Messages One by One 36
Erasing All Messages in a Folder 38
Dividing a Message into Two/Combining Messages 39
Dividing a Message 39
Combining Messages 41
Moving Messages to a Different Folder 42
Adding Priority Mark(s) — Priority Mark Function .... 43
Adding Priority Mark(s) in the Stop Mode 43
Adding Priority Mark(s) during Playback 44
Other Functions
Playing Back a Message at a Desired Time with an Alarm 45
Turning off the OPR Indicator (LED) 49
Preventing Accidental Operation — HOLD Function 50
Using an Adding Recording 51
Changing the Settings — MENU 52
Using the "Digital Voice Editor" Software 55
Additional Information
Precautions 57
Troubleshooting 58
Error Messages of the IC Recorder 61
System Limitations 63
Specifications 64
Index to Parts and Controls 65
Index 67
Step 1: Installing the Batteries
1 Slide and lift the battery compartment lid.

2 Insert two LR03 (size AAA) alkaline batteries with correct polarity, and close the lid.

If the battery compartment lid is accidentally detached, attach it as illustrated.
Clock setting display appears when you insert batteries for the first time, or when you insert batteries after the unit has been without batteries for a certain period of time. Please refer to steps 3 to 6 in "Step 2: Setting the Clock" on pages 8 and 9 to set the date and time.
Using on house current (excluding the Korean and the People's Republic of China models)
Connect the AC power adaptor AC-E30HG (not supplied) to the DC IN 3V jack of the unit and to the wall outlet. Do not use any other AC power adaptor.

Polarity of the plug
Replacing the Batteries
The battery indicator on the display window shows the battery condition.
Notes
- Do not use manganese batteries for this unit.
- When you replace the batteries, insert the new ones within 3 minutes after you remove the exhausted ones. Otherwise, the display may show the clock setting display or incorrect date and time when you re-insert the batteries. In this case, set the date and time again. The recorded messages and alarm setting, however, will remain.
- Do not charge dry batteries.
- When you are not going to use the unit for a long time, remove the batteries to prevent damage from battery leakage and corrosion.
Battery remain indication

: Replace both of the two batteries with new ones.

: The unit will stop operation.
Battery life* (Using Sony alkaline batteries LR03 (SG))
Recording mode: ST (Stereo) STLP SP LP
In recording: Approx. 12 hr. Approx. 14 hr. Approx. 16 hr. Approx. 20 hr.
In playback: Approx. 9 hr. Approx. 9 hr. Approx. 11 hr. Approx. 13 hr.
(hr.: hours)
* In continuous recording/playback * When playing back through the internal speaker with the medium volume level * The battery life may shorten depending on the operation of the unit.
Note on the "ACCESS" message
The unit is accessing data while "ACCESS" appears in the display window or the OPR indicator flashes in orange. While accessing, do not remove
the batteries or AC adaptor (excluding the Korean and the People's Republic of China models). Doing so may damage the data.

Note
If the unit is required to process excessive amount of data, "ACCESS" may be displayed for an extended period of time. This is not a malfunction of the unit. Wait until the message disappears before starting operation.
Step 2: Setting the Clock
You need to set the clock to use the alarm function or record the date and time.
Clock setting display appears when you insert batteries for the first time, or when you insert batteries after the unit has been without batteries for a certain period of time. In this case, proceed from step 4.

1 Turn the jog lever toward MENU.
The menu mode will be displayed in the display window.

2 Press the jog lever up or down (▶▶▶▶/▶◀◀) to select "SET DATE".

3 Press the jog lever (■•▶).
The date and time setting window is displayed. The year digits will flash.

4 Set the date.
① Press the jog lever up or down (▶▶▶/▶◀◀) to select the digits of the year.

② Press the jog lever (■•▶). The month digits will flash. ③ Set the month and day in sequence, then press the jog lever (■•▶). The hour digits will flash.


5 Set the time.
① Press the jog lever up or down (▶▶▶▶/▶◀◀) to select the digits of the hour. ② Press the jog lever (■•▶). The minute digits will flash. ③ Set the minute. ④ Press the jog lever (■•▶). The menu mode will be displayed again.


Note
If you do not press the jog lever (■•▶) for more than one minute, the clock setting mode is cancelled and the window will return to normal display.
6 Turn the jog lever toward MENU.
The window will return to normal display.
If the unit is left unused for more than 3 seconds in the stop mode after the clock is set, the display will show the current time (page 26).


Recording Messages
You can record the maximum of 99 messages in each of the three (A, B, and C) folders. You can record messages in the following three ways:
- Add a recording behind the last recorded message
- Add a recording to a previously recorded message (page 34)
- Add an overwrite recording (page 35)
This section explains how to add a recording behind the last recorded message.
![graph TD A["Message 1"] --> B["Message 2"] B --> C["Message 3 Blank space"] C --> D["When you record a new message. .."] D --> E["Message 1"] E --> F["Message 2"] F --> G["Message 3"] G --> H["Message 4"] H --> I["Recorded after the last recorded message"]](/content/2026/05/1001172/images/9aea68eb0669fc0bcd1c4cc33f034e284cd5a5526b0cfe633296448ef3ab2f6c.jpg)
Maximum recording time
The maximum recording time of all the folders is as follows. You can record messages for the maximum recording time in a single folder.
Recording modes*: ST STLP SP LP
* Recording modes (To record in better sound quality, select the ST or STLP mode. For switching the recording mode, see page 53.)
ST: Standard play stereo recording mode/STLP: Long play stereo recording mode SP: Standard play monaural recording mode/LP: Long play monaural recording mode
Notes
- Before making a long recording, be sure to check the battery indicator (page 7).
- The maximum recording time and the number of messages you can make varies depending on the conditions of use.
- To avoid replacing batteries during long time recording, use the AC power adaptor (not supplied) (excluding the Korean and the People's Republic of China models).
- Depending on the areas, available models may differ.
- Noises caused by touching and rubbing may be recorded.
1
Select the folder.

Turn the jog lever toward FOLDER repeatedly to display the folder (A, B, or C) in which you wish to record messages.
Selected folder

2
Start recording.
Built-in microphone

① Press ●REC/REC PAUSE button.
You do not need to keep pressing ●REC/REC PAUSE while recording.
② Speak into the built-in microphone.
OPR indicator (lights in red during recording**)

* The display selected with the DISP in the menu (page 26) appears.
**When the LED in the menu is set to "OFF", the OPR indicator turns off (page 49).
* The display selected with the DISP in the menu (page 26) appears.
**When the LED in the menu is set to "OFF", the OPR indicator turns off (page 49).**
Notes
- While the OPR indicator flashes or turns orange, do not remove the batteries or the AC adaptor (excluding the Korean and the People's Republic of China models). Doing so may damage the data.
- Noise may be recorded if an object, such as your finger, accidentally rubs or scratches the unit during recording. Continue
Continued
Recording Messages (continued)
3 Stop recording.

Press ■ STOP.
The unit stops at the beginning of the current recording. If you do not change the folder after you stop recording, the next time you record you will record in the same folder.
Other operations
To Do this
| pause recording* Press ●REC/REC PAUSE.During recording pause, the OPR indicator flashes in red and “PAUSE” flashes in the display window. |
| release pause and Press ●REC/REC PAUSE again.resume recording Recording resumes from that point.(To stop recording after pausing recording, press ■STOP.) |
| review the current Press the jog lever (■●▶).recording instantly Recording stops and playback starts from the beginning of the message just recorded. |
| review during recording Keep pressing the jog lever down (◀◀)during recording or recording pause.Recording stops and you can search backwards while listening to fast playback sound. After you release the jog lever, playback starts from that point. You can add an overwrite recording from that point. |
* 1 hour after you pause recording, recording pause is automatically released and the unit goes into the stop mode.
Tips for Using the Built-in Microphone Recording a sound centering on a specific direction
To record a sound centering on a specific direction, slide the DIRECTNL switch to "ON" position. When you record a sound at a conference/meeting or in a spacious place etc., use this setting.
Note
The DIRECTNL switch functions only in the "SP" or "LP" recording mode. In the ST or STLP modes where the high-performance sound reproduction is important, sound is recorded in the stereo mode without regard to the DIRECTNL switch "ON"/ "OFF" position. For details of recording modes, see page 53.

Recording a sound not centering on a specific direction (all-directional recording)
Slide the DIRECTNL switch to "OFF" position.
Selecting the sensitivity of the built-in microphone
You can select the microphone sensitivity by setting the SENS (page 53) in the menu according to the recording conditions:
- H (high): To record a small sound at a meeting or in a quiet and/or spacious place. • L (low): To record for dictation or in a noisy place.
You can change the SENS setting with the menu during recording.
Recording Messages (continued)
Using Convenient Functions while Recording Monitoring the recording
When recording from the built-in microphone, you connect headphones (supplied or not supplied) to the ⏻ (headphones) jack and monitor the recording from the connected headphones. You can adjust the volume with VOL +/−, but the recording level is fixed.
Note
If you turn up the volume excessively or place the headphones near the microphone while monitoring recording, the microphone may pick up the sound from the headphones, causing acoustic feedback (howling sound).
Starting recording automatically in response to the sound — Advanced VOR function
You can set the VOR (voice operated recording) function in the menu. With VOR set to “on”, recording starts when the recorder detects sound, and “VOR” appears in the display window. The recording pauses when no sound is detected, and “VOR PAUSE” appears. You can change the VOR setting with the menu during recording (page 53).
Note
VOR function is affected by the sound around you. Set the SENS (page 53) according to the recording conditions. If recording is not satisfactory after you have changed the microphone sensitivity, or for important recording, set the VOR to “OFF”.
Memory remain indication
During recording, the remaining memory indicator decreases one by one. When the remaining recording time reaches 5 minutes, the remaining memory indication flashes.

When the remaining time reaches 1 minute, the remaining memory indication will flash in the display window regardless of the display mode (page 26).

When the memory is full, recording automatically stops and "FULL" will be displayed with an alarm sound. To continue recording, first erase some of the messages (page 36).
Note
When you set the BEEP (page 54) to "OFF", an alarm sound (beep) does not sound.
Recording with an External Microphone or Other Equipment
You can record sound of an external microphone or other equipment (tape recorder, MiniDisc player, or etc.) with the IC recorder. Depending on the device you use, connect the IC recorder as follows. For available accessories, consult with your nearest Sony dealer.
Recording with an External Microphone
Connect an external microphone to the (microphone) jack. When you connect an external microphone, the built-in microphone is automatically cut off. When a plug in power type microphone is connected, power is automatically supplied to the microphone from the IC recorder.

Recommended types of microphones
You can use the ECM-CS10 Sony electret condenser microphone (not supplied).
Recording from Other Equipment
To record sound of other equipment with the IC recorder, connect the (microphone) jack of the IC recorder to the earphone jack of other equipment (tape recorder etc.) by using a resistance audio connecting cable.
Before you start recording, set the microphone sensitivity by setting the SENS (page 53) in the menu to "H" (high).
Note
If you use an audio connecting cable without a resistor, sound may be recorded interrupted. Make sure to use a resistance audio connecting cable.
Recording with Other Equipment
To record the sound of the IC recorder with other equipment, connect the Ω (headphones) jack of the IC recorder to the audio input connector (minijack, stereo) of other equipment.

Playing Back Messages
When playing back a previously recorded message, start from step 1. When playing back a message you have just finished recording, start from step 3.
1 Select the folder.

Turn the jog lever toward FOLDER repeatedly to display the folder (A, B, or C) in which you wish to play messages.

2 Select the message number.

Press the jog lever up or down (▶▶▶▶/▶◀◀) to display the desired message number.
- Press up (▶▶▶): for next message number.
- Press down (◀◀): for previous message number.
Selected message number

The number of messages in a folder
* The display selected with the DISP in the menu (page 26) appears.
3
Start playback.
(headphones) jack
OPR indicator
(lights in green during playback**)
* The display selected with the DISP in the menu (page 26) appears. **When the LED in the menu is set to "OFF", the OPR indicator turns off (page 49).
After playing back one message, the unit stops at the beginning of the next message.
When the last message in a folder has been played back, the unit stops at the beginning of the last message.
Listening in better sound quality
You can enjoy better sound quality as follows:
• To listen from headphones
Connect the stereo headphones supplied or stereo headphones (not supplied) mentioned in the “Specifications” (page 64) as optional accessories to the ⏻ (headphones) jack. The built-in speaker will be automatically disconnected.
• To listen from an external speaker
Connect an active or passive speaker (not supplied) to the Ω (headphones) jack.
Playing Back Messages (continued)
Other operations
To do this:
| stop at the current position(Playback Pause function) | Press ■STOP or the jog lever (■●▶). |
| To resume playback from that point, press the jog lever (■●▶) again. |
| go back to the beginning Press the jog lever down (◀◀) of the current message* once.** |
| go back to previous Press the jog lever down (◄◄◄) messages repeatedly. (During stop mode, keep the jog lever pressed to go back the messages continuously.) |
| skip to the next message* Press the jog lever up (▶▶) once.** |
| skip to the succeeding messages | Press the jog lever up (▶▶I) repeatedly. (During stop mode, keep the jog lever pressed to skip the messages continuously.) |
* If you have set a bookmark on the message, the unit stops at the bookmark.
** These operations are for when EASY-S is set to "OFF". For operations when EASY-S is set to "ON", see page 54.
Adjusting the playback sound by amplifying inaudible sound - Digital Voice Up function
When you slide the VOICE UP switch to "ON", low-level parts of a recorded message are amplified, allowing you to hear even small voices more easily. By adjusting the overall recording to its optimum level, you can make playback sound well-balanced and more audible (page 29).
Note:
Depending on the area where you purchased the unit, the Digital Voice Up switch name shown on the unit may differ.
Playing back a message rapidly or slowly — DPC (Digital Pitch Control)
When you adjust the playback speed with the DPC in the menu (page 30), you can play back a message rapidly or slowly by sliding the DPC switch to "ON". When you set the playback speed faster or slower than the normal speed, "FAST" or "SLOW" appears. You can change the setting during playback.
Locating quickly the point you wish to start playback (Easy Search)
When EASY-S is set to "ON" (page 54) in the menu, you can quickly locate the point you wish to start playback by pressing the jog lever up or down (▶▶▶/◀◀◀) repeatedly during playback or playback pause.
You can go back approx. 3 seconds by pressing the jog lever down (◀◀◀) once, or advance approx. 10 seconds by pressing the jog lever up (▶▶▶) once. This function is useful when locating a desired point in a long recording.
Searching forward/backward during playback (Cue/Review)
- To search forward (Cue): Keep pressing the jog lever up (▶▶▶) during playback and release it at the point you wish to resume playback.
- To search backward (Review): Keep pressing the jog lever down (◀◀◀) during playback and release it at the point you wish to resume playback.
The unit searches at slow speed with playback sound. It is useful to check one word forward or behind. Then, if you keep pressing the jog lever up or down, the unit starts to search at higher speed. During cue/review, the counter will be displayed, regardless of the display mode setting (page 26).
When playback is done to the end of the last message
- When playback or fast playback is done to the end of the last message, “END” flashes for 5 seconds and the OPR indicator lights up in green. (You cannot hear the playback sound.)
- When "END" stops flashing and the OPR indicator goes off, the unit will stop at the beginning of the last message.
- If you keep pressing the jog lever down (◀◀) while “END” is flashing, the messages are played back rapidly, and normal playback will start at the point you release the button.
- If the last message is long and you wish to start playback at a later part of the message, keep pressing the jog lever up (▶▶) to go to the end of the message and then press the jog lever down (◀◀) while “END” is flashing to go back to the desired point.
- For messages other than the last one, go to the beginning of the next message and play backward to the desired point.
Playing Back Messages (continued)
Playing back all messages in a folder continuously — Continuous Play
When the CONT (page 54) is set to “on” in the menu, you can play back all the messages in a folder continuously. You can change the setting during playback.
Playing back a message repeatedly — Repeat Play
During playback, press the jog lever (■●▶) for more than one second. "will be displayed and the selected message will be played back repeatedly. To resume normal playback, press the jog lever (■●▶) again. To stop playback, press ■STOP.

To play back the specified section repeatedly — A-B Repeat
You can specify the start (A) and end (B) points and play back the specified section repeatedly (page 33).
Using the Display Window
Parts in the display window

1 Folder indication Displays the current folder (A, B, or C). 2 Alarm indicator (47) Appears when the alarm is set for a message. 3 Recording mode indication (53) Displays the current recording mode:
•ST: Standard play stereo recording mode •STLP: Long play stereo recording mode •SP: Standard play monaural recording mode • LP: Long play monaural recording mode
4 REC (Recording) indicator (11) 5 Remaining battery indicator (7)
When the AC power adaptor (not supplied) is connected, the indicator does not appear (excluding the Korean and the People's Republic of China models).
6 Remaining memory indicator (15) 7 Priority marks (43)
8 Selected message number / Total message number in the folder (11, 18) 9 Repeat play indicator (22, 33) Appears while a message or a specific portion (A-B) of the message is played back repeatedly. 10 Bookmark indicator (32) Appears when the bookmark is set for a message. 11 Counter /Remaining time indication /Recording date and time indication / Current time indication (26) The display selected with the DISP in the menu appears. 12 SENS (microphone sensitivity) indication (53) Displays the current microphone sensitivity:
• H (high): To record at a meeting or in a quiet/spacious place. • L (low): To record for dictation or in a noisy place.
Using the Display Window (continued)
■Display during recording and playback
In an ordinary recording or playback mode, the message number, recording mode and microphone sensitivity of the message being recorded or played back, and playback counter are displayed in the window.
In a special recording or playback mode such as overwrite recording, A-B repeat playback, or DPC play, the mode flashes in the display.
■Display during setting the menu
In menu setting mode, the menu items and current setting are displayed. You can change the setting while it is flashing.
In alarm or clock setting, the date and time setting display appears.
Display examples
A message is being recorded as the 21st message of all 21 messages in folder A in ST mode with H (high) microphone sensitivity.

When the DPC switch is set to "ON" to start playback rapidly
LP recording mode is being selected.


"May 10, 2004" is being selected.
■Remain indications
When the battery or memory runs out, the remain indications flash in the display.
■Error messages
The error messages or error numbers will be displayed (page 62).
Display examples
When the remain time becomes shorter than 1 minute

When an access error occurs

When an error number is displayed
Selecting the Display Mode
You can select the display mode for stop, recording and playback modes.

1 Turn the jog lever toward MENU. The menu mode will be displayed.

2 Press the jog lever up or down (▶▶▶/▶◀◀) to select "DISP".

3 Press the jog lever (■•▶). The display setting window will be displayed.

4 Press the jog lever up or down (▶▶▶▶/▶◀◀) to select the display mode.

The display mode changes in the order shown to the right.
5 Press the jog lever (■•▶).
6 Turn the jog lever toward MENU.
The menu mode exits and the normal mode is displayed.
On current time display
If the unit is left unused for more than 3 seconds in the stop mode, the display will turn to the current time display mode as shown to the right, regardless of the display mode setting.

You can select the display mode from the following:
■COUNTER (elapse time)
Elapsed playback/recording time of one message.

■REM (remaining time)
In the playback mode: The remaining time of one message indication.

In the stop and recording mode: the remaining recording time indication.

■ REC DATE (recorded date)
In the playback and playback pause modes, the date the current message was recorded.
In the recording mode, the current date.
(If the clock has not been set, "--Y--M--D" will be displayed.)

■ REC TIME (recorded time)
In the playback and playback pause modes, the time the current message was recorded.
In the recording mode, the current time.
(If the clock has not been set, "--:--" will be displayed.)

Selecting the Display Mode (continued)
Turning off the Display
The unit is not equipped with the power button. The display always appears on the window, which almost will not influence the battery life. To turn off the display, slide the HOLD switch in the direction of the arrow in the stop mode.

"HOLD" will flash for three seconds and then the display turns off in the window. To turn on the display, slide the HOLD switch in the opposite direction.

Adjusting the playback sound by amplifying inaudible sound
— Digital Voice Up function
You can make the playback sound well-balanced and more audible by amplifying only the inaudible low-level part of a recorded message and adjusting the overall recording to its optimum level (Digital Voice Up function). This function is useful to hear a meeting with each speaker's voice more audible.

During playback or stop, slide the VOICE UP switch to "ON".
The message is played back with adjusted sound.
To resume normal playback
Slide the VOICE UP switch to "OFF".
Note
Depending on the area you purchased the unit, the Digital Voice Up switch name shown on the unit may differ.
Adjusting the Playback Speed — DPC (Digital Pitch Control)
You can adjust the speed of the playback between twice the normal speed (+100%) and half the normal speed (-50%). The message is played back in natural tone thanks to the digital processing function.

Playing back a message rapidly or slowly
Slide the DPC switch to "ON".
"FAST" or "SLOW" flashes for 3 seconds and the message is played back at the speed specified with the menu.

To resume normal playback
Slide the DPC switch to "OFF".
Setting the playback speed
You can set the playback speed when the DPC switch is set to "ON". The setting for the playback speed holds effective until you change the setting.
1 Turn the jog lever toward MENU to display the menu mode.
2 Press the jog lever up or down (▶▶▶/▶◀◀) to select "DPC", then press the jog lever (■•▶).
The playback speed setting mode will be displayed. The flashing number represents the playback speed in percentage with the standard speed as "0".
3 Press the jog lever up or down (▶▶▶▶/▶◀◀) to set the playback speed.
- Fast play (up to +100% by 10%): Press up (▶▶▶).
- Slow play (down to -50% by 5%): Press down (◄◄◄).
4 Press the jog lever (■•▶).
The specified playback speed is confirmed.
5 Press the jog lever toward MENU to exit the menu mode.
The normal display appears.


Adding a Bookmark
You can add a bookmark at a point in a message and use it during playback. You can add only one bookmark in each message.

During playback or stop, press DIVIDE/ (bookmark) for more than 1 second.
A bookmark is added and the bookmark indicator ( ) flashes for 3 seconds.

If you add a bookmark to a message that already has a bookmark, the previously added bookmark is deleted and a bookmark is added to the newly specified point.
To start playback at the bookmark
Press the jog lever up or down (▶▶▶/▶◀◀) during stop so that the bookmark indicator flashes for 3 seconds. Then press the jog lever (■•▶).
To delete the bookmark
1 In stop mode, press the jog lever up or down (▶▶/▶◀◀) to display the number of the message with the bookmark you wish to delete. 2 While pressing DIVIDE/ (bookmark), press ERASE for more than 1 second. 3 Press ERASE while the bookmark indicator and "ERASE" are flashing.
Note
If you want to combine messages to which the bookmark is already added, delete the bookmark before combining messages.
Playing Back the Specified Section Repeatedly — A-B Repeat
While playing back a message, you can set the start (A) and end (B) points for a section you wish to play repeatedly.

1 During playback, press A-B (repeat)/PRIORITY briefly.
The starting point (A) of the section you wish to play repeatedly is set. "A-B B" flashes.

2 During playback, press A-B (repeat)/PRIORITY briefly.
The finishing point (B) of the section is set.
"A-B" and "are displayed and the specified section is played back repeatedly.

To resume normal playback
Press the jog lever (■•▶).
To stop A-B Repeat playback
Press ■STOP.
Notes
- You cannot set A-B Repeat for a section that overlaps two or more messages.
- If you do not set the finishing point (B), the finishing point is automatically set at the end (or the beginning) of the message.
Adding a Recording
Notes
- At a factory setting, you cannot add a recording not to erase the message by accidental operation. See "Using an Adding Recording" (page 51) to change the setting.
- The added or overwritten portion of a message will be recorded in the same recording mode (ST, STLP, SP or LP; see page 53) as the original message, regardless of the current recording mode setting.
- You cannot add or overwrite a recording if the remaining memory is not long enough. For more information, see “Troubleshooting” (page 58).

Adding a Recording to a Previously Recorded Message
When REC-OP in the menu is set to "ADD", you can add a recording to the message being played back (page 51).
The added recording will be placed after the current message and counted as a part of the message.
![graph TD A["During playback of Message 3"] --> B["Message 3 Message 4"] B --> C["After adding a recording"] C --> D["Message 3 Message 4"] D --> E["Added recording"]](/content/2026/05/1001172/images/0de36f3af944ff40a53e2956c17c3fe1e6040b79f20d1588c78fcf96b05b229a.jpg)
1 During playback, press ●REC/REC PAUSE briefly.
The "REC" and "ADD" will flash and the unit stops in the recording pause mode.

2 While the "REC" and "ADD" are flashing, press ●REC/REC PAUSE.
The "REC" is displayed and "ADD" flashes for 3 seconds on the display window. The OPR indicator will turn red. Then the new recording will be added at the end of the current message.
3 Press ■ STOP to stop the recording.
Adding an Overwrite Recording during Playback
When REC-OP in the menu is set to "OVER", you can add an overwrite recording after the selected point in a recorded message (page 51). The part of the message after the selected point is deleted.
The starting point of an overwrite recording![graph TD A["Message 2"] --> B["Message 3"] B --> C["Message 4"] D["Message 2"] --> E["Message 3"] E --> F["Message 4"] G["The deleted part of Message 2"] --> H["End"]](/content/2026/05/1001172/images/5bd256e56187a9736de1397f153cb30551920848754bd5b100c02fb3927ffc87.jpg)
Added overwrite recording in Message 2
1 During playback, press ●REC/REC PAUSE briefly.
The "REC" is displayed. "OVER" flashes on the display window and the OPR indicator flashes in red.

2 Press ●REC/REC PAUSE to start recording.
The display returns to the display mode set in the menu and the OPR indicator turns red.
3 Press ■ STOP to stop the recording.
Erasing Messages
You can erase the recorded messages one by one or all messages in a folder at a time.
Note
Once a recording has been erased, you cannot retrieve it.

Erasing Messages one by one
You can erase unnecessary messages only.
When a message is erased, the remaining messages will advance and be renumbered so that there will be no space between messages.
![graph TD A["Before erasing"] --> B["Message 1"] A --> C["Message 2"] A --> D["Message 3"] A --> E["Message 4"] A --> F["Message 5"] G["After erasing"] --> H["Message 1"] G --> I["Message 2"] G --> J["Message 3"] G --> K["Message 4"] L["Remaining messages are renumbered."] --> M["End"]](/content/2026/05/1001172/images/659245d494a96ab5b02d662a2273725f73731d917856e4c877e3495b4fa2d735.jpg)
1 Press ERASE while playing back the message you want to erase or press ERASE for more than 1 second during stop mode.
The message number and "ERASE" will flash while the first and last 5 seconds of the message are played back 10 times.

2 Press ERASE while the message is being played back and "ERASE" is flashing.
The message is erased and the remaining messages will be renumbered. (For example, if you erase Message 3, Message 4 will be renumbered as Message 3. When erasing is completed, the unit will stop at the beginning of the following message.)

To cancel erasing
Press ■STOP before step 2.
To erase other messages
Repeat steps 1 and 2.
To erase a message partially
First divide the message (see page 39) and then follow the steps on this page to erase the message.
Erasing Messages (Continued)
Erasing All Messages in a Folder
You can erase all recorded messages in a folder.
1 Turn the jog lever toward FOLDER repeatedly to display the folder (A, B, or C) containing the messages you want to erase.

2 While pressing ■STOP, press ERASE for more than 1 second.
The message number and "ALL ERASE" will flash for 10 seconds.

3 While "ALL ERASE" is flashing, press ERASE.
All the recorded messages contained in the folder are deleted. The folder itself will not be deleted.

To cancel erasing
Press ■STOP before step 3.


Dividing a Message into Two/Combining Messages
You can divide a message, or combine messages.
- You can divide a message into two while recording/playing back messages.
- You can combine messages in stop mode (see page 41).

Note
Due to the recording system of an IC recorder, you may not be able to divide or combine messages in some cases (pages 60 and 63).
Dividing a Message
You can divide a message during recording or playback, so that the message is divided into two and the new message number is added to the divided message. By dividing a message, you can easily find the point you want to play back when you make a long recording such as a meeting. You can divide a message until the total number of messages in the folder becomes 99.
Notes
- You need a certain amount of space in the memory to divide a message. For more information, see "System Limitations" on page 63.
- If you divide a message with priority mark(s), priority mark(s) will be added to both parts of the divided message.
Dividing a Message into Two/Combining Messages (continued)
While recording or playing back a message, press DIVIDE/ (bookmark) at the point you want to divide.
- When you press DIVIDE/ (bookmark) during recording:
The new message number is added at the point you pressed the button, and the new message number and "DIVIDE" flash for 3 seconds.

The message will be divided into two; however, the messages will be recorded without a break.
![graph TD A["Message 1 Message 2 Message 3"] --> B["A message is divided."] B --> C["Recording continues."]](/content/2026/05/1001172/images/33097ca93b47a7e484e58dc7e7f6c684eb0866698a8d969eaea31bc6889e1722.jpg)
Tip
You can divide a message during recording pause.
- When you press DIVIDE/ (bookmark) during playback:
The message is divided into two at the point you pressed the button, and "DIVIDE" flashes for 3 seconds. The message numbers of the following messages will increase by one.

| Message 1 | Message 2 Message 3 | |||
| A message is divided. | ||||
| Message 1 | Message 2 Message 3 Message 4 | |||
The message numbers increase.
To play the divided message
Press the jog lever up or down (▶▶/▶◀◀) to display the message number as the divided messages have message numbers.
To play the divided messages continuously
Select "on" for CONT in the menu as described in "Changing the Settings" on page 54.
Combining Messages
You can combine two messages into one.
| Message 1 | Message 2 | Message 3 | Message 4 | |
| Message 1 | Message 2 | Message 3 |
The message numbers decrease.
Messages are combined.
Notes
- After combining messages, the latter message's alarm setting, priority mark(s) and bookmark will be deleted.
- If you combine messages with a bookmark, the following procedures will erase the bookmark. To combine messages, redo the procedures.
- You cannot combine messages of different recording modes.
1 Press ■ STOP to stop the IC recorder. 2 Press the jog lever up or down (▶▶I/I◀◀) to display the number of the second of the two messages you want to combine. 3 While pressing DIVIDE/ (bookmark), press ERASE for more than 1 second.
"COMBINE" will flash for 10 seconds.

4 Press ERASE while the display is flashing.
The two messages are combined into one and the messages will be renumbered as in the illustration on this page.
To cancel erasing
Press ■STOP before step 4.
Moving Messages to a Different Folder
You can move the recorded messages to another folder. When you move a message to another folder, the one in the previous folder will be deleted.

Example: Moving Message 3 in Folder B to Folder C
1 Play back the message you want to move.

2 Turn the jog lever toward FOLDER repeatedly to select the folder that you want to move the message into.
The destination folder and "MOVE" flash. The first and last 5 seconds of the message will be played back.
3 Press the jog lever (■•▶).
The message is moved to the destination folder. Messages are sorted in order of the recorded date and time or the number of the priority marks in the folder.


To cancel moving the message
Press ■STOP before step 3.
Adding Priority Mark(s) — Priority Mark Function
Usually the recorded messages are lined up in the order of recording. By adding priority marks (★) to important messages, you can renumber the messages in the order of their priority. There are four levels, “★★★” (the most important), “★★”, “★”, and no priority mark. You can add priority marks both in the stop mode and in the playback mode.

Adding Priority Mark(s) in the Stop Mode
1 Select the message you want to mark.

2 Press A-B (repeat)/PRIORITY for more than 1 second.
“★” and the message number indication will flash on the display window.

3 Press A-B (repeat)/PRIORITY repeatedly to select the number of priority mark(s) (★) while indications are flashing.
The setting is finished when the priority mark(s) (★) light(s) steadily in the display window and the messages are renumbered.

Continued
Adding Priority Mark(s) — Priority Mark Function (Continued)
Adding Priority Mark(s) during Playback
1 Press A-B (repeat)/PRIORITY for more than 1 second during playback of the message you want to mark.

“★” and the message number indication will flash on the display window while the first and last 5 seconds of the message is played back 10 times.
2 Press A-B (repeat)/PRIORITY repeatedly to select the number of priority mark(s) (★). 3 Press the jog lever (■•▶) to fix the setting.
The setting is finished and the messages will be renumbered.

Messages with priority mark(s)
Messages are sorted in order of the number of priority mark(s) (★) in a folder. Messages without a priority mark are moved behind the messages with priority mark(s).

e.g. When there are 3 messages in a folder

Tip
If there are over 2 messages with the same number of priority marks in a folder, these messages are sorted by the recorded date and time (The oldest one comes first).
Message 1

Message 2

Message 3
Note
You can also add priority mark(s) using the supplied "Digital Voice Editor" software. But messages are not sorted in order of the number of the priority marks unless you sorted by the number of priority marks using the software.
Playing Back a Message at a Desired Time with an Alarm
You can sound an alarm and start playback of a selected message at a desired time. You can have the message played back at a specified date, once every week, or the same time everyday.
You can also sound the alarm without playing back a message.
Note
When the clock is not set or no messages are recorded, you cannot set the alarm.

Jog lever (▶▶▶/▶◀◀/■•▶/MENU)
1 Select the message you want to play back.
For more information about selecting the desired message, see step 1 and 2 of "Playing Back Messages" on page 18.

2 Enter the alarm setting mode.
①Press the jog lever toward MENU. The menu mode will be displayed in the display window. ②Press the jog lever up or down (▶▶▶/▶◀◀) to select “ALARM OFF”.
If the alarm has been already set to "on", "ALARM on" will be displayed.


Continued
Playing Back a Message at a Desired Time with an Alarm (continued)
③Press the jog lever (■•▶). The alarm setting mode will be displayed in the display window.
④Press the jog lever up or down (▶▶▶/▶◀◀) to select “on”. If “on” has already been selected, follow the next step.
⑤Press the jog lever (■•▶). "DATE" will be displayed in the display window.
3 Set the alarm date and time. To play back on a desired date
①Press the jog lever (■•▶) while "DATE" is displayed. The year digits will flash. ②Press the jog lever up or down (▶▶▶/▶◀◀) to select the year digits and press the jog lever (■•▶). The month digits will flash. ③Set the month and the day in sequence, then press the jog lever (■●▶).
To play back once a week
Press the jog lever up or down (▶▶▶/▶◀◀) to select the day of the week (“SUN” for Sunday to “SAT” for Saturday). Then press the jog lever (■•▶).


To play back at the same time every day
Press the jog lever up or down (▶▶▶/▶◀◀) to select "DAILY". Then press the jog lever (■•▶).
4 Select the alarm time.
①Press the jog lever up or down (▶▶▶/▶◀◀) to select the hour digits, and press the jog lever (■•▶).
The minute digit will flash.
②Press the jog lever up or down (▶▶▶/▶◀◀) to select the minute digits, and press the jog lever (■•▶).
5 Select the alarm playback.
Press the jog lever up or down (▶▶▶/▶◀◀) to select the alarm sound either from "B-PLAY" (for starting playback after the alarm) or "B-ONLY" (for only the alarm).
6 Press the jog lever (■•▶).
The setting is finished.
7 Press the jog lever toward MENU to exit the menu mode.
The normal display appears. "(●)" is displayed when the message having an alarm setting is selected.


Playing Back a Message at a Desired Time with an Alarm (continued)
When the set date and time comes
At the set time, the alarm will sound for about 10 seconds and the selected message will be played back (If you have selected “B-ONLY” in step 5, only the alarm will sound).
During alarm playback, "ALARM" will flash in the display window.
When the playback ends, the unit will stop automatically at the beginning of that message.
To listen to the same message again
Press the jog lever (■•▶). The same message will be played back from the beginning.
To cancel the alarm setting before the playback starts
Press ■STOP while the alarm sound is heard. You can stop the alarm playback even when the HOLD function is activated.
To cancel the alarm setting
In step 2 on page 45, select "OFF" and then press the jog lever (■•▶).
To check the alarm setting
Follow steps 1 through 2 on page 45 to display the current alarm date and time. Then follow steps 3 to 7 on pages 46 and 47 to change the alarm date and time.
Notes
- If the alarm time comes while another message is being played back with an alarm, the playback stops and the new message will be played back.
- If the alarm time comes during recording, the alarm will sound after the recording is finished. “(●)” will flash when the alarm time comes.
- If more than one alarm time comes during recording, only the first message will be played back.
- When the alarm time comes when the unit is in the menu mode, alarm will sound and the menu mode will be cancelled.
- If you divide a message you set the alarm for, alarm setting remains on only the first part of the divided message.
- If you combine messages you set the alarm for, the alarm setting of the latter message will be cancelled.
- Alarm setting will not be cancelled when the alarm playback finishes.
Turning off the OPR Indicator (LED)
During recording and playback, the OPR (operation) indicator lights or flashes. You can set the OPR indicator to turn off even in operation.

1 Turn the jog lever toward MENU.
The menu mode will be displayed.
2 Press the jog lever up or down (▶▶▶▶/▶◀◀) to select "LED on".
3 Press the jog lever (■•▶).
The LED setting mode will be displayed.
4 Press the jog lever up or down (▶▶▶/▶◀◀) to select "OFF", and then press the jog lever (■•▶).
The setting is changed.
5 Press the jog lever toward MENU to exit the menu mode.
The normal display appears.


To turn on the OPR indicator
In step 4, select "on" and then press the jog lever (■•▶).
Preventing Accidental Operation — HOLD Function

Slide the HOLD switch in the direction of the arrow. "HOLD" will flash for 3 seconds, indicating that all the functions of the buttons are locked.
When the HOLD function is activated during stop, all the display will be turned off after "HOLD" flashes.

To cancel the HOLD function
Slide the HOLD switch in the opposite direction.
Tip
Even if the HOLD function is activated, you can stop the alarm playback. To stop the alarm or playback, press ■STOP. (You cannot stop usual playback.)
Using an Adding Recording
At a factory setting, you cannot add a recording (page 34) not to erase the message by accidental operation. If you want to add a recording to a previously recorded message (page 34) or add an overwrite recording (page 35), change the REC-OP setting in the procedures below.

1 Turn the jog lever toward MENU. The menu mode will be displayed in the display window. 2 Press the jog lever up or down (▶▶I/I◀◀) to select "REC-OP", then press the jog lever (■•▶). The adding recording window will be displayed. 3 Press the jog lever up or down (▶▶▶/▶◀◀) to select "on", then press the jog lever (■•▶). The setting is changed. 4 Press the jog lever up or down (▶▶▶/▶◀◀) to select "ADD" or "OVER", then press the jog lever (■•▶).
- ADD: adds a recording to a previously recorded message - OVER: adds an overwrite recording


5 Press the jog lever toward MENU to exit the menu mode. The normal display appears.
To prohibit to add a recording
In step 3, select "OFF" and then press the jog lever (■•▶).
Changing the Settings — MENU
You can use the menu to change the IC recorder settings. During playback and recording, the menu items to be displayed are limited. Follow the procedures below to display the menu and change the settings:
① Turn the jog lever toward MENU.
The menu mode will be displayed.
② Press the jog lever up or down (▶▶▶/▶◀◀) to select the menu item for which you want to change setting.
③ Press the jog lever (■•▶).
The setting mode of the selected menu item will be displayed.
④ Press the jog lever up or down (▶▶▶/▶◀◀) to select the setting that you want to set, and then press the jog lever (■•▶).
The setting will be changed.
⑤ Turn the jog lever toward MENU to exit the menu mode.
The window will return to normal display.
Note
If you do not press any keys for one minute, the menu mode is automatically cancelled and the window will return to normal display.
| Menu items Settings (*: Initial setting) | Stop/Play/Rec** |
| MODE Displays the window to set the recording mode:ST*: You can record with high-quality stereo sound.STLP: You can record with stereo sound for longer time.SP: You can record with better sound (monaural sound).LP: You can record for longer time (monaural sound). | OK/--/-- |
| SENS Displays the window to set the microphone sensitivity.H* (high): To record at meetings or in a quiet and/or spacious place.L (low): To record dictation or in a noisy place. | OK/--/OK |
| DISP Displays the window to change the display mode (COUNTER*). See page 26. | OK/OK/OK |
| VOR Displays the window to set the VOR (Voice Operated Recording) function.on: The VOR function is activated.Recording starts when the unit detects sound and stops when no sound is heard, eliminating recording from soundless period.OFF*: The VOR function is disabled.Normal recording operation is selected. | OK/--/OK |
| DPC Displays the window to set the playback speed (on/OFF (0%*)). See page 30. | OK/OK/-- |
**Displays whether you can change the setting in each operation mode (Stop: stop mode/Play: playback mode/Rec: recording mode): "OK" shows the setting can be changed and "-" shows the setting cannot be changed.
Continued
Changing the Settings — MENU (continued)
| Menu items Settings (*: Initial setting) | Stop/Play/Rec** |
| EASY-S Displays the window to set the easy search function.on: You can go back for approx. 3 seconds by pressing the jog lever down (◀◀), or advance for approx. 10 seconds by pressing the jog lever up (▶▶▶).OFF*: You can go back or forward the messages by pressing the jog lever down or up (◀◀ /▶▶▶). | OK/--/-- |
| CONT Displays the window to set the continuous play.on: You can play back all messages in a folder continuously.OFF*: Playback stops at the end of each message. | OK/OK/-- |
| REC-OP Displays the window to set the adding recording mode (on/OFF*). See page 51. | OK/--/-- |
| SET DATE Displays the window to set the clock (04Y1M1D*). See page 8. | OK/--/-- |
| BEEP on*: A beep will sound to indicate that operation has been accepted.OFF: No beep sound will be heard except for the alarm. | OK/--/-- |
| LED Displays the window to turn on or off the OPR indicator during operation (on*/OFF). See page 49. | OK/--/-- |
| ALARM Displays the window to set the alarm (on/OFF*). See page 45. | OK/--/-- |
Using the "Digital Voice Editor" Software
By connecting the IC recorder to your computer with the supplied USB cable, you can use the "Digital Voice Editor" software to do the following:
- Saving the IC recorder messages on your computer's hard disk. • Transferring the PC messages back to the IC recorder.
- Playing or editing the messages on your computer.
- Sending a voice e-mail message using MAPI e-mail software. • Transcribing your IC recorder message using Dragon
NaturallySpeaking ® speech-recognition software (not supplied).
For the details, see the supplied "Digital Voice Editor 2" software operating instructions.
Connection
Using the "Digital Voice Editor" Software — MENU (continued)
System requirements
Your computer and system software must meet the following minimum requirements.
- IBM PC/AT or compatible
- CPU: 266MHz Pentium II processor or higher
- RAM: 64MB or more
- Hard disk space: 70MB or more depending on the size and number of sound files you store
- CD-ROM drive
- USB port – Sound board: Sound Blaster 16 compatible
- Display: High color (16 bits) or more and 800 x 480 dots or more
- OS: Microsoft® Windows® XP Media Center Edition 2004/Windows® XP Media Center Edition/Windows® XP Professional/Windows® XP Home Edition/Windows® 2000 Professional/Windows® Millennium Edition/Windows® 98 Second Edition standard installation (You cannot use this software with Windows® 98, Windows® 95 or Windows® NT.)
Notes
- You cannot use the software with a Macintosh machine.
- A handmade computer, a computer whose operating system is installed or upgraded by the user, or a computer with multi-boot operating environment are not supported.
Precautions
On power
- Operate the unit only on 3 V DC. Use two LR 03 (size AAA) alkaline batteries.
On safety
- Do not operate the unit while driving, cycling or operating any motorized vehicle.
On handling
- Do not leave the unit in a location near heat sources, or in a place subject to direct sunlight, excessive dust or mechanical shock.
- Should any solid object or liquid fall into the unit, remove the batteries and have the unit checked by qualified personnel before operating it any further.
On noise
- Noise may be heard when the unit is placed near an AC power source, a fluorescent lamp or a mobile phone during recording or playback.
- Noise may be recorded when an object, such as your finger, etc., rubs or scratches the unit during recording.
On maintenance
- To clean the exterior, use a soft cloth slightly moistened in water. Do not use alcohol, benzine or thinner.
If you have any questions or problems concerning your unit, please consult your nearest Sony dealer.
Backup recommendations
To avoid potential risk of data loss caused by accidental operation or malfunction of the IC recorder, we recommend that you save a backup copy of your recorded messages on a tape recorder or to a computer, etc.
Troubleshooting
Before taking the unit for repair, check the following sections. Should any problem persist after you have made these checks, consult your nearest Sony dealer.
IC Recorder
| Symptom | Remedy |
| The unit does not operate. | ·The batteries have been inserted with incorrect polarity (page 6).·The batteries are weak.·The buttons are locked with the HOLD switch (page 50). (If you press any button, “HOLD” will flash for 3 seconds.) |
| No sound comes from the speaker. | ·The volume is turned down completely.·Headphones are plugged in. |
| Sound comes from the speaker even when the headphones are plugged in. | ·If you plug in the headphones not securely during playback, the sound may come from the speaker. Unplug the headphones and then insert them securely. |
| The OPR indicator does not light. | ·LED is set to “OFF”. Display the menu and set the LED to “on”. |
| “FULL” is displayed and you cannot start recording. | ·The memory is full. Erase some of the messages (page 36).·99 messages have been recorded in the selected folder. Select another folder or erase some of the messages (page 36). |
| You cannot erase a message. | ·The message or the folder which contains the message is set to “Read-only” in the computer. Display the message using Windows Explorer and remove the check for “Read-only” under “Properties”. |
| You cannot add a recording or an overwrite recording. | The remaining memory is too short. The overwritten part will be deleted after the overwriting part finishes recording. Therefore, you can only overwrite within the remaining recording time.At a factory setting, REC-OP is set to “OFF”. Display the menu and set the REC-OP to “on” (page 51). |
| Recording is interrupted. | The advanced VOR function (page 14) is activated. Set the VOR to “OFF”. |
| Noise is heard. | An object, such as your finger, etc., accidentally rubbed or scratched the unit during recording so that noise was recorded.The unit was placed near an AC power source, a fluorescent lamp or a mobile phone during recording or playback.Plug of the connected microphone was dirty when recording. Clean the plug.The ⏻ (headphones) plug is dirty. Clean the plug. |
| Recording level is low. | SENS (microphone sensitivity) is set to L. Display the menu and set SENS to “H” (page 53).If it is difficult to hear small sound of a recorded message, slide VOICE UP to “ON”. Playback sound may become more audible. |
| Recording level is unstable (when recording music, etc.). | This unit is designed to automatically adjust the recording level when recording meetings, etc., and is not suitable for music recording. |
| Recording is interrupted (when recording from an external device). | If you use an audio connecting cable without a resistor to connect the sound source to the IC recorder, sound may be recorded interrupted. Make sure to use a resistance audio connecting cable. |
| Playback speed is too fast or too slow. | The playback speed is adjusted in DPC. Slide the DPC switch to “OFF” or display the menu and adjust the speed in DPC again (page 30). |
| “--:--” is displayed. | You have not set the clock (page 8). |
| “--Y--M--D” or ” --:--” is displayed on the REC DATE display. | The date of recording will not be displayed if you recorded the message when the clock was not set. |
| You cannot combine messages. | The bookmark is set for the message. Delete the bookmark, and then combine messages. |
| Messages are not sorted in order of the number of priority marks in a folder. | Unless you sort messages using the supplied “Digital Voice Editor” software, messages are sorted in the unit the same as the setting in the computer. Sort again in the order of the number of priority marks in the computer using the supplied “Digital Voice Editor” software. |
| The remaining time displayed in the display window is shorter than that displayed in the supplied “Digital Voice Editor” software. | The unit requires a certain amount of memory for system operation. That amount is subtracted from the remaining time, which is the reason for the difference. |
| The battery life is short. | The battery life on page 7 is based on playback through internal speaker with the medium volume level (using Sony alkaline batteries LR03(SG)). The battery life may shorten depending on the operation of the unit. |
| The unit does not operate correctly. | Take out the batteries and insert them again (page 6). |
Please note that recorded messages may be erased during service or repair work.
Error Messages of the IC Recorder
| Error message | Cause/Remedy |
| “BACK-D” | You set the alarm when the time is already past. Check it and set the appropriate date and time. |
| “Err ACCESS” | The IC recorder failed in memory access. Remove and then insert the batteries. |
| “ERR DATA” | The file is not supported by the “Digital Voice Editor” software, or the file itself is corrupted. |
| “FULL” | The remaining memory of the IC recorder is too small. Erase some messages before recording (page 36).When there are already 99 messages in the selected folder or the remaining memory of the IC recorder is short, you cannot divide a message. Erase some messages before dividing a message (page 36). |
| “LO DC-IN” | An AC power adaptor that is not compatible with the IC recorder is connected. Make sure to use the AC power adaptor for the IC recorder (excluding the Korean and the People’s Republic of China models). |
| “LOW BATT” | Batteries are weak. Replace batteries with new ones. |
| “NO DATA” | The selected folder does not have any messages. You cannot set the alarm, etc. because of this. |
| “NO CMB” | You cannot combine messages of different modes. |
| “PRE SET” | You set the alarm to play back a message at a date and time previously set on another message. Change the alarm setting. |
| “REC-OP OFF” | REC-OP in the menu is se to “OFF” and you cannot add or overwrite a recording. |
| “SET DATE” | If you do not set date and time, you cannot make alarm or time recording setting. To set date and time, see page 8. |
For the error messages of the "Digital Voice Editor", please refer to the online Help files.
Continued
Troubleshooting (continued)
If an error message with a number is displayed
If the following error display appears, please consult your nearest Sony dealer.
Error number Cause
| “ERR 01” The IC recorder cannot access the memory or cannot format the memory. |
| “ERR 02” The IC recorder cannot write (record or erase) the data in the memory. |
| “ERR 03” The IC recorder cannot read the memory. |
| “ERR 04” The IC recorder cannot load or write the settings. |
| “ERR 05” An error other than the above occurs. |
System Limitations
There are some system limitations of the unit. Troubles as mentioned below are not malfunctions of the unit.
| Symptom | Cause/Remedy |
| You cannot record messages up to the maximum recording time. | ·If you record messages in a mixture of ST, STLP, SP and LP modes, the recordable time varies from the maximum ST mode recording time to the maximum LP mode recording time.·The sum of the number on the counter (elapsed recording time) and the remaining recording time may be less than the unit's maximum recording time. |
| You cannot divide a message. | ·You cannot divide a message in a folder which has 99 messages.·If you divide or combine messages frequently, the unit may become unable to divide a message. |
| You cannot combine messages. | ·You cannot combine different recording mode (ST/STLP/SP/LP) messages.·If you divide or combine messages frequently, the unit may become unable to combine messages. |
Specifications
Recording media Built-in flash memory 32 MB (ICD-SX25) / 64 MB
(ICD-SX35) /128 MB (ICD-SX45), 256 MB (ICD-
SX55) Stereo/Monaural recording
Recording time See page 10.
Frequency range • ST: 60 Hz - 13,500 Hz
• STLP: 60 Hz - 6,900 Hz
- SP: 60 Hz - 7,000 Hz
• LP: 80 Hz - 3,500 Hz
Speaker Approx. 16 mm (21/32 in.) dia.
Power output 150 mW
Input/Output • Microphone jack (minijack, stereo)
- input for plug in power, minimum input level 0.6 mV, 3 kilohms or lower impedance microphone
- Headphones jack (minijack, stereo) – output for 8 - 300 ohms headphones
- USB connector
- DC IN 3V jack (For Korean and the People's Republic of China models, this jack does not exist.)
Playback speed control +100% to -50% (DPC)
Power requirements Two LR03 (size AAA) alkaline batteries: 3 V DC
Dimensions (w/h/d) (not incl. projecting parts and controls)
28.0 x 120.0 x 13.8 mm (1 1/8 x 4 3/4 x 9/16 in.)
Mass (incl. batteries) 64 g (2.26 oz)
Supplied accessories Stereo headphones x 1
USB connecting cable x 1 Application Software (CD-ROM) x 1 LR03 (size AAA) alkaline batteries x 2*/ Carrying pouch x 1* (*For the ICD-SX25 sold in the USA and Canada only)
Optional accessories Stereo headphones MDR-EX71SL, MDR-E931LP/Active speaker SRS-T88, SRS-T80/Electret condenser microphone ECM-CS10, ECM-TL1/Audio connecting cable RK-G134HG, RK-G135HG, RK-G136HG, RK-G139HG (excluding Europe)/AC power adaptor AC-E30HG (excluding the models for Korea, the People's Republic of China, Australia, and New Zealand)
Your dealer may not handle some of the above listed optional accessories. Please ask the dealer for detailed information.
Design and specifications are subject to change without notice.
Index to Parts and Controls
Refer to the pages indicated in parentheses for details.
Front

1 Ⓝ (headphones) jack (17, 19)
2 Built-in microphone (11, 13)
3 DIRECTNL (directional) switch (13)
4 VOICE UP (Digital Voice Up) switch (29)
5 DPC ON/OFF switch (30)
6 Display window (23)
7 ERASE button (36)
8 DIVIDE/ bookmark button (32, 39)
9 A-B(repeat)/PRIORITY button (33, 43)
10 OPR (operation) indicator (11, 19)
11 ●REC (record) /REC
PAUSE button (11, 34)
12 ■STOP button (12, 20)
13 Jog lever FOLDER/MENU/
◀◀ (review/fast backward)/
▶▶▶ (cue/fast forward)/
■•▶ (play/stop•enter)
14 VOL (volume) +/- buttons (19)
Continued
Index to Parts and Controls (continued)
Rear

15 Base
16 HOLD switch (28, 50)
17 Speaker
18 Battery compartment (6)
19 Clip*
20 (microphone) jack (16)
21 USB connector (55)
22 DC IN 3V jack (6)
(For Korean and the People's
Republic of China models,
this jack does not exist.)
23 Slit for a handstrap
*Notes
• To prevent the clip from breaking, avoid hooking it on thick fabric, such as a pocket of a heavy coat.
- When bending down or running with the unit clipped on your pocket, be careful not to drop the unit.
Index
A
A-B repeat 33
"ACCESS" message 7
Accidental operation 50
Add, bookmark 32
Add, priority marks 43
Advanced VOR 14,53
Alarm 45
B
Battery 6
Beep 54
Bookmark 32
Built-in microphone 11
C
Clock setting 8
Combine 41
Connecting, computer 55
Connecting, external microphone 16
Continuous playback ...... 22, 54
Counter display 27
Cue 21
D
Digital Voice Editor 55
Digital Voice Up function 20, 29
Display mode 26
Display window 23
Divide 39
DPC (Digital Pitch Control) ..... 20, 30, 53
E
Easy search 21, 54
Erase, bookmark 32
Erase, messages 36
Error messages 61
Error numbers 62
External microphone 16
F
Folder 11,18
H
Hold 28,50
L
LED 49
LP mode 7,10,53
M
Maximum recording time ..... 10
Menu.... 31,45,49,52
Message, erasing 36
Message, move 42
Message, playing back ..... 18, 19
Message, recording...... 10
Message number 11,18
Microphone, built-in 11
Microphone, connecting ...... 16
Microphone, external 16
Microphone sensitivity ..... 13, 53
Monitoring recording...... 14
Move 42
0
Overwrite recording...... 35
Continued
Index (continued)
P
Playback 19
Playback pause function ...... 20
Playback speed...... 20, 30, 53
Playing back continuously ..... 22
Plug in power 16
Priority marks 43
R
Recorded date/time display ..... 27
Recording mode ...... 7, 10, 53
Recording pause function ..... 12
Remaining battery 7
Remaining display...... 27
Remaining memory 15
Repeat play 22,33
Review 12,21
S
Search forward/backward ..... 21
SP mode 7,10,53
ST mode 7,10,53
STLP mode 7,10,53
System limitations 63
System requirements 56
T
Turning off the display 28
Turning off the indicator ..... 49
U
USB cable 55
V
VOICE UP (Digital Voice Up) 20, 29
Volume control 19
VOR 14,53
http://www.sony.net/

Printed on 100% recycled paper using VOC (Volatile Organic Compound)-free vegetable oil based ink.
Printed in Japan
- FOR CUSTOMERS IN THE UNITED STATES
- OWNER'S RECORD
- INFORMATION
- DECLARATION OF CONFORMITY
- NOTICE FOR USERS
- TRADEMARKS
- TABLE OF CONTENTS
- GETTING STARTED
- BASIC OPERATIONS
- VARIOUS WAYS OF PLAYBACK
- EDITING MESSAGES
- OTHER FUNCTIONS
- ADDITIONAL INFORMATION
- STEP 1: INSTALLING THE BATTERIES
- USING ON HOUSE CURRENT (EXCLUDING THE KOREAN AND THE PEOPLE'S REPUBLIC OF CHINA MODELS)
- REPLACING THE BATTERIES
- NOTES
- BATTERY REMAIN INDICATION
- RECORDING MODE: ST (STEREO) STLP SP LP
- NOTE ON THE "ACCESS" MESSAGE
- NOTE
- STEP 2: SETTING THE CLOCK
- TURN THE JOG LEVER TOWARD MENU
- PRESS THE JOG LEVER UP OR DOWN (▶▶▶▶/▶◀◀) TO SELECT "SET DATE
- PRESS THE JOG LEVER (■•▶)
- SET THE DATE
- SET THE TIME
- RECORDING MESSAGES
- MAXIMUM RECORDING TIME
- SELECT THE FOLDER
- START RECORDING
- RECORDING MESSAGES (CONTINUED)
- STOP RECORDING
- PRESS ■ STOP
- OTHER OPERATIONS
- TIPS FOR USING THE BUILT-IN MICROPHONE RECORDING A SOUND CENTERING ON A SPECIFIC DIRECTION
- RECORDING A SOUND NOT CENTERING ON A SPECIFIC DIRECTION (ALL-DIRECTIONAL RECORDING)
- SELECTING THE SENSITIVITY OF THE BUILT-IN MICROPHONE
- USING CONVENIENT FUNCTIONS WHILE RECORDING MONITORING THE RECORDING
- STARTING RECORDING AUTOMATICALLY IN RESPONSE TO THE SOUND — ADVANCED VOR FUNCTION
- MEMORY REMAIN INDICATION
- RECORDING WITH AN EXTERNAL MICROPHONE OR OTHER EQUIPMENT
- RECORDING WITH AN EXTERNAL MICROPHONE
- RECOMMENDED TYPES OF MICROPHONES
- RECORDING FROM OTHER EQUIPMENT
- RECORDING WITH OTHER EQUIPMENT
- PLAYING BACK MESSAGES
- SELECT THE MESSAGE NUMBER
- SELECTED MESSAGE NUMBER
- THE NUMBER OF MESSAGES IN A FOLDER
- START PLAYBACK
- OPR INDICATOR
- LISTENING IN BETTER SOUND QUALITY
- TO LISTEN FROM HEADPHONES
- TO LISTEN FROM AN EXTERNAL SPEAKER
- PLAYING BACK MESSAGES (CONTINUED)
- ADJUSTING THE PLAYBACK SOUND BY AMPLIFYING INAUDIBLE SOUND - DIGITAL VOICE UP FUNCTION
- PLAYING BACK A MESSAGE RAPIDLY OR SLOWLY — DPC (DIGITAL PITCH CONTROL)
- LOCATING QUICKLY THE POINT YOU WISH TO START PLAYBACK (EASY SEARCH)
- SEARCHING FORWARD/BACKWARD DURING PLAYBACK (CUE/REVIEW)
- WHEN PLAYBACK IS DONE TO THE END OF THE LAST MESSAGE
- PLAYING BACK ALL MESSAGES IN A FOLDER CONTINUOUSLY — CONTINUOUS PLAY
- PLAYING BACK A MESSAGE REPEATEDLY — REPEAT PLAY
- TO PLAY BACK THE SPECIFIED SECTION REPEATEDLY — A-B REPEAT
- USING THE DISPLAY WINDOW
- PARTS IN THE DISPLAY WINDOW
- USING THE DISPLAY WINDOW (CONTINUED)
- DISPLAY DURING RECORDING AND PLAYBACK
- DISPLAY DURING SETTING THE MENU
- REMAIN INDICATIONS
- ERROR MESSAGES
- SELECTING THE DISPLAY MODE
- COUNTER (ELAPSE TIME)
- REM (REMAINING TIME)
- REC DATE (RECORDED DATE)
- REC TIME (RECORDED TIME)
- SELECTING THE DISPLAY MODE (CONTINUED)
- TURNING OFF THE DISPLAY
- ADJUSTING THE PLAYBACK SOUND BY AMPLIFYING INAUDIBLE SOUND
- DIGITAL VOICE UP FUNCTION
- TO RESUME NORMAL PLAYBACK
- ADJUSTING THE PLAYBACK SPEED — DPC (DIGITAL PITCH CONTROL)
- PLAYING BACK A MESSAGE RAPIDLY OR SLOWLY
- SETTING THE PLAYBACK SPEED
- ADDING A BOOKMARK
- TO START PLAYBACK AT THE BOOKMARK
- TO DELETE THE BOOKMARK
- PLAYING BACK THE SPECIFIED SECTION REPEATEDLY — A-B REPEAT
- DURING PLAYBACK, PRESS A-B (REPEAT)/PRIORITY BRIEFLY
- TO STOP A-B REPEAT PLAYBACK
- ADDING A RECORDING
- ADDING A RECORDING TO A PREVIOUSLY RECORDED MESSAGE
- ADDING AN OVERWRITE RECORDING DURING PLAYBACK
- ERASING MESSAGES
- ERASING MESSAGES ONE BY ONE
- TO CANCEL ERASING
- TO ERASE OTHER MESSAGES
- TO ERASE A MESSAGE PARTIALLY
- ERASING MESSAGES (CONTINUED)
- ERASING ALL MESSAGES IN A FOLDER
- DIVIDING A MESSAGE INTO TWO/COMBINING MESSAGES
- DIVIDING A MESSAGE
- DIVIDING A MESSAGE INTO TWO/COMBINING MESSAGES (CONTINUED)
- TO PLAY THE DIVIDED MESSAGE
- COMBINING MESSAGES
- MOVING MESSAGES TO A DIFFERENT FOLDER
- TO CANCEL MOVING THE MESSAGE
- ADDING PRIORITY MARK(S) — PRIORITY MARK FUNCTION
- ADDING PRIORITY MARK(S) IN THE STOP MODE
- ADDING PRIORITY MARK(S) — PRIORITY MARK FUNCTION (CONTINUED)
- ADDING PRIORITY MARK(S) DURING PLAYBACK
- MESSAGES WITH PRIORITY MARK(S)
- PLAYING BACK A MESSAGE AT A DESIRED TIME WITH AN ALARM
- SELECT THE MESSAGE YOU WANT TO PLAY BACK
- ENTER THE ALARM SETTING MODE
- PLAYING BACK A MESSAGE AT A DESIRED TIME WITH AN ALARM (CONTINUED)
- SET THE ALARM DATE AND TIME. TO PLAY BACK ON A DESIRED DATE
- TO PLAY BACK ONCE A WEEK
- TO PLAY BACK AT THE SAME TIME EVERY DAY
- SELECT THE ALARM TIME
- SELECT THE ALARM PLAYBACK
- PRESS THE JOG LEVER TOWARD MENU TO EXIT THE MENU MODE
- WHEN THE SET DATE AND TIME COMES
- TO CANCEL THE ALARM SETTING
- TO CHECK THE ALARM SETTING
- TURNING OFF THE OPR INDICATOR (LED)
- TO TURN ON THE OPR INDICATOR
- PREVENTING ACCIDENTAL OPERATION — HOLD FUNCTION
- TO CANCEL THE HOLD FUNCTION
- TIP
- USING AN ADDING RECORDING
- TO PROHIBIT TO ADD A RECORDING
- CHANGING THE SETTINGS — MENU
- CHANGING THE SETTINGS — MENU (CONTINUED)
- USING THE "DIGITAL VOICE EDITOR" SOFTWARE
- USING THE "DIGITAL VOICE EDITOR" SOFTWARE — MENU (CONTINUED)
- SYSTEM REQUIREMENTS
- PRECAUTIONS
- ON POWER
- ON SAFETY
- ON HANDLING
- ON NOISE
- ON MAINTENANCE
- BACKUP RECOMMENDATIONS
- TROUBLESHOOTING
- TROUBLESHOOTING (CONTINUED)
- IF AN ERROR MESSAGE WITH A NUMBER IS DISPLAYED
- SYSTEM LIMITATIONS
- SPECIFICATIONS
- INDEX TO PARTS AND CONTROLS
- FRONT
- INDEX TO PARTS AND CONTROLS (CONTINUED)
- REAR
- INDEX
- A
- B
- C
- D
- E
- F
- H
- L
- M
- INDEX (CONTINUED)
- P
- R
- S
- T
- U
- V
Brand : SONY
Model : ICD-SX25VTP
Category : Dictaphone