
USB-DS12 - Computerzubehör Sabrent - Kostenlose Bedienungsanleitung
Finden Sie kostenlos die Bedienungsanleitung des Geräts USB-DS12 Sabrent als PDF.


| Produkttyp | USB 3.0 zu SATA/IDE Festplattenadapter |
| Modell | USB-DS12 |
| Marke | Sabrent |
| Unterstützte Laufwerke | 2,5" / 3,5" / 5,25" (IDE & SATA) |
| Schnittstelle zum Computer | USB 3.0 (abwärtskompatibel zu USB 2.0) |
| Stromversorgung | Externes Netzteil (im Lieferumfang) |
| Lieferumfang | Adapter, USB-Kabel, Netzteil, Bedienungsanleitung |
| Funktionen | Datenübertragung, Backup, Klonen von Festplatten |
| Kompatible Betriebssysteme | Windows 2000/XP/Vista/7 und höher |
| Initialisierung neuer Laufwerke | Erforderlich über Datenträgerverwaltung (NTFS formatieren) |
| Jumper-Einstellungen (IDE) | Auf Master setzen (ggf. Slave oder Cable Select) |
| Besonderheiten | Unterstützt 2,5" IDE über kurzen Anschluss, 3,5" IDE über langen Anschluss und IDE-Stromkabel |
| Anzeige | Laufwerk muss im Betrieb vibrieren/drehen |
| Fehlerbehebung | Anderen USB-Port oder Computer testen |
| Wartung | Keine besondere Wartung erforderlich |
| Reinigung | Nur mit trockenem Tuch reinigen |
| Sicherheitshinweise | Vor Feuchtigkeit schützen, nur mit beiliegendem Netzteil betreiben |
| Reparierbarkeit | Keine reparierbaren Teile; bei Defekt Gerät ersetzen |
| Gewicht (ca.) | 150 g |
| Abmessungen (ca.) | 100 x 50 x 20 mm |
Häufig gestellte Fragen - USB-DS12 Sabrent
Benutzerfragen zu USB-DS12 Sabrent
0 Frage zu diesem Gerät. Beantworten Sie die, die Sie kennen, oder stellen Sie Ihre eigene.
Eine neue Frage zu diesem Gerät stellen
Laden Sie die Anleitung für Ihr Computerzubehör kostenlos im PDF-Format! Finden Sie Ihr Handbuch USB-DS12 - Sabrent und nehmen Sie Ihr elektronisches Gerät wieder in die Hand. Auf dieser Seite sind alle Dokumente veröffentlicht, die für die Verwendung Ihres Geräts notwendig sind. USB-DS12 von der Marke Sabrent.
BEDIENUNGSANLEITUNG USB-DS12 Sabrent

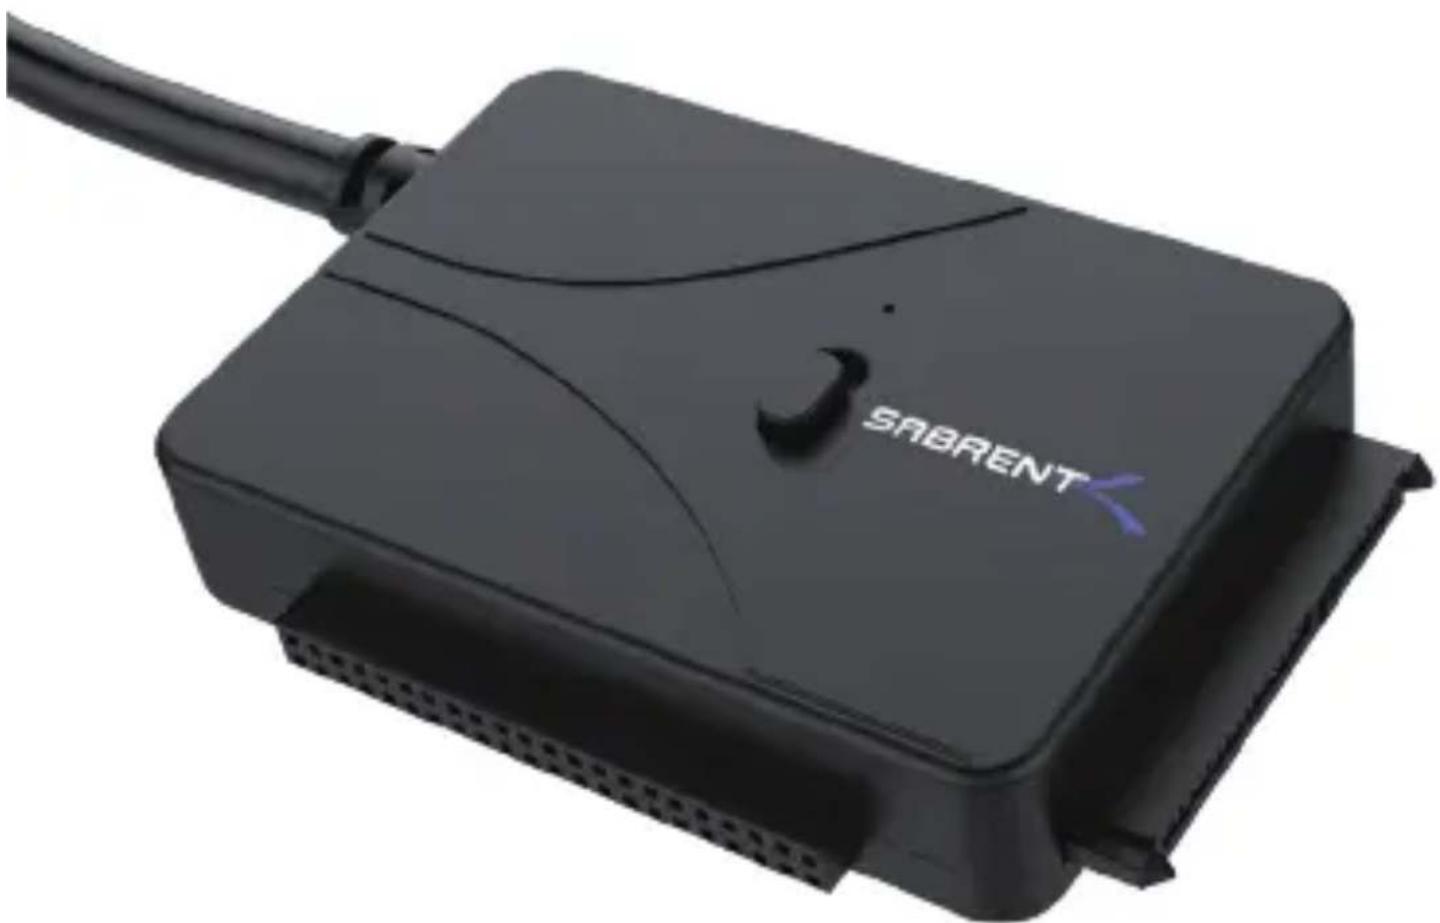
USB 3.0 TO SATA/IDE 2.5"/3.5"/5.25" HARD DRIVE ADAPTER
natural_image
Close-up of a black SABRENT device with a cable, showing internal components and connector (no readable text beyond brand name)USER MANUAL
Package Contents
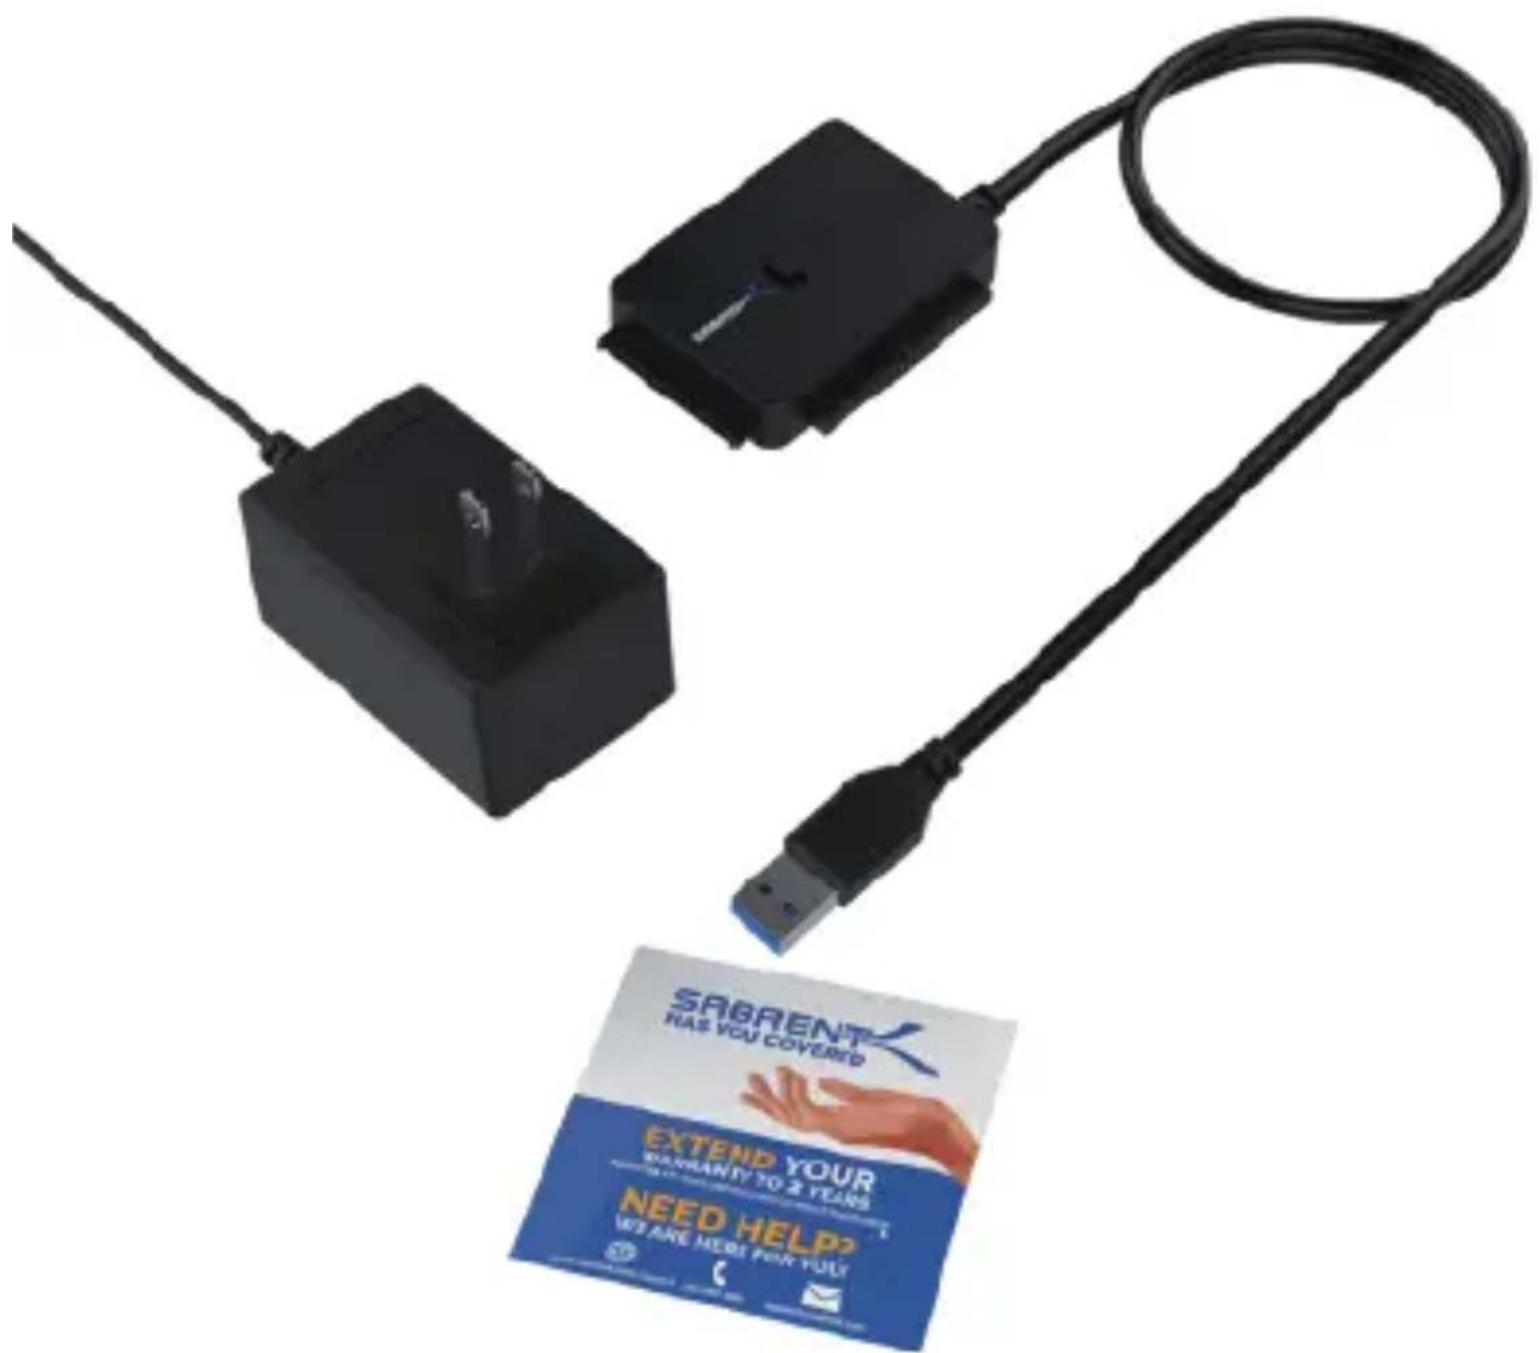
Before You Get Started

2.5 inch Notebook IDE Hard Drive Port


3.5 inch IDE Power Cable Port
Installation Guide For
2.5" Notebook IDE Hard Drive
How to distinguish between IDE and SATA Hard Drive

natural_image
Line drawing of a rectangular electronic device with a black circular top and multiple ports (no text or symbols)SATA Hard Drive

natural_image
Line drawing of a rectangular electronic component with a coiled spring and internal channel (no text or symbols)IDE Hard Drive

- Connect the short 2.5" IDE connector from the Sabrent adapter to the pins on your 2.5" Hard Drive. Note the keyed pin and slot and make sure that the drive and the device line up properly and are securely connected.
Please Note: When you remove ahard drive from an existing laptop, you may need to first remove the outer cage and sometimes an additional converter that is covering the IDE or SATA connectors. (The hard drive is in a cage that needs to be removed, and there is a converter covering the pins.)

natural_image
Simple line drawing of a desktop computer with monitor and tower (no text or symbols)
natural_image
Pure diagram of a USB connector with internal cable (no text or symbols)- Connect the USB cable from the Hard Dive Adapter to an available USB port on your computer.
- Connect the power adapter to the Power port of the Sabrent adapter and turn on the power.
Installation Guide for
3.5" Desktop IDE Hard Drive
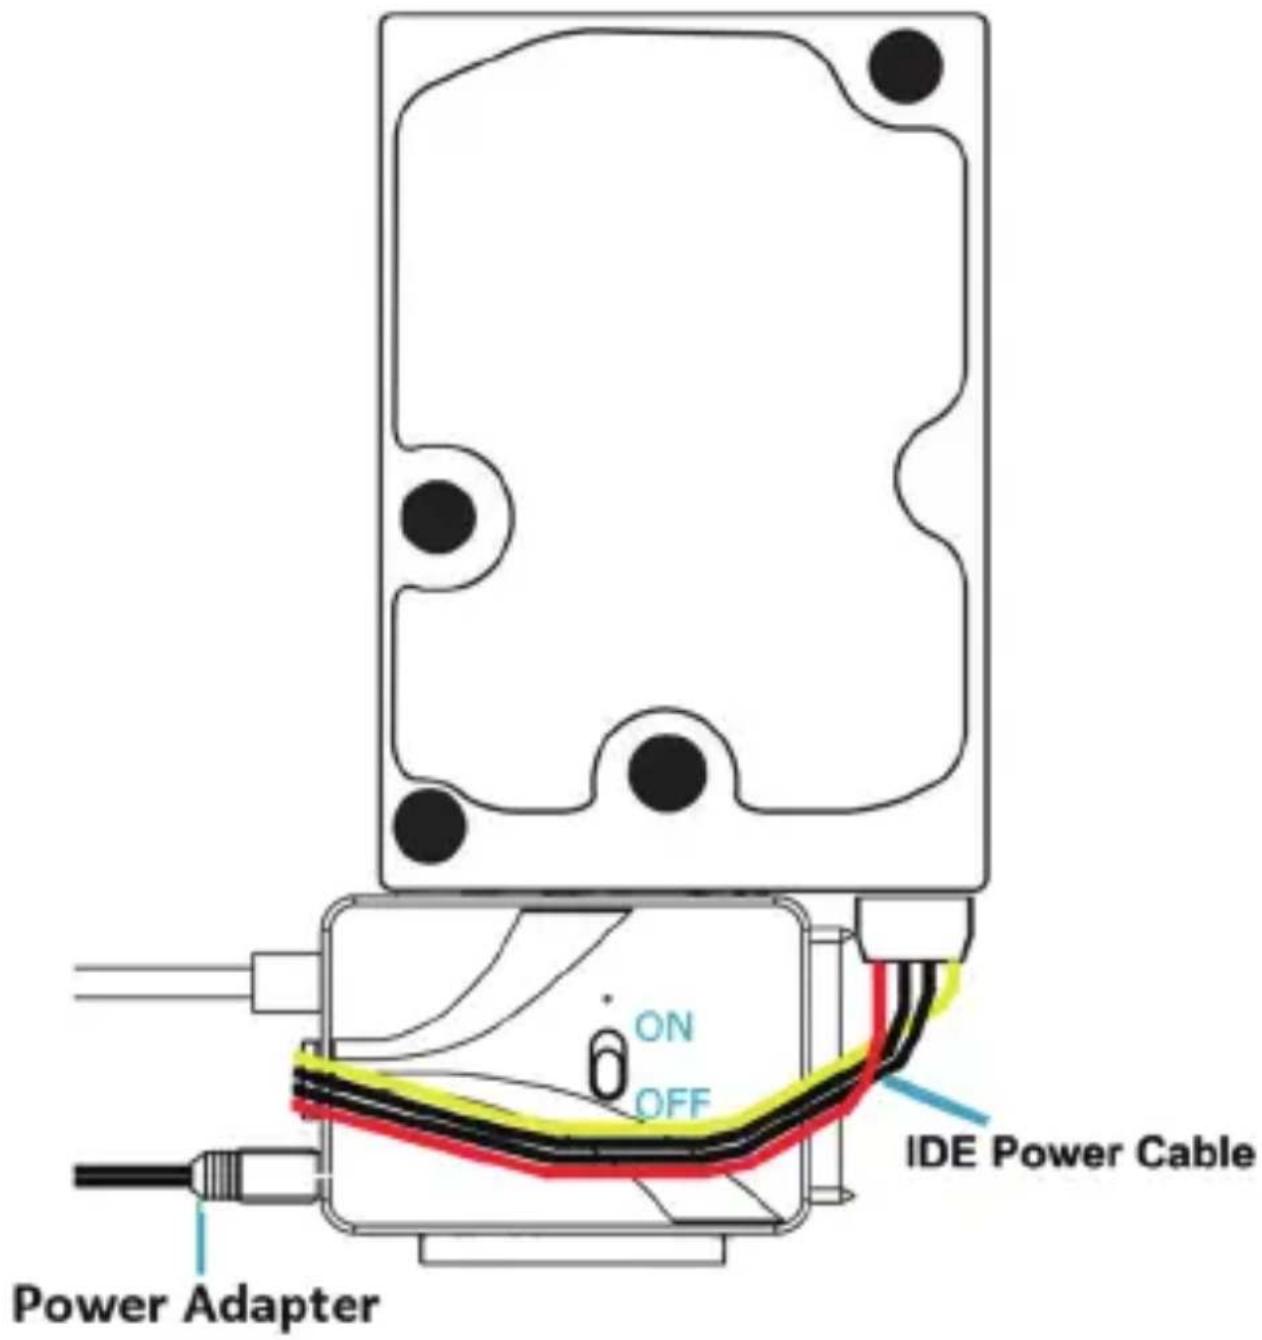
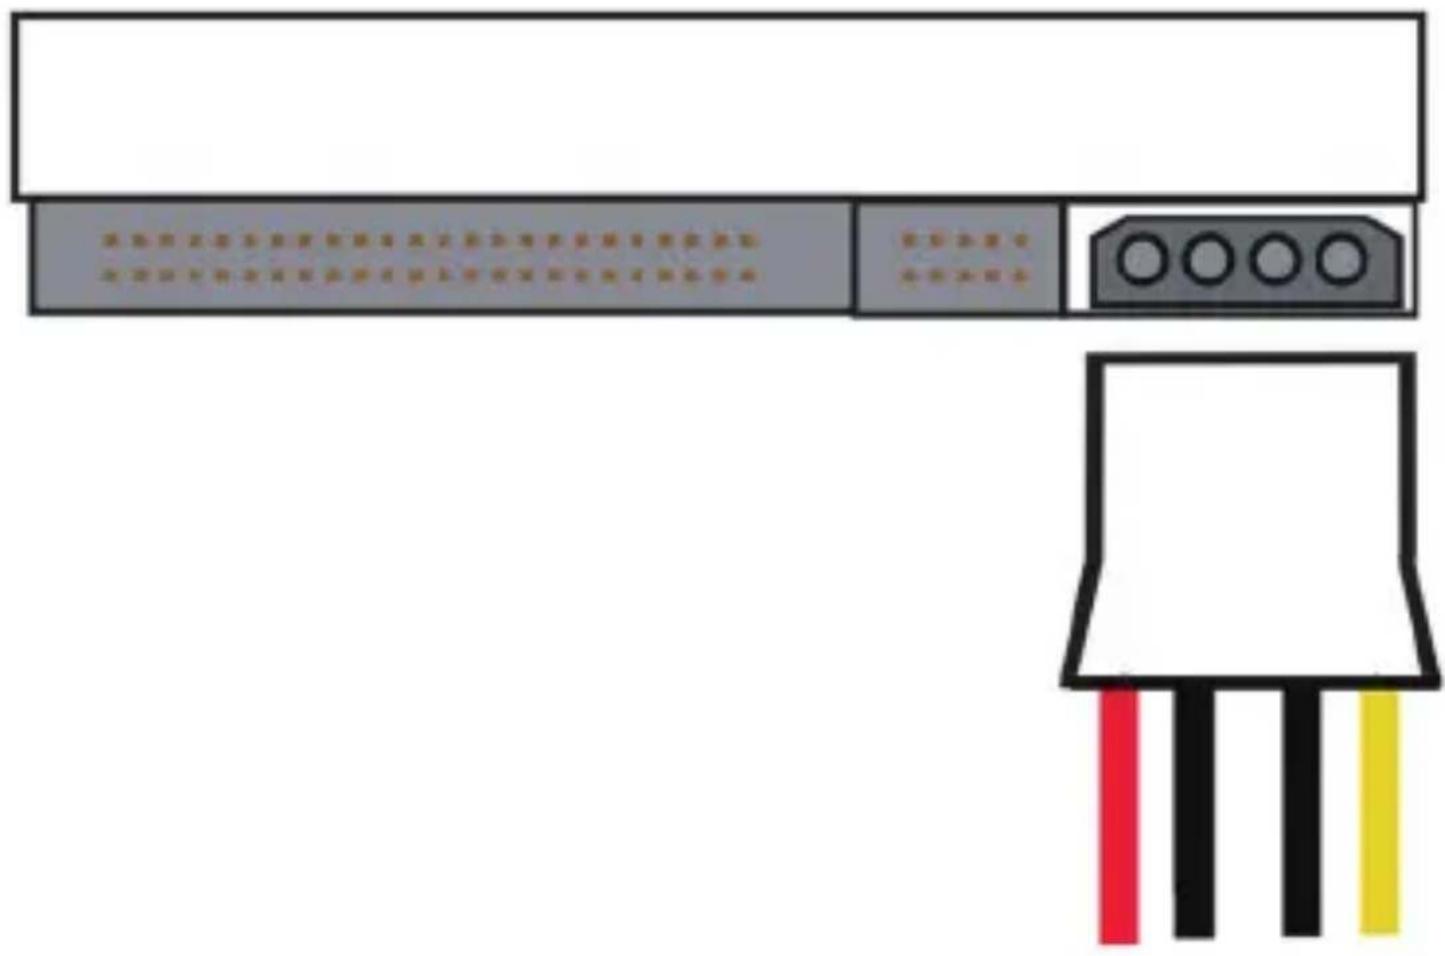
- Most 3.5" IDE Hard Drives have jumpers. Make sure they are set to Master Only. (Note: Please refer to the drive manufacturer's website for more information regarding your specific hard drive model.)
natural_image
Pure electrical connector pinout diagram without any text or symbols- One end of the IDE Power Cable is connected to the hard disk, and the other end is connected to the Sabrent adapter.
- Connect the long 3.5 inch IDE connector to the pins on your hard drive. Note the keyed pin and slot and make sure that the drive and the device line up properly and are securely connected.

natural_image
Simple icon of a desktop computer with monitor and tower (no text or symbols)
natural_image
Diagram of a USB connector with internal switch symbol and two leads (no text or labels)- Connect the USB cable from the Sabrent converter to a USB port on your computer.
- Connect the power adapter to the Power port of the Sabrent adapter and turn on the power.
Installation Guide For
2.5"/3.5" SATA Hard Drive

- Connect the Sabrent adapter to the SATA Hard Disk Drive.
- Connect the USB cable from the Sabrent adapter to a USB port on your computer.
- Connect the power adapter to the Power port of the Sabrent adapter and turn on the power.

natural_image
Simple icon of a desktop computer with monitor and tower (no text or symbols)
natural_image
Pure diagram of a USB connector with internal cable (no text or symbols)The Hard Drive should now spin/vibrate, indicating that the Hard Drive is powering up. If the Hard Drive does not spin, it may indicate that the hard drive itself is no longer working. Quite often, older laptops or desktops that have failed may also have a malfunctioning hard drive. Only working drives can be accessed.
A drive letter should appear in MY COMPUTER, indicating that the Hard Drive has mounted and the data is accessible. if the drive cannot be accessed:
- Try connecting to a different USB port on the computer (Sometimes rear ports work more reliable than front panel ports)
- Try connecting to a different computer.
- Try using a different Hard Drive.
if that still does not work, that my indicate that the Adapter itself is not working and needs to be replaced. if 2.5" drives work but 3.5" does do not, this may indicate that the power supply has failed.
Hard Drive Initialization
For Windows 2000/XP/VISTA/7, no drives or software are necessary.
If the Hard-Drive is brand new you may need to initialize it first in order to cause the Drive Letter to appear:

- Click the Start button, right-click on "My Computer", and select "Manage".
2. Click on "Disk Management".

- Locate the drive in the right column and right-click on the drive and click "New Simple Volume".

- At the following prompt, click "Next".

5. Click "Next".

Specify Volume Size
Choose a volume size that is between the maximum and minimum sizes.
Maximum disk space in MB: 1907727
Minimum disk space in MB: 8
Simple volume size in MB:

< Back
Next >
Cancel
- Assign a drive letter to the drive, then click "Next".

- Click on "Format this volumn with the following setting" Change the "File system" to "NTFS". Change the "Volume lable" to what you want to the drive to be named. Click the checkbox for "Perform a quick format". Click "Next".
New Simple Volume Wizard

Format Partition
To store data on this partition, you must format it first.
Choose whether you want to format this volume, and if so, what settings you want to use.
Do not format this volume
Format this volume with the following settings:
File system:
NTFS
Allocation unit size:
Default
Volume label:
Sabrent
√ Perform a quick format
Enable file and folder compression
< Back
Next >
Cancel
- Click "Finish". Windows will now begin formatting and initializing the disk.

| Volume | Layout | Type | File System | Status | Capacity | Free Space | % Free |
| (C) | Simple | Basic | NTFS | Healthy (Boot, Page File, Crash Dump, Primary Partition) | 148.90 GB | 92.12 GB | 62 % |
| Driver (D) | Simple | Basic | CDFS | Healthy (Primary Partition) | 443 MB | 0 MB | 0 % |
| System (E) | Simple | Basic | NTFS | Healthy (Primary Partition) | 1963.01 GB | 1862.87 GB | 106 % |
| System Reserved | Simple | Basic | NTFS | Healthy (System, Active, Primary Partition) | 100 MB | 71 MB | 71 % |

- Open "My Computer" and verify that the drive shows up properly.

If the drive has already been formatted, you can skip these steps.
- Check the "Device Manager" to make sure the "USB mass Storage Device" driver appears under the "Universal Serial Bus Controllers" section. Also check that the drive shows up under "Disk drives" as a "(Hard drive model number) USB Device". There should be no error message in your Device manager, such as a bold? or !.
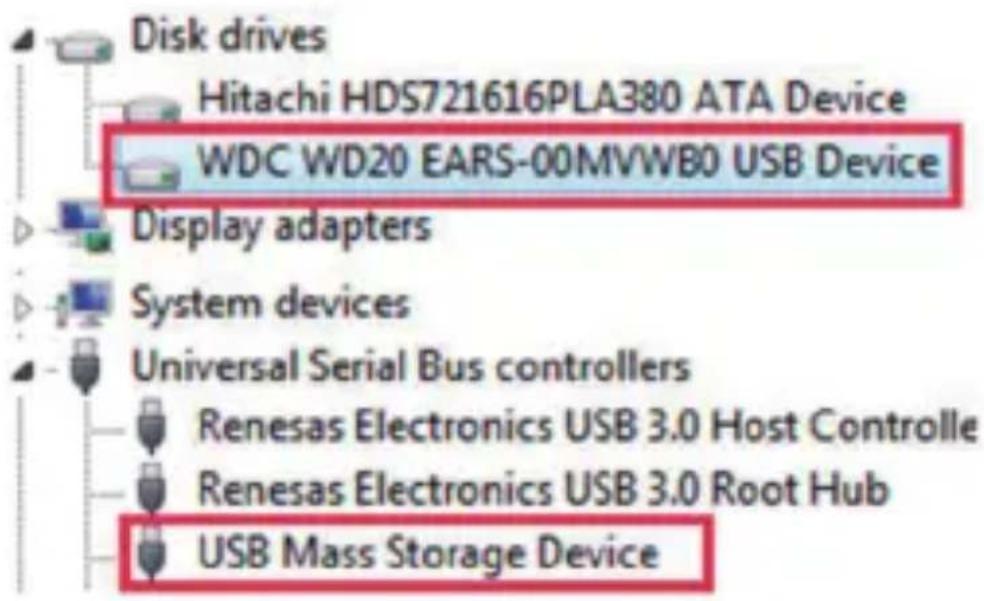
- You may also need go change the HDD settings from Dynamic to Basic, then format NTFS, and give it a drive letter, but you should back up the data on your drive before doing this. To convert the disk from Dynamic to Basic follow the instructions at the link included.
http://sabrent.com/support/knowledgebase.php?article=58
- Please Note: Make sure to disable disk drive password protection
Frequently Asked Questions:
- My drive died or was damaged in my previous computer. Will it work with this adapter?
This adapter is the equivalent of plugging in the drive directly into your computer's IDE or SATA port. If the drive was damaged to the point where it doesn't work when plugged directly into the computer, then it is likely that it will not work using this adapter.
- I set my IDE drive's Jumper to the Master setting, but it still doesn't show up on my computer.
Usually you will have to set the Jumper to Master, but depending on the specific drive and the specific settings of the computer, you may have to set it to Slave or Cable Select.
- My drive doesn't show up on my computer, but it has data and works elsewhere.
Make sure you are connecting the Hard Drive int the correct sequence: First connect the power supply, and then connect the USB Cable to the computer.
PLEASE CONTACT OUR TECHNICAL SUPPORT TEAM FOR ADDITIONAL TROUBLESHOOTING





- USB 3.0 TO SATA/IDE 2.5"/3.5"/5.25" HARD DRIVE ADAPTER
- Package Contents
- Before You Get Started
- How to distinguish between IDE and SATA Hard Drive
- Installation Guide for
- 3.5" Desktop IDE Hard Drive
- 2.5"/3.5" SATA Hard Drive
- Hard Drive Initialization
- Click on "Disk Management".
- Click "Next".
- Specify Volume Size
- Format Partition
- PLEASE CONTACT OUR TECHNICAL SUPPORT TEAM FOR ADDITIONAL TROUBLESHOOTING
Marke : Sabrent
Modell : USB-DS12
Kategorie : Computerzubehör