
Mizar - Computermaus CM Storm - Kostenlose Bedienungsanleitung
Finden Sie kostenlos die Bedienungsanleitung des Geräts Mizar CM Storm als PDF.


| Produkttyp | Gaming-Maus |
| Marke | CM Storm (Cooler Master) |
| Modell | Mizar |
| Sensor | Optisch |
| DPI-Bereich | 200 bis 8200 DPI (einstellbar) |
| DPI-Stufen | 4 Level je Profil |
| Abfragerate (Polling Rate) | 100, 111, 125, 142, 166, 186, 200, 250, 333, 500, 1000 Hz (einstellbar) |
| Tastenanzahl | 8 programmierbare Tasten |
| Makro-Unterstützung | Ja, mit Bibliothek und Import/Export |
| Beleuchtung | LED, 4 Modi: Immer an, Aus, Atmen, Rapid Fire |
| Helligkeit einstellbar | Ja (Schieberegler) |
| Onboard-Speicher | Ja (Profile auf der Maus speicherbar) |
| Anschluss | USB |
| Kabellänge | ca. 1,8 m |
| Gewicht | ca. 128 g |
| Abmessungen (L x B x H) | ca. 125 x 70 x 40 mm |
| Kompatibilität | Windows |
| Entsorgung | Elektroschrott (nicht im Hausmüll) |
| Lieferumfang | Maus, Bedienungsanleitung |
Häufig gestellte Fragen - Mizar CM Storm
Benutzerfragen zu Mizar CM Storm
0 Frage zu diesem Gerät. Beantworten Sie die, die Sie kennen, oder stellen Sie Ihre eigene.
Eine neue Frage zu diesem Gerät stellen
Laden Sie die Anleitung für Ihr Computermaus kostenlos im PDF-Format! Finden Sie Ihr Handbuch Mizar - CM Storm und nehmen Sie Ihr elektronisches Gerät wieder in die Hand. Auf dieser Seite sind alle Dokumente veröffentlicht, die für die Verwendung Ihres Geräts notwendig sind. Mizar von der Marke CM Storm.
BEDIENUNGSANLEITUNG Mizar CM Storm
Main Button Assignment
Default
![BUTTON ASSIGNMENT 1 Left click 2 Right click 3 Mouse wheel click 4 IE forward 5 IE backward 6 DPI [+] 7 DPI [-]](/content/2026/05/901337/images/27bc43587a0fe55205f4dac20c7ca6ba441ad84a0c18917a1f8951e5b1bfa779.jpg)
The default button assignments may be changed from the above configuration.
Button assignment choices

| Disable - | Disable a button. |
| Left Click - | Set a button to function as the Left Click.Note: One button must always be set as the left click button. |
| Right Click - | Set a button to function as Right Click. |
| Mouse Wheel Click - | Set a button to function as the Mouse Wheel Click. |
| IE forward - | Set a button to function as the browser page forward button. |
| IE backward - | Set a button to function as the browser page backward button |
| Macro - | Set a Stored Macro to execute when button is pressed. |
| Keyboard - | Set a button to perform a selected key stroke. |
| Multimedia - | |
| Web Browser - | Set a button to open the default web browser. |
| E-Mail - | Set a button to open the default email program. |
| Media Player - | Set a button to open the default media player program. |
| Play/Pause - | Set a button to function as the play/pause media function. |
| Stop - | Set a button to function as the stop media function. |
| Next Track - | Set a button to function as the next track media function. |
Multimedia (cont)-
Prev Track -
Set a button to function as the previous track media function.
Mute -
Set a button to function as the volume mute media function.
Volume up
Set a button to function as the volume up media function.
Volume down
Set a button to function as the volume down media function.
Calculator
Set a button to open the Windows calculator program.
My Computer
Set a button to open the Windows My Computer file explorer.
Rapid fire -
Keyboard -
Set a button to function as a repeating key stroke.

Press a key on the keyboard.
Enter a number for the amount of times to repeat the keystroke.

Click ENTER to store the key stroke and the number of times to repeat the key stroke.
Profile -
Profile 0 -
Set a button to switch to Profile 0(default).
Profile 1 -
Set a button to switch to Profile 1.
Profile 2 -
Set a button to switch to Profile 2.
Profile 3 -
Set a button to switch to Profile 3.
Next profile -
Set a button to switch to the next Profile.
Previous profile -
Set a button to switch to the previous Profile.
Profile cycle[+] -
Set a button to switch to the next Profile. Hold to cycle forward through the profiles.
Profile cycle[-] -
Set a button to switch to the previous Profile. Hold to cycle forward through the profiles.
DPI -
DPI level 1 -
Set a button to switch to the active Profile's Level 1 DPI setting.
DPI level 2 -
Set a button to switch to the active Profile's Level 2 DPI setting.
DPI level 3 -
Set a button to switch to the active Profile's Level 3 DPI setting.
DPI level 4 -
Set a button to switch to the active Profile's Level 4 DPI setting.
DPI [+] -
Set a button to increase one DPI level for the active Profile.
DPI [-] -
Set a button to decrease one DPI level for the active Profile.
DPI cycle [+] -
Set a button to cycle DPI from level 1 to level 4.
DPI cycle [-] -
Set a button to cycle DPI from level 4 to level 1.
Sensor on/off -
Set a button to turn the mouse sensor on and off.
DPI Settings
1) Select the ADVANCED tab from top of software
2) Each profile allows for the setting of 4 DPI levels to switch to in that profile.
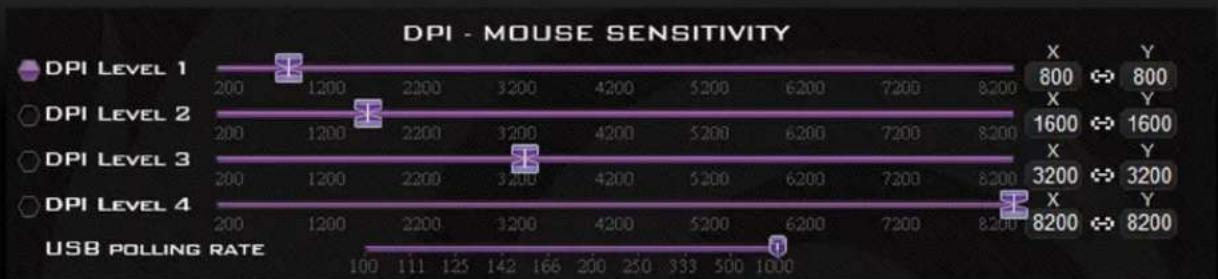
3) Choose which DPI Level you want to set the DPI.
4) Slide the slider on the bar right to increase the mouse sensitivity. The further the tab is to the right, the faster the mouse cursor will move.
Settings can be set from 200 to 8200 DPI.
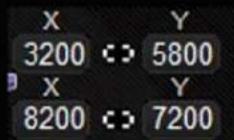
5) Click the ✦ between the numerical values to adjust the DPI settings for the X axis separate from the Y Axis.
Adjust the Axis at same time.

Adjust the Axis separately.
USB Polling Rate
The polling rate (or report rate) determines how often the mouse sends information to your computer.
Increasing the polling interval will improve precision at the tradeoff of using more CPU resources.
1) Select the ADVANCED tab from top of software
2) Slide the tab to set the Polling Rate for the mouse.
LED Modes and Other Settings
LED Mode
There are 4 LED MODES
Always On- The LEDs on the mouse are always on.(DEFAULT)
Always Off- The LEDs are turned off.
Breathing- The LEDs will increase brightness and decrease brightness.
Rapid Fire- The LEDs will light up depending on the activity of the mouse.
1) Select the ADVANCED tab from top of software
2) Select the LED MODE that you wish to use.

LED Brightness
Adjust how bright the LEDs will appear.
Slide the slider to the right to increase the brightness.
Slide the slider to left to decrease the brightness.

OS Sensitivity
Mouse sensitivity is how far the mouse moves with a certain movement.
OS Double Click Speed
Adjust this setting to change how fast the left and right click buttons must be pressed to register a Double Click.
The lower the number, the slower the presses to complete a Double Click will be. Set the number higher to require faster presses of the buttons to complete a Double Click.
Button Response Time
The delay time between the clicking of the mouse button and the system executing the button press.
Set the slider to the left for faster response time.
Lock OS Settings
Locks the software from controlling the settings. The Operating system mouse settings will control how the mouse functions.
Angle Snapping
Angle snapping is a type of path correction in mouse sensors that assists in drawing horizontal or vertical lines (useful for graphical applications). The sensor will predict when you attempt to draw a straight line and correct any movement that drifts away from that line. This is not an accurate representation of your movement, so most people prefer to play without prediction.
Profile Settings
Save Profile to Computer
1) Open the Mizar software by double clicking the icon in the Start Menu.

3) By Default, there are no Profiles stored on the computer.

5) This will move the stored profile on | the mouse to the computer to be saved.

2) Click on the Profiles Tab to edit your Profiles.

4) Click on Profile in NAME panel and then Click the

Load Profile from Computer
1) Open the Mizar software by double clicking the icon in the Start Menu.

3) Highlight the Saved profile to upload to the Mizar.

5) Click → to transfer the Profile from computer to the Mizar.
2) Click on the Profiles Tab to edit your Profiles.

4) Highlight the profile on the Mizar that is to be replaced by the Saved profile.
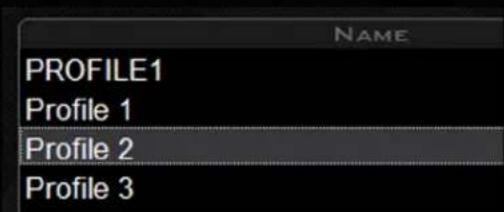
EXAMPLE:
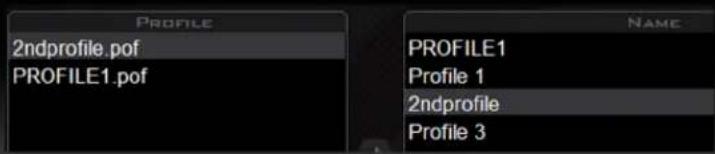
Spawn Mouse
Macro Setup Guide
Create a Macro
1) Open the Mizar software by double clicking the icon in the system tray

2) Click on the Macro Tab to edit your Macros

3) Click on new and give a name to the macro

4) Click on the Macro name in the list.
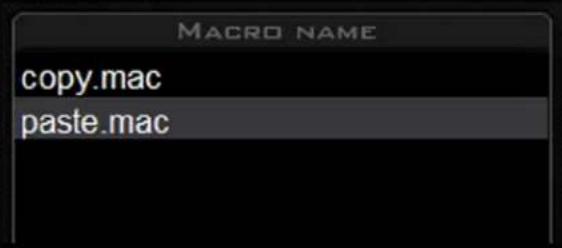
5) Click on . Execute your macro. In this example, we use the keyboard short-cut commands for copy.
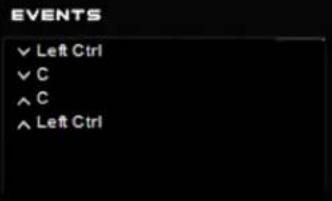
6) Click on . Click on The Macro is now stored.
Assign Macro to Mouse
1) Select the Profile to assign the macro to. 2) Choose a button to assign the macro to.
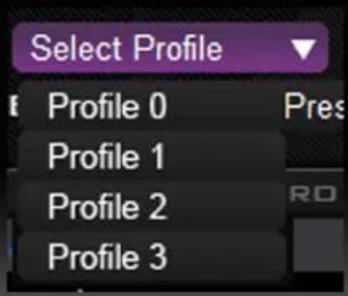

3) Select the execution type for the macro.
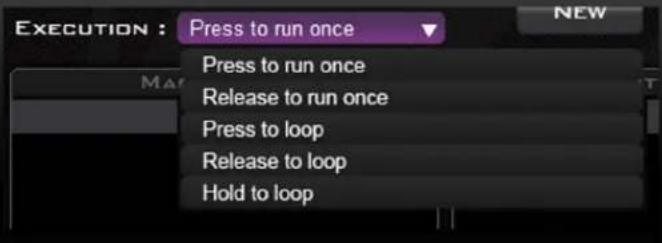
| Press to run once | - pressing the assigned button activates the programmed macro. |
| Release to run once | - pressing the assigned button and then releasing the button activates the programmed macro. |
| Press to loop | - pressing the assigned button down causes the programmed macro to repeat over and over until the assigned button is pressed again. |
| Release to loop | - pressing and releasing the assigned button causes the programmed macro to repeat over and over until the assigned button is released. |
| Hold to loop | - holding the assigned button down causes the programmed macro to repeat over and over until the assigned button is released. |
4) Set the delay between keystrokes.
If you wish to use the natural delay between the keystrokes, select the "With Time" on the setup.

To have a set delay between each keystroke, then choose the delay time from the dropdown.

Then press record button and the chosen delay time will be substituted for the natural delay time of the keystroke.
INSERT FUNCTIONS
INSERT :

Delay Cycle
The delay cycle can also be set by choosing the INSERT dropdown and selecting "delay(ms)
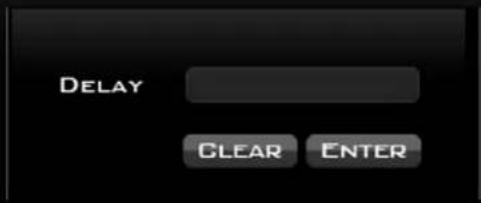
Enter in the delay time(in ms) and press ENTER. The delay will then be placed in line in the actions list.
Delay
42 ms
Keystroke
The keystroke function allows the input of single keyboard keystroke into the action list.
Choose "keystroik" and enter in the keystroke. The keystroke will appear in the on screen box.
KEYSTROKE
CLEAR
ENTER
**NOTE: The ALT and CTRL keys can not be programmed in this manner.
Mouse
The mouse function allows the input of basic mouse functions to be added to the action list.

Basic
The Basic function allows the input of commonly used functions into the action list.

Additional Commands
The Additional Commans allows for the use of some Windows short cut commands.

-Swap windows
Swap between windows as if using ALT + TAB function.
-Close Window
Close active window as if using ALT + F4.
-Lock PC
Lock your computer desktop as if using the lock function from the windows START menu.
-Open Explorer
Open Windows Explorer window.
-Run
Opens windows command prompt to run a program.
-Show Desktop
Minimizes all open windows to allow access to the desktop.
-Zoom in
Zoom in to increase size of viewing area.
-Zoom out
Zoom out to decrease size of viewing area.
Assign Macro to Mouse From Library
1) Open the Mizar software by double clicking the icon in the Start Menu.

3) Highlight the created Macro in the Macro Library column to copy it to the mouse.

2) Click on the LIBRARY Tab.

4) Select the Profile and the button on the Mizar to assign the macro to.

5) Click the ➕ to assign the highlighted Macro to the chosen Profile and button.
IMPORT/EXPORT
IMPORT
The Import function is used to import saved Macros to the Library.
EXPORT
The Export function is to export saved Macros from the Library.


- MAIN BUTTON ASSIGNMENT
- MULTIMEDIA (CONT)
- RAPID FIRE
- PROFILE
- DPI
- DPI SETTINGS
- USB POLLING RATE
- LED MODES AND OTHER SETTINGS
- LED MODE
- LED BRIGHTNESS
- OS SENSITIVITY
- OS DOUBLE CLICK SPEED
- BUTTON RESPONSE TIME
- LOCK OS SETTINGS
- ANGLE SNAPPING
- PROFILE SETTINGS
- SAVE PROFILE TO COMPUTER
- LOAD PROFILE FROM COMPUTER
- EXAMPLE
- SPAWN MOUSE
- MACRO SETUP GUIDE
- CREATE A MACRO
- ASSIGN MACRO TO MOUSE
- INSERT FUNCTIONS
- INSERT
- DELAY CYCLE
- KEYSTROKE
- MOUSE
- BASIC
- ADDITIONAL COMMANDS
- SWAP WINDOWS
- CLOSE WINDOW
- LOCK PC
- OPEN EXPLORER
- RUN
- SHOW DESKTOP
- ZOOM IN
- ZOOM OUT
- ASSIGN MACRO TO MOUSE FROM LIBRARY
- IMPORT/EXPORT
Marke : CM Storm
Modell : Mizar
Kategorie : Computermaus