Golden Bullet URB - Nicht kategorisiert K&K Sound - Kostenlose Bedienungsanleitung
Finden Sie kostenlos die Bedienungsanleitung des Geräts Golden Bullet URB K&K Sound als PDF.


Benutzerfragen zu Golden Bullet URB K&K Sound
0 Frage zu diesem Gerät. Beantworten Sie die, die Sie kennen, oder stellen Sie Ihre eigene.
Eine neue Frage zu diesem Gerät stellen
Laden Sie die Anleitung für Ihr Nicht kategorisiert kostenlos im PDF-Format! Finden Sie Ihr Handbuch Golden Bullet URB - K&K Sound und nehmen Sie Ihr elektronisches Gerät wieder in die Hand. Auf dieser Seite sind alle Dokumente veröffentlicht, die für die Verwendung Ihres Geräts notwendig sind. Golden Bullet URB von der Marke K&K Sound.
BEDIENUNGSANLEITUNG Golden Bullet URB K&K Sound

text_image
K&K SOUND NATURAL PICKUP POWERPRODUCT MANUAL
GOLDEN BULLET URB MICROPHONE
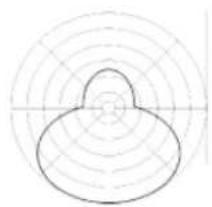
The Golden Bullet URB Microphone is a condensor microphone chosen specifically for its performance with the double bass. We picked this mic in cooperation with one of the most renowned double bass specialists, Bob Gollihur, because it combines great sound with excellent feedback resistance. It is unidirectional to help avoid rumble and undesirable bleed from other instruments. Amazingly light and small, it is mounted on the bridge using a special Velcro self-adhesive fastener and positioned using its six-inch gooseneck.
ATTACHING THE MICROPHONE
The mic is supplied with a piece of dual-lock (similar to Velcro) for mounting on your bridge. Cut a piece from the supplied dual-lock (the same length as the folded piece attached to the mic gooseneck) and, leaving the adhesive backing piece in place, attach it to one side of the dual-lock on the mic.
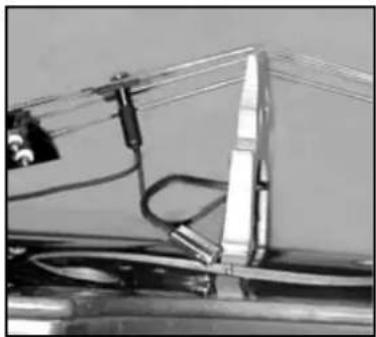
Since each bridge is different, the best placement requires some experimenting. You may wish to place the adhesive piece on the inside or on the bottom of the leg of the bridge. Before you remove the protective strip, use both hands to temporarily hold it in place and adjust the mic gooseneck.
Once you have found the best location, remove the protective strip and press the adhesive against the bridge. The bridge surface should be clean and clear of any rosin for the best results. Our testing has shown that a good location for the mic is on the G-string side of the bass, with the mic at an angle towards the F-hole, as shown in the photograph. Directly aiming at the sound hole is not recommended. Of course, the gooseneck allows you to try a wide range of positions.
natural_image
Close-up of a mechanical or electrical component with wires and connectors (no visible text or symbols)Note: Tight bass cases may catch on or move the mic. If necessary, you may wish to place another piece of dual-lock elsewhere on your bridge to temporarily relocate the mic when you pack the bass.
JACK INSTALLATION
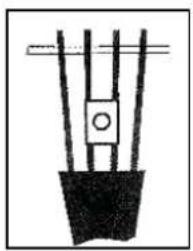
Put the mounting plate between any two pairs of strings as shown in the illustration. Make sure all cables are placed so they do not vibrate against the bass or each other.
natural_image
Simple line drawing of a suspended object with vertical rods and a central square (no text or symbols)USING THE PREAMP
Remove the screw and remove the lid to install a 9-volt battery. The microphone must be used with the companion preamplifier to work. The preamp supplies the necessary power to the microphone. To prolong battery life, remove the output cable when not in use.
TECHNICAL DATA
Preamp: 3"x3.5"x1.25"
Pickup channel input impedance: 1 MegOhm
Output impedance: 10K ohms
Input: Stereo 1/4"
Outputs: 1/4"
Power: 9-volt battery
Supplied with stereo connecting cable
natural_image
Simple circular diagram with concentric rings and a central oval shape, no text or symbols present.
line
| Frequency | Value | | --------- | ----- | | 20Hz | 0 | | 50 | ~0.8 | | 100 | ~0.9 | | 200 | ~0.9 | | 500 | ~0.85 | | 1kHz | ~0.85 | | 2 | ~0.85 | | 5 | ~0.9 | | 10 | ~0.9 | | 20kHz | ~0.7 |Frequency Diagram
Unidirectional Polar Pattern