
CQ-RDP101 - Autoradio PANASONIC - Kostenlose Bedienungsanleitung
Finden Sie kostenlos die Bedienungsanleitung des Geräts CQ-RDP101 PANASONIC als PDF.


Benutzerfragen zu CQ-RDP101 PANASONIC
0 Frage zu diesem Gerät. Beantworten Sie die, die Sie kennen, oder stellen Sie Ihre eigene.
Eine neue Frage zu diesem Gerät stellen
Laden Sie die Anleitung für Ihr Autoradio kostenlos im PDF-Format! Finden Sie Ihr Handbuch CQ-RDP101 - PANASONIC und nehmen Sie Ihr elektronisches Gerät wieder in die Hand. Auf dieser Seite sind alle Dokumente veröffentlicht, die für die Verwendung Ihres Geräts notwendig sind. CQ-RDP101 von der Marke PANASONIC.
BEDIENUNGSANLEITUNG CQ-RDP101 PANASONIC
RDS Basics
The following functions are available when receiving RDS stations.
PS Display
(Program Service Name)
The name of station is displayed instead of the frequency.
CT Service
(Clock Time)
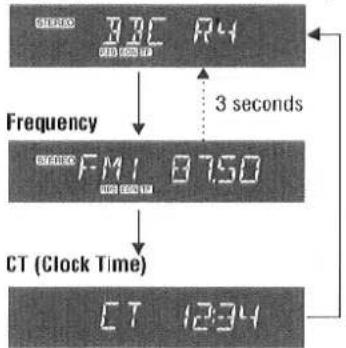
When receiving an RDS station, the CT (Clock Time) service automatically adjusts the time. "NO CT" is displayed in areas where CT service is not available. (→ Page 13 for Clock Set)
AF
(Alternative Frequency)
When reception is poor, an RDS station broadcasting the same program is tuned in automatically.
AF Mode
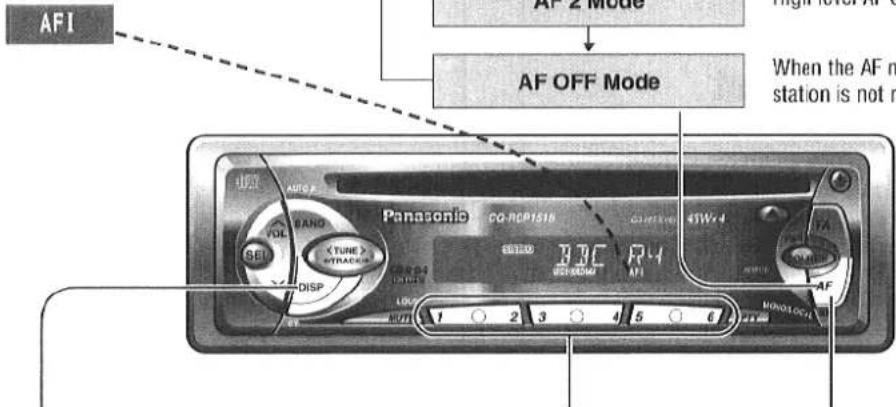
Press [AF] to select one of the following AF modes:
text_image
AFI AF 2 Mode High level AF AF OFF Mode When the AF m station is not r 1 2 3 4 5 6 OFF AFC VOLT SEED X TURE X INTRACER DISP CO-RCP1518 3000 3000 R4 45W-4 MUNO LOCT 1 2 3 4 5 6Low level AF operating sensitivity.
High level AF operating sensitivity.
When the AF network of an RDS station is not required
Display Change
Press [DISP] to change the display as follows.
Auto Preset Memory
Auto preset memory works only for RDS stations when AF mode is on.
REG (Region) Mode
Changes the selection range of AF, Best Station Research and PI Seek. Press and hold [AF] (REG) when AF mode is on.
PS (Program Service Name)(Default)
flowchart
graph TD
    A["800 MHz R4"] --> B["Frequency"]
    B --> C["FM1 8750"]
    C --> D["CT (Clock Time)"]
    D --> E["CT 12:34"]
    C --> F["3 seconds"]
Best Station Research
Best Station Research is automatically activated to store the station with the best reception for each preset button.
PI (Program Identification) Seek
If Best Station Research does not work properly and reception is poor when tuning in a preset station, press the same preset button again. PI Seek will search an AF station with good reception.
REG ON
The frequency is changed only for programs within the region.
REG OFF
The frequency is changed also for programs outside the region.
Traffic Announcements
Some RDS FM stations periodically provide traffic information.
TP
(Traffic Program)
Broadcasting of traffic information
TA
(Traffic Announcements)
Radio announcements on traffic conditions
TA Mode
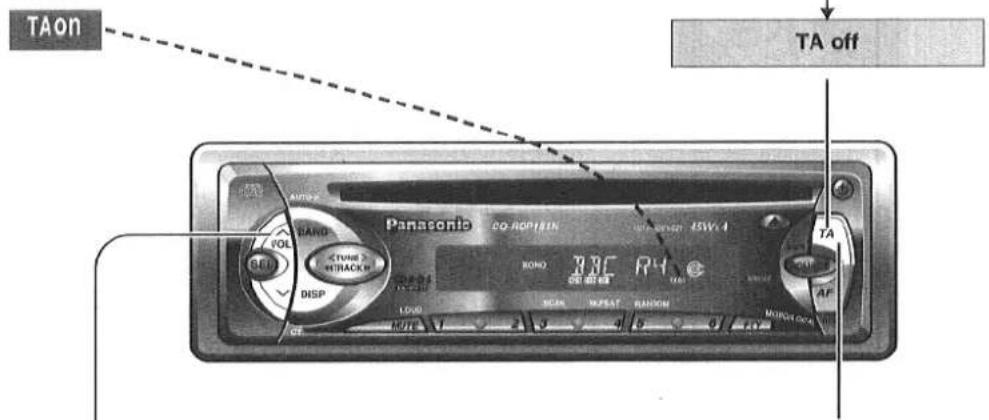
Press [TA] to switch TA mode on and off.
text_image
TAon TA off VOL BAND TUBE 2 MTRACK DISP RHO RRC R4 TA TAG TAG TAG TAG TAG TAG TAG TAG TAG TAG TAG TAG TAG TAG TAG TAG TAG TAG TAG TAG TAG TAG TAG TAG TAG TAG TAG TAG TAG TAG TAG TAG TAG TAG TAG TAG TAG TAG TAG TAG TAG TAG TAG TAG TAG TAG TAG TAG TAG TAG TGND TAG TAG TAG TAG TAG TAG TAG TAG TAG TAG TAG TAG TAG TAG TAG TAG TAG TAG TAG TAG TAG TAG TAG TAG TAG TAG TAG TAG TAG TAG TAG TAG TAG TAG TAG TAG TAGTA Volume Set
(Volume Level : 0 to 40)
Press [AVOL] or [VVOL] while receiving traffic announcements.
The TA volume differs from the regular volume (by up to 5 levels).
TA in CD Mode
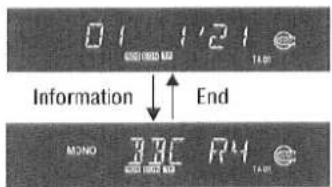
When TA is on, CD playback will be interrupted by FM traffic announcements.
text_image
01 1'21 TAR Information ↑ End MONO 38C R4 TARMuting in TA Mode
To listen only to Traffic Announcements while muting, press and hold [TA] for more than 2 seconds. To cancel the muting TA on mode (muting in TA mode → TA mode), take either following two.
- Press [TA] again.
- Press [AVOL] several times.
Note: To switch to TA off, press [TA] again and hold for more than 2 seconds.
TP Auto Search
When reception of a TP station is poor, TP Auto Search will automatically search for a TP station with better reception.
Seek and Preset Station
TP Seek Tuning
Seek tunes only TP stations. (→ Page 8)
Auto TP Station Preset
The 6 strongest TP stations are saved in memory. (→ Page 9)
Tuning in a TP Preset Station (→ Page 9)
CQ-RDP151/RDP101N
PTY Reception (Program Type)
RDS FM stations provide a program type identification signal.
Example: news, rock, classical music, etc.
PTY Mode
Press [PTY] to switch PTY display mode on or off.
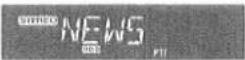
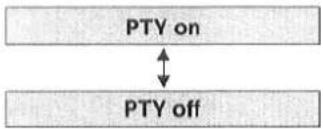
flowchart
graph TD
    A["PTY on"] <--> B["PTY off"]
When there is no corresponding program type,
"NO PTY" is display
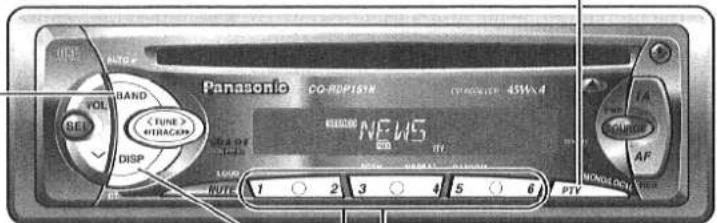
text_image
Panasonic CO-RDP15M (45W x 4) VOLT BAND SETPTY Selection
1 Press [>TUNE] to change the program type as follows. (<TUNE): opposite direction)
| SPEECH | → | MUSIC | → | NEWS | → | AFFAIRS | → |
| INFO | → | SPORT | → | EDUCATE | → | DRAMA | → |
| CULTURES | → | SCIENCE | → | VARIED | → | POP M | → |
| ROCK M | · | M.O.R.M | · | LIGHT M | · | CLASSICS | · |
| OTHER M | → | WEATHER | → | FINANCE | → | CHILDREN | → |
| SOCIAL A | → | RELIGION | → | PHONE IN | · | TRAVEL | · |
| LEISURE | → | JAZZ | → | COUNTRY | → | NATIONAL | → |
| OLDIES | → | FOLK M | → | DOCUMENT | → |
2 Select the desired program and press [BAND]. Seek will start to tune in to a station broadcasting the selected program type.
PTY display in Swedish
Press [DISP] to switch the PTY display language as follows.
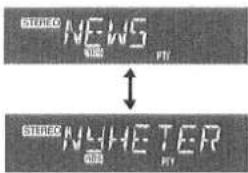
text_image
STUDIO NEWS ↑ STUDIO NHETERPTY Search
1 Select a program type by pressing the preset button. The preset program type appears on the display for 5 seconds.
(Example) Press preset button [1].
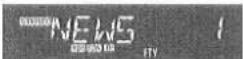
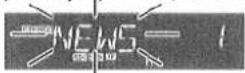
2 Press the same preset button again (or press [BAND]) to tune in the desired program type station.
(Example) Press preset button [1] again.
PTY Preset Change
1 Select a program type by using PTY Selection or pressing PTY Preset buttons.
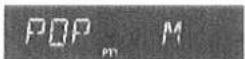
2 Press and hold one of the buttons [1] to [6]. (Example) Press and hold preset button [2]
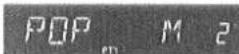
PTY Type Preset
Program types are stored in memory under preset buttons [1] to [6] as shown in the table below.
To tune in the desired program type, press any of preset buttons [1] to [6].
| 1 | News | NEWS | NEWS |
| 2 | Speech | SPEECH 2 | AFFAIRS / INFO EDUCATE / DRAMA CULTURES / SCIENCE VARIED / WEATHER FINANCE / CHILDREN SOCIAL A / RELIGION PHONE IN / TRAVEL LEISURE / DOCUMENT |
| 3 | Sport | SPORT 3 | SPORT |
| 4 | Pop. Music | POP M 4 | POP.M |
| 5 | Classic Music | CLASSICS 5 | CLASSICS |
| 6 | Other Music | MUSIC 6 | ROCK M / M.O.R.M LIGHT M / OTHER M JAZZ / COUNTRY NATIONAL / OLDIES FOLK M |
EON (Enhanced Other Networks)
When EON data is received, the EON indicator lights and the TA and AF functions are expanded as follows.
TA : Traffic information from the current and other network stations can be received.
AF : The frequency list of preset RDS stations is updated by EON data.
EON enables the radio to make fuller use of RDS information. It constantly updates the AF list of preset stations, including that currently tuned in to. For example, if you preset a station far from home, you will later be able to receive the same station at an alternative frequency, or any other station serving the same program. EON also keeps track of locally available TP stations for quick reception.
Emergency Announcement Reception
When an emergency announcement is broadcast, the unit is automatically switched to receiving that broadcast. If this happens in a mode other than radio mode (CD mode) or in Muting in TA mode, "ALARM" blinks on the display.
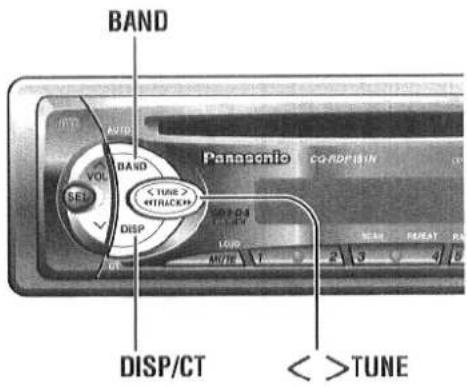
When RDS CT service is not available, set the clock as follows.
text_image
BAND INTU AUTO VOL R BAND SET < TUNE >AM Band
① Press [BAND] to change to AM band.
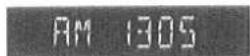
(AM band)
② Press [DISP].
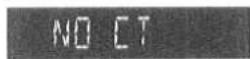
(Clock display)
Hours
③ Press and hold [DISP].
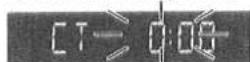
(hour blinks)
4 Press [>TUNE] or [<TUNE].
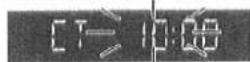
(hour set)
Minutes
⑤ Press [DISP].
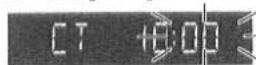
-minute blinks)
⑥ Press [>TUNE] or [<TUNE].
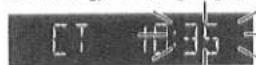
(minute set)
⑦ Press [DISP].
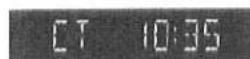
(end)
Note: Hold [>TUNE] or [<TUNE] to change numbers rapidly.
CQ-RDP151/RDP101N
Disc Insert and Playback
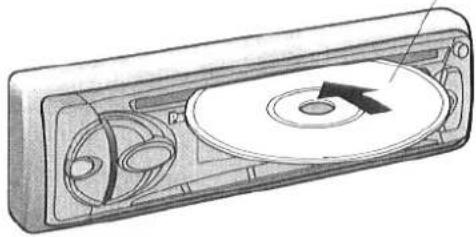
Insert a disc.
Playback starts automatically.
Caution: Make sure that the disc indicator is off before loading a disc. If the disc indicator is on, eject the disc.
Disc indicator

Stop and Disc Eject
Press [▲] to stop CD play and eject the disc.
Label side
natural_image
Diagram of a CD or DVD drive showing front and back views with no text or symbolsCaution: Only 12cm CD is available for this unit.
ONLY USE DISCS CARRYING THE LABEL SHOWN ON THE RIGHT

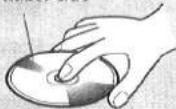
How to hold the CD
- Do not touch the underside of the disc.
- Do not make scratches on the disc.
- Do not bend disc.
- When not in use, keep CD in the case.
Label side
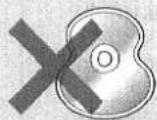
Do not use irregularly shaped CDs
Do not leave discs in the following places:
- Direct sunlight
● Dirty, dusty and damp area - Near car heaters
- Seats and dashboards
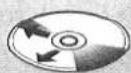
Disc Cleaning
Use a dry, soft cloth to wipe from the center outward.
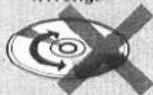
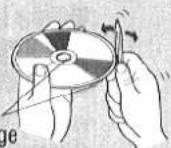
Caution on New Discs
A new disc may have rough edges on its inner and outer perimeter. These may cause malfunction.
Remove the rough edges using a pencil, etc.
Rough edge
Listening to a CD
Mode Selection
Press [SOURCE] to change to the CD mode.
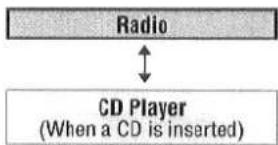
flowchart
graph TD
    A["Radio"] <--> B["CD Player\n(When a CD is inserted)"]
Track Selection
[▶▶TRACK] : Advance to the next track.
[◀◀TRACK]: Back to beginning of the current track.
Back to previous track.
(Press twice)
Track Search
Press and hold
[▶▶TRACK]: Fast forward
[◀◀TRACK]: Fast backward Release to resume the regular CD play.
Various Ways of Listening
Random Play
Scan Play
Repeat Play
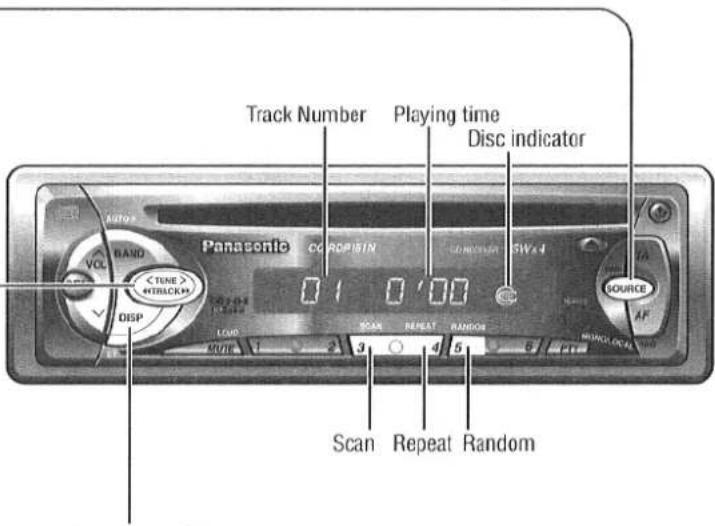
text_image
Track Number Playing time Disc indicator VOL BAND < TUNE > (TRACKIN) DISP Panasonic CC PROPISIN SWx4 0 1 0 '00 LOAD SCAN REPEAT RANDOM 3 5 Source AF MANGO/LOCK Scan Repeat RandomDisplay Change
Press [DISP] to switch to the clock display. Press again to cancel.
CT 12:34
Error Display Messages for CD Player
- Press [5] (RANDOM). All tracks are played in random order.
- Press again to cancel.
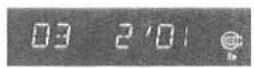
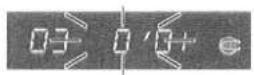
- Press [3] (SCAN). The first 10 seconds of each track on the disc are played in sequence.
- Press again to cancel.
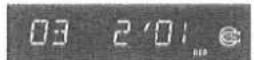
- Press [4] (REPEAT). The current track is repeated.
- Press again to cancel
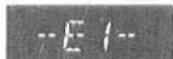
CD is dirty or inverted. The disc will be ejected automatically.
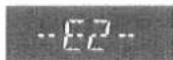
CD is scratched. The disc will be ejected automatically.
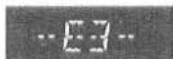
CD stops operating for some reason. Please eject the CD. If the error message E3 is still displayed, please turn off the car engine (ACC off) and remove the fuse from the battery lead (yellow) for 1 minute or more. Then reinstall the fuse.
CQ-RDP151/RDP101N
Preparation
- Before installation, check the radio operation with antenna and speakers.
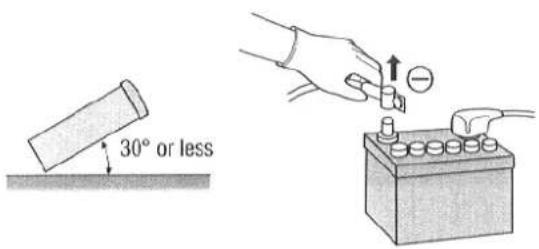
- Disconnect the cable from the negative (−) battery terminal (see caution below).
- Unit should be installed in a horizontal position with the front end up at a convenient angle, but not more than 30°.
text_image
30° or lessCaution: Do not disconnect the battery terminals of a car with trip or navigational computer since all user settings stored in memory will be lost. Instead take extra care with installing the unit to prevent shorts.
Dashboard Installation Installation Opening
The unit can be installed in any dashboard having an opening as shown at right. The dashboard should be
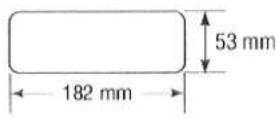
4.5 mm - 6 mm thick in order to be able to support the unit.
Installation Precautions
This product should be installed by a professional installer, if possible.
In case of difficulty, please consult your nearest authorized Panasonic Service Center.
- This system is to be used only in a 12-volt, DC battery system (car) with negative ground.
- Follow the electrical connections carefully ( Page 20) Failure to do so may result in damage to the unit.
- Connect the power lead (red) after all other connections are made.
- Be sure to connect the battery lead (yellow) to the positive terminal (+) of the battery or fuse block (BAT) terminal.
- Insulate all exposed wires to prevent short circuiting.
- Secure all loose wires after installing the unit.
- Please carefully read the operating and installation instructions of the respective equipment before connecting it to this unit.
- We strongly recommend that you wear gloves for installation work to protect yourself from injuries.
First complete the electrical connections, and then check them for correctness.(→ Page 20)
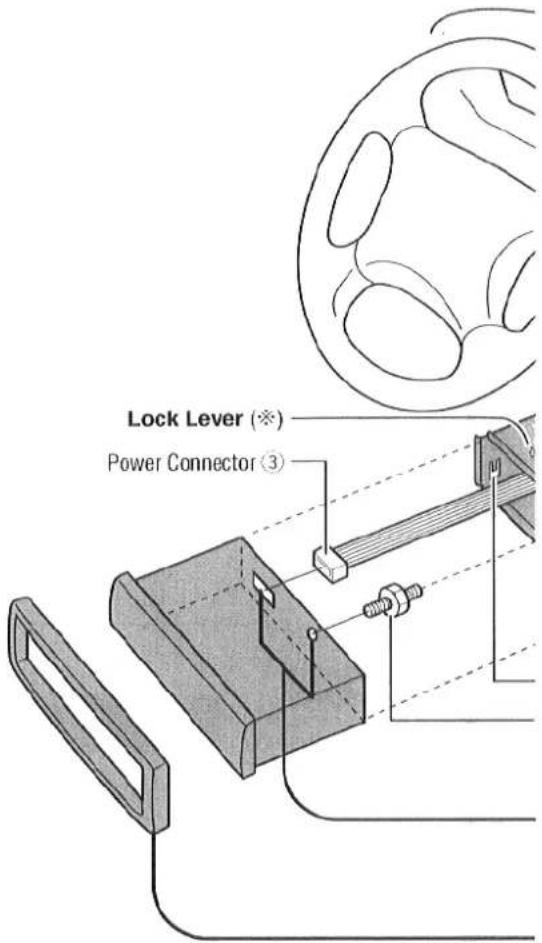
text_image
Lock Lever (※) Power Connector ③- When bending the mounting tab of the mounting collar with a screwdriver, be careful not to injure your hands and fingers.
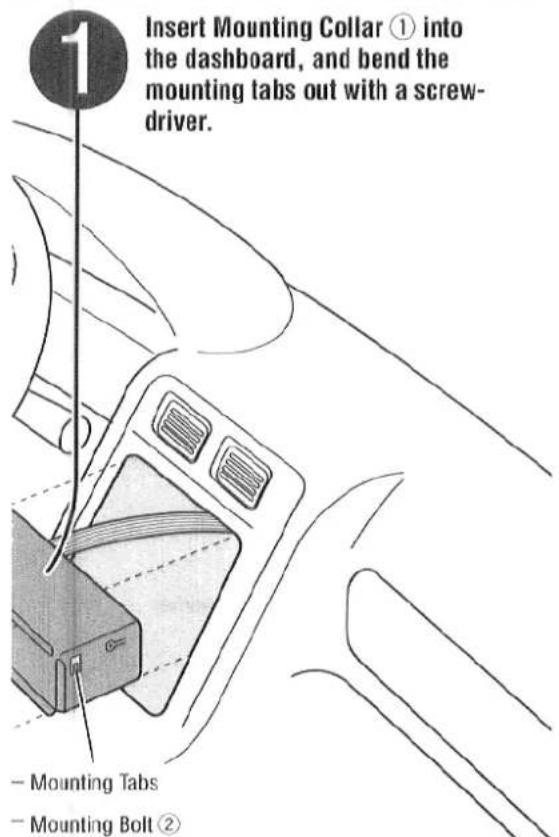
text_image
Insert Mounting Collar ① into the dashboard, and bend the mounting tabs out with a screw-driver. - Mounting Tabs - Mounting Bolt ②
Secure the rear of the unit.
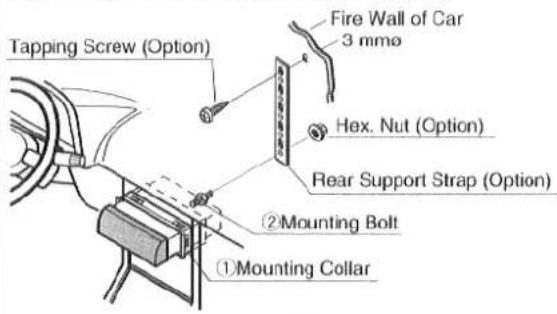
After fixing Mounting Bolt ② and Power Connector ③, fix the rear of the unit to the car body by either method (a) or (b) shown at right.

Insert Trim Plate ⑤.

After installation reconnect the negative (−) battery terminal.
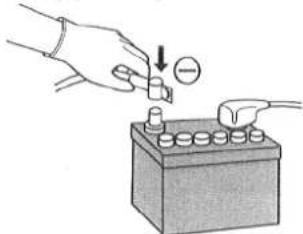
natural_image
Illustration of a hand using a tool to press down a battery component (no text or symbols present)Supplied Hardware
| No. | Item | Diagram | Q'ty |
| 1 | Mounting Collar |  | 1 |
| 2 | Mounting Bolt (5 mmø) | [323Z] | 1 |
| 3 | Power Connector |  | 1 |
| 4 | Removable Face Plate Case |  | 1 |
| 5 | Trim Plate |  | 1 |
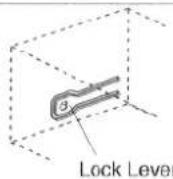
Make sure that the lock lever (※) is flush with the mounting collar (not projecting outward).
(a) Using the Rear Support Strap (Option)
text_image
Tapping Screw (Option) Fire Wall of Car 3 mmø Hex. Nut (Option) Rear Support Strap (Option) ②Mounting Bolt ①Mounting Collar(b) Using the Rubber Cushion (Option)
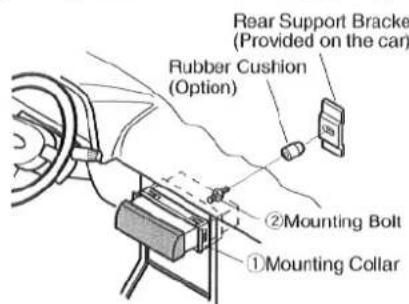
text_image
Rear Support Bracket (Provided on the car) Rubber Cushion (Option) ②Mounting Bolt ①Mounting CollarCQ-RDP151/RDP101N
To Remove the Unit
1 Remove the removable face plate.
(a) Press the release button [↑].
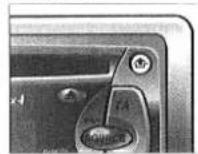
(b) Pull on the right side of the unit.
2 Remove the trim plate ⑤ with a screwdriver.
3 Pull out the unit while pushing down the lock lever with a screwdriver.
4 Remove the unit pulling with both hands.
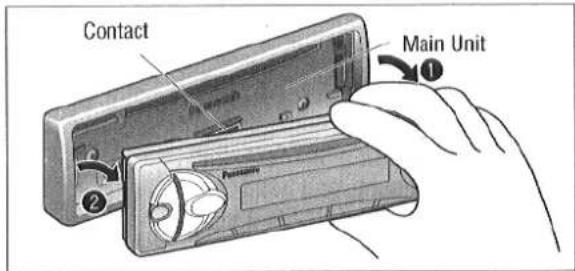
text_image
Contact Main Unit ①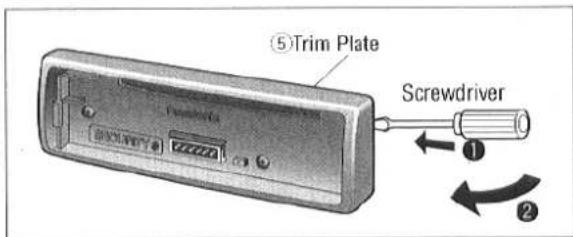
text_image
⑤Trim Plate Screwdriver ① ②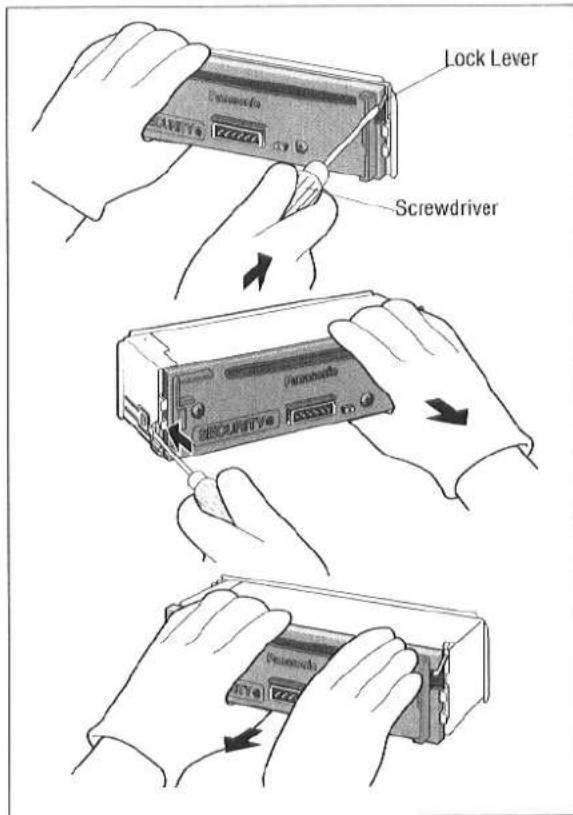
text_image
Lock Lever ScrewdriverCautions:
- Do not touch the contacts on the face plate or on the main unit, since this may result in poor electrical contacts.
- If dirt or other foreign substances get on the contacts, wipe them off with clean and dry cloth.
This unit is equipped with a removable face plate. Removing this face plate makes the radio totally inoperable.
Place Removable Face Plate into Case
① Switch off the power of the unit.
② Remove the removable face plate. (→ Page 18)
③ Insert the removable face plate the removable face plate case until you hear a "click". Place the face plate into the case and take it with you when you leave the car.
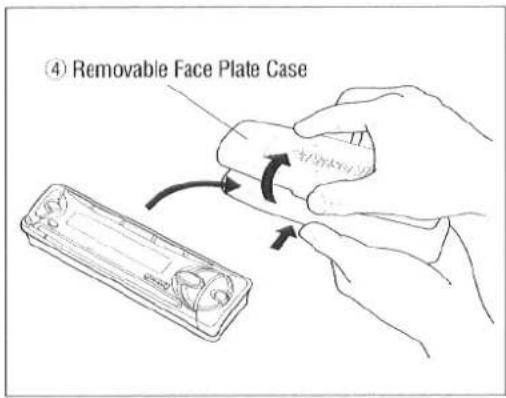
text_image
(④ Removable Face Plate Case)Cautions:
- This face plate is not water-proof. Do not expose it to water or excessive moisture.
- Do not remove the face plate while driving your car.
- Do not place the face plate on the dashboard or nearby areas where the temperature rises to high levels.
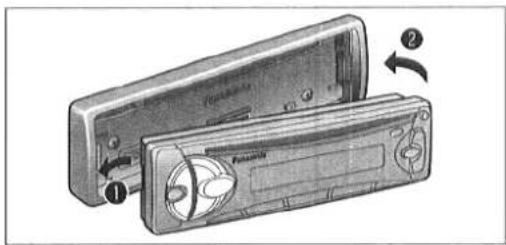
Install Removable Face Plate
① Slide the left side of the removable face plate in place.
② Press the right end of removable face plate until "click" is heard.
Panel Removal Alarm
This alarm sounds to warn you not to forget to remove the panel before leaving your car.
natural_image
Diagram of a portable electronic device with labeled parts and directional arrows indicating rotation (no text or symbols present)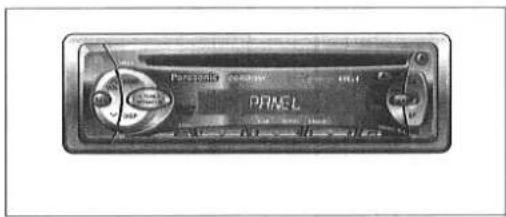
text_image
Panasonic CD-ROM PANCELCQ-RDP151/RDP101N
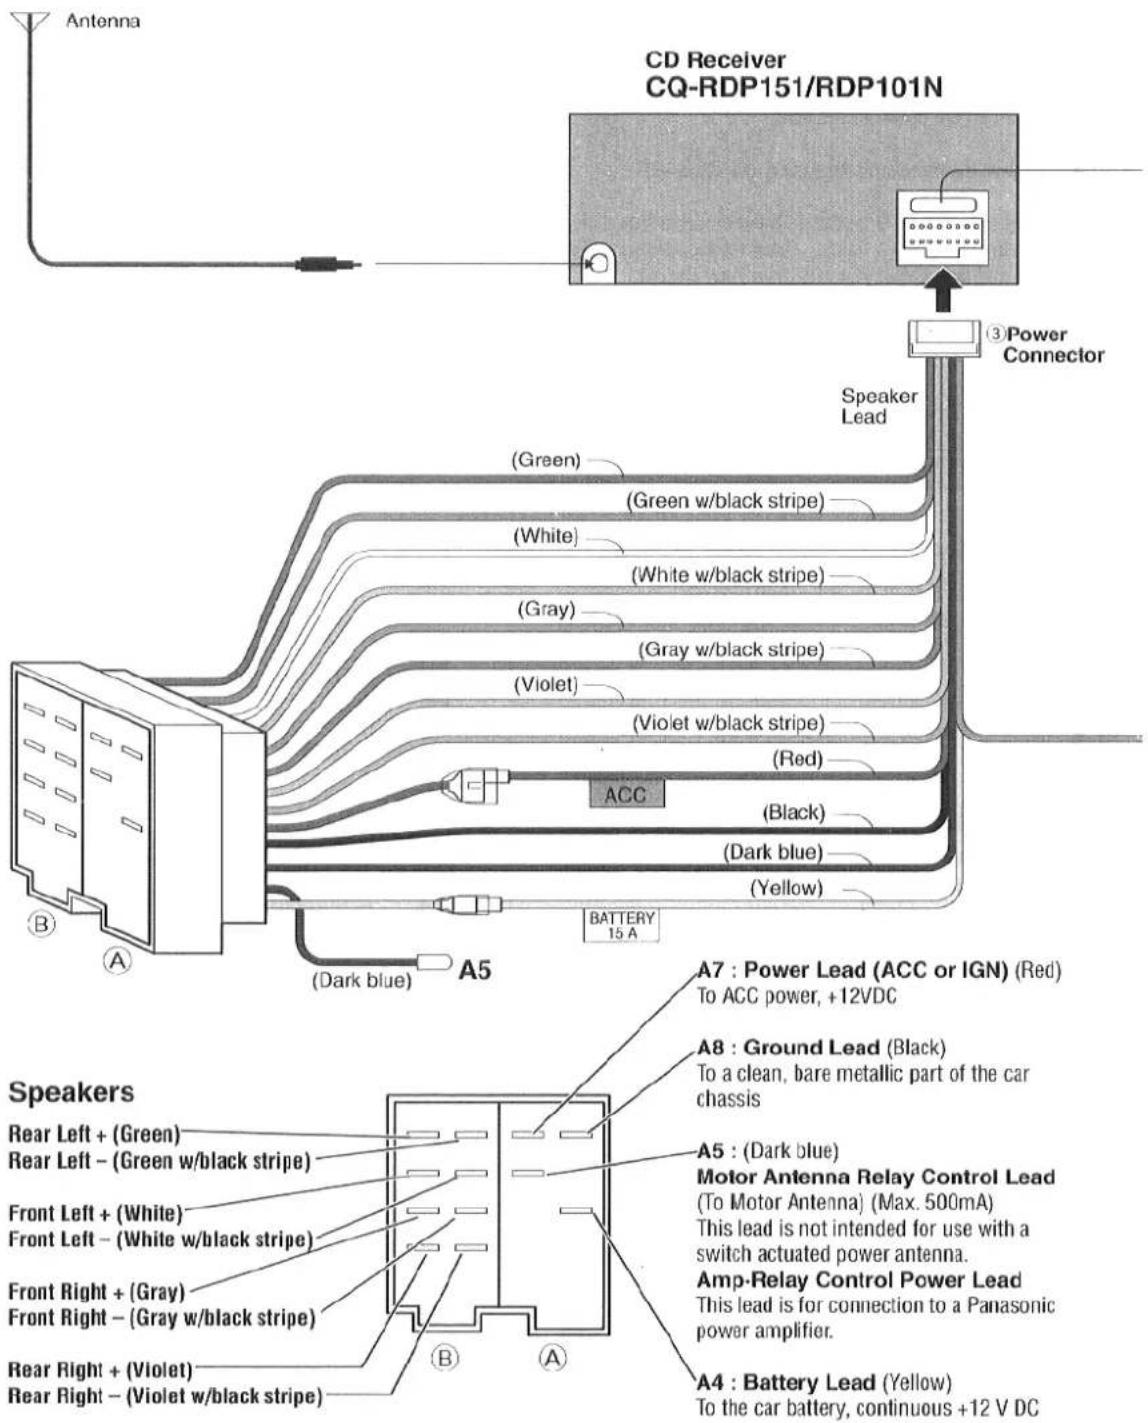
Cable Wiring Diagram
text_image
CD Receiver CQ-RDP151/RDP101N ③Power Connector Speaker Lead (Green) (Green w/black stripe) (White) (White w/black stripe) (Gray) (Gray w/black stripe) (Violet) (Violet w/black stripe) (Red) ACC (Black) (Dark blue) (Yellow) BATTERY 15 A (A5) (A7) : Power Lead (ACC or IGN) (Red) To ACC power, +12VDC Speakers A8 : Ground Lead (Black) To a clean, bare metallic part of the car chassis A5 : (Dark blue) Motor Antenna Relay Control Lead (To Motor Antenna) (Max. 500mA) This lead is not intended for use with a switch actuated power antenna. Amp-Relay Control Power Lead This lead is for connection to a Panasonic power amplifier. A4 : Battery Lead (Yellow) To the car battery, continuous +12 V DC Rear Left + (Green) Rear Left - (Green w/black stripe) Front Left + (White) Front Left - (White w/black stripe) Front Right + (Gray) Front Right - (Gray w/black stripe) Rear Right + (Violet) Rear Right - (Violet w/black stripe)Fuse (15 A)
If the fuse (rear panel) blows frequently, they may be something wrong with the unit. Consult your nearest Panasonic Service Center for service.
Cautions:
- Check the connectors provided on your car (see note on page 4 and 5) before connecting the system.
- This unit is designed for use in a car having a 12-volt negative ground battery system.
- To prevent damage to the unit, be sure to follow the connection diagram below.
- Strip about 5 mm of the lead ends for connection (only non-ISO connector cords).
- Do not insert the power connector into the unit until the wiring is completed.
- Be sure to insulate any exposed wires to prevent short circuiting with the car chassis. Bundle all cables, and prevent cable terminals from touching any metal parts.
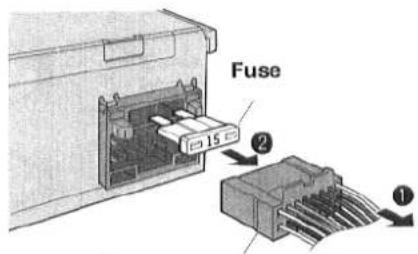
To remove the Fuse
text_image
Fuse 15 ② ①③ Power Connector
(Orange)
C1 : (Orange)
Telephone Mute Lead (\*)
Connect to the car telephone mute lead
Note: The telephone mute lead is only for connection to the radio mute lead. Output other than telephone will not be muted
Navi Mute Lead (\*\*)
To the Navi Mute lead of the Panasonic car navigation system.
* Telephone Mute
The sound from the speakers cannot be heard while the telephone conversation is in progress.
** Navi Mute
The sound from the speakers cannot be heard while the navigation guide is on.
Speaker Connections
Caution: Please follow the instructions given below. Failure to do so will cause damage to the unit and speakers.
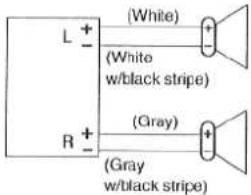
text_image
L + - (White) (White w/black stripe) R + - (Gray) (Gray w/black stripe)- Use ungrounded speaker only.
- The maximum speaker output should be 45 W or more. (If used with the optional power amplifier, the speaker output should be higher than the maximum amplifier output.)
● The speaker impedance should be 4 - 8 Ω. - This unit uses the BTCL circuit, so each speaker should be connected separately using parallel vinyl insulated cords.
- The speaker cords and the power amplifier unit should be kept away (about 30 cm apart) from the antenna and antenna extension cord.
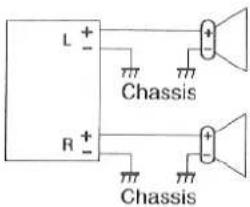
text_image
L + - Chassis R + - Chassis
text_image
L + - R + -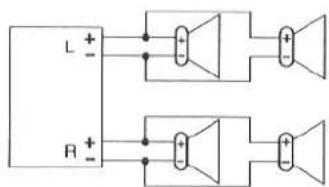
text_image
L + - R + -- Never connect the speaker cord to the body of the car.
- Do not use a 3-wire type speaker system having a common earth lead.
- Do not connect more than one speaker to one set of speaker leads.
Fuse
Use fuses of the same specified rating (15 A). Using different substitutes or fuses with higher ratings, or connecting the unit directly without a fuse, could cause fire or damage to the unit.
If the replacement fuse fails, contact your nearest authorized Panasonic Service Center.
Maintenance
Your product is designed and manufactured to ensure the minimum of maintenance. Use a soft cloth for routine exterior cleaning. Never use benzine, thinner, or other solvents.
| General | FM Stereo Radio | ||
| Power Supply | : DC 12 V (11 V - 16 V), Test Voltage 14.4 V, Negative Ground | Frequency Range | : 87.5 - 108 MHz |
| Usable Sensitivity | : 6 dB/μV(S/N 30 dB) | ||
| Stereo Separation | : 35 dB (at 1 kHz) | ||
| Tone Controls | : Bass; ±12 dB at 100 Hz | MW Radio | |
| Treble; ±12 dB at 10 kHz | Frequency Range | : 531 - 1.602 kHz | |
| Usable Sensitivity | : 28 dB/μV (S/N 20 dB) | ||
| Current Consumption | : Less than 2.5 A (CD mode, 0.5 W 4-Speaker) | LW Radio | |
| Maximum Power Output | : 45 W x 4 (at 4 Ω) | Frequency Range | : 153 - 279 kHz |
| Power Output | : 20 W x 4 (DIN45 324, at 4 Ω) | Usable Sensitivity | : 32 dB/μV (S/N 20 dB) |
| Speaker Impedance | : 4 - 8 Ω | CD Player | |
| Dimensions (Main Unit) | : 178(W) x 50(H) x 150(D) mm | Sampling Frequency | : 8 times oversampling |
| DA Converter | : 1 bit DAC System | ||
| Weight (Main Unit) | : 1.5 kg | Error Correction System | : Panasonic Super Decoding Algorithm |
| Pick-Up Type | : 3-beam | ||
| Light Source | : Semiconductor laser | ||
| Wavelength | : 780 nm | ||
| Frequency Response | : 20 Hz - 20 kHz (±1 dB) | ||
| Signal to Noise Ratio | : 96 dB | ||
| Total Harmonic Distortion | : 0.01 % (1 kHz) | ||
| Wow and Flutter | : Below measurable limits | ||
| Channel Separation | : 75 dB | ||
Note: Specifications and design are subject to modification without notice due to improvements.