
Pokemon Mystery Dungeon (3DS) - Videospiel NINTENDO - Kostenlose Bedienungsanleitung
Finden Sie kostenlos die Bedienungsanleitung des Geräts Pokemon Mystery Dungeon (3DS) NINTENDO als PDF.


| Typ | Videospiel |
| Plattform | Nintendo 3DS / Nintendo 3DS XL |
| Genre | Rollenspiel, Dungeon-Crawler |
| Anzahl der Spieler | 1 (lokales Spiel: 2–4) |
| Speichermedium | Game Card |
| Sprache | Deutsch, Englisch, Spanisch, Französisch, Italienisch |
| Herausgeber | Nintendo |
| Entwickler | Spike Chunsoft |
| Veröffentlichungsdatum | 2013 |
| Hauptfunktionen | Erkundung von zufallsgenerierten Mystery Dungeons, rundenbasierte Kämpfe, Rekrutierung und Entwicklung von Pokémon, Aufbau des Paradieses, Übernahme von Jobs |
| Kommunikation | Lokale drahtlose Kommunikation (StreetPass, SpotPass), lokales Mehrspieler |
| Zusatzinhalte | Herunterladbare Inhalte (DLC) über Nintendo eShop |
| Steuerung | Tasten, Touchscreen |
| Stromversorgung | Über den Akku des Nintendo 3DS-Systems |
| Sicherheitshinweise | Gesundheits- und Sicherheitsinformationen im HOME-Menü beachten |
| Wartung | Keine besondere Wartung erforderlich |
| Ersatzteile | Nicht zutreffend |
| Reparierbarkeit | Bei Defekt wenden Sie sich an den Nintendo-Kundendienst |
| Verpackungsinhalt | Spielmodul, Bedienungsanleitung (PDF) |
| Kompatibilität | Nintendo 3DS, Nintendo 3DS XL |
Häufig gestellte Fragen - Pokemon Mystery Dungeon (3DS) NINTENDO
Benutzerfragen zu Pokemon Mystery Dungeon (3DS) NINTENDO
0 Frage zu diesem Gerät. Beantworten Sie die, die Sie kennen, oder stellen Sie Ihre eigene.
Eine neue Frage zu diesem Gerät stellen
Laden Sie die Anleitung für Ihr Videospiel kostenlos im PDF-Format! Finden Sie Ihr Handbuch Pokemon Mystery Dungeon (3DS) - NINTENDO und nehmen Sie Ihr elektronisches Gerät wieder in die Hand. Auf dieser Seite sind alle Dokumente veröffentlicht, die für die Verwendung Ihres Geräts notwendig sind. Pokemon Mystery Dungeon (3DS) von der Marke NINTENDO.
BEDIENUNGSANLEITUNG Pokemon Mystery Dungeon (3DS) NINTENDO
Thank you for choosing the Pokémon™ Mystery Dungeon: Gates to Infinity game for the Nintendo 3DS™ system.
Please note that, for this manual, "Nintendo 3DS" refers to both Nintendo 3DS and Nintendo 3DS XL.
Please read this manual carefully before using the software. Please also read your operations manual for more details and tips to help you enjoy your playing experience.
IMPORTANT
Before using this software, read all content within the Health and Safety Information application on the HOME Menu.
To access this application, tap the icon on the HOME Menu, then tap Open and read the contents of each section carefully. When you are finished, press HOME to return to the HOME Menu.
You should also thoroughly read your operations manual, including the "Health and Safety Information" section, before using this software.
IMPORTANT
Your Nintendo 3DS system and loss software are not designed for use with any unauthorized device or unlicensed accessory. Such use may be illegal, words or words, and/or attention of the solutions to use the Use Agreement. Further, such use may lead to injury to yourself or others and may cause performance issues and/or damage to your Nintendo 3DS system and/or its services. Nintendo (as well as a single) is not authorized by Nintendo's internal security, is not responsible for any damage or loss caused by the use of such device or unlicensed accessory. Except as authorized, copying of any Nintendo software in illegal and is strictly protected by Nintendo's internal intellectual property laws. Back-up" or "archival" copies are not authorized.
Nintendo respects the intellectual property of others, and we ask Nintendo 3DS software Content Providers to do the same. In accordance with the Digital Millennium Copyright Act in the US, the Electronic Commerce Directive in the EU, and other applicable law, we have affected a policy of removing an appropriate circumstances and how safe consumer goods are introduced into iOS software that appears to infringe anyone else a intellectual property. If you believe your intellectual property rights are being infringed, please visit www.eintino.com/policy to view the full policy and understand your rights.
Protecting Your Privacy
This software allows you to share information, such as your Pokémon and Pokémon character names, with other users through local communication. Keep the following in mind when sharing personal information through these features. • To protect your privacy, do not give out personal information such as last name, phone number, birth date, age, school, e-mail, or home address when communicating with others.
© 2013 Pokémon. © 1995-2013 Nintendo/ Creatures Inc./GAME FREAK inc. © 1993-2013 Spike Chunsoft.
Trademarks are property of their respective owners. Nintendo 3DS is a trademark of Nintendo. This product uses Concept AR Engine for Nintendo 3DS by Concept, Inc.
This product uses BISHAMON by Matchlock Co., Ltd.
■Lua ©1994-2008 Lua.org. PUC-Rio.
Permission is hereby granted, free of charge, to any person obtaining a copy of this software and associated documentation files (the "Software"), to deal in the Software without restriction, including without limitation the rights to use, copy, modify, merge, publish, distribute, sublicense, and/or sell copies of the Software, and to permit persons to whom the Software is furnished to do so, subject to the following conditions:
The above copyright notice and this permission notice shall be included in all copies or substantial portions of the Software.
THE SOFTWARE IS PROVIDED "AS IS", WITHOUT WARRANTY OF ANY KIND. EXPRESS OR IMPLIED, INCLUDING BUT NOT LIMITED TO THE WARRANTIES OF MERCHANTABILITY, FITNESS FOR A PARTICULAR PURPOSE AND NONINFRINGEMENT. IN NO EVENT SHALL THE AUTHORS OR COPYRIGHT HOLDERS BE LIABLE FOR ANY CLAIM, DAMAGES OR OTHER LIABILITY, WHETHER IN AN ACTION OF CONTRACT, TORT OR OTHERWISE, ARISING FROM OUT OF OR IN CONNECTION WITH THE SOFTWARE OR THE USE OR OTHER DEALINGS IN THE SOFTWARE.
■Luabind ©2003 Daniel Wallin and Arvid Norberg
Permission is hereby granted, free of charge, to any person obtaining a copy of this software and associated documentation files (the "Software"), to deal in the Software without restriction, including without limitation the rights to use, copy, modify, merge, publish, distribute, sublicense, and/or sell copies of the Software, and to permit persons to whom the Software is furnished to do so, subject to the following conditions:
The above copyright notice and this permission notice shall be included in all copies or substantial portions of the Software.
THE SOFTWARE IS PROVIDED "AS IS", WITHOUT WARRANTY OF ANY KIND. EXPRESS OR IMPLIED, INCLUDING BUT NOT LIMITED TO THE WARRANTIES OF MERCHANTABILITY, FITNESS FOR A PARTICULAR PURPOSE AND NONINFRINGEMENT. IN NO EVENT SHALL THE AUTHORS OR COPYRIGHT HOLDERS BE LIABLE FOR ANY CLAIM, DAMAGES OR OTHER LIABILITY, WHETHER IN AN ACTION OF CONTRACT, TORT OR OTHERWISE, ARISING FROM OUT OF OR IN CONNECTION WITH THE SOFTWARE OR THE USE OR OTHER DEALINGS IN THE SOFTWARE. CTR-P-APDE-USZ

Explore Dungeons
In this game, you will explore a variety of Mystery Dungeons (p. 7).
Form a party of up
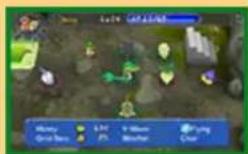
to four Pokémon and make your way through the dungeons while battling enemies and using a wide range of items.

Take On Job Requests
Your Pokémon Paradise (p. 14) serves as the base for your adventures. While

in Paradise, you can take on all kinds of different job requests (p. 15) from other Pokémon. By completing job requests, you can receive rewards in the form of (money) and items, and you will also be able to advance the story.

Expand Your Paradise
When you first encounter Paradise, you'll notice there's not a whole lot in it.

However, as you progress through the story, you'll gain the ability to prepare land. Then, you can build new facilities to help make Paradise bigger and better (p. 14)!
Companion Mode
After progressing in the story to a certain point, you'll gain access to Companion Mode. This will let you take control of a different Pokémon in Paradise (not the main player Pokémon) and play with friends via local wireless (p. 22).
Note: While in Companion Mode, you will be able to travel only to Paradise and the various dungeons. Post Town will be unavailable, but its facilities will appear in Paradise.

Main Menu
At the title screen, tap the Touch Screen or press START to go to the main menu.
Playing the Main Game
| New Game | This option will appear when you don't have any saved data. Select it to begin a new adventure. |
| Continue | This option will appear when you save your progress while in Post Town or Paradise before quitting the game. Select it to resume your adventure from where you left off. |
| Resume from Dungeon | This option will appear when you saved while inside a dungeon. Select it to resume your adventure from where you left off in the dungeon. |
| Give Up on Rescue | This option will appear after you've been defeated inside a dungeon (p. 10) and are waiting for a rescue. Select it to give up on waiting for a rescue and resume the game from the point where you were unable to continue your adventure. |
| Revive | This option will appear when a player rescues you after you are defeated in a dungeon. Select it to revive and resume your adventure from the spot where you were defeated. |
Discover a Magnagate! (p. 26)
Use the outer camera to search for a dungeon where you can enjoy a quick adventure.
Wonder Mail (p. 27)
Enter the right password to receive Wonder Mail.
DLC (Downloadable Content) (p. 25)
Purchase additional dungeons.
Change Team Name
Change your team's name.
Delete Save
Delete the saved data of your adventure.
Note: Some options will become available as you progress in the game.

Saving Your Progress
Be sure to save your progress before quitting the game.
Saving outside Dungeons
Select "Save" from the menu (p. 21). You will also be able to save your progress whenever you rest at home, after certain events, and when you switch modes (p. 21).

Saving inside a Dungeon
While in a dungeon, you will have the option to select "Quick Save" (p. 20) from the menu. Selecting this will create a temporary save file and return you to the main menu.
Note: Your quick save data will be deleted after you load your game.
Data can be lost due to user action, such as repeatedly powering off and on the system or removing the Game Card or SD Card while saving. Data loss may also be caused by poor connectivity, due to dirt or dust in the system's ports. Please be aware that in these cases data cannot be restored.

Delete Saved Data
Select "Delete Save" from the main menu to delete any existing saved data.
Note: Deleted data cannot be recovered. Be absolutely sure that you want to delete your saved data before selecting "Delete Save."
The game is played primarily by using the buttons, but in some situations, the Touch Screen can also be used to make menu selections.
Note: While playing in Local Wireless or when browsing downloadable content, closing the system will not put it into Sleep Mode.

Universal Controls
| Move cursor | ◎/+ |
| Confirm | Ⓐ |
| Advance text | Ⓐ |
| Cancel | Ⓑ |
| Auto-advance text | Hold Ⓑ |

Text Entry Controls
When entering character and team names.
| Move cursor | ∅/+ |
| Enter a character or confirm entry | A |
| Delete a character | B |
| Change character set | L/R |
| Move cursor to "END" | START |

When outside a Dungeon
These are the controls available while in Post Town, Paradise, or on a gridless area in a dungeon (p. 7).
| Walk | ◎/⊕ |
| Run | ◎+◎/+⊕+◎ |
| Inspect, talk to Pokémon | Ⓐ |
| Display the menu | ⊗ |
| Change Touch Screen view | START |
These are the controls available while inside a dungeon.
| Move | ◎/⊕ |
| Run | ◎+◎/⊕+◎ |
| Move diagonally | R+◎/R+⊕ |
| Take an action, regular attack, inspect | ◎ |
| Pass turns without moving | Hold Ⓑ+◎ |
| Display Items in Bag | ◎ |
| Display the Message Log | ◎+◎ |
| Display the menu | ◎ |
| Face adjacent Pokémon | ◎ |
| Skip move visual effects | Hold ◎ (only when enabled in Options) |
| Display grid and line of sight | Hold ◎ |
| Look around | ◎+◎ |
| Change direction without moving | ◎+◎/◎+⊕ |
| Use a move | L+A/L+B/L+⊗/L+◎ |
| Use team attack | L + tap the Touch Screen |
| Throw item | L+R |
| Change Touch Screen view | START |

Go to a Dungeon
You can go to a dungeon using the following methods.
From the Crossroads
The crossroads lies between Paradise and Post Town. Take the northern path, and you'll reach the Select Du

Through the Gate
If you accept a job request in Paradise (p. 15), the Request Gate will open, allowing you to go to the dungeon for that job.

What's a Mystery Dungeon?
Mystery Dungeons are mysterious places that appear inside caves, mountains, and other areas. Each time you enter one, the layout will be different. Once you're inside, you can leave a Mystery Dungeon only by finding your way to the very end--or by being defeated.
Floors and Stairs
Each dungeon consists of multiple floors, where you'll find stairs leading to the next floor. Walk over the stairs, and a message will appear. If you choose "Yes," you will advance to the next floor. You won't be able to return to previous floors once you've moved on.
Turns
Inside a dungeon, you will take turns in the following order: you → your allies → enemy Pokémon. Each Pokémon can take one action on its turn. Your turn will not end until you take an action.
Note: If you take too many turns on a single floor in a dungeon, a gust of wind will blow you away, causing your adventure to fail.
Gridless Floors
Some floors inside a dungeon are gridless under normal

circumstances. On
these floors, there are no turns, and you can move about just like in Post Town or Paradise. However, if you approach an enemy, the game will switch to turn mode, and a battle will begin.

Clearing a Dungeon
You can clear a dungeon by reaching its final floor or by fulfilling the conditions of the job that sent you there. The results of your dungeon exploration will be displayed, and you can press Ⓐ to leave the dungeon.
Mysteriosity
As your adventure progresses, dungeons will

be assigned a level of mysteriosity. In dungeons where the mysteriosity level is high, mysterious things will occur. For example, a dungeon may have special rules, or you may be temporarily warped to another dungeon.
While you hold Ⓨ, the grid will appear and the direction you are facing will be shown in orange.
Note: You can set it so that the grid is always shown by opening the menu and selecting "Others," then "Options" (p. 20), and enabling the option.

① Floor Number
② Other Pokémon
A Ⓧ will appear at ally Pokémon's feet, and a Ⓧ will appear at the feet of enemy Pokémon.
③ Messages
Information about battles and items you pick up will be displayed here. If you don't touch the controls for a while, some play information (p. 16) will appear.
4 Your Status
Your name, level, and HP / Max HP are shown here. If your HP is reduced to 0, you'll be defeated (p. 10).
⑤ Touch Screen
Press START to change the information that is displayed on the Touch Screen. In order, you can toggle between the Dungeon Map, Control Info, Party Status, and Job Notes (only when you have taken on a job).
More of the map will appear as you explore the dungeon.
Pokémon and items will also appear as icons on the map.
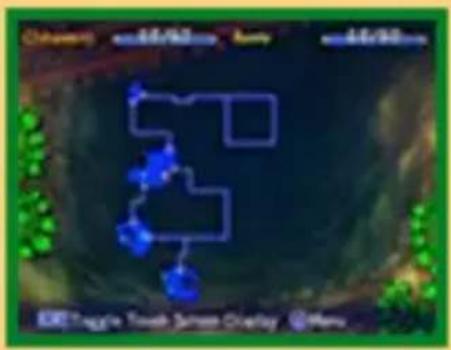

Ally Pokémon
Note: The icon for the Pokémon you control will flash.

Enemy Pokémon

Outlaw Pokémon

Items on the ground

Obstacles and doors

Stairs

Traps

Wonder Tiles

Battle Rules
You use moves to battle against enemies. Defeat enemies to gain Exp. Points. Once a Pokémon gains enough Exp. Points, it will gain a level and become stronger.
Use Moves
While holding L, press either A, B, X, or Y to use a move (p. 19).
Defeat an enemy with your moves, and you'll gain Exp. Points. Using moves will deplete PP. Once the PP for a move reaches 0, that move will no longer be usable until the PP is replenished.
Team Attack
When your party becomes fully in sync with each other while inside a dungeon, you can
hold down and tap the Touch Screen to unleash a team attack. Your party comes together to dish out a devastating attack on all nearby enemies. Depending on the type of the Pokémon you are controlling, HP recovery and other effects may be added to the team attack.
Note: You can't use another team attack until your party is once again fully in sync with each other.
Unlikely Allies
At a certain point in the story, you will gain access to Quagsire Assembly (p. 14). Afterward, whenever the leader of your party defeats an enemy Pokémon in a dungeon, that Pokémon may ask to join your team.
Note: If you already have four members in your party when you let another Pokémon join your team, you'll have to switch out or have that Pokémon go back and wait in Paradise.

Pokémon Evolution
When a Pokémon reaches a certain level or uses a specific item, it might evolve. By evolving, a Pokémon becomes even stronger--its stats will rise, and it will be able to learn new moves. Watch out, though! Enemy Pokémon inside dungeons can evolve, too.
Note: You and your partner cannot evolve until after you complete the main story.

Status Conditions and Stat Reductions
Some enemy attacks may change your ally
Pokémon's status condition or lower its stats. Some status conditions will go away after a certain number of turns, and all conditions will be cured if you advance to the next floor, but they can also be cured by using certain items like seeds and Berries. Reduced stats can be returned to normal by walking over Wonder Tiles (p. 11) or by advancing to the next floor.

Defeat
If the HP of the Pokémon you are controlling is reduced to 0, you will be defeated. If you are defeated and you have no Reviver Seeds in your Bag, your adventure will fall and you will be returned to Paradise. If you're particularly unlucky, some of your items may be lost, too.
Note: If one of the ally Pokémon you aren't controlling is defeated, your adventure may fail, too.
Seek Help
In some dungeons, you'll be able to seek help from other players via the StreetPass™

feature (p. 23) if you are defeated.
Note: The number of times you can seek help from other players during a single adventure is limited.

Tiles and Traps
Inside dungeons, you'll find tiles that produce a variety of effects when a Pokémon steps on them. There are also traps that aren't normally visible.

Wonder Tiles
If a Pokémon steps on a Wonder Tile, all of its stats will return to normal. This applies to both stats that have been lowered and stats that have been raised.


Items and Money

Walk over any item or Ⓓ on the ground in a dungeon, and you can pick it up. Items and Ⓓ will not be picked up if you step on them while running. Items can be used or inspected by pressing Ⓑ or opening the menu and selecting "Items" (p. 17).

Note: If your Bag is full, you won't be able to pick up any items.
Shops inside Dungeons
In some dungeons, you'll find that Kecleon has set up shop!

You can pick up an item on the ground and talk to Kecleon to purchase it. You can also drop your own items on the ground and talk to Kecleon to sell them.

1 Icons
A 📷 will appear for characters you can talk to, and a ⏰ will appear for objects that can be inspected.
② Touch Screen
The ★ shows where on the map you currently are. By pressing START, you can change what information is displayed on the Touch Screen. In order, you can toggle between the Map, Control Info, and Party Status.
You'll find lots of Pokémon and useful facilities in Post Town.

Facilities in Post Town
The number of facilities you can visit will increase as you advance the story.
Kecleon Shop
You can buy and sell items here. When selecting which items to buy or sell, you can press ☐ to select multiple items at once.

Deposit Box
You can store items and Ⓟ in the Deposit Box. Any items stored here will not go away, even if you are defeated in a dungeon. By selecting "Recommended Sets," you can withdraw a set of useful items all at once.

natural_image
Illustration of a purple castle with a yellow penguin, set on a green grassy background (no text or symbols)Note: Deposit Boxes can be found in Paradise, as well as inside some dungeons.
Glorious Gold
If you find Gold Bars on your adventure, you can exchange them here for items or Ⓟ.
DLC Guide
Here you can choose to return to the main menu and purchase downloadable content (p. 25).
Paradise serves as the base for your adventures.

Facilities in Paradise
Paradise starts out as bare land, but as the story progresses and you work to develop it, many facilities will appear.
Quagsire Assembly
Select "Edit Party" to display a list of your team members who can join your adventure
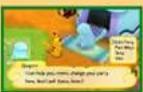
party. In Companion Mode (p. 2), you can also change the Pokémon you control. This Pokémon will lead the party.
You can also buy and sell items here.
Scraggy's Savvy Moves
You can make the Pokémon on your team forget moves they know, or remember moves they have forgotten. Any move that can be learned through gaining levels can be forgotten or remembered as many times as you like.
Note: Some of the moves you have at the start of the game, as well as moves that are learned through the use of TMs, cannot be remembered once forgotten.
V-Wheel
If you're lucky, you can change the V-Wave (p. 16) here. Spin the wheel, and if you win, choose which type you want the day's V-Wave to be. (If you don't win, nothing happens.) You can spin the V-Wheel once per in-game day.

Developing Paradise
By preparing the land in Paradise and building new facilities, you can develop Paradise.
Note: To prepare land, you'll need a certain amount of materials and Ⓗ.
Prepare Land
Call in the Gurdurr Crew and select "Prepare" to prepare wasteland areas, making them

fit for building facilities. Choose the land you want to prepare and what kind of land you want it to be.
Build Facilities
Once a piece of land has been prepared, inspect one of the

signboards you find there to build a facility. Select "Call Gurdurr" and then choose which facility you wish to build.
Available Facilities
Here are some of the facilities you can build in Paradise.
Fields
Plant and grow seeds and Berries.
Move Dojos
Power up one move once per in-game day.
Berries and Seeds
These shops specialize in selling seeds and Berries.
Swap Shop
Exchange items in your Deposit Box that you no longer need for other items.
Beartic Slide
Play a fun game using the stylus.
You can take on a variety of jobs from many different Pokémon who need your help.

Check the Request Board
Check the Request Board or the Challenge Board to see what job requests are currently available.

After selecting a job, choose either "Go Right Away" or "Save for Later." If you save it for later, the job note will be saved in your Job List (p. 21), which is selectable from the menu.
Note: Challenge Board job requests can be played with other players via local wireless (p. 22).

Open the Gate
Choose "Go Right Away," or talk to Azumarill at the counter and select "Hand a Note," and

the Request Gate will open. Go through the gate to travel to the dungeon for that job.
Note: The right-side gate will open for job requests taken from the Request Board, and the left-side gate will open for job requests taken from the Challenge Board.

Complete Jobs
By obtaining the required item or finding and talking to the required Pokémon, you can complete a job. Once completed, you can leave the dungeon and receive your reward, as well as some Paradise Points.
Get Paradise Points
The more Paradise Points you get, the higher your Paradise Rank will rise. If your Paradise Rank rises, you'll be able to build new facilities.
Press Ⓧ to bring up the menu (p. 17-21). Play information will appear on the upper screen.
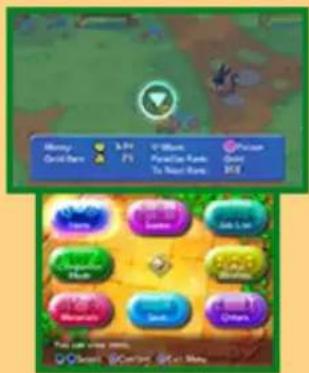
Play information and some of the items that appear on the menu differ depending on whether you are in a dungeon or not.

Play Information
| Money | The P you are carrying. Get more money by finding it in dungeons or by completing jobs. |
| Gold Bars | The number of Gold Bars you have. |
| V-Wave | The V-Wave for that day. Pokémon of the same type as the V-Wave gain an advantage in battle. |
| Weather | The current weather condition in the dungeon. Weather conditions have various effects on stats and move strength. |
| Paradise Rank | Your current Paradise Rank. |
| Next Rank | The necessary number of Paradise Points to reach the next Paradise Rank. |
Choose "Items" (💡) from the menu to open your inventory.
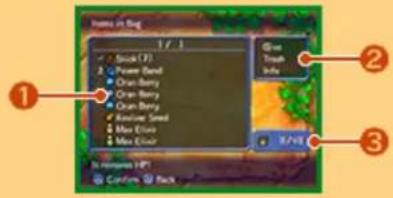
① Inventory
A number will appear next to items that are equipped by party members. A number will also appear to the right of throwable items, displaying how many you have left. If the item is registered, a √ mark will appear next to it. Pressing Ⓤ will re-sort your inventory by item type.
② Item Commands
Select an item, and a list of commands will appear. You can choose to give the item to a party member, to trash it, or to view info about the item to learn about its effects.
Note: The commands that become available differ depending on the item and the situation.
③ Current Items / Max Capacity

Give Items
Select the "Give" option to give an item to a party member. Each Pokémon in your party can carry only one item, which it will use automatically or equip to raise its stats.


Register a Throwable Item
Spikes and stones can be registered as throwable items. Only one item can be registered at a time by choosing "Register" after selecting an item. The registered item can be thrown by pressing ☐ while holding down ☐ to inflict damage on enemies.
Note: Items can be registered only while inside a dungeon.
Choose "Status" (_) from the menu to check on a Pokémon's stats and to decide its tactics in
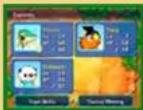
battle. Each Pokémon under the effects of the day's V-Wave (p. 16) will have a √ symbol in the bottom-right corner of its portrait.

Check a Pokémon's Information
Select a Pokémon and you can view information about it, such as the moves it knows. Switch

between pages by pressing ☐ or by moving left or right on ☐. While inside a dungeon, you can select "Send Home" to send Pokémon in your party (except for you and your partner) back to Paradise.
Pokémon Information
Type
The Pokémon's type. Each type has advantages and disadvantages against other types. The strength of a move is also affected by the Pokémon's type.
Lv.
The Pokémon's level.
HP
The Pokémon's current and max HP.
Exp. Points
The Pokémon's current Exp. Point total.
To next level
The amount of Exp. Points required for the next level.
Attack
Represents the strength of physical moves.
Defense
Represents the capacity to defend against physical moves.
Sp. Atk
Represents the strength of special moves.
Sp. Def
Represents the capacity to defend against special moves.
Item
Shows the item the Pokémon is holding.
Tactic
Shows the Pokémon's current tactic. This will display for all Pokémon other than you.

Team Skills
Team Skills are powers that can be learned by everyone on the team. They can be obtained from Treasure Boxes. Select the skill and choose "Select" to toggle which Team Skills will be used. Team Skills that are toggled on will have a √ appear next to them.

Tactics Meeting
You can decide how your party members will behave inside dungeons.
Choose "Moves" (💡) from the menu to check the moves known by the
Pokémon in your party, and to toggle on and off the use of specific moves. You can even use the moves known by the Pokémon you're controlling straight from this menu.
Note: "Moves" can only be selected while inside a dungeon.

Rearrange Moves
Select a move and choose "Move up" or "Move down" to change which slot it occupies. This affects which button you press to use a move for the Pokémon you are controlling.

Toggle Move Use
Select a party member's move and choose "Move Select / Deselect" to toggle the use of that move. Moves that are enabled will have a √ next to their name.

Move Growth
Certain moves have a growth gauge next to their names.
Use the move frequently to fill up the gauge. Once the gauge is filled, the move will grow, and its power, accuracy, and maximum PP value will rise.
The growth progress of a move is shared across your entire team. If one Pokémon powers up a move, every Pokémon who knows that move will receive the benefits.


Here are some of the other options that appear on the menu while inside a dungeon.

Look Around

Use Ⓐ or ✝ to move the camera and survey the area.

Underfoot

Select this to pick up or use an item at your feet. You can also exchange it for an item you have in your inventory. This option also allows you to step on any Wonder Tiles at your feet.

Quick Save

Give Up

You can create a temporary save file of your progress in the dungeon and return to the main menu. In Companion Mode (p. 2), this menu item will turn into "Give Up," which ends the adventure and brings you back to Paradise when selected.

Others

The following options are available.
| Options | Change volume and screen settings here. |
| SpotPass ^TM Settings | Set whether or not you will receive data using SpotPass (p. 24). |
| Pokémon Who Can Appear | This shows the Pokémon who can appear on your current floor. |
| V-Wave | You can check the day's V-Wave (p. 16) and its effects here. |
| Message Log | Review the messages that have appeared so far. |
| Dungeon Status | Check on the dungeon's status and weather condition. |
| Dungeon Hints | View information and helpful hints for exploring dungeons. |
| How to Play | View useful adventure information. |
| Give Up | Give up your adventure in the dungeon and return to Paradise. |
Here are some of the other options that appear on the menu while outside a dungeon.

Job List ( )
You can view job requests that you chose to save for later here. You can delete any jobs you no longer want, too.

Note: Jobs with the 📄 icon can be played with friends via local wireless (p. 22).

Change Modes ( )
Switch between Hero Mode (where you control the main character) and Companion Mode (p. 2).

Local Wireless ( )
Using local wireless (p. 22), you can invite a friend to your Paradise, or go visit a friend's Paradise.
Note: This option can be selected only while in Companion Mode.

Materials ( )
You can check on the materials you have. Materials are necessary to prepare land and build new facilities in Paradise.

Save ( )
Select this to save your progress. When you're done playing, save your progress and return to the main menu.

Others (Other)
Modify game settings and view information about the game here. The menu items available here are limited while outside a dungeon.

Multiplayer (Local Play)
This software supports multiplayer games via wireless communication. Each player must have a copy of the software.
Information-Sharing Precautions
This software allows you to share the nickname of your Pokémon and your team name with others via Local Wireless Play. Note the following when using this software:
- When communicating with others, the information you enter may be viewed by many people, so please do not use personal information that could be used to identify you.

You Will Need:
• One Nintendo 3DS system per player
• One copy of the software per player

Connection Procedures
When you're in Paradise while in Companion Mode (p. 2), select "Local Wireless" from the menu. To invite a friend to your Paradise, choose "Call a Friend." If you want to visit a friend's Paradise, choose "Pay a Visit."

Play in Paradise
While playing with a friend via local wireless, you can visit only some of the areas in Paradise. You are also able to use most of the facilities in Paradise.
Explore a Dungeon
You can take on job requests from the Challenge Board with your friends. The Request Gate will open, and you can journey to the dungeon together.

Exiting Multiplayer
When you are ready to stop playing with your friends, select "Local Wireless" and choose "Stop Local Wireless." If you want to leave your friend's Paradise, choose "Return to Your Paradise."

Player Assistance (StreetPass) 🎨)
This software uses StreetPass (local wireless communication) for the exchange of team information. You can also help and be helped by other players when one of you is defeated in a dungeon.
Note: To communicate using this feature, all players must activate StreetPass for this software.
Information-Sharing Precautions
This software allows you to share your team name with others via StreetPass. Note the following when using this software:
- When communicating with others, the information you enter may be viewed by many people, so please do not use personal information that could be used to identify you.

Activating StreetPass
Inspect the Passerby Post in Paradise. Then you can choose whether or not to activate StreetPass.

Place Reviver Seeds
Inspect the Passerby Post and select "Place Reviver Seeds." Once you've put Reviver Seeds into the post, you'll be able to revive players you pass by when they are waiting for help after being defeated in a dungeon. Reviving a player will use up one Reviver Seed. Help other players out, and you'll find rewards in the Passerby Post.

Deactivating StreetPass
To deactivate StreetPass, open System Settings, select Data Management, and then select StreetPass Management. Tap the icon for this software title, then select Deactivate StreetPass.
Note: If you delete your save by selecting "Delete Save" from the main menu, your StreetPass data will also be deleted.
You can disable StreetPass functionality via Parental Controls.
Note: Refer to your operations manual for information on how to set up Parental Controls.
This software supports the Nintendo Network™.
The Nintendo Network logo appears on the packages of software supporting the Nintendo Network.

About Nintendo Network
Nintendo Network is the name of Nintendo's network service that enables users to enjoy games and other content via the Internet. It provides access to a wide range of network services, including the ability to play games with people around the world, purchase and download games/content, and exchange images and messages.
Note: Each software title with Nintendo Network supports different features. For more information about other Nintendo Network features this software supports, see the downloadable content section (p. 25).

Receive Notifications
(SpotPass)
This software supports the automatic receiving of notifications about newly available downloadable content (p. 25) via an Internet connection.
Data received through SpotPass is saved on SD Cards. As a result, it is recommended that you keep an SD Card inserted in your system at all times.
Before you can use SpotPass, you must first accept the Nintendo 3DS Service User Agreement and set up an Internet connection.

Activating SpotPass
When you first start up the game, you'll be able to configure your SpotPass settings. Select "Yes" if you'd like to enable it. If you don't set up SpotPass at this time, you'll be able to adjust the settings at any time by selecting "SpotPass Settings" from the Others menu.

Deactivating SpotPass
You can choose to stop receiving data through SpotPass at any time.
Settings
Select "SpotPass Settings" in the Others menu to disable SpotPass at any time.
For more information about the user agreement and connecting to the Internet, please consult the operations manual for your Nintendo 3DS.
Select "Discover a Magnagate!" to use the outer camera to search for the entrance to a dungeon, known as a Magnagate.
Note: The "Discover a Magnagate!" option will become available on the main menu after you reach a certain point in the game.

Searching for Dungeons
Hold the
Nintendo 3DS in both hands and move it around to search for a round shape. Line up the shape inside the circle on the upper screen. If the shape is recognized, the screen will flash. Quickly press Ⓐ if this happens. If you're successful, a Magnagate will appear!

natural_image
Circular object with a bright yellow center and concentric blue rings, no visible text or symbols.Note: Some round shapes will not be recognized.
Note: Make sure the area you are in is sufficiently lit.
When playing this game, you may have to move the Nintendo 3DS system around. Make sure you have enough room before playing, and hold the system firmly with both hands while playing. Do not move the system with excessive force, as this could cause injuries, damage to the product, or damage to nearby objects.

Entering Dungeons
When you find a Magnagate, you can enter a dungeon. The first time you enter a dungeon through a Magnagate, your Pokémon party will be decided for you. Any items you obtain in this mode will be available in the Deposit Box in the main game.
Note: Select "Erase a Dungeon" to delete all records of a dungeon you've previously found.
Select "Wonder Mail" from the main menu to proceed to the password entry screen. Enter the eight-character password and select "END."
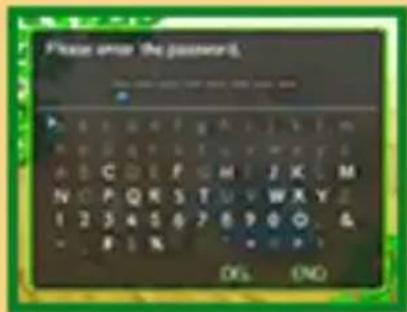
Enter the correct password to receive a variety of items.
Note: The "Wonder Mail" option will become available after you reach a certain point in the game.
Give It a Try!
First, try entering the password shown here.
XN83N4W6
Get Passwords
Wonder Mail passwords will be revealed in a variety of places. For more details, please check the official website: Pokemon.com/MysteryDungeon
Support Information
Nintendo Customer Service SUPPORT.NINTENDO.COM
USA/Canada: 1-800-255-3700
Latin America/Caribbean: (001) 425-558-7078
1 Important Information
2 Game Introduction
3 Beginning Your Adventure
4 Stopping Your Adventure
5 Controls
6 When inside a Dungeon
Getting Started
Dungeons
7 Exploring Dungeons
8 Game Screen in a Dungeon
9 Dungeon Map
10 Battling Enemies
11 Tiles, Traps, and Items
12 Game Screen in Town
13 Post Town
14 Paradise
15 Job Requests
The Menu
16 The Menu Screen
17 Items
18 Status
19 Moves
20 Other Dungeon Menu Options
21 Other Menu Options
Communication Functions
22 Local Wireless Play
23 StreetPass
24 SpotPass
25 Downloadable Content
Others
26 Discover a Magnagate!
27 Wonder Mail
Troubleshooting
28 Support Information


- IMPORTANT
- Protecting Your Privacy
- Explore Dungeons
- Take On Job Requests
- Expand Your Paradise
- Companion Mode
- Main Menu
- Discover a Magnagate! (p. 26)
- Wonder Mail (p. 27)
- DLC (Downloadable Content) (p. 25)
- Change Team Name
- Delete Save
- Saving Your Progress
- Saving outside Dungeons
- Saving inside a Dungeon
- Delete Saved Data
- Go to a Dungeon
- From the Crossroads
- Through the Gate
- What's a Mystery Dungeon?
- Floors and Stairs
- Turns
- Gridless Floors
- Clearing a Dungeon
- Mysteriosity
- Battle Rules
- Unlikely Allies
- Pokémon Evolution
- Status Conditions and Stat Reductions
- Defeat
- Tiles and Traps
- Wonder Tiles
- Items and Money
- Shops inside Dungeons
- Icons
- ② Touch Screen
- Facilities in Post Town
- Kecleon Shop
- Deposit Box
- Glorious Gold
- DLC Guide
- Facilities in Paradise
- Quagsire Assembly
- Scraggy's Savvy Moves
- V-Wheel
- Developing Paradise
- Prepare Land
- Build Facilities
- Available Facilities
- Check the Request Board
- Open the Gate
- Complete Jobs
- Get Paradise Points
- ① Inventory
- ② Item Commands
- ③ Current Items / Max Capacity
- Give Items
- Register a Throwable Item
- Check a Pokémon's Information
- Pokémon Information
- Type
- Lv.
- HP
- Exp. Points
- To next level
- Attack
- Defense
- Sp. Atk
- Sp. Def
- Item
- Tactic
- Team Skills
- Tactics Meeting
- Rearrange Moves
- Toggle Move Use
- Move Growth
- Look Around
- Underfoot
- Quick Save
- Give Up
- Others
- Job List ( )
- Change Modes ( )
- Local Wireless ( )
- Materials ( )
- Save ( )
- Others (Other)
- Multiplayer (Local Play)
- Information-Sharing Precautions
- You Will Need:
- Connection Procedures
- Play in Paradise
- Explore a Dungeon
- Exiting Multiplayer
- Player Assistance (StreetPass) 🎨)
- Activating StreetPass
- Place Reviver Seeds
- Deactivating StreetPass
- About Nintendo Network
- Receive Notifications
- (SpotPass)
- Activating SpotPass
- Deactivating SpotPass
- Settings
- Searching for Dungeons
- Hold the
- Entering Dungeons
- Get Passwords
- Support Information
- Getting Started
- Dungeons
- The Menu
- Communication Functions
- Troubleshooting
Marke : NINTENDO
Modell : Pokemon Mystery Dungeon (3DS)
Kategorie : Videospiel