
EM-604T - Mikrowelle SANYO - Kostenlose Bedienungsanleitung
Finden Sie kostenlos die Bedienungsanleitung des Geräts EM-604T SANYO als PDF.


| Produkttyp | Mikrowelle |
| Marke | Sanyo |
| Modell | EM-604T |
| Abmessungen (B x T x H) | 45 x 35 x 25 cm |
| Gewicht | 12 kg |
| Netzspannung | 230 V ~ 50 Hz |
| Mikrowellenleistung | 800 W |
| Garraumvolumen | 20 Liter |
| Funktionen | Auftauen, Schnellkochen, Timer, Kindersicherung |
| Drehteller | Ja, Durchmesser 25 cm |
| Leistungsstufen | 10 Stufen |
| Anzeige | LED-Display |
| Innenbeleuchtung | Ja |
| Automatikprogramme | 6 Programme |
| Reinigung | Feuchtes Tuch, keine Scheuermittel |
| Sicherheit | Kindersicherung, Türsicherheitsschalter |
| Ersatzteile | Türdichtung, Glasplatte, Drehring |
| Reparaturanleitung | Verfügbar auf Anfrage |
| Lieferumfang | Mikrowelle, Drehteller, Bedienungsanleitung |
Häufig gestellte Fragen - EM-604T SANYO
Benutzerfragen zu EM-604T SANYO
0 Frage zu diesem Gerät. Beantworten Sie die, die Sie kennen, oder stellen Sie Ihre eigene.
Eine neue Frage zu diesem Gerät stellen
Laden Sie die Anleitung für Ihr Mikrowelle kostenlos im PDF-Format! Finden Sie Ihr Handbuch EM-604T - SANYO und nehmen Sie Ihr elektronisches Gerät wieder in die Hand. Auf dieser Seite sind alle Dokumente veröffentlicht, die für die Verwendung Ihres Geräts notwendig sind. EM-604T von der Marke SANYO.
BEDIENUNGSANLEITUNG EM-604T SANYO
EM-604T / EM-604TW
Microwave Oven
Table of Contents
General Instructions
• How a Microwave Oven Makes Cooking Faster, Easier and Much More Enjoyable.... 2
• The Extra Features of Your Sanyo Microwave Oven.... 2
- Installation.... 3
- Names of Oven Parts 3
- Oven Control Panel 4
User Instructions
- Easy Use Chart.... 5
- Recall and Change of Setting 6
- Turntable 6
- Regular Timer 6
- Child Safety Lock-Out 6
Detailed Directions
- Quick-Set Cooking 7-8
- Cooking Guide for "Multi-Power" Setting 9
- "HI-Power"/"Multi-Power" Cooking.... 10
- Multi-Stage Cooking 11-12
- Delay Start Cooking.... 12
• Automatic Defrosting 13–16
• Automatic Reheating.... 17–18 - Popcorn 19
How to Use Your Microwave Oven Safely (Important) 20
Taking Care of Your Microwave Oven.... 20
Usable Cooking Utensils and Materials 21
Utensils and Material to Avoid 21
A Few Other Precautions (Important) 21
What to Do If Repairs Are Needed 22
WARRANTY
It is important to keep your receipt of purchase for your microwave oven.
This will show the date of purchase along with the model number if service required.
How a Microwave Oven Makes Cooking Faster, Easier and Much More Enjoyable
1. A feast in minutes.
High energy microwaves penetrate the food and cook it quickly, evenly and efficiently.
2. Natural flavour.
Microwave cooking preserves the natural taste and nutritive value of the food to a much higher degree than conventional cooking methods.
3. Utensils.
Glassware, earthenware, ceramic, plastic containers marked microwave safe, ovenable board and practically all utensils EXCEPT METAL ONES are perfectly suitable for microwave cooking.
4. Simplified operation.
You are cooking by time, and not by heat. Simply touch power levels and numbers for Cooking Time and touch "START" pad.
5. Clean, cool operation.
No smoke, no grease, no heat. Your kitchen stays cool and clean at all times.
6. Perfect for defrosting and re-heating.
When there is no time for natural thawing of frozen foods, your microwave oven can reduce the process to a matter of minutes. It defrosts all kinds of frozen foods and it re-heats fast.
7. Economical.
Since the required cooking time is extremely short, microwave cooking is more economical than conventional ovens.
8. Always undercook.
Cooking times may vary according to the temperature of the food, the density of the food, and the ingredients of the recipe. So always under-cook in the first instance — you can always pop the food back for a few seconds if it is not quite done, but if you overcook, there is no turning back.
The Extra Features of Your Sanyo Microwave Oven
1. Compact, light weight, easy to move.
Fits easily on a kitchen work surface. See installation on Page 3. Light enough to be moved to a summer house of seaside cottage.
2. Five separate safety features.
1) Latch system: when the door release button is pushed, a built-in switch turns off the oven before the door is opened.
2) Door switch: when the door is opened this switch automatically turns off the oven.
3) Choke seal: a special seal around the door prevents all radiation leakage from the oven.
4) Thermal limiter: when the temperature of the magnetron rises above the limit, this switch automatically turns off the oven.
5) Monitor switch: should the latch switch fail to function properly, this switch is activated to prevent the oven from operating.
3. Multi power control.
By selecting cooking power level the following appropriate power may be selected.
| IEC 705 method | 140 ~ 650W |
| 2-litre method | 130 ~ 600W |
4. Simplified cooking.
Simply touch numbers for cooking time and touch the "START" pad. Your oven does the rest, and a beep sounds when the food is ready.
5. Boomerang Turntable.
This turntable is specially designed to return to its original starting position when cooking is finished.
6. High-visible viewing window.
The progress of cooking can be observed while oven is operating.
7. Practical dimensions.
1) Over all: 45.8(W) × 33.8(D) × 25.0(H)cm
2) Oven : 29.0(W) × 30.4(D) × 18.1(H) cm
Installation
-
Install the oven on a flat, level surface.
-
Strong enough to safely bear the weight of the oven, which is 14.0kg. To avoid the possibility of causing vibration or noise the oven must be in a stable position.
- When oven is first plugged into power outlet, "0:00" will appear in the display window, if not, switch off at power outlet, unplug the unit and reinsert the plug into the wall outlet.
-
Following a power failure, the display window will revert back to "0:00" then will show in minutes or hours the elapsed time from the time power was restored. Re-set the clock to correct time of day.
-
Keep the oven away from heat and water.
Exposure to heat and water can lower oven efficiency and lead to malfunctioning, so be sure to install the oven away from heat and water sources.
- The exhaust vent of the oven is at the left side on the bottom plate, so keep it at least 5cm away from the left side wall.
Covering the exhaust vent may lead to malfunctioning. Hot air escapes from this vent, so be sure not to obstruct it or let curtains come between the oven and the counter top.
-
Place the oven as far away from radios and T.V.'s as possible. Some interference may occur if it is placed too close to a radio or TV, so keep them as far apart as possible.
-
Installation of under the cabinet.
To install under the cabinet, an optional mounting bracket (model EMA-108) is available. Contact the store where you purchased your oven.
Names of Oven Parts
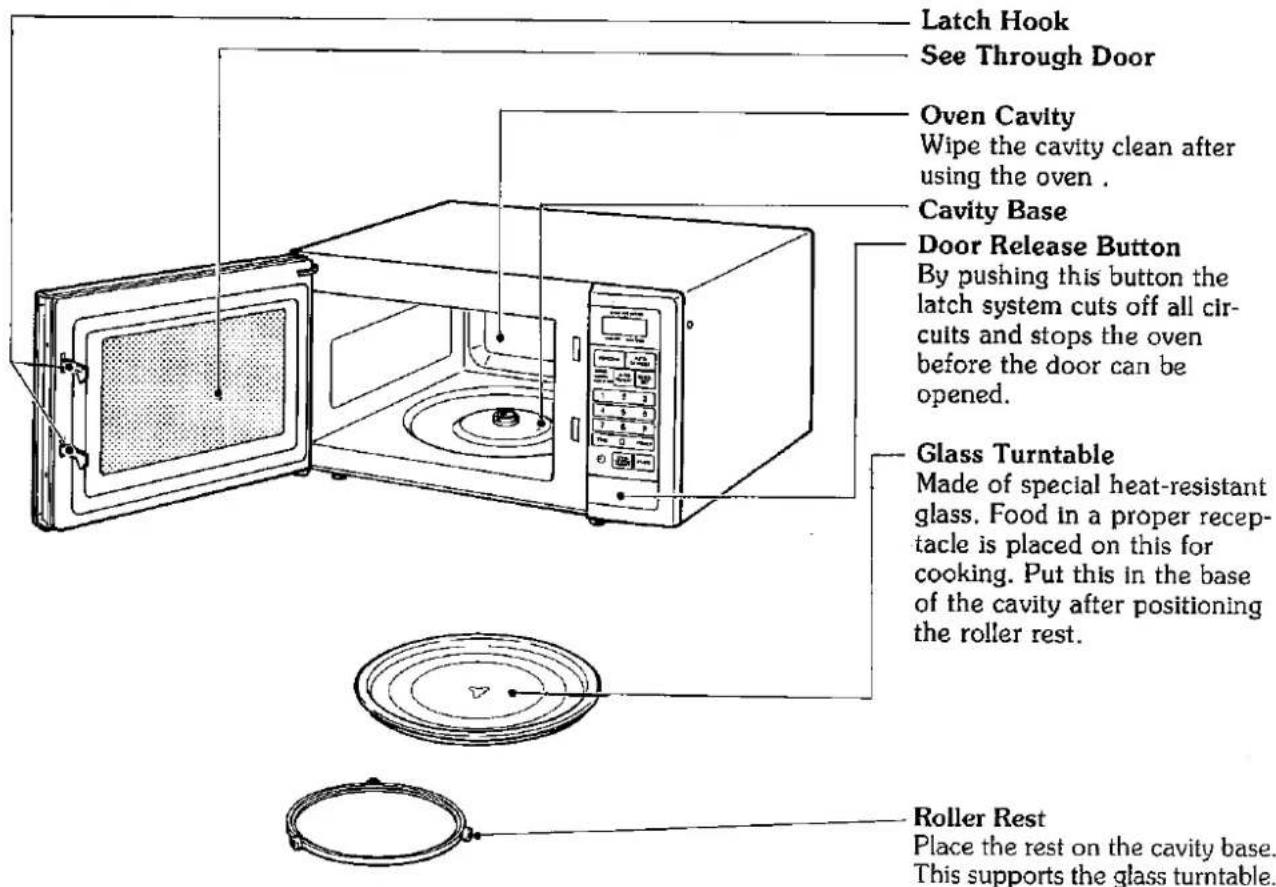
Remove your Oven and all material from the shipping carton. Your oven comes with the following material:
Glass Turntable 1 each
Roller Rest 1 each
Operating Instructions.... 1 each
Do not use this Microwave Oven for commercial purposes. This Microwave Oven is made for domestic use only.
Oven Control Panel
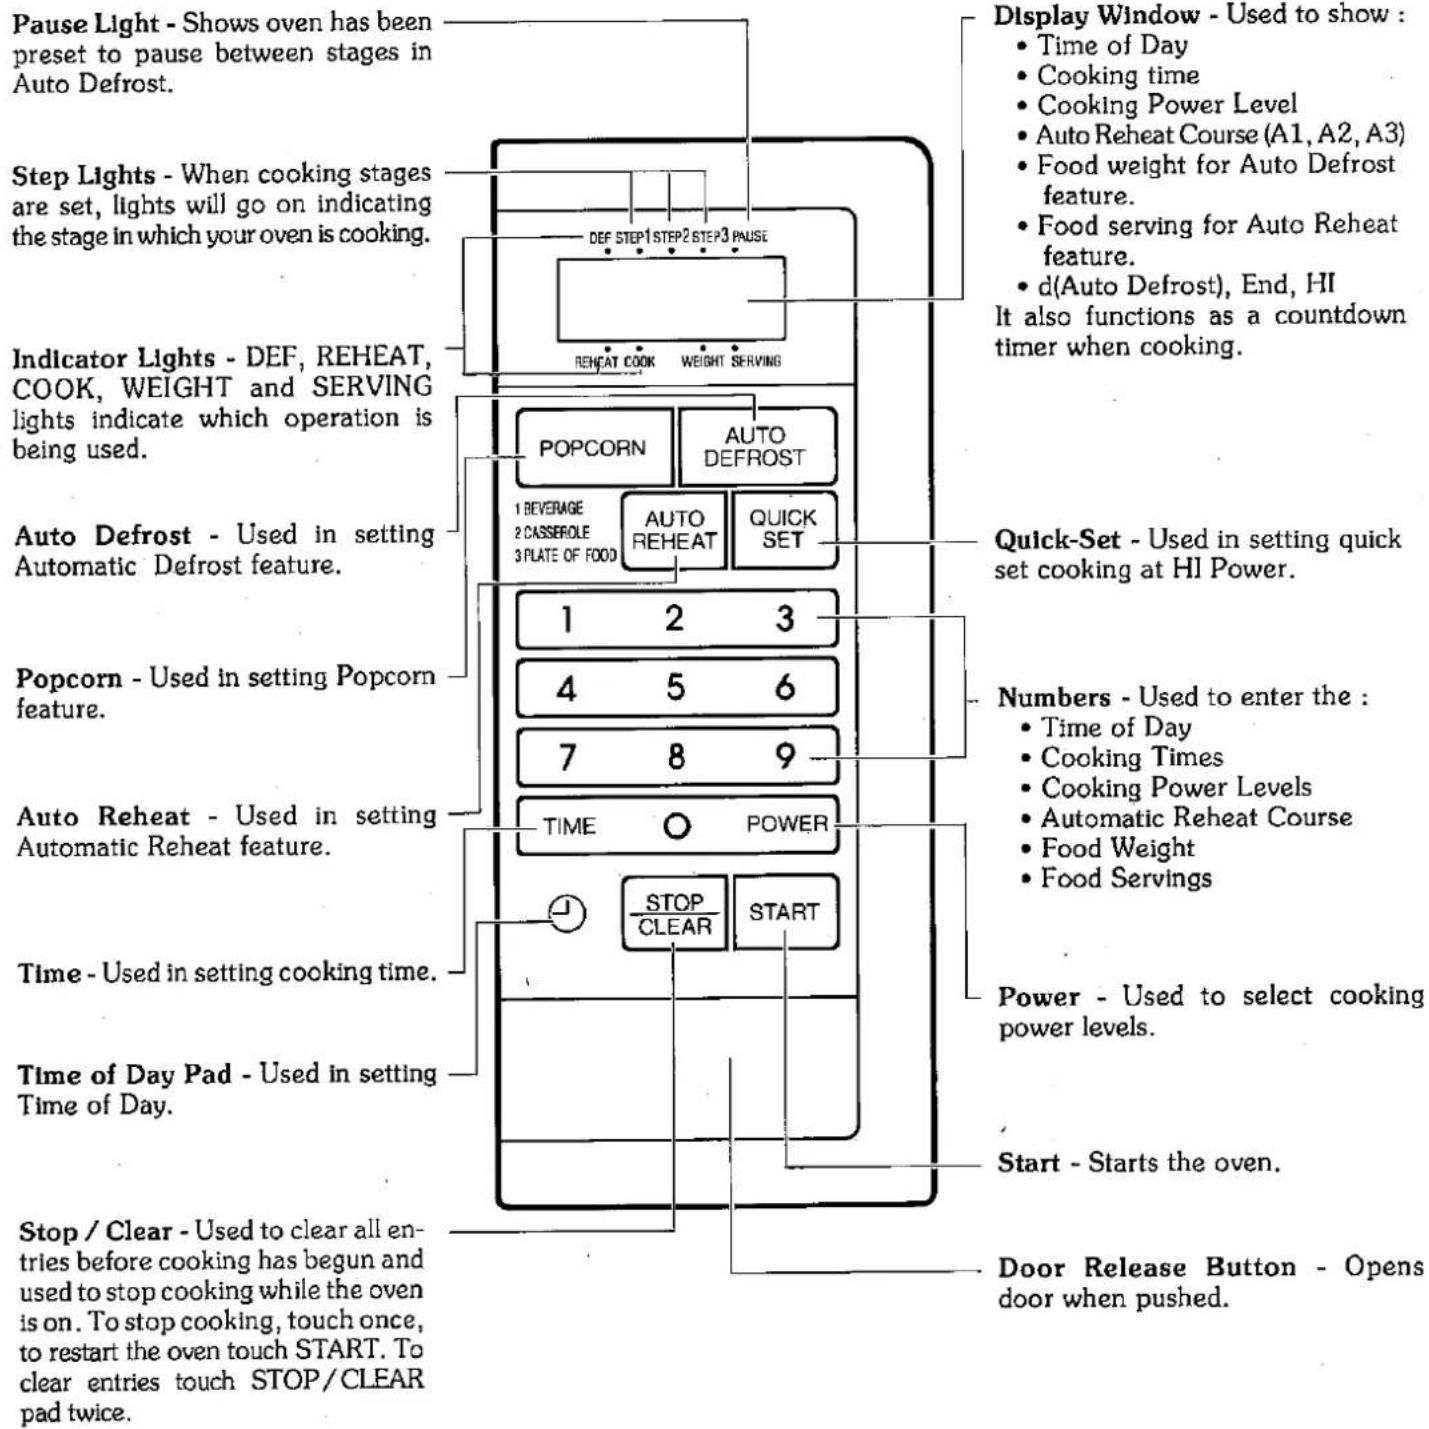
NOTE: A "beep tone" sounds when a "pad" on the control panel is touched, to indicate a setting has been entered.
Easy Use Chart
Your new DIGITOUCH control system allows you to use your microwave oven in many ways.
| TIME OF DAY | TIMER | “QUICK SET” COOKING(HI-power only) |
| To set:1. Touch STOP/CLEAR.2. Touch the symbol “⊖” (Time of Day).3. Touch numbers for correct time of day.4. Touch the symbol “⊖” (Time of Day).* This “locks” in the time and starts the clock running. | To set:1. Touch STOP/CLEAR.2. Touch TIME.3. Touch correct numbers for time.4. Touch POWER.5. Touch “0” (power level 0).6. Touch START.(See Page 6 for more instructions.) | To set:1. Touch STOP/CLEAR.2. Touch QUICK-SET.3. Touch number (single digit, 1-9) for desired cooking time in minutes.(See Page 7 and 8 for more detailed instructions.) |
| “HI-POWER”/“MULTI-POWER”COOKING | MULTI-STAGE COOKING | DELAY-START COOKING |
| To set:1. Touch STOP/CLEAR.2. Touch TIME.3. Touch numbers for desired cooking time.4. Touch POWER.5. Touch number (1-9) for desired cooking power level.6. Touch START.NOTE: It is not necessary to touch POWER when cooking with the highest power (“HI”). To set “HI-POWER” Cooking, skip steps 4 and 5 above.(See Page 10 for more detailed instructions) | To set:1. Touch STOP/CLEAR.2. Touch TIME.3. Touch numbers for cooking time.4. Touch POWER.5. Touch number (1-9) for desired cooking power level.6. Repeat steps 2-5 to set 2nd cooking stage.7. Repeat steps 2-5 to set 3rd cooking stage.8. Touch START.(See Page 11 and 12 for more detailed instructions.) | To set:1. Touch STOP/CLEAR.2. Touch TIME.3. Touch numbers for desired delay time.4. Touch POWER.5. Touch “0” (power level! 0).6. Touch TIME.7. Touch numbers for desired cooking time.8. Touch POWER.9. Touch number (1-9) for desired cooking power level.10. Touch START.NOTE: A preset delay time must be no more than 99 minutes and 99 seconds.(See Page 12 for more detailed instructions.) |
| POPCORN | AUTOMATIC DEFROST | AUTOMATIC REHEAT |
| To set:1. Touch STOP/CLEAR.2. Touch POPCORN3. Touch START.NOTE: Use only one prepackaged microwave popcorn (100g).(See Page 19 for more detailed instructions.) | To set:1. Touch STOP/CLEAR.2. Touch AUTO DEFROST.3. Enter the weight of your food in decimal increments from 0.1 to 2.9kg.4. Touch START.5. At pause, follow the instructions in the Auto Defrost chart for rearranging, turning food over, etc.6. To resume defrosting, touch START.(See Pages 13 through 16 for more detailed instructions.) | To set:1. Touch STOP/CLEAR.2. Touch AUTO REHEAT.3. Touch number (1-3) to select the appropriate Auto Reheat Course.4. Touch number (1-4) to enter the number of servings.5. Touch START.(See Page 17 and 18 for more detailed instructions.) |
| CHILD SAFETY LOCK-OUT | ||
| To set:1. Touch STOP/CLEAR2. Touch the symbol “⊖” (Time of day).3. Touch numbers 9999.4. Touch START.To cancel:1. Touch STOP/CLEAR.2. Touch the symbol “⊖” (Time of day).3. Touch numbers 7777.4. Touch START.(See page 6 for more instructions.) | ||
Recall and Change of Settings
To Recall a Setting
- To recall Time of Day while the oven is running, touch Symbol “ ^1 ” (Time of Day). It will appear momentarily in the display window.
- To check the Cooking Power Level during cooking, touch POWER. The power level will appear in the display window. Automatic features such as Auto Reheat, and Auto Defrost cannot be checked.
To Change a Setting
- To change a setting before you start the oven, touch STOP/CLEAR once and reset your desired sequence. To clear after you have started the oven, touch STOP/CLEAR twice and reset desired sequence.
Turntable
The turntable will automatically rotates either clockwise or counter-clockwise during any cooking cycle, this allows for more even results.
BOOMERANG TURNTABLE
The turntable of your oven is specially designed to return to its original starting position when cooking is finished. However, if you open the door while the oven operating, or before a "beep" tone has sounded, the turntable will stop at the same time.
Timer
Your oven also has a timer that can be used for non-cooking functions. When used as a regular timer, the oven is not running. The time is simply counting down in the display window with no cooking or heating in the oven. A tone will sound and the word "End" will show in the display window when the time is over. For settings of this timer, see "Easy Use Chart" Timer section on page 5.
Child Safety Lock-out
Your new Sanyo oven incorporate this additional Safety feature. By setting a series of numbers as described on page 5. All normal functions will appear to work as normal, but no power (heating) from the magnetron. This will prevent the possibility of the oven being accidentally operated without adult supervision.
Quick Set Cooking (HI-power only)
This feature was designed for simple setting of the oven with convenience cooking and/or reheating in mind. To set, simply touch the "QUICK-SET" pad, then touch a number pad from 1 to 9. The oven starts instantly.
- Touch STOP/CLEAR, and a beep tone will be heard. The STOP/CLEAR erases all previous settings.
- Touch QUICK-SET. The light below STEP 1 will go on. "0" will appear in the display window.
- Touch a number (single digit, 1-9) for desired cooking time in minutes. For example, 1 for one minute, 2 for two minutes, etc.
The oven will begin to cook on "HI" power and the display window will show the time counting down in minutes and seconds.
- A tone will sound and the word "End" will appear in the display window for two seconds when the cooking time is completed. The oven shuts off automatically.
NOTE: To stir or rearrange food during cooking, simply open the door; stir or rearrange and close the door.
Touch "START."
The oven will resume heating. The display window will show the time remaining.
EXAMPLE: To heat 1 cup of milk, you would use HI-power for 2 minutes.
To do this, follow these steps:
- Touch STOP/CLEAR.
- Touch QUICK-SET.
-
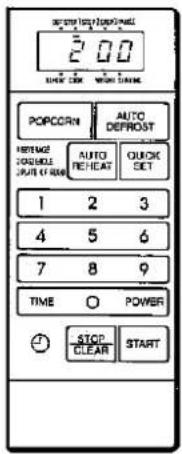
Touch "2". The oven begins to heat the milk and the time will begin to count down in the display window.
-
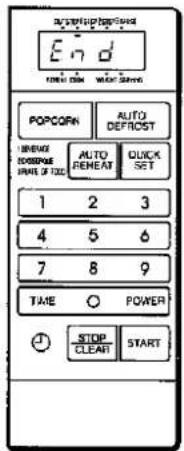
A tone will sound and the word "End" will appear in the display window for two seconds when the 2 minutes is over. The oven shuts off automatically.
"Quick Set" Heating Guide
This guide shows the food items and some special notes for reheating with "Quick-Set" feature. Touch STOP/CLEAR, touch QUICK-SET, touch numbers from 1 to 9 for minutes of heating.
| Food | Amount | Time | Special Notes |
| BEVERAGES | |||
| Water Based | 1 cup2 cups | 1-2 min.3-4 min. | Heat uncovered. Use 200-250ml cup. |
| Milk Based | 1 cup2 cups | 2 min.3-4 min. | |
| Broth-based soups | 2 cups | 3-4 min. | Use 1 litre casserole. Cover. |
| Cream-based soups | 2 cups | 4-5 min. | Use 1 litre casserole. Cover. |
| Sandwich | 1-2 | 1 min. | Place on paper plate or towels. |
| Cooked pizza,25cm,cut in 8 portions | 2 wedges4 wedgeswhole | 2 min.2-3 min.4-5 min. | Place on paper towels or paper plate or leave inuncovered cardboard box, points toward centre. |
| Casseroles | 4 cups | 7-9 min. | Cover. Stir once. |
| MEAT | |||
| Sliced thin | 85-150g | 1 min. | Heat on microproof plate, covered with plastic wrap. |
| Sliced thick | 1.25-2.5cm thick | 2 min. | |
| Barbecued beef, chili,stews, hash, etc. | 2 cups | 5-7 min. | Place in microproof dish. Cover. Stir halfwaythrough cooking time. |
| Hamburgers, Meat loaf slices, Sausage patties | 1 serving2 servings4 servings | 1 min.2-3 min.4-5 min. | Place on microproof plate. Cover with paper towel.Turn over once. |
| POULTRY | |||
| Chicken pieces | 1246 | 1 min.1-2 min.3-4 min.4-6 min. | Heat on microproof plate. Cover with plastic wrap. Iffried, cover with paper towel. |
| Creamed chicken | 2 cups | 3-4 min. | Cover. Stir once. |
| Chicken, turkey, sliced | 85-140g | 1-2 min. | Heat on microproof plate. Cover with plastic wrap. |
| SEAFOOD | |||
| Prawns, crab, or scallopsin sauce, frozen | 185g | 4-6 min. | Slit pouch and place on microproof plate. Flexpouch to mix halfway through cooking time. |
| Seafood or fishcasseroles, frozen | 400g | 7-9 min. | Remove from package to 1 litre microproof cas-serole. Cover. Stir once during cooking. |
| SIDE DISHES | |||
| Rice, Pasta | 3/4 cup1-2 cups | 1 min.2 min. | Heat in microproof casserole, covered firmly withplastic wrap. |
| Vegetables, frozen inpacket | 300-350g | 5-8 min. | Slit pouch. Place on microproof plate. Flex halfwaythrough cooking time to mix. |
| Mashed potatoes, instant | 4 servings(100g packet) | 5-7 min. | Follow package directions. Reduce liquid by 1tablespoon. |
| Canned vegetables | 220g440g500g | 2-3 min.3-5 min.5-6 min. | Use 4-cup microproof casserole, covered. Stir once. |
| Pudding and Piefilling mix | 90g | 6-8 min. | Follow package directions. Stir once. Use 4-cup glassmeasure. |
NOTE : Your oven is equipped with an Auto Reheat feature. See pages 17 and 18 for Auto Reheat information.
Cooking Guide for "Multi-power" Settings
The "Multi-Power" feature lets you cook at the best power level for the food being cooked. Cooking directions can be found in the cookbook.
| POWER LEVEL | POWER SETTINGS | EXAMPLES | OUTPUT POWER |
| 10 | LOW | Softening cream cheese.Keeping casseroles and main dishes warm. | 140(130) |
| 20 | WARM | Softening chocolate.Heating breads, rolls, pancakes, tacos, tortillas and french toast.Clarifying butter.Taking the chill out of fruit.Heating small amounts of food. | 190(180) |
| 30 | DEFROST MED LOW | Thawing meat, poultry and seafood.Completing the cooking cycle of casseroles, stews and some sauces.Cooking small quantities of food. | 245(225) |
| 40 | BRAISE | Cooking less tender cuts of meat in liquid or slow cooking dishes.Completing the cooking cycle of less tender roasts. | 295(275) |
| 50 | SIMMER | Cooking stews and soups after bringing to a boil.Cooking baked custards and pasta. | 350(320) |
| 60 | BAKE | Cooking scrambled eggs.Cooking cakes. | 400(370) |
| 70 | ROAST MED HIGH | Cooking rump roast, ham, veal and lamb.Cooking cheese dishes.Cooking quick breads and cereal products. | 450(420) |
| 80 | REHEAT | Reheating precooked or prepared food quickly.Heating sandwiches. | 505(465) |
| 90 | SAUTÉ | Cooking onions, celery and green peppers quickly.Reheating meat slices quickly. | 555(515) |
| 100(HI) | MAX POWER HIGH | Cooking tender cuts of meat.Cooking poultry, fish, vegetables and starting most casseroles.Preheating the browning dish.Boiling water.Thickening some sauces. | 650(600) |
NOTE: Approximate watts as measured by IEC-705 Test Procedure. ( ) means approximate watts as measured by 2-litre method.
As you get to know your microwave oven, you may find that a particular setting is too low or too high for the results you desire.
To set "Multi-Power", touch POWER then touch number (single digit, 1-9). For example, to set power level 30, touch POWER and "3". The display window will show "30".
If you want to change to the highest power level instead of power level 30, touch STOP/CLEAR once and reset. If you want to change to power level 50 instead of power level 30, touch "5" and the display window will show "50".
FAST DEFROST
Your oven is equipped with an Auto Defrost feature which is the best defrost method for this oven.
FAST DEFROST is explained in order to show other defrosting possibilities.
To speed up the defrosting of dense food items over 450g, start on "HI", then reduce to the 30 (DEFROST) setting.
- Microwave on "HI" for 1-2 minutes per 450g of dense food items.
- Then Microwave on 30 (DEFROST) for 3 minutes per 450g or until food is thawed.
Defrosting time will be greatly reduced.
"HI-Power"/"Multi-Power" Cooking
"HI" gives the highest power cooking possible with your microwave oven. It is the recommended setting for cooking foods with high moisture content or for cooking foods that need fast cooking to maintain their natural flavour and texture. Many foods need slower cooking (at less than full power) in order to give you the best results. In addition to "HI" there are ten multi-power settings. The power setting is recommended for the food being cooked in the Cooking Guide for "Multi-power" Setting on Page 9.
To Cook
- Touch STOP/CLEAR, and a beep tone will be heard. The STOP/CLEAR erases all previous settings.
- Touch TIME. The light below STEP 1 will go on. "0" will appear in the display window.
-
Touch the correct numbers on the control panel to set the cooking time. The time set will appear in the display window at the top of the control panel. For example:
-
To set 30 seconds, you would touch "3" and then "0".
• To set 3 minutes, touch "3", "0" and "0". - To set 3-1/2 minutes, touch "3", "3" and "0".
Remember, the timer is a digital clock that is divided into 60 seconds. Therefore, 1/2 minute is equal to 30 seconds. Touch 30 and not 50 (as with a calculator) to indicate 1/2.
- Touch POWER. The word "HI" will appear in the display window until a lower setting is entered. This is to tell you that the oven will be operating on "HI" unless a different power setting is chosen.
- Touch the number (single digit, 1-9) for desired cooking power level. For example, if the recipe calls for cooking at the "80" (REHEAT) setting, you would touch "8". The display window will show "80". This means the oven is cooking at power level 80 (REHEAT) setting.
NOTE: It is not necessary to touch POWER when cooking with the highest power ("HI"). To set "HI-POWER" Cooking, skip steps 4 and 5 above.
However, if POWER is touched, the word "HI" will appear in the display window. This is to let you know that the oven will be operating on "HI" power unless a different power setting is chosen.
6. Touch START. The oven begins to cook and the display window will show the time counting down in minutes and seconds. A tone will sound and the word "End" will appear in the display window for two seconds when the cooking time is completed. The oven will automatically shut off.
NOTE: To stir or rearrange food during cooking, simply open the door; stir or rearrange and close the door. Touch "START".
The oven will automatically continue to count down the remaining amount of time left in the display window.
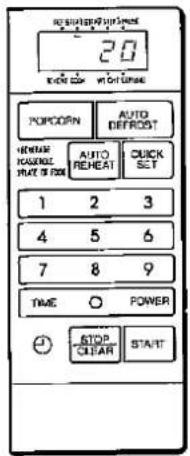
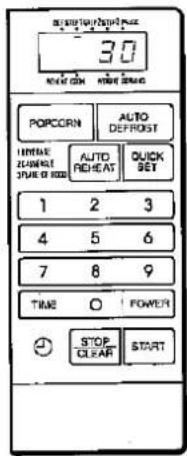
EXAMPLE: To defrost 1 slice of frozen bread, you would defrost at power level "30" (DEFROST) for 20 seconds.
To do this, follow these six steps:
- Touch STOP/CLEAR.
- Touch TIME.
-
Set 20 seconds by touching "2" and then "0". "20" will appear in the display window.
-
Touch POWER. The display window will show "HI".
- Touch number "3". "30" will appear in the display window indicating that you have set the oven to operate at power level 30 (DEFROST).
- Touch START. The oven begins to cook and the time will begin to count down in the display window.
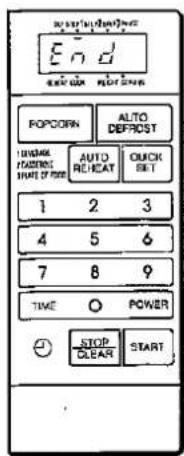
A tone will sound and the word "End" will appear in the display window for 2 seconds when the 20 seconds are over. The oven shuts off automatically.
Multi-Stage Cooking
Multi-Stage cooking allows you to set the oven to cook in one stage at a certain power level for a chosen time and then in a second and a third stage at a different power level for a chosen time. The cooking process can be set for four memory stages when Auto Defrost is included as the first stage. The stages are set before cooking and will follow automatically when oven is started.
- Touch STOP/CLEAR.
- Touch TIME. The light below STEP 1 will go on. The display window will show "0".
- Touch the correct numbers for the time of the first cooking stage.
- Touch POWER. The display window will show "HI".
- Touch the correct number (single digit, 1-9) for the cooking power level of the first cooking stage (if other than "HI").
- Touch TIME. The light below STEP 2 will go on. The display window will show "0".
- Touch the correct numbers for the time of the second cooking stage.
- Touch POWER. The display window will show "HI".
- Touch the correct number (single digit, 1-9) for the cooking power level of the second cooking stage (if other than "HI").
10A. Touch START for two-stage cooking.
10B. If three-stage cooking is desired, touch TIME. The light below STEP 3 will go on. The display window will show "0". Repeat steps 6-9 above to set the third cooking stage at the same or a different power level for a chosen time.
- Touch START.
MULTI-STAGE COOKING WITH AUTO DEFROST
If you want to cook after using the Auto Defrost cycle, first set the Auto Defrost and touch TIME, then follow the above instructions numbered 2-11. See page 15 for detailed Auto Defrost instructions. The cooking process can be set for up to four stages when Auto Defrost is the first stage. Auto Reheat cannot be combined with "Multi-Stage Cooking". Auto Reheat is designed to reheat the food completely and therefore cannot be combined with other cooking or reheating features. If it is set, the word "E" will appear in the display window and the oven will not work.
EXAMPLE: (Three-stage cooking) To defrost, cook and simmer frozen beef stew, here is how to set the oven:
First Stage
(20 minutes: Power level 40 BRAISE)
- Touch STOP/CLEAR.
- Touch TIME.
-
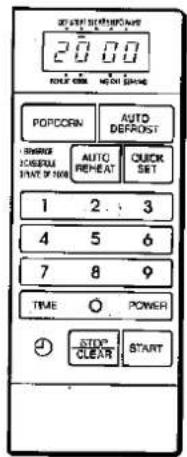
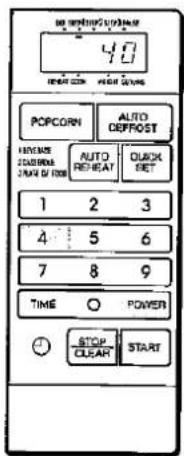
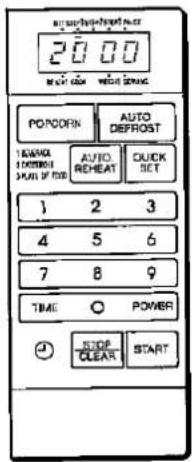
Set 20 minutes by touching "2" then "0" three times. "2000" will appear in the display window.
-
Touch POWER. "HI" will appear in the display window to remind you that the oven will operate at highest power unless you enter a lower power setting.
-
Touch number "4" "40" will appear in the display window (indicating that you have set the oven to operate at power level 40 (BRAISE). The first stage has been set.
Second Stage
(18 minutes: Power level "HI")
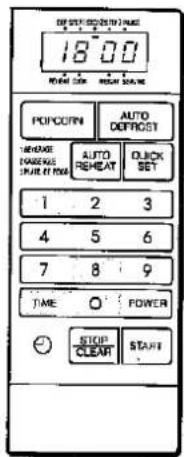
6. Touch TIME. The light below STEP 2 will go on. The display window will show "0".
7. Set 18 minutes by touching "1" then "8", and then "0" twice. "1800" will appear in the display window. (Power is on "HI".)
Multi-Stage Cooking (Cont'd)
Third Stage
(8 minutes: Power level 70 ROAST)
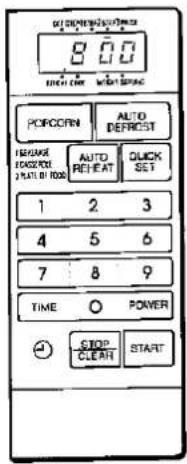
- Touch TIME. The light below STEP 3 will go on. The display window will show "0".
-
Set 8 minutes by touching "8", then "0" twice. "800" will appear in the display window.
-
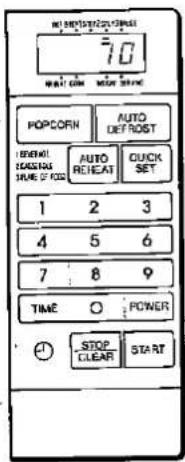
Touch POWER and number "7". "70" will appear in the display window. The third stage has been set.
- Touch START. The first stage will begin. "2000" will appear in the display window. The oven will begin to defrost (power level 40) and the time can be seen counting down in the display window. When the 20 minutes are up, a tone will sound and the oven will proceed into the second stage. The oven will begin cooking at "HI" power and the time will be counting down in the display window. When the 18 minutes are up, a tone will sound and the oven will proceed into the third stage. When the third stage is over, a tone will sound and the word "End" will appear in the display window. The oven shuts off automatically. The oven will have finished all stages.
NOTE: You may wish to rearrange the defrosted food after the manual or Auto Defrost time has ended. Simply touch STOP/CLEAR once, open the door and rearrange food. To restart the oven; close the door and touch START. The oven will automatically continue with the Multi-Stage cooking.
Delay Start Cooking
Delayed cooking can be done by using the MULTI-STAGE COOKING feature. After counting down the preset delay time, the oven will cook for the chosen cooking time.
- Touch STOP/CLEAR.
- Touch TIME.
- Touch the correct numbers for the desired delay time.
- Touch POWER.
- Touch "0" (power level 0).
- Touch TIME.
- Touch the correct numbers for the desired cooking time.
-
Touch POWER.
-
Touch the correct number (single digit, 1-9) for the desired cooking power level.
10A. Touch START for one-stage cooking.
10B. If two-stage cooking is desired, touch TIME. Repeat steps 6-9 above.
11. Touch START.
NOTE: A preset delay time must be no more than 99 minutes and 99 seconds.
Automatic Defrosting
The automatic defrosting course is preset in your oven. The "Auto Defrost" feature provides you with the best defrosting method for your frozen foods.
AUTO DEFROST COURSE CHART
| FOOD | BASE Q'TY | DEFROST TIME PER BASE Q'TY | MIN./MAX. QUANTITY |
| BEEF ...... Ground beef, Round steak,Rib roast (rolled), Rump roast,Chuck roast, Stew beefLAMB ...... Cubed for stew, Ground lamb,Chops, LegPORK ...... Chops, Spareribs, Country-Style ribs, sausage, RoastVEAL ...... Chops, RoastVARIETY MEAT .... Liver slices, Tongue (Whole)CHICKEN ...... Whole or Cut upCORNISH HENS .... WholeDUCKLING ...... WholeTURKEY ...... Breast, Drumsticks, Roast(boneless)FISH ...... Fish fillets, Fish steak,Whole fishSEAFOOD ...... Lobster, Crabmeat, Shrimp | 1 Kg | 15 min. 22 sec. | 0.1 to 2.9 Kg |
All foods listed in the Auto Defrost Chart above have the same defrost time of 15 minutes 22 seconds per base quantity of 1kg. The minimum quantity that can be entered is 0.1 kg. (one-tenth of a kg); the maximum is 2.9 kg.
AUTO DEFROST TIPS
- The benefit of the Auto Defrost feature is the automatic setting and control of defrosting, but just like conventional defrosting, you must check the food during the defrosting time.
- To check the food "Pause" is preset in this Auto Defrost cycle.
Turn over, separate or rearrange food items per instructions in the Auto Defrost Chart when the word "PAUS" appears in the display window. - For best results, remove fish/seafood/meat/poultry from its original paper or plastic packaging (wrapper). Otherwise, the wrap will hold steam and juices close to the foods to cook.
-
When it is difficult to remove the wrap from the foods, defrost the wrapped food for about a quarter of the total defrost time, which is displayed at the beginning of the defrost cycle. Remove the food from the oven and then remove the wrap from the food. Return the food to the oven and touch START.
-
Place foods in a shallow microproof baking dish or on a microwave roasting rack to prevent steam and juices cooking outside areas of the food.
- Food should still be somewhat icy in the centre when removed from the oven.
• Standing time is included in the Auto Defrost courses.
IMPORTANT NOTE: The defrosting power setting (power level 30 DEFROST) should not be confused with this "Auto Defrost" feature. The defrost cooking level is a low-energy setting used to cook foods that need slow, gentle cooking. Also, use the defrost cooking level to defrost small ground beef patties, bacon and bread items.
Automatic Defrosting (Cont'd)
EXAMPLE : To defrost 0.9 kg of Ground Beef you would use Auto Defrost.
To do this follow these steps:
-
Touch STOP/CLEAR.
-
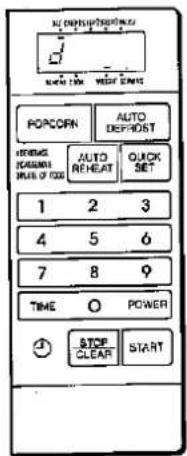
Touch AUTO DEFROST The letter "d" will appear in the display window and the light below DEF will go on. The light above WEIGHT will flash. This is to tell you that you need to enter the weight.
- The oven will stop automatically at the end of the first time segment and the time remaining will appear in the display window.
At pause, follow the instructions in the Auto Defrost Chart for separating, rearranging, and turning food over. See pages 15 and 16.
-
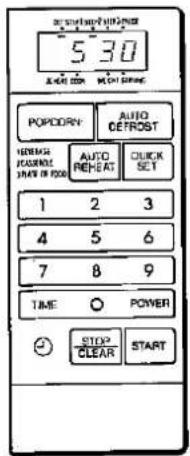
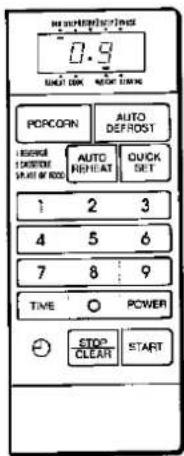
Touch number to enter the food weight in decimal increments from 0.1kg to 2.9kg. Enter the weight of the ground beef by touching "0" and then "9". The number "0.9" will appear in the display window. The light above WEIGHT will stop flashing remain on.
-
Touch START. The oven will begin the defrosting. You will see the time "counting down" in the display window.
NOTE : If the oven door is not opened during the pause time segment, the oven will restart automatically after 5 minutes. Because turning, separating, etc. are usually necessary for proper defrosting and cooking, follow steps 1 thru 5 for best results.
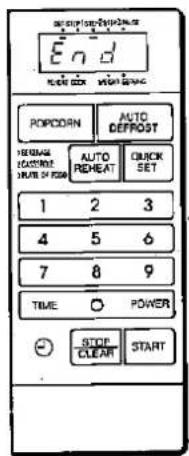
- After turning food over or rearranging, etc., touch START. The oven will resume defrosting. At the end of the defrosting time, a tone will sound and the word "End" will appear in the display window for 2 seconds. The oven shuts off automatically.
NOTE:
- It is not necessary to enter weight when defrosting 1kg of food. The menu automatically selects 1kg if is not entered.
- To enter a weight of less than 1kg always press "0" first. For example, to enter 0.2kg, press "0" and then "2".
- As only one digit can be entered after decimal point, round figures off to the lower number to avoid over defrosting. For example, for 1.28kg, use 1.2.
AUTO DEFROST CHART
This chart shows standing time and some special directions for use with the "Auto Defrost" feature.
| FOOD | DIRECTIONS | STANDING TIME |
| BEEFGround beef | Remove thawed portions with fork at pause.Turn over.Return remainder to oven. | 5-10 |
| Round steakFlank steakTenderloin steak | Use a microproof roasting rack.Turn over at pause.Cover warm areas with aluminium foil. | 5-10 |
| Chuck roastRib roast, rolledRump roastSirloin tip roast | Use a microproof roasting rack.Turn over at pause.Cover warm areas with aluminium foil. | 30-60 |
| Stew beef | Remove thawed portions with fork at pause.Separate remainder.Return remainder to oven. | 10 |
| LAMB Cubed for stew | Remove thawed portions with fork at pause.Separate remainder.Return remainder to oven. | 10 |
| Ground lamb | Remove thawed portions with fork at pause.Turn over.Return remainder to oven. | 5-10 |
| Chops2.5cm (1 inch) thick | Use microproof rack.Separate and rearrange at pause. | 15 |
| Leg | Use a microproof roasting rack.Turn over at pause.Cover warm areas with aluminium foil. | 20-30 |
| PORKChops, 1.25cm (1/2 inch) thick | Use microproof roasting rack.Separate and rearrange at pause. | 5-10 |
| SpareribsCountry-style ribsRoast | Use a microproof roasting rack.Turn over at pause.Cover warm areas with aluminium foil. | 10 |
| Sausage, bulk | Remove thawed portions with fork at pause.Turn over.Return remainder to oven. | 5 |
| Sausage, links | Separate and rearrange at pause. | 5 |
| VEALChops, 1.25cm (1/2 inch) thick. | Use microproof roasting rack.Separate and rearrange at pause. | 10-20 |
| Roast | Use a microproof roasting rack.Turn over at pause.Cover warm areas with aluminium foil. | 30 |
| VARIETY MEATLiver, slices | Separate slices and rearrange at pause. | 10-15 |
| Tongue, whole | Use a microproof roasting rack.Turn over at pause.Cover warm areas with aluminium foil. | 10-20 |
| CHICKENWhole | Place chicken breast-side up in microproof roasting rack.Turn over at pause.Cover warm areas with aluminium foil.Giblets may still be frozen but chicken will be thawed.Immerse in cold water. | 30-45 |
| Cut up | Use microproof roasting rack.Separate pieces and rearrange at pause.Turn over.Cover warm areas with aluminium foil. | 10-15 |
| CORNISH HENS /DUCKLINGWhole | Place chicken breast-side up in microproof roasting rack.Turn over at pause.Cover warm areas with aluminium foil. | 20-30 |
| TURKEYBreast | Use microproof roasting rack.Turn over at pause.Cover warm areas with aluminium foil. | 30-45 |
| Drumsticks | Use microproof roasting rack.Turn over at pause.Separate pieces and rearrange. | 15-20 |
| Roast, boneless | Use microproof roasting rack.Turn over at pause.Cover warm areas with aluminium foil. | 30-45 |
| FISHFish fillets | Use microproof roasting rack.Turn over at pause.Separate fillets when partially thawed.Carefully separate fillets under cold water. | 5 |
| Fish steak | Use microproof roasting rack.Separate and rearrange at pause. | 5 |
| Whole fish | Use microproof roasting rack.Cover head and tail with aluminium foil.Turn over at pause. | 5-10 |
| SEAFOODLobster tails | Use a microproof baking dish.Turn over and rearrange at pause. | 5 |
| Crabmeat | Use a microproof baking dish.Break apart and turn over at pause. | 5 |
| Shrimp | Use a microproof baking dish.Break up and stir to rearrange at pause. | 5 |
Automatic Reheating
Three automatic reheat courses are preset in your oven. The "Auto Reheat" feature provides you with best reheating method for your foods.
AUTO REHEAT COURSES CHART
| COURSE # | FOOD | BASE Q'TY | DIRECTIONS |
| AUTO REHEAT 1 (A1) BEVERAGE | Coffee / Tea Milk | 1 cup | No cover.Use uncovered microproof cup(s) or mug(s).Stir after reheating. |
| Soup | 1 cup | Use uncovered microproof mug(s) or microproof casserole, covered.Stir after reheating. | |
| Sauce | 1 cup | Use microproof casserole, covered.Stir after reheating. | |
| AUTO REHEAT 2 (A2) CASSEROLE | Casserole | 1 cup | Use appropriate size microproof casserole, covered.Let stand 5 minutes. |
| AUTO REHEAT 3 (A3) PLATE OF FOOD | Plate of Food | 1 serving | Use microproof plate.Cover lightly with wax paper.Use one plate for 2 - 4 servings.Example of one serving for Plate of Food course;1 chicken leg, 1/2 cup vegetables, 1/2 cup rice or 2 slices roast beef, 1/2 cup mashed potatoes. |
AUTO REHEAT TIPS
- Starting temperatures of foods listed above are refrigerator or room temperature.
- Follow instructions given under "Directions" for best results.
-
When reheating a plate of food how the food is arranged on the plate affects how well it will reheat. Therefore, the denser, thicker areas should be near the outer edges of the plate.
-
Stirring helps to distribute heat more evenly so when appropriate, stir foods after reheating.
• Number of servings can be increased up to four serving. (See page 18.)
Automatic Reheating (Cont'd)
EXAMPLE : To reheat 1 cup of soup (one serving), you would use Auto Reheat course number "A1 (Beverage)" for one serving.
To do this, follow these steps;
- Touch STOP / CLEAR.
- Touch AUTO REHEAT to select the appropriate automatic reheating course. The letter "A" will appear in the display window and the light above REHEAT will flash.
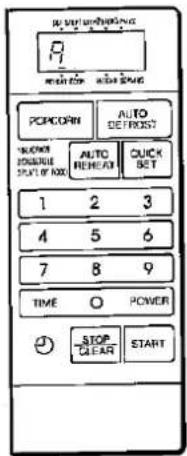
- Touch START. The oven will begin the reheating course you have selected. You will see the time "counting down" in the display window.
- At the end of the reheating time, a tone will sound and the word "End" will appear in the display window for 2 seconds. The oven shuts off automatically.
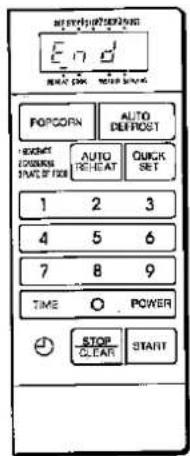
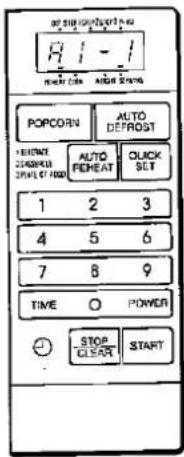
- Touch a number (single digit, 1-3) to select the course desired. Touch number "1" to select the beverage course (A1). The course number "A1" will appear in the display window. The light above REHEAT will stop flashing and remain on. The light above SERVING will flash. This is to tell you that you need to enter the number of servings.
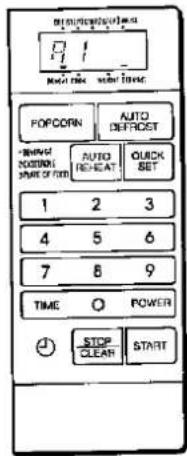
- Touch a number (single digit, 1-4) to enter the number of servings to be reheated. Enter one serving of soup by touching "1". "A1-1" will appear in the display window. The light above SERVING will stop flashing and remain on.
Popcorn
This feature is designed for quick and easy popping of a prepackaged room temperature microwave popcorn (100g). To set, simply touch the "POPCORN" pad, and touch "START". (CAUTION - USE ONLY 100g BAG SIZE.)
-
Touch STOP / CLEAR, and a beep tone will be heard. The STOP / CLEAR erases all previous setting.
-
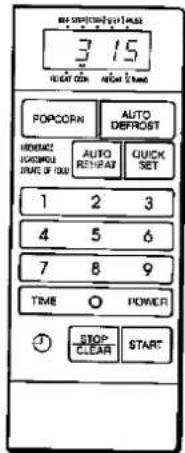
Touch POPCORN. The light above COOK will go on. The "Popping Time" will appear in the display window.
The "Popping Time" for one prepackaged popcorn (100g) is :
3 minutes 15 seconds.
- Touch START. The popcorn will pop on "HI" power. The display window will show remaining time in minutes and seconds.
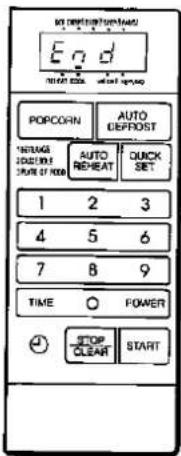
- A tone will sound and the word "End" will appear in the display window for two seconds when the popping time is completed. The oven shuts off automatically.
POPCORN TIPS
- Use only popcorn packaged especially for microwave oven.
- Place only bag (100g) in the oven according to manufacturer's directions.
- Pop only one bag (100g) at a time. DO NOT DOUBLE QUANTITY.
• After popping, open bag carefully! Popcorn and steam are extremely HOT. - Do not reheat unpopped kernels or reuse bag.
- Popcorn popping devices are not recommended for this feature.
EXAMPLE : To pop one bag (100g) of microwave Popcorn, follow these steps :
-
Touch STOP / CLEAR.
-
Touch POPCORN. Popping time will appear in the display window.
Place only one bag on center of turntable.
- Touch START. The time will begin to count down in the display window. The popcorn begins to pop after about one minute.
- A tone will sound and the word "End" will appear in the display window for two seconds when the popping time is over. The oven shuts off automatically.
NOTE: This "Popcorn" feature cannot be combined with another feature or automatic features such as Auto Defrost, and Auto Reheat.
How to Use Your Microwave Oven Safely (IMPORTANT)
Although your oven is provided with safety features, it is important to observe the following:
a) It is important not to interfere or tamper with safety interlocks.
b) Do not place any object between the oven front face and the door or allow residue to accumulate on door sealing surfaces. Wipe the door sealing area frequently with a mild detergent, rinse and wipe dry. Never use abrasive powders or pads.
c) When opened, the door must not be subjected to strain, for example, a child hanging on an opened door or any load could cause the oven to fall forward, weight could also damage the door.
Do not operate the oven if it is damaged, until it has been repaired by a service engineer trained by SANYO. It is particularly important that the oven closes properly and that it is inspected to ensure that there is no damage to the:
i) Door (bent)
ii) Hinges and Latches (broken or loosened)
iii) Door seals and Sealing surfaces
d) It is dangerous for anyone other than a properly qualified service engineer trained by SANYO to carry out adjustments or repairs.
e) Small quantities of food or foods with low moisture content or high fat or sugar content can burn, dry out or catch on fire if cooked or re-heated too long.
Please note that the heating/cooking period required is extremely short: for example it only takes approximately 15 seconds to heat one mince pie or similar. In the unlikely event of a fire occurring, turn off the oven and its electrical supply, pull out the plug, but keep the oven door closed.
f) If the supply cord is damaged, it must be replaced by SANYO SERVICE CENTRE, as a special prepared cord is required.
NOTE
It is quite normal for steam to be emitted around the door, for misting to occur on the door, or even for water droplets to appear below the door during the cooking cycle.
This is merely condensation from the heat of the food and does not affect the safety of your oven.
The door is not intended to seal the oven cavity completely but its special SANYO design contributes to the complete safety of the appliance.
WARNING
- Do not heat food or liquids in bottles or jars with lids on.
Air must be allowed to escape from the container. Do not warm babies bottles in the microwave oven with screw top lids or teats in place. - Milk or food for babies should be heated on SIMMER. It should then be stirred thoroughly and the milk or food should be tested to ensure that it is at the correct temperature before giving it to the baby.
- When boiling water or other liquids, be sure to use a wide necked container. This will allow air bubbles to escape freely. Should a narrow necked container be used, air bubbles may combine to form a large bubble which may in turn cause the liquid to boil over. This may happen even after the cooking time has stopped.
- Do not attempt to operate the oven while empty as this will cause damage.
- As an exhaust is located in the bottom of the oven, install the oven so as not to block the outlet.
- Do not deep fry in the microwave oven as the temperature of oil cannot be controlled and it may overheat.
- Always remove contents from cans to microproof container for reheating.
- It is important to keep the oven interior clean. Food particles or spatters left on the oven walls reduce the efficiency of the microwaves.
- Never completely seal containers in the microwave oven. Coverings are necessary but containers must not be airtight.
Taking Care of Your Microwave Oven
Wipe the oven inside and out with a mild detergent solution, rinse, and wipe dry. Any food left in oven could possibly cause arcing due to carbonisation. This should be done on a weekly basis — more often if needed. Never use abrasive powders or pads.
REMOVABLE PARTS
- The glass turntable can be removed for cleaning at the sink. Wipe up excess spillage with paper towel or cloth prior to removal of turntable.
- Roller rest can be removed for easy cleaning.
Usable Cooking Utensils and Materials
OVENPROOF GLASS
Ovenware (treated for high-intensity heat), such as mixing bowls, bread dishes, pie plates, cake plates, liquid measuring cups, casseroles, and bowls without metallic decoration.
CHINA
Bowls, cups serving pieces, plates, and platters without metallic decoration.
POTTERY
Dishes, cups, mugs, and bowls.
PLASTIC
Non P.V.C. cling film may be used as a cover. Place cling film firmly over container, make sure there is sufficient air space by pressing finger in the centre. Never have the cling film skin tight. The dish should be deep enough so that the cling film will not touch the food. As the food heats, it may cause the cling film to melt wherever it touches the food. Plastic dishes, cups, semi rigid freezer containers, and plastic bags are usable for short cooking operations. Use with care as some softening of the plastic can occur with heat from the food.
Specially designed plastic microwave cookware is suitable for general use provided it is clearly made "Microwave Oven" safe.
Utensils and Materials to Avoid
METAL UTENSILS
Metal utensils are not recommended because the metal shields the food from microwave energy on the bottom and sides, causing uneven cooking results. Metal utensils could also cause arcing and damage the appliance.
METAL DECORATION
Metal-trimmed or -banded dinnerware, casseroles, etc., should not be used. The metal trim interferes with normal cooking and may damage the dish.
ALUMINIUM FOIL
Large sheets of aluminium foil should be avoided because they will disrupt cooking and may cause harmful arcing. However, smaller pieces may be used to cover areas such as poultry legs and wings. Any aluminium foil used should never be closer than 2.5cm (1 inch) from side walls of oven.
Do not cover food completely with aluminium foil.
WOOD
Wooden bowls and boards, will become dried out when used in the microwave oven and may split or crack.
OTHER
Avoid using cracked, flawed, or defective utensils, including ovenproof glassware.
CAUTION: DO NOT USE METAL TIES ON ANY PAPER OR PLASTIC BAGS; THE TIES BECOME HOT AND COULD CAUSE A FIRE.
A Few Other Precautions (IMPORTANT)
-
Arcing in the oven during operation usually occurs from use of metallic utensils or overuse of aluminium foil. Arcing is denoted by a "snapping" or "cracking" noise and may be accompanied by bright flashes.
Continuous arcing can damage the unit. If continuous arcing occurs during operation, do not use the unit and call a service engineer. -
Always make sure that closed containers, such as jars of baby food, are opened and plastic pouches of vegetable are pierced before cooking.
Tightly closed containers could explode.
-
Do not cook eggs in their shells because they will explode. Puncture the membrane around the yolk before frying eggs. This is because the yolk swells faster than the membrane and the egg explodes when heated quickly.
-
Do not be alarmed or surprised if you notice the turntable moving clockwise sometimes, and anticlockwise at other times. There is nothing wrong with your oven it is merely the type of turntable motor we use.
- Small quantities of food or foods with low moisture content or high fat or sugar content can burn, dry out or catch on fire if cooked or re-heated too long.
Please note that the heating/cooking period required is extremely short: for example it only takes approximately 15 seconds to heat one mince pie or similar. In the unlikely event of a fire occurring, turn off the oven and its electrical supply, pull out the plug, but KEEP THE OVEN DOOR CLOSED.
What to Do If Repairs Are Needed
Get in contact with your nearest Sanyo Service Centre. On no account remove or interfere with any parts or screws. "THIS COULD PROVE VERY DANGEROUS" Make the following simple check-up before contacting the Sanyo Service Centre:
- If the interior lamp does not light when the "START" pad is touched.
-
Make sure that the mains lead is securely plugged in.
-
Make sure that the door is properly closed.
- If the lamp inside lights but the food is not heated:
-
Make sure that the food is not completely covered with a metal container or aluminium foil.
-
Check child safety lock out has been cancelled.
- Noisy operation:
- Make sure that sparks are not being produced due to the use of metal utensils.
NOTE
SANYO
SANYO Electric Co., Ltd.
OSAKA, JAPAN


- EM-604T / EM-604TW
- Microwave Oven
- Table of Contents
- General Instructions
- User Instructions
- Detailed Directions
- WARRANTY
- How a Microwave Oven Makes Cooking Faster, Easier and Much More Enjoyable
- A feast in minutes.
- Natural flavour.
- Utensils.
- Simplified operation.
- Clean, cool operation.
- Perfect for defrosting and re-heating.
- Economical.
- Always undercook.
- The Extra Features of Your Sanyo Microwave Oven
- Compact, light weight, easy to move.
- Five separate safety features.
- Multi power control.
- Simplified cooking.
- Boomerang Turntable.
- High-visible viewing window.
- Practical dimensions.
- Installation
- Oven Control Panel
- Easy Use Chart
- Recall and Change of Settings
- To Recall a Setting
- To Change a Setting
- Turntable
- BOOMERANG TURNTABLE
- Timer
- Child Safety Lock-out
- Quick Set Cooking (HI-power only)
- "Quick Set" Heating Guide
- Cooking Guide for "Multi-power" Settings
- FAST DEFROST
- "HI-Power"/"Multi-Power" Cooking
- To Cook
- Multi-Stage Cooking
- MULTI-STAGE COOKING WITH AUTO DEFROST
- First Stage
- Second Stage
- Multi-Stage Cooking (Cont'd)
- Third Stage
- Delay Start Cooking
- Automatic Defrosting
- AUTO DEFROST TIPS
- Automatic Defrosting (Cont'd)
- NOTE:
- AUTO DEFROST CHART
- Automatic Reheating
- AUTO REHEAT TIPS
- Automatic Reheating (Cont'd)
- Popcorn
- POPCORN TIPS
- How to Use Your Microwave Oven Safely (IMPORTANT)
- NOTE
- WARNING
- Taking Care of Your Microwave Oven
- REMOVABLE PARTS
- Usable Cooking Utensils and Materials
- OVENPROOF GLASS
- CHINA
- POTTERY
- PLASTIC
- Utensils and Materials to Avoid
- METAL UTENSILS
- METAL DECORATION
- ALUMINIUM FOIL
- WOOD
- OTHER
- A Few Other Precautions (IMPORTANT)
- What to Do If Repairs Are Needed
- SANYO
Marke : SANYO
Modell : EM-604T
Kategorie : Mikrowelle