
KH 94 - Staubsauger LERVIA - Kostenlose Bedienungsanleitung
Finden Sie kostenlos die Bedienungsanleitung des Geräts KH 94 LERVIA als PDF.
Benutzerfragen zu KH 94 LERVIA
0 Frage zu diesem Gerät. Beantworten Sie die, die Sie kennen, oder stellen Sie Ihre eigene.
Eine neue Frage zu diesem Gerät stellen
Laden Sie die Anleitung für Ihr Staubsauger kostenlos im PDF-Format! Finden Sie Ihr Handbuch KH 94 - LERVIA und nehmen Sie Ihr elektronisches Gerät wieder in die Hand. Auf dieser Seite sind alle Dokumente veröffentlicht, die für die Verwendung Ihres Geräts notwendig sind. KH 94 von der Marke LERVIA.
BEDIENUNGSANLEITUNG KH 94 LERVIA
graphic design, photos & translations by ORFGEN Marketing & Communication · Essen, Germany
Lervia


Operating and safety instructions
Dear Customer,
Thank you for choosing this LERVIA product. Our products are noted for their high quality and safety standards. We guarantee our products for 36 months. We look forward to you choosing other LERVIA products in the future. Before using the appliance for the first time, please read carefully through the instructions for use and if necessary pass them on to third parties. These instructions are to be considered as a constituent part of the product.
Proper use
The vacuum cleaner is only to be used for vacuum cleaning dry surfaces or sucking up dry materials. The appliance is not to be used on people or animals. Any other use or modification to the equipment shall be considered as improper use and could give rise to considerable dangers. The manufacturer shall not be liable for damage caused by improper use or incorrect operation.
Technical details
Nominal voltage: 230 ~V 50 ~Hz
Power rating: 1700 watts
Connecting to the mains
Before you switch on the vacuum cleaner make sure that the mains voltage is the same as that shown in the technical details.
Important safety advice
- This equipment is intended exclusively for domestic use.
- Never pull the plug out of the socket to switch off the vacuum cleaner. Always use the on/off switch.
- Never use the vacuum cleaner if the cable, plug or housing is damaged.
- Do not use the vacuum cleaner without a bag, or if the bag is damaged or full (look at the dust bag filling level indicator).
- If the vacuum stops working properly, pull the plug out of the socket immediately. In addition, make sure that the plug is pulled out of the socket before changing the dust bag or filter, or before cleaning the vacuum cleaner.
- Do not use the vacuum cleaner for sucking up sharp objects or pieces of glass.
- Never suck up burning matches, glowing ashes or cigarette ends.
- Do not use the vacuum cleaner for sucking up products containing chemicals, stone dusts, plaster, cement, or similar particles.
- This vacuum cleaner is intended only for use on dry surfaces. The vacuum cleaner is not intended for use on liquid foams, water, inflammable or explosive materials or other liquids.
- WARNING! DANGER OF FIRE! There is the danger of fire when vacuuming or working with electrical tools that are connected to the vacuum cleaner for the purpose of dust collection. Under certain conditions the wood dust in the dust extraction bag (or in the vacuum's filter bag) can self-ignite, e.g. as a result of flying sparks generated when abrading metals or metal objects left in wood. This can happen particularly if the wood dust is mixed with paint residue or other chemicals and the abraded particles are hot from prolonged abrasion.
Therefore you must empty the dust collection bag and filter bag before pausing or stopping work and always avoid overheating the abraded particles. -
Always make sure that the vacuum cleaner is not placed near radiators, ovens or other heating appliances or heated surfaces.
-
Always make sure that the ventilation slots are kept free from obstruction. Obstructed air circulation can lead to overheating and damage to the vacuum cleaner.
- Always make sure that the vacuum cleaner is only operated with the dust bag and the dust filter installed.
- The vacuum cleaner is not intended for use by children.
- If your vacuum cleaner is defective, please send it to the appropriate service centre or have it repaired at an electrical equipment repair workshop. Under no circumstances open the vacuum cleaner yourself. Work on your vacuum cleaner carried out by non-authorised service centres could endanger your health.
- Any rights under the guarantee are lost if these operating instructions are not followed. The guarantee does not cover wear parts or damage resulting from improper use (incorrect operation, water, dropping etc.), work on the vacuum cleaner carried out by third parties, or technical modifications to the vacuum cleaner. The performance of services under the guarantee does not extend or renew the 36 months guarantee period.
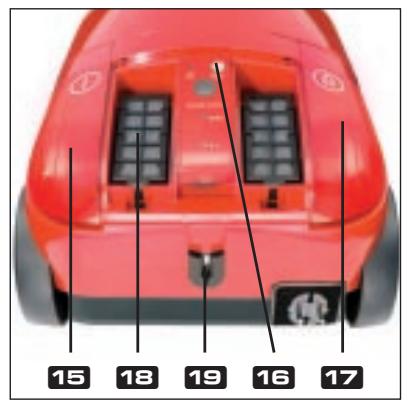
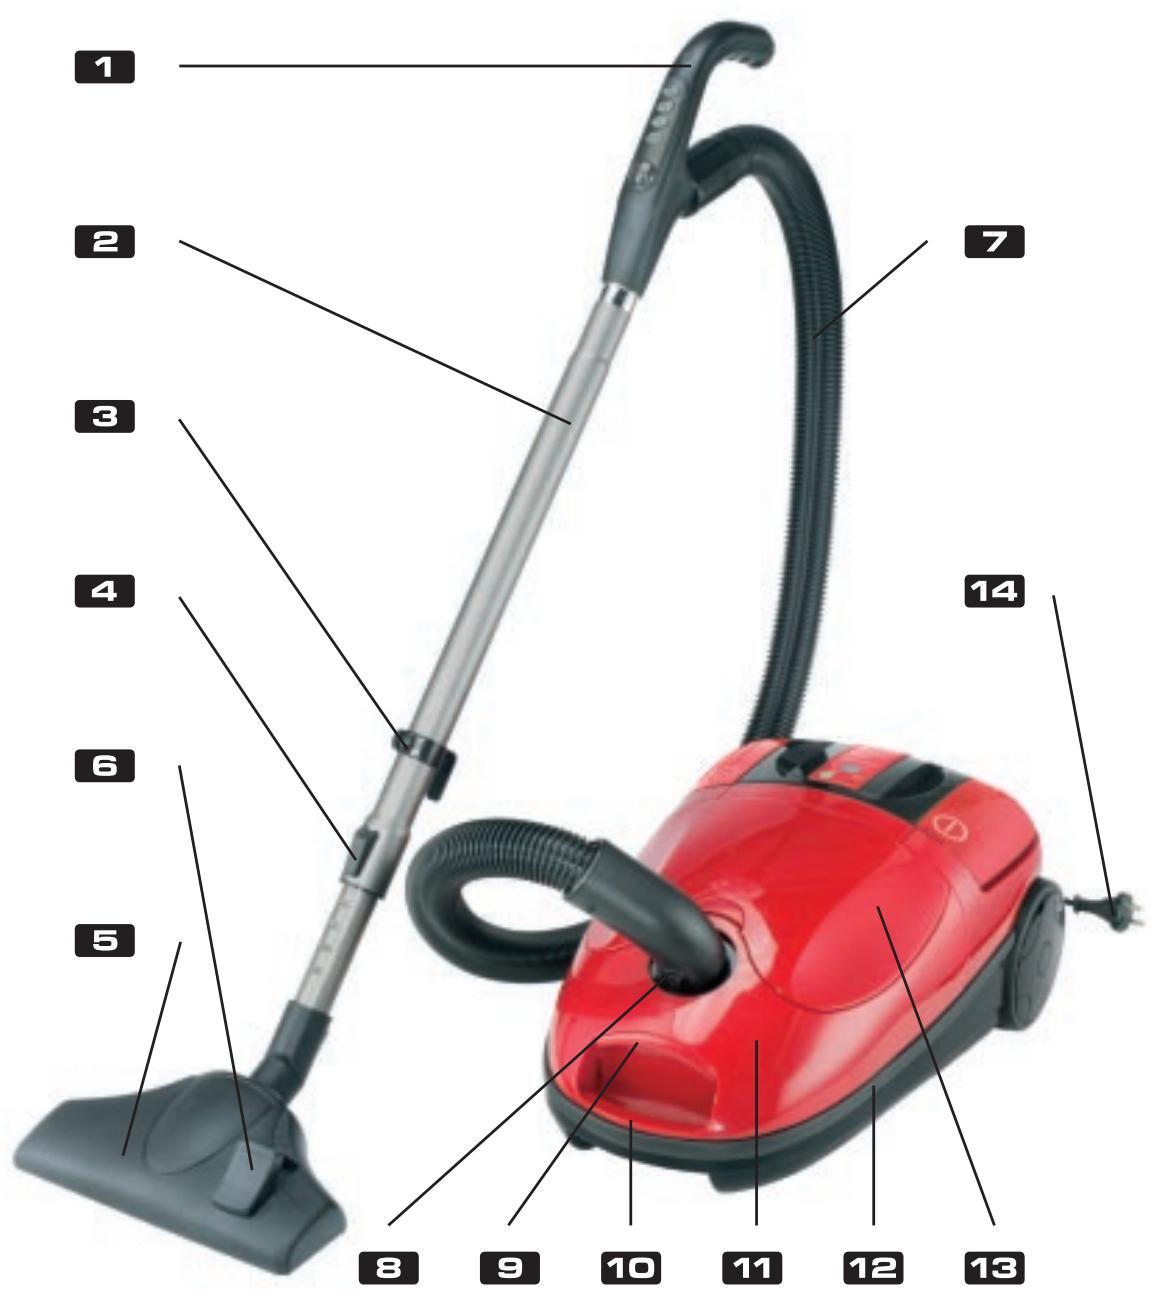
Features
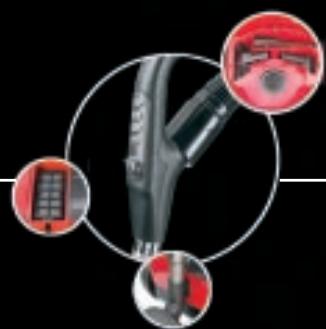
1 Handle/remote control
Telescopic tube
Parking clip
Telescopic adjuster
Floor tool/brush
Changeover switch
Hose
Hose unlock button
Cover button
Carrying handle
Cover
Soft strip furniture protector
Accessory container cover
Plug
Foot switch ON/OFF
Dust bag indicator
Foot switch for cable tidy
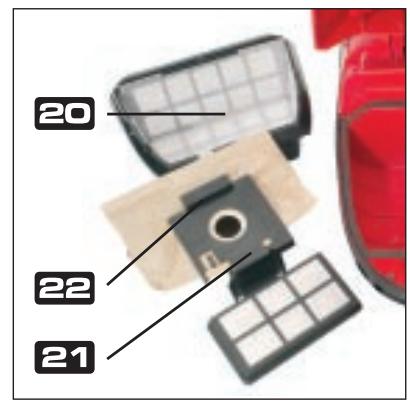
18 Outlet air filter
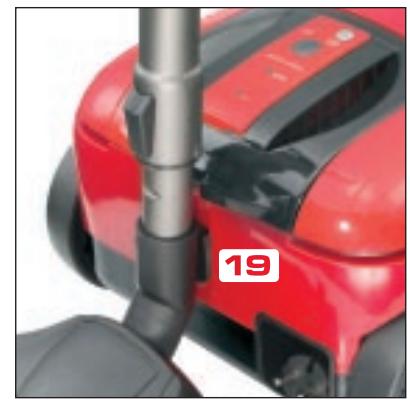
19 Parking rail with Auto-Power ON/OFF:
Dust bag container
Dust bag adapter
Clip
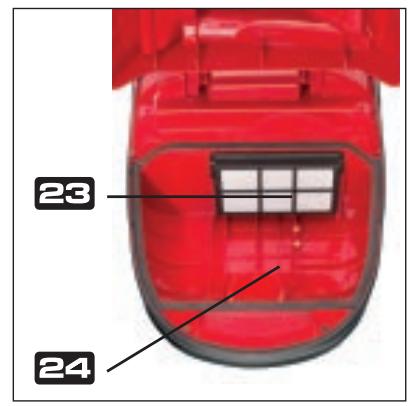
Motor filter
Dust bag compartment
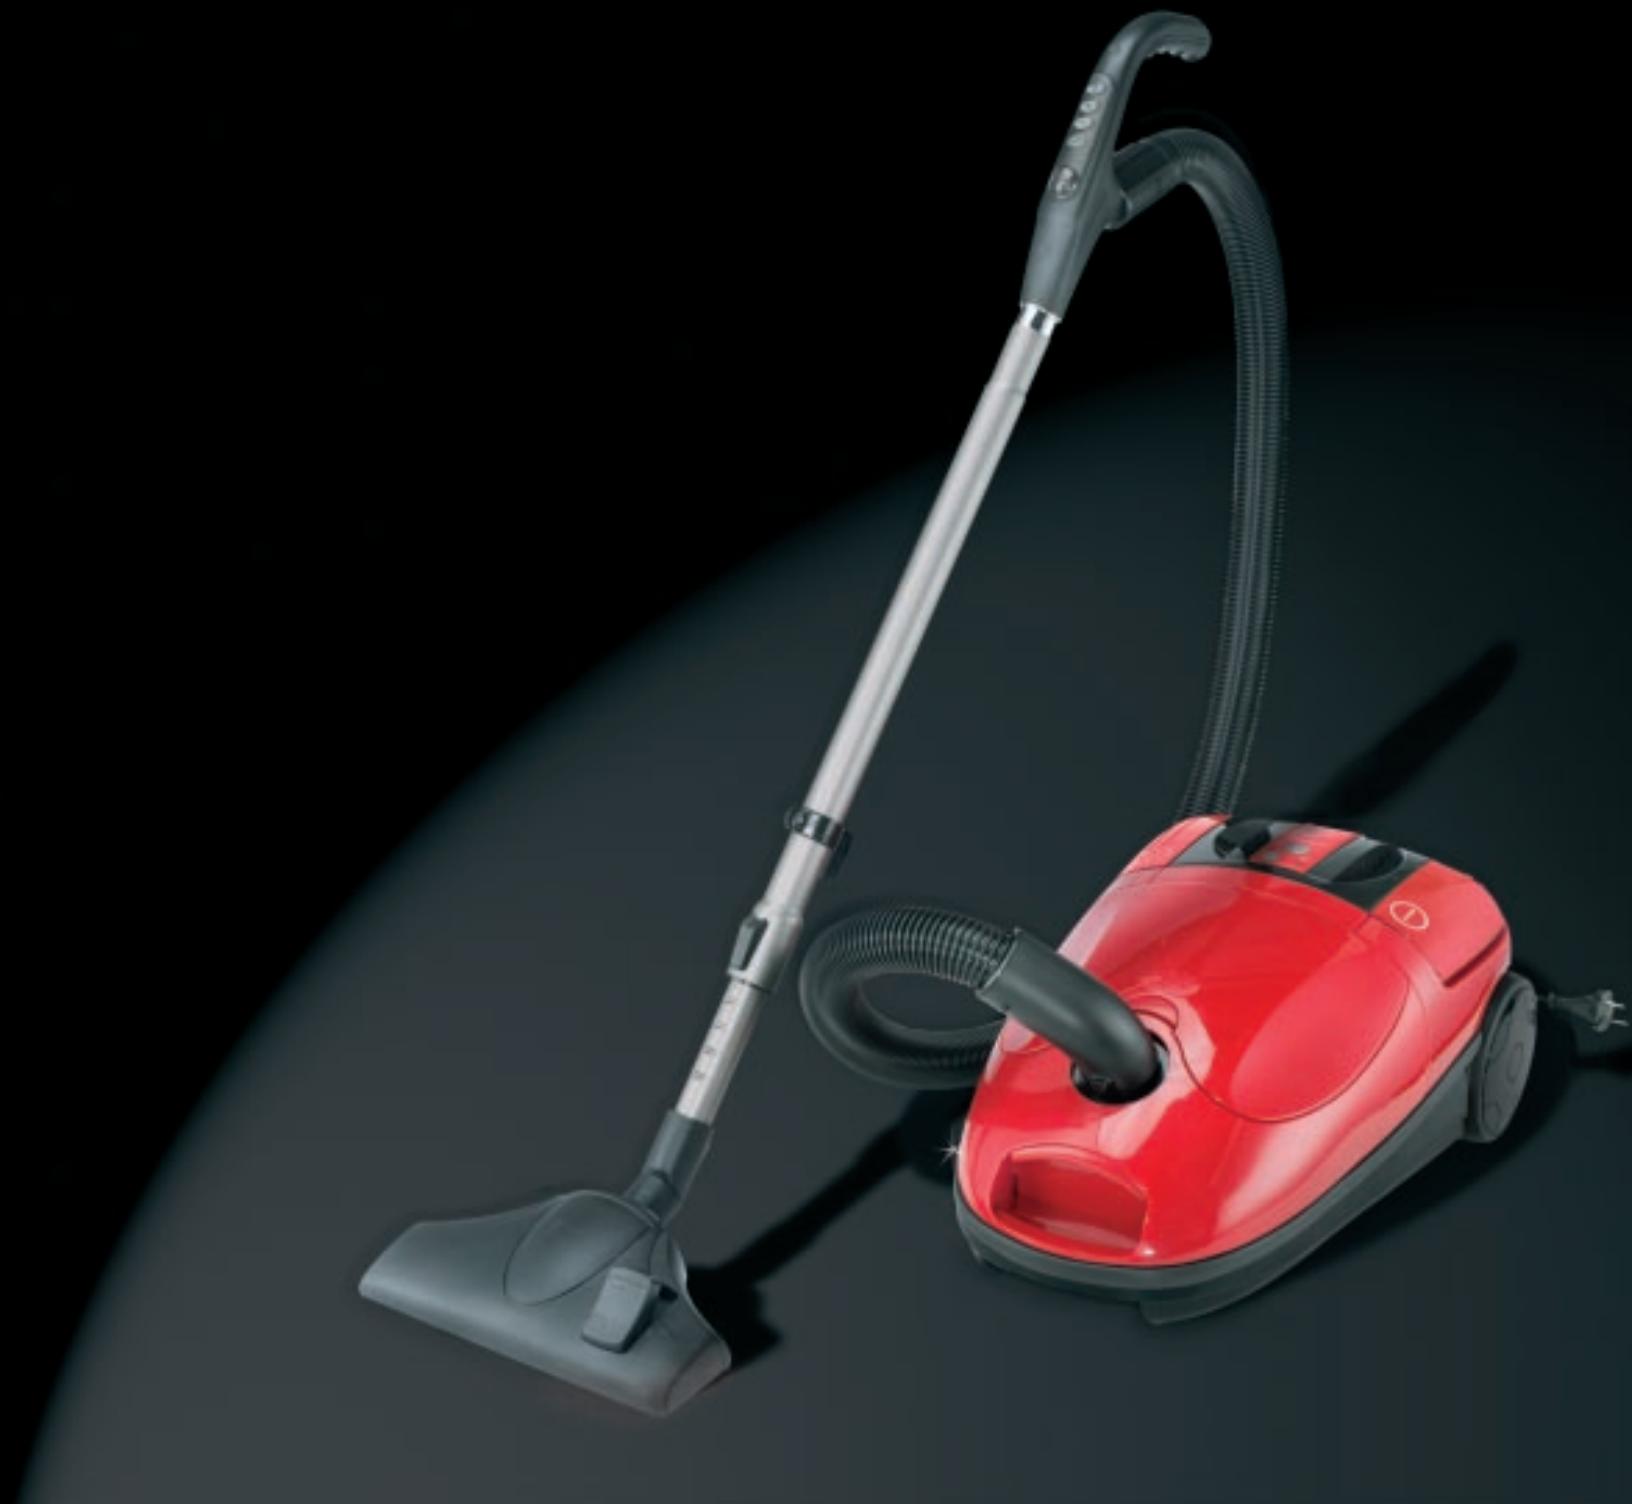
① Crevicetool
② Textile tool
③ Special tool
Before using for the first time
- Take the vacuum cleaner out of the packaging.
- Check that the dust bag is correctly fitted.
- Check that the outlet air filter u and motor filter e are correctly fitted.
Using the vacuum cleaner
- Place the vacuum cleaner in the horizontal working position.
- Attach the hose so that it engages in the hose socket on the appliance.
- Connect the telescopic tube to the handle
-
Open the control fascia on the handle/remote control and insert 2 micro batteries type LR03 /AAA as indicated.
-
Set the telescopic tube into your required position by pressing the telescopic adjuster and pulling the bottom tube.
- Pull the plug 13/mains cable out as far as you require.
- Press the foot switch ON/OFF to switch the appliance on.
- All further settings can be made directly and easily using the handle/remote control (see section Remote control from handle
- For short pauses in work use the AUTO-POWER ON/OFF feature (automatic on/off switch). To do this, place the telescopic tube into the parking rail - the appliance switches off and goes into stand-by mode. When you take the tube out of the parking rail - the appliance switches on again. You can then set the suction power you require as described below.
- Press the foot switch ON/OFF again to switch the appliance off.
- After you have finished vacuuming always pull the plug out of the mains socket.
- Rewind the mains cable by actuating the foot switch for the cable tidy on the vacuum cleaner.
- You can remove the hose 2 from the vacuum cleaner before storing. To take the hose out of the hose socket, press both buttons at the end of the hose.
Remote control from handle
The handle/remote control allows you to operate the vacuum cleaner conveniently, without bending down.
Pull the mains cable out as far as you require and insert the plug into the mains socket.
- Press the foot switch ON/OFF on the vacuum cleaner to switch it on.
- All further vacuuming functions can now be controlled from the handle:
[AUTO] = automatic adjustment of the suction power; ensures that the suction power is automatically set to suit the type and structure of the surface to be cleaned.
[-] = to reduce suction power manually
[+] = to increase suction power manually
[Plug] = Standby feature; for a short pause in vacuuming without turning the appliance off completely. To reactivate - press the button again.
4 suction power settings
The 4 suction power settings allow you to set the optimum suction power for the surface being cleaned (e.g. tiles, parquet) or to suit the amount of dirt present. As you reduce the power in the lower settings you also reduce the noise level, which allows you to vacuum quietly, say when your baby is sleeping or to suit the particular time of day or night.
Supplied accessories
- Floor tool/brush
Press the changeover switch to set the floor brush for use on floors and smooth or flat surfaces. This setting is for cleaning PVC, floor-boards, marble, sandstone, parquet etc. Place the changeover switch into its original position again when you wish to use the floor tool for carpets or soft surfaces. - Crevicetool ①
Use the crevice tool to reach places that are narrow or difficult to access, such as around curtain rails, along skirting boards, in recesses, corners and narrow openings. - Textile tool ②
The textile tool is intended for the thorough cleaning of car seats, mattresses, cushions, curtains, wall coverings. We recommend a low power setting for delicate surfaces (curtains, wall hangings).
Special tool ③
This tool is intended for cleaning delicate parts or electrical/mechanical devices. You can also use the special brush for furniture, lamps etc.
Replacing the dust bag
The flashing dust bag filling level indicator 10 lets you know when the dust bag is full and needs to be changed.
Removing the dust bag:
- Switch the appliance off and pull the plug out of the mains socket.
- Remove the hose from the appliance. To do this, press both buttons on the end of the hose.
- Press the button on the vacuum cleaner carrying handle and fully open the cover.
- The dust bag container can be easily removed using the carrier.
Take the dust bag out of the dust bag container and remove the dust bag from the adapter. To do this, press the clip at the rear of the adapter.
Inserting the dust bag:
- Slide a new dust bag on to the adapter (note the direction of the arrow) and engage the clip.
- Slide the adapter into the adapter guide on the dust bag container and place the container into the dust bag container compartment.
- Close the cover, making sure it engages.
You can order replacement dust bags in a kit with a replacement filter using the special card.
Changing the filter
You should change the filter about every 20 full bags or after particularly heavy use (check visually). You can remove large particles of dirt from the filter by tapping it.
You can order a replacement filter in a kit with replacement dust bags with using the special card.
Care and cleaning of the vacuum cleaner
- Before you clean the vacuum cleaner always switch it off and pull the plug out of the socket.
- To prevent electric shock do not clean the vacuum cleaner with water and never allow the vacuum cleaner to be in contact with water.
- Use a damp or dry cloth to clean the vacuum cleaner. Only clean the housing and the accessories.
- The outlet air filter 10 and the internal motor filter 出 should be cleaned regularly.
- Do not use any aggressive cleaning agents or solvents as these may attack the plastic.
Storing
- Rewind the mains cable fully by actuating the foot switch on the vacuum cleaner.
- Store the vacuum cleaner in the vertical position.
- Push the parking clip on the telescopic tube into the locator (parking rail) on the underside of the appliance.
Disposal
Dispos of the packaging material in an environmentally friendly manner using the local refuse disposal facility. Take used batteries to an official collection facility for these materials. The appliance is to be disposed of at a suitable materials disposal facility.
DECLARATION OF CONFORMITY (C)
We, Kompernaß Handelsgesellschaft mbH, Burgstr. 21, D-44867 Bochum, Germany, declare that this product complies with the following EU directives:
Low Voltage Directive (73/23 EEC, 93/68 EEC), Electromagnetic compatibility (89/336 EEC, 93/68 EEC) in accordance with the applicable standards, and confirm this with the CE mark.
Type designation of device: Floor vacuum cleaner LERVIA KH 94
Bochum, 30.04.2003
Hans Komperna