
VT-M430 - Videorekorder HITACHI - Kostenlose Bedienungsanleitung
Finden Sie kostenlos die Bedienungsanleitung des Geräts VT-M430 HITACHI als PDF.


| Produkttyp | Videorekorder (VHS) |
| Modell | VT-M430E (UK) |
| Marke | Hitachi |
| Farbe | Schwarz |
| Abmessungen (B x H x T) | 380 mm x 93 mm x 275 mm |
| Gewicht | ca. 4,0 kg |
| Stromversorgung | AC 220-240V, 50 Hz |
| Leistungsaufnahme | 16 W (inkl. Timer) |
| Bandgeschwindigkeit | SP: 23,39 mm/s, LP: 11,7 mm/s |
| Maximale Aufnahmezeit (SP) | 240 min mit E-240 Kassette |
| Maximale Aufnahmezeit (LP) | 480 min mit E-240 Kassette |
| Tuner | Frequenzsynthesizer, 49 Programme |
| RF-Ausgang | UHF Kanal 37 (einstellbar 32-42) |
| Videoausgang (Scart) | 1 Vp-p, 75 Ohm, unsymmetrisch |
| Audioausgang | -3,8 dBm, 1 kOhm |
| Signal-Rauschabstand Video | >43 dB |
| Horizontale Auflösung | 260 Linien (Farbe) |
| Timer-Aufnahme | 8 Programme / 1 Jahr (mit Video Plus+) |
| Besondere Funktionen | Auto Head Cleaning, Auto Tracking, Shuttle Ring, Index/Counter GO-TO, IRT, IPT, OSD 7 Sprachen |
| Decoder-Anschluss | Ja (Pay-TV) |
| Satellitensteuerung | Ja (integrierte Infrarotsteuerung) |
| Fernbedienung | Infrarot, 2 VCRs und 14 TV-Marken steuerbar |
| Mitgeliefertes Zubehör | Aerialkabel, Fernbedienung, 2 Batterien (R6) |
Häufig gestellte Fragen - VT-M430 HITACHI
Benutzerfragen zu VT-M430 HITACHI
0 Frage zu diesem Gerät. Beantworten Sie die, die Sie kennen, oder stellen Sie Ihre eigene.
Eine neue Frage zu diesem Gerät stellen
Laden Sie die Anleitung für Ihr Videorekorder kostenlos im PDF-Format! Finden Sie Ihr Handbuch VT-M430 - HITACHI und nehmen Sie Ihr elektronisches Gerät wieder in die Hand. Auf dieser Seite sind alle Dokumente veröffentlicht, die für die Verwendung Ihres Geräts notwendig sind. VT-M430 von der Marke HITACHI.
BEDIENUNGSANLEITUNG VT-M430 HITACHI
VIDEO CASSETTE RECORDER
VT-M430E(UK)
Instruction manual
VIDEOPlus+
natural_image
Black-and-white illustration of a vintage Hitachi TV setup in a living room with palm trees and furniture (no text or symbols visible)Dear Hitachi Customer
Congratulations on your choice of a Hitachi video cassette recorder (VCR).
And welcome to our company-wide commitment to your complete satisfaction and viewing enjoyment.
INFORMATION FOR YOUR SAFETY
Please read the following instructions carefully before using this VCR.
The mains lead on this equipment is supplied with a moulded plug incorporating a fuse, the value of which is indicated on the pin face of the plug. Should the fuse need to be replaced, an ASTA or BSI approved BS1362 fuse must be used of the same rating.
If the fuse cover is detachable never use the plug with the cover omitted.
If a replacement fuse cover is required, ensure it is of the same colour as that visible on the pin face of the plug. Fuse covers are available from your dealer.
DO NOT cut off the mains plug from this equipment. If the plug fitted is not suitable for the power points in your home or the cable is too short to reach a power point, then obtain an appropriate safety approved extension lead or consult your dealer.
If there is no alternative to cutting off the mains plug, ensure that you dispose of it immediately, having first removed the fuse, to avoid a possible shock hazard by inadvertent connection to the mains supply.
IMPORTANT
The wires in the mains lead are coloured in accordance with the following code:
Blue = Neutral, Brown = Live
As these colours may not correspond with the coloured markings identifying the terminals in your plug, proceed as follows: The wire coloured BLUE must be connected to the terminal marked with the letter N or coloured BLUE or BLACK. The wire coloured BROWN must be connected to the terminal marked with the letter L or coloured BROWN or RED.
On no account connect either of these wires to the terminal marked E or by the earth symbol 1= or coloured green or green and yellow.
WARNING: To prevent fire or electric shock, do not expose this equipment to rain or moisture.
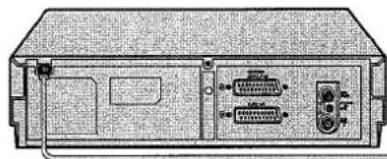
Mains supply: AC 220 - 240V, 50 Hz only
natural_image
Back view of a computer chassis showing internal components including an RJ48 connector and two ports (no text or labels visible)AC 220 - 240V, 50Hz

- The Operate button located on the front of the VCR switches the VCR on and off, leaving the clock facility unaffected.
- The operate button is indicated "|", this button allows you to select operate on or electrical power standby.
- The Operate button is secondarily connected and does not separate the apparatus from the mains supply in the switched-off position.
This product is manufactured to comply with the radio interference requirements of EEC Directive 89/336/EEC.
On safety
- Do not remove panel covers by unscrewing.
There are no user serviceable parts inside. Refer all servicing to qualified service personnel. - Should any solid object or liquid fall into the cabinet, remove the mains lead and have it checked by qualified personnel before operating it any further.
- To disconnect the mains lead, pull out the plug itself. Never pull the lead.
- If the unit is to be left unattended for a long period and it is not intended to use the timer recording function, it is recommended that the VCR be switched off and the plug removed. If you intend to record during your absence, remember there is no necessity for the TV receiver to be switched on.
CONTENTS
This instruction manual consists of the following four sections.
| Section-1 | Setting Up |
| This section tells you how to set up your new VCR and how to use the VCR's controls. | Installation......6Customer Controls......8Remote Operation......10Setting the Video Programme Number on Your TV......11Pre-tuning of Built-in TV Tuner......12Setting the Clock......16Cassette Tapes......17 |
| Section-2 | Basic Operation |
| This section tells you how to play-back a tape and record a TV programme. | Play-back......19Play-back Using Shuttle Ring......21Instant Play-back Timer (IPT)......22Recording TV Programmes......23Instant Recording Timer (IRT)......25Timer Recording......26 |
| Section-3 | Additional Operations |
| This section tells you how to use the additional functions. | Special CharacteristicsLinear Time Counter......35Counter Memory......35Automatic Rewind......36Rewind Shut Off......36Mode Lock......36Tape Remaining Display......36Index......37GO-TO......38Menu Features......39VIDEO PLUS+ Setup......42EditingTape Dubbing......43"Pay Television" Decoder Operation......45Satellite Receiver Operation......47How to Operate Your TV by Usingthe Remote Control Handset......52 |
| Section-4 | Subsidiary Information |
| Problem Guide......55 | |
| Maintenance......56 | |
| Specifications......57 | |
| Battery Safety Guidelines......58 | |
| Some Do's and Don'ts......59 |
FEATURES
- The VIDEO Plus+* function allows you to programme the VCR for timer recording by simply entering a PlusCode* number.
* Video Plus+ and PlusCode are trademarks of Gemstar Development Corp. Video Plus+ system is manufactured under license from Gemstar Development Corporation.
• Satellite receiver controller.
• "Pay TV" decoder socket provided.
• 8-programme/1-year preset recording.
• Automatic controls for easier operation.
—Auto Programme Play immediately starts to play a recorded programme by simply turning the VCR on after timer recording has finished.
—Auto Head Cleaning system minimizes the need for accessory cleaners and professional head cleaning.
—Auto Tracking system automatically adjusts the tracking so the picture is optimized.
—Rental Play immediately starts to play a tape without its safety tab, rewinds the tape after play is ended and ejects it, then turns the VCR off.
—Auto Play immediately starts to play a tape without its safety tab.
—Auto Eject & Auto Tape Canceller ejects a cassette without its tab when the REC or REC/IRT button is pressed.
—Auto Operate On turns the VCR on by simply inserting a cassette.
—Auto Endless Play repeats playing tape from beginning to end.
—Auto Rewind/Rewind Shut-off automatically rewinds a tape at its end and automatically shuts off at its beginning if the VCR is switched off into the standby mode.
—Auto Blue sets the TV picture to blue when a tape without any recordings is played back.
- Instant Play-back Timer (IPT) allows you to play-back a tape for a predetermined time and then turn the VCR off automatically.
- High-quality variable slow and still picture — plus dual speed play, visual search and frame advance.
- Sharp, finely detailed pictures from High Quality (HQ) picture technology.
- Frequency synthesized tuner provides easy, preset tuning to up to 49 programmes.
- Instant Recording Timer (IRT) allows you to quickly set-up the VCR to record a TV programme for a specified period.
- Selectable 7-language OSD (On-Screen Display).
- The remote control handset provided can operate not only two VCRs but also 14 different types of TVs.
- Index/Counter GO-TO functions — convenient for locating the desired programme on your tape.
- Mode Lock can be used to lock the VCR mode (recording, play, etc.).
- A rewind button allows you to rewind tape at extremely high speed.
Accessories supplied
Check and identify the accessories supplied.
If any are missing or appear damaged, consult your dealer.
①
natural_image
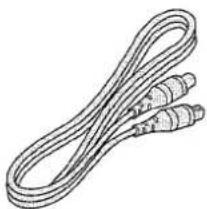
Line drawing of a coiled cable with three connectors (no text or symbols)Aerial Cable for connecting this VCR and a TV
②
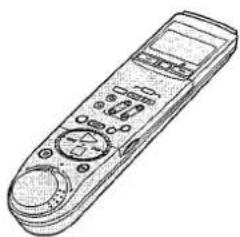
natural_image
Line drawing of a remote control device with buttons and dials (no text or symbols)Remote Control Handset
③

2 pcs.
Batteries for remote control handset (R6)
Installation
This tells you how to connect your VCR to an aerial, TV, etc.
Customer Controls
This tells you the location and the detailed functions of the switches, buttons, VCR's display and connection terminals on the VCR.
Remote Operation
This tells you how to insert batteries into the remote control handset and how to operate your VCR remotely.
Setting the Video Programme Number on Your TV
Your VCR gives a signal of the same type as that used for TV broadcasts. This signal is sent from the RF OUT socket via the cable provided to your TV. To see this signal you must tune in one of the programme numbers of your TV. This will then become your "VIDEO PROGRAMME NUMBER", you must then select this each time you wish to see the signal from your VCR. If you connect your VCR to a TV with a 21-pin Scart connector, set your TV to its proper video input to see the signal from the VCR. (Consult your TV's manual for details.).
Pre-tuning of Built-in TV Tuner
This VCR incorporates a complete TV tuner (just like your normal TV) and can be pre-tuned to receive up to 49 TV programmes.
To preset satellite programmes see page 47 for details.
Setting the Clock
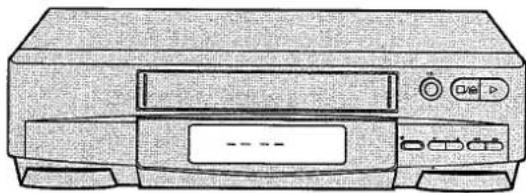
The clock display area in the VCR's display panel will look like "---:" until you set the 24-hour clock. The clock must be set to the correct time before you can programme the VCR for timer recording and instant recording timer. To set the clock of the VCR, first set the clock in the remote control handset, and then transfer the set time to the clock in the VCR.
Cassette Tapes
This tells you how to insert and remove a cassette, and how to protect recordings from accidental erasure.
INSTALLATION
Basic Method
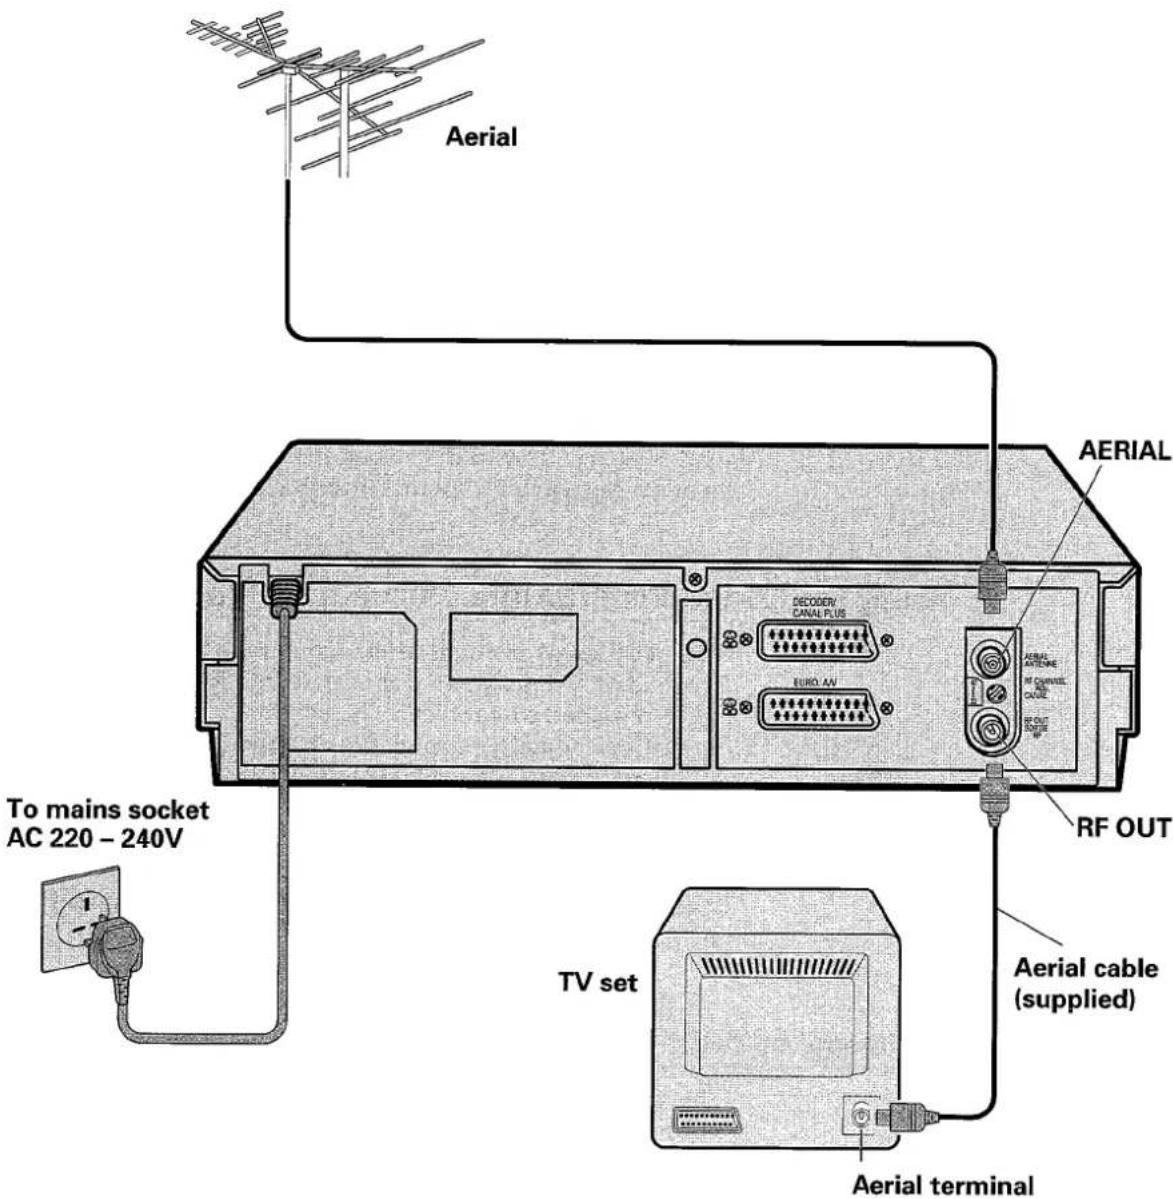
With this connection, the video and audio signals of the VCR are fed to your TV via the aerial cable.
To receive these signals on your TV, tune your TV to the video programme number, described on page 11.
PRECAUTIONS
On Installation
- Do not install the unit near heat sources such as radiators or air ducts or in a place subject to direct sunlight, excessive dust, mechanical vibrations or shocks.
-
Never bring a magnet or magnetized object near the VCR because it will adversely affect the performance of the VCR.
-
Do not install your VCR in an inclined position. The unit is designed for operation in a horizontal position.
Additional Method (for record and play-back)
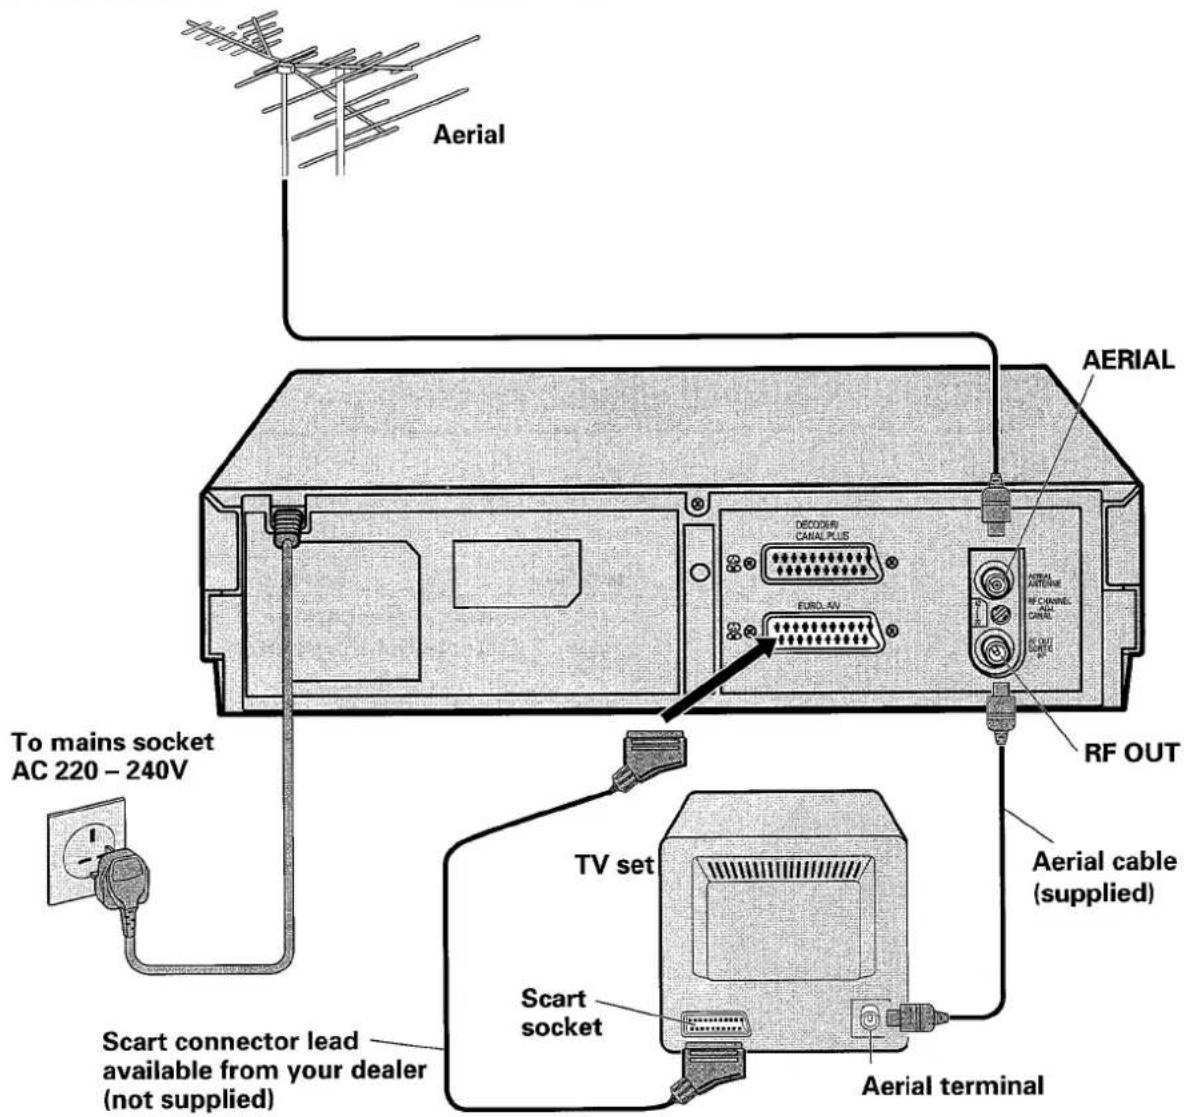
With this connection, the video and audio signals from the VCR are fed to your TV via the aerial cable and the Scart connector lead.
To receive these signals via the aerial cable, tune your TV to the video programme number, described on page 11.
OR
Set your TV to its proper Scart input to receive them via the Scart connector lead. This connection improves the picture and audio quality.
Make sure the VCR indicator lights in the VCR display to feed the audio and video signals from the VCR to TV. If not, press the VCR/TV button on the hand set to display it.
This connection also allows you to record the TV programme selected on the TV. To do this, press the TRANS/AUX button on the remote control handset to display the "L1" indicator in the VCR's display instead of a VCR programme number.
On Operation
- Moisture condensation
If you pour a cold liquid into a glass, water vapour in the air will condense on the surface of the glass. This is moisture condensation. Moisture condensation on the head drum, one of the most crucial parts of the VCR, will cause damage to the tape.
The VCR should not be operated for at least 2 hours after being moved from a cold to a hot environment to avoid condensation from occurring on the head drum.
On Cleaning
- DO NOT use volatile agents such as benzine, alcohol, thinner, or chemically processed cloth to wipe the surface of the VCR case. These agents may cause the surface finish to deteriorate or peel.
On Repacking
- It is wise for you to save the packing materials and box in case you ever need to ship or store your unit.
CUSTOMER CONTROLS
VCR Customer Controls
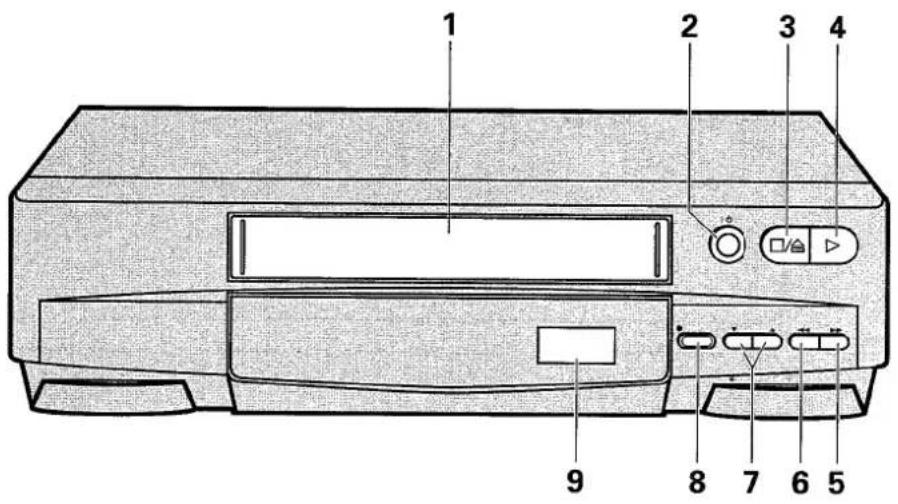
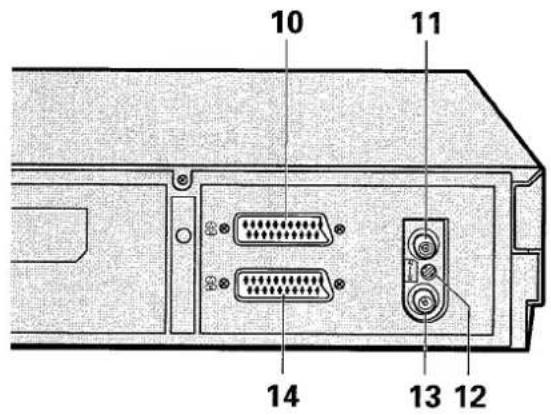
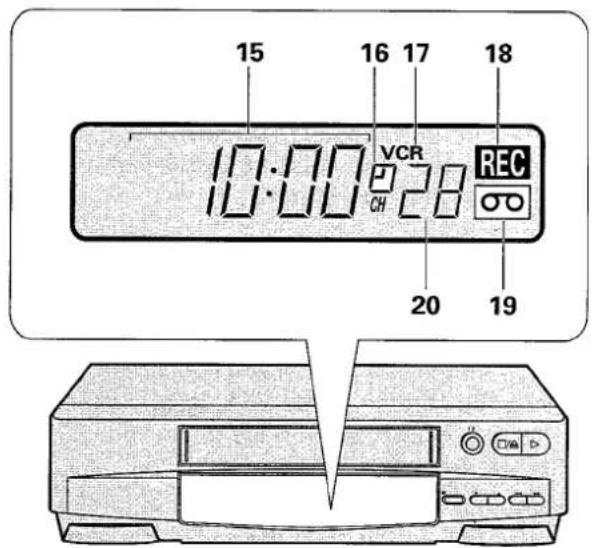
| Item No. | Function | Page |
| 1 | Cassette compartment | 17 |
| 2 | Operate/Standby button | 2 |
| 3 | Stop/Eject button | 19 |
| 4 | Play button | 19 |
| 5 | Fast forward button | 19 |
| 6 | Rewind button | 19 |
| 7 | TV PROG button — programme select | 13 |
| 8 | REC/IRT button | 23 |
| 9 | Remote control receiving window | 10 |
| 10 | Decoder socket | 45 |
| 11 | AERIAL — signal input | 6 |
| 12 | RF CHANNEL ADJ — preset to CH37 | 11 |
| 13 | RF OUT — signal out to TV | 6 |
| 14 | Scart socket | 7 |
| VCR Display | ||
| 15 | Time, | 16 |
| Time counter or | 35 | |
| VCR mode indicator | 19 | |
| PLAY — play-back | 19 | |
| SRCH — double-speedplay andvisual search | 19 | |
| SLOW — slow play | 19 | |
| REW — rewind | 19 | |
| FF — fast forward | 19 | |
| STILL — play pause(flashes during frame advance) | 19 | |
| 16 | Timer indicator | 32 |
| 17 | VCR, operate mode | 19 |
| 18 | REC — record (flashes duringrecord pause) | 23 |
| 19 | Tape-in indicator | 17 |
| 20 | TV programme number orAuxiliary (L1/L2) | 2343 |
Remote Control Handset Customer Controls
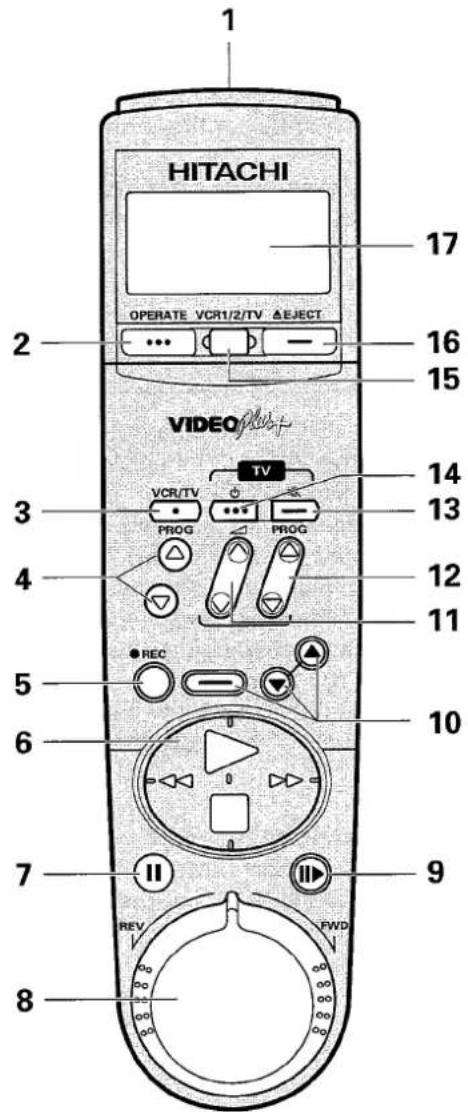
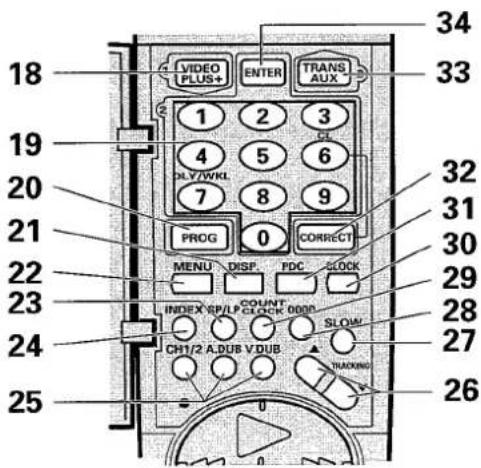
| Item No. | Function | Page |
| 1 | Transmission window | 10 |
| 2 | OPERATE—switch between operate and standby mode | 26 |
| 3 | VCR/TV select button | 19 |
| 4 | Programme up/down button | 13 |
| 5 | REC — record button | 23 |
| 6 | Tape transport button | 19 |
| ▷ — play-back | ||
| ◀◀ — fast rewind or search | ||
| ▶▶ — fast forward or search | ||
| □ — stops play/record function | ||
| 7 | Pause/still button | 19 |
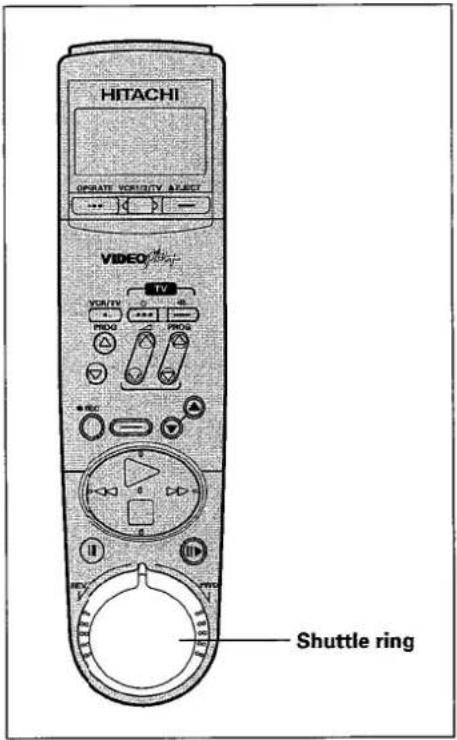
| 8 | Shuttle ring | 21 |
| 9 | Frame advance during still | 19 |
| 10 | These buttons are not used. | — |
| 11 | TV volume buttons | 53 |
| 12 | TV PROG button | 53 |
| 13 | TV mute button | 53 |
| 14 | TV Operate button | 53 |
| Note: Four buttons 11 – 14 are used only when operating the TV. | ||
| 15 | VCR1/2/TV select button | 10 |
| 16 | EJECT — ejects cassette | 17 |
| 17 | Display clock/timer programme information | 16 |
| 18 | Video Plus+ programming | 27 |
| 19 | Number buttons | 16 |
| 20 | PROG — to enter timer programme information | 30 |
| 21 | DISP. — to recall on-screen display | 40 |
| 22 | MENU — to recall OSD menu | 39 |
| 23 | SP/LP — changes tape speed during record | 17 |
| 24 | INDEX button — INDEX/GO-TO feature | 37 |
| 25 | These buttons are not used | — |
| 26 | TRACKING buttons | 20 |
| 27 | SLOW button | 19 |
| 28 | 0000 — clears time counter | 35 |
| 29 | COUNT/CLOCK — changes VCR display | 35 |
| 30 | CLOCK — enter or correct time on handset | 16 |
| 31 | PDC button | 27 |
| 32 | CORRECT button | 16 |
| 33 | TRANS/AUX button — transmits data, select L1 or L2 input | 28 |
| 34 | ENTER button — to enter PlusCode number | 27 |
REMOTE OPERATION
Power source of infrared remote control handset
natural_image
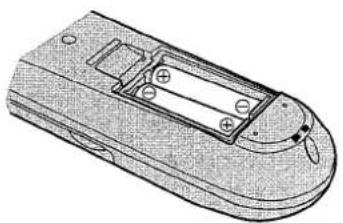
Technical line drawing of a remote control casing with mounting holes and internal components (no text or symbols)The infrared remote control handset is powered by two batteries (size IEC standard R6). The life of the batteries is about a year although this depends on the number of times the handset is used.
Replace the batteries when operation is not possible or when the operating distance becomes too small.
Remote operations
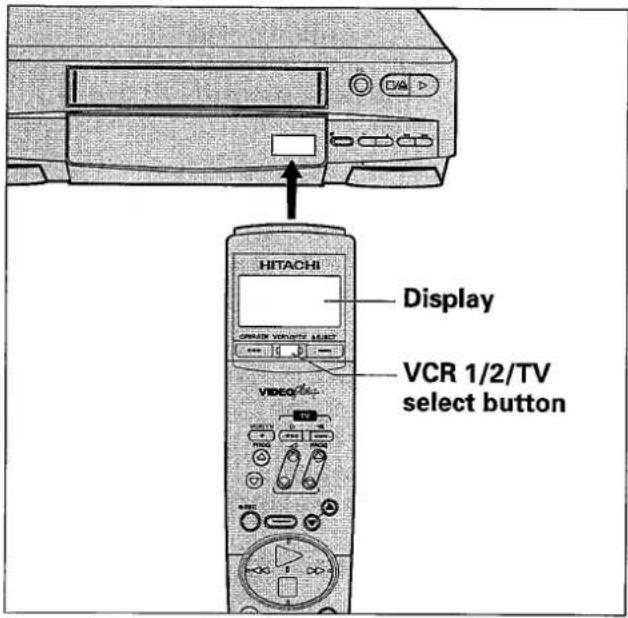
To operate this VCR with the remote control handset, press the VCR 1/2/TV select button on the handset to display "VCR 1" or "VCR 2", then point it at the receiver on the front of the VCR.
- The EJECT, play ▷, rewind ◀, fast forward ▷, stop □, ⏻ and ⏻ buttons can control your VCR even if "TV" is displayed when the "REMOTE CODE" display (see page 41 for details) is set to [1] or [-].
- This VCR is designed so it can be controlled when either "VCR 1" or "VCR 2" is selected (see page 41).
Note: Be sure to press the mark (▷, ◁, ▶, □) of the tape transport button on the remote control to operate the VCR, not the centre of the button. Pressing the centre of the button could cause a malfunction.
VCR 1/2/TV Select button
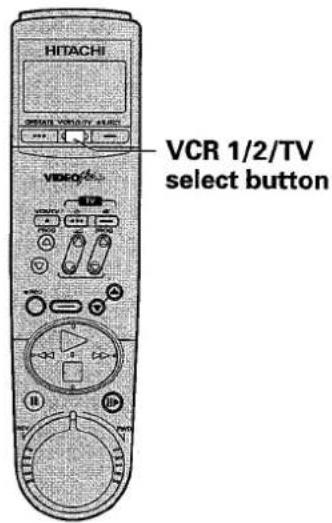
The remote control handset provided is designed to operate up to two types of Hitachi VCRs and 14 different types of TV.
• Refer to page 52 when using the handset to operate the TV.
- For dubbing your own tapes, as an example, the recording VCR and playback VCR can be controlled by a single handset. In order to operate two VCRs, set this VCR's remote code to "VCR 2", and the other VCR to "VCR 1", following the "REMOTE CODE [1], [2] or [-]" section on page 41.
SETTING THE VIDEO PROGRAMME NUMBER ON YOUR TV
natural_image
Line drawing of a CD-ROM device with control panel and indicator lights (no text or symbols)VCR
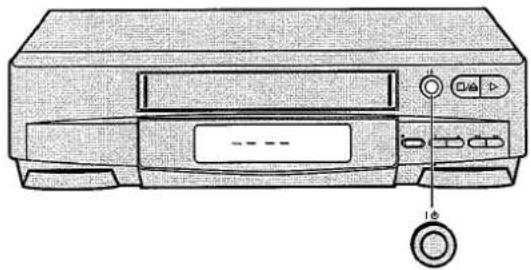
Switch on at the mains supply socket.
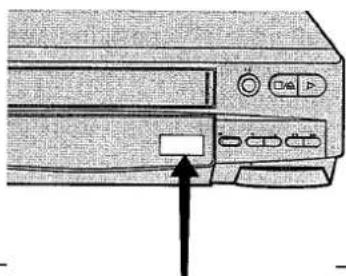
Video display after connecting the mains supply. (Note: The VCR will be in the standby mode at this stage.)
If the display shows as in step 4 (TV programme number appears), press the button ⏻ on the VCR once.
1

2
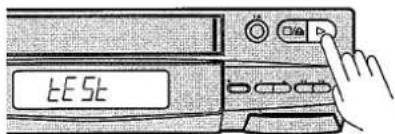
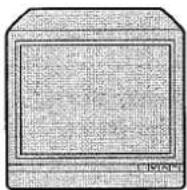
Switch on your TV and select an unused programme number. i.e. one not used for BBC1, ITV, etc. (Please consult your TV operating guide as your TV may have a special VCR programme number which must be used.)
Note: This programme number will be your VCR programme from now on.
Press the ▷ button (Note: The VCR is still in the standby mode) and "E5E5E" appears in the display as shown.
3
4

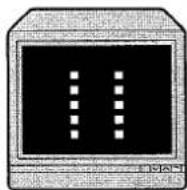
Tune your TV (consult your TV instruction manual) until the test pattern shown appears.
The correct tuning position is when the picture is clear. Ensure this programme is stored in your TV.
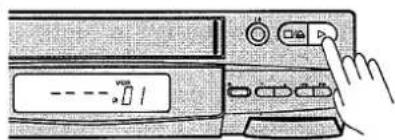
Press the ▷ button again, the test pattern will disappear and the VCR will now come out of the standby mode into the operate mode.
5
You should now be able to play-back a prerecorded cassette.
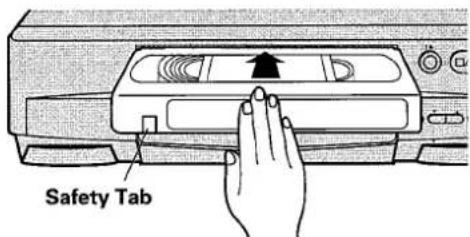
Insert the cassette carefully (see page 17 for CASSETTE TAPES). If the safety tab is removed then play-back will start immediately, if not press the ▷ button and the picture will appear on the screen.
6
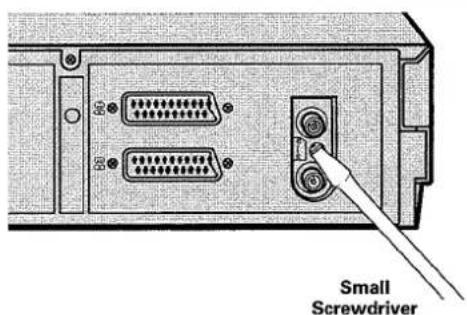
If you cannot tune your TV correctly to the test signal, or there is patterning in the signal, it may be necessary to change the VCR's RF channel.
Slightly turn the RF CHANNEL ADJ control at the rear of your VCR with a small screwdriver.
Retune your TV. If the test signal has not improved, turn the screw a little more and re-tune your TV again. Continue to adjust the screw in either direction, re-tuning your TV each time, until a clear test picture received.
PRE-TUNING OF BUILT-IN TV TUNER
natural_image
Line drawing of a desktop computer with ports and control panel (no text or symbols)Controls
TV Screen
Video display after connecting the mains supply.
1
Turn on the TV and the VCR, then tune the TV to the video programme number as described on page 11.
If you connect the VCR and TV using a 21-pin Scart connector lead, select the 21-pin Scart input of the TV.
2
natural_image
Diagram of a computer monitor with control buttons and an arrow pointing to the left panel (no text or symbols present)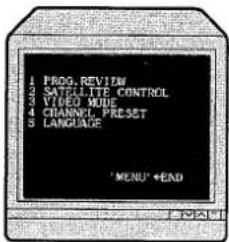
Press the MENU button.
The menu, as illustrated, appears on the TV screen.
3
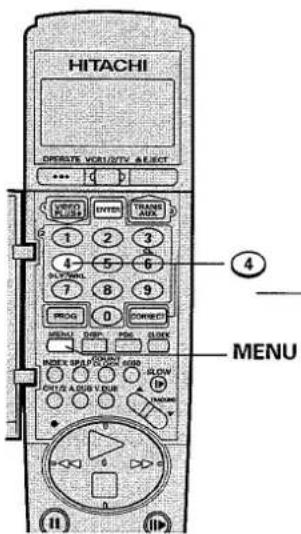
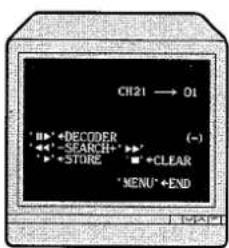
Press the ④ button.
The menu changes to the channel preset display such as that shown on the left, for example.
4
Press and release the fast forward ▶ or rewind ◀ button to start searching for a broadcast TV station.
▷: Searches from low frequency to high frequency.
◀: Searches in the reverse order.
At a station that is broadcasting, a picture appears on the TV screen. If a channel that is not required appears on the TV screen, press the button ▷ or ◀ again.
5
TV's Display
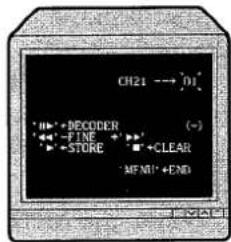
Press the play ▷ button to store this station number when the picture from the station to be preset appears on the TV screen.
The programme number starts flashing. If not, press the ▷ button again.
Note: If the picture appears a little noisy you can fine tune the signal after storing by pressing ◀ or ▶ to get the best picture. After fine tuning for the best picture press the ▷ button to store the station number again.
6
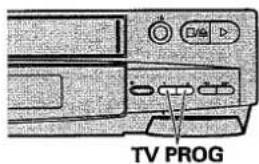
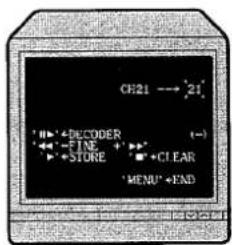
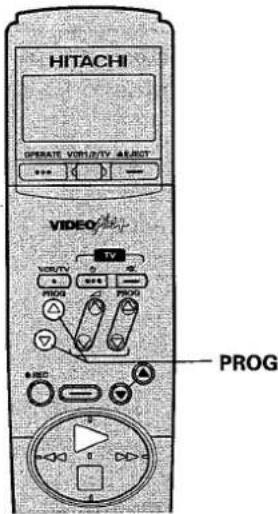
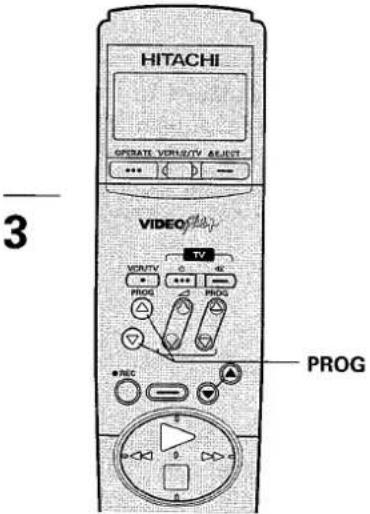
Press the PROG or TV PROG buttons to select the programme number (one of 01 through 49) to be memorized.
We recommend you to set the programme numbers as follows, ready for "Video Plus+" timer programming.
BBC1 on programme 01
BBC2 on programme 02
ITV on programme 03
CH4 on programme 04
Note:
• See "Video Plus+" programming on page 27.
- Programme numbers "01" through "49" can now be selected consecutively by pressing the PROG or TV PROG button (either up or down).
7
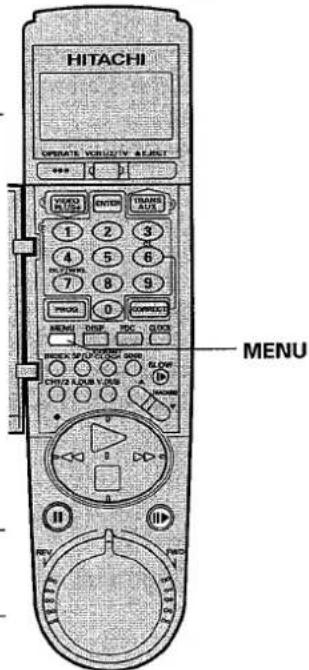
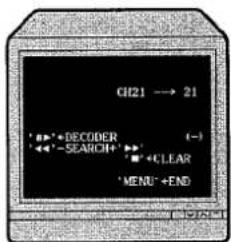
Press the play ▷ button to store this programme number.
To preset "pay-TV" programme;
If the picture displayed is a "pay-TV" programme, press the Ⓞ button to change the display from "DECODER (-)" to "DECODER (0)".
Then press the ▷ button to store this programme.
To search for a next broadcast TV station, press the ⏻ button again to change the display from "DECODER (0)" to "DECODER (-)".
Repeat steps 4 through 7 for other stations.
After having completed pre-tuning to all stations, press the MENU button. The VCR's display will change from the channel indication to the clock time (or time counter) indication and the TV screen will return to normal.
8
9
Direct Preset
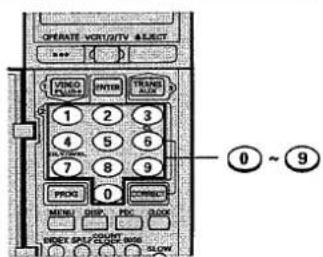
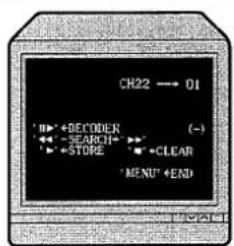
Press the 10 key buttons on the remote control handset instead of the procedure described in steps 4 through 7 to preset the desired stations.
To preset channel 22 in programme number 01, for example, press ② (in step 4) on the handset then press the play ▷ button (in step 5). Then press ① (in step 6) and then ▷ (in step 7).
(PRE-TUNING OF BUILT-IN TV TUNER)
To change the station or programme number
You can change the station number or programme number after pre-tuning your VCR.
1
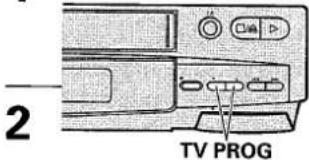
Press the PROG, TV PROG or two number buttons to display the programme to be changed on the VCR's display.
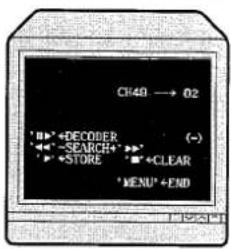
Press the MENU button, and then ④. The menu, as illustrated, appears on the TV screen.
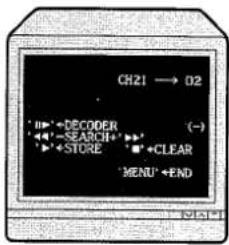
To change the station number; Press the fast forward ▷ or rewind ◀ button to start searching for the broadcast TV station you want. ____ OR ____
Press two number buttons to directly enter the station number you want.
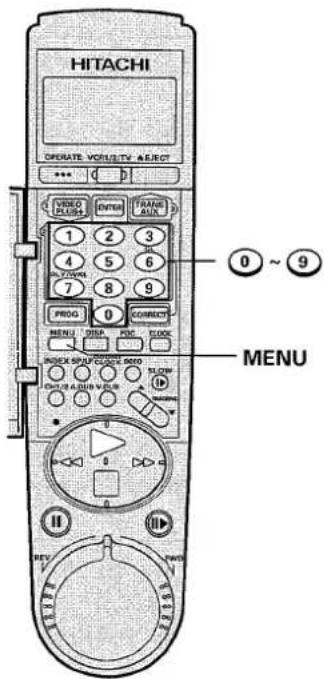
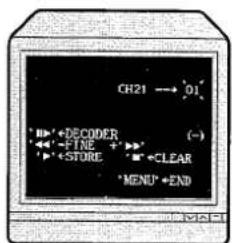
Press the play ▷ button to store this station number when the picture from the station you want appears on the TV screen. If you want to change the programme number too, follow the steps below.
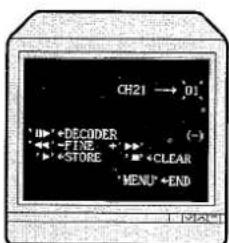
To change the programme number; Press the play ▷ button so the programme number starts flashing, then press two number buttons, PROG or TV PROG buttons to display the desired programme number.
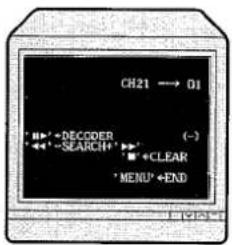
After entering, the programme number, press the ▷ button to store it.
4
To end, press the MENU button.
Eliminating Unwanted Preset Stations
You can rearrange the desired stations by eliminating unwanted preset stations.
1
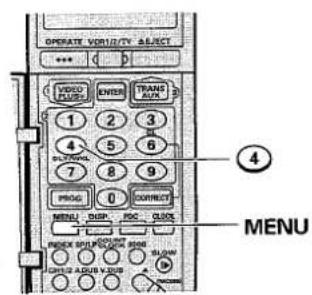
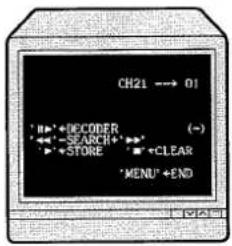
Press the MENU button, and then ④
2
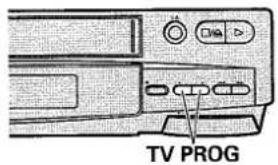
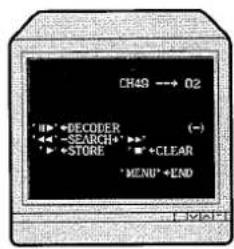
Press the PROG or TV PROG buttons until an unwanted station is found.
3
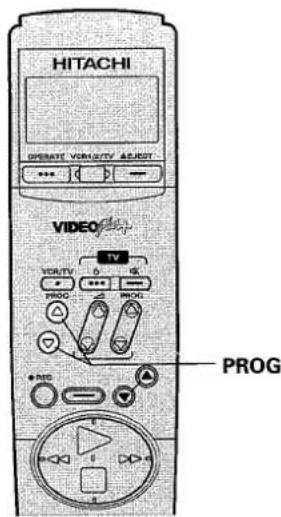
Press the stop □ button. The station number flashes, indicating that the station has been erased from memory.
4
Repeat steps 2 and 3 until all unwanted stations have been erased.
5
After eliminating them, press the MENU button.
SETTING THE CLOCK
Things to know before starting
- While you are setting the clock, the display panel on the remote control handset will prompt you through the procedure.
• Always press "0" before a single-digit hour, minute, day, month or year. -
If you press the wrong digit during clock setting, press the CORRECT button repeatedly until the incorrect digit flashes then enter the correct digit.
-
You have about one minute to complete each step in the procedure. If you do not proceed to the next step within this time, all entries are erased and you must start again.
- The clock must be set to the correct time before programming the timer for unattended recording or Instant Recording Timer (IRT).
Controls
Remote Display
1
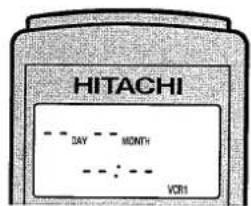
Be sure to check that "VCR1" or "VCR2" is displayed.
This VCR is designed so it can be controlled when either "VCR1" or "VCR2" is selected.
See "REMOTE CODE" on page 41.
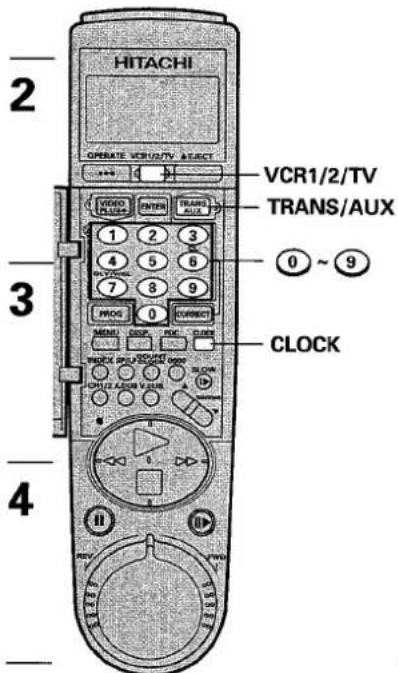
Press the CLOCK button.
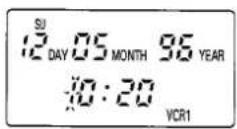
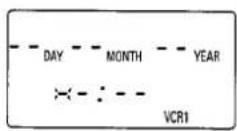
Set the time and date.
For example, press 1 0 2 0 for 10:20, and then 1 2 0 5 9 6 for the 12th of May, 1996.
(0:00 for midnight, 12:00 for noon)
The day of week appears automatically.
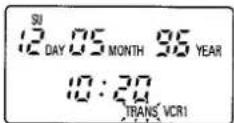
After setting the date, press the CLOCK button.
The clock starts counting and the blinking "TRANS" appears.
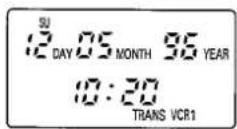
Press the TRANS/AUX button while aiming the remote control handset at the receiver on the VCR.
The transferred time appears on the display of the VCR.
6
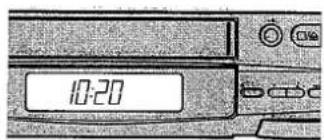
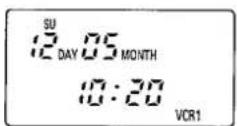
Press the CLOCK button.
The remote control handset and the VCR clock have now been set up.
Notes:
- If you wish to correct the time in the VCR's display after transmitting the information to the VCR, follow the steps above correcting the information and transmit it again.
- If the power is interrupted, “--:---” will appear on the VCR display and the time and date will need to be reset.
CASSETTE TAPES
natural_image
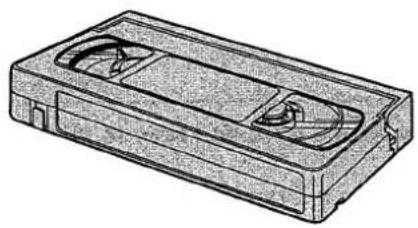
Line drawing of a rectangular film case with two circular cutouts (no text or symbols)Only use video cassettes with the VHS mark in this VCR.
Insertion
1
natural_image
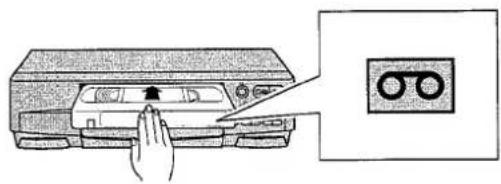
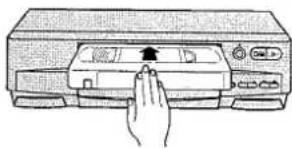
Illustration of a hand pressing down on a printer with a magnified view showing two circular objects (no text or symbols)Push the cassette through the door until the VCR mechanism pulls it into the compartment.
The VCR automatically turns on and the indicator ☐ turns on when the cassette is in place.
Press the EJECT button on the remote control
Removal
1
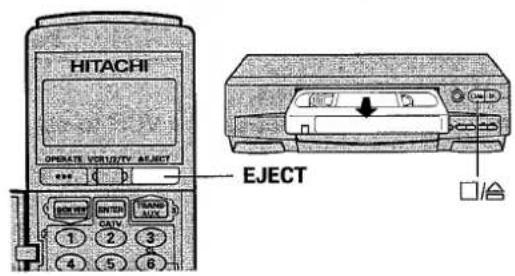
handset or the button □/△ on the VCR.
The cassette will come partially out of the compartment so you can pull it out.
- The indicator ☐ turns off when the cassette is ejected.
- The cassette can be ejected with operate on or off.
Remember that:
—The VCR automatically enters the play-back mode when a cassette without its safety tab is inserted.
—The VCR automatically ejects the cassette if the REC or REC/IRT button is pressed when a cassette without its safety tab is in the VCR.
—Be sure to check the safety tab before inserting a cassette for the above reasons.
Type of video cassette
The table below shows the recording time of different cassettes.
| TYPE | SPEED SELECT SWITCH | |
| SP | LP | |
| E-30 | 30 minutes | 60 minutes |
| E-60 | 60 minutes | 120 minutes |
| E-120 | 120 minutes | 240 minutes |
| E-180 | 180 minutes | 360 minutes |
| E-240 | 240 minutes | 480 minutes |
- Press the SP/LP button on the remote control handset to select the recording speed before recording. It is set to the correct speed automatically during play, so it is not necessary to change it over.
- It is recommended to record in the SP mode for higher quality picture and sound.
To avoid erasing a recording
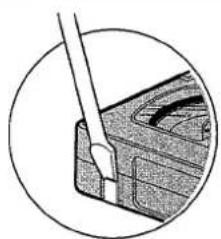
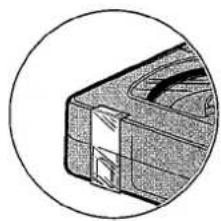
Break off the safety tab using a screwdriver or similar tool.
natural_image
Close-up of a mechanical component with a tool inserted, no visible text or symbolsTo re-record on a cassette which has its safety tab removed
Cover the hole with cellophane tape.
natural_image
Cross-sectional diagram of a mechanical component with no visible text or symbolsPlay-back
This tells you how to play a tape back and how to view a scene at variable tape speed.
Shuttle Ring; allows you to view a tape at variable tape speed easily.
Instant Play-back Timer (IPT)
This tells you how to use the IPT feature. The IPT feature allows you to play-back a tape for a predetermined time and then turn the VCR off automatically.
Recording TV Programmes
This tells you how to record a TV programme while viewing the same TV programme or while viewing another TV programme.
Instant Recording Timer (IRT)
This tells you how to use the IRT feature.
The IRT feature allows you to quickly set-up the VCR to record a TV programme for a specified period.
Timer Recording
The built-in 24-hour timer permits the unattended recording of up to 8 preselected programmes within a period of 1 year, including daily and weekly programmes.
In additional to the conventional timer programming procedure, this VCR incorporates a new programming procedure called "Video Plus+".
PLAY-BACK
Start point: Turn the TV set on and select the video programme number (described on page 11).
Controls
VCR's Display
1
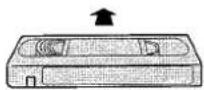
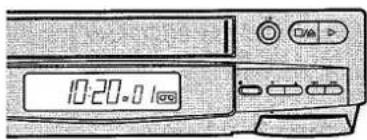
Insert a cassette.
Note: When a cassette (with its safety tab snapped off) is loaded, play-back starts automatically.
2
natural_image
Diagram of a computer monitor with control buttons and an arrow pointing to the front panel (no text or symbols present)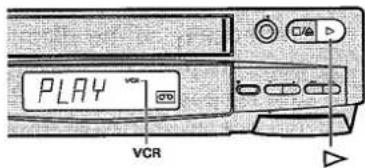
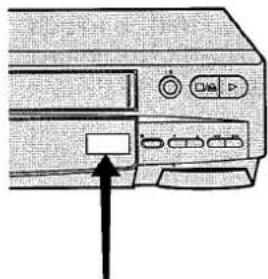
Press the play ▷ button.
The VCR indicator must be lit for viewing video via the Scart connector lead. If not, press the VCR/TV button on the handset so that it lights.
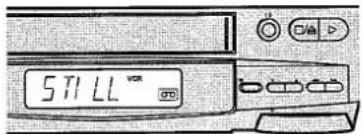
During play-back you can use the following features.
Still play-back
Press the Ⓞ button to stop the picture on the screen during play-back.
Press the button again to reset to normal play-back.
If the screen "jitters" vertically, this can be improved by pressing the TRACKING buttons.
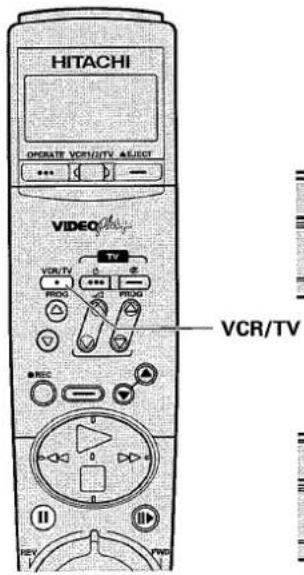
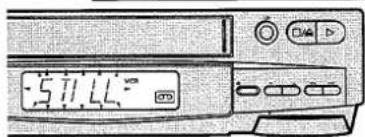
Frame advance
Press the ⏻ button to advance the picture to the next frame during still play-back.
Pressing and holding the ⏻ button advances the frames continuously.
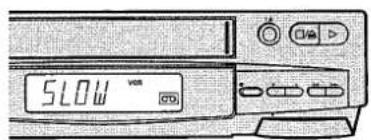
Slow function
Press the SLOW button during play-back, and the tape will be played back at slow speed.
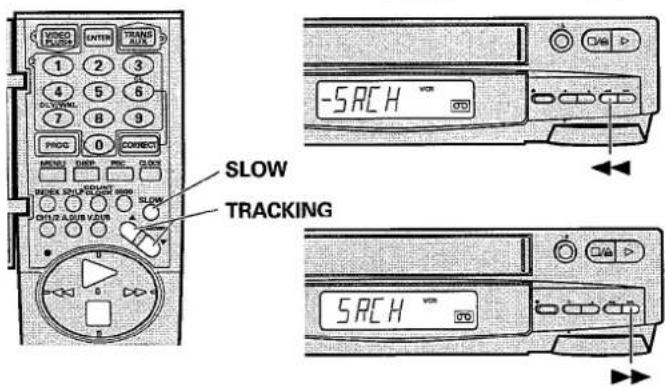
Visual search
Press either the rewind ◀ or fast forward ▶ button during play-back.
Pictures can be viewed at high speed in either the forward or reverse direction. Press the button again (or press the ▷ button) to return to normal speed play-back.
Notes:
- The play-back picture will have some horizontal noise bars during visual search.
• These noise bars may be much more noticeable with tapes recorded in the LP mode.
3
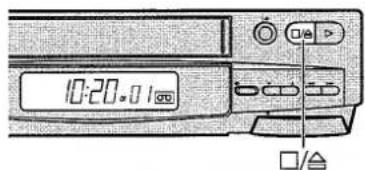
Press either the stop □ or □/△ button to stop play-back.
(PLAY-BACK)
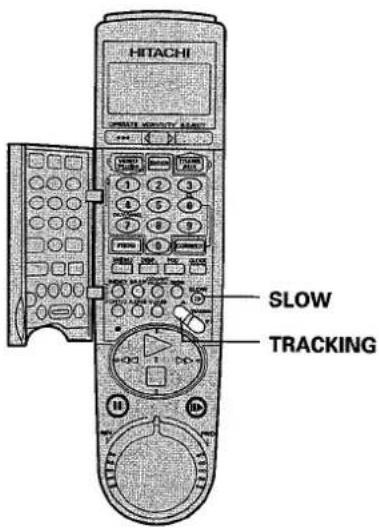
Notes:
- If there is a noise bar in the picture during still or slow motion play, press the SLOW button and then either of the TRACKING buttons until the noise is reduced.
- To prevent tape damage, the VCR will switch from the still/slow mode to the stop mode after about 5 minutes.
Auto Tracking
When play-back is started, the auto tracking function operates and adjusts tracking automatically so the picture is optimized.
- Auto tracking may not operate correctly when the tape is scratched or the recorded condition is poor. In this case, press a TRACKING control button (▲ or ▼) to adjust tracking.
PLAY-BACK USING SHUTTLE RING
Use of the shuttle ring allows many different kinds of play-back – slow-motion play, normal play, double-speed play, forward search, reverse slow-motion play, reverse play, reverse double-speed play, and reverse search.
Notes: If the shuttle ring is operated in the stop mode, the VCR enters the fast forward or rewind mode.
■ How to use the shuttle ring
If the shuttle ring is turned during play-back, turning the ring to the positions indicated gives the special effects indicated.
- Release your hand from the shuttle ring for normal play.
- If the shuttle ring is operated during still play and is then released, the VCR re-enters the still play mode. If the VCR is left for more than one minute after still play is restored from reverse play, reverse double-speed play or reverse search, the VCR will enter the stop mode automatically to prevent damage to the tape.
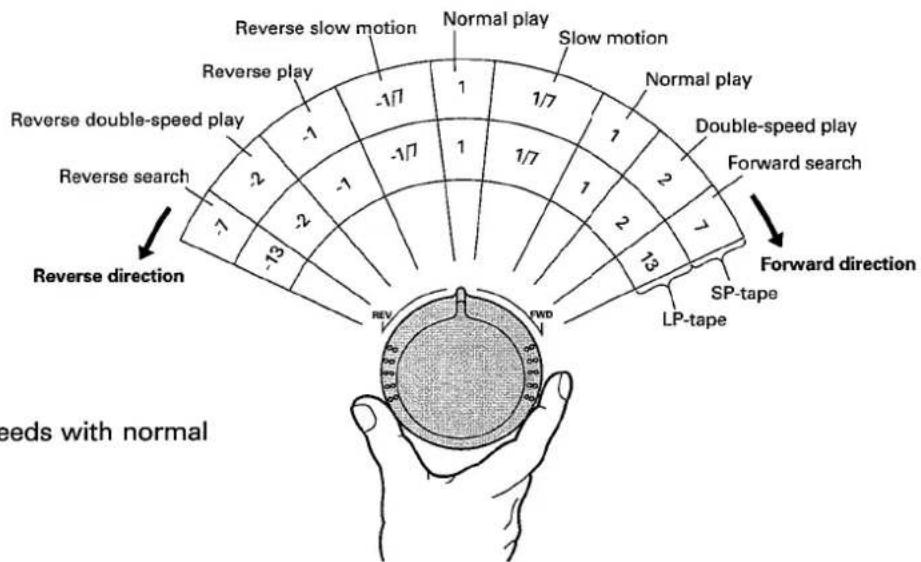
- Numbers indicate tape speeds with normal play as 1.
Notes:
- The picture may contain noise, streaking or other distortion when it changes.
- If noise bars appear on the TV screen during slow/still mode, first set the VCR to the slow mode and then adjust the TRACKING buttons (▼ or ▲) to minimize the noise bars. The noise bars in the still mode are reduced automatically. After adjusting the tracking during slow mode, set the VCR to reverse slow mode and then press TRACKING buttons (▼ or ▲) to minimize noise bars.
INSTANT PLAY-BACK TIMER (IPT)
Start point: Turn the TV set on and select the video programme number (described on page 11).
Controls
TV Screen
1
natural_image
Hand pressing down on a printer front panel (no text or symbols visible)Insert a cassette.
Note: When a cassette (with its safety tab snapped off) is loaded, play-back starts automatically.
2
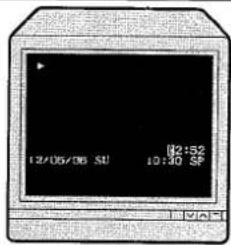
Press the play ▷ button.
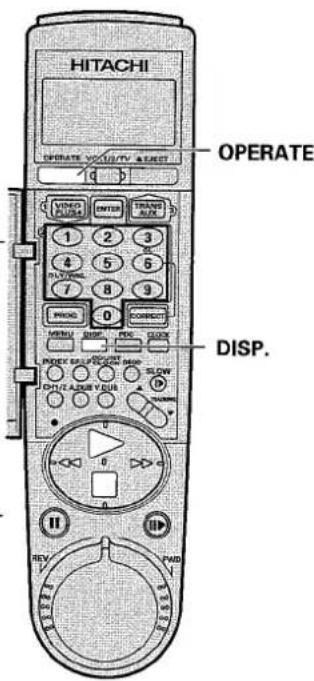
Play-back starts and the on-screen display is automatically displayed on the TV screen.
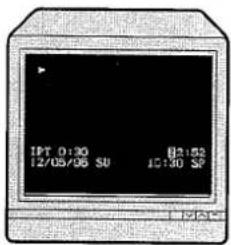
Press the play ▷ button again before the on-screen display disappears; the IPT setting mode will appear on the TV screen.
Press the play ▷ button until you select the required play-back time; the time changes in hours and minutes in the following sequence 0:30, 1:00, 1:30, 2:00, 3:00, 4:00.
During play-back, the remaining time is displayed when the play ▷ or DISP. button is pressed.
When play-back is finished, the VCR will turn off automatically.
To stop IPT during play-back; press the play ▷ button until the IPT setting mode disappears from the TV screen.
Pressing the stop □ button also stops play-back, but does not re-set IPT display.
Notes:
• If the clock has not been set, IPT cannot be set.
- You can preset the play-back time by performing steps 2 – 4 even before inserting a cassette.
- All functions in play-back mode can be activated during IPT.
RECORDING TV PROGRAMMES
Start point: Turn the TV set on and select the video pogramme number (described on page 11).
Controls
VCR's Display
1
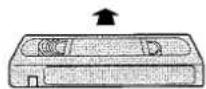
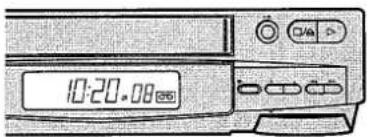
Insert a cassette.
Note: Be sure to check that the safety tab is not missing. If it is removed, the VCR is set to the play-back mode automatically.
2
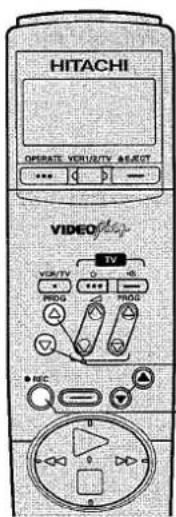
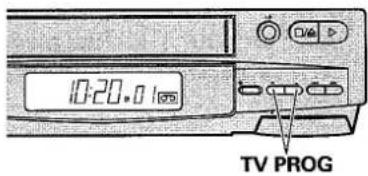
Select the programme to be recorded by pressing the PROG, TV PROG buttons or two number buttons.
3
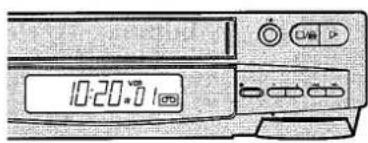
Make sure the VCR indicator lights in the VCR's display for viewing video via the Scart connector lead. If not, press the VCR/TV button on the handset so that it lights.
4
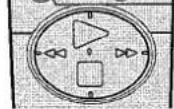
PROG
REC
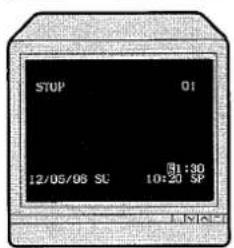
Press the DISP. button.
The on-screen display will appear on the TV screen.
5
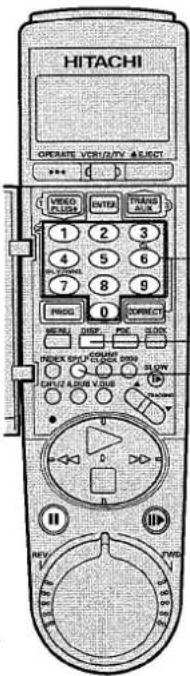

DISP.
SP/LP
Press the SP/LP button to select the recording speed.
6
natural_image
Close-up of a mechanical control dial with rotary buttons and indicator lights (no text or symbols visible)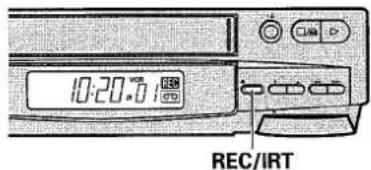
Press the REC or REC/IRT button.
Now, recording starts.
7
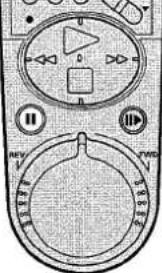
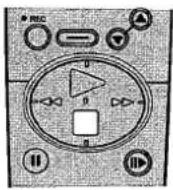
If you want to avoid recording unwanted material, press the Ⓥ button. Press the button again to continue recording.
To prevent tape damage, the VCR will automatically switch from record/pause to the stop mode after about 5 minutes.
(RECORDING TV PROGRAMMES)
Controls
VCR's Display
8

To view a programme while recording it
You can view a programme while recording it by selecting the video programme number (described on page 11) on your TV.
9

To record one programme while viewing another
You can record one programme while viewing another by selecting the programme you want to view on your TV. The recorded programme can be viewed later at your convenience.
10
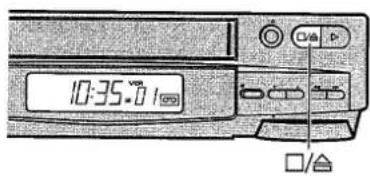
After the recording has been made press the stop □ or □/△ button.
INSTANT RECORDING TIMER (IRT)
| Controls | VCR's Display | |
| 1 | Ensure the time is correct in the VCR's display. | |
| 2 | Start recording as described on page 23. | |
| 3 | To start the IRT recording press the REC or REC/IRT button again. The recording time is then indicated in the display. Press the REC or REC/IRT button until you select the required recording time; the time changes in hours and minutes in the following sequence; 0:30, 1:00, 1:30, 2:00, 3:00, 4:00. During recording the remaining time is displayed. At the end of the recording time, when the display shows 0:00, the VCR will turn off automatically. |
flowchart
graph LR
    A["OPERATE"] --> B["OR"]
    C["● REC"] --> D["OR"]
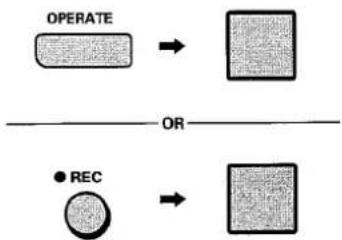
To stop recording during IRT; either, press the OPERATE button and then the stop button (☐ or ☐/△) within 10 seconds; or, press the REC or REC/IRT button until the timer indicator □ disappears from the VCR's display and then press the stop button ☐ or ☐/△
TIMER RECORDING
| Controls | VCR's Display | Your TV does not have to be on to make a recording because the VCR records TV programmes without the aid of your TV. It is only used for monitoring. | |
| 1 | 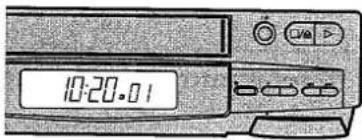 | Make sure that the clock shows the present time correctly. | |
| 2 | 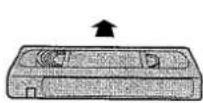 | 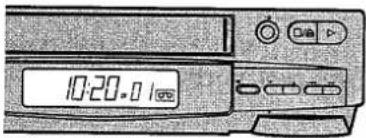 | Insert a cassette.Be sure to check that the record safety tab is not missing. If the safety tab is missing, recording will not begin. |
| 3 | 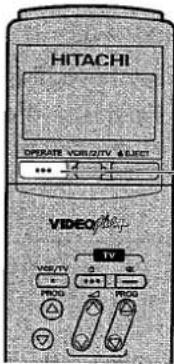 | OPERATE | Programme the timer.See pages 27 to 33 for details. |
| 4 | 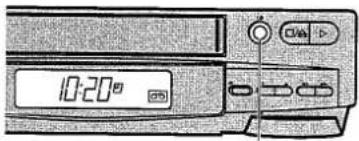 | Press the OPERATE button to turn the VCR off. |
2
3
To interrupt a recording after it starts, press the OPERATE button and then the stop button (☐ or ☐/△) within 10 seconds.
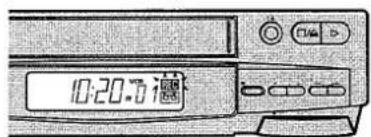
If a cassette with its safety tab snapped off is inserted, it will be ejected automatically and the indicator ☐ in the VCR's display will start flashing when the VCR is turned off. In this case, insert a cassette with its safety tab in place or cover the hole with cellophane tape.
Also, if a cassette is not loaded in the VCR, the indicator 📋 starts flashing.
Programming the timer
This VCR incorporates two programming procedures for timer recording.
One is conventional, and the TV programme No., start time, stop time, recording date, etc., must be input, and the other is called "Video Plus+" and up to 9 digits must be input.
Programming the timer using "VideoPlus+"
Things to know before starting programming
- To find the "PlusCode" number, look in the TV section of most newspapers or TV guide magazines.
- Check that the time and date are correct.
- You have about one minute to complete each step of the procedure. If you do not proceed to the next step within this time, all entries are erased and you must start again.
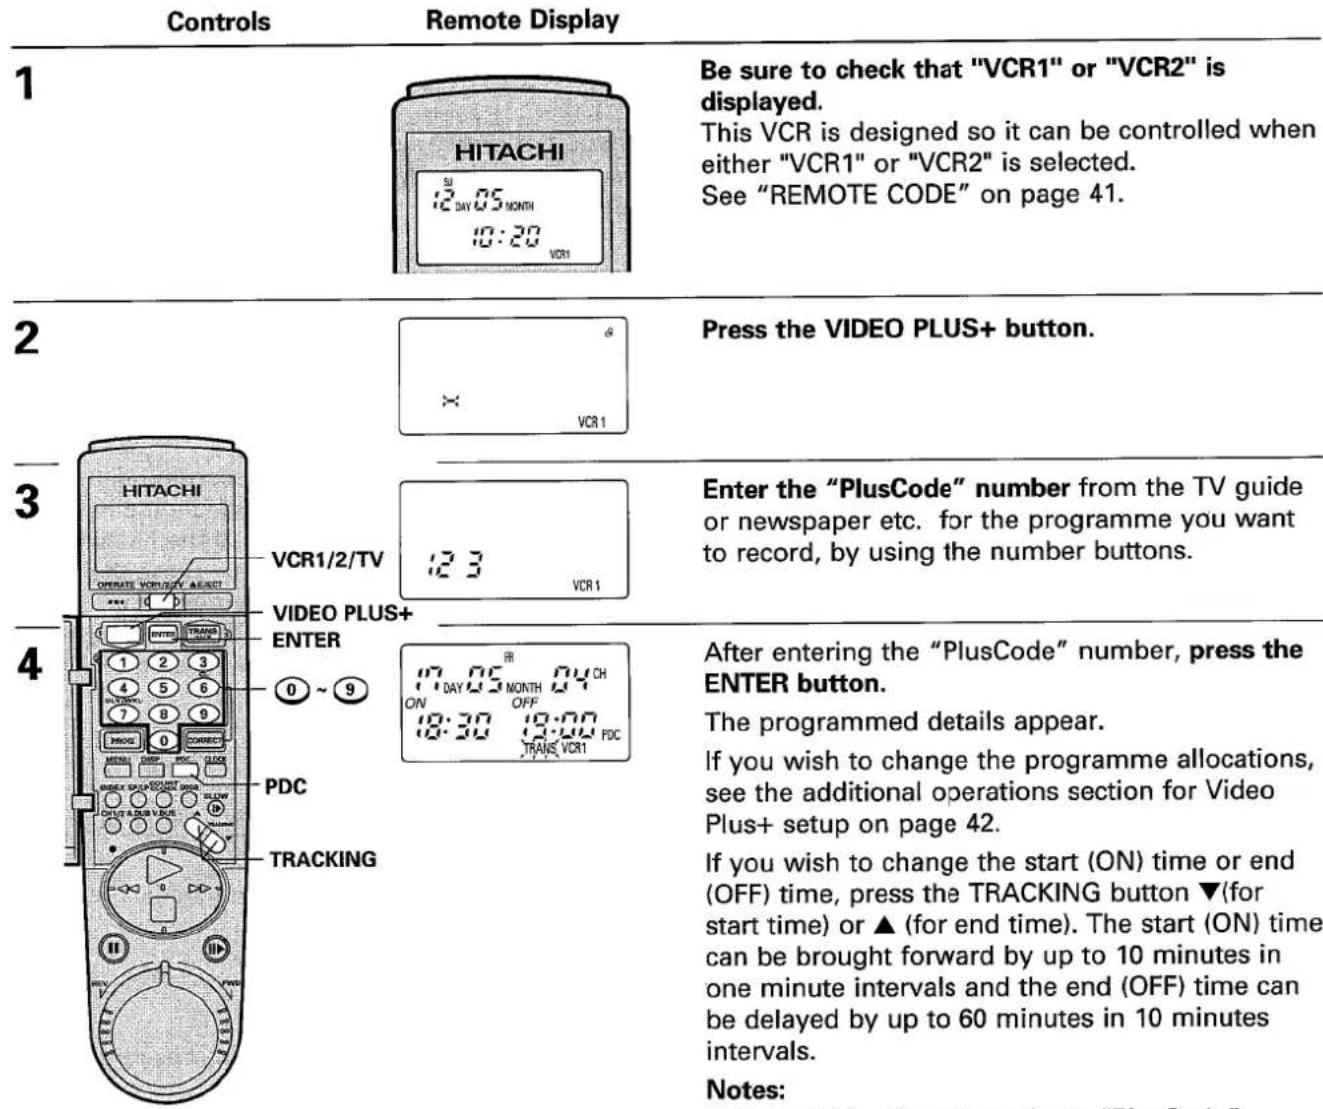
Be sure to check that "VCR1" or "VCR2" is displayed.
This VCR is designed so it can be controlled when either "VCR1" or "VCR2" is selected.
See "REMOTE CODE" on page 41.
Press the VIDEO PLUS+ button.
Enter the "PlusCode" number from the TV guide or newspaper etc. for the programme you want to record, by using the number buttons.
After entering the "PlusCode" number, press the ENTER button.
The programmed details appear.
If you wish to change the programme allocations, see the additional operations section for Video Plus+ setup on page 42.
If you wish to change the start (ON) time or end (OFF) time, press the TRACKING button ▼(for start time) or ▲ (for end time). The start (ON) time can be brought forward by up to 10 minutes in one minute intervals and the end (OFF) time can be delayed by up to 60 minutes in 10 minutes intervals.
Notes:
- Use of "PlusCode" numbers. "PlusCode" numbers only record programmes at the times shown in the TV guide.
The VCR timer will not follow the TV programme if the time is changed for any reason (e.g. delayed due to a previous programme).
- When you press the ENTER button, "PDC" will appear. Ignore these letters if you don't intend to use this function or if your VCR does not have this function. If it is confusing, press the PDC button to erase these letters.
(TIMER RECORDING)
| Controls | Remote Display | |
| 5 | 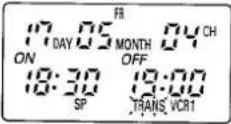 | Press the SP/LP button to select the recording speed (SP, LP, or no display).Note: If you select no display, the VCR will record at the speed displayed by the on-screen display.Check the recording speed after programming the timer. Turn the VCR and TV on, then tune the TV to the video programme number as described on page 11.The VCR indicator must be lit for viewing video via the Scart connector lead. If not, press the VCR/TV button on the handset so that it lights.The on-screen display appears on the TV screen by pressing the DISP. button. |
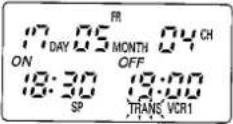 | If you are programming the timer for one time recording only, skip step 6 and go straight to step 7. | |
 | ||
 | ||

| Controls | Remote Display | |
| 8 | Press the CLOCK button to switch the display panel back to the clock/calendar display. | |
| 9 | 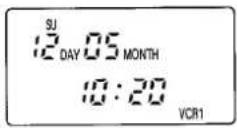 | If you want to programme another event, repeat steps 2 to 8. |
 | VCR's Display | To activate the VCR's timer and make a recording at the preselected time, be sure to press the Operate button to turn the VCR off. Of course a cassette which has an intact safety tab must be inserted. |
 | ||
| - c | ||
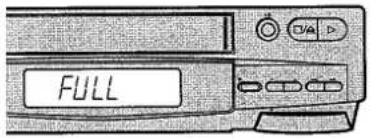
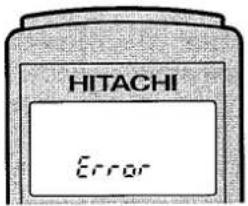 | Operating notes:If you have entered a wrong number in step 3, "Error" will appear on the remote display when the ENTER button is pressed. In this case, enter the correct number again.If the TRANS/AUX button is pressed when all the programme numbers that the VCR can store are occupied, "FULL" will appear in the display of the VCR and the information transferred will be rejected.See page 33 for recalling and clearing the programming from the VCR memory and for programme priority. | |
 |
(TIMER RECORDING)
Programming the timer without using "VideoPlus+"
Things to know before starting programming
- While you are programming the timer, the display panel on the handset will prompt you through the procedure.
• Always press Ⓞ before a single-digit channel, hour and minute etc. -
You have about one minute to complete each step of the procedure. If you do not proceed to the next step within this time, all entries are erased and you must start again.
-
You can correct an error in the programme any time before the last step by pressing the CORRECT button repeatedly until the digit to be corrected flashes and then enter the correct digit.
- Check time and date are correct.
| Controls | Remote Display | |
| 1 | 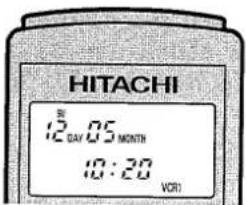 | Be sure to check that "VCR1" or "VCR2" is displayed.This VCR is designed so it can be controlled when either "VCR1" or "VCR2" is selected.See "REMOTE CODE" on page 41. |
| 2 | 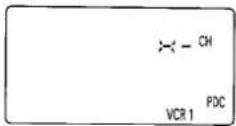 | Press the PROG button.Note: When you press the PROG button, "PDC" will appear. Ignore these letters if you don't intend to use PDC function or if your VCR does not have PDC function. If it is confusing, press the PDC button to erase these letters. |
| 3 | 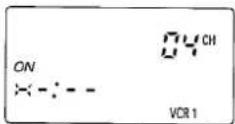 | Select the TV programme number to be recorded.For example, press 04 for TV station 4. |
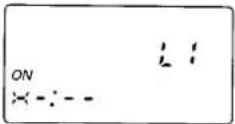 | To record video and audio signals from external equipment via the Scart socket on the back of the VCR, press the TRANS/AUX button so that "L1" is displayed in the display panel in place of a programme number.To record via the DECODER socket on the back of the VCR, press the TRANS/AUX button again to display "L2". | |
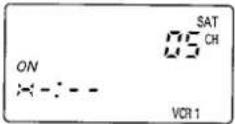 | To record a satellite programme, press the TRANS/AUX button third time to display "SAT".Then enter the programme number of the satellite receiver. | |
| 4 | 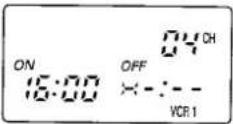 | Select the start time.For example, press 1600 for 16:00 (4:00 p.m.).0:00 for midnight 12:00 for noon |
| 5 | 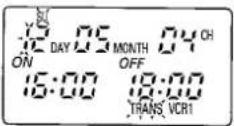 | Select the stop time.For example, press 1800 for 18:00 (6:00 p.m.). |
| 6 | 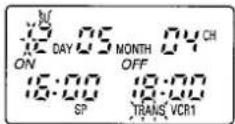 | Press the SP/LP button to select the recording speed (SP, LP, or no display).Note: If you select no display, the VCR will record at the speed displayed by the on-screen display. Check the recording speed after programming the timer. Turn the VCR and TV on, then tune the TV to the video programme number as described on page 11.The VCR indicator must be lit for viewing video via the Scart connector lead. If not, press the VCR/TV button on the handset so that it lights. The on-screen display appears on the TV screen by pressing the DISP. button. |
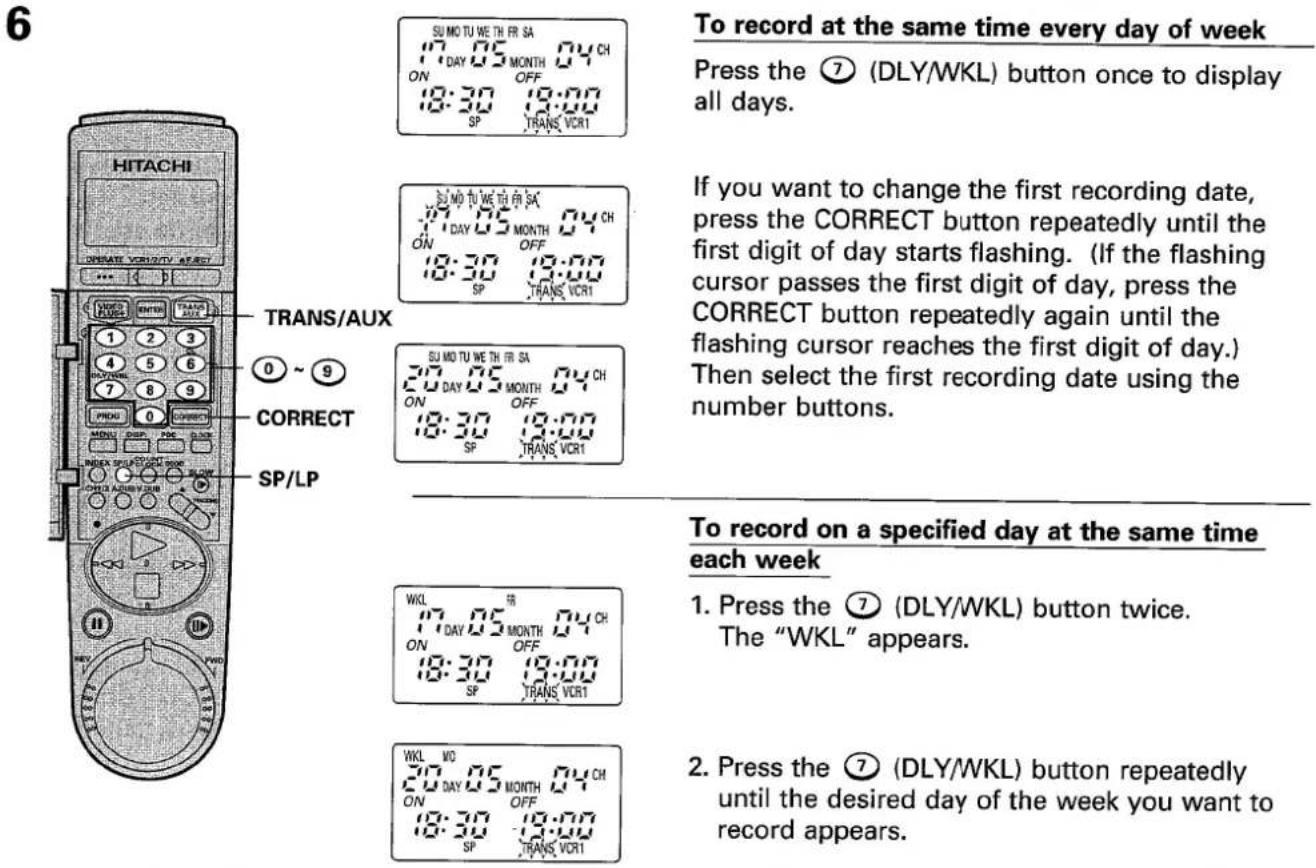
| 7 | 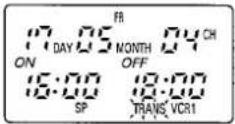 | Select the date for recording.To record on a single day up to one year aheadFor example, press 1705 to begin recording on the 17th of May. |
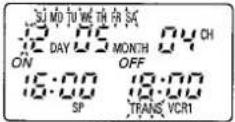 | To record at the same time every day of the weekSelect the first recording date using the number buttons. Then press 7 (DLY/WKL) button once | |
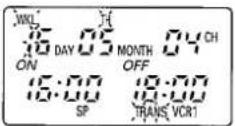 | To record on a specified day at the same time each weekPress the 7 (DLY/WKL) button repeatedly until the desired day of the week you want to record appears. | |
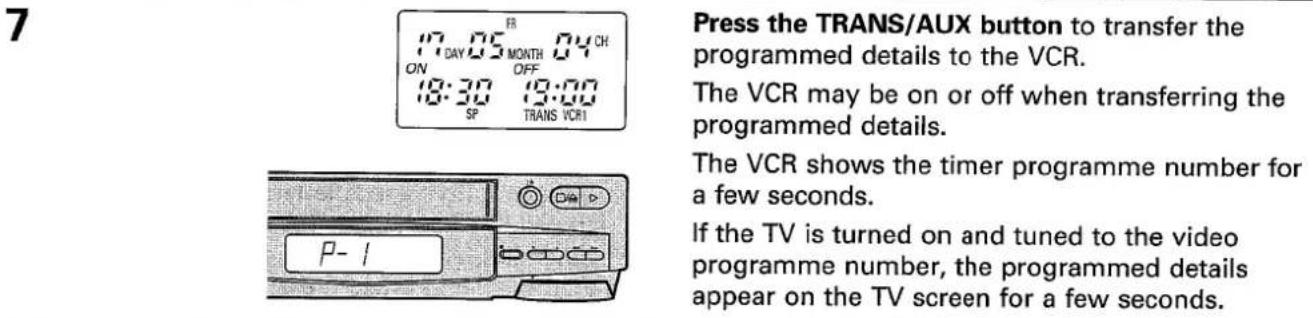
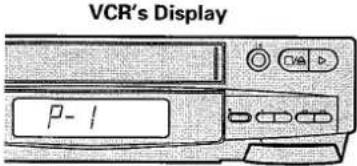
| 8 | 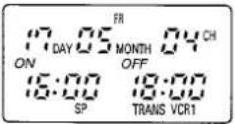 | Now, programming has been completed to record one event.Press the TRANS/AUX button while aiming the handset at the receiver of the VCR.The VCR may be on or off when transferring the programmed details.The VCR shows the timer programme number for a few seconds. |
 | ||
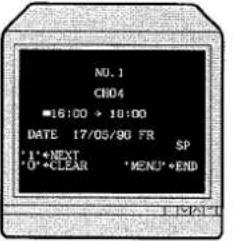 | If the TV is turned on and tuned to the video programme number, the programmed details appear on the TV screen for a few seconds. | |
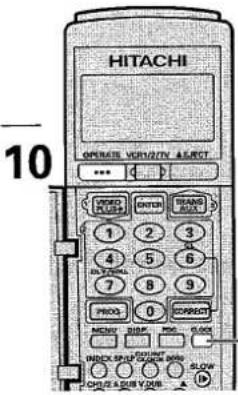
| 9 | 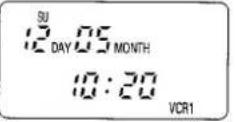 | Press the CLOCK button to switch the display panel on the handset back to the clock/calendar display. |
(TIME RECORDING)
Controls
VCR's Display
10
If you want to programme other programmes, repeat steps 2 to 9.
11
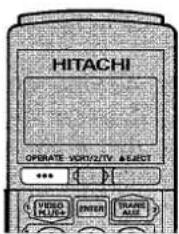
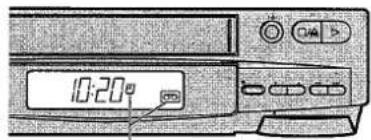
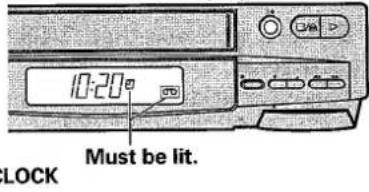
Must be lit.
To activate the VCR's timer and make a recording at the preselected time, be sure to press the Operate button to turn the VCR off. Of course a cassette which has an intact safety tab must be inserted.
Operating notes:
- If your timer programme has a TV programme channel number that you have not preset in the VCR, "Err" is displayed in the VCR display when you try to transfer this programme to the VCR. In this case, correct the channel then transfer the data to the VCR again.
- If the TRANS/AUX button is pressed when all the programme numbers that the VCR can store are occupied, "FULL" will appear in the display of the VCR and the information transferred will be rejected.
Recalling and clearing the programme from the VCR's memory
| Controls | TV screen | |
| 1 |  | Turn the VCR and TV on.Be sure that the TV is set to the video programme number. |
| 2 | 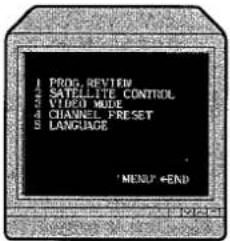 | Press the MENU button.The OSD menu appears on the TV screen. |
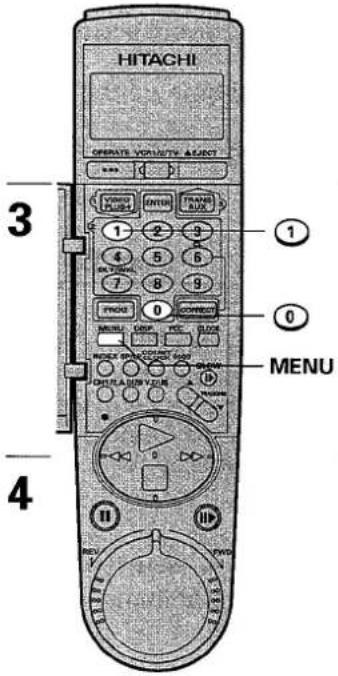 | 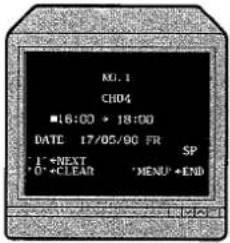 | Press the 1 button (PROG. REVIEW).The TV screen will display the information you entered for the lowest programme number for 10 seconds.Press 1 again if you want to view the next programme information immediately. |
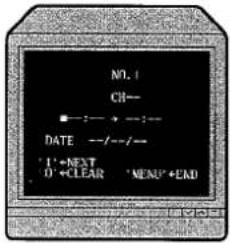 | To clear a programme, press the 0 button when the programme information you want to clear is displayed.One event's timer programme data is erased from the VCR's memory when the timer recording is finished, but daily and weekly programmes remain in the VCR's memory even after the timer recording is finished. | |
| 5 | When you finish reviewing the programmes,press the MENU button to switch off the on-screen display. |
2
5
Programme priority
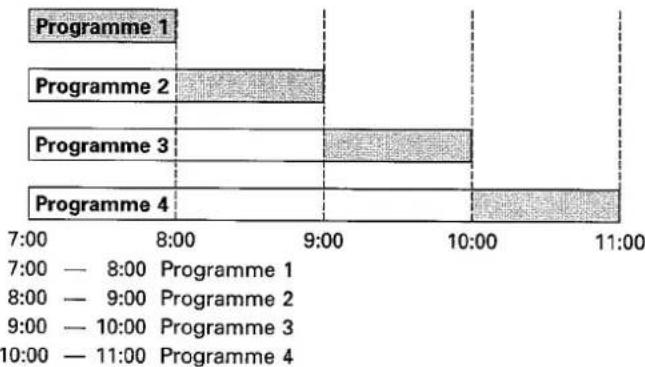
Example 1: When the programme start time is the same for more than one programme on the same day, they are recorded in the order of Programme 1, 2, 3 .... 8.
bar
| Programme | Time (hours) | |---|---| | Programme 1 | 8:00 | | Programme 2 | 9:00 | | Programme 3 | 10:00 | | Programme 4 | 11:00 | 7:00 — 8:00 Programme 1 8:00 — 9:00 Programme 2 9:00 — 10:00 Programme 3 10:00 — 11:00 Programme 4Programme 1 is executed as programmed, and Programme 2, as illustrated, after Programme 1, and Programme 3, as illustrated, after Programmes 1 and 2, and Programme 4, as illustrated, after Programmes 1, 2 and 3.
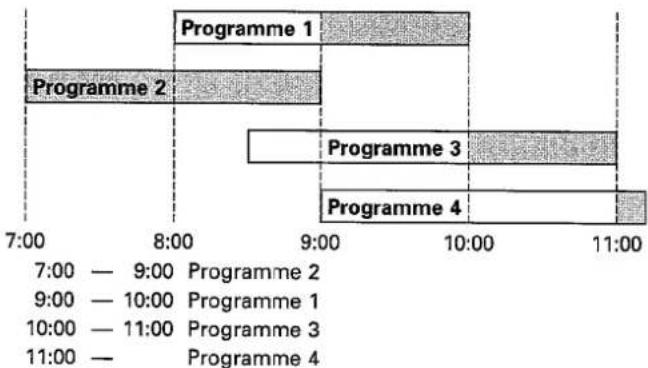
Example 2: When the programmes overlap, the earlier programme has priority.
line
| Program | Time | Value | |---|---|---| | Programme 1 | 7:00-9:00 | High | | Programme 1 | 9:00-10:00 | High | | Programme 2 | 7:00-8:00 | High | | Programme 2 | 9:00-10:00 | High | | Programme 3 | 9:00-10:00 | High | | Programme 3 | 10:00-11:00 | High | | Programme 4 | 10:00-11:00 | High | | Programme 4 | 11:00-12:00 | High | 7:00-9:00 Programme 2 9:00-10:00 Programme 1 10:00-11:00 Programme 3 11:00-12:00 Programme 4Programme 2 is executed as programmed, and Programme 1, as illustrated, after Programme 2, and Programme 3, as illustrated, after Programmes 2 and 1, and Programme 4, as illustrated, after Programmes 2, 1 and 3.
Section-3 Additional Operations
Special Characteristics
This explains the following additional convenient features: Linear Time Counter; shows the actual elapsed time in hours, minutes, and seconds. Counter Memory; allows you to quickly return to a specified point from any point on the tape. Automatic Rewind/Automatic Rewind Shut-Off; automatically rewinds the tape at its end and automatically shuts off at its beginning if the VCR is switched to the standby mode. Mode Lock; allows you to lock VCR mode to prevent accidental operation. Tape remaining display; shows the remaining time on the TV screen. Index/Counter Go-To; locates the desired programme on your tape.
Menu Features
Menu features; shows you various displays; programme review, language selection, OSD feature on/off selection, rental play on/off selection, endless play on/off selection, auto programme play cn/off selection, remote code selection and auto blue on/off selection.
VIDEO PLUS+ Setup
Describes additional information for timer programming with "Video Plus+".
Editing
Tape Dubbing; allows copying from another pre-recorded tape.
Pay Television/Satellite Receiver
This tells you how to connect a "Pay Television" decoder or satellite receiver and record its programme.
How to Operate Your TV by Using the Remote Control Handset
Because the supplied remote control handset is designed to operate 14 different types of TV, you should programme the handset to match the remote codes of your TV.
SPECIAL CHARACTERISTICS
Linear time counter
1
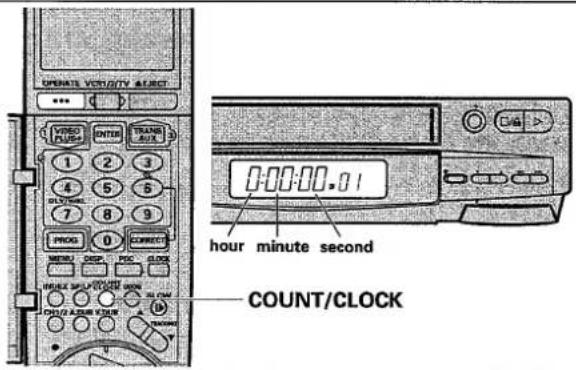
Press the COUNT/CLOCK button to select the linear time counter display. Every time the button is pressed, it changes the VCR's display between the clock time display and time counter display.
- The counter is reset to 0:00:00 when a tape is ejected.
- When the tape starts, it counts up from 0:00:00 and the counter indicates the elapsed time.
Note: The linear time counter does not operate when nothing is recorded on the tape.
Counter memory function
This is useful if there is a section of tape you want to view immediately after recording or if you want to return to the same point several times.
1
Start recording or playing back a tape.
2
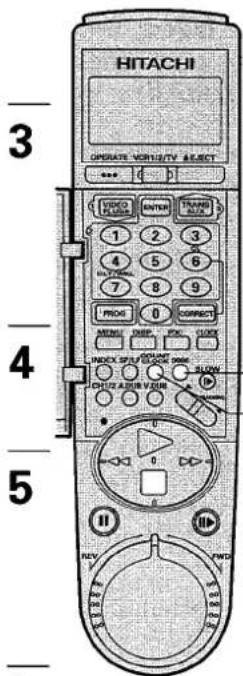
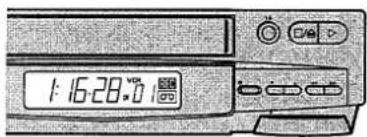
Press the COUNT/CLOCK button to display the time counter in the VCR's display.
Also the time counter appears on the TV screen for approx. 5 seconds by pressing the DISP. button.
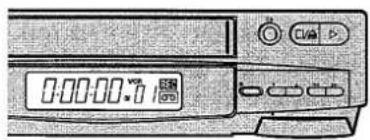
At the point where you want play-back to start, reset the time counter to "0:00:00" by pressing the 0000 button.
0000
COUNT/ CLOCK
Continue to play or record.
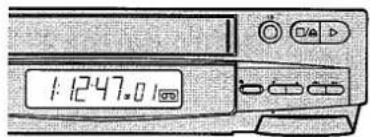
Press the stop □ button or □/△ when recording or play-back finishes.
6
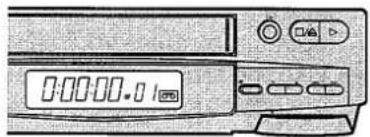
Press the rewind ◀ button.
The tape will stop automatically at approximately the "0:00:00" position.
Note: The counter memory function will also operate in the fast-forward mode.
(SPECIAL CHARACTERISTICS)
Automatic rewind
The VCR automatically rewinds the tape when the end of tape is reached.
To prevent accidental erasure, the VCR does not rewind the tape after timer recording.
Rewind shut off
If the OPERATE button is pressed during the rewind operation, the VCR will be turned off automatically after the tape has been completely rewound.
If the time counter is turned on, the VCR will stop rewinding and switch off at the specified position.
Mode lock function
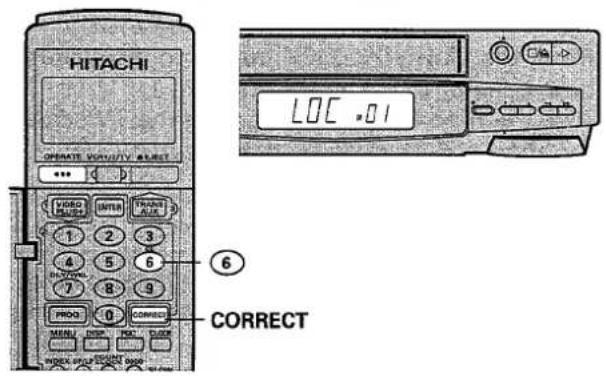
Press the CORRECT button and button number 6 on the remote control handset simultaneously.
The VCR mode is locked and "LOC" appears in the VCR display and also "( )" is displayed on the TV screen.
When the VCR operating mode is locked, the VCR accepts remote control operations but it does not accept any operations from the buttons on the VCR.
To release the VCR lock, press the CORRECT button and ⑥ button at the same time again or press the OPERATE button on the handset.
Tape remaining display function
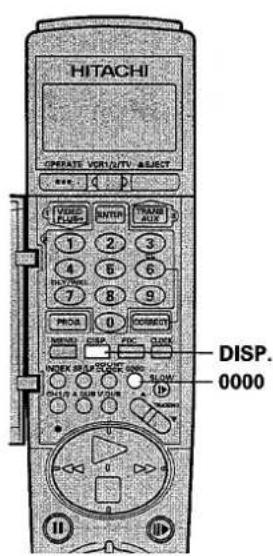
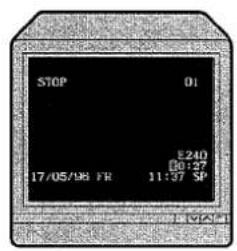
When you start play-back, recording, fast forward or rewind, the VCR will automatically calculate the remaining time within approx. 30 seconds. When the clock is displayed in the VCR's display, the remaining time appears on the TV screen for approx. 5 seconds by pressing the DISP. button.
Notes:
- If you are using an E-240 tape, switch the VCR's display to the clock indication and press the 0000 button to adjust the VCR time remaining system for an accurate read-out. "E-240" appears on the TV screen.
- Use the tape remaining display as a reference. The tape remaining function is designed so it works correctly with E-30, E-60, E-120, E-180 and E-240 cassettes. If you use a cassette other than these, the remaining time will not be displayed correctly.
Index function
The cassette tape may be recorded using the tape indexing feature for the rapid location of any section.
To record using the indexing feature
Record as usual. Each time you press the Record button to begin recording, an index signal is recorded on the tape.
The index signal is only recorded on the tape when you first begin to record. If you use the pause feature between different recorded programmes no new index signal will have been recorded. Press the stop button and then record between different recordings.
To locate a programme using the index feature
The index function lets you view the first few seconds of all recordings on the tape. This also allows you to jot down details of all recordings on the tape easily.
To locate a programme using the index feature, turn the VCR on and insert a cassette which was recorded using the tape indexing feature, then operate as follows.
| Controls | TV Screen | |
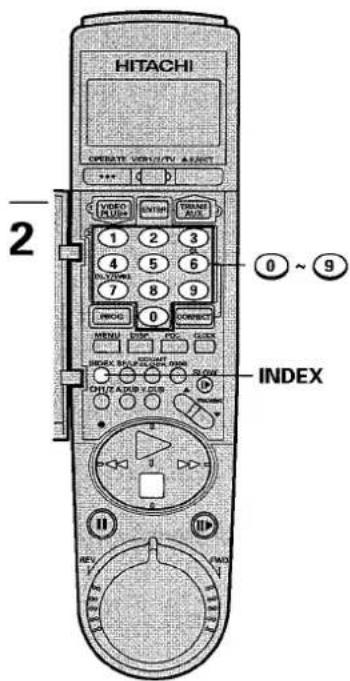
| 1 | 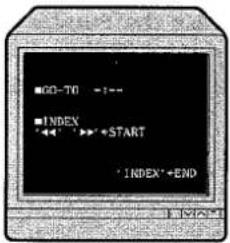 | Press the INDEX button when a cassette is loaded and the VCR is in the stop mode. |
| 2 | 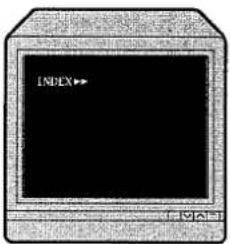 | Press the <> or <> button.The tape will be rewound or fast forwarded until an index mark is detected. |
| 3 | 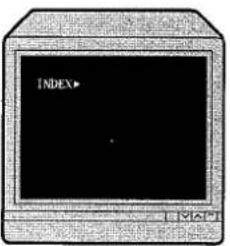 | When the VCR has located an index mark, it will enter the play-back mode for approximately 15 seconds. This is long enough for you to recognize the programme. The VCR then winds the tape to subsequent index marks in sequence. |
| 4 | When you see the programme you want to watch, press the ▷ button to start play-back.The INDEX indicator will disappear from the TV screen. |
(SPECIAL CHARACTERISTICS)
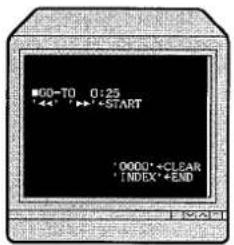
GO-TO function
The VCR will automatically run from anywhere on the tape (either forward or backward) for a certain time using the time counter.
Controls
1
TV Screen
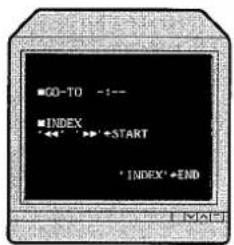
Press the INDEX button when a cassette is loaded and the VCR is in the stop mode.
3
The VCR will automatically fast forward or rewind the tape to locate the point on the tape you have chosen, and begin playing back the tape.MENU FEATURES
| Controls | TV Screen | |
| 1 |  | Turn the VCR and TV on, then set the TV to the video programme number. |
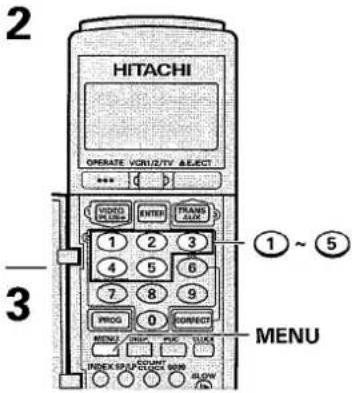 | 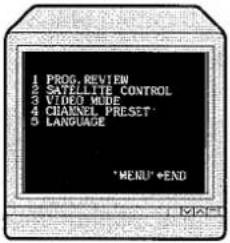 | Point the remote control handset at the receiver on the front of the VCR.Press the MENU button.The menu, as illustrated, will appear on the TV screen. |
| Press one of 1 to 5 to select the required display. |
Checking (reviewing) the programme information
  Press ①. The TV screen will display the information you entered for the lowest programme number for 10 seconds. - Press ① again if you want to view the next programme's information. - Pressing Ⓞ will clear the programme. - Press the MENU button to return to the original picture.Language selection
  1. Press ⑤. 2. Press one of buttons ① to ⑦. ① for English ② for German ③ for French ④ for Italian ⑤ for Spanish ⑥ for Swedish ⑦ for Dutch Now, you can view the On-screen Display in the language you have selected.Video mode setting
  You can change the VCR mode as required. Press ③. The menu, as illustrated, will appear on the TV screen. Press one of ① to ⑥ to change the required display. (See overleaf for details.)(MENU FEATURES)
OSD [O] or [—]
  Press ① to change the On-Screen Display setting. [0]: Whenever you change the mode, the new mode is automatically displayed on the TV screen for a few seconds. [—]: Nothing will be displayed on the TV screen even when you change the mode.Notes:
- When the DISP. button is pressed, the on-screen display will appear for a few seconds whether the OSD is set to [O] or [—]. - When the DISP. button is pressed again before the display disappears, the display will disappear from the TV screen.RENTAL PLAY [O] or [—]
  Press ② to change the Rental Play setting. [O]: The VCR will automatically start play-back when a cassette with its safety tab removed is inserted into the VCR. Then the VCR will enter the rewind mode when the tape reaches its end or when the VCR plays a non-recorded section for approximately 30 seconds. After rewinding the tape to its beginning, the VCR will eject the cassette and turn off. [—]: The rental play feature is switched off. (However, the VCR will automatically start play when a cassette with its safety tab removed is inserted into the VCR.) It is impossible to set both the RENTAL PLAY and ENDLESS PLAY functions to [O] at the same time. If you attempt to do so, the other function is automatically set to [—]. When a cassette with its safety tab is loaded, rental play does not operate even if this function is set to [O].ENDLESS PLAY [O] or [—]
  Press ③ to change the Endless Play setting. [0]: You can play the tape from the beginning to the end repeatedly. While in the endless play mode, you can perform still play, frame advance, visual search, etc., however, this does not mean the endless play feature is switched off. To switch off the endless play feature, you must select [—] with this display. [—]: The endless play feature is switched off.AUTO PROGRAM PLAY [O] or [—]
  Press ④ to change the Auto programme Play setting. [0]: After the timer recording has finished, the VCR will automatically rewind the tape to locate the programme just recorded then begin playing it back, by merely turning the VCR on. Note: If two or more programmes are recorded at once, the programme recorded last is played back. [—]: The auto programme play feature is switched off.REMOTE CODE [1], [2] or [—]
  Press ⑤ to change the Remote Code setting. This display lets you control your VCR when "VCR1" or "VCR2" appears in the remote control handset's display. This is convenient when you want to add another Hitachi VCR to your system, and control both VCRs with the same handset. "VCR1" display in the handset's display will control the VCR to which [1] was assigned with this display, and "VCR 2" will control the VCR to which [2] was assigned with this display. [1]: Your VCR will respond to "VCR1" [2]: Your VCR will respond to "VCR2" [—]: Your VCR will respond to either. For example, if you select [2], you must press the VCR1/2/TV to display "VCR2" before the VCR will respond to the handset.AUTO BLUE [O] or [—]
  Press ⑥ to change the auto blue setting. [0]: The TV screen becomes blue when a tape without a recording is played back. [—]: The TV screen does not become blue. Note: If no picture appears when a recorded tape is played back, specify the AUTO BLUE option as [—].VIDEO PLUS+ SETUP
Changing the TV Programme Allocations
The Video Plus+ assumes that you have tuned your VCR as follow: BBC1 is on programme 01 BBC2 is on programme 02 ITV is on programme 03 CH4 is on programme 04 For timer recording using Video Plus+ please refer to page 27. Things to know before changing the programme allocations \- You have about one minute to complete each step of the procedure. If you do not proceed to the next step within this time, all entries are erased and you must start again. \- Check that the time and date are correct. If you wish to change the programme allocations, follow the procedure below.| Controls | Remote Display | |
1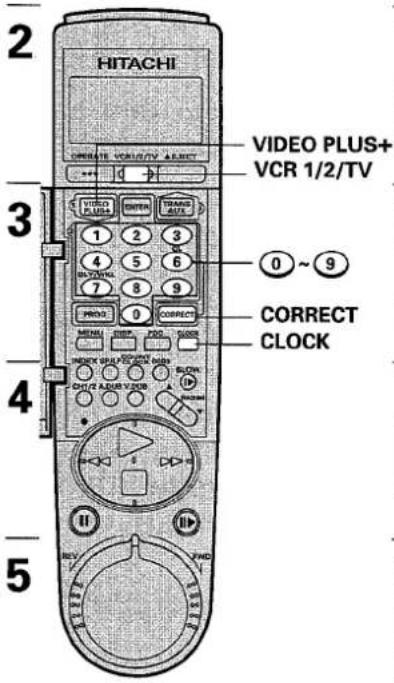 | 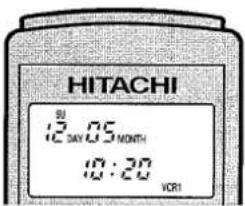 | Be sure to check that "VCR1" or "VCR2" is displayed.This VCR is designed so it can be controlled when either "VCR1" or "VCR2" is selected.See "REMOTE CODE" on page 41. |
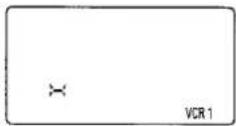 | Press the VIDEO PLUS+ button. | |
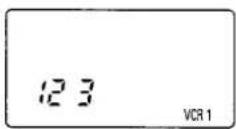 | Enter the "PlusCode" number from the TV guide or newspaper etc. for the programme you want to record using the number buttons. | |
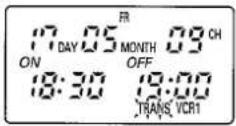 | After entering the code number, press the ENTER button.The programmed details appear. | |
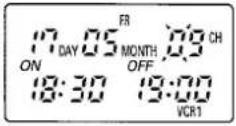 | To change the TV programme allocation, press the CORRECT button.The first digit of the TV programme number starts flashing. Then enter the correct TV programme number. | |
| 6 | 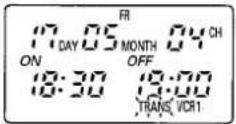 | Press the ENTER button. Now the programme number has been memorized.Press the CLOCK button to switch the display panel on the remote control handset back to the clock/calendar display. |
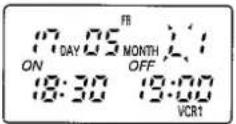 | Notes:If you change the TV programme allocations by following the above steps, the TV programme number will be automatically over written by the alternate programme number when you |
Notes:
- If you change the TV programme allocations by following the above steps, the TV programme number will be automatically over written by the alternate programme number when you programme subsequently. - If you want to record from external video equipment connected to the Scart socket or DECODER socket, press the TRANS/AUX button to change the TV programme number to "L1" for Scart socket input or "L2" for DECODER socket input.EDITING — Tape Dubbing
flowchart
graph TD
    A["Video equipment for play-back"] --> B["To Scart or DECODER socket"]
    B --> C["Recording VCR"]
(EDITING — Tape Dubbing)
Controls VCR's Display 5   Press the REC button on the recording VCR and the play button on the play-back VCR.  To edit out unwanted material, press the pause button on the recording VCR while it is recording at the appropriate time. Press the pause button again to resume recording. 6   To end tape dubbing, press both stop buttons. 7"PAY TELEVISION" DECODER OPERATION
Connect the "Pay Television" decoder as follows. What is a "Pay Television" Broadcast? The radio waves are transmitted from the broadcasting station in the same way as with an ordinary TV broadcast in the "Pay Television" system, however, the radio waves are scrambled, therefore you cannot receive them or view the broadcast on the TV without unscrambling. You must connect an exclusive decoder to perform this unscrambling and then you can view the "Pay Television" broadcast like an ordinary TV broadcast. Consult your dealer for details. flowchart
graph TD
    A["Aerial"] -->|To Aerial terminal| B["To AC outlet 220 - 240V/50Hz"]
    B --> C["To "RF OUT""]
    C --> D["To "AERIAL""]
    D --> E[""Pay Television" Decoder"]
    E --> F["Scart cable (option)"]
    F --> G["Aerial cable supplied"]
    G --> H[""Aerial"]
SATELLITE RECEIVER OPERATION
Connection
There are two connection methods according to the type of satellite receiver. When using a Scart connector lead:  When using an aerial cable: Method B Programme the VCR to match the control system of your satellite receiver.
This VCR can control several types of satellite receiver to tune to satellite programmes and record them with the timer. You must first programme the VCR to match the system control code of your satellite receiver.Notes:
- Set your satellite receiver to the 2-digit programme number indication mode if your receiver is switchable. - Place the satellite receiver on the VCR so that the VCR's infrared transmitter is not blocked and is as close as possible to the infrared receiver of the satellite receiver. - You can view a satellite programme even when playing back a tape by pressing the VCR/TV button to set the VCR to the TV mode. Depending on the type of a satellite receiver, its TV output socket must be connected to the VCR's DECODER socket, to view a satellite programme. - You can connect your satellite receiver to either the VCR's EURO.A/V socket (L1), DECODER/CANAL PLUS socket (L2) or AERIAL socket and can select the connection from the satellite control setup menu. However, when recording a satellite programme using the timer, connect the satellite receiver to the DECODER/CANAL PLUS or AERIAL socket and select L2 or RF as the CONNECTION option. If the satellite receiver is connected to the EURO.A/V socket and you attempt to record a satellite programme using the timer, it will not be recorded normally. (SATELLITE RECEIVER OPERATION)
When connecting the VCR and satellite receiver using a Scart connector lead (Method A) Controls TV Screen 1 Turn the satellite receiver on and select a satellite programme other than programme number 12. 2  Turn the VCR on. Point the handset at the front of VCR, then press the MENU button, and ② button. The satellite control set-up menu appears on the TV screen. 3   Press the ① button to select "L2". The satellite picture should now appear on the TV screen.  Press the ENTER button. If this type number is incorrect for your satellite receiver, refer to table opposite. Enter the code using the number buttons on the remote control handset. After entering the numbers, the VCR will transmit a control signal to the satellite receiver.  Press the stop □ button. If the programme number of the satellite receiver changes to "12", your satellite receiver can be controlled by this VCR. Press the MENU button to end programming. If the programme number does not change to "12", follow the next procedure. 6| Satellite receiver Brand | Type Number |
| HITACHI | 19 |
| AMSTRAD | 03 |
| CAMBRIDGE | 13 |
| PACE | 19 |
| NOKIA | 23 |
| MASPRO | 16 |
| PHILIPS | 20 |
| TECHNISAT | 26 |
| FERGUSON | 12 |
| UNIDON | 32 |
| Controls | TV Screen | ||
| 1 | Turn the satellite receiver on and select a satellite programme other than programme number 12. | ||
| 2 | 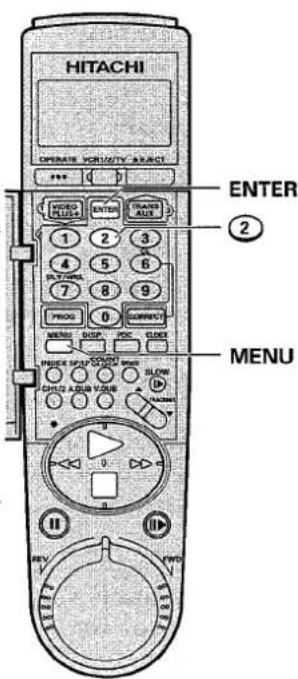 | 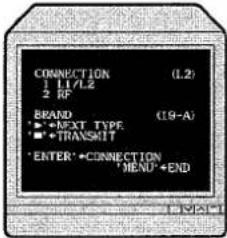 | Point the handset at the front of VCR, then press the MENU button, and 2 button.The satellite control set-up menu appears on the TV screen. |
| 3 | 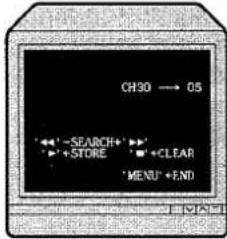 | Press the 2 button.The channel preset menu appears on the TV screen. | |
| 4 | 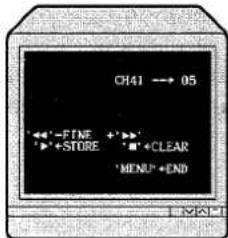 | Press and release the fast forward ▷ or rewind ◀ button to start searching for the satellite programme.If the RF output channel is known from satellite receiver, press the 0 ~ 9 buttons on the remote control. When a "satellite" picture appears on the TV screen, press the ▷ button to store this station number.The programme number starts flashing. If not, press the ▷ button again. | |
| 5 | 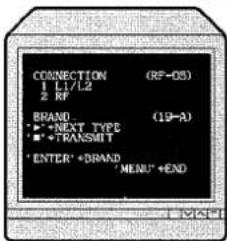 | Press the play ▷ button to store this programme number.The satellite control set-up menu appears on the TV screen.The connection display changes from “(L2)” to “(RF-05)”. | |
| 6 | Satellite receiver Brand | Type Number | 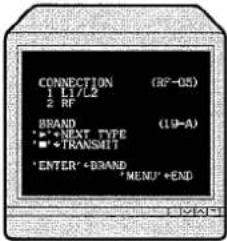 |
| HITACHI | 19 | ||
| AMSTRAD | 03 | ||
| CAMBRIDGE | 13 | ||
| PACE | 19 | ||
| NOKIA | 23 | ||
| MASPRO | 16 | ||
| PHILIPS | 20 | ||
| TECHNISAT | 26 | ||
| FERGUSON | 12 | ||
| UNIDON | 32 |
(SATELLITE RECEIVER OPERATION)
TV Screen| 7 | 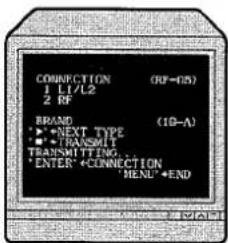 | Press the stop □ button.If the programme number of the satellite receiver changes to "12", your satellite receiver can be controlled by this VCR. Press the MENU button to end programming. If the programme number does not change to "12", follow the next procedure. | ||
| 8 | CAMBRIDGE | 13 | 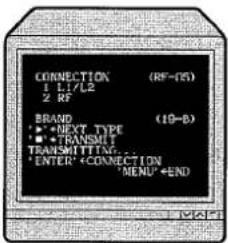 | Press and release the play ▷ button.If the satellite receiver programme number still does not change to "12", press the play ▷button again. Repeat this step until the programme number changes to "12".If your satellite receiver does not work after entering the code shown, please try an alternative code from table.Note: With some satellite receivers, the programme number may not change to "12" even if the code is correct. Read the instruction manual of your satellite receiver carefully and set up the receiver correctly, then perform the above operation. |
| PACE | 19 | |||
| NOKIA | 23 | |||
| MASPRO | 16 | |||
| PHILIPS | 20 | |||
| TECHNISAT | 26 | |||
| FERGUSON | 12 | |||
| UNIDON | 32 | |||
| 9 | After programming the system control code,press the MENU button to return to normal operating mode. | |||
"Video Plus+" Setup
Changing the satellite programme allocations
Satellite receivers are normally supplied pre-programmed to Sky Order or Transponder Order. To check which Order your satellite receiver is using, select a programme and check the table below. The satellite programme allocation on this VCR has been preset to Sky Order. If your satellite receiver uses the Transponder Order you should change the allocations by following the procedure below.| Controls | Remote Display | ||
| 1 | HITACHI | × - CH00: d - 00: VCR1 | Press the ENTER button and hold it, press theVIDEO PLUS+ button."GUID 001" and "--CH" appear. |
| 2 | VIDEO PLUS+ ENTER | × - CH00: d - 19:9TRANS VCR1 | Press the rewind ◀ button once, then press theENTER button. |
| 3 | SU12 DAY 05 MONTH10:20VCR1 | Press the CLOCK button to switch the display onthe handset back to normal.The allocation is now changed from SKY-Order toTRANSPONDER-Order. |
Notes:
- If some of your satellite programme numbers are still different from the ones shown in the table below you can alter individual programmes by following the steps below. - To correct a satellite programme number (see step 3 – 5 page 42), enter a PlusCode number in the handset for the satellite programme you wish to record then press ENTER to display the programme details in the handset. Push CORRECT once, then enter the correct satellite programme number. Press ENTER and the new programme number will be memorised.| Satellite programme | Satellite programme Channel | |
| SKY-Order | Transponder order | |
| SKY ONE | 1 | 8 |
| SKY NEWS | 2 | 12 |
| SKY MOVIE | 3 | 16 |
| THE MOVIE CHANNEL | 4 | 18 |
| SKY MOVIE GOLD | 5 | 26 |
| SKY SPORTS | 6 | 20 |
| NICKELODEON & TV ASIA | 7 | 46 |
| BRAVO & THE ADULT CHANNEL | 8 | 42 |
| DISCOVERY & COUNTRY MUSIC TV | 9 | 41 |
| THE CHILDREN'S CH & THE FAMILY CH | 10 | 35 |
| UK GOLD | 11 | 23 |
| QVC | 12 | 38 |
| UK LIVING | 13 | 34 |
| MTV | 14 | 22 |
| CNN | 15 | 28 |
| Satellite programme | Satellite programme Channel | |
| SKY-Order | Transponder order | |
| EUROSPORT | 16 | 4 |
| CARTOON NETWORK & TNT | 17 | 37 |
| JSTV | 18 | 24 |
| MTV | 19 | 15 |
| DAS ERSTE | 20 | 19 |
| ZDF | 21 | 33 |
| WEST 3 | 22 | 39 |
| BR3 | 23 | 45 |
| N3 | 24 | 25 |
| RTL | 25 | 2 |
| RTL2 | 26 | 1 |
| SAT1 | 27 | 6 |
| PRO7 | 28 | 14 |
| 3SAT | 29 | 10 |
| MDR | 30 | 43 |
| NTV | 31 | 29 |
| DSF | 32 | 21 |
| VOX | 33 | 5 |
| Satellite programme | Satellite programme Channel | |
| SKY-Order | Transponder order | |
| PREMIERE | 34 | 17 |
| TELECLUB | 35 | 9 |
| RTL4 | 36 | 13 |
| RTL5 | 37 | 64 |
| FILMNET:THE MOVIE CHANNEL | 38 | 63 |
| FILMNET PLUS | 39 | 11 |
| TV 1000 | 40 | 7 |
| TV3 DENMARK | 41 | 27 |
| TV3 SWEDEN | 42 | 3 |
| TV3 NORWAY | 43 | 31 |
| GALAVISION | 44 | 44 |
| CINEMANIA | 45 | 30 |
| DOCUMANIA | 46 | 32 |
| SOGECABLE 3 | 47 | 36 |
| SOGECABLE 4 | 48 | 40 |
| TBC | 49 | |
| 50 | ||
On some TVs the following is applied:
To select channels 10 \~ 19 on the TV, press the MENU button and then buttons 0 \~ 9. When selecting channel 17, for example, press the MENU button and then button 7. To select channels 20 \~ 29, press the DISP. button and then buttons 0 \~ 9. To select channel 26, for example, press the DISP. button and then button 6. Only the remote control of the Mute feature is different between remote transmission codes "01TV" and "02 TV". When only the Mute feature is not operated properly by the handset with "01 TV" ("02 TV") selected, set the transmission code to "02 TV" ("01 TV"). With some TVs, TV channel 12 can be selected by pressing the MENU button and then number buttons 1 and 2. The handset has a memory which enables it to operate some Hitachi TVs and, in the same way, some TVs from other manufacturers.| TV code | 01 | 02 | 03 | 04 | 05 | 06 | 07 | 08 | 09 | 10 | 11 | 12 | 13 | 14 | 15 |
| Coding system | NEC50 PAL-50 | NEC50 UK-1 | NEC53 PAL-53 | NEC53 UK-2 | SIEMENS | ITT | RC-5 | Sony | Panasonic | — | Toshiba | Sharp | Mitsubishi | JVC | NOKIA |
| Type of TV | Hitachi TV | Hitachi TV | Hitachi TV | Hitachi TV | Hitachi, Finlux TV | Hitachi TV | Philips, Loewe TV | Sony TV | Panasonic TV | — TV | Toshiba TV | Sharp TV | Mitsubishi TV | JVC | Hitachi TV |
Section-4 Subsidiary Information
Problem Guide
Page 55 Some problems you will be able to solve easily by checking a few basic items. Please follow this section before you call for help or take your VCR to your dealer. It could save you time and money.Maintenance
Page 56Specifications
Page 57Battery Safety Guidelines
Page 58Some Do's and Don'ts
Page 59PROBLEM GUIDE
Sometimes problems can be solved easily by checking a few basic things. Check below before you call for help or take your unit to your dealer.No power
\- Check to see if the VCR is plugged into an AC mains socket.Does not respond to remote control handset
- Check to see if there are batteries in the handset, their polarities are correct, and they are fitted correctly. - Make sure "VCR1" or "VCR2" is displayed. (See "REMOTE CODE" on page 41.) • The handset is not aimed at the VCR. - Weak batteries in the handset.Will not record
• No cassette in the VCR. - Safety tab removed from cassette. (In this case, the cassette will be ejected.)Will not playback
• No cassette in the VCR. - For play-back, TV must be tuned to the video programme number (See page 11). - Set the TV to the video input mode when the VCR and TV are connected via a Scart connector (see your TV manual). - Press the VCR/TV button on the remote handset to display the VCR indicator on the VCR display when the VCR and TV are connected via a Scart connector.Snowy/Noisy picture
• Make sure the TV is fine tuned. - Head cleaning may be required. See "MAINTENANCE". • Some snow or streaks are normal during visual search, still and slow play-back.Will not make timer recordings
• The VCR should be in the standby mode to activate timer recording. - Programmes entered incorrectly. - Clock was not set correctly. • Programme exceeded cassette length. - No cassette or cassette's safety tab removed.Rewinding stops half way
\- Counter memory has operated. (Tape stops at "0:00:00" if time counter is on.) Clock shows — — : — — • Power interrupted.Poor/No picture in normal TV viewing
\- Carefully check aerial connection.Indication of the VCR display appears abnormal/No button can be engaged
\- Push the reset switch using a toothpick, etc. The display will be reset. Then set the information again. natural_image
Line drawing of a printer with ports and a cable inserted (no text or symbols)MAINTENANCE
1. To maintain the optimum performance of this VCR, regular periodic maintenance is required. Your dealer will advise you further. 2. Maintenance and adjustments may not be carried out by the user. In all cases of difficulty or doubt, consult your dealer. 3. Head cleaning Dirt accumulated on the video heads after a period of time may cause the play-back picture to become blurred or part of the video information to be lost. This does not mean that the recorded programme has been erased but head cleaning is required. natural_image
Black and white abstract pattern with no discernible text, symbols, or structured content.Auto Head Cleaning System
This system cleans the video heads automatically when a cassette is inserted and ejected or the VCR is turned on or off while a cassette is in the VCR, to prevent dirt from accumulating on the heads. Note: Mechanical sound is heard during head cleaning. SPECIFICATIONS
| Format: | VHS PAL Standard |
| Recording: | Rotary Two-Head Helical Scan Azimuth Recording |
| Tape Speed: | 23.39 mm/sec. — SP, 11.7mm/sec. — LP |
| Tape Width: | 12.7 mm |
| Operation Temperature: | 5°C to 40°C |
| Video: | PAL colour (system I) & CCIR monochrome signals 625 lines |
| Recording Time: | 240 min. with E-240 cassette — SP |
| 480 min. with E-240 cassette — LP | |
| Aerial Input: | UHF channels 21 — 69 |
| RF Output: | UHF channel 37 (32 — 42 adjustable) (System I) |
| Video Input: | 0.5 to 1.5Vp-p 75 ohm Unbalanced |
| Video Output: | 1Vp-p 75 ohm Unbalanced |
| S/N Ratio (Video): | More than 43 dB |
| Horizontal Resolution: | Colour 260 lines |
Audio
| Input: | -3.8 dBm 10 Kohm |
| Output: | -3.8 dBm 1 Kohm |
| S/N Ratio: | 43 dB |
| Frequency Range: | 70 Hz to 12 kHz |
| Power: | AC 220 – 240V, 50 Hz |
| Power Consumption: | 16W (including timer) |
| Timer: | 24-hour digital indication |
| Cabinet Size: | 380 mm(W) x 93 mm(H) x 275 mm(D) |
| Weight: | Approx. 4.0 kg |
| Accessories Included: | 1 — Aerial cable |
| 1 — Infrared remote control handset | |
| 2 — Batteries |
PLEASE PHOTOCOPY AND DISPLAY
Used correctly, domestic batteries are a safe and dependable source of portable power. Problems can occur if they are misused or abused—resulting in leakage or, in extreme cases, fire or explosion. Here are some simple guidelines to safe battery use designed to eliminate any such problems. ALWAYS natural_image
Two batteries with one marked by a cross symbol, shown against a black background (no text or labels)flowchart
graph TD
    A["Input Battery"] --> B{Recycle}
    B --> C["Output Battery"]
    C --> D["Storage"]
    style A fill:#f9f,stroke:#333
    style D fill:#bbf,stroke:#333
natural_image
Illustration of battery pack, battery cell, and various tools including fork, screwdriver, and hammer (no text or symbols)natural_image
Abstract black-and-white pattern with diagonal lines and cloud-like shapes (no text or symbols)natural_image
Pure electrical circuit lines without any symbolsnatural_image
Illustration of a hand holding a rectangular device with a separate mechanical component (no text or symbols visible)natural_image
Illustration of a human tongue with a coin and a cross mark on the tongue (no text or symbols)natural_image
Abstract illustration of hands holding a cross and a partial circle with curved lines, against a black background (no text or symbols)natural_image
Illustration of a hand pressing down on a mechanical component (no text or symbols visible)natural_image
Silhouette of a human torso with a downward arrow and a cross symbol, no text or labels presentSOME DO'S AND DON'TS ON THE SAFE USE OF EQUIPMENT
This equipment has been designed and manufactured to meet international safety standards but, like any electrical equipment, care must be taken if you are to obtain the best results and safety is to be assured.★★★★★★★★★
DO read the operating instructions before you attempt to use the equipment. DO ensure that all electrical connections (including the mains plug, extension leads and interconnections between pieces of equipment) are properly made and in accordance with the manufacturer's instructions. Switch off and withdraw the mains plug when making or changing connections. DO consult your dealer if you are ever in doubt about the installation, operation or safety of your equipment. DO be careful with glass panels or doors on equipment.★★★★★★★★★
DON'T continue to operate the equipment if you are in any doubt about it working normally, or if it is damaged in any way — switch off, withdraw the mains plug and consult your dealer. DON'T remove any fixed cover as this may expose dangerous voltages. DON'T leave equipment switched on when it is unattended unless it is specifically stated that it is designed for unattended operation or has a standby mode. Switch off using the switch on the equipment and make sure that your family know how to do this. Special arrangements may need to be made for infirm or handicapped people. DON'T use equipment such as personal stereos or radios so that you are distracted from the requirements of traffic safety. It is illegal to watch television whilst driving. DON'T listen to headphones at high volume, as such use can permanently damage your hearing. DON'T obstruct the ventilation of the equipment, for example with curtains or soft furnishings. Overheating will cause damage and shorten the life of the equipment. DON'T use makeshift stands and NEVER fix legs with wood screws — to ensure complete safety always fit the manufacturer's approved stand or legs with the fixings provided according to the instructions. DON'T allow electrical equipment to be exposed to rain or moisture.ABOVE ALL
— NEVER let anyone especially children push anything into holes, slots or any other opening in the case — this could result in a fatal electrical shock; — NEVER guess or take chances with electrical equipment of any kind — it is better to be safe than sorry! ★★★★★★★★★QUICK SET UP GUIDE
Hitachi Video Cassette Recorder
VT-M430E(UK)
Dear Hitachi Customer,
Congratulations on your choice of Hitachi video cassette recorder (VCR). Welcome to our company-wide commitment to your complete satisfaction and viewing enjoyment. Before using your Hitachi VCR for the first time, we suggest that you spend a few minutes reading these set-up instructions. Even if you never used a VCR before, you can get your VCR connected and preset quickly by following this quick set-up guide.Contents
- Accessories Supplied ....1 • Installation 2-3 - Setting the Video Programme Number on Your TV ....4 - Setting Your Remote Control Handset ....5 • Pre-Tuning the Built in Tuner......6Accessories Supplied
Check and identify the accessories supplied. If any are missing or appear damaged, contact your dealer immediately. ① natural_image
Illustration of a coiled cable with three connectors (no text or symbols)natural_image
Line drawing of a mobile phone with control buttons and display (no text or symbols)Setting the Video Programme Number on Your TV
natural_image
Line drawing of a printer front panel with control buttons and a dial indicator (no text or symbols)1
 TV Switch on your TV and select an unused programme number. i.e. one not used for BBC 1, ITV, etc. (Please consult your TV operating guide as your TV may have a special VTR programme number which must be used.) Note: This programme number will be your VCR programme from now on.2
3
 Press the ▷ button (Note: The VCR is still in the standby mode) and "E5E" appears as shown in the display.4
 Tune your TV (consult your TV instruction manual) until the test pattern shown appears. The correct tuning position is when the picture is clear. Ensure this programme is stored on your TV.5
 Press the ▷ button again, the test pattern will disappear and the VCR will now come out of the stand by mode into the operate mode. You should now be able to play back a prerecorded cassette. Insert the cassette as shown. If the safety tab is removed then playback will start immediately, if not press the ▷ button and the picture will appear on the screen.IMPORTANT:
Insert the cassette squarely into the VCR. Push the cassette until the machine carries the cassette in itself. Never force a cassette in as this may damage the mechanism.Setting Your Remote Control Handset
natural_image
Technical line drawing of a mechanical component with internal parts and mounting holes (no text or symbols)natural_image
Diagram of a computer monitor with control buttons and an arrow pointing to the front panel (no text or symbols present)Pre-Tuning the Built in Tuner
Starting Point (after setting the video channel as described on page 4.)1
 Press the EJECT button on the handset to stop and eject the VCR cassette. Ensure the VCR is in the operate mode (VCR display is as shown). Make sure TV is set to the VCR programme number as described on page 4.2
 TV screen  Press the MENU button, and press the ④ button for channel setting.3
natural_image
Diagram of a computer monitor with ports and an arrow pointing to the front panel (no text or symbols present)4
   Press the fast forward ▶ button on the handset and the VCR will start searching for a channel. The VCR will stop searching when a strong channel is found. If this is not the correct channel press the ▶ button again until the correct channel is found. Press the play ▷ button on the handset to store this channel. The programme number starts flashing. If not, press the play ▷ button once again. Using the PROG buttons select the programme number on the VCR for the channel you wish to set. e.g. programme 01 for BBC 1 e.g. programme 02 for BBC 2 e.g. programme 03 for ITV e.g. programme 04 for CH4 Press the play ▷ button to store this programme number. Repeat the steps above to tune in the other channels. Press the MENU button to set the VCR to the normal operating mode.Hitachi Home Electronics (Europe) LIMITED
Hitachi House, Station Road, Hayes, Middlesex UB3 4DR U.K. Tel: 0181 849 2000 Hitachi, Ltd. Tokyo Japan THE HITACHI ATAGO BLDG. No. 15-12, 2-chome, Nishi-Shinbashi, Minato-ku, Tokyo 105, Japan Tel.: Tokyo (03) 3502-2111- VIDEO CASSETTE RECORDER
- VT-M430E(UK)
- Instruction manual
- VIDEOPlus+
- Dear Hitachi Customer
- INFORMATION FOR YOUR SAFETY
- Please read the following instructions carefully before using this VCR.
- IMPORTANT
- On safety
- CONTENTS
- FEATURES
- Accessories supplied
- Installation
- Customer Controls
- Remote Operation
- Setting the Video Programme Number on Your TV
- Pre-tuning of Built-in TV Tuner
- Setting the Clock
- Cassette Tapes
- PRECAUTIONS
- On Installation
- On Operation
- On Cleaning
- On Repacking
- Remote Control Handset Customer Controls
- Power source of infrared remote control handset
- Remote operations
- VCR 1/2/TV Select button
- 1
- 2
- 3
- 4
- Note:
- To preset "pay-TV" programme;
- (PRE-TUNING OF BUILT-IN TV TUNER)
- To change the station or programme number
- Eliminating Unwanted Preset Stations
- Things to know before starting
- Be sure to check that "VCR1" or "VCR2" is displayed.
- Set the time and date.
- After setting the date, press the CLOCK button.
- Press the TRANS/AUX button while aiming the remote control handset at the receiver on the VCR.
- Press the CLOCK button.
- Notes:
- Insertion
- Removal
- Remember that:
- Type of video cassette
- To avoid erasing a recording
- To re-record on a cassette which has its safety tab removed
- Play-back
- Instant Play-back Timer (IPT)
- Recording TV Programmes
- Instant Recording Timer (IRT)
- Timer Recording
- Insert a cassette.
- Press the play ▷ button.
- Still play-back
- Frame advance
- Slow function
- Visual search
- (PLAY-BACK)
- Auto Tracking
- PLAY-BACK USING SHUTTLE RING
- ■ How to use the shuttle ring
- Controls
- TV Screen
- (RECORDING TV PROGRAMMES)
- To view a programme while recording it
- To record one programme while viewing another
- Programming the timer
- Programming the timer using "VideoPlus+"
- Things to know before starting programming
- (TIMER RECORDING)
- Programming the timer without using "VideoPlus+"
- (TIME RECORDING)
- Operating notes:
- Programme priority
- Section-3 Additional Operations
- Special Characteristics
- Menu Features
- VIDEO PLUS+ Setup
- Editing
- Pay Television/Satellite Receiver
- How to Operate Your TV by Using the Remote Control Handset
- Linear time counter
- Counter memory function
- (SPECIAL CHARACTERISTICS)
- Automatic rewind
- Rewind shut off
- Mode lock function
- Tape remaining display function
- Index function
- To record using the indexing feature
- To locate a programme using the index feature
- GO-TO function
- Checking (reviewing) the programme information
- Language selection
- Video mode setting
- (MENU FEATURES)
- OSD [O] or [—]
- RENTAL PLAY [O] or [—]
- ENDLESS PLAY [O] or [—]
- AUTO PROGRAM PLAY [O] or [—]
- REMOTE CODE [1], [2] or [—]
- AUTO BLUE [O] or [—]
- Changing the TV Programme Allocations
- EDITING — Tape Dubbing
- (EDITING — Tape Dubbing)
- "PAY TELEVISION" DECODER OPERATION
- SATELLITE RECEIVER OPERATION
- Connection
- Programme the VCR to match the control system of your satellite receiver.
- (SATELLITE RECEIVER OPERATION)
- "Video Plus+" Setup
- Changing the satellite programme allocations
- On some TVs the following is applied:
- Section-4 Subsidiary Information
- Problem Guide
- Maintenance
- Specifications
- Battery Safety Guidelines
- Some Do's and Don'ts
- No power
- Does not respond to remote control handset
- Will not record
- Will not playback
- Snowy/Noisy picture
- Will not make timer recordings
- Rewinding stops half way
- Poor/No picture in normal TV viewing
- Indication of the VCR display appears abnormal/No button can be engaged
- Auto Head Cleaning System
- Audio
- PLEASE PHOTOCOPY AND DISPLAY
- SOME DO'S AND DON'TS ON THE SAFE USE OF EQUIPMENT
- ★★★★★★★★★
- ABOVE ALL
- QUICK SET UP GUIDE
- Hitachi Video Cassette Recorder
- Dear Hitachi Customer,
- 5
- IMPORTANT:
- Setting Your Remote Control Handset
- Pre-Tuning the Built in Tuner
- Hitachi Home Electronics (Europe) LIMITED
Marke : HITACHI
Modell : VT-M430
Kategorie : Videorekorder