LCS-8141A - Netzwerkkarte / Adapter Longshine - Kostenlose Bedienungsanleitung
Finden Sie kostenlos die Bedienungsanleitung des Geräts LCS-8141A Longshine als PDF.

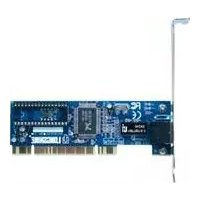
| Produkttyp | Netzwerkkarte / Adapter |
| Marke | Longshine |
| Modell | LCS-8141A |
| Schnittstelle | PCI Express x1 |
| Übertragungsrate | 10/100/1000 Mbit/s (Gigabit Ethernet) |
| Anschlüsse | 1x RJ45 |
| Kompatibilität | Windows 10, 8.1, 7, Linux, macOS |
| Netzwerkstandards | IEEE 802.3, 802.3u, 802.3ab |
| LED-Anzeigen | Link/Aktivität |
| Abmessungen (ca.) | 120 x 80 x 20 mm |
| Gewicht (ca.) | 50 g |
| Stromversorgung | Über PCI-Express-Slot |
| Betriebstemperatur | 0 °C bis 50 °C |
| Lagertemperatur | -20 °C bis 70 °C |
| Luftfeuchtigkeit | 10% bis 90% (nicht kondensierend) |
| Zertifizierungen | CE, FCC |
| Lieferumfang | Netzwerkkarte, Treiber-CD, Bedienungsanleitung |
| Garantie | 2 Jahre |
| Besonderheiten | Wake-on-LAN, Jumbo Frame Unterstützung |
| Reinigung | Mit trockenem Tuch reinigen, keine Flüssigkeiten |
| Sicherheitshinweise | Nur in trockener Umgebung verwenden, vor statischer Entladung schützen |
| Reparatur und Ersatzteile | Reparatur nur durch Fachpersonal; keine vom Benutzer zu wartenden Teile |
Häufig gestellte Fragen - LCS-8141A Longshine
Benutzerfragen zu LCS-8141A Longshine
0 Frage zu diesem Gerät. Beantworten Sie die, die Sie kennen, oder stellen Sie Ihre eigene.
Eine neue Frage zu diesem Gerät stellen
Laden Sie die Anleitung für Ihr Netzwerkkarte / Adapter kostenlos im PDF-Format! Finden Sie Ihr Handbuch LCS-8141A - Longshine und nehmen Sie Ihr elektronisches Gerät wieder in die Hand. Auf dieser Seite sind alle Dokumente veröffentlicht, die für die Verwendung Ihres Geräts notwendig sind. LCS-8141A von der Marke Longshine.
BEDIENUNGSANLEITUNG LCS-8141A Longshine
- Click on the + (plus sign) in front of the "Infrared devices", one "USB-Infrared Adapter" should be displayed.
For Windows® Vista
- With the computer powered on, connect the USB to IrDA adapter to an available USB port. Windows should automatically detect a new device, and prompt you for driver installation. Please select Locate and install Driver Software.
- Windows will search online for driver updates for the adapter, and notify you that it couldn't locate suitable software. Click on Browse my computer for Driver Software. Insert the driver CD into the CD/DVD-ROM drive. On the window that follows, click the Browse button, then navigate to and select the \MCS7780\Vista32 folder on the driver CD, then click OK to designate the location. Click on Next to begin installation.
- Once the necessary files have been installed, you will be notified that The software for this device has been successfully installed. Click Close.
- Open "Device Manager" under System Properties.
- Click on the + (plus sign) in front of the "Infrared devices", one "MosChip 7780-USBFIR Adapter" should be displayed.
CE FC ©
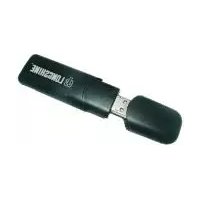
USB to IrDA Adapter
User Manual
Ver. 3.00
All brand names and trademarks are properties of their Respective owners.
Features
● Compliant with the Standard Specification of USB 1.1 and 2.0
Full Compliance to IrDA 1.4
● Powered from USB port, no adapter required
- IrDA Data Rates from 2.4 Kbps to 115.2 Kbps in SIR mode
● Supports MIR (Medium IR) at 1.152 Mbps
● Supports FIR (Fast IR) mode with Data Rate of 4 Mbps
● Supports Windows® 2000, XP/2003 32/64 bit, Vista 32/64bit
System Requirements
- Windows® 2000, XP, 2003, Vista
• Available USB port
Package Contents
• 1 x USB to IrDA adapter
- 1 x Driver CD
1 x User's Manual
Optional Accessories
USB Cable
Driver Installation
For Windows® 2000/XP/Server 2003
- Don't plug in the USB to IrDA adapter to the USB port of your computer.
- Please insert the CD driver bound with USB to IrDA adapter into your CD-ROM Drive.
- At the Windows desktop click Start, then Run.
- Type D:\MCS7780\IRSetup.exe, then click OK. (Change D: to match your CD-ROM drive letter)
- Follow the on-screen instructions to complete the installation.
- Plug in the USB to IrDA adapter to the USB port of your computer.
- Windows should detect the new USB device, and a Found New Hardware wizard window appears. Click on Next to continue.
- Click on Finish to close the wizard.
- When Windows desktop is displayed, the driver installation is complete.
- Open "Device Manager" under System Properties.