NV-M50 - Videokamera PANASONIC - Gratis brugsanvisning og manual
Find enhedens vejledning gratis NV-M50 PANASONIC i PDF-format.


Brugerspørgsmål om NV-M50 PANASONIC
0 spørgsmål om dette apparat. Besvar dem du kender, eller stil dit eget.
Stil et nyt spørgsmål om dette apparat
Download vejledningen til din Videokamera i PDF-format gratis! Find din vejledning NV-M50 - PANASONIC og tag din elektroniske enhed tilbage i hånden. På denne side er alle dokumenter nødvendige for brugen af din enhed offentliggjort. NV-M50 af mærket PANASONIC.
BRUGSANVISNING NV-M50 PANASONIC
Panasonic
Basic
Operations
Before Filming
4
Filming
12
Playback
15
Advanced
Operations
19
VHS
Notes,
Others
47
Before attempting to connect, operate or adjust this product, please read these instructions completely.
Dear Customer,
We would like to take this opportunity to thank you for purchasing this Panasonic Movie Camera.
Please read these Operating Instructions carefully and keep them handy for later reference, in case you wish to look up something in the future.
Caution:
Injury or material damage resulting from any kind of use that is not in accordance with the operating procedures explained in these Operating Instructions are the sole responsibility of the user.
Filming with this Movie Camera is possible simply by:
- Inserting the charged Battery Pack.
- Inserting a Video Cassette.
- Pressing the Start/Stop Button.

natural_image
Illustration of a person using a camera (no text or symbols visible)Guide to these Operating Instructions
These Operating Instructions consist of 3 sections: Basic Operations, Advanced Operations and Others.
Basic Operation:
(Before Filming, Filming, Playback)
In this section, the basic preparations for basic filming and basic playback are described. People inexperienced in the use of a Movie Camera should read from this section.
Advanced Operations:
The use of various functions and the necessary preparations for performing these operations are described in this section. Please study and try out these functions one by one, until you have all the capabilities of this Movie Camera at your command.
Notes, Others:
This section describes the controls and functions of this Movie Camera and it contains a troubleshooting guide.
Before Use
■ After Opening the Packing Case...
- Check the Standard Accessories. (p. 4)
Note:
If the accessories are not going to be used immediately, put them back into the Packing Case and store them carefully. - Charge the Battery Pack. (p. 5)
- Insert the Battery Pack into the Movie Camera. (p. 6)
- Adjust the length of the Grip Belt. (p. 7)
- Attach the Shoulder Strap. (p. 7)
- Insert a Video Cassette. (p. 8)
- Adjust the Viewfinder to your eyesight. (p. 9)
- Remove the Lens Cap. (p. 10)
After completing the above preparations, your Movie Camera ready for filming.
Information for Your Safety
IMPORTANT
YOUR ATTENTION IS DRAWN TO THE FACT THAT RECORDING OF PRE-RECORDED TAPES OR DISCS OR OTHER PUBLISHED OR BROADCAST MATERIAL MAY INFRINGE COPYRIGHT LAWS.
WARNING
TO REDUCE THE RISK OF FIRE OR SHOCK HAZARD, DO NOT EXPOSE THIS EQUIPMENT TO RAIN OR MOISTURE.
CAUTION
TO REDUCE THE RISK OF FIRE OR SHOCK HAZARD AND ANNOYING INTERFERENCE. USE THE RECOMMENDED ACCESSORIES ONLY.
VHS Movle
The rating plate is on the bottom side of the Movie Camera.
AC Adaptor
The rating plate is on the bottom side of the unit
- As this AC Adaptor gets hot during use, operate it in a well ventilated place; do not use it in a tight enclosure.
FOR YOUR SAFETY
■ DO NOT REMOVE THE OUTER COVER.
To prevent electric shock, do not remove the cover. No user serviceable parts inside. Refer servicing to qualified service personnel.
Caution for AC mains lead
For your safety, please read the following text carefully.
This appliance is supplied with a moulded three-pin mains plug for your safety and convenience.
A 5-ampere fuse is fitted in this plug.
Should the fuse need to be replaced please ensure that the replacement fuse has a rating of 5 amperes and it is approved by ASTA or BSI to BS1362.
Check for the ASTA mark 📄 or the BSI mark 🌐 on the body of the fuse.
If the plug contains a removable fuse cover you must ensure that it is refitted when the fuse is replaced. If you lose the fuse cover, the plug must not be used until a replacement cover is obtained.
A replacement fuse cover can be purchased from your local Panasonic Dealer.
IF THE FITTED MOULDED PLUG IS UNSUITABLE FOR THE SOCKET OUTLET IN YOUR HOME THEN THE FUSE SHOULD BE REMOVED AND THE PLUG CUT OFF AND DISPOSED OF SAFELY.
THERE IS A DANGER OF SEVERE ELECTRICAL SHOCK IF THE CUT OFF PLUG IS INSERTED INTO ANY 13-AMPERE SOCKET.
If a new plug is to be fitted please observe the wiring code as shown below.
If in any doubt, please consult a qualified electrician.
■ IMPORTANT
The wires in this mains lead are coloured in accordance with the following code:
Blue: Neutral Brown: Live
As the colours of the wires in the mains lead of this appliance may not correspond with the coloured markings identifying the terminals in your plug, proceed as follows:
The wire which is coloured BLUE must be connected to the terminal in the plug which is marked with the letter N or coloured BLACK.
The wire which is coloured BROWN must be connected to the terminal in the plug which is marked with the letter L or coloured RED.
Under no circumstances should either of these wires be connected to the earth terminal of the three pin plug, marked with the letter E or the Earth Symbol.
■ Before Use
Remove the Connector Cover as follows.
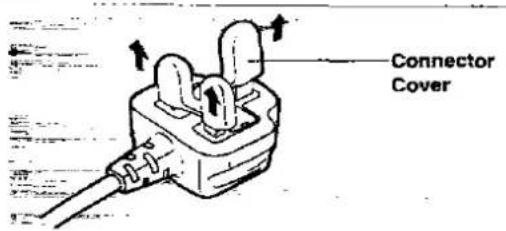
text_image
Connector Cover■ How to replace the Fuse
- Remove the Fuse Cover with a screwdriver.

text_image
Fuse Cover- Replace the fuse and attach the Fuse Cover.
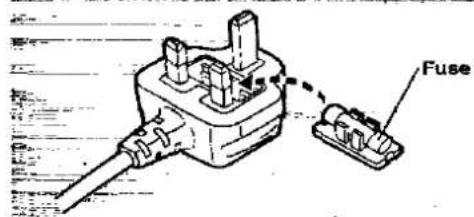
text_image
FuseContents
Basic Operations/Before Filming
1 Preparation for Use, Standard Accessories 4
2 Charging the New Battery Pack for the First Time ..... 5
3 How to Insert the Battery Pack 6
4 Adjusting the Grip Belt 7
5 Attaching the Shoulder Strap 7
6 Inserting the Video Cassette 8
7 Preventing Accidental Erasure of Recordings ..... 8
8 Viewfinder 9
9 Adjusting the Viewfinder to Your Eyesight 9
10 Removing the Lens Cap 10
11 How to Hold the Movie Camera for Filming.... 10
Basic Operations/Filming
1 How to Film from the Beginning of the Cassette ..... 12
2 How to Check the End of the Filmed Scene 13
3 Searching for a Previously Filmed Scene 13
4 How to Add New Scenes at the End of Previous Scenes 14
Basic Operations/Playback
1 How to Playback via the Viewfinder
(Playback from the Beginning of the Tape) 15
2 How to Adjust the Tracking 15
3 How to Rewind or Fast-Forward the Tape 16
After Use 17
Cleaning 17
Advanced Operations
Power Supply 20
How to Use the Tape Counter Indication 21
How to Record the Date and Time during Filming 23
How to Enlarge the Subject during Filming 26
How to Film with the Fade Function 27
How to Film with the Digital Fade Function 28
How to Film with Strobe Effect.... 29
How to Approach very Small Subjects and Film them enlarged 30
How to Film All Scenes with Natural Colours 31
How to Adjust the Focus 34
How to Film Fast-Moving Subjects 36
How to make Your Subjects Stand out Sharply from the Background 37
How to Film Dark Scenes More Brightly. 37
How to Film Backlit Scenes 38
How to Film in the Dark (High Sensitivity Function) 38
How to Film with the Digital Wipe Function 39
Self-Timer Filming and Interval Filming 40
How to Playback via a TV Set 41
How to Edit a Previously Recorded Tape 43
Insert Editing 45
Audio Dubbing 46
Notes, Other
Cautions 47
Before Requesting Service 49
Colour Temperature and White Balance 50
Quick Reference Guide to the Indications in the Viewfinder .. 51
Controls and Functions 53
Optional Accessories 58
Specifications 59
Before Filming
① Preparation for Use, Standard Accessories
Accessories Used for the Basic Operations
| AC AdaptorVW-AM10B | DC Input CableVJA0967 | Battery PackVW-VBF2E |
| For supplyingpower to theMovie Camera orfor charging theBattery Pack | For connection lothe AC AdaptorThis Cable is onlyfor this MovieCamera. | For supplyingpower to theMovie Camera |
Shoulder StrapVFC2252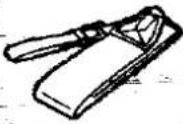 | Battery PackCharging ConnectorVJA0180-1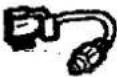 To recharge theBattery Pack,connect it to theAC Adaptor withthis connector. To recharge theBattery Pack,connect it to theAC Adaptor withthis connector. | System CaseVW-SHM20E |
Accessories Used in the Advanced Operations
| AV Output CableVFA0039 | 21-pin Conversion ConnectorVFA0152 | |
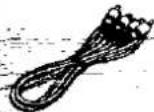 |  | |
| For connection to a TV set or VCR | For connection to a TV set or VCR |
text_image
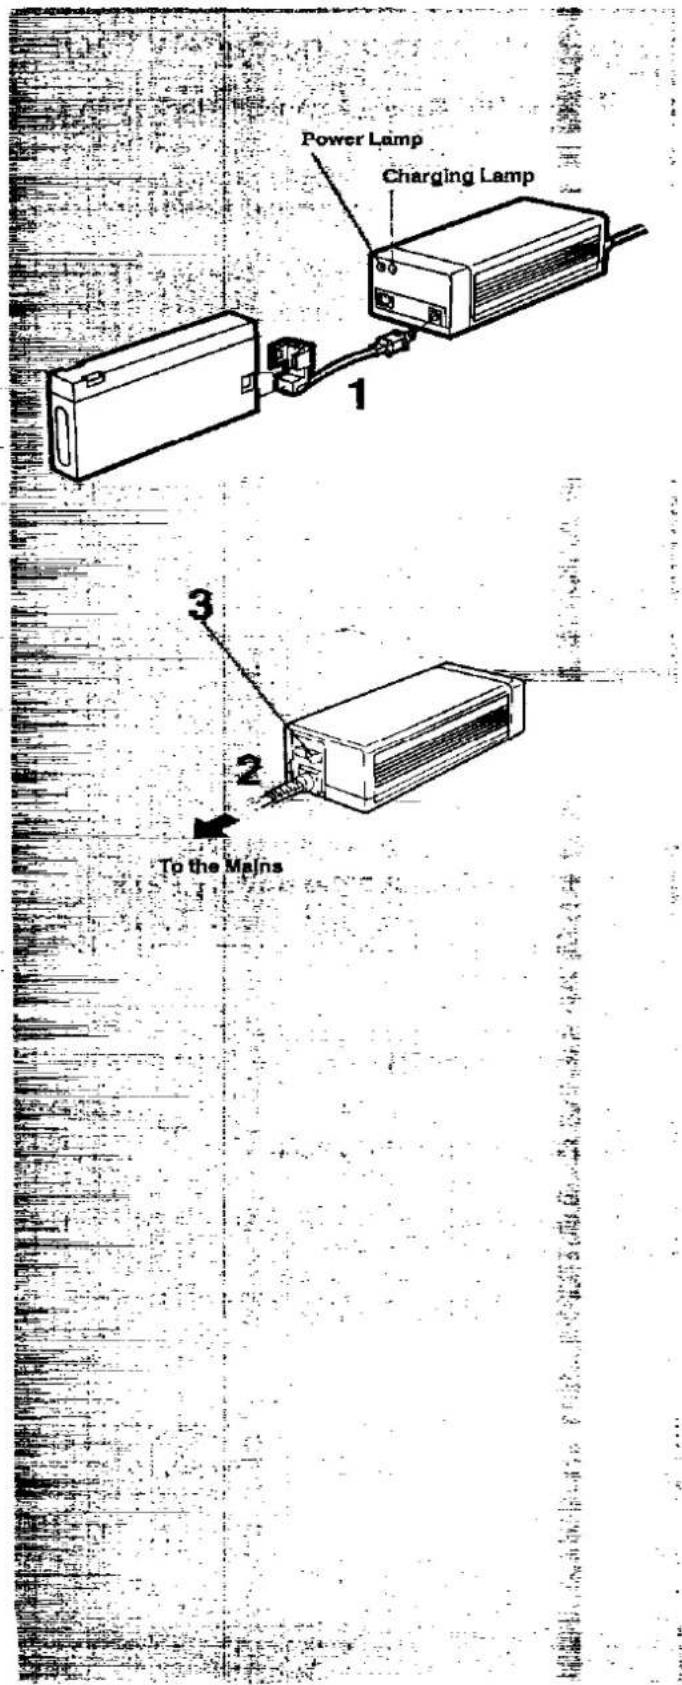
Power Lamp Charging Lamp 1 3 2 To the Mains② Charging the New Battery Pack for the First Time
Notes:
- Charge the Battery Pack within a temperature range of 10^ - 35^ .
- It is not possible to charge the Battery Pack when it is inside the Movie Camera. To charge the Battery Pack, take it out from the Movie Camera and connect it to the AC Adaptor.
1 Connect the Battery Pack and the AC Adaptor with the Battery Pack Charging Connector.
2 Connect the Power Cable of the AC Adaptor to the Mains.
3 Turn the AC Adaptor on.
Charging Indication Lamp:
When charging is started, the red lamp lights up. When approx. 45 minutes of charging time remain, the lamp will change to green. The Charging Indication Lamp will go out about 100 minutes after charging starts. However, the Battery Pack should be charged for at least 3 hours for extended use.
Operation Time:
With a fully charged Battery Pack (VW-VBF2E), the Movie Camera can be used (in filming mode only) continuously for approx. 120 minutes at 25°C. However, depending on how often the various functions listed below are used, and depending on the filming conditions, the actual operation time may be considerably shorter.
●Filming Start/Stop (p. 12)
●Auto focus (p. 34)
- Zoom function (p. 26)
●Playback, Fast Forward, Rewind, and other operations (p. 15)
Digital Functions
●Use of the Movie Camera at low temperature
Therefore, it is recommended to take along a charged spare Battery Pack.
Before Filming (cont'd)
text_image
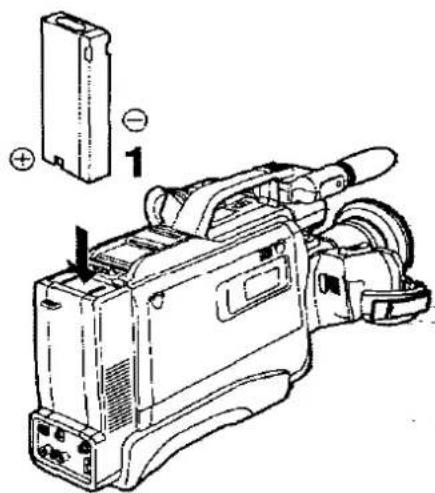
Technical diagram of a handheld device with labeled components and an inset showing a battery casing and a component marked '1'.3 How to Insert the Battery Pack
1 Insert the Battery Pack until it locks with a click.
Note:
Insert the Battery Pack with its + side facing the rear of the Movie Camera.
text_image
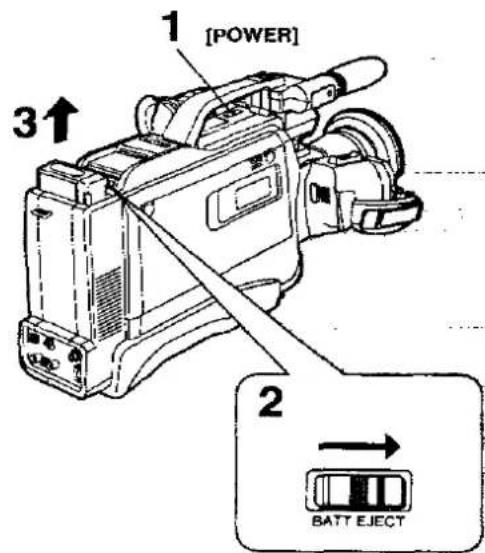
1 [POWER] 3↑ 2 BATT EJECT■ How to Remove the Battery Pack
1 Slide the [POWER] Switch and turn the Movie Camera off.
2 After two or three seconds, slide the [BATT.EJECT] Lever in the direction of the arrow.
3 Remove the Battery Pack.
Caution:
If the Battery Pack is removed during filming or playback, the tape remains wound around the video head cylinder and could become damaged.
This is also the case during loading and unloading of the tape.
text_image
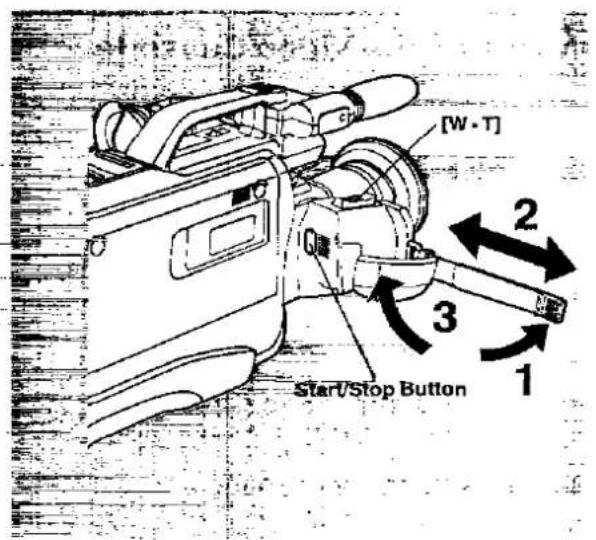
[W·T] 2 3 Start/Stop Button 1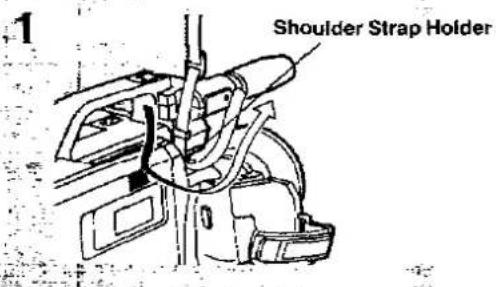
text_image
1 Shoulder Strap Holder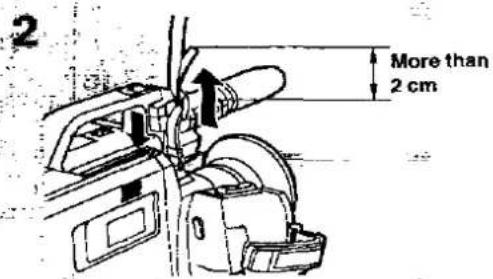
text_image
2 More than 2 cm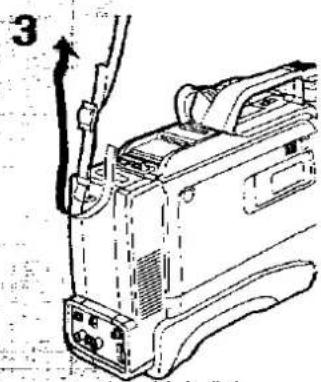
natural_image
Technical line drawing of a mechanical device with no visible text or symbols4 Adjusting the Grip Belt
■ Adjusting the Length of the Grip Belt
The length of the Grip Belt should be adjusted so that the Grip fits comfortably into the palm of your hand and the Start:Stop Button and the [W] and [T] Zoom Buttons can easily be pressed with the fingertips.
1 Unfasten the velcro tape closure.
2 Adjust the length to the size of your hand.
3 Fasten the velcro tape closure.
5 Attaching the Shoulder Strap
1 Pull the end of the Shoulder Strap through the Shoulder Strap Holder.
2 Securely attach the end of the Shoulder Strap. (More than 2 cm)
3 Attach the other side in the same way.
Before Filming (cont'd)
text_image
Cassette Window 1 [TAPE EJECT] 2 3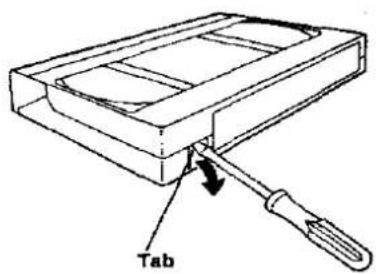
text_image
Tab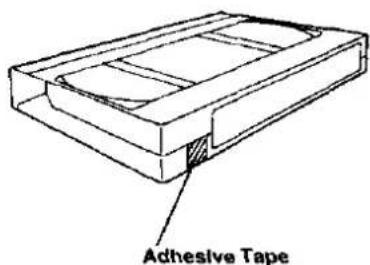
text_image
Adhesive Tape6 Inserting the Video Cassette
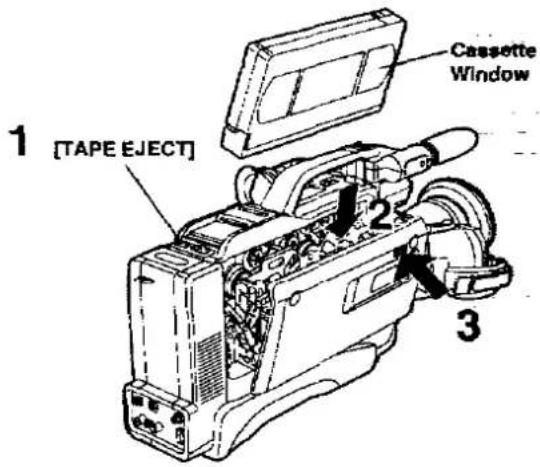
■ How to Insert the Video Cassette
1 Press the [TAPE EJECT] Button.
After a few seconds, the Cassette Compartment Cover opens.
2 Insert the video cassette with the cassette window facing outwards.
3 Close the Cover until it locks with a click.
■ How to Eject the Video Cassette
Make sure that power is supplied to the Movie Camera.
1 Press the [TAPE EJECT] Button.
2 Pull out the Video Cassette.
3 Close the Cover until it locks with a click.
7 Preventing Accidental Erasure of Recordings
When recording on a previously recorded tape, the previously recorded contents will be erased and replaced by the new recording. An important recording can be protected against accidental erasure, by breaking out the tab. If the tab is removed, recording on this Video Cassette is not longer possible.
■ How to Break off the Tab
Break off the tab with a screwdriver in the direction of the arrow.
■ How to Record Again onto a Video Cassette with Removed Tab
Cover the hole firmly with two layers of adhesive tape.
text_image
Eycup 1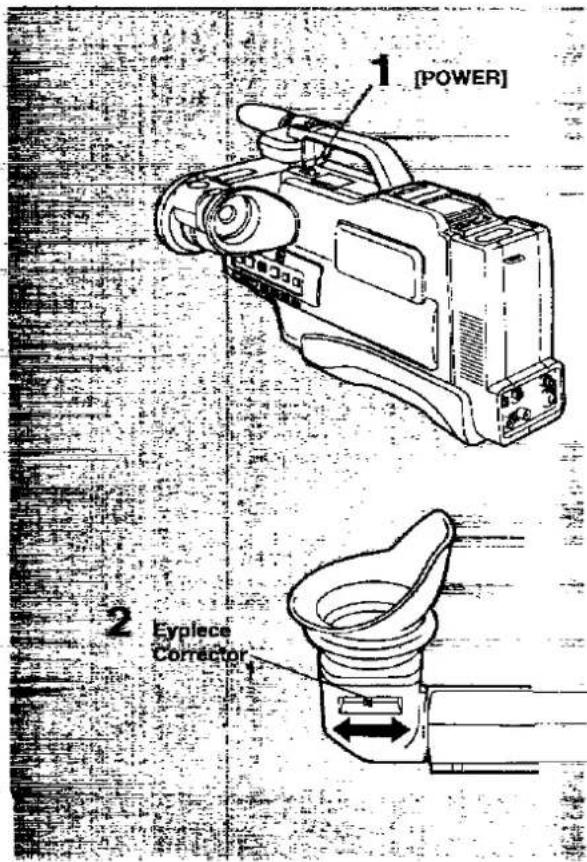
text_image
1 [POWER] 2 Eypiece Corrector8 Viewfinder
■ Setting the Viewfinder to its Filming Position
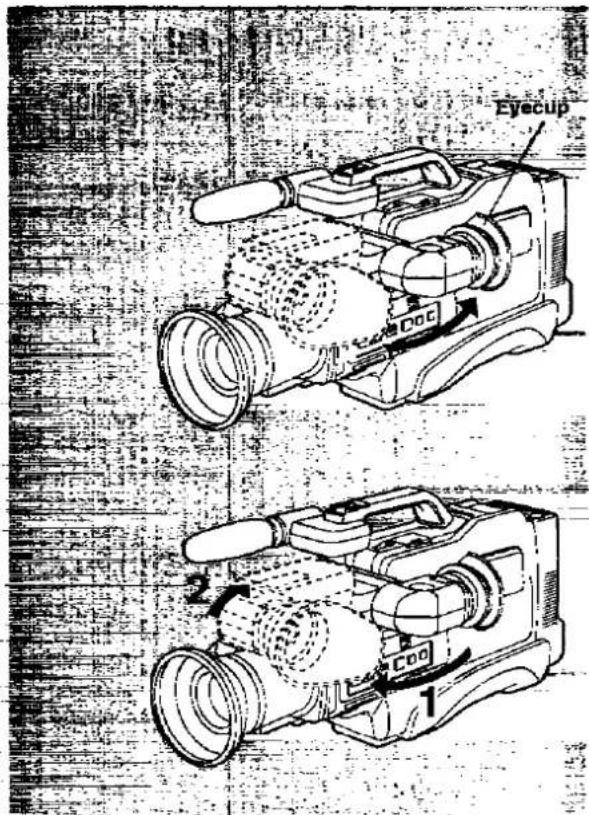
Turn the Viewfinder backwards by 90° so that the Eyecup faces the rear of the movie camera.
- The angular part of the Viewfinder can be tilted up or down by 90^ .
- To be able to watch the picture in the Viewfinder without holding the Viewfinder close to the eye, swing up the Eyecup.
- By pulling on the Viewfinder it can be extended further outside to a position that is most comfortable for filming.
■ Returning the Viewfinder to Its Original Position
1 Turn it forward toward the Lens.
2 Retract the Viewfinder by pushing it back toward its base.
Note:
Never aim the Movie Camera with its Viewfinder or Lens directly at the sun; this could damage internal parts of the unit.
9 Adjusting the Viewfinder to Your Eyesight
1 Turn the Movie Camera on.
2 Slide the control until the indications in the Viewfinder can be seen clearly.
Notes:
- Do not apply any pressure to the Viewfinder except when folding it up, raising, lowering and folding down.
- For viewing the picture in the Viewfinder with the left eye, remove the Eyecup and attach it with its longer side facing left.
Before Filming (cont'd)
text_image
1 Stoppers Lens Cap 2 Lens Cap1
natural_image
Illustration of a person holding a camera, wearing casual clothing (no text or symbols visible)2
natural_image
Illustration of a person sitting and kneeling, handling a shoe (no text or symbols visible)3
natural_image
Silhouette of a person in casual attire with arms raised (no text or symbols visible)4
natural_image
Illustration of two people sitting at a desk, one holding a camera (no text or symbols)
Removing the Lens Cap
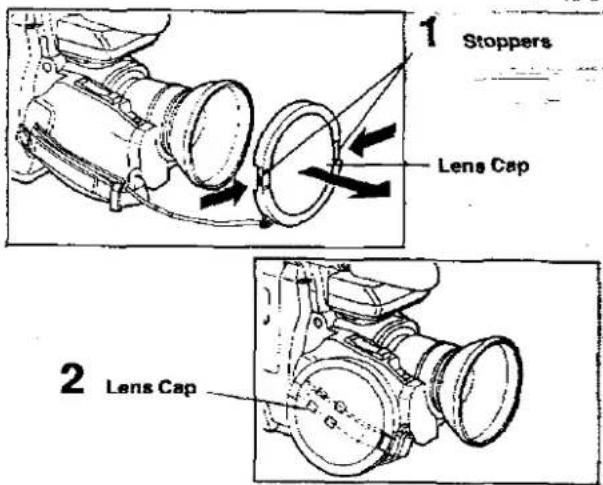
1 Press the Stoppers on each side and gently remove it.
2 Hook the Lens Cap onto the Grip Belt to prevent it from getting in front of the Lens.

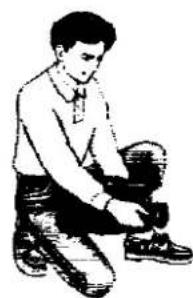
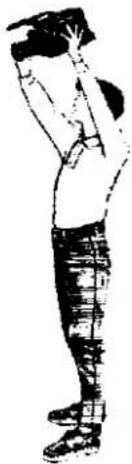
How to Hold the Movie Camera for Filming
1
Basic Filming
- When walking while filming, keep both eyes open so that you can see where you are going and what is happening around you.
- Place the Movie Camera on your right shoulder and hold it firmly with both hands.
- Hold the Eyecup of the Viewfinder as close as possible to your right or left eye.
Take a firm stance with the legs slightly apart. - For stable images, it is recommended to use a tripod (optional) whenever possible. (p. 58)
2
Low-Angle Filming
Adjust the angle of the Viewfinder according to the position in which the Movie Camera is held.
- If the Movie Camera is not held firmly in stable position, the picture in the Viewfinder cannot be watched properly.
- For easier low-angle filming, the Start-/Stop Button on the front of the Movie Camera can be used.
Fl
Flaming from a high position
4
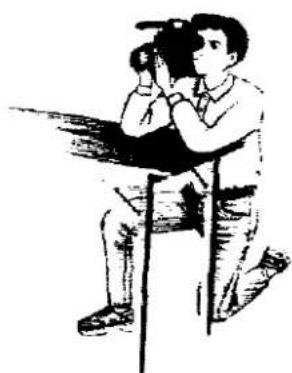
For More Stable Pictures
Stabilize the Movie Camera by resting your elbows on a table or another stable horizontal surface.
text_image
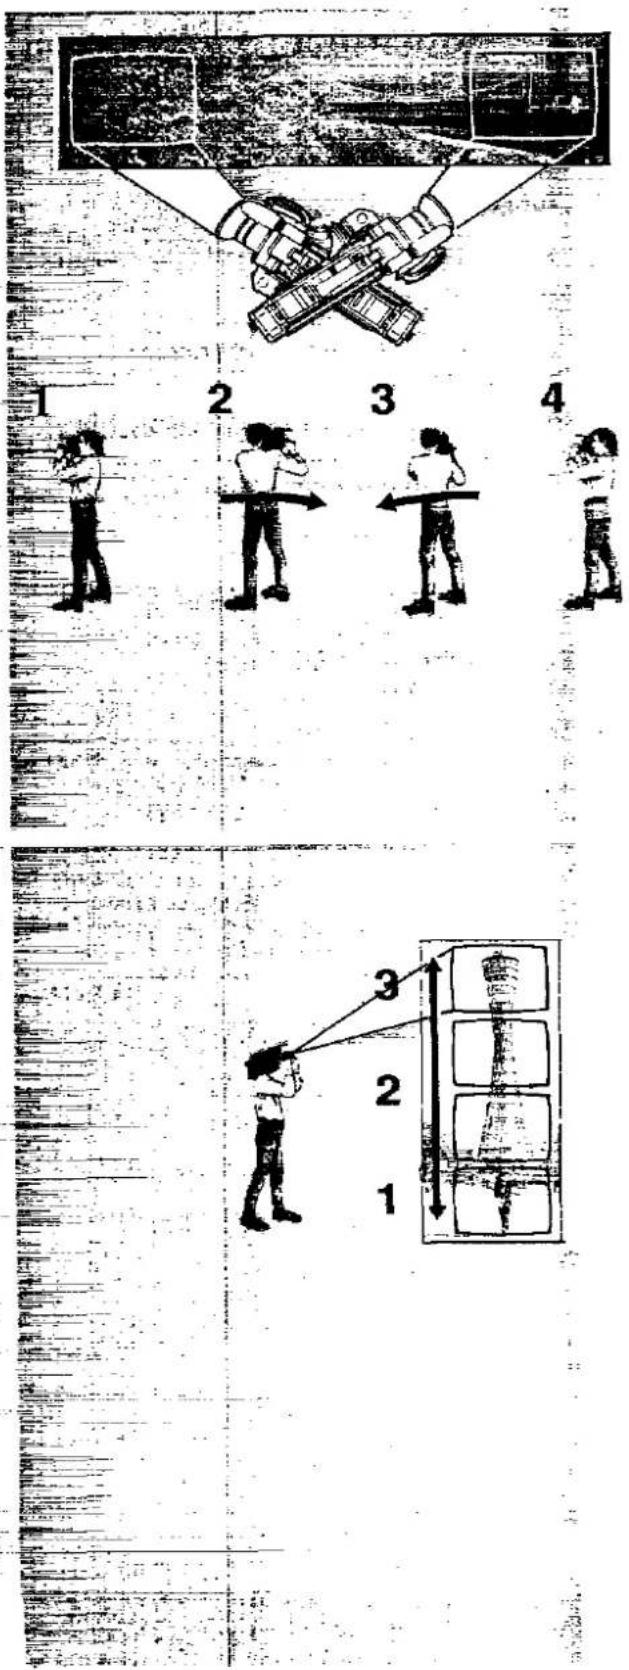
Diagram illustrating a robotic arm operation with numbered steps and a close-up of the arm structure.■ For Filming Panoramic or Wide Open View
For best results, always move the Movie Camera horizontally and very slowly.
1 First, turn your body so that you are facing the point where the filming is to end.
2 Without moving your feet, turn your upper body to face the point where the filming is to start, and then start filming.
In this position, film for about 5 seconds without moving the Movie Camera.
3 Gradually turn your upper body toward the point where the filming is to stop.
While filming continues, slowly move the Movie Camera laterailly so that the viewer will be able to follow the action easily.
4 Finish the filming at the same point as in step (1).
In this position, film again for about 5 seconds without moving the Movie Camera.
■ For Filming Tall Narrow Subjects such as Tall Buildings or Trees
For best results, move the Movie Camera vertically from top to bottom, or vice versa.
1 First, film the bottom part for about 5 seconds.
2 Gradually turn the Movie Camera from bottom to top.
3 Film the top part for about 5 seconds.
Hints:
- To emphasize the height of a subject, film it from the bottom to the top.
To emphasize the stream of the people coming out of the tall building, film it from the top of the building to the bottom. In this way, the flow of the people coming out of the entrance of the building is natural.
Filming
natural_image
Black-and-white illustration of a giraffe perched on its back, with no visible text or symbols.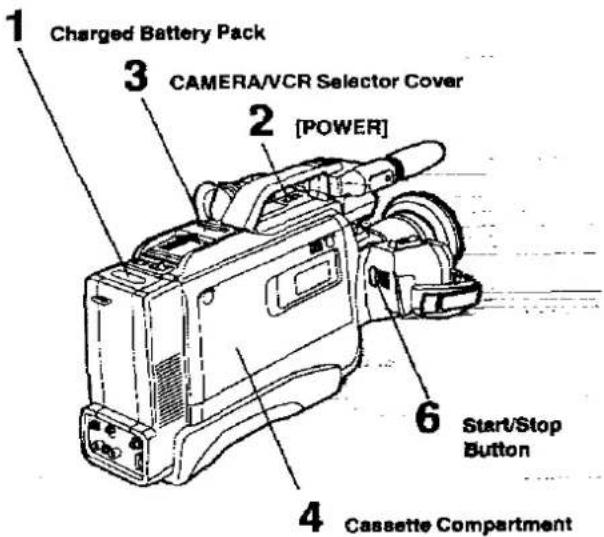
text_image
1 Charged Battery Pack 3 CAMERA/VCR Selector Cover 2 [POWER] 6 Start/Stop Button 4 Cassette Compartment① How to Film from the Beginning of the Cassette
1 insert the charged Battery Pack. (p. 6)
2 Turn the Movie Camera on.
3 Slide the [CAMERA/VCR] Selector Cover to "CAMERA".
4 Insert a cassette with intact erasure prevention tab.
A few seconds after closing the Cassette Compartment, the Movie Camera will be in the filming pause mode.
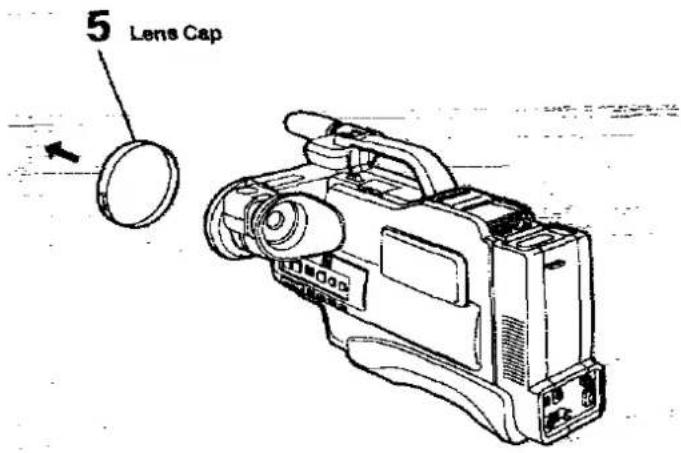
5 Remove the Lens Cap.
6 Press the Start/Stop Button.
■ How to Pause the Filming...
Press the Start/Stop Button.
■ To Film the Next Scene(s)...
Press the Start/Stop Button again.
■ To Stop the Fliming...
Press the Start/Stop Button to pause the filming and then turn the Movie Camera off.
Note:
If the Movie Camera is left in the Filming Pause Mode for more than 6 minutes, the Filming Pause Mode will be cancelled and the Viewfinder will be turned off (Filming Lock Mode). To resume filming from this condition, turn the Movie Camera on again. If the Movie Camera is left in the Filming Lock Mode for more than 48 hours, it will automatically switch off completely.
text_image
5 Lens Cap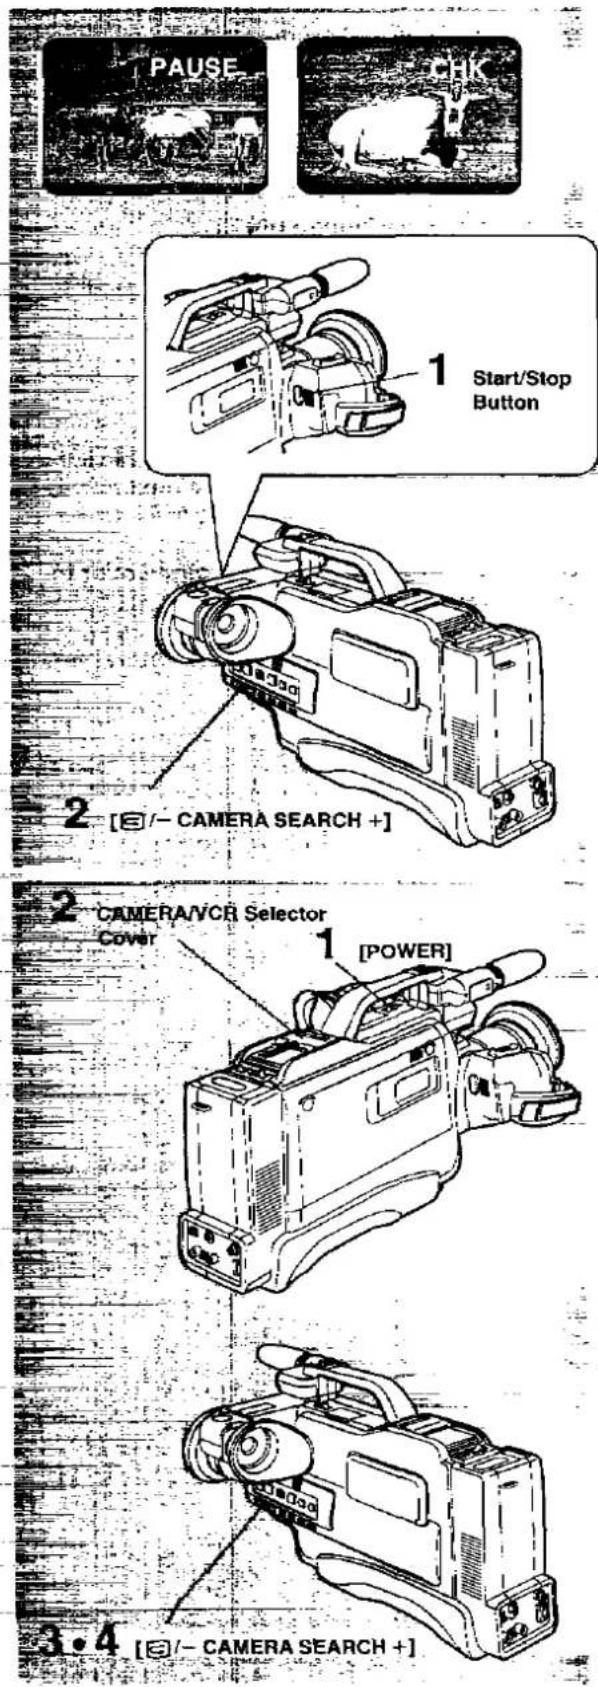
text_image
PAUSE CHK 1 Start/Stop Button 2 [E/- CAMERA SEARCH+] CAMERA/VCR Selector Cover 1 [POWER] 3.4 [E/- CAMERA SEARCH+]② How to Check the End of the Filmed Scene
1 Press the Start/Stop Button to pause the filming. The "PAUSE" Indication appears in the Viewfinder.
2 Press the - side of the [☐/- CAMERA SEARCH +] Button briefly.
The "CHK" Indication in the Viewfinder lights up, and the last 2–3 seconds of the last filmed scene will be played back in the Viewfinder. After that, the Movie Camera is again in the Filming Pause Mode. ("CHK" means Check.)
Note:
During filming, use this function to confirm from time to time that the filming has been performed correctly.
3 Searching for a Previously Filmed Scene
■ How to Search for a Point in a Recorded Scene
After inserting the recorded video cassette:
1 Turn the Movie Camera on.
2 Slide the [CAMERA/VCR] Selector Cover to "CAMERA".
3 Keep the - side of the [C/- CAMERA SEARCH +] Button pressed.
The recorded scene will be played back at high speed in reverse direction.
Or keep the + side of the [☐/- CAMERA SEARCH+] Button pressed.
The recorded scene will be played back at normal speed in forward direction.
4 Release this button after reaching the desired point.
This puts the Movie Camera into the filming pause mode.
Filming (cont'd)
text_image
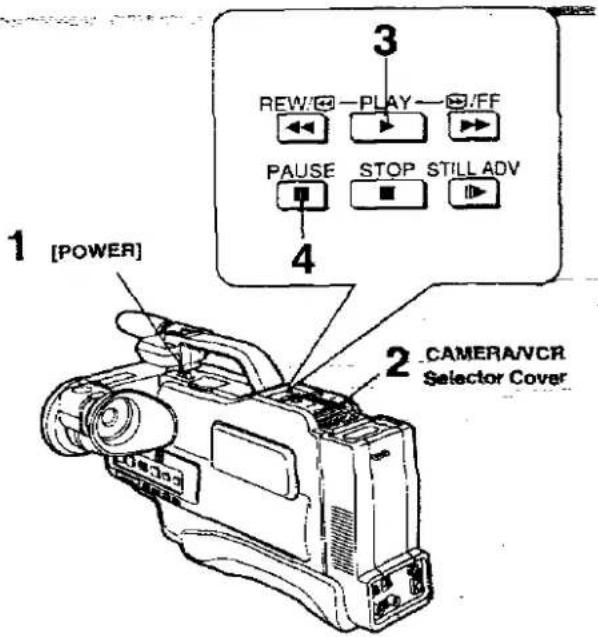
1 [POWER] 2 CAMERA/VCR Selector Cover 3 REW:←→-PLAY→/FF PAUSE STOP STILL ADV 4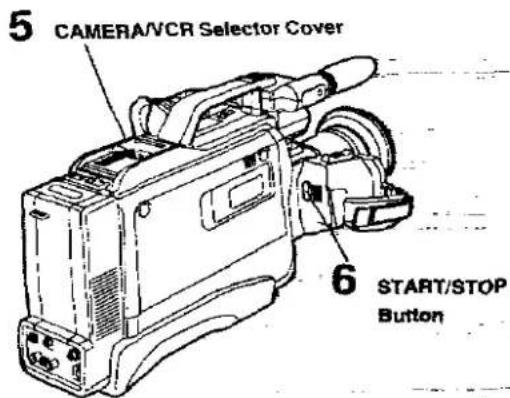
text_image
5 CAMERA/VCR Selector Cover 6 START/STOP Button4 How to Add New Scenes at the End of Previous Scenes
This function makes it possible to achieve smooth transitions between a previously and a newly filmed scene.
1 Turn the Movie Camera on.
2 Slide the [CAMERA/VCR] Selector Cover to "VCR".
("VCR" means Video Cassette Recorder.)
3 Press the [PLAY] Button.
4 Press the [PAUSE] Button after reaching the point where you want to add the next scene. (Thereby erasing the rest of the previously filmed scene)
5 Slide the [CAMERA/VCR] Selector Cover to "CAMERA".
6 Press the START/STOP Button to start filming the new scene.
The filming starts.
Playback
text_image
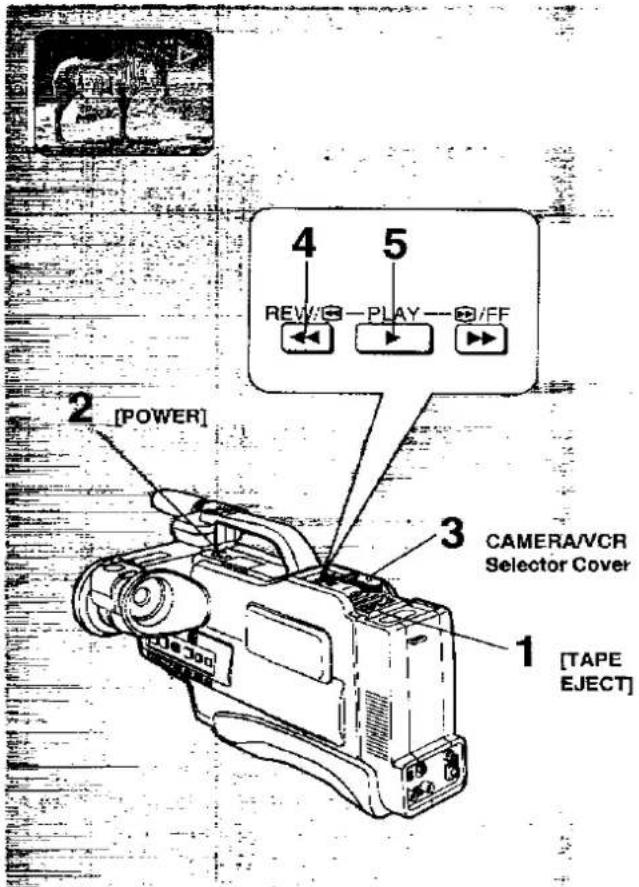
2 [POWER] 3 CAMERA/VCR Selector Cover 1 [TAPE EJECT] 4 5 REV PLAY /FF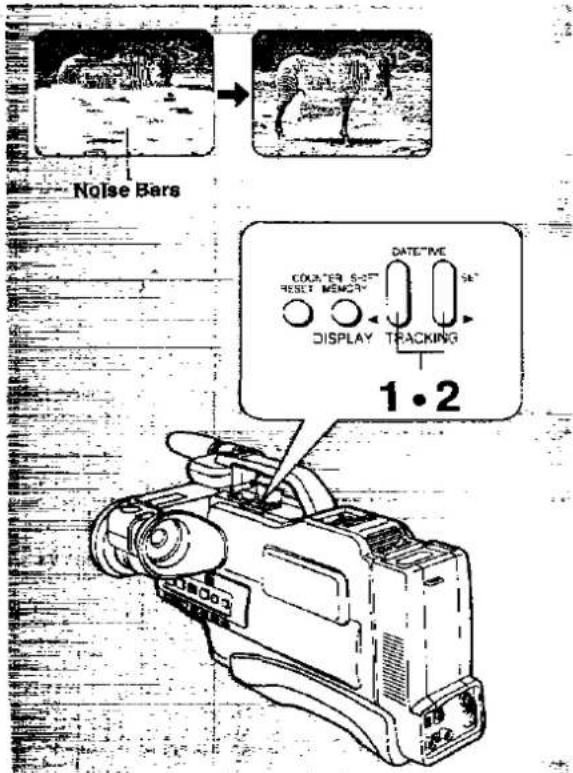
text_image
Noise Bars COOLER SOFT RESET MENOY DISPLAY DATE"MC ST TRACKING 1·21 How to Playback via the Viewfinder (Playback from the Beginning of the Tape)
The recorded tape can be played back in the Viewfinder or on a connected TV set.
1 Press the [TAPE EJECT] Button and insert the recorded video cassette.
2 Turn the Movie Camera on.
3 Slide the [CAMERA/VCR] Selector Cover to "VCR".
4 Press the [REW/←] Button.
The tape will stop automatically when it reaches its beginning.
5 Press the [PLAY] Button.
●The playback starts.
The Playback Indication "D>” appears in the Viewfinder.
- The tape will be rewound automatically when it reaches its end.
■ How to Stop the Playback...
Press the [STOP] Button.
② How to Adjust the Tracking
Notes:
- When playing back a Video Cassette which has been recorded on another Movie Camera, it may not be possible to eliminate these noise bars completely.
- If the picture is distorted by noise bars during playback, the tracking needs to be adjusted.
■ What is the Purpose of the Tracking Adjustment
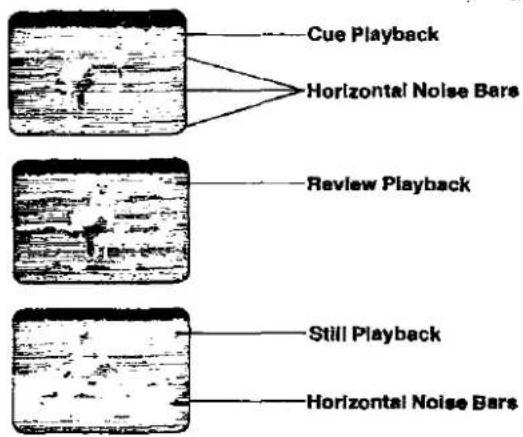
When playing back a recorded tape, especially a tape recorded on another Movie Camera, bands of white noise may appear in the picture. This occurs when the video heads don't precisely trace the recorded video tracks during playback. Adjusting the tracking pattern of the heads is called tracking adjustment.
1 Press both the [◀ TRACKING] and [TRACKING ▶] Buttons simultaneously.
2 Eliminate any noise bars by adjusting the tracking with the [◀ TRACKING] or [TRACKING ▶] Button.
Playback (cont'd)
text_image
Cue Playback Horizontal Noise Bars Review Playback Still Playback Horizontal Noise Bars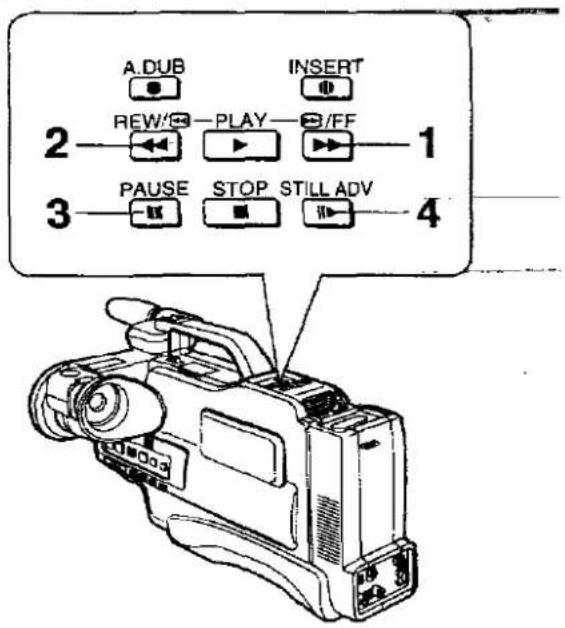
text_image
A.DUB INSERT 2 REW/PLAY/FF 1 3 PAUSE STOP STILL ADV 4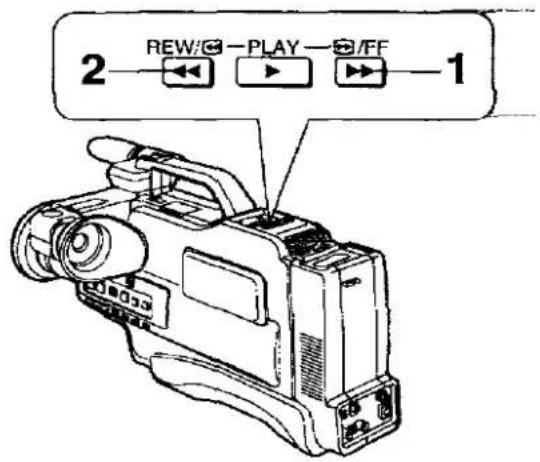
text_image
2 REW/ play/FF 1How to Use Cue, Review and Still Playback Functions During Normal Playback.
Note:
The sound will be played back only during normal playback.
■ For Cue Playback
1 Keep the [FF] Button pressed. The Fast Forward/Cue Mode Indication "appears in the Viewfinder.
■ For Review Playback
2 Keep the [REW/◀] Button pressed. The Rewind/Review Mode Indication "<<" appears in the Viewfinder.
■ For Still Playback
3 Press the [PAUSE] Button. The Still Mode Indication "II" appears in the Viewfinder.
■ For Still Advance Playback (During Still Playback)
4 Press the [STILL ADV] Button.
How to Resume Normal Playback Press the [PAUSE] Button again. If the Movie Camera is left in the Still Playback Mode for about 6 minutes, it will switch over to the stop mode, to protect the tape and the video heads.
③ How to Rewind or Fast-Forward the Tape
Note: With the Movie Camera in the Stop Mode:
■ For Fast-Forwarding
1 Press the [→/FF] Button to wind the tape forward at high speed. The tape will be rewound automatically when it reaches its end.
For Rewinding
2 Press the [REW/→] Button to rewind the tape at high speed. The tape will stop automatically when it reaches its beginning
After Use
text_image
2 Lens Cap 1 5 [BATT.EJECT] 4 [POWER] 3 [TAPE EJECT]Cleaning
text_image
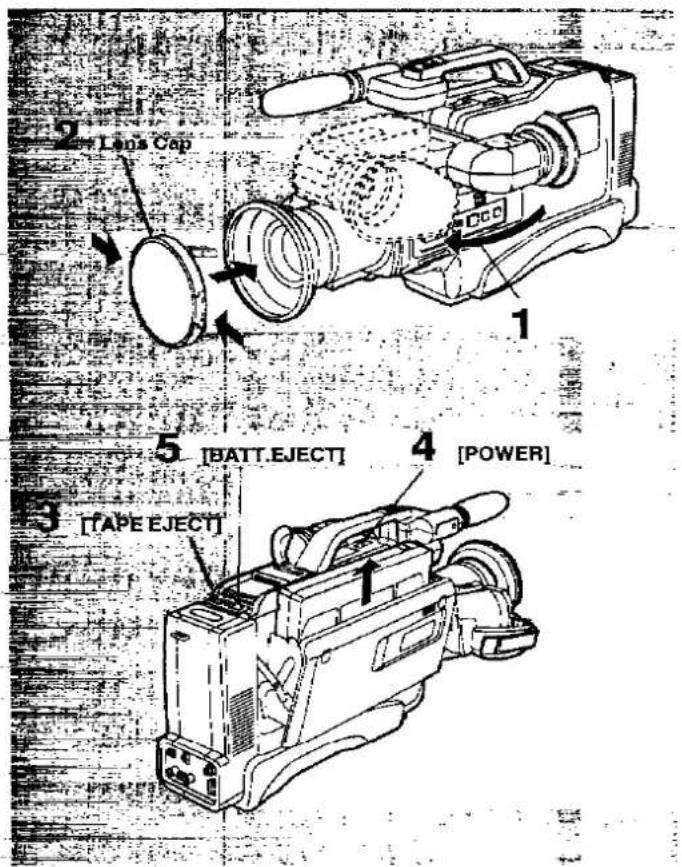
1·3 2 Blower Brush1 Retract the Viewfinder.
2 Attach the Lens Cap to the Lens.
3 Press the [TAPE EJECT] Button and remove the video cassette. (p. 8)
4 Turn the Movie Camera off.
5 Slide the [BATT.EJECT] Lever and remove the Battery Pack.
■ When the Movie Camera will not be Used for a Long Period of Time
Turn the unit on occasionally to prevent malfunction.
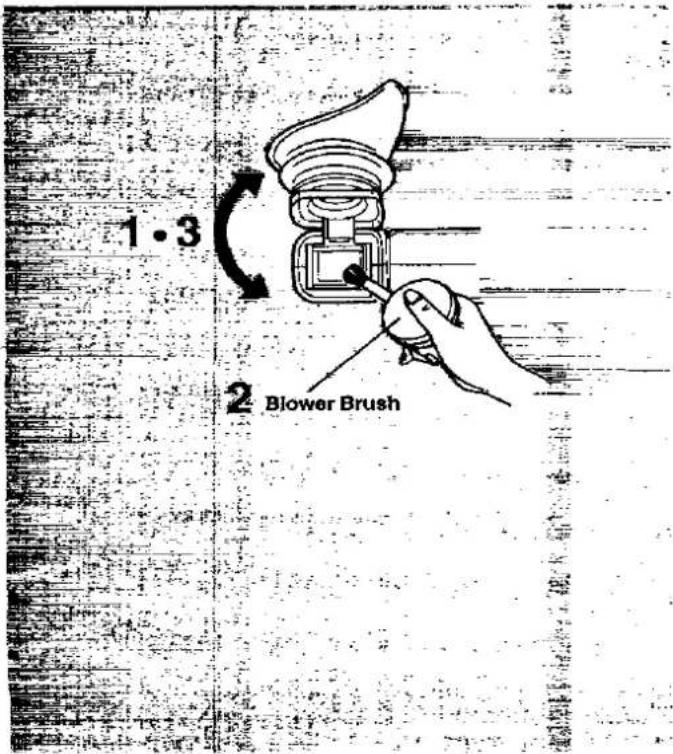
① Cleaning the Viewfinder
1 Swing up the eyecup.
2 Remove dust with a blower brush.
3 Swing down the eyecup.
2 Cleaning the Movie Camera
- Clean the lens only with a biower brush (used for photo cameras) or special lens cleaning tissue (used for glasses and cameras).
- Wipe the Movie Camera with a clean, dry cloth. Never use cleaning fluid or other chemicals.
Cautions for Cleaning
- Do not use benzine, thinner or other chemicals for cleaning, because they could change the colour and damage the surface of the camera body.
- When using a chemically treated cloth for cleaning, carefully follow the instructions for its use.
Cleaning (cont'd)
text_image
Clogging Mark
The picture shakes vertically.

The whole picture contains noise.


The picture is totally distorted.
③ Cleaning the Video Heads
The video heads are the means by which the Movie Camera places picture signals on the tape during recording, and reads picture signals from the tape during playback. If these heads become dirty and clogged from long use, the signals can no longer be recorded correctly, and the playback picture will be distorted accordingly. This is the case, for example, during the playback of a tape, the sound of which is reproduced normally, but no picture is seen, or the picture is greatly distorted. If such symptoms occur, have the Movie Camera checked by qualified service personnel.
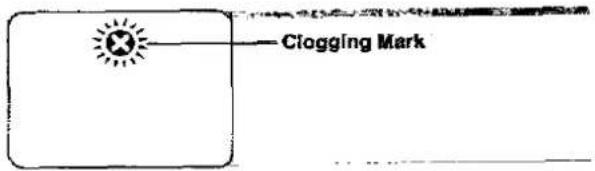
This Movie Camera is equipped with Head Clogging Detection Function. When the heads are clogged, the "✗" Indication in the Viewfinder appears. As the accumulation of dirt on the heads may be dislodged by the movement of the tape, it is possible that this indication sometimes appears, but may not reappear on the next filming start.
The Head Clogging Detection Function will be activated when the filming is started from the Filming Pause Mode. However, it will not be activated when filming immediately after replacing the cassette and after playing back some part of the tape.
Symptom:
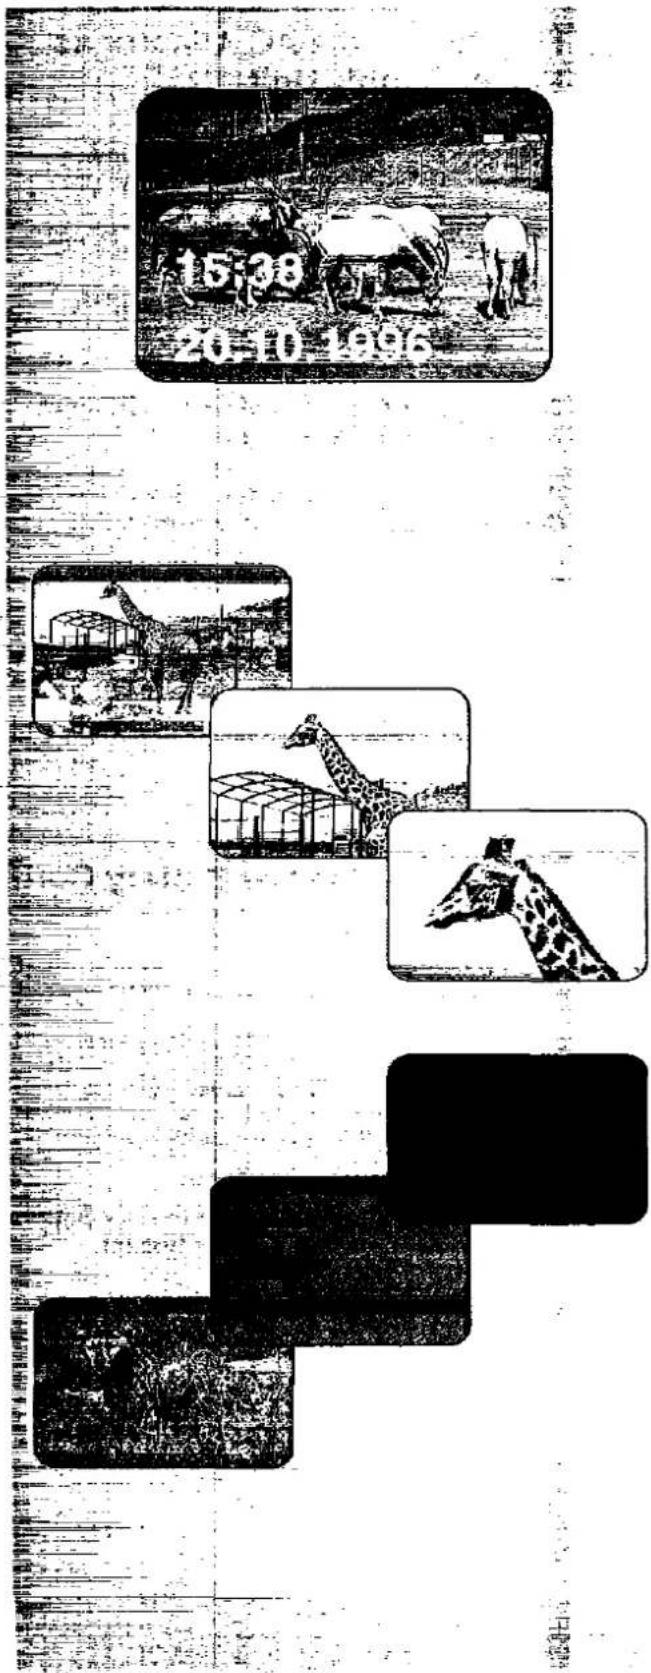
The Head Clogging Indication "✗" appears in the Viewfinder. The playback image becomes distorted as shown in the illustrations on the left.
Remedy:
Use an optional Cleaning Tape and play it back to remove dirt from the video heads.
■ Causes of Video Head Clogging
- Dust in the air
- High ambient temperature, high humidity
- Scratches on the tape
- Long-term use of the Movie Camera
Advanced Operations
text_image
15.38 20-10-1996Contents
Power Supply 20
1 How to Use the AC Adaptor as Power Supply Unit .... 20
2 How to Use the Car Battery Cord (Optional) 20
How to Use the Tape Counter Indication 21
How to Record the Date and Time during Filming 23
1 How to Recharge the Built-In Lithium Battery 23
2 How to Set the Year. Date and Time 24
3 How to Record the Date and Time during Filming ..... 25
How to Enlarge the Subject during Filming (Using the Zoom Function) 26
How to Film with the Fade Function 27
1 How to Fade in.... 27
2 How to Fade out 27
How to Film with the Digital Fade Function 28
1 How to Fade In 28
2 How to Fade Out 28
How to Film with Strobe Effect....29
How to Approach very Small Subjects and Film them enlarged 30
How to Film All Scenes with Natural Colours 31
1 How to Film with Automatic White Balance Adjustment 31
2 How to Film with Manual White Balance Adjustment.... 32
How to Adjust the Focus 34
1 How to Film with the Auto Focus Mode 34
2 How to Film with the Manual Focus Mode 35
How to Film Fast-Moving Subject 36
How to make Your Subject Stand out Sharply from the Background 37
How to Film Dark Scenes More Brightly.... 37
How to Film Backlit Scenes 38
How to Film in the Dark (High Sensitivity Function) ..... 38
How to Film with the Digital Wipe Function 39
Self-Timer Filming and Interval Filming 40
1 Self-Timer Filming 40
2 Interval Film:ng 40
How to Playback via a TV Set 41
1 Playback via a TV Set with AV Input Socket (Using the Supplied AV Output Cable) 41
2 Playback via a TV Set with AV Input Socket (21-pin) (Using the Supplied AV Output Cable and 21-pin Conversion Connector) 41
3 Playback via a TV Set without AV Input Socket (Using the Optional RF Adaptor) 42
How to Edit a Previously Recorded Tape 43
Insert Editing 45
Audio Dubbing 46
Power Supply
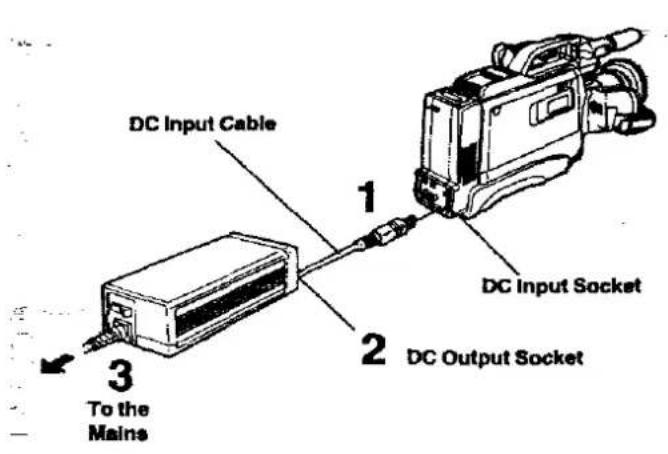
text_image
DC Input Cable 1 DC Input Socket 2 DC Output Socket 3 To the Mains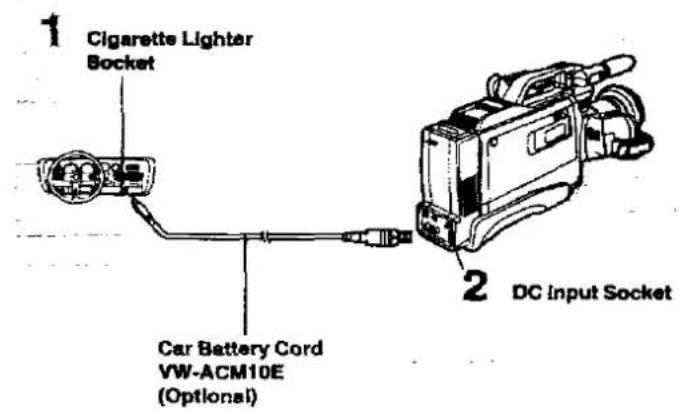
text_image
1 Cigarette Lighter Socket Car Battery Cord VW-ACM10E (Optional) 2 DC Input SocketHow to Use the AC Adaptor as Power Supply Unit
Notes:
- Do not use the AC Adaptor for any purposes other than supplying the Movie Camera with power and charging the Battery Pack.
- When listening to a radio while the AC Adaptor is in operation, the radio reception may be distorted. In this case, move the radio further away from the AC Adaptor.
- When not using the AC Adaptor, unplug its mains cable When unplugging the mains cable, pull it by the plug, not by the cable.
1 Connect the DC Input Cable to the DC Input Socket on the Movie Camera.
2 Connect the other end of the cable to the DC Output Socket on the AC Adaptor.
3 Connect the Mains Cable of the AC Adaptor to the mains.
② How to Use the Car Battery Cord (Optional)
Notes:
- The Car Battery Cord can only be used with 12 V DC negative-grounded vehicles.
- Do not start the car engine while the Movie Camera is powered by the car battery.
- When the voltage drops suddenly for example because the car air-conditioner is turned on, the Movie Camera is automatically turned off to protect it. Wait about 10 seconds before turning it on again.
1 Start the engine and then plug the Car Battery Cord into the Cigarette Lighter Socket.
2 Connect the other end of the cord to the DC Input Socket on the Movie Camera.
How to Use the Tape Counter Indication
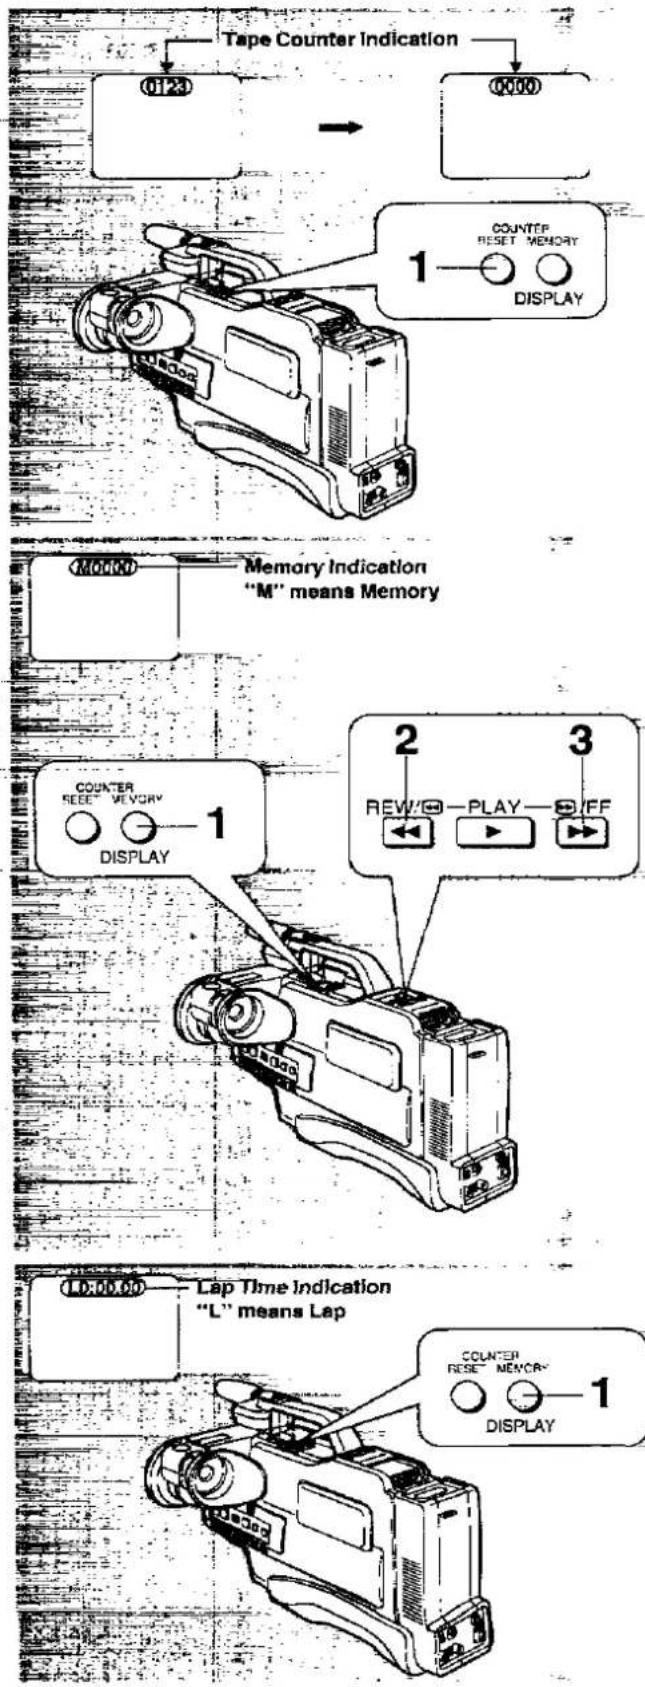
flowchart
graph TD
    A["Tape Counter Indication"] --> B["0123"]
    C["0000"] --> D["1"]
    D --> E["COUNTER RESET MEMORY DISPLAY"]
    F["Memory Indication "M" means Memory"] --> G["2"]
    G --> H["3"]
    H --> I["REVIEW PLAY OFF"]
    J["Lap Time Indication "L" means Lap"] --> K["1"]
    K --> L["COUNTER RESET MEMORY DISPLAY"]
■ How to Reset the Tape Counter to "0000"...
1 Press the [RESET] Button.
■ How to Search for the Tape Position "0000" After Filming or Playback...
Resetting the Tape Counter to "0000" and making the "M" Indication appear before starting to film or playback makes it easy to find that tape position again when rewinding the tape.
Note:
After fast-forwarding or rewinding the tape, the Tape Counter Indication may deviate a little from the "M 0000" tape position.
1 Press the [MEMORY/DISPLAY] Button. The "M" Indication appears in the Viewfinder next to the Tape Counter Indication.
■ For Rewinding
2 Press the [REW/←] Button.
The tape stops automatically at about the point where the tape counter reads "M 0000".
■ For Fast Forwarding
3 Press the [→/FF] Button.
The tape stops automatically at about the point where the Tape Counter reads "M 0000".
■ How to Cancel the Memory Function...
Press the [MEMORY/DISPLAY] Button twice. The "M" Indication disappears.
■ How to Make the Lap Time Counter Indication Appear
1 Press the [MEMORY/DISPLAY] Button twice.
The Lap Time Counter Indication "L 0:00.00" (real time) appears.
●The Lap Time Counter counts up only during filming.
●The Lap Time Counter Shows the elapsed time in hours, minutes and seconds.
How to use the Tape Counter Indication (cont'd)
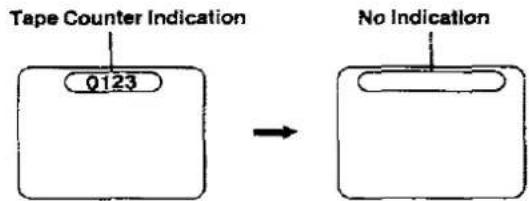
text_image
Tape Counter Indication Q123 No Indication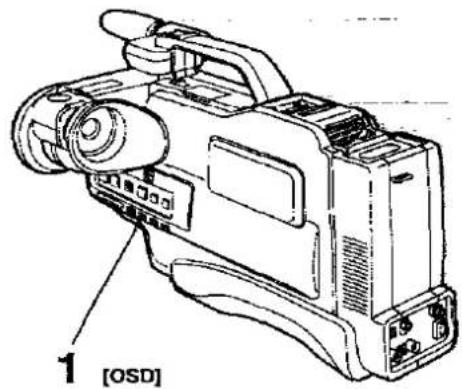
natural_image
Line drawing of a vintage video camera with labeled component '1 [OSD]' (no text or symbols on device body)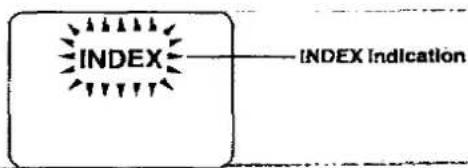
flowchart
graph TD
    A["INDEX"] --> B["INDEX Indication"]
    style A fill:#f9f,stroke:#333
    style B fill:#ccf,stroke:#333
natural_image
Line drawing of a vintage video camera with lens and external ports (no text or symbols)■ How to Turn off the Indications in the Viewfinder (Using the On-Screen Display Function)
1 Press the [OSD] Button.
The indications in the Viewfinder disappear except the Warning and Alarm Indications, the Date/Time Indication and the Manual White Balance Indications.
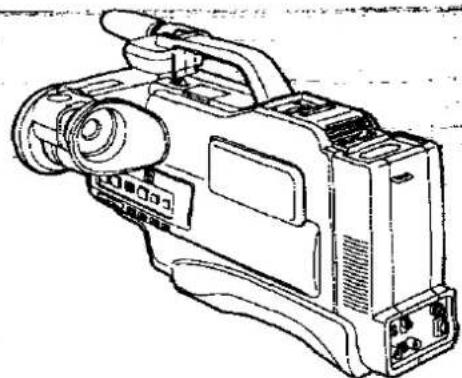
■ To Return to the Initial Mode...
Press the [OSD] Button again.
■ Index Signals (VISS)
The index signals make possible the use of the VHS Index Search or the Intro Scan Function when playing back the tape on a VCR equipped with these functions.
An index signal is recorded automatically in the following cases:
- When filming is started for the first time after attaching the Battery Pack.
- When filming is restarted after exchanging the cassette.
In each of these cases, the "INDEX" indication in the Viewfinder flashes for a few seconds.
- For the correct functioning of the VHS Index Search and Intro Scan Functions on the VCR, the index signals should be at intervals of not less than 2 minutes.
How to Record the Date and Time during Filming
text_image
Diagram showing a device connected to a device via cable, labeled with parts 1 and 2, and a sun icon symbol.■ The Built-in lithium battery
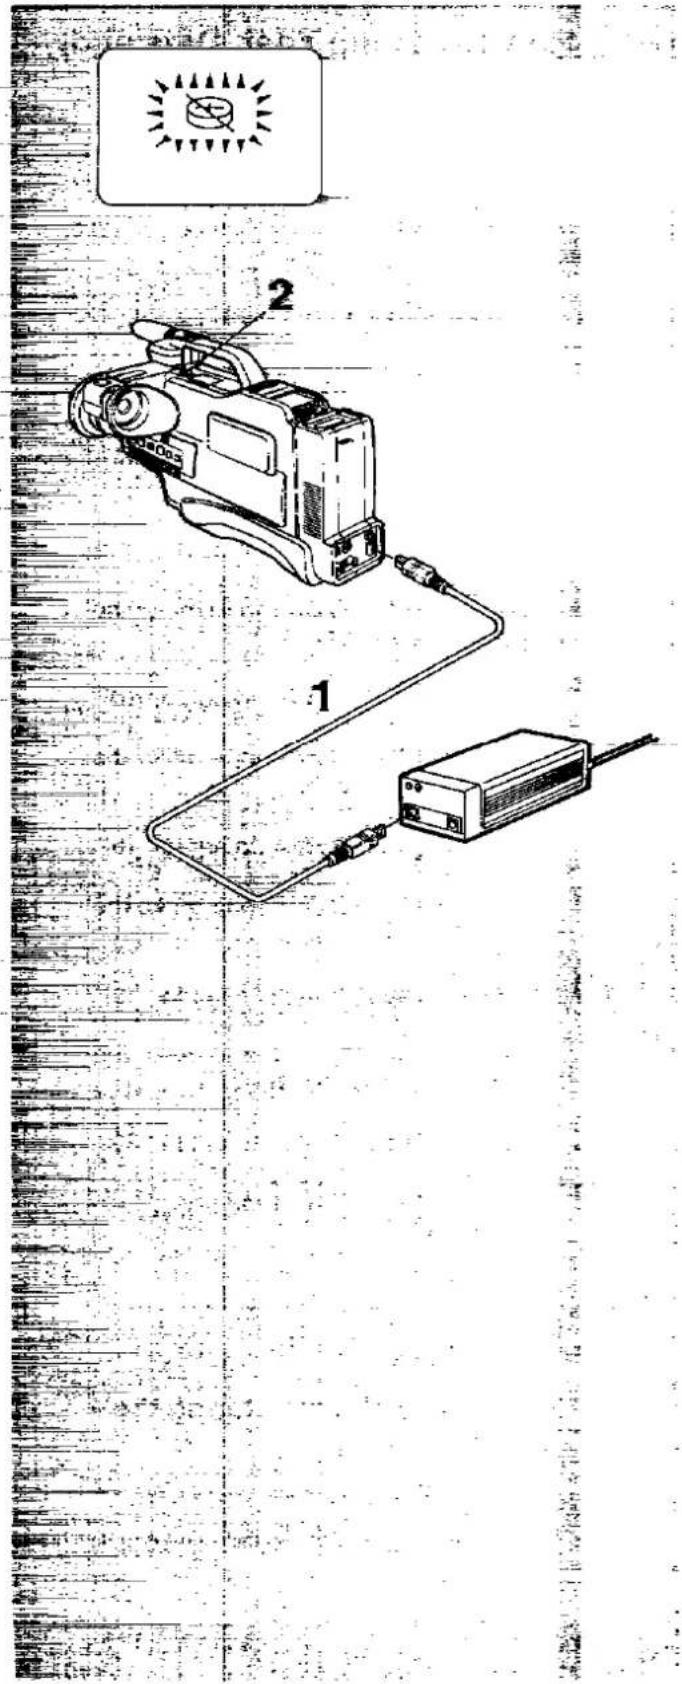
A built-in rechargeable lithium battery maintains the operation of the built-in clock when the Movie Camera is turned off. When the Movie Camera is in operation, this battery is recharged automatically.
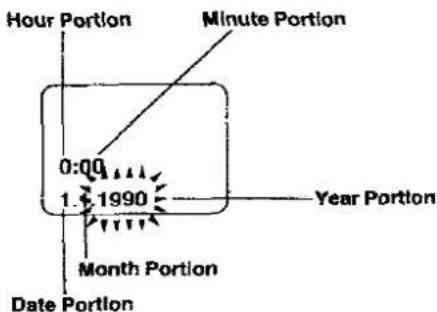
However, if the Movie Camera is not used for a very long time, the lithium battery can become exhausted. In this case, the Indication "ES" in the Viewfinder flashes and the date and time return to the initial Indication "1.1.1990".
① How to Recharge the Built-In Lithium Battery
If the Indication "☒" in the Viewfinder flashes for approx. 10 seconds when turning the Movie Camera on, the lithium battery needs to be recharged as follows.
1 Connect the Movie Camera to the AC Adaptor or insert the Battery Pack into the Movie Camera.
2 Leave the Battery Pack in the Movie Camera for 20 hours.
The Movie Camera does not need to be turned on,
When the lithium battery is fully charged, it can maintain the operation of the clock for approx. one year.
Information for your safety
WARNING
THE LITHIUM BATTERY IN THIS EQUIPMENT MUST ONLY BE REPLACED BY QUALIFIED PERSONNEL WHEN NECESSARY, CONTACT YOUR LOCAL PANASONIC SUPPLIER.
How to Record the Date and Time during Filming (cont'd)
text_image
Hour Portion Minute Portion 0:00 1. 1990 Month Portion Date Portion Year Portion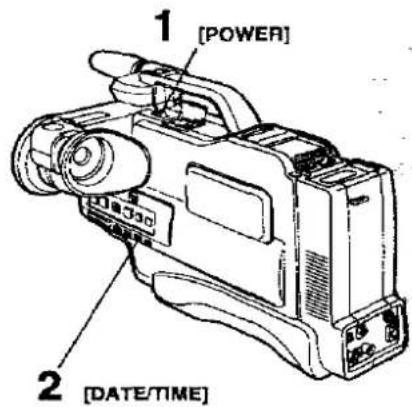
text_image
1 [POWER] 2 [DATE/TIME]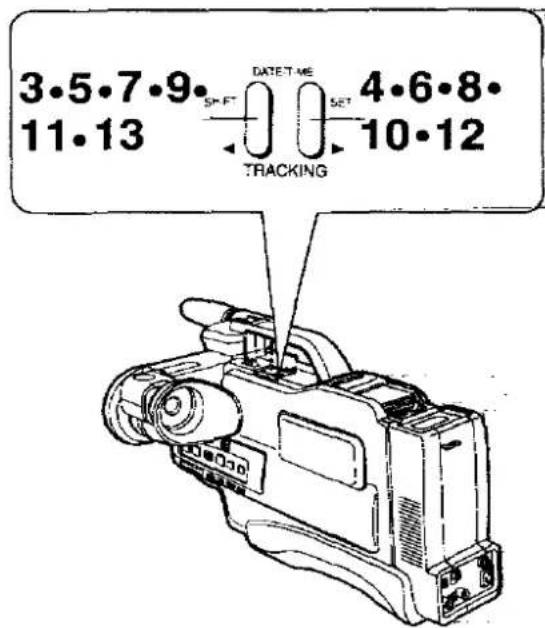
text_image
3.5.7.9 11.13 SHIFT DATE: ME SET 4.6.8 10.12 TRACKING② How to Set the Year, Date and Time
Attach the charged Battery Pack or connect the AC Adaptor to the Movie Camera. Set the date and time in the following sequence: Year, Month, Day, Hour and Minute.
For example: To set the clock to October 15, 1996, 12:30...
1 Turn the Movie Camera on.
2 Press the [DATE/TIME] Button. The Date Indication appears.
3 Keep the [SHIFT] Button pressed until the "Year" portion flash.
4 Press the [SET] Button to set to "1996".
5 Press the [SHIFT] Button to make the "Month" portion flash.
6 Press the [SET] Button to set to "10".
7 Press the [SHIFT] Button to make the "Day" portion flash.
8 Press the [SET] Button to set to "15".
9 Press the [SHIFT] Button to make the "Hour" portion flash.
10 Press the [SET] Button to set to "12".
11 Press the [SHIFT] Button to make the "Minute" portion flash.
12 Press the [SET] Button to set to "30".
13 Press the [SHIFT] Button. The clock starts. After a few minutes, check in the Viewfinder that the clock is functioning.
Note: At the time of purchase, the clock does not show the correct time and must first be adjusted.
■ If You Make a Mistake during the Setting:
Press the [SHIFT] Button until the portion that is to be changed flashes, and then change the figure with the [SET] Button
When the [SET] Button is kept pressed, the figures change more quickly.
flowchart
graph LR
    A["1 [DATE/TIME"]] --> B["Presed three times"]
    B --> C["Disappeared"]
    C --> D["Pressed once"]
    D --> E["Date and Time 15:38 20.10.1996"]
    E --> F["Pressed twice"]
    F --> G["Date only 20.10.1996"]
3 How to Record the Date and Time during Filming
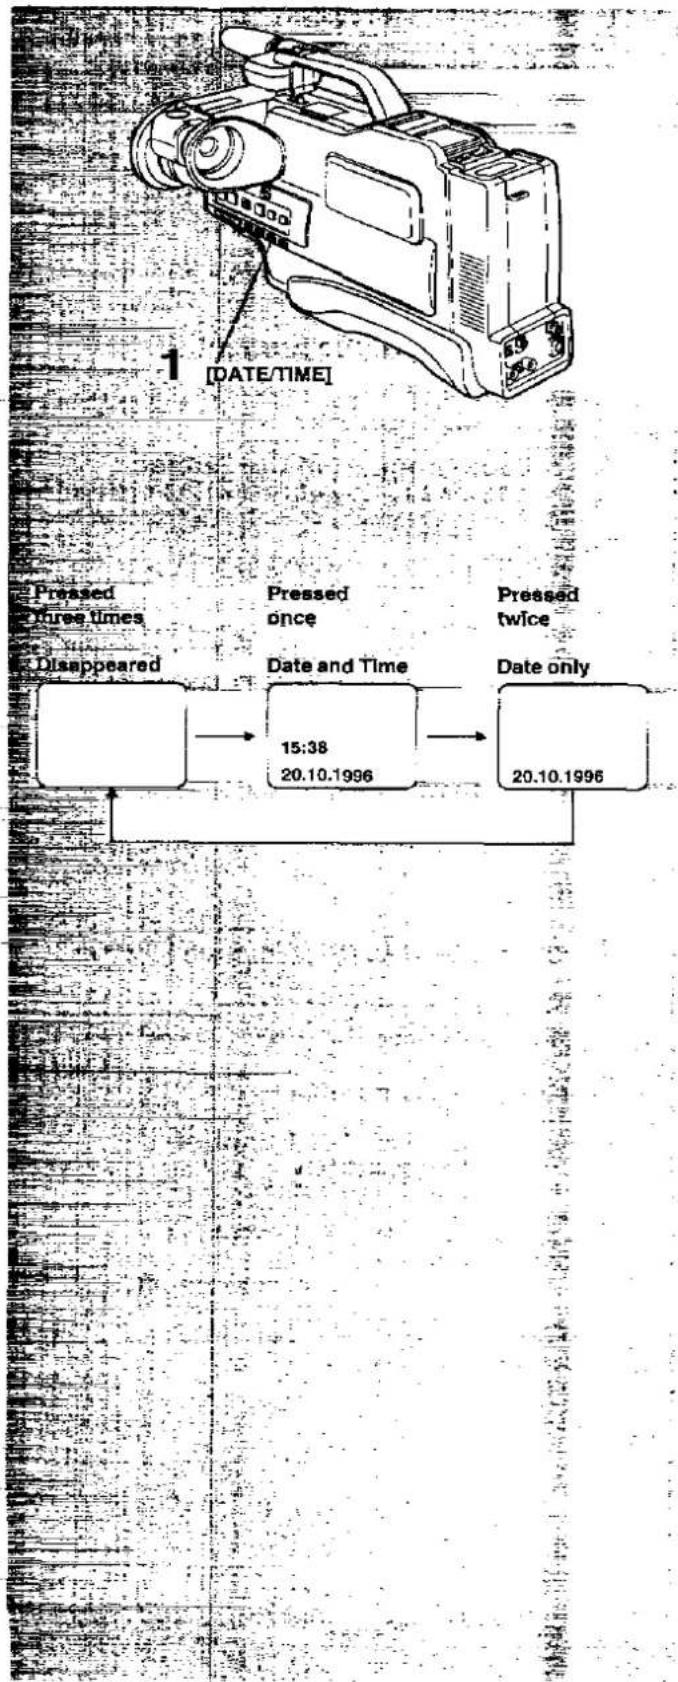
During filming, the Date/Time Indication displayed in the Viewfinder will also be recorded.
1 Press the [DATE/TIME] Button.
At each press of the [DATE/TIME] Button, the Date/Time Indication in the Viewfinder can be changed in the following order:
![PANASONIC NV-M50 - Press the [DATE/TIME] Button. - 1](/content/2026/05/869864/images/f2a6a871451d67a16027b8ec3a3386c8ee81b1af54e12ac98bec0e3f84fbe50c.jpg)
flowchart
graph LR
    A["No indication"] --> B["15:38"]
    B --> C["20.10.1996"]
    C --> D["date and time"]
    C --> E["20.10.1996"]
    E --> F["date only"]
Press the [DATE/TIME] Button to select the desired indication.
How to Enlarge the Subject during Filming (Using the Zoom Function)
text_image
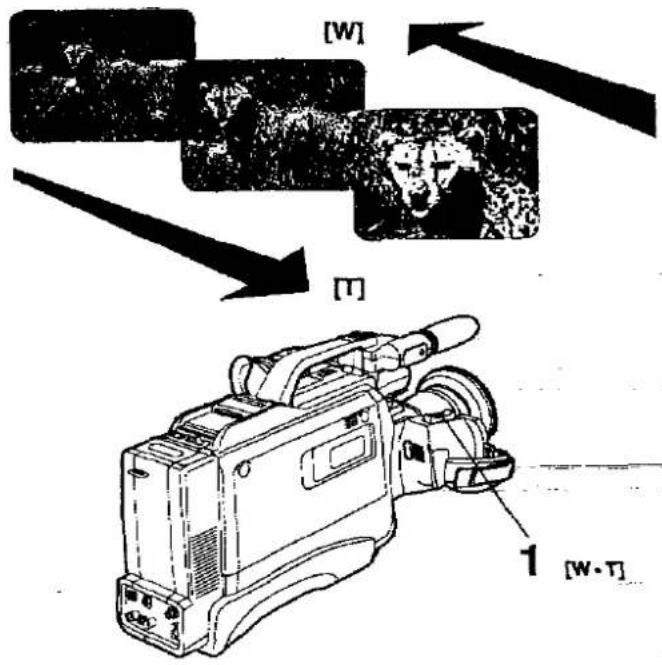
[W] [T] 1 [W·T]There are two ways to zoom in on the subject: with the Power Zoom Function and the Digital Zoom Function. Select them according to your filming purpose.
① How to Use the Power Zoom Function
There are two zooming speeds.
For faster zooming, press the [W] or [T] Zoom Button firmly. For slow zooming, press either of these buttons lightly.
■ To Zoom in on the Subject:
Keep the [T] Zoom Button pressed until the subject has the desired size in the viewfinder, then release the finger from the button. The subject can be enlarged up to 14 times.
■ To Zoom back from the Subject:
Keep the [W] Zoom Button pressed until the subject has the desired size in the Viewfinder, then release the finger from the button.
text_image
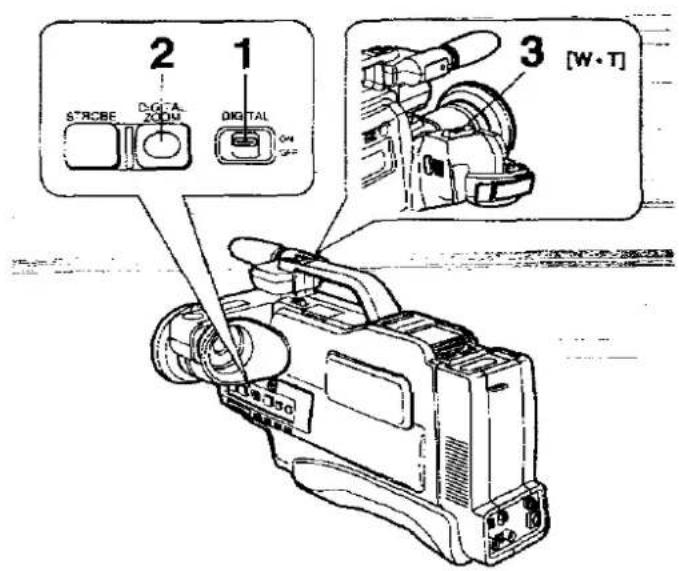
2 1 S*RCBE D-DCA-ZOU DIGITAL 3 [W·T]② How to Use the Digital Zoom Function
When the Digital Zoom Function is activated, the picture is magnified electronically and the zoom magnification range is extended to 28×.
1 Set the [DIGITAL ON/OFF] Switch to "ON".
2 Press the [DIGITAL ZOOM] Button. The "D.ZOOM" Indication appears in the Viewfinder.
3 Press the [W·T] Button.
How to Cancel this Function Press the [DIGITAL ZOOM] Button.
Notes:
- The Digital Zoom Function decreases the picture resolution and fine picture details.
- The higher the magnification of the Digital Zoom becomes, the grainier the picture will be. When the zoom range is increased to 28x, the picture and its colours may become unnatural.
How to Film with the Fade Function
flowchart
graph TD
    A["Start/Stop Button"] --> B["Fade-In"]
    B --> C["1.3 [FADE"]]
    C --> D["Fade-out"]
    D --> E["1.3 [FADE"]]
    style A fill:#f9f,stroke:#333
    style B fill:#ccf,stroke:#333
    style C fill:#cfc,stroke:#333
    style D fill:#fcc,stroke:#333
    style E fill:#ffc,stroke:#333
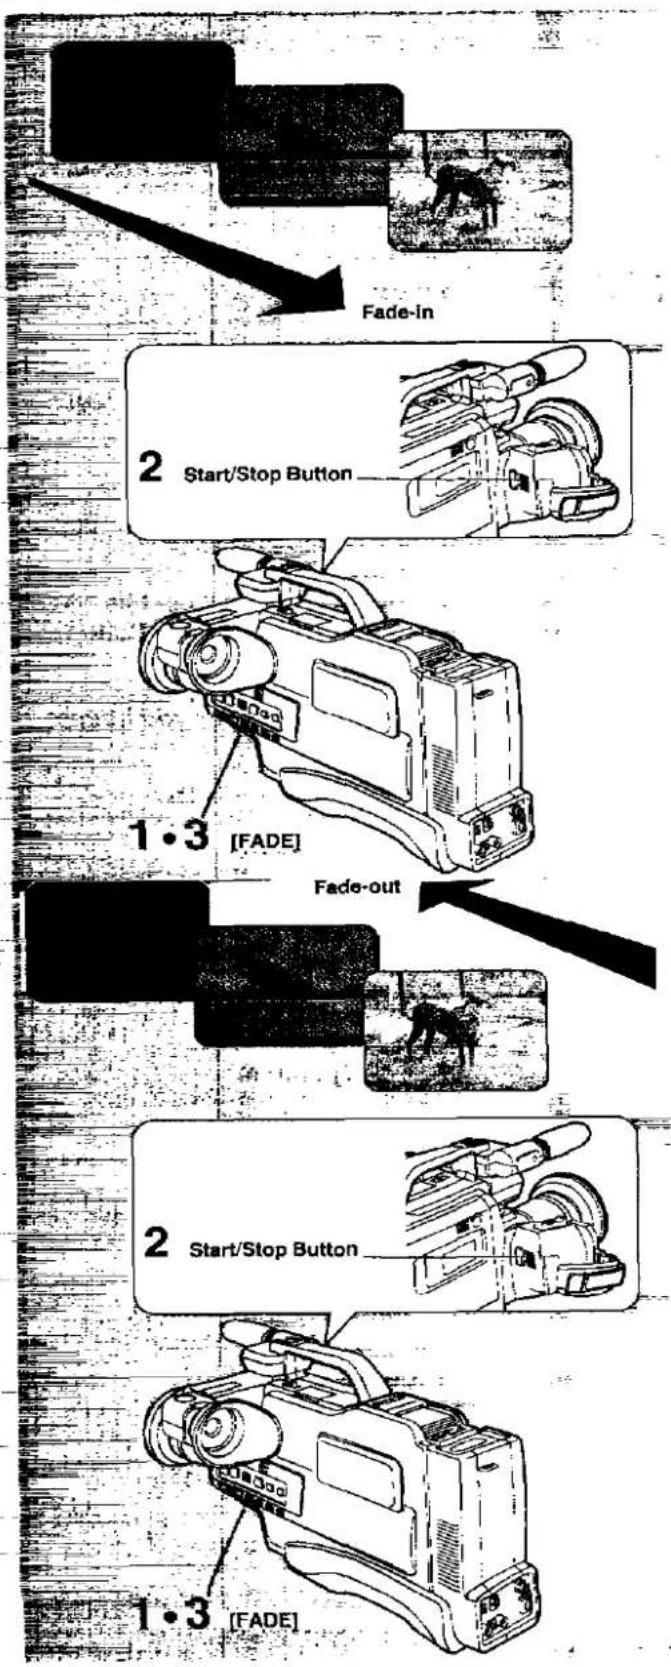
Fading in from black with the Normal Fade Function is very effective at the beginning of a movie or (together with fade out) for soft transitions between scenes. And fading out to black is ideal for giving a scene or movie a gentle, lingering ending.
The sound is also gradually faded in and faded out together with the picture.
1 How to Fade in
In the filming pause Mode:
1 Keep the [FADE] Button Pressed.
2 After the picture In the Viewfinder has disappeared, Press the Start/Stop Button to Start the filming.
3 After about 3 seconds, release your finger from the [FADE] Button.
② How to Fade out
During filming:
1 Keep the [FADE] Button pressed.
2 After the picture has disappeared, press the Start/Stop Button to stop the filming.
3 Release your finger from the [FADE] Button.
How to Film with the Digital Fade Function
flowchart
graph TD
    A["Fade-In"] --> B["4 Start/Stop Button"]
    B --> C["1 [DIGITAL ON/OFF"]
    C --> D["3·5 [FADE"]]
    D --> E["2 [D.FADE"]]
    E --> F["Fade-out"]
    F --> G["4 Start/Stop Button"]
    G --> H["1 [DIGITAL ON/OFF"]
    H --> I["3·5 [FADE"]]
    I --> J["2 [D.FADE"]]
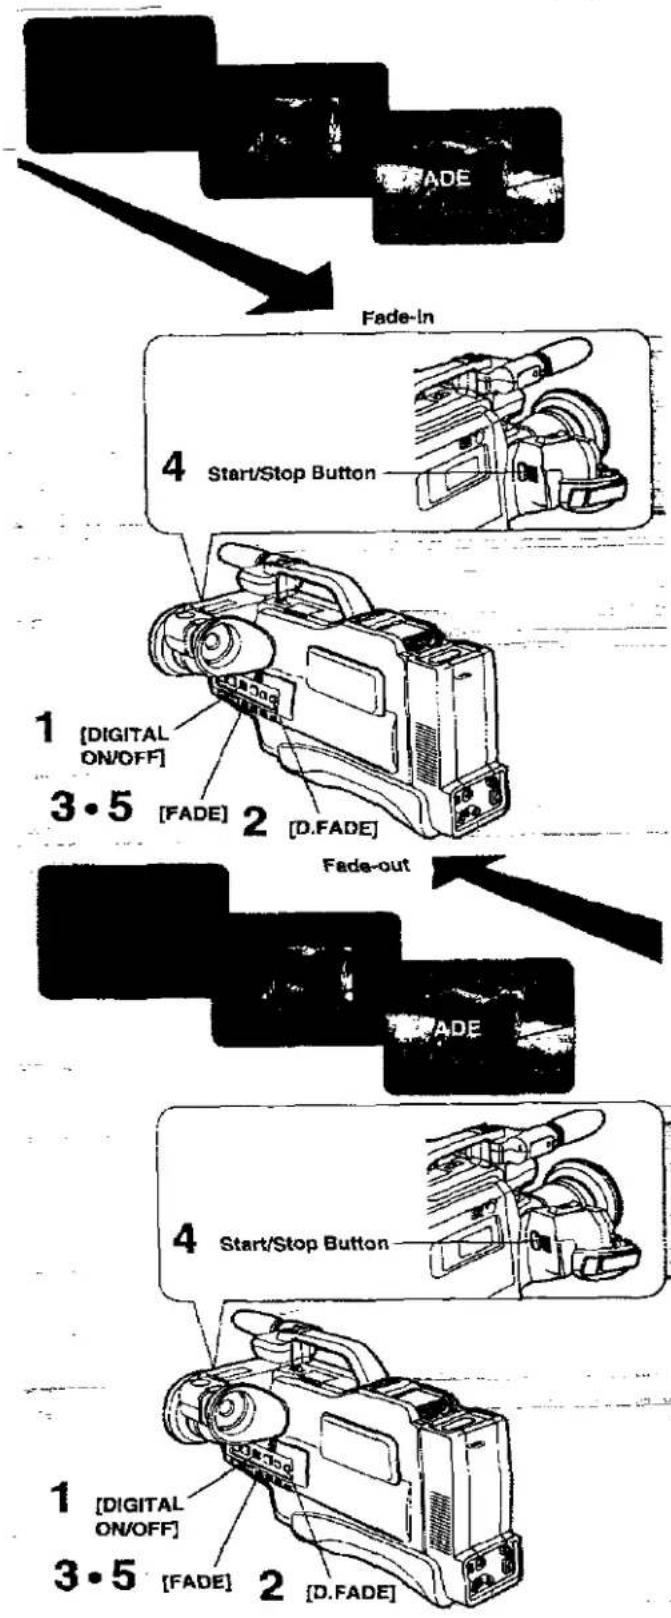
Fading In from black with the Digital Fade Function is a very interesting way to give groups of scenes a uniform beginning, for example by using it to start each day's action in a vacation film. It is also great for inserting scenes that do not fit into the film's natural time sequence. The sound is also gradually faded in and faded out together with the picture.
① How to Fade in
in the filming pause Mode:
1 Set the [DIGITAL ON/OFF] Switch to "ON".
2 Press the [D.FADE] Button.
The "D.FADE" Indication appears in the Viewfinder.
3 Keep the [FADE] Button Pressed.
4 After the picture in the Viewfinder has disappeared, press the Start/Stop Button to start the filming.
5 After about 3 seconds, release your finger from the [FADE] Button.
■ How to Cancel this Function
Press the [D.FADE] Button again.
② How to Fade out
During filming:
1 Set the [DIGITAL ON/OFF] Switch to "ON".
2 Press the [D.FADE] Button.
The "D.FADE" Indication appears in the Viewfinder.
3 Keep the [FADE] Button Pressed.
4 After the picture has disappeared, press the Start/Stop Button to stop the filming.
5 Release your finger from the [FADE] Button.
■ How to Cancel this Function
Press the [D.FADE] Button again.
How to Film with Strobe Effect
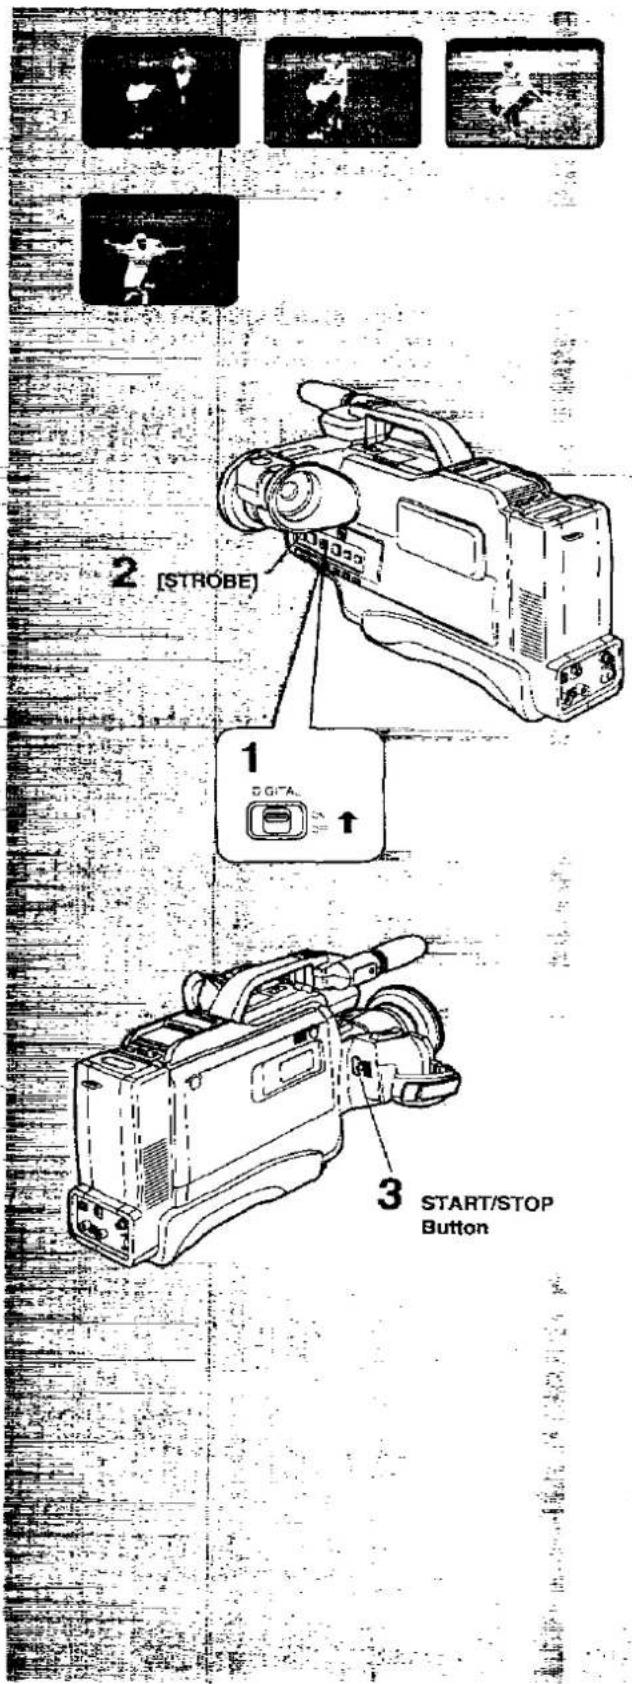
text_image
2 [STROBE] 1 207A 3 START/STOP Button■ Using the Digital Filming Function
For continuously filming 6 still images per second:
1 Set the [DIGITAL ON/OFF] Switch to "ON".
2 Press the [STROBE] Button. The picture in the Viewfinder will also have a strobe effect.
3 Press the Start/Stop Button. Continuous filming with strobe effect is now possible.
■ How to Cancel this Function
Press the [STROBE] Bulton again
Notes:
- When filming under fluorescent lamps, the brightness of the picture may fluctuate.
- Since the strobe pictures are recorded from the digital image memory, the picture quality may be slightly inferior to that of normally recorded pictures.
How to Approach very Small Subjects and Film them enlarged
text_image
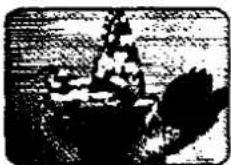
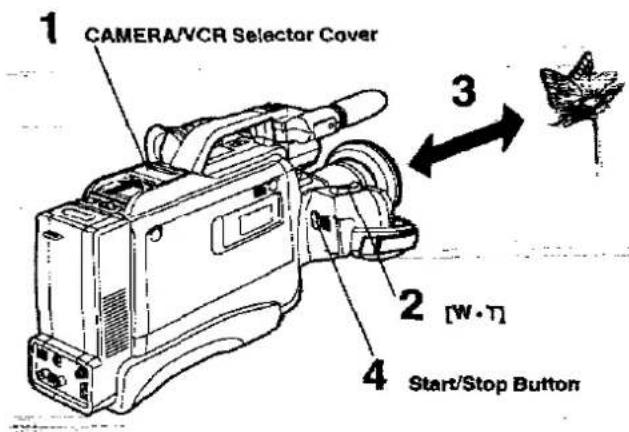
CAMERA/VCR Selector Cover 3 2 [W·T] 4 Start/Stop ButtonThe Macro Close-up Function makes it possible to film very small objects, photos, printed matter, insects and many other things. The subject can be approached down to a minimum distance of 5 mm between lens and subject.
Hints for Fliming with the Macro Close-up Function
- To get more or less of the subject into the picture, change the distance between the lens and the subject; do not use the [W] or [T] Zoom Button.
- As the depth of field is very small in macro filming, even slight camera movements can cause the subject to go out of focus. Therefore, it is recommended to use a tripod (optional).
- When the zoom lens is in its maximum telephoto position, the minimum filming distance between lens and subject is 1.5 m.
- In macro close-up filming, the subject can be approached down to a minimum distance of 5 mm between lens and subject. It is recommended to use the Auto Focus Mode. However, with a stable camera position (tripod, etc.), the Manual Focus Mode can also be used.
1 Slide the [CAMERA/VCR] Selector Cover to "CAMERA".
2 Keep the [W] Zoom Button pressed to zoom to the maximum wide-angle position.
3 Approach the subject to the desired distance. The focus will be adjusted automatically (Auto Focus Mode).
4 Press the Start/Stop Button.
The filming starts.
How to Film All Scenes with Natural Colours
natural_image
Line drawing of a vintage digital camera with lens and screen, no text or symbols present1 How to Film with Automatic White Balance Adjustment
To human eyes, white subjects appear as white even under different lighting conditions. A Movie Camera, however, would give these white subjects, depending on the colour of the light source, a reddish or bluish tint. To attain filmed scenes with natural colours, it is necessary to adjust the sensor in the camera to the existing colour of the light. This adjustment is called white balance adjustment. This camera offers two modes for this adjustment: Automatic and Manual White Balance Adjustment. The Automatic White Balance Adjustment Function provides satisfactory results with almost all subjects. (No operation is necessary.)
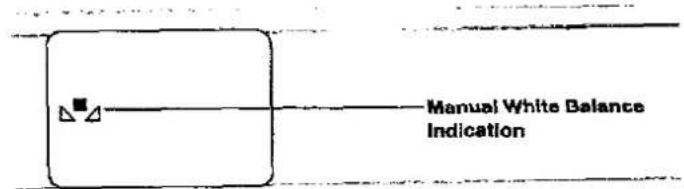
When the “ ” Indication is displayed in the Viewfinder, the Movie Camera is not in the Auto White Balance Mode. In this case, press the [W.B] Button to make the “ ” Indication disappear.
- If the Movie Camera is moved from outdoors to indoors during filming, the picture will initially take on a slightly reddish cast but it will gradually regain its natural colours.
For the following types of scenes, the Automatic White Balance Adjustment Mode cannot provide satisfactory results, even if the light source is within the range shown on page 50. Use the Manual White Balance Adjustment Mode instead.
- When a Scene Is Lit by Several Light Sources
If there is more than one light source for a scene, the Movie Camera cannot decide which of the stored White Balance Adjustment settings to use. Therefore, precise Automatic White Balance Adjustment is not possible in such cases.
- When Filming an Outdoor Scene from Inside a Building
As the colour of the light entering through the lens differs greatly from that received by the White Balance Sensor, the Automatic White Balance Adjustment Function compensates for indoor lighting and this results in unnatural colours.
- When Filming in a Very Dark Place
As the colour information entering through the lens is greatly reduced, the Automatic White Balance Adjustment Function cannot correctly compensate for the colour of the lighting and this results in unnatural colours.
How to Film All Scenes with Natural Colours (cont'd)
text_image
Manual White Balance Indication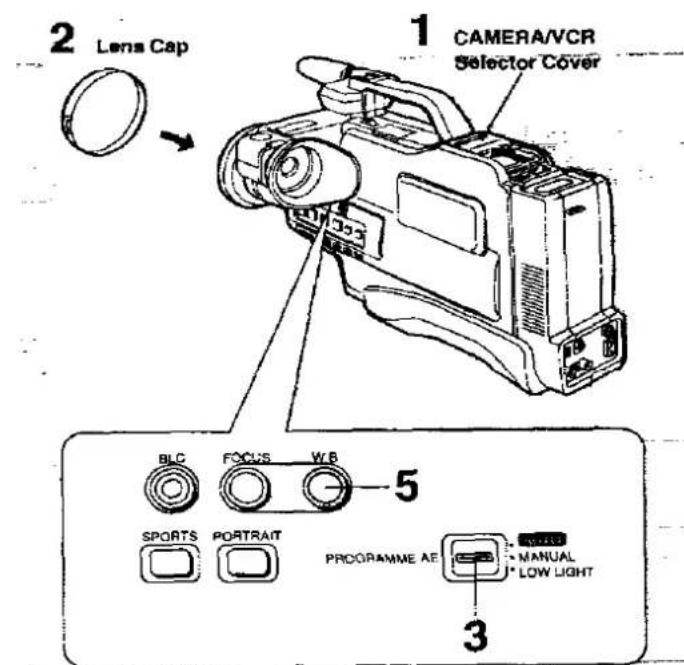
text_image
2 Lens Cap 1 CAMERA/VCR Selector Cover 5 BLC FOCUS W.B SPORTS PORTRAIT PROCORAMME AE MANUAL 3 LOW LIGHT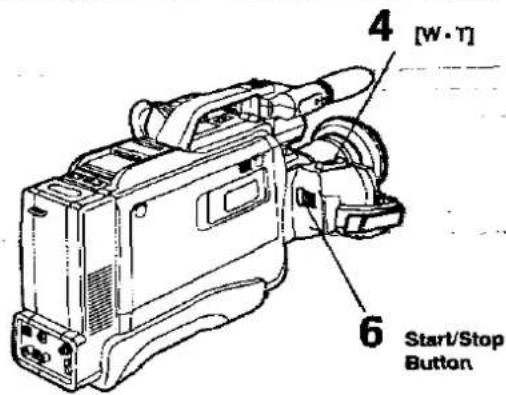
text_image
4 [W·T] 6 Start/Stop Button② How to Film with Manual White Balance Adjustment
There are two ways to perform the Manual White Balance adjustment:
- Using the white Lens Cap.
- Using a pure white sheet of paper or wall.
Using the white Lens Cap
When the surrounding Light is bright, the White Balance can be adjusted based on the light passing through the Lens Cap.
1 Slide the [CAMERA/VCR] Selector Cover to "CAMERA".
2 Attach the Lens Cap to the Lens.
3 Set the Mode Selector Switch to "MANUAL".
4 Keep the [T] Zoom Button pressed until the screen in the Viewfinder becomes completely white.
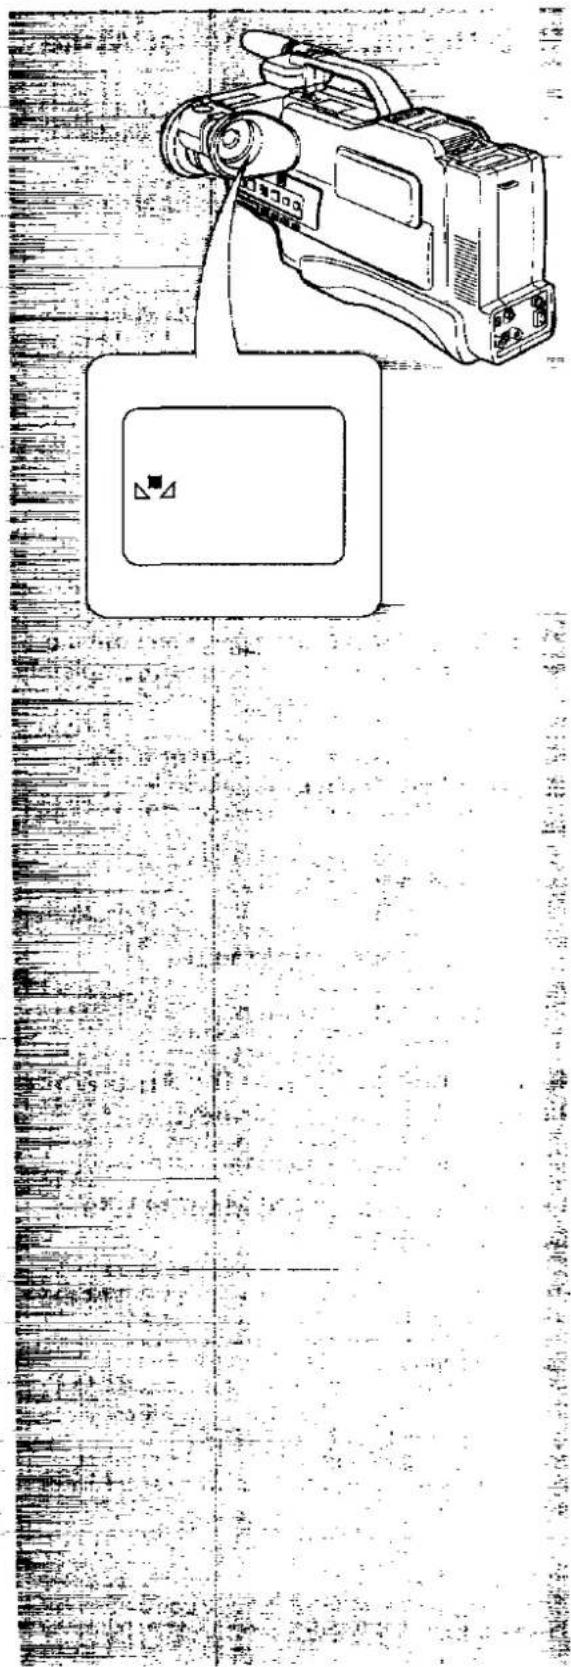
5 Keep the [W.B] Button pressed until the Manual White Balance Indication is lit.
The following indications in the Viewfinder inform about the state of the adjustment:
W.B: means White Balance.
"△△" flashes slowly .... Not adjusted
" z " flashes rapidly ..... During adjustment
“△” is lit .... Adjustment is finished
The Movie Camera is now ready for filming
6 Press the Start/Stop Button.
The filming starts.
■ How to Change Back to the Auto White Balance Adjustment Mode...
Press the [W.B] Button to the "☐" indication in the Viewfinder disappears or set the Mode Selector Switch to "AUTO".
■ How to Recall the Last Manual White Balance Setting
After turning the Movie Camera off and later on again, the "△△" Indication flashes slowly, however, the last previous white balance setting is still maintained.
However, to ensure the best possible colour reproduction, adjust the white balance again.
The last previous white balance setting is also maintained after pressing the [C] - CAMERA SEARCH + 1 Button to confirm the end of the previously recorded scene
But after removing the Battery Pack (or disconnecting the AC Adaptor from the Movie Camera) the last previous white balance setting is no longer maintained.
Note:
When moving the Movie Camera from indoors to outdoors or vice versa, be sure to adjust the white balance again, as the colour of the light has changed considerably.
text_image
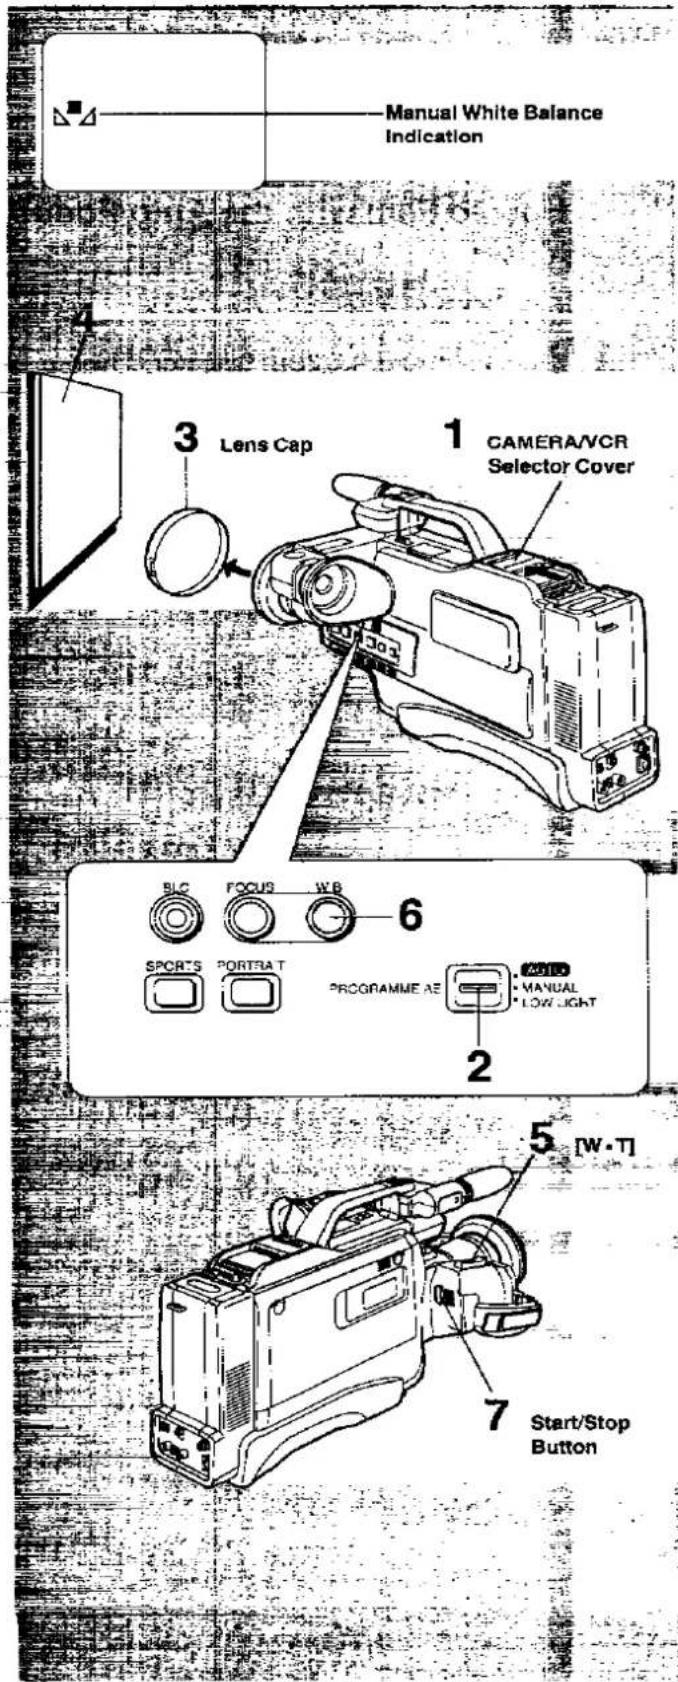
Manual White Balance Indication 3 Lens Cap CAMERA/VCR Selector Cover 6 SPORTS PORTRAT PROGRAMME AE 2 5 [W·T] 7 Start/Stop ButtonUsing a pure white sheet of paper or wall When the surrounding light is not bright, or when various kinds of light are mixed, use a pure white sheet of paper or wall.
1 Slide the [CAMERA/VCR] Selector Cover to "CAMERA".
2 Set the Mode Selector Switch to "MANUAL".
3 Remove the Lens Cap from the Lens.
4 Point the Movie Camera at white paper or at another pure white object.
5 Keep the [T] Zoom Button pressed until the screen in the Viewfinder becomes completely white.
6 Keep the [W.B] Button pressed until the Manual White Balance Indication appears.
The condition of the Manual White Balance Indication in the Viewfinder informs about the state of the adjustment:
"■" flashes slowly .... Not adjusted
"■" flashes rapidly .... During adjustment
"■" is lit .... Adjustment is finished.
The Movie Camera is now ready for filming.
7 Press the Start/Stop Button. The filming starts.
■ How to Change Back to the Auto White Balance Adjustment Mode...
Press the [W.B] Button to the "■" Indication in the Viewfinder disappears or set the Mode Selector Switch to "AUTO".
How to Adjust the Focus
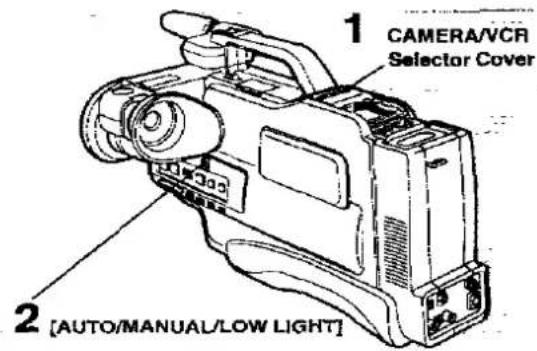
text_image
1 CAMERA/VCR Selector Cover 2 [AUTO/MANUAL/LOW LIGHT]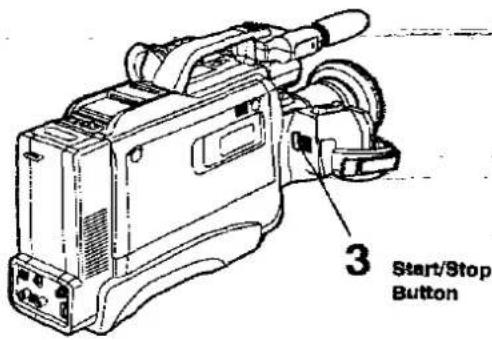
text_image
3 Start/Stop Button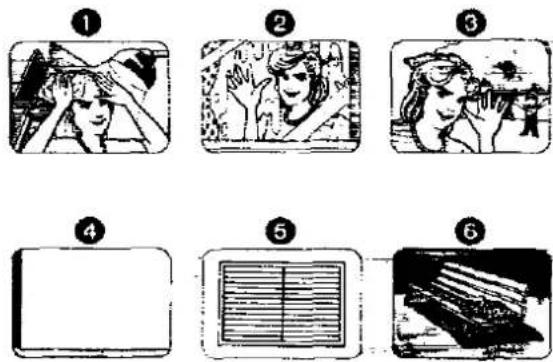
There are two ways to perform the focus
adjustment: ① Auto Focus Mode and
② Manual Focus Mode.
Select the mode according to the condition of the subject or the surroundings.
① How to Film with the Auto Focus Mode
This Movie Camera focuses Automatically on almost any subject.
1 Slide the [CAMERA/VCR] Selector Cover to "CAMERA".
2 Confirm that the Mode Selector Switch is set to "AUTO".
3 Press the Start/Stop Button.
The filming starts.
Notes:
- When zooming from wide-angle toward telephoto, the subject may slightly go out of focus depending on the filming conditions.
- In the filming situations listed below, the Auto Focus Mode may not provide satisfactory results; use the Manual Focus Mode instead. (See next page.)
① Shiny surfaces Subjects with backlighting or light reflection.
A subject behind dirty glass.
A subject with a part of it near the Movie Camera and another part far away from it.
A flat surface, e.g. white wall.
A subject with horizontal stripes
An oblique subject.
•A fast-moving subject.
●A subject with a dark surface.
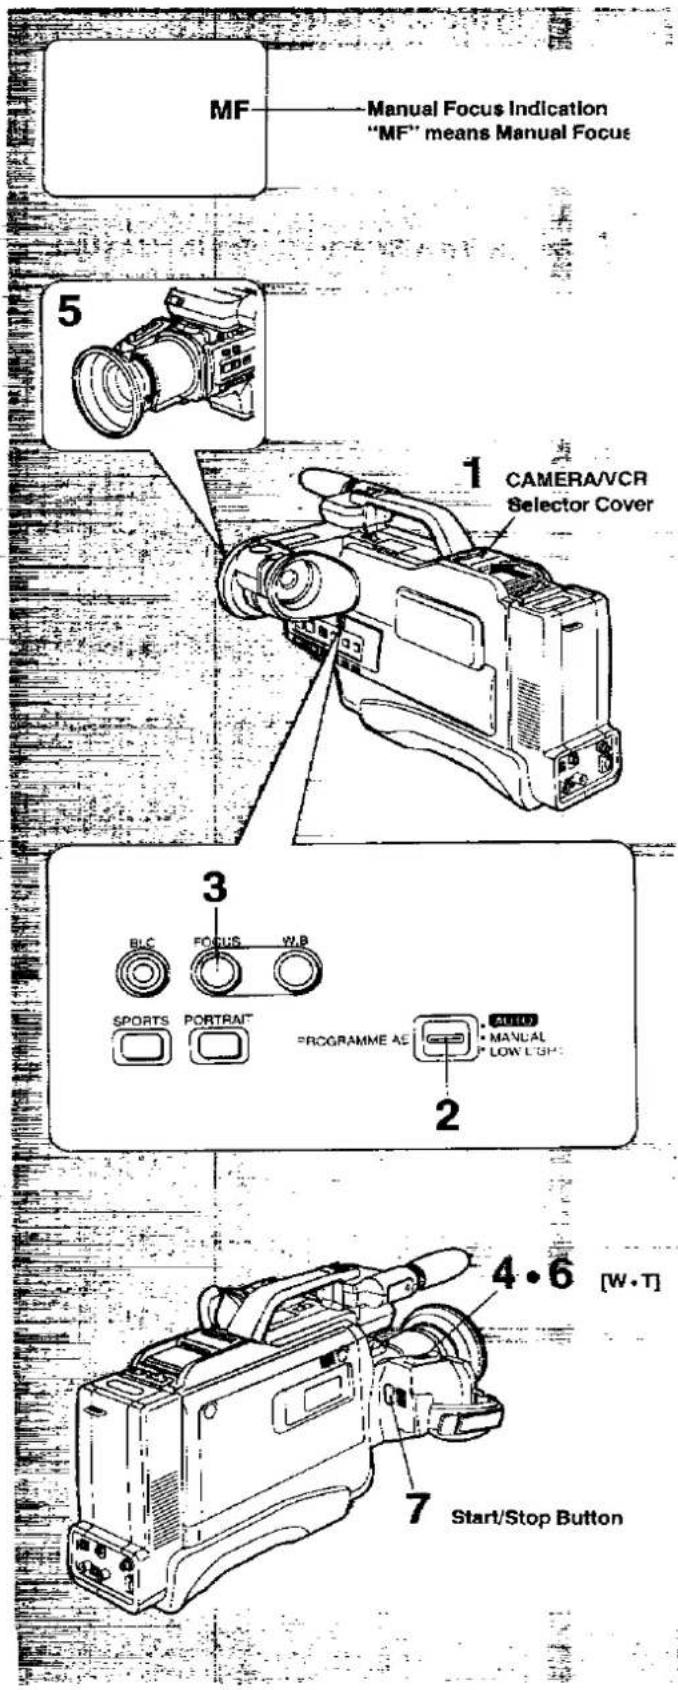
text_image
MF Manual Focus Indication "MF" means Manual Focus 1 CAMERA/VCR Selector Cover 3 BLC FOCUS W.B SPORTS PORTRAIT PROGRAMME AC 2 AMULO MANUAL LOW LIGHT 4.6 [W·T] 7 Start/Stop Button2 How to Film with the Manual Focus Mode
Note:
When using the Manual Focus Mode, always adjust the lens with the Zoom [T] Button in the maximum tele setting. This will ensure that the subject remains precisely focused throughout the zoom range from the maximum tele to maximum wide-angle setting.
1 Slide the [CAMERA/VCR] Selector Cover to "CAMERA".
2 Set the Mode Selector Switch to "MANUAL".
3 Press the [FOCUS] Button.
The "MF" Indication appears in the Viewfinder.
4 Press the [T] Zoom Button to zoom in on the subject to be focused.
5 Turn the Focus Ring to adjust the focus.
6 Press the [W] Zoom Button to zoom back as desired.
7 Press the Start/Stop Button.
The filming starts.
■ How to Change back to the Auto Focus Mode
Press the [FOCUS] Button or set the Mode Selector Switch to "AUTO".
The "MF" Indication disappears from the Viewfinder.
How to Film Fast-Moving Subjects
text_image
SPORT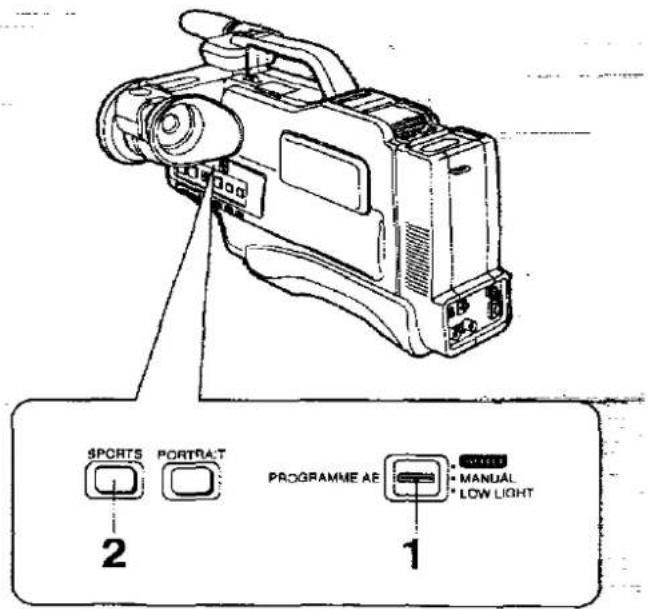
text_image
SPORTS PORTRAT PROGRAMME AE MANUAL * LOW LIGHT 1 2■ Using the Sports Mode
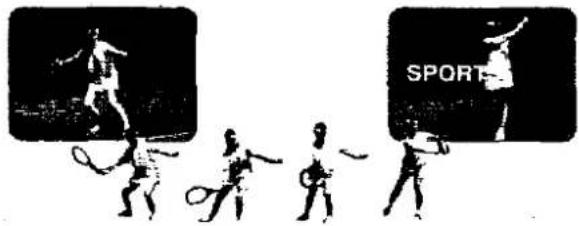
In the Sports Mode, the shutter speed is automatically adjusted (between 1/50 s and 1/500 s) according to the brightness of the subject, so images are sharp and stable even when filming fast movements.
When you play back scenes recorded in the Sports Mode on a VCR, you can enjoy still and slow motion playback of very sharp images with fine details.
1 Set the Mode Selector Switch to "MANUAL".
2 Press the [SPORTS] Button.
The "SPORTS" Indication appears in the Viewfinder.
■ To Return to the Normal Filming Mode
Reset the Mode Selector Switch to "AUTO"
Notes:
- The subject must be brightly lit by sunlight or other strong light, with little shade.
- When filming under fluorescent, mercury-vapor or natrium lamps, the picture will be adversely influenced by flickering.
- When a scene filmed in the Sports Mode is played back in the normal playback mode, the picture movement may not be as smooth as it usually is.
- If you film under weak lighting, the "SPORTS" Indication flashes to warn you that the Sports Mode may not be effective.
How to make Your Subject Stand out Sharply from the Background
text_image
P-RAIT SPORTS PORTRAIT PROGRAMME AE AUTO MANUAL LOW LIGHT 2 1■ Using the Portrait Mode
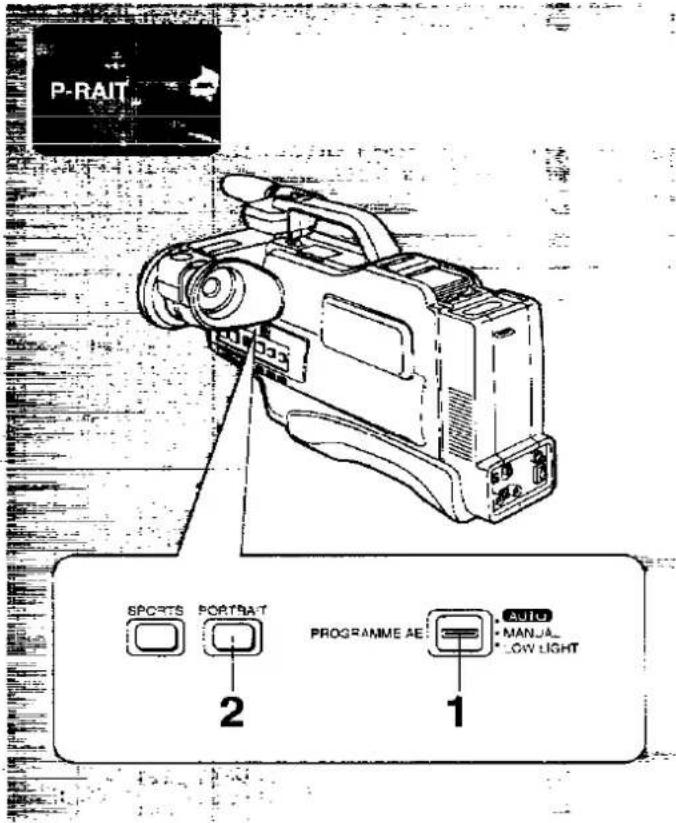
In the Portrait Mode, the iris is automatically set to the maximum aperture for a very small depth-of-field. This gives you a sharply focused subject in the centre of the picture with a blurred background and foreground.
1 Set the Mode Selector Switch to "MANUAL".
2 Press the [PORTRAIT] Button.
- The "P-RAIT" Indication appears in the Viewfinder.
- By pressing the T zoom Button increases the blurring of the background.
■ To Return to the Normal Filming Mode
Reset the Mode Selector Switch to "AUTO".
How to Film Dark Scenes More Brightly
text_image
↓ LOW AUTO MANUAL LOW LIGHT 1■ Using the Low Light Mode
Note:
Even if you use this mode for outdoor filming in the daytime, the result will be almost the same as when filming in the normal mode.
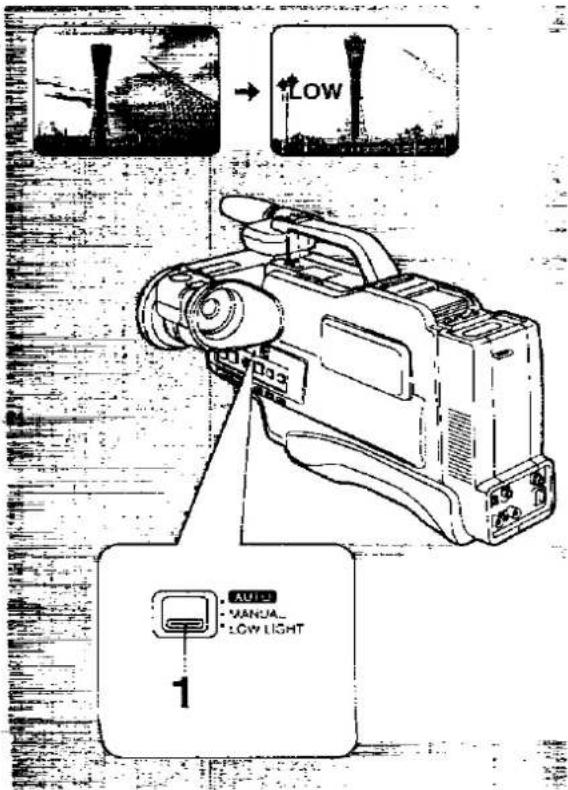
1 Set the Mode Selector Switch to "LOW LIGHT".
●The "LOW L" Indication appears in the Viewfinder.
● This increases the sensitivity and brightens up the picture
■ To Return to the Normal Filming Mode
Reset the Mode Selector Switch to "AUTO".
How to Film Backlit Scenes
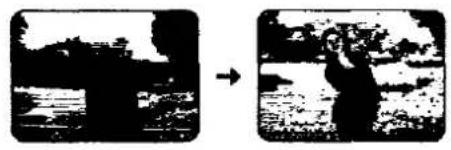
natural_image
Two black-and-white photos showing a person standing in water, with no visible text or symbols.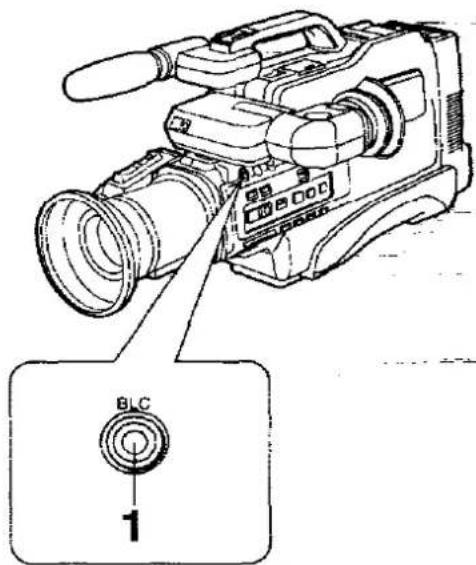
text_image
BLC 1This function makes it possible to brighten up the subject when filming a backlit scene.
1 Keep pressed the [BLC] Button.
■ To Cancel this Function
Release the [BLC] Button.
Cautions for Fliming Backlit Subjects
• The sky may become whitish.
- In case of extremely strong backlight, is may not be possible to brighten up the subject sufficiently.
- When filming with the sun striking the subject at an angle, start-shaped light reflexes may be recorded in the picture.
How to Film in the Dark (High Sensitivity Function)
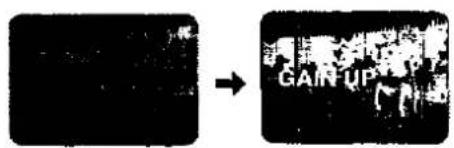
text_image
GAIN UP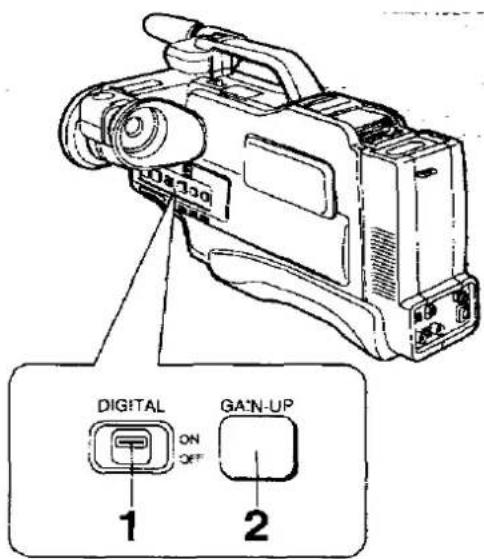
text_image
DIGITAL ON OFF 1 2 GA'N-UP1 Set the [DIGITAL ON/OFF] Switch to "ON".
2 Press the [GAIN-UP] Button.
●The "GAIN UP" Indication appears in the Viewfinder.
■ To Cancel this Function
Press the [GAIN-UP] Button again.
Notes:
- Some after-image distortion will occur.
- The Sports Mode Function and Portrait Function will be cancelled automatically.
- In the High-Sensitivity Mode, the focus must be adjusted manually since the Movie Camera is automatically put into the Manual Focus Mode.
How to Film with the Digital Wipe Function
text_image
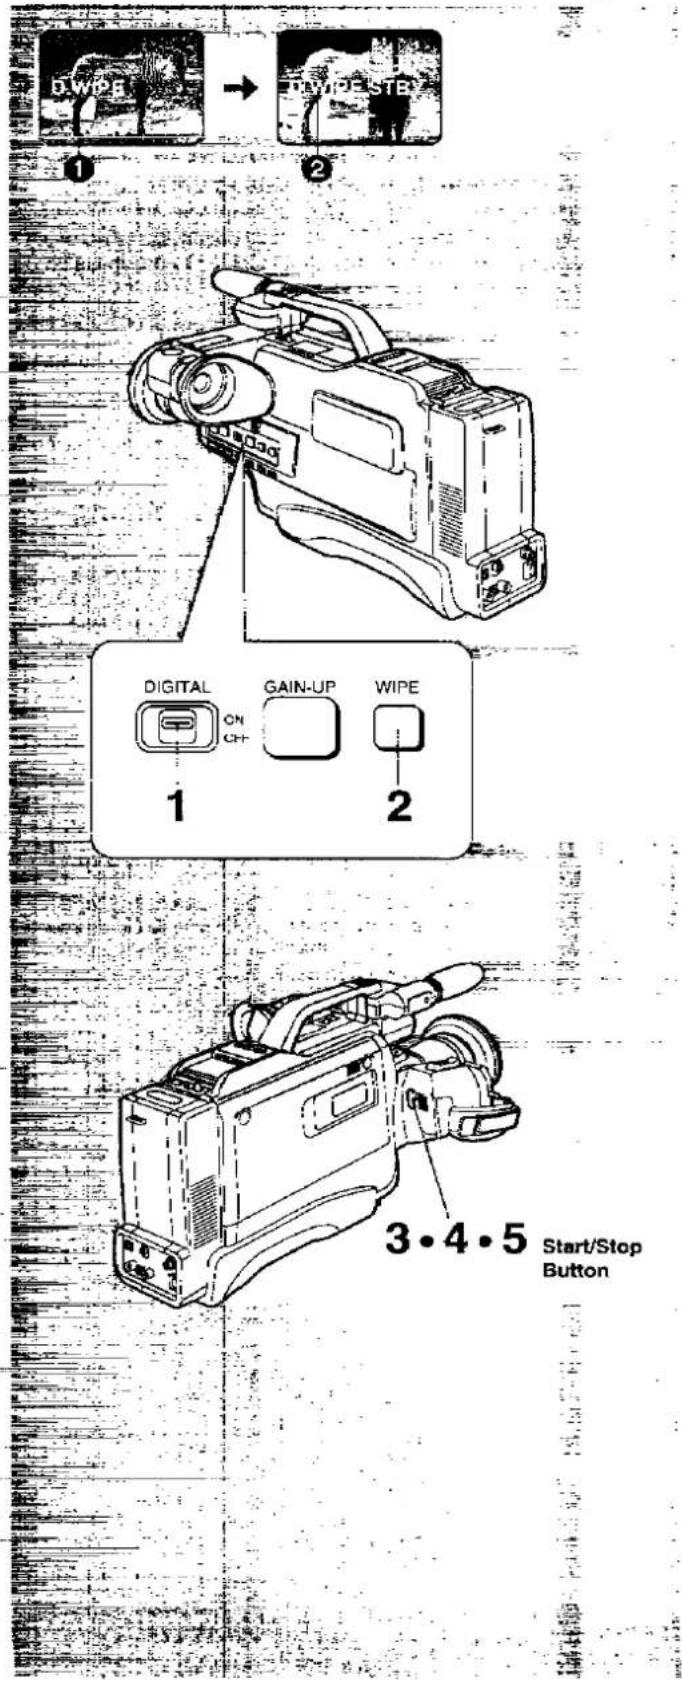
D.WIPE → T.WIPE.STER 1 2 DIGITAL ON CH GAIN-UP WIPE 1 2 3.4.5 Start/Stop ButtonThis function makes it possible to achieve a smooth transition from the last recorded scene to the next scene. When starting to film the new scene, a still picture of the last scene appears, and it then changes over to the moving picture of the new scene with Digital Wipe.
1 Set the [DIGITAL ON/OFF] Switch to "ON".
2 Press the [WIPE] Button.
●The "D.WIPE" Indication ① appears in the Viewfinder.
3 Press the Start/Stop Button.
• The filming starts.
4 Press the Start/Stop Button.
●The filming stops (Filming Pause Mode).
●The Indication ① changes to ②
- The last picture of the just recorded scene is kept in the digital image memory.
5 Press the Start/Stop Button.
- The picture (from the memory) appears as still picture. It is then gradually replaced from right to left by the moving picture of the new scene.
■ To Cancel the Digital Wipe Function
The [DIGITAL ON/OFF] Switch is set to "OFF" or press the [WIPE] Button.
Notes:
- Since the still picture is recorded from the digital image memory, the picture quality becomes slightly inferior to that of normally recorded pictures.
- Performing Recording Review does not erase the picture in the digital image memory.
Self-Timer Filming and Interval Filming
text_image
1 [TIMER/INTERVAL REC]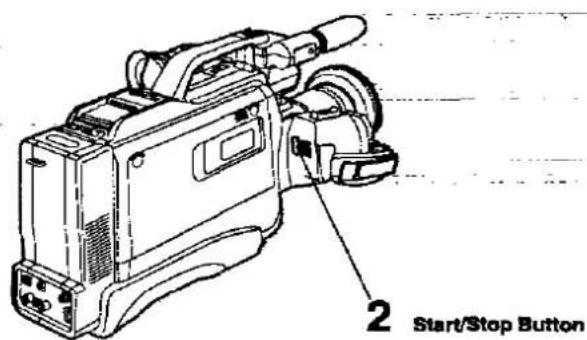
text_image
2 Start/Stop Button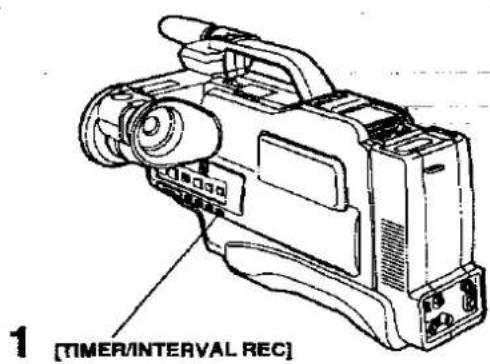
text_image
1 [TIMER/INTERVAL REC]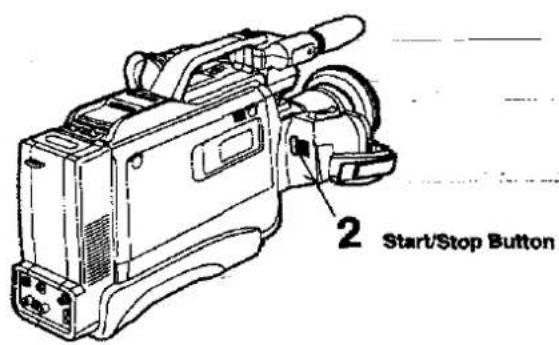
text_image
2 Start/Stop Button① Self-Timer Filming
When the Movie Camera is in the filming pause mode:
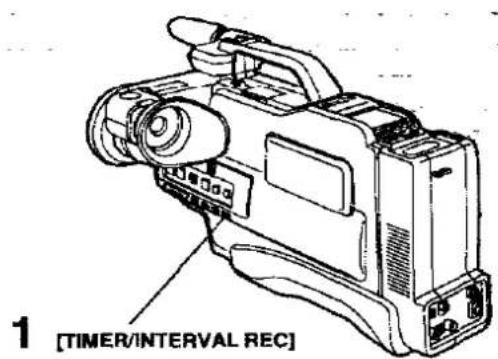
1 Press the [TIMER/INTERVAL REC] Button during filming pause mode to select the desired filming mode.
When the [TIMER/INTERVAL REC] Button is pressed once, "SLF20" will appear in the Viewfinder, and when the button is pressed twice, "SLF" will appear in the Viewfinder.
2 Press the Start/Stop Button.
- The self-timer filming will start 10 seconds later. - When "SLF20" is indicated, the filming will be made for 20 seconds. When "SLF" is indicated, the filming will be made until the tape reaches its end.
■ How to Stop the Self-Timer Filming Midway
Press the Start/Stop Button, and the self-timer filming will be cancelled.
② Interval Filming
This function automatically filmes scenes of approx. 1 second duration at 1-minute intervals. (However, the initially filmed scene continues for about 5 seconds.) The interval filming will continue for a maximum of 10 hours, after which the Movie Camera will turn itself off.
1 Press the [TIMER/INTERVAL REC] Button three times during filming pause mode. "INT" will appear in the Viewfinder.
2 Press the Start/Stop Button.
■ How to Stop the Interval Filming Midway
Press the Start/Stop Button, and the interval filming will be cancelled.
How to Playback via a TV Set
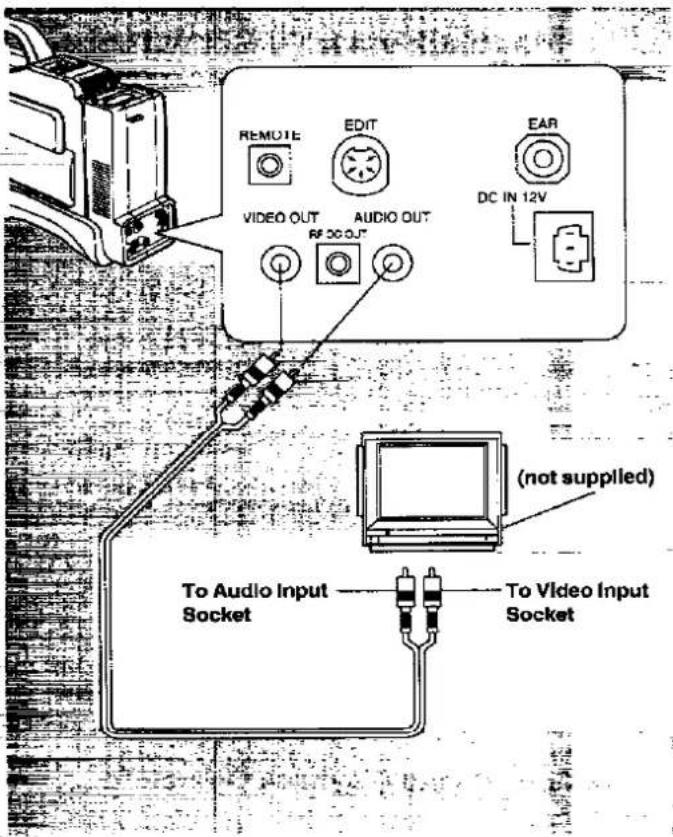
text_image
REMOTE EDIT EAR VIDEO OUT AUDIO OUT RF 300 OUT DC IN 12V (not supplied) To Audio Input Socket To Video Input Socket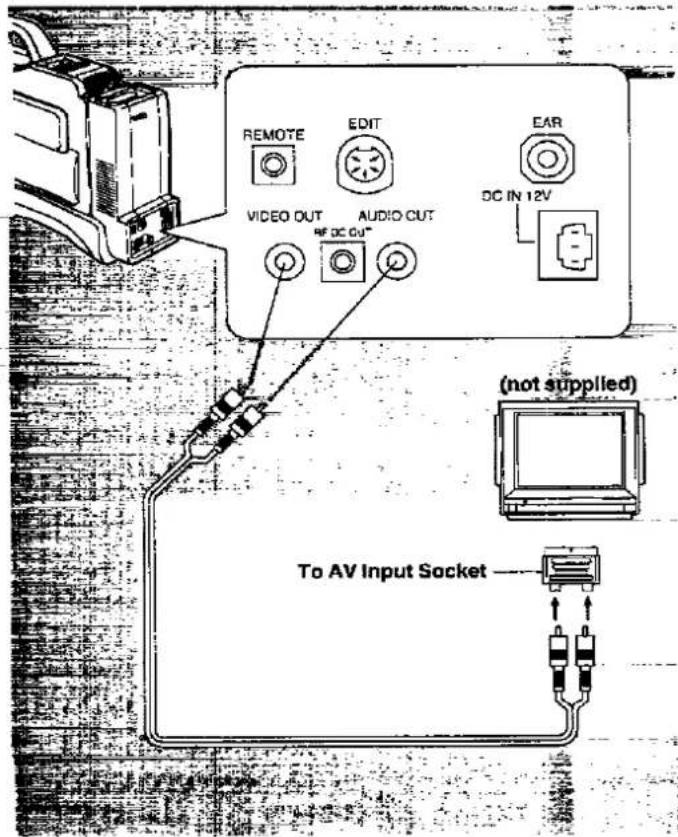
text_image
REMOTE VIDEO OUT AUDIO OUT RF DC OUT EDIT EAR DC IN 12V (not supplied) To AV Input Socket1 Playback via a TV Set with AV Input Socket (Using the Supplied AV Output Cable)
Turn off the Movie Camera and the TV set.
Connect the Movie Camera to the TV set.
■ Activate the Playback Operation (p. 15)
2 Playback via a TV Set with AV Input Socket (21-pin) (Using the Supplied AV Output Cable and 21-pin Conversion Connector
Turn off the Movie Camera and the TV set.
Connect the Movie Camera to the TV set.
■ Activate the Playback Operation (p. 15)
How to Playback via a TV Set (cont'd)
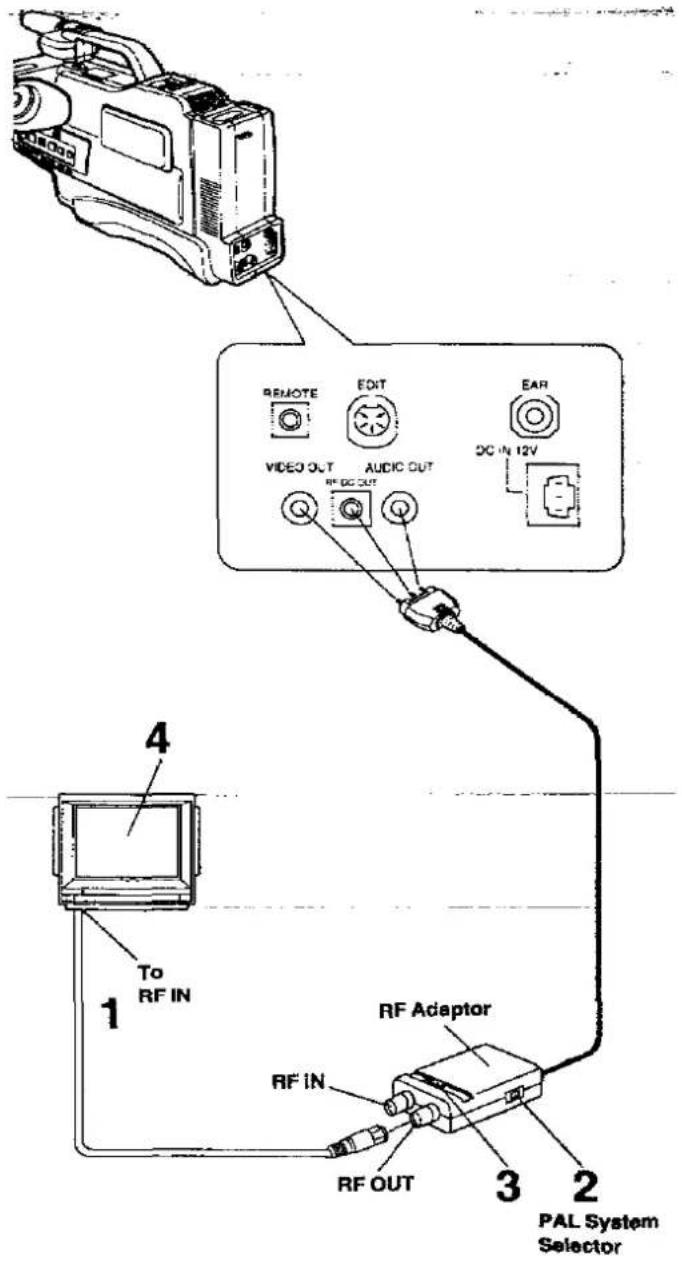
text_image
REMOTE EDIT EAR VIDEO OUT AUDIO OUT DC IN 12V RF DC OUT RF IN RF IN RF OUT 4 To RF IN 3 2 PAL System Selector③ Playback via a TV Set without AV Input Socket (Using the Optional RF Adaptor)
Turn off the Movie Camera and the TV set.
1 Connect the Movie Camera to the TV set.
2 Set the PAL System Selector Switch to the correct position.
- Set to "I" for the UK.
- Set to "G" for continental Europe. If set to the wrong position, the sound will be muted.
3 Set the TV/VTR Selector Switch on the RF Adaptor to:
VTR: For playing back a video cassette
TV: For watching TV
4 Select an unused TV programme position (channel).
- Follow the tuning procedure outlined in the instruction booklet for your TV set to re-tune your TV set to the UHF transmission channel 36. The camera picture now appears on the TV screen.
- If in doubt, consult your local video dealer
■ Activate the Playback Operation (p. 15)
How to Edit a Previously Recorded Tape
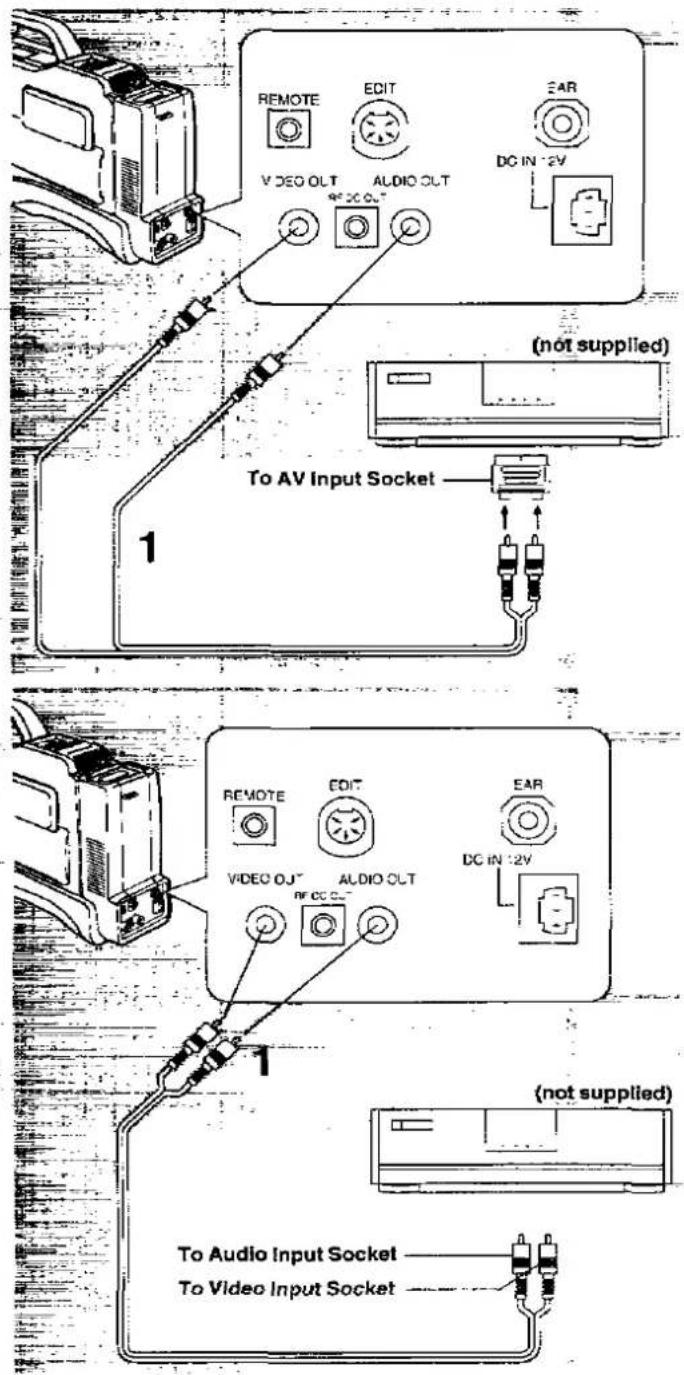
text_image
REMOTE V ECO OUT EDIT AUDIO OUT EAR DC IN 2V (not supplied) To AV Input Socket 1 REMOTE VIDEO OUT EDIT AUDIO OUT EAR DC IN 2V (not supplied) 1 To Audio Input Socket To Video Input Socket■ Connections
1 Connect the Movie Camera to a VCR.
Using the Supplied AV Output Cable and 21-pin Conversion Connector
■ Operations
Movie Camera
- Insert a recorded Video Cassette into the Movie Camera.
- Press the [PLAY] Button. (and if necessary the ▶/FF or [REW/□] Button to locate the scene from where the dubbing is to start.)
- Press the [PAUSE] Button at the point where the dubbing is to start.
VCR
- Insert a Video Cassette with intact erasure prevention tab into the VCR. If your VCR is equipped with SP and LP modes, it is recommended to use the SP mode.
- Press the Record Button to start recording.
Movie Camera
- Press the [PAUSE] Button to start the playback.
VCR
- Press the Pause/Still Button at the exact position where the recording is to end. The VCR is now in the Recording Pause Mode.
Movie Camera
- Locate the beginning of the next scene to be dubbed, and press the [PAUSE] Button at that point.
VCR
- Press the Pause/Still Button again to resume recording.
Repeat the operation steps 6 to 9 for each additional scene to be edited.
■ Connections
1 Connect the Movie Camera to a VCR.
Using the Supplied AV Output Cable
Operations
The operation is the same as the operation described above.
1)
text_image
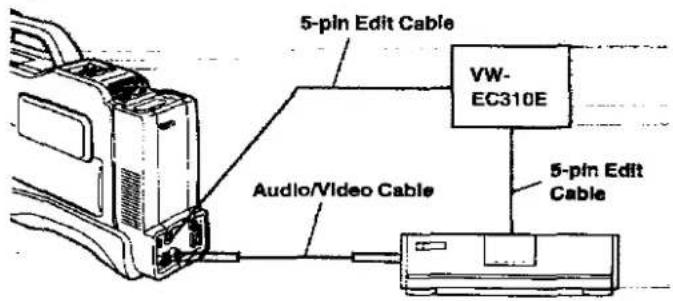
5-pin Edit Cable VW- EC310E Audio/Video Cable 5-pin Edit Cable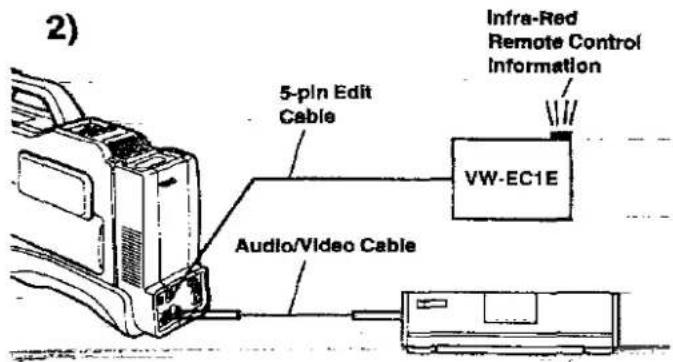
text_image
2) 5-pin Edit Cable VW-EC1E Audio/Video Cable Infra-Red Remote Control Information3)
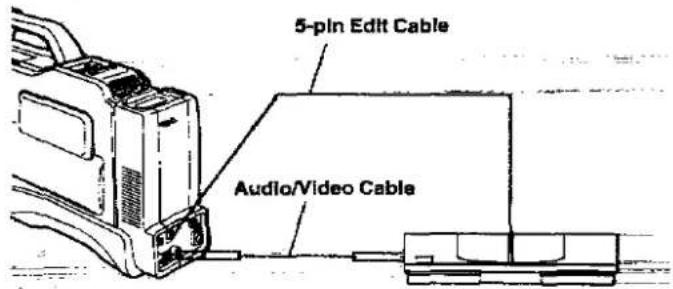
text_image
5-pin Edit Cable Audio/Video Cable■ [EDIT] Socket
Note:
The full instructions as written in the Operating Instructions of the Editing Controllers must be followed or the edit function may not operate correctly.
This may not be a fault of the Movie Camera.
By connecting a Panasonic Editing Controller (optional) to this socket or connecting a Panasonic VCR equipped with Edit Socket, highly precise and speedy editing becomes possible. The following types of Editing Controller can be used with this Movie Camera.
1) Connecting the Movie Camera to a Panasonic VCR equipped with 5-pin edit socket as the recording unit, using the Editing Controller VW-EC310E (optional).
- This Editing Controller can be programmed for automatic editing of up to 8 scenes
- When using this Editing Controller, be sure to edit with the "Standard-Speed Mode".
2) Connecting the Movie Camera to any brand of VCR equipped with Infra-Red Remote Controller as the recording unit, using the Editing Controller VW-EC1E (optional).
- This Editing Controller can be programmed for automatic editing of up to 4 scenes
- If the Movie Camera does not work correctly, turn it off. or disconnect and then reconnect the editing system again
3) Connecting the Movie Camera to a Panasonic VCR with built-in Editing Controller.
- Consult the operating instructions of the VCR for details.
- If incorrect operation occurs, turn the Movie Camera off or cancel the VCR's editing mode.
- "PROGRAM EDIT" Function is not possible with this Movie Camera.
Insert Editing
text_image
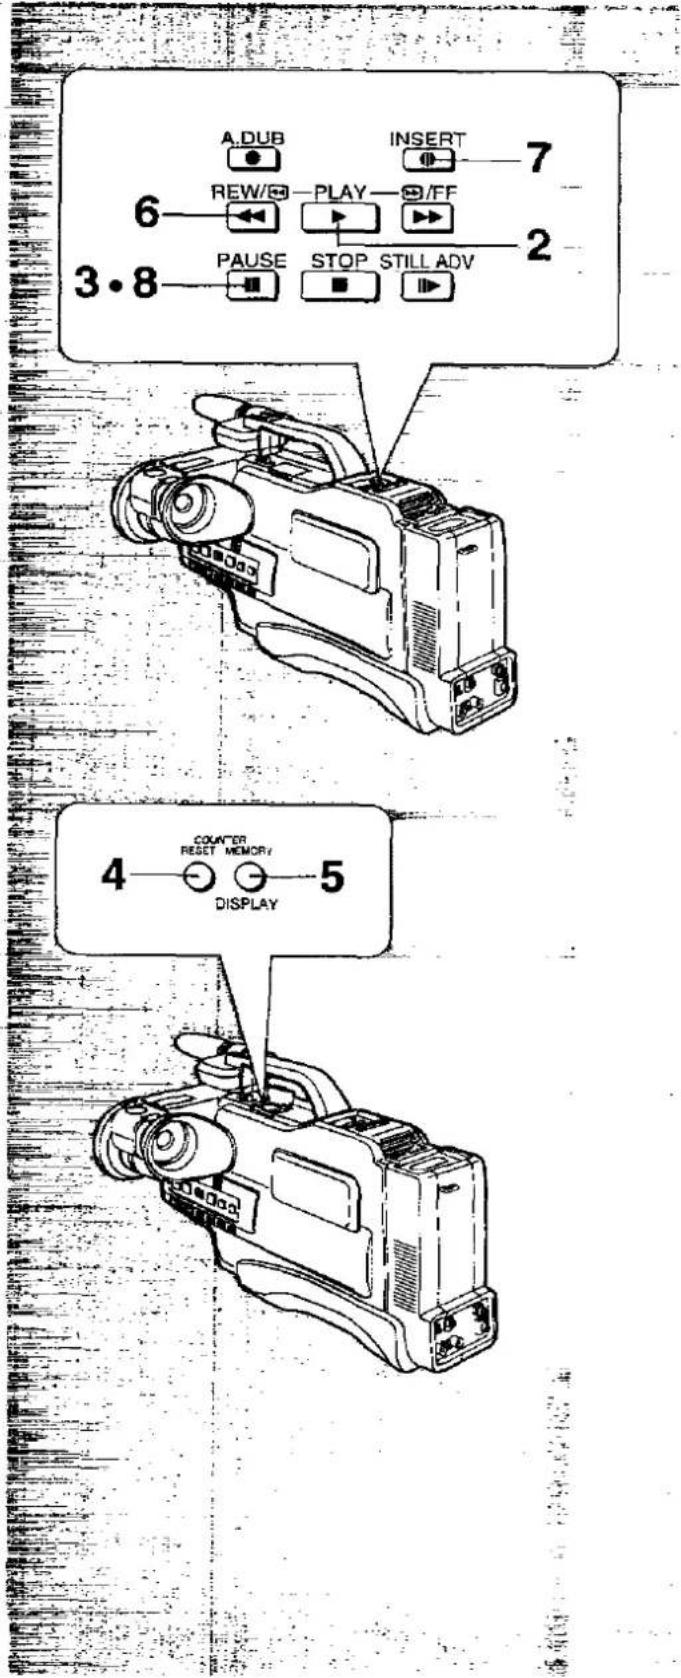
A.DUB INSERT 7 6 REW/FF PLAY 2 3.8 PAUSE STOP STILL ADV 4 COUNTER RESET MEMORY 5 DISPLAYInsert Editing lets you replace pictures on a recorded tape with new scenes. (The original sound remains on the normal audio track.)
1 Insert the recorded cassette.
Insert a video cassette with intact tab.
If the tab is removed, cover the hole with adhesive tape. (p. 8)
2 Press the [PLAY] Button.
Playback the tape to locate the point where you wish to finish the Insert Editing.
3 Press the [PAUSE] Button.
4 Press the [RESET] Button.
5 Press the [MEMORY/DISPLAY] Button.
The indication "M 0000" appears in the Viewfinder.
6 Press the [REW/←] Button.
Rewind the tape to locate the point where the Insert Editing is to start, and release the button at that point.
7 Press the [INSERT] Button.
●The "INST III" Indication appears in the Viewfinder.
8 Press the [PAUSE] Button again.
The Insert Editing starts.
•The "INST>" Indication appears in the Viewfinder.
The Insert Editing will automatically finish at the point where the counter indicates "M 0000".
To stop the Insert Editing midway, press the [PAUSE] Button.
Audio Dubbing
text_image
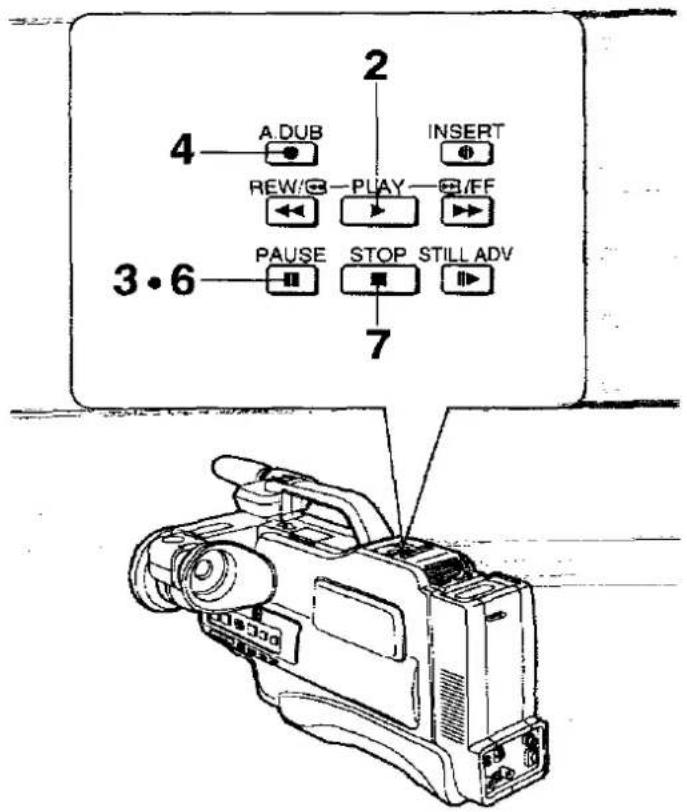
2 4 A.DUB INSERT REW/○ PLAY ○/FF 3·6 PAUSE STOP STILL ADV 7Audio Dubbing can be performed by using the built-in microphone or an external microphone.
1 Insert the recorded cassette.
Insert a video cassette with intact tab.
If the lab is removed, cover the hole with adhesive tape. (p. 8)
2 Press the [PLAY] Button.
Playback the tape to locate the point where you wish to start the Audio Dubbing
3 Press the [PAUSE] Button.
4 Press the [A.DUB] Button.
•The "A.DUB II" Indication appears in the Viewfinder.
5 Operate the audio source unit.
6 Press the [PAUSE] Button again.
The Audio Dubbing starts.
7 Press the [STOP] Button.
• The Audio Dubbing starts.
- The "A.DUB >" Indication appears in the Viewfinder.
Cautions
Please read these cautions before operating the Movie Camera and its accessories.
Video Head Clogging
The video heads are the means by which the Movie Camera places picture signals on the tape during recording, and reads picture signals from the tape during playback. If these heads become dirty and clogged from long use, the signals can no longer be recorded or played back correctly. This is the case, if the sound of a tape during playback is reproduced normally, but the picture is not visible or greatly distorted. When such symptoms occur, have the Movie Camera checked by qualified service personnel.
This Movie Camera is equipped with Head Clogging Detection Function. When the heads are clogged, the "×" Indication in the Viewfinder will appear. As the accumulation of dirt on the heads may be dislodged by the movement of the tape, it is possible that this indication sometimes appears, but may not reappear on the next recording start.
The Head Clogging Detection Function will be activated when the filming is started from the filming pause mode. However, it will not be activated when filming immediately after replacing the cassette and after playing back some part of the tape.
If Condensation Forms Inside the Movie Camera
Condensation (dew) forms when warm air comes in contact with a cold object, for example on a window in a heated room in winter. Condensation may also form in the Movie Camera and damage the tape and the video heads, if:
• The Movie Camera is in a room where the heater has just been turned on.
●The Movie Camera is in a room with steam or high humidity.
- The Movie Camera is brought from cold surroundings into a well-heated room.
- The Movie Camera is suddenly brought from cool surroundings, such as an air-conditioned room or car, to a place which is hot and humid.
- When condensation has formed inside the Movie Camera, the "DEW" Indication in the Viewfinder will flash and few seconds later, the Movie Camera will turn itself off to protect the tape and the video heads.
After a while, turn the Movie Camera on again and make sure that the "DEW" Indication is not displayed any more. Then, wait about 1 hour before operating the Movie Camera again. Depending on the surrounding conditions, it may take several hours before the Movie Camera can be used again.
- As condensation forms gradually, it may take about 10–15 minutes before the Movie Camera turns itself off after a change of working environment.
- In an extremely cold place, condensation may freeze and turn into frost. In this case, it may take quite some time for the frost to melt, turn into dew and evaporate.
- When you bring the Movie Camera from a very cold place, e.g. the ski slopes, into a heated room, keep it in a tightly closed plastic bag or similar to prevent condensation from forming inside the Movie Camera.
Cautions for the Movie Camera
In case of abnormal operation of this Movie Camera (e.g. if it emits smoke or some unusual smell), immediately stop the operation and consult qualified service personnel.
■ Cautions for Use:
- Do not disassemble or reconstruct this Movie Camera. Some internal parts of this Movie Camera have high voltage. Diassembling or reconstructing is very dangerous and may cause serious damage to the Movie Camera.
●Never put any objects inside.
Never insert any metal objects or inflammable material through any of the openings (cassette compartment, etc.). If any liquid is spilled into the Movie Camera, immediately stop the operation and consult qualified service personnel.
Operating the Movie Camera with some foreign matter inside may cause malfunction or electric shock.
If children have access to this Movie Camera, special attention should be paid to this point.
- Never aim the lens at the sun because this could cause permanent damage to the CCD image sensor. Such damage could manifest itself in reduced picture quality or could make filming altogether impossible. Attention should be paid to this point not only during filming but during other operations as well.
- Never subject the Movie Camera to strong vibrations or shocks. Shocks during use may result in picture distortion.
- Do not use this Movie Camera during a thunderstorm, especially not in a large open field, because this would be very dangerous. If used indoors during a thunderstorm, be sure to disconnect the AC Adaptor from the mains outlet.
- Never use this Movie Camera with the cassette compartment facing down, because this could cause uneven winding, slacking and damage to the tape.
- Do not use the viewfinder as a carrying handle when transporting the Movie Camera.
Cautions (cont'd)
■ Cautions for Surroundings:
- Do not use the Movie Camera in places where water or some other liquid could splash on it.
- Do not operate the Movie Camera very near a TV set or radio, because this could negatively influence the picture and sound reception.
- Keep the Movie Camera away from areas with strong electric fields, because they could impair the proper functioning of the Movie Camera and cause picture distortion.
- Keep the Movie Camera away from objects emitting high temperature, such as heaters.
- Do not insert video cassettes into the Movie Camera or take them out from it in dusty places.
- It is not possible to use the Movie Camera in the water. If it is accidentally dropped into water (or some other liquid), disconnect it from the AC Adaptor, take it out of the water, and then consult qualified service personnel.
■ Cautions for Connections:
- Before connecting, confirm that all systems are turned off and that the connecting cables are not damaged.
- Do not expose the connection cables to high temperature, chemicals and objects with sharp edges; also do not bend the cables excessively.
■ Cautions for Storage and Transportation:
- Do not leave the Movie Camera in places exposed to direct sunlight (e.g. a closed car in summer) or near heaters. Excessive heat could deform the body or cause other damage to the Movie Camera.
- The packing materials in which the Movie Camera is shipped are designed for optimum protection. Keep them for transporting the Movie Camera in the future.
Store the Movie Camera and video cassettes away from
magnetized objects such as toys containing motors and batteries
- Do not leave the Movie Camera in places with high temperature and high humidity such as in a closed car or in places with steam or oily smoke.
If the Movie Camera is left in a damp place for a long time, mold could form on and damage the lens.
- Do not leave the Movie Camera in contact with rubber or plastic products for a long time, because it could cause deformation and discoloration of the body.
■ After Use:
- Be sure to attach the Lens Cap.
- When the Movie Camera is connected to the AC Adaptor, turn the Movie Camera off before unplugging the AC Adaptor.
- When the Movie Camera is not going to be used for a longer period of time, remove the cassette before turning the Movie Camera off.
- When the Movie Camera is not going to be used for a long period of time, turn the Movie Camera on occasionally to prevent malfunction.
Cautlons for the Battery Pack
The functin of the Battery Pack is based on a chemical reaction. Pay attention to the following points when using it.
- If charged at low temperatures, the operation time of the Battery Pack becomes shorter.
- For recharging, use the specially designed AC Adaptor only.
- Charge the Battery Pack within a temperature range of 10°C–35°C. At higher or lower temperatures, the Battery Pack cannot be charged to its full capacity.
- Do not recharge the Battery Pack when it is already fully charged
- If, in spite of normal recharging, the operation time of the Battery Pack becomes too short for practical use, the service life of the Battery Pack has reached its end. Replace it with a new one.
- During operation of this unit or during recharging, the Battery pack may become warm. However, this does not pose any problem.
- When the Battery Pack is not being used, remove it from the Movie Camera or the AC Adaptor.
- Do not short-circuit the connectors nor disassemble or reconstruct the Battery Pack.
- Do not throw the exhausted Battery Pack into a fire.
■ Cautions for Storing the Battery Pack:
- Do not store the Battery Pack in contact with metal objects because they could short-circuit the connectors of the Battery Pack and exhaust it.
- Do not leave the Battery Pack at places with high temperature, e.g. on the dashboard of a car or other places exposed to direct sunlight.
Cautions for the AC Adaptor
- Before connecting the AC Adaptor to an AC wall outlet, confirm that the voltage on the rating plate matches your local AC mains voltage.
- When not using the AC Adaptor, unplug its mains cable
- Do not use the AC Adaptor for any purposes other than supplying the unit with power and charging the Battery Pack.
- When unplugging the mains cable, pull it by the plug, not by the cable.
- When listening to a radio while the AC Adaptor is in operation, the radio reception may be distorted. In this case, move the radio farther away from the AC Adaptor.
- Do not place any heavy objects on the AC Adaptor.
●Before cleaning the AC Adaptor, make sure that it is disconnected from the AC mains socket.
Be sure to obtain a warranty card from the shop at the time of purchase, and make sure that it contains all necessary information.
Before Requesting Service
| Items | Symptom | Cause | Action | Reference pages | |
| Power | Using the Battery Pack | ●Movie Camera does not turn on. | ●Not inserted. | ●Insert it correctly. | 0 |
| ●Not charged. | ●Charge it. | 5 | |||
| ●Movie Camera turns off soon. | ●Exhausted | ●Use a fully charged one. | 5 | ||
| ●Filming was paused for more than 6 minutes. | ●Slide the [POWER] Switch backward to turn the Movie Camera on. | 12 | |||
Using the AC Adaptor | ●Movie Camera does not turn on. | ●Not connected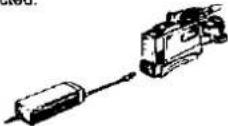 | ●Connect it correctly.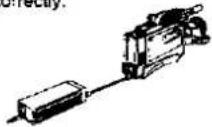 | 20 | |
| Using any of the Power sources | ●Movie Camera turns off soon. | ●Dew has formed inside. | ●Wait several hours. | 47 | |
| Flaming | 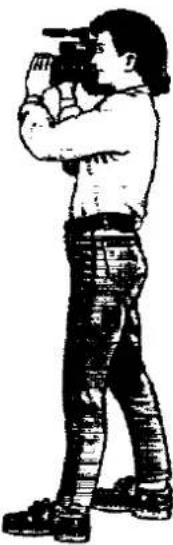 | ●No picture in the Viewfinder. | ●Movie Camera is not turned on. | ●Turn the Movie Camera on, and slide the [CAMERA/VCR] Selector Cover to "CAMERA".  | 12 |
●Lens Cap is attached. | ●Remove it.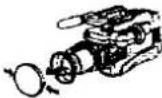 | 10 | |||
| ●Indications in the Viewfinder are not clear. | ●Eyepiece Corrector is not adjusted. | ●Adjust it.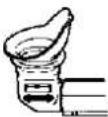 | 9 | ||
| ●Lens is dirty. | ●Clean it. | 17 | |||
| ●Filming cannot be started | ●The erasure prevention tab of the inserted cassette is broken out.  | ●Cover the tab hole with adhesive tape. 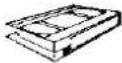 | 8 | ||
●No cassette is inserted. | ●Insert a cassette with intact erasure prevention tab. | 8 | |||
| ●Tape has reached its endEND | ●Insert a new cassette. | 8 | |||
Before Requesting Service (cont'd)
| Items | Symptom | Cause | Action | Reference pages | |
| Flaming | 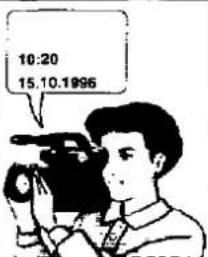 | Date and time cannot be recorded. | Date and time are not set. | Set the date and time. | 24 |
| Date and time are not displayed in the Viewfinder. | Date/Time Button was not pressed. | Press the Date/Time Button. | 25 | ||
| Playback (picture) | 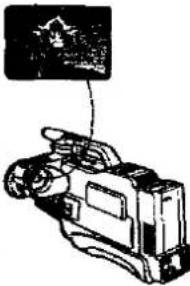 | No picture. | Movie Camera is not turned on  | Turn the Movie Camera on, and slide the [CAMERA/VCR] Selector Cover to "VCR".   | 15 |
| Not connected or incorrectly connected. | Connect correctly. | 41. 42 | |||
| Wrong channel is selected on TV set. | Select the correct channel. | 42 | |||
| Picture is not in colour or distorted. | Tracking is not adjusted. | Adjust the tracking  | 15 | ||
| Picture contains noise bars. | Cue. Review or Playback is activated. | It is not a malfunction. | 16 | ||
Colour Temperature and White Balance
The colour temperature of the light source is measured in Kelvin. The higher the Kelvin value is, the more bluish is the light; the lower the value, the more reddish is the light. This is not directly related to the brightness.
The table below shows the relationship between natural light, artificial light and colour temperature.
| Natural light | Colour Temperature | Artificial Light | White Balance Adjustment | ||
| ●Blue sky | 10,000 K | Bluish colourRange in which the Auto White Balance Adjustment is effectiveWhitish colourReddish colour | |||
| ●Slightly overcast sky |  | 7,000 K~8,000 K | 8,000 K~9,000 K | ●TV screen | |
| ●Cloudy sky (Rain) |  | 6,000 K |  | ||
| ●Sunlight |  | 5,000 K | |||
| 4,800 K | ●Fluorescent lamp (white)  | ||||
| ●1~2 hours after sunrise or before sunset: | 3,000 K~4,200 K | 2,500 K~3,500 K | ●Fluorescent Lamp (not white) or studio lamp  | ||
| ●Sunrise or sunset | 2,000 K~2,500 K | 2,000 K~2,800 K | ●Halogen light bulb  | ||
| 2,000 K~2,500 K | ●Tungsten lamp [K2xK] | ||||
| 1.500 K~2,000 K | ●Candle-light | ||||
Quick Reference Guide to the Indications in the Viewfinder
The following indications are displayed in the Viewfinder to inform you about the condition of the Movie Camera.
1 Warning/Alarm Indications in the Viewfinder
| Viewfinder | Conditions |
| When condensation has formed inside the Movie Camera, the "DEW" Indication will flash and a few seconds later, the Movie Camera will turn itself off.-Press the Cassette Eject Button, remove the Video Cassette and wait until the "DEW" Indication disappears.Video Head Clogging. (p. 18, 47) | |
| The "—" Indications begin to disappear one after another as the power of the Battery Pack weakens.When the last bar has disappeared, the Battery Indication "←→" will flash.-Replace with a fully charged Battery Pack.When a newly charged Battery Pack is inserted, this indication initially always shows E----F, regardless of the Battery Pack charging condition. | |
| There is no cassette inside, or the tab of the inserted cassette is broken out. The indication flashes to warn that filming is not possible.-Insert a video cassette with intact erasure prevention tab. If the tab is broken out, seal the hole with adhesive tape. | |
| When the Built-in lithium Battery (for the auto date function, etc.) is exhausted, this indication will flash for 10 seconds after the Movie Camera has been turned on. | |
| END | During filming: The tape has reached its end. Replace the video cassette with a new one whose tab is intact. |
| It appears briefly while an index signal is being recorded. |
② Filming/Playback Indications
| Viewfinder | Conditions |
| Filming Mode Indications"REC" During Filming"PAUSE" During Filming Pause"CHK" During Rec ReviewTape Running IndicationsDepending on the operation being currently performed by the Movie Camera, one of the following indications appears.">" During PlaybackCamera Search(in forward direction)"II" During Still Playback"<<" Rewind/Review ModeCamera Search(in reverse direction)"D>>" Fast Forward/Cue ModeINST D> Insert Editing modeINST II Insert Editing Pause modeA.DUB D> Audio Dubbing modeA.DUB II Audio Dubbing Pause mode | |
| Manual White Balance Mode (p. 32) | |
| Self-Timer and Interval IndicationsAt every press of the [TIMER-INTERVAL REC] Button, the indication changes in the following order:→no indication→"SLF20"→SLF"→"INT" | |
| Date and Time Mode (p. 25)The Date and Time Indication can be removed from the Viewfinder with the [DATE/TIME] Button. | |
| Manual Focus Mode (p. 35)"MF": means Manual Focus | |
| Magnification Ratio IndicationIt appears when the Movie Camera is turned on. |
Quick Reference Guide to the Indications In the Viewfinder (cont'd)
| Viewfinder | Conditions |
| 0000 | Tape Counter (p. 21) |
| M0000 | Tape Counter with activated Memory Function."M": means Memory (p. 21) |
| LD:00.00 | The Lap Time Counter counts up only during filming. (p. 21) |
| SPORTS | When the [SPORTS] Button is pressed, the "SPORTS" Indication appears. |
| P-RAIT | When the [PORTRAIT] Button is pressed, the "P-RAIT" Indication appears. |
| LOW L | When the Mode Selector Switch is set to [LOW LIGHT], the "LOW L" Indication appears. |
| D.WIPE | When the [WIPE] Button is pressed, the "D.WIPE" Indication appears. |
| GAIN UP | High Sensitivity IndicationWhen the [GAIN-UP] Button is pressed, the "GAIN UP" Indication appears. |
| D.FADE | When the [DIGITAL ON/OFF] Switch is set to "ON" and the [D.FADE] Button is pressed, the "D.FADE" Indication appears. |
| D.ZOOM | Digital Zoom Mode (p. 26)The range of the Digital Zoom can be changed with the [DIGITAL ZOOM] Button."D": means Digital |
Controls and Functions
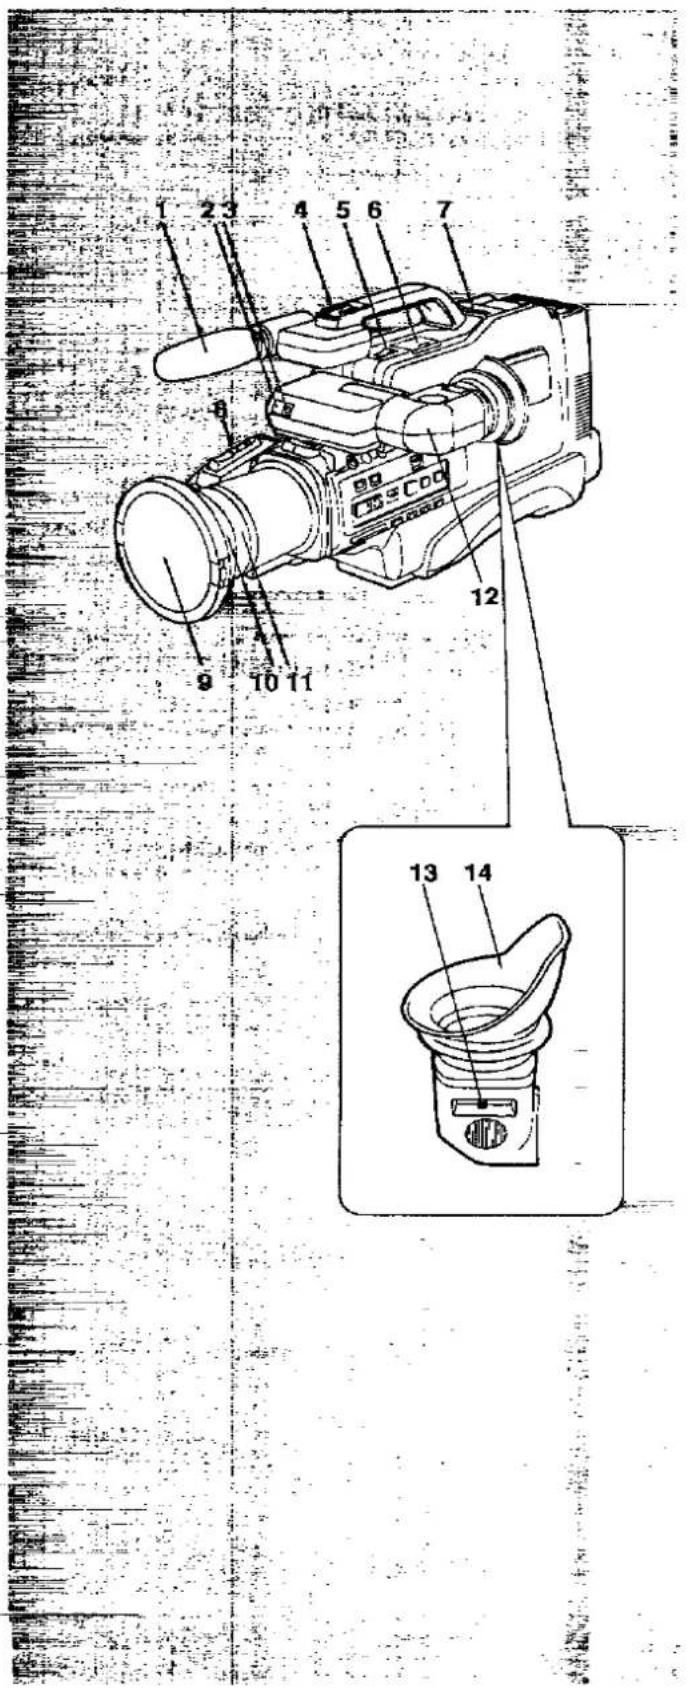
text_image
Technical diagram of a digital camera with numbered parts for identification and assembly reference.1 Built-in Microphone
2 White Balance Sensor Window
3 Tally Lamp
It is lit during filming to inform the people in front of the Movie Camera that filming is under way.
4 Accessories Shoe
The Character Generator (optional) or other accessories can be attached to this accessories shoe.
5 Power Switch [POWER]
For turning the Movie Camera on and off.
6 General Operation Controls
7 CAMERA/VCR Selector Cover [CAMERA/VCR]
8 Zoom Buttons
Press these buttons to gradually zoom in and out.
9 Lens Cap
10 Lens Hood
11 Focus Ring
After selecting the manual focusing mode with the [FOCUS]
Button, adjust the focus to the desired subject by turning this ring.
12 Viewfinder
The subject in front of the camera can be seen on the viewfinder screen.
13 Eyepiece Corrector
Adjust the Eyepiece Corrector to your eyesight so that the picture and indications in the Viewfinder become as clear and sharp as possible.
14 Eyecup
Controls and Functions (cont'd)
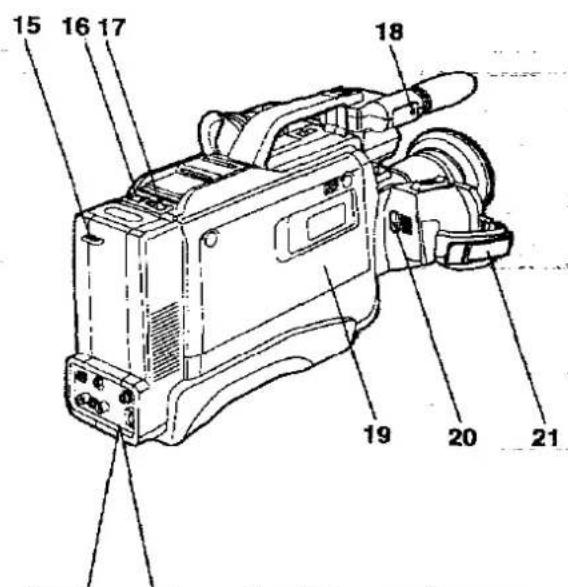
text_image
15 16 17 18 19 20 21
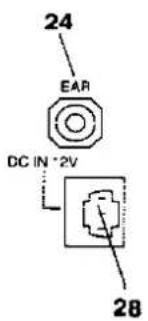
text_image
24 EAR DC IN *2V 28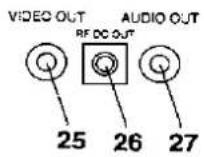
15 Shoulder Strap Holders
16 Tape Eject Button [TAPE EJECT] To insert or take out a video cassette. press this button.
17 Battery Pack Eject Lever [BATT.EJECT] Slide this lever to the right to remove the Battery Pack.
18 External Microphone Socket [MIC] If you want to use an external microphone, connect it to this socket (in this case, the built-in microphone will be deactivated).
19 Cassette Compartment Insert a video cassette into this compartment.
20 Start/Stop Button Press this button to start and stop filming a scene.
21 Grip Belt
22 Remote Control Socket [REMOTE] Connect a Pause Remote Control (optional) to this socket.
23 Edit Socket [EDIT] Connect an Editing Controller (optional), etc. to this socket.
24 Earphone Socket [EAR]
25 Video Output Socket [VIDEO OUT]
26 RF DC Output Socket [RF DC OUT]
27 Audio Output Sockets [AUDIO OUT]
28 DC Input Socket [DC IN 12 V] Connect the DC Input Cable to this socket.
29 Tripod Mounting When using a tripod for stable filming, attach the screw of the tripod to this mounting.
30 Character Generator Socket [CHAR.GEN] Connect a Character Generator (optional) to this socket.
31 Start/Stop Button Press this button to start and stop filming a scene for low angle filming.

text_image
Technical diagram of a video camera with labeled parts including 29, 30, and 31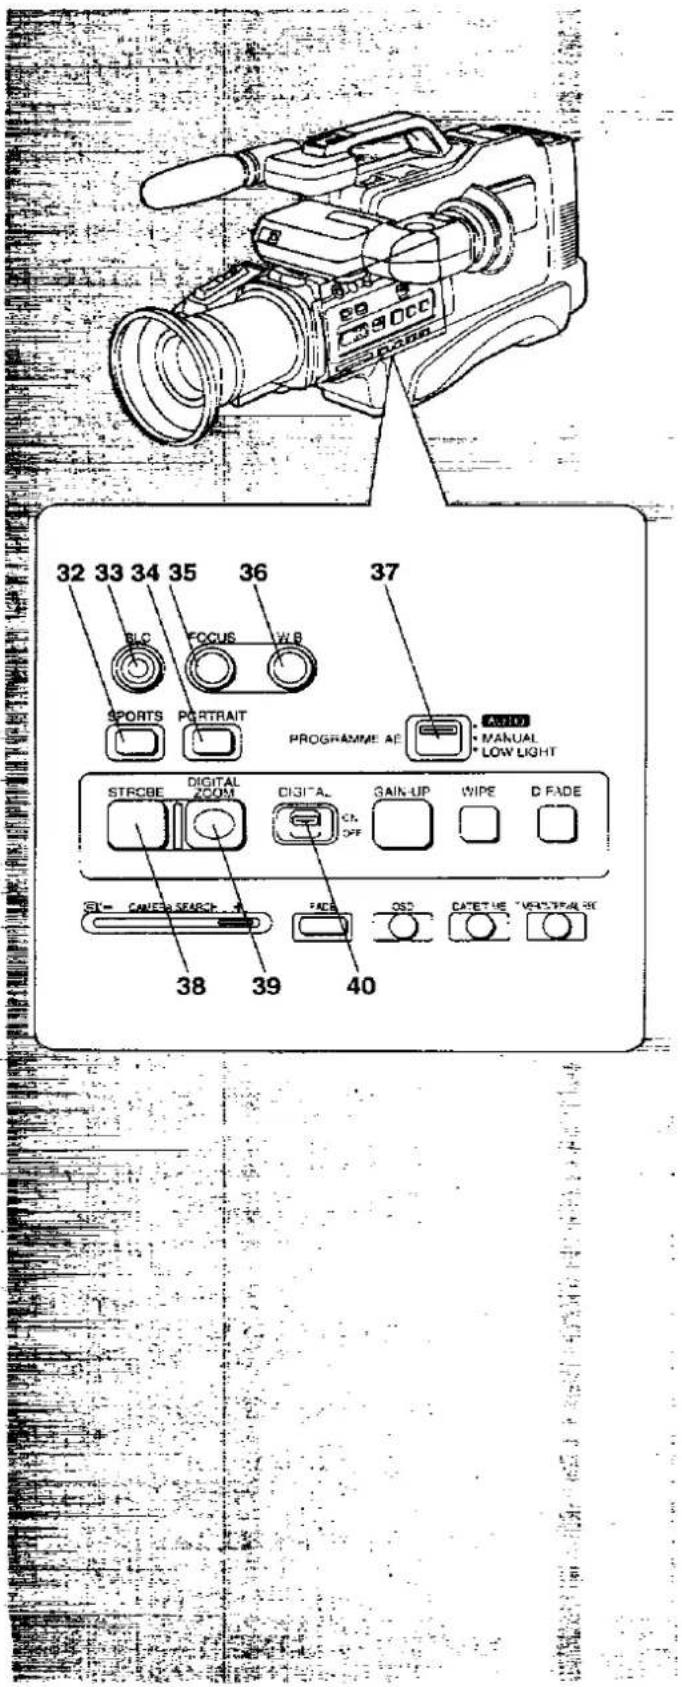
text_image
32 33 34 35 36 37 PLC FOCUS VLB SPORTS PORTRAIT PROGRAMME AF AUDIO MANUAL LOW LIGHT STRCBE DIGITAL ACOM DIGITAL GAIN-UP WIRE D FADE OFF ST-CANCE SPACING FACE OS2 CATETIME VECUPTABLE 38 39 4032 Sports Button [SPORTS]
Press this button to film fast-moving subjects.
33 Backlight Button [BLC]
Press this button to film backlit scenes.
34 Portrait Button [PORTRAIT]
Press this button to blur the background and the extreme foreground so that the subject will stand out sharply.
35 Focus Button [FOCUS]
Press this button to select manual focus adjustment for filming.
36 White Balance Button [W.B]
In the Manual Filming Mode, press this button to perform manual white balance adjustment.
37 Recording Mode Selector Switch
[AUTO/MANUAL/LOWLIGHT]
Use this selector switch to select the automatic, manual filming mode or Lowlight mode.
38 Strobe Button [STROBE]
When the [DIGITAL ON/OFF] Switch is set to "ON", press this Button to film with strobe effect.
39 Digital Zoom Button [DIGITAL ZOOM]
When the [DIGITAL ON/OFF] Switch is set to "ON", press this Button to use the Digital Zoom Function.
40 Digital Mode ON/OFF Switch [DIGITAL ON/OFF]
Set this Switch to "ON" when you want to use one of the Digital Filming Modes (Strobe, Digital Zoom, Gain Up, Wipe or Digital Fade)
Controls and Functions (cont'd)
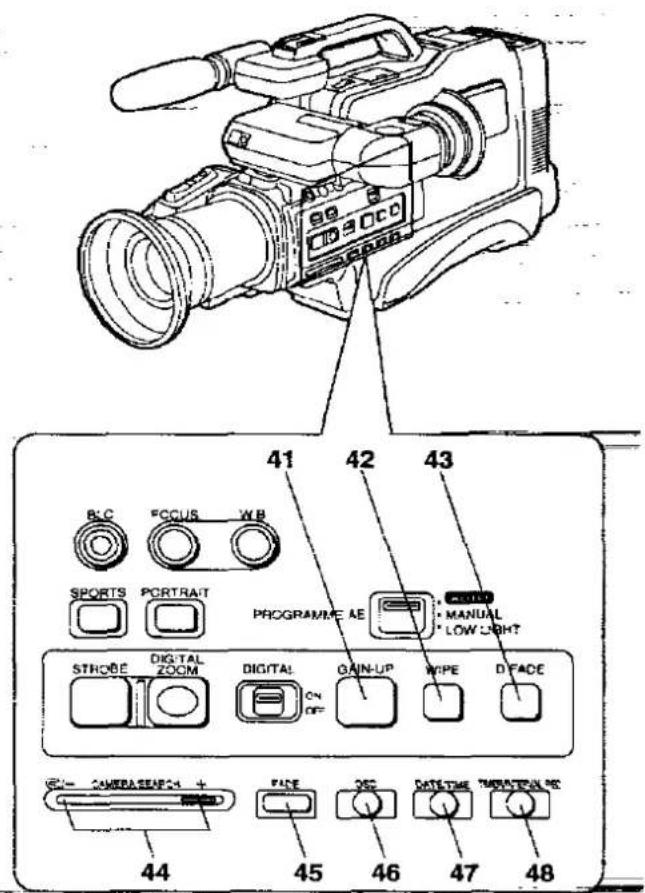
text_image
41 42 43 B:C *CCUS WB SPORTS PORTRAIT PROGRAMME AE C:MANUAL *LOW LIGHT STROBE DIGITAL ZOOM DIGITAL ON OF GAIN-UP WIPE D'FADE CAMERA SEASON + FACE OFF DATE TIME TOMATO/TH/NC 44 45 46 47 4841 Gain Button [GAIN-UP]
When the [DIGITAL ON/OFF] Switch is set to "ON", press this button to film with the Gain Up Function. When filming under weak lighting, this function brightens up the picture.
42 Digital Wipe Button [WIPE]
When the [DIGITAL ON/OFF] Switch is set to "ON", press this button for a horizontal wipe transition from a still picture of the last recorded scene to the moving picture of the new scene.
43 Digital Fade Button [D.FADE]
When the [DIGITAL ON/OFF] Switch is set to "ON". press this button to film with the Digital Fade Function
44 Camera Search Button [☐/- CAMERA SEARCH+]
Keep these buttons pressed during filming pause mode to playback recorded scenes at high speed in reverse direction or at normal speed in forward direction.
To check the last few seconds of the last recorded scene, press the - side of the [☐/- CAMERA SEARCH +] Button briefly.
45 Fade Button [FADE]
Press this button to fade out a scene and to fade in the following scene for a soft scene-to-scene transition.
46 On-Screen Display Button [OSD]
Press this button to make the indications in the Viewfinder disappear.
47 Date/Time Button [DATE/TIME]
Press this button to make the time and/or date appear in the Viewfinder and superimpose them onto the picture during filming.
48 Interval Button [TIMER/INTERVAL REC]
Press this button to activate the Self-Timer and Interval: Filming Functions.
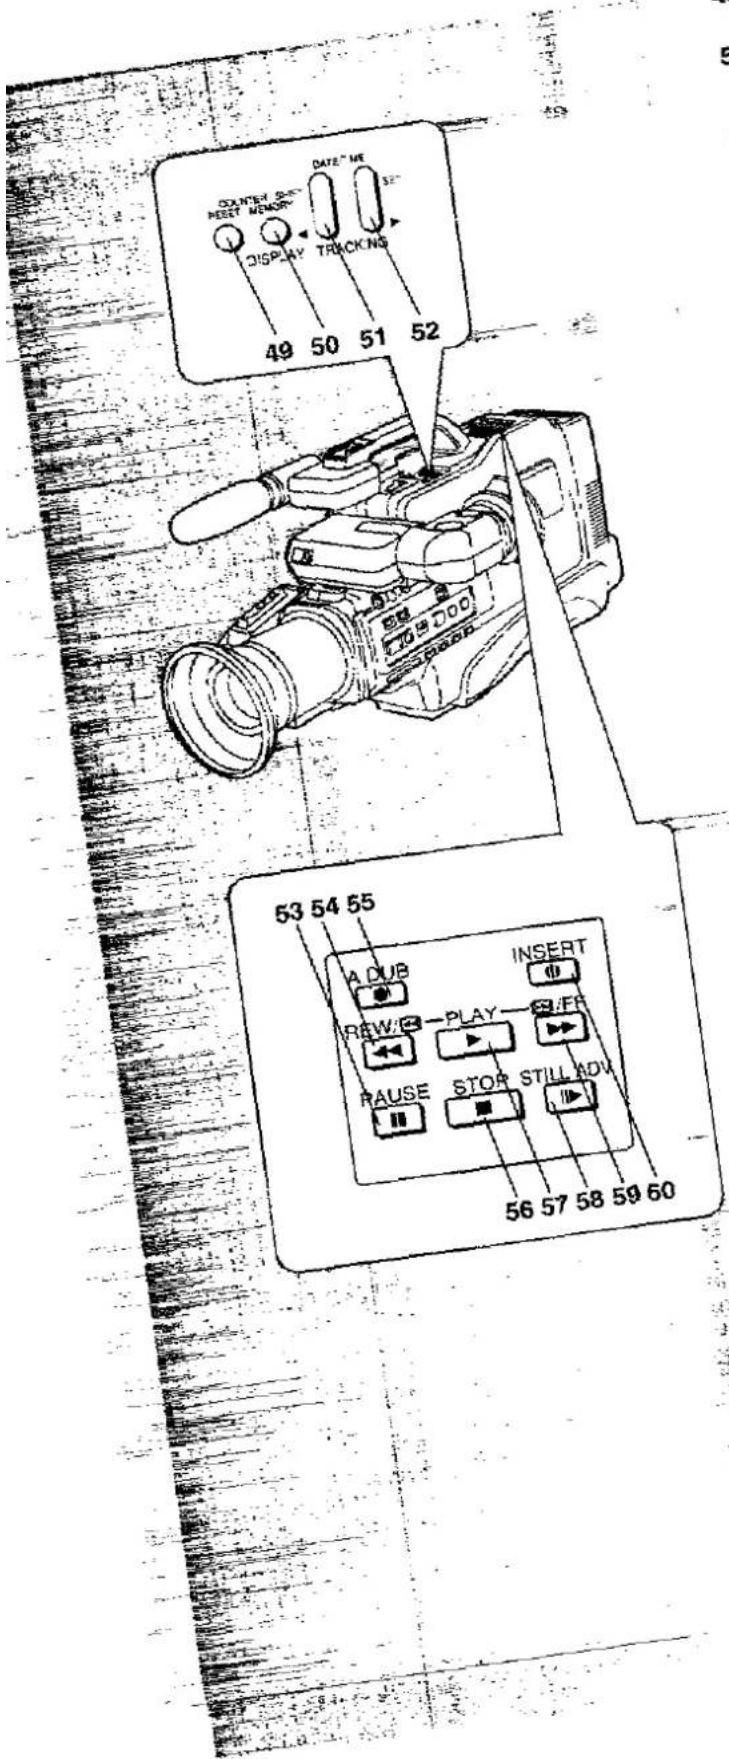
text_image
OXYTER S MEET MEMORY DISPLAY TRACKING 49 50 51 52 53 54 55 A DUB INSERT REW/PLAY/FR RAUSE STOP STILL ADV 56 57 58 59 60"RESET"
Press this button to reset the top
- Memory Button [MEMORY] is to activate the Tape Counter Member
50 Press this button to add
Function. Shift Button
- Tracking/Date/Time Signal Tracking
[DATE/TIME SHIFT] to advance to the next item during
(i) Press it to date. the time and date. It is when you want to adjust the tracking man.
2) Press It Whirly, Time Set Button
- Tracking/Date/Time
52 [DATE/TIME SET • IFR]
1) Press it to change and date.
2) Press it when you want to be able to watch a still button [PAUSE]
53 Pause Button Press this Button during playback to picture.
- Rawind/Review Button
Press this button to rewrite
- Audio Dubbing Button (1) is a sound button to add new sound on a record track.
Press this button to use the Audio Dubbing Function.
STOP Button
56 Stop Button to stop the play Press this button to stop the play
• Clash Button [PLAY]
57 Play Button to start the play button [STILL ADV]
- Still Advance Button to the Pause Button, pre
After pressing the Pads the still picture frame by frame.
- Last Forward/Cue Button is the tape forward.
Press this button to wind the way
Button [INSERT]
60 Insert Button Press this button to insert new buttons recorded video cassette.
Optional Accessories
Battery PackVW-VBF2E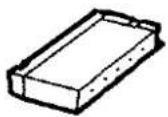 | Car Battery CordVW-ACM10E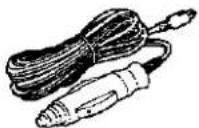 | Filter KitVW-LF49E | Tele Conversion LensVW-LT2E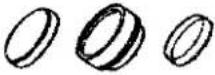 | Standard TripodVZ-CT55E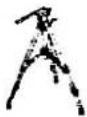 |
Deluxe TripodVZ-CT75E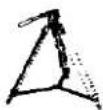 | Pause Remote ControlVW-RM1E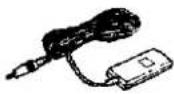 | RF AdaptorVW-RF7E | Character GeneratorVW-CG5E | Editing ControllerVW-EC310E |
Editing ControllerVW-EC1E | Video TitleVW-VT1B | Synchro CordVW-K1E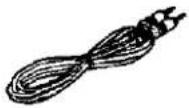 | Soft BagVW-SBF1E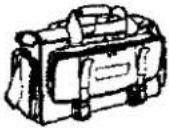 | Rain JacketVW-RJF1E |
System CaseVW-SHM20E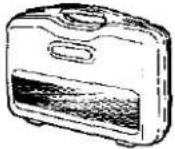 | ||||
Notes: •Consult your dealer for details of other accessories not listed here. •Before using the Character Generator (optional), make sure that a backup battery is inserted in it.
Specifications
VHS Movie
Information for your safety.
| Power Source: | DC 12.0 V |
| Power Consumption: | Recording mode; 8.7 W (Battery Operation) |
Tape Format:
VHS tape
Recording/Playback
4 hours 20 minutes with E260
VIDEO
Television System:
CCIR; 625 lines, 50 fields PAL colour signal
Output Level:
Video out (PHONO);
1.0 Vp-p,
75 ohm terminated
AUDIO
Output Level/Impedance:
Audio Out (PHONO); -6 dBV/47 kohm loaded/less than 1 kohm
Earphone Jack (M3); -29 dBV/8 ohm
Mic In (M3); -70 dBV/4.7 kohm or more unbalanced
Audio Track:
1 track (Normal-Monaural)
Image Sensor;
¼-inch CCD Image Sensor
Lens:
14:1 Wide-angle Power Zoom Lens
F1.4
Focal Length: 3.9-54.6 mm
Digital AI Auto Focus/Auto Iris
Filter Diameter: 49 mm
Viewfinder:
0.7-inch Electronic Viewfinder
Standard Illumination:
1.400 Lux
Minimum Required
0.7 Lux (Low Light Mode)
perating Temperature:
0°C-40°C
Operating Humidity:
10%-80%
Weight:
Approx. 2.7 kg (without Battery Pack)
Dimensions:
130 (W)×245 (H)×470 (D) mm
AC Adaptor
Information for your safety.
| Power Source: | AC 100-240 V, 50-60 Hz |
| Power Consumption: | 44 W |
| DC Output: | DC 12 V, 1.8 A (Movie Camera Operation)DC 12 V, 1.5 A (Battery Pack Charging) |
Weight:
Approx. 620 g
Dimensions:
Approx. 80 (W)×54 (H)×196 (D) mm
Weight and dimensions shown are approximate.
Specifications are subject to change without notice.
276

Printed in Japan
VQT6560
F0396S0-①1000