CC-NIRC - Carte réseau/Adaptateur AMX - Gratis brugsanvisning og manual
Find enhedens vejledning gratis CC-NIRC AMX i PDF-format.

Brugerspørgsmål om CC-NIRC AMX
0 spørgsmål om dette apparat. Besvar dem du kender, eller stil dit eget.
Stil et nyt spørgsmål om dette apparat
Download vejledningen til din Carte réseau/Adaptateur i PDF-format gratis! Find din vejledning CC-NIRC - AMX og tag din elektroniske enhed tilbage i hånden. På denne side er alle dokumenter nødvendige for brugen af din enhed offentliggjort. CC-NIRC af mærket AMX.
BRUGSANVISNING CC-NIRC AMX
Overview
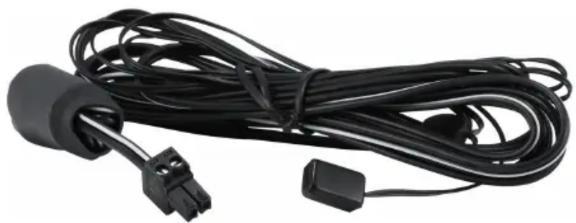
The CC-NIRC (FG10-000-11) is an IR emitter cable used with NetLinx controllers to control your equipment either from IR emitters or a hand-held remote control. Utilizes a 2-pin, 3.5 mm Phoenix connector on one end and a single LED emitter (flasher) on the other end.
natural_image
Black cable with connector and terminal connector, no visible text or symbolsFIG. 1 CC-NIRC
One black adhesive backed IR window shield is included. With this shield surrounding the internal emitter, you can restrict IR reception through the device's control window by blocking any interference or IR signals produced by sources other than the internal emitter. Without this shield, any incoming IR signal can pass through to the IR control window and overlap signals sent via the emitter. See Shielded Configuration for details.
Note: Clean the surface of the IR window of your equipment and make sure it is free of any residue or contaminants before attaching the IR emitter.
Pass-Through Configurations
This method allows IR signals generated from hand-held remotes to easily pass through the opaque red shell/cover. The internal IR LED can be oriented to either face towards or away from the shell, depending on its output configuration.
- Use the low-output configuration when device is being saturated by an IR signal.
- Use the high-output configuration when the device isn't receiving enough of an IR signal and requires more strength. The side with the round "bump" is the high-output side.

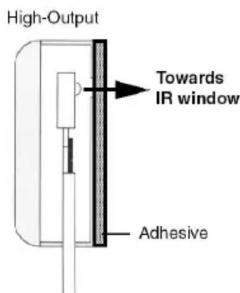
FIG. 2 Low-Output and High-Output sides
Removing the Factory-Installed Shell
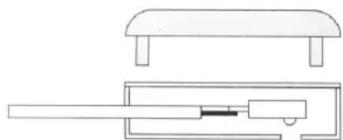
The factory-installed shell is easily removed by carefully separating the two halves with a sharp-edged tool.
The IR LED can then be reversed or removed when the shell is separated. Once the IR emitter and/or shield installations have been completed, the housing can be re-assembled by pressing the two halves firmly together.
natural_image
Technical line drawing of a mechanical assembly with a flat top and internal components (no text or symbols)FIG. 3 Removing the Factory-Installed Shell
Shielded Configuration
Use this configuration to prevent interference from fluorescent lights or other IR sources. The metallic shield prohibits passage of external IR signals and ensures proper IR signals will be received from the emitter.
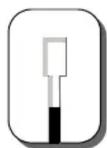
Opaque IR Window Shield
Opaque IR Window Shell
- Remove the IR LED from the factory-installed shell.
- Test fit the location and size of the IR shield on the target device. If necessary, use scissors to trim the shield to fit the opening of the IR window.
- Remove the adhesive backing from the IR shield and carefully place the IR LED into the recessed area using the correct orientation. Make sure the wires attached to the IR LED are not shorted together.
- Flip the shield-emitter combo back over and begin to carefully position the shield over the IR control window so that it covers the entire surface. This keeps any other signal from coming through.
- Press firmly on the shield surface to activate the pressure-sensitive adhesive.

CC-NIRC Cable
Example CC-NIRC Installation