
A-2 - Måling KONICA MINOLTA - Gratis brugsanvisning og manual
Find enhedens vejledning gratis A-2 KONICA MINOLTA i PDF-format.


Brugerspørgsmål om A-2 KONICA MINOLTA
0 spørgsmål om dette apparat. Besvar dem du kender, eller stil dit eget.
Stil et nyt spørgsmål om dette apparat
Download vejledningen til din Måling i PDF-format gratis! Find din vejledning A-2 - KONICA MINOLTA og tag din elektroniske enhed tilbage i hånden. På denne side er alle dokumenter nødvendige for brugen af din enhed offentliggjort. A-2 af mærket KONICA MINOLTA.
BRUGSANVISNING A-2 KONICA MINOLTA
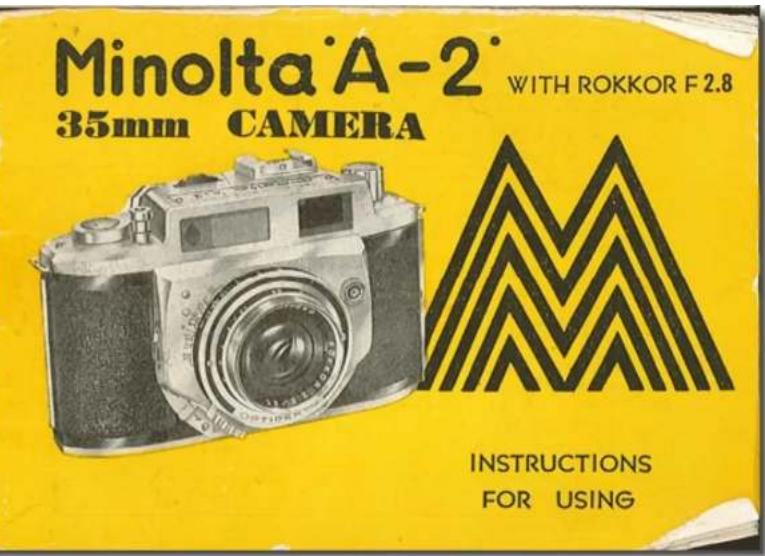
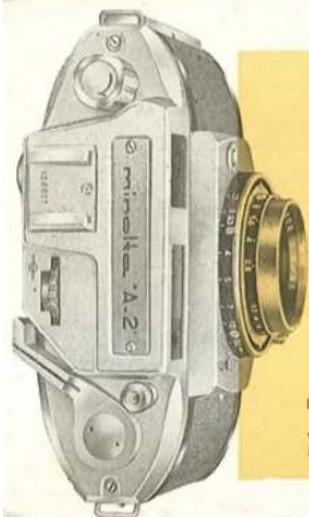
The MINOLTA 'A-2'
A precision, professional quality 35 mm camera in every respect, ruggedly built to withstand years of hard usage. It is housed in a lightweight, precision-diecast, aluminum alloy body. Designed for fast sequence shooting, the single thumb-stroke film advance lever cocks the shutter in the same operation and prevents double exposures. A knurled, index-finger-actuated cam and helical focusing threads provide smooth, fast-action focusing.
The fast, Rokkor F 2.8-45mm five-element lens has glass-air surfaces hard-coated and is equipped with a click-stop diaphragm. Diaphragm-stop numbers are equally spaced on the dial making proportional stops easy to select.
The smooth acting Optiper MV shutter provides fast acting vibrationless operation at speeds from 1 to 1/400 second and bulb. It is synchronized for both flash bulbs and strobe-light and has a standard type connection so that any flash gun may be used. An accessory shoe on top of the camera takes all slide-in types of accessories.
It makes 36 standard size pictures from the standard 35mm film cartridge. The hinged back provides easy loading and an automatic film counter shows the number of frames exposed.
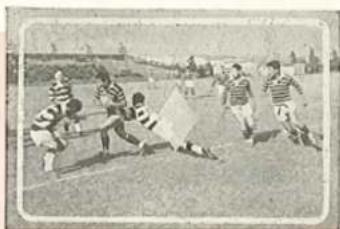
Your Minolta A-2 boasts a bright-frame built-in rangefinder-viewfinder which is the ultimate in composing ease and speed. Your subject is seen framed in a luminous rectangle which remains clearly visible even under dark conditions. The permanent position of the luminous frame, even though you may move your eyes, will greatly diminish the possibility of your chopping off heads or other subject matter composed on the extreme edges of your finder. This finder enables quick composing and anticipation of your next shot in the same manner as a sports finder, in as much as the area directly outside of the frame is clearly visible.
natural_image
Group of soccer players in action on a field, wearing striped and striped uniforms (no visible text or symbols)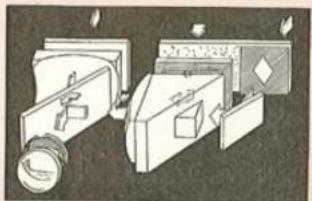
natural_image
Illustration of mechanical components and parts, no visible text or symbols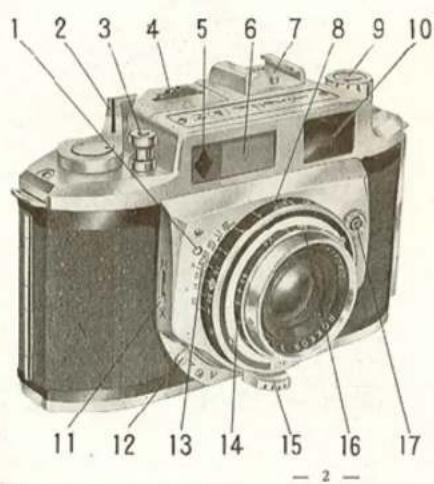
- Signal Window for Self-timer Lever.
- Film Advance and Shuttercock Lever.
- Shutter Release Button.
- Shutter Speed Dial.
- Rangefinder Window.
- Illuminating Window for Bright Frame.
- Accessory Shoe.
- Distance Scale.
- Rewind Knob.
- Viewfinder Window.
- Synchro Selector.
- Self-timor Lever.
- Depth-of-Field Scale.
- Flash Guide Scale.
-
Focusing Lever.
-
Click-stop Diaphragm Setting Ring. (Diaphragm Stop Scale on top of lens barrel).
- Flash Synchronizer Connection.
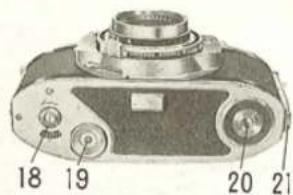
- Film Counter Dial and Knurled Setting Screw.
- Rewind (Sprocket) Release Button.
- Tripod Mount.
- Back Locking Tab.
- Neck Strap Attachment,
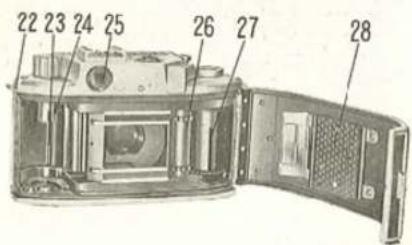
- Film Cartridge Chamber.
- Rewind Shaft.
- Rangefinder - Viewfinder Window.
- Film Winding Sprocket
- Film Winding Spool.
- Pressure Plate.
-3-
natural_image
Close-up of a hand holding a textured rectangular object with a grid-like top, possibly a device or device component (no visible text or symbols)HOW TO USE
To Load Film
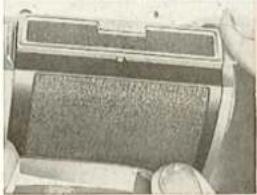
- Pull out the Back Locking Tab (21), open the camera back.
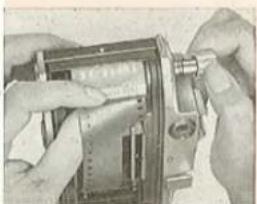
- Pull the Rewind Knob (9) out as far as it will go and place a film cartridge in the Chamber (23). Note that the spool on one end of the cartridge protrudes much further than on the other end. This protruding end must be pointing towards the bottom plate of the camera.
- Insert the end of the film into the groove of the Film Winding Spool (27). It is necessary to insure that the film is caught
Film Cartridge Film Winding Spool
natural_image
Close-up of hands operating a mechanical device with a tool (no visible text or symbols)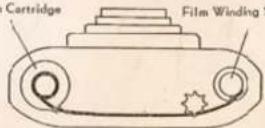
- 4 -
THE MINOLTA ·A-2·
between the inner and outer flanges of the Film Winding Spool, as illustrated.
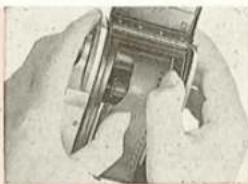
- Turn the Winding Spool by means of the knurled edge to take up the slack on the film. Move the Film Advance Lever (2) a few short strokes to be sure that the perforations in the film meal with the teeth of the Film Winding Sprocket (26). If they do, close the back cover, then it will be automatically locked.
- Turn the film advance lever as far as it will go and release the shutter. Repeat this three-times. Then set the Film Counter Dial (13) to zero by turning the knurled screw with your finger. The counter will then automatically indicate the number of exposures made.
natural_image
Close-up of hands holding a mechanical component, possibly a device or tool, with no visible text or symbols.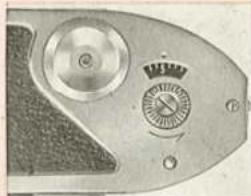
natural_image
Close-up of a metallic mechanical component with a dial and circular head (no visible text or symbols)-5-
natural_image
Close-up of a hand holding a small mechanical component with a magnifying glass (no visible text or symbols)To Take Pictures
-
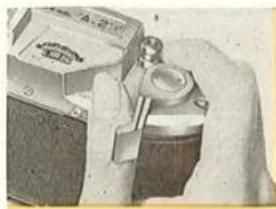
Set the Diaphragm Scale (16) to the proper number as indicated by your exposure meter or exposure guide. This is done by turning the diaphragm ring until the red dot clicks into position opposite the proper F stop.
-
Set the Shutter' Speed Dial (4) to the proper shutter speed, again in accordance with your exposure meter reading.
-
Move the film advance lever to your right until it stops. This can be done in one long stroke or several short ones. This moves the film to the next exposure and also cocks the shutter.
-
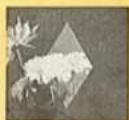
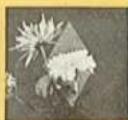
While sighting through the Viewfinder (25) turn the lens barrel by means of the Focusing Lever (15) until the pink image in the center diamond of the viewfinder is exactly superimposed over the full image (Illustration 3). The arrow △ on the Depth of Field Scale (12) will then point to the number of feet on the Distance Scale (8) indicating the subject-to-camera distance.
Note: To use infrared film move the dial so that the number of feet indicated by the mark is advanced to the letter "R" on the Depth of Field Scale.
- Keeping the camera as steady as you can, press the Shutter Release (3) firmly but smoothly to trip the shutter.
CAUTION: Do not wind the film advance lever until the shutter has finished its operation. This is particularly important at slow shutter speeds.
-
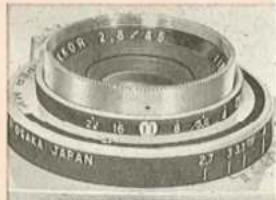
To set the camera at a fixed focus position set the red dot on the diaphragm ring to number "11" on the Diaphragm Scale. Then set the camera so that the number "15" on the Distance Scale is opposite the arrow on the Depth of Field Scale. Now everything from 8 ft. to infinity will be in focus.
-
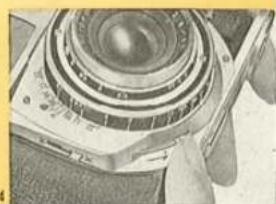
The Optiper Self-timer (12) can be set to delay the actual working of the shutter for any time up to 8 seconds after the shutter is tripped. This is determined by how far down the self-timer lever is set. When the lever is set for the full 6 second delay, i.e. to the mark "V" (which means self-timer), the Signal Window (1) shows a red warning signal.
The setting lever moves back to its original position after setting. It is not supposed to stay in the down position.
natural_image
Close-up of a camera lens assembly with no visible text or symbols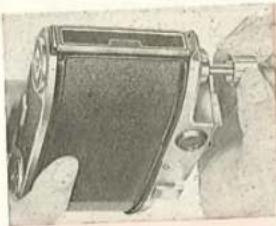
natural_image
Close-up of a hand holding a black electronic device with a small lens (no visible text or symbols)To Remove the Film
After all the film has been exposed it is necessary to rewind the film into its cartridge for removal from the camera. This is
-
Push in the Rewind Release Button(19) located on the bottom plate of the camera. You will note that the button remains in the "pushed in" position.
-
Pull the Rewind Knob (9) out as far as it can go and wind it in the direction indicated by the arrow. Continue to wind until you feel the film leave the film winding spool. You will recognize this by the sudden release of tension in the rewinding. Then wind two or three more turns in order to get all the film completely into the cartridge.
NOTE: Should the Rewind Release Button inadvertently pop out while rewinding, move the film wirding lever a little, then push the button in again and continue as before.
-
It is now possible to open the back and off. For Flash Operation Your Minolta A-2 is internally synchronized for use with electronic flash or with flash bulbs at all shutter speeds. However, the proper setting must first be made.
-
For electronic flash use, set the lever (II) at "M" NOTE: On this setting, class F (gas filled) flash bulbs can also be used at the shutter speed of 1/50 sec. or slower.
- For almost M. (foil filled) flash bulbs, set the lever (11) at "M".
Flash Guide Scale
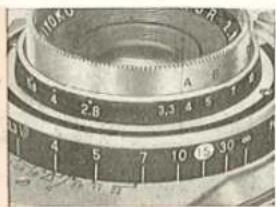
The correct lens opening for use with any flash bulb or electronic flash at any distance is automatically computed on your Minolta A-2. You will notice the marks A, B, C and D engraved on the Diaphragm Setting Ring. These correspond with the guide numbers of Flash bulbs or electronic flash in accordance with the scale below. By setting proper
letter opposite the number representing the distance in feet between the flash bulb and the subject, you will automatically arrive at the correct lens setting.
For Example:
Assume you are using a flash bulb with a guide number of 50 and that your subject is 4 ft. away from the bulb. The chart indicates that you should use the letter "A". You would then turn the diaphragm ring until the "A" appeared opposite the number "4", as in illustration 1. That is all you need to do.
In order to find the proper guide number to use with various flash bulbs or electronic flash units refer to the instructions of the bulb manufacturer.
natural_image
Close-up of a mechanical caliper with dual dials and measurement markings (no readable text or symbols)1
2
natural_image
Vintage camera with visible lens and control knobs (no readable text or symbols)Relative Diaphragm Openings to Shutter Speeds
The Diaphragm Opening of a Lens controls the volume of Light that reaches the film in a given period of exposure. The Dial Markings indicate this volume of Light (see the diagram). Each Stop opening indicated on the dial by the numbers 2.8 to 22 reduces the amount of light passing through the lens by 1/2, or conversely, opening the lens from one mark to the next from the number 22 to 2.6 doubles the amount of light. The shutter controls the amount of light by the length of time it remains open 1.5, 1.7 second, 1/2 second, 1/3 sec., etc. Now, suppose you have determined by an exposure meter reading or other means that the correct exposure for your film under certain light conditions is 1/50 second at 1/8, and you want to use a pulse speed because your subject is in motion. A sutter speed of 1/100 second cuts the exposure in motion, so you must open the lens one step to 1.5 which will allow twice as much light to pass through and the amount of exposure will be the same as before.
Conversely, if you need to stop down the lens for greater depth-of-Field (see explosion of Depth-of-Field next) and you select 16 as the correct stop opening you here reduced the amount of light to 1/4. Then you must give the film an exposure 4 times as long or 1/12 second, in this case you select the nearest shutter speed which is 1/10 second.
| Diaphragm | 2,8 | 4 | 5,6 | 8 | 11 | 16 | 22 |
| Volume of light | 1 | 12 | 14 | 18 | 316 | 192 | 114 |
Depth-of-Field
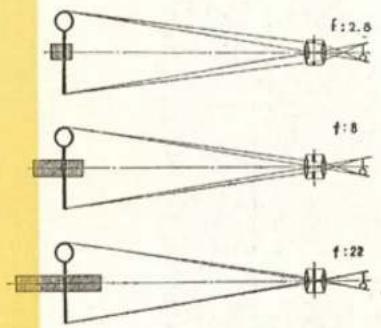
The depth-of-field of a lens is the range of distance within which all objects are in relatively sharp focus when the lens is set for a given distance. This range varies with the dispersion opening, being greatest when the lens is stopped down and least when it is open full (see diagram). The range also varies with the distance for which the lens is set being least at close distances and greatest at further distances up to a point where it takes in everything beyond an intermediate distance to infinity, which is indicated by on the distance scale, i.e. when the camera is set at and the lens is opened to f 5.6 the depth-of-field is from 36 ft. to infinity.
Mærke : KONICA MINOLTA
Model : A-2
Kategori : Måling