
BIR24303BCS - Ovn BEKO - Gratis brugsanvisning og manual
Find enhedens vejledning gratis BIR24303BCS BEKO i PDF-format.
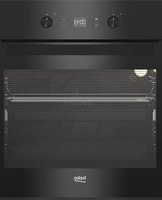


Brugerspørgsmål om BIR24303BCS BEKO
0 spørgsmål om dette apparat. Besvar dem du kender, eller stil dit eget.
Stil et nyt spørgsmål om dette apparat
Download vejledningen til din Ovn i PDF-format gratis! Find din vejledning BIR24303BCS - BEKO og tag din elektroniske enhed tilbage i hånden. På denne side er alle dokumenter nødvendige for brugen af din enhed offentliggjort. BIR24303BCS af mærket BEKO.
BRUGSANVISNING BIR24303BCS BEKO
beko
Indbygningsovn
Brugervejledning
Piekarnik do zabudowy
Instrukcja użytkowania
Sisseehitatav ahi
Kasutusjuhend


BIR24303BCS
EN / PL / ET
285.4455.51/R.AE/25.11.2019/4-1
7724086705
Læs venligst denne brugervejledning først!
Kære kunde,
Tak fordi du har købt dette Beko-produkt. Vi håber, at du får de bedste resultater med dit produkt, som er fremstillet med høj kvalitet og avanceret teknologi. Derfor bedes du læse hele denne brugervejledning og alle andre medfølgende dokumenter omhyggeligt, før du bruger produktet, og gem den som reference til fremtidig brug. Hvis du overdrager produktet til en anden, skal du også give brugervejledningen med. Følg alle advarsler og oplysninger i brugervejledningen.
Husk, at denne brugervejledning også gælder for flere andre modeller. Forskelle mellem modeller vil blive identificeret i vejledningen.
Symbolforklaring
I hele denne brugsanvisning anvendes følgende symboler:

Vigtige oplysninger eller nyttige tip til brug.

Advarsel om farlige situationer med hensyn til liv og ejendom.

Advarsel om elektrisk stød.

Advarsel om brandfare.

Advarsel om varme overflader.
Arçelik A.Ş.
Karaağaç caddesi No:2-6
34445 Süflüce/Istanbul/TYRKIET
Fremstillet i TYRKIET
CE
Dette produkt er fremstillet med den nyeste teknologi under miljøvenlige forhold.
1 Vigtige instruktioner og advarsler for sikkerhed og miljø 4
Generel sikkerhed 4
Elektrisk sikkerhed 4
Produktsikkerhed 5
Tilsigtet brug 7
Sikkerhed for børn....7
Bortskaffelse af det gamle produkt....8
Pakkeoplysninger 8
2 Generelle oplysninger 9
Oversigt 9
Pakkeindhold 10
Tekniske specifikationer 11
3 Installation 12
Før installation....12
Installation og tilslutning 14
Fremtidig transport....15
4 Forberedelse 17
Tips til energibesparelse....17
Første brug....17
Tidsindstilling 17
Første rengøring af apparatet 17
Første opvarmning....17
5 Sådan betjenes ovnen 19
Generelle oplysninger om bagning, stegning og grilning19
Sådan betjenes den elektriske ovn 19
Driftstilstande.... 20
Brug af ovnuret 21
Tabel over tilberedningstider.... 23
Sådan betjenes grillen.... 25
Tabel over tilberedningstider til grilning.... 25
6 Vedligeholdelse og pleje 27
Generelle oplysninger....27
Rengøring af betjeningspanelet 27
Rengøring af ovnen 27
Afmontering af ovnlågen 29
Afmontering af lågens indvendige glas 29
Udskiftning af ovnpæren.... 30
7 Fejlfinding 31
1 Vigtige instruktioner og advarsler for sikkerhed og miljø
Dette afsnit indeholder sikkerhedsinstruktioner, der hjælper med at beskytte mod risiko for personskade eller ejendomsskade. Manglende overholdelse af disse instruktioner annullerer enhver garanti. Generel sikkerhed
- Dette apparat kan bruges af børn fra 8 år og opefter samt personer med nedsatte fysiske, sensoriske eller mentale evner eller manglende erfaring og viden, hvis de har fået opsyn eller instruktion i sikker brug af apparatet og forstår de involverede farer. Børn må ikke lege med apparatet. Rengøring og vedligeholdelse må ikke udføres af børn uden opsyn.
- Apparatet må ikke bruges af personer (herunder børn) med nedsatte fysiske, sensoriske eller mentale evner eller manglende erfaring og viden, medmindre de har fået opsyn eller instruktion. Børn bør overvåges for at sikre, at de ikke leger med apparatet.
- Hvis produktet overdrages til en anden person til personlig brug eller genbrug, skal
brugervejledningen, produktetiketter og andre relevante dokumenter og dele også overdrages.
- Installations- og reparationsprocedurer skal altid udføres af autoriserede serviceagenter. Producenten påtager sig intet ansvar for skader, der opstår som følge af procedurer udført af uautoriserede personer, hvilket også kan annullere garantien. Læs instruktionerne omhyggeligt før installation.
- Brug ikke produktet, hvis det er defekt eller har synlige skader.
- Sørg for, at produktets funktionsknapper er slukket efter hver brug.
Elektrisk sikkerhed
- Hvis produktet har en fejl, må det ikke betjenes, medmindre det er repareret af en autoriseret serviceagent. Der er risiko for elektrisk stød!
- Tilslut kun produktet til en jordet stikkontakt/ledning med den spænding og beskyttelse, der er angivet i "Tekniske specifikationer". Lad en kvalificeret elektriker udføre jordforbindelsen, når produktet bruges med eller uden en transformer.
Vores virksomhed er ikke ansvarlig for problemer, der opstår på grund af, at produktet ikke er jordet i overensstemmelse med lokale regler.
- Vask aldrig produktet ved at sprede eller hælde vand på det! Der er risiko for elektrisk stød!
- Rør aldrig ved stikket med våde hænder! Træk aldrig i ledningen for at tage stikket ud, træk altid ud ved at holde i stikket.
- Produktet skal afbrydes under installation, vedligeholdelse, rengøring og reparation.
- Hvis produktets strømkabel er beskadiget, skal det udskiftes af producenten, dennes serviceagent eller tilsvarende kvalificerede personer for at undgå fare.
- Apparatet skal installeres, så det kan afbrydes fuldstændigt fra strømforsyningen. Adskillelsen skal ske ved hjælp af en kontakt, der er indbygget i den faste elektriske installation, i overensstemmelse med byggereglerne.
- Ovnen bagside bliver varm, når den er i brug. Sørg for, at den elektriske forbindelse ikke rører bagsiden; ellers kan forbindelserne blive beskadiget.
- Klem ikke netledningen mellem ovndøren og rammen, og før den ikke over varme overflader. Ellers kan kablets isolering smelte og forårsage brand på grund af kortslutning.
- Alt arbejde på elektrisk udstyr og systemer må kun udføres af autoriserede og kvalificerede personer.
- I tilfælde af skade skal produktet slukkes og afbrydes fra strømforsyningen. Gør dette ved at slukke for sikringen derhjemme. • Sørg for, at sikringens størrelse er kompatibel med produktet.
Produktsikkerhed
- ADVARSEL: Apparatet og dets tilgængelige dele bliver varme under brug. Vær forsigtig for at undgå at røre varmelegemer. Børn under 8 år skal holdes væk, medmindre de er under konstant opsyn.
- Brug aldrig produktet, når din dømmekraft eller koordination er påvirket af brug af alkohol og/eller stoffer.
- Vær forsigtig, når du bruger alkoholiske drikke i dine retter. Alkohol fordamper ved høje temperaturer og kan forårsage brand, da det kan antændes, når det kommer i kontakt med varme overflader.
- Fare for madforgiftning: Lad ikke maden stå i ovnen i mere end 1
time før eller efter tilberedning. Dette kan resultere i madforgiftning eller sygdom.
- Placer ikke brændbare materialer tæt på produktet, da siderne kan blive varme under brug.
- Under brug bliver apparatet varmt. Der skal udvises forsigtighed for at undgå at røre varmeelementer inde i ovnen.
- Hold alle ventilationsåbninger fri for forhindringer.
- Opvarm ikke lukkede dåser og glasglas i ovnen. Det tryk, der ville opbygges i dåsen/glasset, kan få det til at sprænge.
- Placer ikke bageplader, fade eller aluminiumsfolie direkte på bunden af ovnen. Varmeakkumuleringen kan beskadige bunden af ovnen.
- Brug ikke skrappe slibende rengøringsmidler eller skarpe metalskrabere til at rengøre ovnens glasdør, da de kan ridse overfladen, hvilket kan resultere i, at glasset splintrer.
- Brug ikke damprenser til at rengøre apparatet, da dette kan forårsage elektrisk stød.
• (Varierer afhængigt af produktmodellen.)
Placering af trådhylden og bagepladen korrekt på trådristene
Det er vigtigt at placere trådhylden og/eller bagepladen korrekt på risten. Skub trådhylden eller bagepladen mellem 2 skinner, og sørg for, at den er i balance, før du placerer mad på den (se følgende figur).

Bortskaffelse af det gamle produkt
Compliance with the WEEE Directive and Disposing of the Waste Product:  This product complies with EU WEEE Directive (2012/19/EU). This product bears a classification symbol for waste electrical and electronic equipment (WEEE). This product has been manufactured with high quality parts and materials which can be reused and are suitable for recycling. Do not dispose of the waste product with normal domestic and other wastes at the end of its service life. Take it to the collection center for the recycling of electrical and electronic equipment. Please consult your local authorities to learn about these collection centers.Overholdelse af RoHS-direktivet:
The product you have purchased complies with EU RoHS Directive (2011/65/EU). It does not contain harmful and prohibited materials specified in the Directive.Pakkeoplysninger
\- Packaging materials of the product are manufactured from recyclable materials in accordance with our National Environment Regulations. Do not dispose of the packaging materials together with the domestic or other wastes. Take them to the packaging material collection points designated by the local authorities.2 Generelle oplysninger
Overview   1 Control panel 2 Wire shelf 3 Tray 4 Handle 5 Door 6 Fan motor (behind steel plate) 7 Lamp 8 Top heating element 9 Shelf positions  1 Function knob 2 Digital timer 3 Thermostat knob 4 Thermostat lampIndhold i pakken
 Accessories supplied can vary depending on the product model. Not every accessory described in the user manual may exist on your product.1. Brugervejledning
2. Standardbakke
Used for pastries, frozen foods and big roasts. 3. Dyb bakke
Used for pastries, large roasts, juicy dishes, and for collecting the fat while grilling. 4. Trådrist
Used for roasting and for placing the food to be baked, roasted or cooked in casserole dishes to the desired rack.  5. Placering af trådristen og bakken på teleskopskinnerne korrekt
(This feature is optional. It may not exist on your product.) Telescopic racks allow you to install and remove the trays and wire shelf easily. When using the tray and wire shelf with telescopic racks, make sure that the pins at the rear section of the telescopic rack stands against the edges of the wire shelf and tray.   Technical specifications| Voltage / frequency | 220-240 V ~ 50 Hz |
| Total power consumption | 2.5 kW |
| Cable type / section | min.H05VV-FG 3 × 1,5 mm2 |
| External dimensions (height / width / depth) | 595 mm/594 mm/567 mm |
| Installation dimensions (height / width / depth) | **590 or 600 mm/560 mm/min. 550 mm |
| Main oven | Multifunction oven |
| Inner lamp | 15/25 W |
| Grill power consumption | 2.2 kW |
| i Technical specifications may be changed without prior notice to improve the quality of the product. |
| i Figures in this manual are schematic and may not exactly match your product. |
| i | Values stated on the product labels or in the documentation accompanying it are obtained in laboratory conditions in accordance with relevant standards. Depending on operational and environmental conditions of the product, these values may vary. |
3 Installation
Product must be installed by a qualified person in accordance with the regulations in force. The manufacturer shall not be held responsible for damages arising from procedures carried out by unauthorized persons which may also void the warranty.| i | Preparation of location and electrical installation for the product is under customer's responsibility. |
| DANGER:The product must be installed in accordance with all local electrical regulations. | |
| DANGER:Prior to installation, visually check if the product has any defects on it. If so, do not have it installed.Damaged products cause risks for your safety. |
Før installation
The appliances must not be installed behind a decorative door in order to avoid overheating. The appliance is intended for installation in commercially available kitchen cabinets. A safety distance must be left between the appliance and the kitchen walls and furniture. See figure (values in mm). - Surfaces, synthetic laminates and adhesives used must be heat resistant (100 °C minimum). • Kitchen cabinets must be set level and fixed. - If there is a drawer beneath the oven, a shelf must be installed in order to separate from the oven and drawer. - Carry the appliance with at least two persons. - Hold the oven from the slots for handling on both sides to move it. • Before installing the product, remove all materials and documents inside. - Kitchen furniture must be in compliance with the dimensions given in the figure below. At the rear section of the kitchen furniture, an opening must be cut out with the dimensions given in the figure below to ensure sufficient ventilation.| Do not install the appliance next to refrigerators or freezers. The heat emitted by the appliance will lead to an increased energy consumption of cooling appliances. |
| The door and/or handle must not be used for lifting or moving the appliance. |
Installation og tilslutning
\- The product must be installed in accordance with all local gas and electrical regulations.Elektrisk tilslutning
Connect the product to a grounded outlet/line protected by a miniature circuit breaker of suitable capacity as stated in the "Technical specifications" table. Have the grounding installation made by a qualified electrician while using the product with or without a transformer. Our company shall not be liable for any damages that will arise due to using the product without a grounding installation in accordance with the local regulations. FARE:
The product must be connected to the mains supply only by an authorised and qualified person. The product's warranty period starts only after correct installation. Manufacturer shall not be held responsible for damages arising from procedures carried out by unauthorised persons. FARE:
The power cable must not be clamped, bent or trapped or come into contact with hot parts of the product. A damaged power cable must be replaced by a qualified electrician. Otherwise, there is risk of electric shock, short circuit or fire! - Connection must comply with national regulations. - The mains supply data must correspond to the data specified on the type label of the product. Open the front door to see the type label. - Power cable of your product must comply with the values in "Technical specifications" table. FARE:
Before starting any work on the electrical installation, disconnect the product from the mains supply. There is the risk of electric shock!  Power cable plug must be within easy reach after installation (do not route it above the hob).  While performing the wiring, you must apply with the national/local electrical regulations and must use the appropriate socket outlet/line and plug for oven. In case of the product's power limits are out of current carrying capability of plug and socket outlet/line, the product must be connected through fixed electrical installation directly without using plug and socket outlet/line. Plug the power cable into the socket.Installation af produktet
1. Slide the oven into the cabinet, align and secure it while making sure that the power cable is not broken and/or trapped.  Secure the oven with 2 screws as illustrated. After the installation, make sure that the screws are sufficiently tightened and the oven does not move. Oven may tip over during use if it is not installed as per the instructions and if the screws are not sufficiently tightened.For produkter med køleventilator (Dette findes muligvis ikke på dit produkt.)
 1 Cooling fan 2 Control panel 3 Door The built-in cooling fan cools both the built-in cabinet and the front of the product.  Cooling fan continues to operate for about 20-30 minutes after the oven is switched off. If you have cooked by programming the timer of the oven, cooling fan will also be switched off at the end of the cooking time together with all functions.Endelig kontrol
1. Operate the product. 2. Check the functions.Fremtidig transport
- Keep the product's original carton and transport the product in it. Follow the instructions on the carton. If you do not have the original carton, pack the product in bubble wrap or thick cardboard and tape it securely. - To prevent the wire grill and tray inside the oven from damaging the oven door, place a strip of cardboard onto the inside of the oven door that lines up with the position of the trays. Tape the oven door to the side walls. - Do not use the door or handle to lift or move the product.  Do not place any objects onto the product and move it in upright position.  Check the general appearance of your product for any damages that might have occurred during transportation.4 Forberedelse
Tips til at spare energi
The following information will help you to use your appliance in an ecological way, and to save energy: - Use dark coloured or enamel coated cookware in the oven since the heat transmission will be better. - While cooking your dishes, perform a preheating operation if it is advised in the user manual or cooking instructions. - Do not open the door of the oven frequently during cooking. - Try to cook more than one dish in the oven at the same time whenever possible. You can cook by placing two cooking vessels onto the wire shelf. • Cook more than one dish one after another. The oven will already be hot. - You can save energy by switching off your oven a few minutes before the end of the cooking time. Do not open the oven door. • Defrost frozen dishes before cooking them.Første brug
Tidsindstilling
 While making any adjustment, related symbols will flash on the display. Press +/— keys to set the time of the day after the oven is energized for the first time.  For touch control models, touch :≡ first and then use + / — to set the time of the day. Confirm the setting by touching Ⓛ symbol and wait for 4 seconds without touching any keys to confirm.  1 Adjustment key 2 Key lock symbol 3 Clock symbol 4 Alarm volume symbol (This may not exist on your product.) 5 Eco mode symbol 6 Plus key 7 Minus key 8 Time slice symbol 9 Alarm symbol 10 End of Cooking Time symbol 11 Cooking Time symbol 12 Program key  If the initial time is not set, clock will run starting from 12:00 and ⓣ symbol will be displayed. The symbol will disappear once the time is set.  Current time settings are canceled in case of power failure. It needs to be readjusted.Første rengøring af apparatet
 The surface might get damaged by some detergents or cleaning materials. Do not use aggressive detergents, cleaning powders/creams or any sharp objects during cleaning. Do not use harsh abrasive cleaners or sharp metal scrapers to clean the oven door glass since they can scratch the surface, which may result in shattering of the glass. 1. Remove all packaging materials. 2. Wipe the surfaces of the appliance with a damp cloth or sponge and dry with a cloth.Første opvarmning
Heat up the product for about 30 minutes and then switch it off. Thus, any production residues or layers will be burnt off and removed. ADVARSEL
Hot surfaces cause burns! Product may be hot when it is in use. Never touch the hot burners, inner sections of the oven, heaters and etc. Keep children away. Always use heat resistant oven gloves when putting in or removing dishes into/from the hot oven.Elektrisk ovn
1. Take all baking trays and the wire grill out of the oven. 2. Close the oven door. 3. Select Static position. 4. Select the highest grill power; See How to operate the electric oven, page 19. 5. Operate the oven for about 30 minutes. 6. Turn off your oven; See How to operate the electric oven, page 19Grillovn
1. Take all baking trays and the wire grill out of the oven. 2. Close the oven door. 3. Select the highest grill power; see How to operate the grill, page 25. 4. Operate the grill about 30 minutes. 5. Turn off your grill; see How to operate the grill, page 25  Smoke and smell may emit for a couple of hours during the initial operation. This is quite normal. Ensure that the room is well ventilated to remove the smoke and smell. Avoid directly inhaling the smoke and the smell that emits.5 Sådan betjenes ovnen
Generelle oplysninger om bagning, stegning og grilning
ADVARSEL
Hot surfaces cause burns! Product may be hot when it is in use. Never touch the hot burners, inner sections of the oven, heaters and etc. Keep children away. Always use heat resistant oven gloves when putting in or removing dishes into/from the hot oven. FARE:
Be careful when opening the oven door as steam may escape. Exiting steam can scald your hands, face and/or eyes.Tips til bagning
- Use non-sticky coated appropriate metal plates or aluminum vessels or heat-resistant silicone moulds. • Make best use of the space on the rack. - Place the baking mould in the middle of the shelf. - Select the correct rack position before turning the oven or grill on. Do not change the rack position when the oven is hot. - Keep the oven door closed.Tips til stegning
- Treating whole chicken, turkey and large piece of meat with dressings such as lemon juice and black pepper before cooking will increase the cooking performance. - It takes about 15 to 30 minutes longer to roast meat with bones when compared to roasting the same size of meat without bones. • Each centimeter of meat thickness requires approximately 4 to 5 minutes of cooking time. - Let meat rest in the oven for about 10 minutes after the cooking time is over. The juice is better distributed all over the roast and does not run out when the meat is cut. - Fish should be placed on the middle or lower rack in a heat-resistant plate.Tips til grilning
When meat, fish and poultry are grilled, they quickly get brown, have a nice crust and do not get dry. Flat pieces, meat skewers and sausages are particularly suited for grilling as are vegetables with high water content such as tomatoes and onions. \- Distribute the pieces to be grilled on the wire shelf or in the baking tray with wire shelf in such a way that the space covered does not exceed the size of the heater. \- Slide the wire shelf or baking tray with grill into the desired level in the oven. If you are grilling on the wire shelf, slide the baking tray to the lower rack to collect fats. Add some water in the tray for easy cleaning.  Foods that are not suitable for grilling carry the risk of fire. Only grill food which is suitable for intensive grilling heat. Do not place the food too far in the back of the grill. This is the hottest area and fatty food may catch fire.Sådan betjenes den elektriske ovn
Your oven is equipped with pop-out knobs that protrude when you press them. 1. Press inwards to protrude the knob and then turn it to make the desired setting.  2. When the cooking process is finished, press the knob inwards.Vælg temperatur og driftstilstand
 1 Function knob 2 Thermostat knob 1. Set the Function knob to the desired operating mode. 2. Set the Temperature knob to the desired temperature. » Oven heats up to the adjusted temperature and maintains it. During heating, temperature lamp stays on.Slukning af den elektriske ovn
Turn the function knob and temperature knob to off (upper) position.Ristpositioner (For modeller med trådrist)
It is important to place the wire shelf onto the side rack correctly. Wire shelf must be inserted between the side racks as illustrated in the figure. Do not let the wire shelf stand against the rear wall of the oven. Slide your wire shelf to the front section of the rack and settle it with the help of the door in order to obtain a good grill performance. (Varies depending on the product model.) Driftstilstande
The order of operating modes shown here may be different from the arrangement on your product.Top- og bundvarme
 Top and bottom heating are in operation. Food is heated simultaneously from the top and bottom. For example, it is suitable for cakes, pastries, or cakes and casseroles in baking moulds. Cook with one tray only.Bundvarme
 Only bottom heating is in operation. It is suitable for pizza and for subsequent browning of food from the bottom.  This function must be used for easy steam cleaning as well.Varmluft med bund- og topvarme
 Top heating, bottom heating plus fan (in the rear wall) are in operation. Hot air is evenly distributed throughout the oven rapidly by means of the fan. Cook with one tray only.Drift med blæser
 The oven is not heated. Only the fan (in the rear wall) is in operation. Suitable for thawing frozen granular food slowly at room temperature and cooling down the cooked food.Surf-funktion
 Hot air heated by the rear heater is evenly distributed throughout the oven rapidly by means of the fan. It is suitable for cooking your meals in different shelf levels and preheating is not required in most cases. Suitable for cooking with multi trays. This function must be used for easy steam cleaning as well. "3D"-funktion
 Top heating, bottom heating and fan assisted heating (in the rear wall) are in operation. Food is cooked evenly and quickly all around. Cook with one tray only.Fuld grill
 Large grill at the ceiling of the oven is in operation. It is suitable for grilling large amount of meat. - Put big or medium-sized portions in correct rack position under the grill heater for grilling. - Set the temperature to maximum level. • Turn the food after half of the grilling time.Grill + blæser
 Grilling effect is not as strong as in Full Grill - Put small or medium-sized portions in correct shelf position under the grill heater for grilling. • Set the desired temperature. • Turn the food after half of the grilling time.Brug af ovnuret
 1 Adjustment key 2 Key lock symbol 3 Clock symbol 5 Eco mode symbol 6 Plus key 7 Minus key 8 Time slice symbol 9 Alarm symbol 10 End of Cooking Time symbol 11 Cooking Time symbol 12 Program key 4 Alarm volume symbol (This may not exist on your product.) | Maximum time that can be set for end of cooking is 5 hours 59 minutes. Program will be cancelled in case of power failure. You must reprogram the oven. |
 | While making any setting, related symbols will flash on the display. You must wait for a short time for the settings to take effect. |
 | If no cooking setting is made, time of the day cannot be set. |
 | Remaining time will be displayed if cooking time is set when the cooking starts. |
Tilberedning ved at indstille tilberedningstiden;
You can set the oven so that it will stop at the end of the specified time by setting the cooking time on the timer. 1. Select the function for cooking. 2. Touch ⏻ until |→| symbol appears on display for cooking time. 3. Set the cooking time with + / - keys. » » After the cooking time is set, I→I symbol and the time slice will appear on display continuously. 4. Place the dish into the oven and set the temperature with temperature knob. Cooking will start. » Cooking time starts to count down on display when cooking starts and all parts of time slice symbol is lit. The set cooking time is divided into 4 equal parts and when the time of each parts ends, the symbol of that parts turns off. So you can understand the ratio of remaining cooking time to total cooking time easily.Indstilling af slutningen af tilberedningstiden til et senere tidspunkt;
After setting the cooking time on the timer, you can set the end of cooking time to a later time. 1. Select the function for cooking. 2. Touch ⏻ until |→| symbol appears on display for cooking time. 3. Set the cooking time with + / - keys. »» Once the Cooking Time is set, |→| symbol will appear on display continuously. 4. Touch Ⓤ until → symbol appears on display for the end of cooking time. 5. Press + /— keys to set the end of cooking time. » After the cooking time is set, |→| symbol plus →| symbol and the time slice will appear on display continuously. Once the cooking starts, →| symbol disappears. 6. Place the dish into the oven and set the temperature with temperature knob. Cooking will start. » Oven timer calculates the startup time by deducting the cooking time from the end of cooking time you have set. Selected operating mode is activated when the startup time of cooking has come and the oven is heated up to the set temperature. It maintains this temperature until the end of cooking time. » Cooking time starts to count down on display when cooking starts and all parts of time slice symbol is lit. The set cooking time is divided into 4 equal parts and when the time of each parts ends, the symbol of that parts turns off. So you can understand the ratio of remaining cooking time to total cooking time easily. 7. After the cooking process is completed, "End" appears on the displayed and the timer gives an audio warning. 8. Audio warning sounds for 2 minutes. To stop the audio warning, just press any key. Audio warning will be silenced and current time will be displayed.  If you press any key at the end of the audio warning, the oven will restart operating. Turn the temperature knob and function knob to "0" (off) position to switch off the oven in order to prevent re-operation of the oven at the end of warning.Aktivering af tastelåsen
You can prevent digital timer from being intervened with by activating the key lock function. 1. Touch: ≡ until 🔒 symbol appears on display. » "OFF" will appear on the display. 2. Press + to activate the key lock. » Once the key lock is activated, "On" appears on the display and the 🔒 symbol remains lit.  Digital timer keys are not functional when the key lock is activated. Key lock will not be cancelled in case of power failure.Deaktivering af tastelåsen
1. Touch :≡ until 🔊 symbol appears on display. » "On" will appear on the display. 2. Disable the key lock by pressing the - key. » "OFF" will be displayed once the keylock is deactivated.Indstilling af vækkeuret
You can use the timer of the product for any warning or reminder apart from the cooking program. The alarm clock has no influence on the functions of the oven. It is only used as a warning. For example, this is useful when you want to turn food in the oven at a certain point of time. Timer will give an audio warning at the end of the set time. 1. Touch ⏻ until ⚠ symbol appears on display.  Maximum alarm time can be 23 hours and 59 minutes. 2. Set the alarm duration by using + / - keys.  Function keys for alarm tone, time of day, display brightness and temperature keys should be at 0 (OFF) position. » △ symbol will remain lit and the alarm time will appear on the display once the alarm time is set. 3. At the end of the alarm time, symbol starts flashing and the audio warning is heard.Slukning af alarmen
1. Audio warning sounds for 2 minutes. To stop the audio warning, just press any key. » Audio warning will be silenced and current time will be displayed.Annullering af alarmen;
1. Touch ⏻ until △ symbol appears on display in order to cancel the alarm. 2. Press and hold — key until "00:00" is displayed.  Alarm time will be displayed. If the alarm time and cooking time are set concurrently, shortest time will be displayed.Ændring af alarmtonen
1. Touch ≡ until ◀ symbol appears on display. 2. Adjust the desired alarm tone with + / - keys. 3. The tone you have set will be activated in a short time. » Selected alarm tone will appear as "b-01", "b-02" or "b-03" on the display.Ændring af tidspunktet på dagen
To change the time of the day you have previously set: 1. Touch ≡ until ⏱ symbol appears on display. 2. Set the time of the day with +/— keys. 3. The time you have set will be activated in a short time.Økonomitilstand
You can save energy with economy mode while cooking by setting cooking time in the oven. This mode completes the cooking with the inner temperature of the oven by switching off the heaters before the end of cooking time.Indstilling af økonomitilstanden
1. Touch ≡ symbol until eco symbol appears on display. » "OFF" will appear on the display. 2. Enable economy mode by touching + key. » Once the economy mode is activated, "On" appears on the display and the eco symbol remains lit.Deaktivering af økonomitilstanden
1. Touch ≡ symbol until eco symbol appears on display. » "On" will appear on the display. 2. Disable economy mode by touching ■ key. » "Off" will be displayed once the eco mode is deactivated.Indstilling af skærmens lysstyrke
(This feature is optional. It may not exist on your product.) 1. Touch ≡ until d-01 or d-02 or d-03 appears on display for display brightness. 2. Set the desired brightness with +/— keys. » The time you have set will be activated in a short time. Cooking times table  The timings in this chart are meant as a guide. Timings may vary due to temperature of food, thickness, type and your own preference of cooking. Baking and roasting  1st rack of the oven is the bottom rack.| Dish | Cooking level number | Accessory to use | Operating mode | Rack position | Temperature (°C) | Cooking time (approx. in min.) |
| Cakes in tray | One level | Standard tray* | 3 | 180 | 25 ... 30 | |
| Cakes in mould | One level | Cake mold on wire grill** | 2 | 180 | 50 ... 60 | |
| Small cakes | One level | Standard tray* | 3 | 160 | 25 ... 35 | |
| One level | Standard tray* | 3 | 150 | 30 ... 40 | ||
| 2 levels | 1-Pastry tray*3-Standard tray* | 1 - 3 | 150 | 35 ... 50 | ||
| 3 levels | 1-Standard tray*3-Pastry tray*5-Deep tray* | 1 - 3 - 5 | 150 | 35 ... 50 | ||
| Sponge cake | One level | Round springform pan with a diameter of 26 cm on wire grill** | 3 | 160 | 25 ... 35 | |
| One level | Round springform pan with a diameter of 26 cm on wire grill** | 2 | 150 | 30 ... 40 | ||
| 2 levels | 1-Round springform pan with a diameter of 26 cm on wire grill**4-Round springform pan with a diameter of 26 cm on pastry tray** | 1 - 4 | 150 | 35 ... 45 | ||
| Cookies | One level | Pastry tray* | 3 | 180 | 25 ... 30 | |
| 2 levels | 1-Pastry tray*3-Standard tray* | 1 - 3 | 180 | 30 ... 40 | ||
| 3 levels | 1-Pastry tray*3-Standard tray*5-Deep tray* | 1 - 3 - 5 | 180 | 35 ... 45 | ||
| Dough pastry | One level | Standard tray* | 2 | 200 | 30 ... 40 | |
| 2 levels | 1-Pastry tray*3-Standard tray* | 1 - 3 | 200 | 45 ... 55 | ||
| 3 levels | 1-Pastry tray*3-Standard tray*5-Deep tray* | 1 - 3 - 5 | 200 | 45 ... 55 | ||
| Rich pastry | One level | Standard tray* | 2 | 200 | 25 ... 35 | |
| 2 levels | 1-Pastry tray*3-Standard tray* | 1 - 3 | 200 | 35 ... 45 | ||
| 3 levels | 1-Pastry tray*3-Standard tray*5-Deep tray* | 1 - 3 - 5 | 200 | 35 ... 45 | ||
| Leaven | One level | Standard tray* | 2 | 200 | 35 ... 45 | |
| Lasagna | One level | Glass/metal rectangular pan on wire grill** | 2 - 3 | 200 | 30 ... 40 | |
| Pizza | One level | Standard tray* | 2 | 200 ... 220 | 15 ... 20 | |
| Beef steak (whole) / Roast | One level | Standard tray* | 3 | 25 min250/max, then180 ... 190 | 100 ... 120 | |
| Leg of Lamb (casserole) | One level | Standard tray* | 3 | 25 min.250/max, then190 | 70 ... 90 | |
| One level | Standard tray* | 3 | 25 min.250/max, then190 | 60 ... 80 | ||
| Roastedchicken (1,8-2 kg) | One level | Standard tray* | 2 | 15 min.250/max, then 180 ... 190 | 60 ... 80 | |
| One level | Standard tray* | 2 | 15 min. 250/max, then 180 ... 190 | 60 ... 80 | ||
| Turkey (5.5 kg) | One level | Standard tray* | 1 | 25 min. 250/max, then 180 ... 190 | 150 ... 210 | |
| One level | Standard tray* | 1 | 25 min. 250/max, then 180 ... 190 | 150 ... 210 | ||
| Fish | One level | Standard tray* | 3 | 200 | 20 ... 30 | |
| One level | Standard tray* | 3 | 200 | 20 ... 30 | ||
| It is suggested to perform preheating for all foods.* These accessories may not supplied with the product.** These accessories are not supplied with the product. They are commercially available accessories. | ||||||
Stegetabel for testmåltider
Meals in this cooking table are prepared according to EN 60350-1 to make it easier for control institutes to test the product| Dish | Cooking level number | Accessory to use | Operating mode | Rack position | Temperature (°C) | Cooking time (approx. in min.) |
| Shortbread | One level | Standard tray* | 3 | 140 | 20 ... 30 | |
| One level | Standard tray* | 3 | 140 | 20 ... 30 | ||
| 2 levels | 1-Standard tray*3-Pastry tray* | 1 - 3 | 140 | 20 ... 30 | ||
| 3 levels | 1-Standard tray*3-Pastry tray*5-Deep tray* | 1 - 3 - 5 | 140 | 25 ... 35 | ||
| Small cakes | One level | Standard tray* | 3 | 160 | 25 ... 35 | |
| One level | Standard tray* | 3 | 150 | 30 ... 40 | ||
| 2 levels | 1-Pastry tray*3-Standard tray* | 1 - 3 | 150 | 35 ... 50 | ||
| 3 levels | 1-Standard tray*3-Pastry tray*5-Deep tray* | 1 - 3 - 5 | 150 | 35 ... 50 | ||
| Sponge cake | One level | Round springform pan with a diameter of 26 cm on wire grill** | 3 | 160 | 25 ... 35 | |
| One level | Round springform pan with a diameter of 26 cm on wire grill** | 2 | 150 | 30 ... 40 | ||
| 2 levels | 1-Round springform pan with a diameter of 26 cm on wire grill**4-Round springform pan with a diameter of 26 cm on pastry tray** | 1 - 4 | 150 | 35 ... 45 | ||
| Apple pie | One level | Round black metal dish with a diameter of 20 cm on wire grill** | 2 | 180 | 50 ... 60 | |
| One level | Round black metal dish with a diameter of 20 cm on wire grill** | 2 | 170 | 50 ... 60 | ||
| 2 levels | 1-Round black metal dish with a diameter of 20 cm on wire grill**4-Round black metal dish with a diameter of 20 cm on pastry tray** | 1 - 4 | 170 | 50 ... 60 | ||
| It is suggested to perform preheating for all foods.* These accessories may not supplied with the product.** These accessories are not supplied with the product. They are commercially available accessories. | ||||||
Tips til bagning af kage
- If the cake is too dry, increase the temperature by 10°C and decrease the cooking time. - If the cake is wet, use less liquid or lower the temperature by 10°C. - If the cake is too dark on top, place it on a lower rack, lower the temperature and increase the cooking time. - If cooked well on the inside but sticky on the outside use less liquid, lower the temperature and increase the cooking time.Tips til bagning af wienerbrød
- If the pastry is too dry, increase the temperature by 10°C and decrease the cooking time. Dampen the layers of dough with a sauce composed of milk, oil, egg and yoghurt. - If the pastry takes too long to bake, pay care that the thickness of the pastry you have prepared does not exceed the depth of the tray. - If the upper side of the pastry gets browned, but the lower part is not cooked, make sure that the amount of sauce you have used for the pastry is not too much at the bottom of the pastry. Try to scatter the sauce equally between the dough layers and on the top of pastry for an even browning.  Cook the pastry in accordance with the mode and temperature given in the cooking table. If the bottom part is still not browned enough, place it on one lower rack next time.Tips til tilberedning af grøntsager
- If the vegetable dish runs out of juice and gets too dry, cook it in a pan with a lid instead of a tray. Closed vessels will preserve the juice of the dish. - If a vegetable dish does not get cooked, boil the vegetables beforehand or prepare them like canned food and put in the oven.For det bedste tilberedningsresultat (varmluft/over- og undervarme/surffunktion):
- You can cook foods made of dense dough such as buns, cake in paper, cookies or biscuits simultaneously in 1, 2 or 3 trays thanks to the homogenous heat distribution ensured by this function. • You may cook wet dough foods such as apple pie and tart in tray simultaneously in 2 trays. - Cooking large amount of foods containing much liquid or yeasted dough in a single tray will improve the cooking result. More homogenous cooking is obtained in large volume foods which are rising as the hot air comes from the side walls as well, which is a function not contained in conventional ovens. - Time and energy can be saved and perfect cooking results can be obtained thanks to the multi-tray cooking feature of this function.Sådan betjenes grillen
ADVARSEL
Close oven door during grilling. Hot surfaces may cause burns!Tænding af grillen
1. Turn the Function knob to the desired grill symbol. 2. Then, select the desired grilling temperature. 3. If required, perform a preheating of about 5 minutes. » Temperature light turns on.Slukning af grillen
1. Turn the Function knob to Off (top) position.  Foods that are not suitable for grilling carry the risk of fire. Only grill food which is suitable for intensive grilling heat. Do not place the food too far in the back of the grill. This is the hottest area and fatty food may catch fire.Tilberedningstider for grillstegning
Grilling with electric grill| Food | Accessory to use | Rack position | Recommended temperature (°C)** | Cooking time (approx. in min.) |
| Fish | Wire grill | 4...5 | 250/max | 20...25 min.# |
| Sliced chicken | Wire grill | 4...5 | 250/max | 25...35 min. |
| Lamb chops | Wire grill | 4...5 | 250/max | 20...25 min. |
| Roast beef | Wire grill | 4...5 | 250/max | 25...30 min.# |
| Veal chops | Wire grill | 4...5 | 250/max | 25...30 min.# |
| Toast bread* | Wire grill | 4 | 250/max | 1...3 min. |
| *depending on thickness*Preheat for 5 minutes**If the grill temperature of your product cannot be adjusted, the grill will work at the maximum temperature. | ||||
| Food | Accessory to use | Rack position | Temperature (°C) | Cooking time (approx. in min.) |
| Toast bread | Wire grill | 4 | 250/max | 1...3 min. |
| Meatballs (beef) - 12 pieces | Wire grill | 4 | 250/max | 25...35 min. |
| Turn the food after 2/3 of the total grilling time.It is suggested to perform 5-6 minutes preheating for all foods broiling. | ||||
6 Vedligeholdelse og pleje
Generelle oplysninger
Service life of the product will extend and the possibility of problems will decrease if the product is cleaned at regular intervals. FARE:
Disconnect the product from mains supply before starting maintenance and cleaning works. There is the risk of electric shock! FARE:
Allow the product to cool down before you clean it. Hot surfaces may cause burns! - Clean the product thoroughly after each use. In this way it will be possible to remove cooking residues more easily, thus avoiding these from burning the next time the appliance is used. - No special cleaning agents are required for cleaning the product. Use warm water with washing liquid, a soft cloth or sponge to clean the product and wipe it with a dry cloth. • Always ensure any excess liquid is thoroughly wiped off after cleaning and any spillage is immediately wiped dry. - Do not use cleaning agents that contain acid or chloride to clean the stainless or inox surfaces and the handle. Use a soft cloth with a liquid detergent (not abrasive) to wipe those parts clean, paying attention to sweep in one direction.  The surface might get damaged by some detergents or cleaning materials. Do not use aggressive detergents, cleaning powders/creams or any sharp objects during cleaning. Do not use harsh abrasive cleaners or sharp metal scrapers to clean the oven door glass since they can scratch the surface, which may result in shattering of the glass.  Do not use steam cleaners to clean the appliance as this may cause an electric shock.Rengøring af betjeningspanelet
Clean the control panel and knobs with a damp cloth and wipe them dry.  If your product is equipped with buttons/knobs do not remove the control buttons/knobs to clean the control panel. Control panel may get damaged!Rengøring af ovnen
Rengøring af sidevæggen (varierer afhængigt af produktmodellen)
(This feature is optional. It may not exist on your product.) 1. Remove the front section of the side rack by pulling it in the opposite direction of the side wall. 2. Remove the side rack completely by pulling it towards you.  (If your product is equipped with "Surf" function) 1. Remove pin (1) of the side rack by pulling it in the direction of arrow with the side wall it is mounted.  2. Remove the side rack and side wall completely by pulling it towards you. 3. Remove the side rack from the holes (2) on the oven wall by pulling.  The number of holes behind the side wall and the size of the wire rack may change depending on the product model. 4. To clean the side rack and side wall, use warm water with washing liquid, a soft cloth or sponge to clean the product and wipe it with a dry cloth. 5. Place side rack by pulling to holes (2) on the back of side wall.   If you have the flexi telescopic feature of your product; there is one hole on the back surf side wall. Place side rack by pulling to hole. 6. Lock side rack to side wall by pulling pin (1) of side rack in the direction of arrow. 7. Place side rack and side wall assembly to its place by pulling pins (3) to holes on the back wall as shown in figure.  8. Place pin (1) at side rack to its place as shown in figure.  Be sure that side rack and side wall has been placed properly.Katalytiske vægge
(Denne funktion er valgfri. Den findes muligvis ikke på dit produkt.)
The inner side walls (A) and/or the rear wall (B) of your product may be coated with catalytic enamel. Catalytic walls have a light matte colour and a porous surface. Catalytic walls of the oven should not be cleaned. Porous surfaces of the catalytic walls are automatically cleaned by absorbing and converting the spilled oil (steam and carbon dioxide). Nem damprengøring
It ensures easy cleaning because the dirt (having waited not for too long) is softened with the steam that forms inside the oven and the water drops condensing on the inner surfaces of the oven. 1. Remove all accessories inside the oven. 2. Pour 500 ml of water into the oven tray and place the tray at the 2nd rack of the oven.  3. Set the oven to easy steam cleaning mode and run at 100° C for 25 minutes. 4. Open the door and wipe the inner surfaces of the oven with a damp sponge or cloth. 5. Use warm water with washing liquid, a soft cloth or sponge to clean the persistent dirt and wipe it with a dry cloth.  During the easy steam cleaning mode, water that is placed in the tray to soften lightly formed residues/dirt within the oven cavity will evaporate and condense in the oven cavity and inner glass of the oven door, therefore water may drip when the oven door is opened. Wipe away the condensation as soon as the oven door is opened.Rengøring af ovnlågen
To clean the oven door, use warm water with washing liquid, a soft cloth or sponge to clean the product and wipe it with a dry cloth.  Don't use any harsh abrasive cleaners or sharp metal scrapers for cleaning the oven door. They could scratch the surface and destroy the glass.Afmontering af ovnlågen
1. Open the front door (1). 2. Open the clips at the hinge housing (2) on the right and left hand sides of the front door by pressing them down as illustrated in the figure.  1 Door 2 Hinge lock(closed position) 3 Oven 4 Hinge lock(open position)  3. Move the front door to half-way.  4. Remove the front door by pulling it upwards to release it from the right and left hinges.  Steps carried out during removing process should be performed in reverse order to install the door. Do not forget to close the clips at the hinge housing when reinstalling the door.Afmontering af den indvendige glasplade i lågen
(This feature is optional. It may not exist on your product.) The inner glass panel of the oven door can be removed for cleaning. Open the oven door.  1 Frame 2 Plastic part Pull towards yourself and remove the plastic part installed to upper section of the front door.  1 Innermost glass panel 2 Inner glass panel 3 Outer glass panel 4 Plastic glass panel slot-Lower As illustrated in figure, raise the innermost glass panel (1) slightly in direction A and pull it out in direction B. Repeat the same procedure to remove the inner glass panel (2).  The first step to regroup the door is reinstalling inner glass panel (2). As illustrated in figure, place the chamfered corner of the glass panel so that it will rest in the chamfered corner of the plastic slot.  Inner glass panel (2) must be installed into the plastic slot close the innermost glass panel (1). When installing the innermost glass panel (1), make sure that the printed side of the panel faces towards the inner glass panel. It is important to seat lower corner of inner glass panel into the lower plastic slot. Push the plastic part towards the frame until you hear a "click".Udskiftning af ovnpæren
FARE:
Before replacing the oven lamp, make sure that the product is disconnected from mains and cooled down in order to avoid the risk of an electrical shock. Hot surfaces may cause burns!  In this oven, an incandescent lamp with a power of less than 40 W, a height of less than 60 mm, a diameter of less than 30 mm or a halogen lamp with socket type G9, a power of less than 60 W is used. The lamps are suitable for operation at temperatures above 300 °C. Oven lamps can be obtained from Authorised Service Agents or technician with licence.  Position of lamp might vary from the figure.  The lamp used in this appliance is not suitable for household room illumination. The intended purpose of this lamp is to assist the user to see foodstuffs.  The lamps used in this appliance have to withstand extreme physical conditions such as temperatures above 50 °C.Hvis dit komfur er udstyret med en rund pære:
1. Disconnect the product from mains. 2. Turn the glass cover counter clockwise to remove it.  3. If your oven lamp is of type (A) shown in the figure below, remove it by rotating as shown and replace it. If it is of type (B), pull and remove it as shown in the figure and replace it.   4. Install the glass cover.7 Fejlfinding
Ovnen afgiver damp, når den er i brug.
\- It is normal that steam escapes during operation. >>> This is not a fault.Produktet afgiver metalliske lyde under opvarmning og afkøling.
\- When the metal parts are heated, they may expand and cause noise. >>> This is not a fault.Produktet fungerer ikke.
- The mains fuse is defective or has tripped. >>> Check fuses in the fuse box. If necessary, replace or reset them. • Product is not plugged into the (grounded) socket. >>> Check the plug connection.Ovnen lys virker ikke.
- Oven lamp is defective. >>> Replace oven lamp. - Power is cut. >>> Check if there is power. Check the fuses in the fuse box. If necessary, replace or reset the fuses.Ovnen varmer ikke.
- Might not be set to a certain cooking function and/or temperature. >>> Set the oven to a certain cooking function and/or temperature. - In models equipped with a timer, the timer is not adjusted. >>> Adjust the time. (In products with microwave oven, timer controls only microwave oven.) - Power is cut. >>> Check if there is power. Check the fuses in the fuse box. If necessary, replace or reset the fuses.(I modeller med timer) Urdisplayet blinker, eller ursymbolet er tændt.
\- A previous power outage has occurred. >>> Adjust the time / Switch of the product and switch it on again.  Consult the Authorised Service Agent or technician with licence or the dealer where you have purchased the product if you can not remedy the trouble although you have implemented the instructions in this section. Never attempt to repair a defective product yourself.beko
Indbygningsovn
Instrukcja użytkowania  PLLæs venligst denne brugsanvisning først!
Drogi Kliencie, Dziękujemy za wybór wyrobu firmy Beko. Mamy nadzieję, że wyrób ten, wyprodukowany zgodnie z najwyższymi wymogami jakościowymi i według najnowszej technologii, służyć Ci będzie jak najlepiej. Prosimy zatem przed użyciem tego wyrobu uważnie przeczytać całą tę instrukcję obsługi i wszystkie inne dostarczone z nim dokumenty i zachować je do wglądu w przyszłości. Jeśli przekażesz ten wyrób komuś innemu, oddajcie mu także tę instrukcję. Przestrzegaj wszelkich ostrzeżeń i informacji z tej instrukcji. Pamiętaj, że niniejsza instrukcja użytkowania może odnosić się także do kilku innych modeli. Różnice pomiędzy modelami wskazano w niniejszej instrukcji.Forklaring af symboler
W niniejszej instrukcji użytkowania stosuje się następujące symbole:  Ważna informacja lub przydatna wskazówka dot. użytkowania  Ostrzeżenie przed zagrożeniem dla życia i mienia.  Ostrzeżenie przed porażeniem elektrycznym.  Ostrzeżenie przed zagrożeniem pożarem.  Ostrzeżenie przed gorącymi powierzchniami. Niniejsze urządzenie jest zgodne z następującymi Dyrektywami Unii Europejskiej: \- 2014/30/WE LVD (Niskie Napięcia) \- 2014/35/WE EMC (Kompatybilność Elektromagnetyczna) Importer: Beko S.A. ul. Puławska 366, 02-819 Warszawa1 Vigtige instruktioner og advarsler vedrørende sikkerhed og miljø 4
Ogólne zasady bezpieczeństwa....4 Bezpieczeństwo elektryczne....4 Zasady zachowania bezpieczeństwa przy użytkowaniu tego wyrobu....5 Zamierzone przeznaczenie....7 Bezpieczeństwo dzieci....8 Stare urządzenia....8 Pozbywanie się materiałów opakowaniowych......92 Generelle oplysninger 10
Opis urządzenia....10 Zawartość opakowania....11 Dane techniczne....123 Installation 13
Przed zainstalowaniem....13 Instalacja i przyłączenie....15 Przyszły transport....164 Forberedelse 18
Jak oszczędzać energię....18 Pierwszy raz....18 Ustawianie czasu....18 Pierwsze czyszczenie ....18 Podgrzewanie wstępne....185 Sådan bruges ovnen 20
Ogólne informacje o pieczeniu ciast i mięs oraz o grillowaniu. 20 Jak obsługiwać piekarnik elektryczny.... 20 Tryby pracy....21 Korzystanie z zegara piekarnika.... 22 Tabela czasów pieczenia 24 Jak obsługiwać grill.... 26 Tabela czasów pieczenia przy grillowaniu.... 276 Rengøring og vedligeholdelse 28
Informacje ogólne.... 28 Czyszczenie panelu sterowania 28 Czyszczenie piekarnika 28 Przenoszenie drzwiczek piekarnika.... 30 Wyjmowanie szyby w drzwiczkach.... 30 Wymiana lampki w piekarniku.... 317 Fejlfinding 32
1 Vigtige instruktioner og advarsler vedrørende sikkerhed og miljøbeskyttelse
W rozdziale tym zawarto instrukcje zachowania bezpieczeństwa, które pomogą uniknąć zagrożenia obrażeniem lub szkodą. Nieprzestrzeganie tych instrukcji spowoduje unieważnienie wszelkich gwarancji.Generelle sikkerhedsregler
- Urządzenie może być używane przez dzieci w wieku 8 lat i starsze oraz osoby o ograniczonych zdolnościach fizycznych, czuciowych lub umysłowych, lub nieumiejętne i niedoświadczone, jeśli są pod nadzorem lub poinstruowano je w sprawach użytkowania tego urządzenia w sposób bezpieczny i rozumieją związane z tym zagrożenia. Dzieci nie powinny bawić się tym urządzeniem. Dzieciom bez nadzoru nie należy powierzać czyszczenia ani konserwacji. \- Urządzenie może być używane przez osoby (w tym dzieci) niepełnosprawne fizycznie, psychicznie lub umysłowo, a także przez osoby bez doświadczenia lub wiedzy w zakresie obsługi urządzenia wyłącznie pod nadzorem lub po uprzednim poinstruowaniu w zakresie bezpiecznego korzystania z urządzenia. Należy dopilnować, aby dzieci nie bawiły się tym urządzeniem. \- W razie przekazania produktu innej osobie do użytku osobistego lub do celów związanych z wykorzystaniem używanego produktu należy przekazać go wraz z podręcznikiem użytkownika, etykietami produktu i innymi stosownymi dokumentami i elementami. \- Instalacje i naprawy musi zawsze wykonywać autoryzowany pracownik serwisowy. Producent nie odpowiada za szkody wynikłe z instalacji i napraw wykonywanych przez osoby nieupoważnione i może z tego powodu unieważnić gwarancję. Przed instalacją uważnie przeczytaj tę instrukcję. \- Nie wolno uruchamiać tego wyrobu, jeśli jeśli jest niesprawny lub widocznie uszkodzony. - Po każdym użyciu sprawdź, czy wyłączone zostały pokrętła funkcjonalne.Elektrisk sikkerhed
\- W razie awarii tego urządzenia nie należy go używać do czasu naprawy przez autoryzowany serwis. Grozi to porażeniem elektrycznym! \- Piekarnik ten można podłaczyć tylko do gniazdka z uziemieniem o napięciu i z zabezpieczeniem jakie podano w "Danych technicznych. Zleć wykonanie instalacji uziemienia wykwalifikowanemu elektrykowi, niezależnie od tego, czy używasz transformatora do zasilania. Firma nasza nie ponosi odpowiedzialności za jakiekolwiek problemy wynikające z braku uziemienia tego piekarnika zgodnie z miejscowymi przepisami. \- Nie wolno myć piekarnika rozlewając nań wodę! Grozi to porażeniem elektrycznym! \- Nie wolno dotykać wtyczki mokrymi dłońmi. Nie wolno wyciągać wtyczki ciągnąc za przewód, należy ją wyciągnij chwytając za nią samą. \- Piekarnik ten trzeba odłączyć od zasilania na czas instalacji, konserwacji, czyszczenia i napraw. \- Aby uniknąć zagrożenie w przypadku uszkodzenia przewodu zasilającego, musi go wymienić producent, punkt serwisowy lub osoba o podobnych kwalifikacjach. \- Piekarnik należy tak zainstalować, aby można było go całkowicie odłączyć od sieci. Odłączenie to należy zapewnić albo poprzez wyjęcie wtyczki z gniazdka, albo wyłączenie wyłącznika, w który wyposażona jest domowa instalacja elektryczna, zgodnie z przepisami budowlanymi. - Tylna powierzchnia piekarnika nagrzewa się w trakcie jego pracy. Upewnij się, że przyłącze elektryczne nie dotyka tej tylnej powierzchni; w przeciwnym razie może ono ulec uszkodzeniu. - Przewód zasilający nie może się zakleszczyć między drzwiczkami i ramą piekarnika, a także nie można go prowadzić przez gorące powierzchnie. W przeciwnym wypadku izolacja przewodów może się topić i w rezultacie może nastąpić zwarcie. - Wszelkie prace na układach i urządzeniach elektrycznych wykonywać może tylko upoważniony i wykwalifikowany personel. - W razie jakiejkolwiek awarii wyłącz wyrób i odłącz go od sieci zasilającej. W tym celu wyłącz bezpiecznik zabezpieczający instalację domową. - Upewnij się, że prąd bezpiecznika jest odpowiedni dla tego wyrobu.Sikkerhedsregler ved brug af dette produkt
\- OSTRZEŻENIE: Podczas użytkowania urządzenie i jego części są gorące. Nie dotykać nagrzanych części. Dzieci poniżej 8 lat mogą przebywać w pobliżu urządzenia wyłącznie pod nadzorem osób dorosłych. \- Nigdy nie wolno używać tego wyrobu w stanie zakłócenia oceny sytuacji lub koordynacji przez konsumpcję alkoholu i/lub innych środków odmieniających świadomość. \- Zachowaj ostrożność, jeśli w potrawach stosuje się napoje alkoholowe. W wysokiej temperaturze alkohol paruje i może się zapalić po zetknięciu z gorącymi powierzchniami. \- Nie umieszczaj żadnych materiałów łatwopalnych w pobliżu tego wyrobu, ponieważ jego boki mogą bardzo się nagrzewać przy pracy. \- W trakcie użytkowania piekarnik nagrzewa się. Należy zachować ostrożność i nie dotykać elementów grzejnych wewnątrz piekarnika. \- Należy dbać, aby żaden otwór wentylacyjny nie był zakryty. \- Nie podgrzewaj w piekarniku zamkniętych puszek ani szklanych słoików. Ciśnienie, które wytworzy sie w takiej puszce/słoiku, może je rozsadzić. \- Nie umieszczaj foremek do pieczenia, naczyń ani folii aluminiowej bezpośrednio na dnia piekarnika. Nagromadzenie ciepła mogłoby zniszczyć dno piekarnika. - 'Do czyszczenia szyby w drzwiczkach piekarnika nie należy używać szorstkich środków czyszczących ani ostrych skrobaków metalowych, ponieważ mogą one zarysować powierzchnię, co może doprowadzić do popękania szyby.'" - Do czyszczenia tego urządzenia nie używaj urządzeń parowych, ponieważ może to spowodować porażenie prądem. - (Różnią się zależnie od modelu piekarnika.) Właściwe umieszczanie rusztu i foremki na stelażach Właściwe umieszczanie na stelażu rusztu i/lub tacki na ociekający tłuszcz jest niezwykle ważne. Wsuń ruszt lub tackę na ociekający tłuszcz pomiędzy dwie szyny i zanim umieścisz na nim potrawę upewnij się, że jest wypoziomowany (patrz następująca ilustracja).  Gamle apparater
Zgodność z dyrektywą WEEE i usuwanie odpadów:  Niniejszy wyrób jest zgodny z dyrektywą Parlamentu Europejskiego i Rady (2012/19/WE). Wyrób ten oznaczony jest symbolem klasyfikacji zużytych urządzeń elektrycznych i elektronicznych (WEEE). Wyrób ten wykonano z części i materiałów wysokiej jakości, które mogą być odzyskane i użyte jako surowce wtórne. Po zakończeniu użytkowania nie należy pozbywać się go razem z innymi odpadkami domowymi. Należy przekazać go do punktu zbiórki urządzeń elektrycznych i elektronicznych na surowce wtórne. Aby dowiedzieć się, gdzie jest najbliższy taki punkt, prosimy skonsultować się z władzami lokalnymi. Odpowiednie postępowanie ze zużytym sprzętem zapobiega potencjalnym konsekwencjom dla środowiska naturalnego i ludzkiego zdrowia.Overensstemmelse med RoHS-direktivet:
Niniejszy wyrób jest zgodny z dyrektywą Parlamentu Europejskiego i Rady RoHS (Ograniczenie użycia substancji niebezpiecznych) (2011/65/WE). Nie zawiera szkodliwych i zakazanych materiałów, podanych w tej dyrektywie.Bortskaffelse af emballagematerialer
\- Materiały opakowaniowe są niebezpieczne dla dzieci. Należy trzymać je w bezpiecznym miejscu, niedostępne dla dzieci. Opakowanie tego wyrobu wyprodukowano z surowców wtórnych. Należy odpowiednio się ich pozbywać i sortować je zgodnie z instrukcjami gospodarki surowcami wtórnymi. Nie należy ich wyrzucać razem ze zwykłymi odpadkami domowymi.2 Generelle oplysninger
Opis urządzenia   1 Panel sterowania 2 Półka druciana 3 Tacka 4 Uchwyt 5 Drzwiczki 6 Silnik wentylatora (za płytą stalową) 7 Lampka 8 Górny element grzejny 9 Pozycje półki  1 Pokrętło wyboru funkcji 2 Czasomierz cyfrowy 3 Pokrętło termostatu 4 Lampka termostatuIndhold i pakken
 Dostarczane akcesoria różnią się zależnie od modelu wyrobu. Niektóre z akcesoriów opisanych w instrukcji obsługi mogą nie być dostarczane razem z tym modelem produktu.1. Brugsanvisning
2. Standard bageplade
Służy do pieczenia ciast, mrożonek i dużych porcji pieczeni. 3. Dyb form
Służy do pieczenia ciast, dużych porcji pieczeni, potraw soczystych oraz do zbierania tłuszczu przy grillowaniu. 4. Trådrist
Służy do pieczenia oraz do ustawiania potraw do smażenia, pieczenia lub gotowania w naczyniach do zapiekanek na wybranej półce.  5. Korrekt placering af trådrist og form på teleskopskinner (Denne funktion er kun tilgængelig som ekstraudstyr. Den er muligvis ikke inkluderet i det købte produkt).
Teleskopowe stelaże pozwalają na łatwe zakładanie i zdejmowanie foremek oraz rusztu. Podczas używania foremki i rusztu ze stelażem teleskopowym, muszą być do nich dosunięte kołki znajdujące się z tyłu stelaża teleskopowego, przy krawędziach rusztu i foremki.   Dane techniczne| Napięcie/częstotliwość | 220-240 V ~ 50 Hz |
| Łączne zużycie energii el. | 2.5 kW |
| Typ/ przekrój przewodu | min.H05VV-FG 3 × 1,5 mm2 |
| Wymiary zewnętrzne (wys./szer./głęb.) | 595 mm/594 mm/567 mm |
| Wymiary instalacyjne (wys./szer./głęb.) | **590 lub 600 mm/560 mm/min. 550 mm |
| Piekarnik główny | Piekarnik wielofunkcyjny |
| Oświetlenie wewnętrzne | 15/25 W |
| Zużycie energii el. przez grill. | 2.2 kW |
Grundlæggende oplysninger: Data på energimærker for elektriske ovne er angivet i henhold til standarden PL-EN 60350-1 / IEC 60350-1. Disse værdier bestemmes ved standardbelastning med aktive funktioner for over- og undervarme og varmluftstøtte (hvis sådanne funktioner er tilgængelige).
Klasę sprawności energetycznej określa się zgodnie z następującą priorytetyzacją, zależnie od występowania odpowiednich funkcji w danym modelu piekarnika. 1-Pieczenie z wentylatorem eco-fan, 2-Pieczenie turbo powolne, 3-Pieczenie turbo, 4-Grzałki dolna/górna wspomagane wentylatorem. ** Patrz: Instalacja, strona 13.  Dane techniczne mogą zostać zmienione bez uprzedzenia w celu poprawy jakości wyrobu.  Rysunki w tej instrukcji są schematyczne i mogą się nieco różnic od danego wyrobu.  Wartości podane na etykietkach wyrobu lub w towarzyszącej mu dokumentacji uzyskano w warunkach laboratoryjnych zgodnie z odnośnymi normami. Wartości te mogą się różnić zależnie od operacyjnych i środowiskowych warunków pracy danego wyrobu.3 Installation
Produkt musi zostać zainstalowany przez wykwalifikowaną osobę i zgodnie z obowiązującymi przepisami. W przeciwnym gwarancja zostanie unieważniona. Producent nie odpowiada za szkody wynikłe z instalacji i napraw wykonywanych przez osoby nieupoważnione i może z tego powodu unieważnić gwarancję. Før installation
Urządzenie to przeznaczone jest do zainstalowania w dostępnych w handlu szafkach kuchennych. Pomiędzy tym urządzeniem a ścianami lub meblami kuchennymi należy pozostawić bezpieczny odstęp. Patrz: rysunek (wymiary w mm) - Powierzchnie zastosowanych syntetycznych laminatów i lepiszczy muszą być odporne na wysoką temperaturę (minimum 100 °C). - Szafki kuchenne należy ustawić równo i przymocować. - Jeśli pod piekarnikiem jest szuflada, trzeba pomiędzy nimi założyć półkę. - Urządzenie nosić muszą przynajmniej dwie osoby. - Piekarnik należy przenosić, trzymając za wycięcia do noszenia po obu stronach. - Przed montażem produktu należy wyjąć z jego wnętrza wszystkie materiały i dokumenty. - Meble kuchenne muszą mieć wymiary zgodne z poniższym rysunkiem. Aby zapewnić odpowiednią wentylację, z tyłu mebli kuchennych należy wyciąć otwór o wymiarach podanych na poniższym rysunku.       min.  * min.Installation og tilslutning
\- Urządzenie to należy instalować zgodnie z miejscowymi przepisami dot. instalacji gazowych i elektrycznych.Elektrisk tilslutning
Przyłączyć ten wyrób do uziemionego gniazda / obwodu zabezpieczonego miniaturowym wyłącznikiem automatycznym o odpowiedniej mocy, jak podano w tabeli „Dane techniczne”. Zlecić wykonanie instalacji uziemienia wykwalifikowanemu elektrykowi, niezależnie od tego, czy używany jest transformator do zasilania. Nasza firma nie odpowiada za żadne szkody wynikłe z użytkowania tego wyrobu bez uziemienia, zgodnie z przepisami miejscowymi. FARE:
Wyrób ten musi był przyłączony do sieci elektrycznej przez osobę upoważnioną i wykwalifikowaną. Gwarancja na ten wyrób obowiązuje dopiero po jego prawidłowym zainstalowaniu. Producent nie odpowiada za szkody wynikłe z instalacji i napraw wykonywanych przez osoby nieupoważnione. FARE:
Przewodu zasilającego nie można klamrować, zginać i przyciskać, ani stykać z gorącymi częściami urządzenia. Przewody uszkodzone wymieniać może tylko wykwalifikowany elektryk. Zagrożenie porażeniem elektrycznym, zwarciem lub pożarem z powodu niefachowej instalacji! - Przyłączenie musi być zgodne z przepisami krajowymi. - Parametry zasilania muszą odpowiadać danym podanym na tabliczce znamionowej urządzenia. Tabliczkę znamionową zobaczysz po otwarciu przednich drzwiczek. - Przewód zasilający ten wyrób musi odpowiadać parametrom podanym w tabeli "Dane techniczne". FARE:
Przed podjęciem jakichkolwiek prac przy instalacji elektrycznej, odłącz to urządzenie od zasilania. Grozi to porażeniem elektrycznym!  Wtyczka przewodu zasilająca musi był łatwo dostępna po zainstalowaniu (nie prowadzić przewodu ponad płytą kuchenną).  Podczas podłączania kabli należy przestrzegać krajowych/miejscowych przepisów elektrycznych oraz korzystać z właściwego dla piekarnika gniazda zasilającego / obwodu oraz wtyczki. Jeśli ograniczenia mocy produktu znajdują się poza obecną obciążalnością wtyczki i gniazda zasilającego / obwodu, należy podłączyć produkt bezpośrednio za pośrednictwem stałej instalacji elektrycznej bez korzystania z wtyczki i gniazda zasilającego / obwodu.Sæt strømkablets stik i stikkontakten.
Installation af produktet
1. Wsuń piekarnik do szafki, wyrównaj ustawienie i zabezpiecz, sprawdzając, czy przewód zasilania nie jest uszkodzony ani nie uwiązt.  Zabezpiecz piekarnik 2 śrubkami, jak na rysunku. Po montażu należy się upewnić, że śruby są wystarczająco dokręcone, a piekarnik się nie rusza. Piekarnik zamontowany niezgodnie z instrukcjami lub zamocowany niedostatecznie dokręconymi śrubami może się przewrócić podczas użytkowania.Ovne med køleventilator (Den er måske ikke en del af det købte produkts udstyr).
 1 Wentylator chłodzący 2 Panel sterowania 3 Drzwiczki Wbudowany wentylator chłodzący chłodzi zarówno szafkę do zabudowy, jak i przód urządzenia.  Wentylator chłodzący nadal pracuje przez 20 - 30 minut nawet po wyłączeniu piekarnika. Jeśli pieczenie odbywało się z zaprogramowanym timerem piekarnika, po zakończeniu pieczenia wraz z wszystkimi funkcjami zostanie wyłączony również wentylator.Endelig kontrol
1. Obsługa produktu... 2. Sprawdź funkcjeFremtidig transport
- Zachowaj oryginalne pudło kartonowe na piekarnik i transportuj go w nim. Przestrzegaj instrukcji na pudle. Jeśli nie masz oryginalnego pudła, zapakuj piekarnik w folię bąbelkową lub gruba tekturę i zabezpiecz taśmą klejącą. - Aby zapobiec uszkodzeniu drzwiczek przez ruszt druciany i tackę z wnętrza piekarnika włóż do jego środka pasek tektury, równo z pozycją tacek. Drzwiczki piekarnika zabezpiecz taśmą klejącą do ścian bocznych. \- Nie podnos piekarnika za drzwiczki ani za klamkę.  Nie stawiaj na nim żadnych przedmiotów i przemieszczaj go w pozycji pionowej.  Sprawdzaj, czy piekarnik nie uległ w transporcie widocznym uszkodzeniom.4 Forberedelse
Sådan sparer du energi
Następujące wskazówki pomogą użytkować urządzenie w sposób ekologiczny oraz energooszczędny. - Używaj naczyń w ciemnych barwach lub emaliowanych, co poprawi przepływ ciepła. - Gotując potrawy wykonuj operacje podgrzewania, jeśli zaleca się ją w instrukcji obsługi lub przepisie gotowania. - Nie otwieraj zbyt często drzwiczek w trakcie gotowania. - O ile to możliwe staraj się gotować w piekarniku więcej niż jedną potrawę na raz. Można gotować w dwóch naczyniach obok siebie na ruszcie. - Gotuj potrawy po kolei. Piekarnik będzie już gorący. - Można oszczędzić energię wyłączając piekarnik na kilka minut przed upływem czasu gotowania. Nie otwieraj drzwiczek piekarnika. • Rozmrażaj mrożonki przed gotowaniem.Første gang
Indstilling af tiden
 Przy każdej regulacji na wyświetlaczu migać będą odnośne symbole. Naciskaj przyciski +/—, abynastawić godzinę, o której piekamik zostanie załączony po raz pierwszy.  W przypadku modeli ze sterowaniem dotykowym najpierw dotknij ≡, a następnie za pomocą + / — ustaw godzinę. Potwierdź ustawienie, dotykając symbolu ⓘ i poczekaj 4 sekundy, nie dotykając żadnych klawiszy, aby potwierdzić.  1 Klawisz regulacji 2 Symbol blokady klawiszy 3 Symbol zegara 4 Symbol głośności alarmu (Może ona nie wchodzić w zakres wyposażenia zakupionego produktu). 5 Symbol trybu oszczędnego Eco 6 Klawisz plus 7 Klawisz minus 8 Symbol wykresu czasu 9 Symbol alarmu 10 Symbol końca gotowania 11 Symbol czasu gotowania 12 Klawisz programu  Jeśli nie ustawiono godziny początkowej, zegar zacznie działać poczynając od godziny 12:00 i wyświetli się symbol ⓣ. Symbol ten zniknie po ustawieniu godziny.  W przypadku zaniku zasilania ustawienia bieżącej godziny zostają skasowane. Trzeba je ustawić na nowo.Første rengøring
 Pewne detergenty lub środki czyszczące mogą uszkodzić powierzchnię. Nie używaj agresywnych detergentów, proszku/mleczka do czyszczenia, ani żadnych ostrych przedmiotów. 1. Usuń wszystkie materiały opakowaniowe. 2. Wytrzyj powierzchnie wyrobu wilgotną ściereczką lub gąbką i wytrzyj do sucha ściereczką.Forvarmning
Nagrzewaj urządzenie przez ok. 30 minut, a potem je wyłącz. Przed pierwszym użyciem należy wypalić wszelkie pozostałości po produkcji i warstwy ochronne. ADVARSEL
Można się poparzyć od gorących powierzchni! Urządzenie to nagrzewa się podczas pracy. Nie dotykaj gorących palników, wewnętrznych sekcji piekarnika, elementów grzejnych itp. Zakaz zbliżania się dzieci! Do wkładania i wyjmowania potraw z gorącego piekarnika zawsze zakładaj odporne na wysokie temperatury rękawice.Elektrisk ovn
1. Wyjmij z piekarnika wszystkie foremki do pieczenia i ruszt. 2. Zamknij drzwiczki piekarnika. 3. Wybierz pozycję „Static" (Statyczne) 4. Wybierz najwyższą moc grilla; patrz Jak obsługiwać piekarnik elektryczny, strona 20. 5. Niech piekarnik pracuje przez ok. 30 minut. 6. Wyłącz piekarnik; patrz Jak obsługiwać piekarnik elektryczny, strona 20Ovn med grill
1. Wyjmij z piekarnika wszystkie foremki do pieczenia i ruszt. 2. Zamknij drzwiczki piekarnika. 3. Wybierz najwyższą moc grilla; patrz Jak obsługiwać grill, strona 26. 4. Niech piekarnik pracuje przez ok. 30 minut. 5. Wyłącz grill; patrz Jak obsługiwać grill, strona 26  W trakcie pierwszego uruchomienia przez parę godzin mogą się wydzielać dym i zapach. Jest to całkiem normalne. Zadbaj o dobrą wentylację kuchni i pozbędź się dymu i zapachu. Nie wdychać bezpośrednio powstającego dymu i zapachu.5 Sådan betjener du ovnen
Generelle oplysninger om bagning af kager og kød samt grillning.
ADVARSEL
Można się poparzyć od gorących powierzchni! Urządzenie to nagrzewa się podczas pracy. Nie dotykaj gorących palników, wewnętrznych sekcji piekarnika, elementów grzejnych itp. Zakaz zbliżania się dzieci! Do wkładania i wyjmowania potraw z gorącego piekarnika zawsze zakładaj odporne na wysokie temperatury rękawice. FARE:
Otwierając drzwiczki piekarnika zachowaj ostrożność, bo może ulotnić się z niego para. Taka ulatniająca się para może poparzyć dłonie, twarz i oczy.Tips til bagning af kager
- Używaj stosownych naczyń metalowych z powłokami nieprzylegającymi, pojemników aluminiowych, lub żaroodpornych form silikonowych. • Rób najlepszy użytek z miejsca na półce. • Foremkę do pieczenia stawiaj w środku półki. - Prze załączeniem piekarnika lub grilla wybierz właściwą pozycję półki. Nie zmieniaj pozycji półki, gdy kuchenka jest gorąca. • Zamknij drzwiczki piekarnika i nie otwieraj ich.Tips til bagning af kød
- Przyprawienie całych kurcząt, indyków i dużych porcji mięsa, np. sokiem z cytryny ;in czarnym pieprzem przed pieczeniem podniesie jego wydajność. - Pieczenia mięsa z kością trwa ok. 15 - 30 minut dłużej niż pieczenie takiego samego kawałka bez kości. - Na upieczenie jednego centymetra grubości mięsa potrzeba ok. 4 do 5 minut. - Po zakończeniu pieczenia pozostaw pieczeń w piekarniku na ok. 10 minut. Soki lepiej rozchodzą się po całej pieczeni i nie wyciekają przy jej krojeniu. - Ryby należy piec na półce środkowej lub dolnej na żaroodpornym talerzu.Tips til grillning
Mięso, ryby i drób szybciej rumienią się, gdy się je grilluje, zachowują miłą kruchość i nie wysychają. Do grillowania szczególnie nadają się płaskie kawałki, nadziane na szpikulec szaszłyki i kiełbaski, a także warzywa o znacznej zawartości wody, takie jak pomidory i cebule. - Rozłoż kawałki mięsa do grillowania na ruszcie drucianym lub w foremce do pieczenia z rusztem drucianym w taki sposób, aby pokryta nimi powierzchnia nie wystawała poza grzałkę. - Wsuń ten ruszt druciany lub foremkę do pieczenia z rusztem na wybrany poziom w piekarniku. Jeśli grillujesz na ruszcie drucianym, na dolną półkę wsuń foremkę do pieczenia na kapiący tłuszcz. Aby łatwiej oczyścić to naczynie z tłuszczu wlej do niego trochę wody.  Żywność nie nadająca się do grillowania stwarza zagrożenie pożarowe. Do grillowania używaj wyłącznie żywności, która nadaje się do przyrządzania w wysokich temperaturach. Nie wkładaj żywności do grilla zbyt głęboko. Tam jest najgoręcej i tłusta żywność może się zapalić.Sådan betjenes den elektriske ovn
Piecyk ten wyposażony jest w "wyskakujące" pokrętła, które po naciśnięciu wysuwają się. 1. Aby wysunąc pokrętło wciśnij je, a potem obróć w żądane nastawienie.  2. Po zakończeniu procesu gotowania należy wsunąć pokrętło do wewnątrz.Valg af temperatur og funktion
 1 Pokrętło wyboru funkcji 2 Pokrętło termostatu 1. Nastaw pokrętło Function [Funkcja] na wybrany tryb pracy. 2. Nastaw pokrętło Temperature na wybraną temperature. » Piekarnik nagrzewa się do nastawionej temperatury i utrzymuje ją. W trakcie nagrzewania lampka temperatury pozostaje zapalona.Slukning af den elektriske ovn
Przekręć pokrętła funkcji i temperatury w górne pozycje „off” ("wył.).Ristpositioner (modeller med trådrist)
Ważne jest, aby prawidłowo umieszczać ruszt druciany na półce drucianej. Ruszt druciany trzeba wsadzić pomiędzy półki druciane jak pokazano na rysunku. Ruszt druciany nie może opierać się o tylną ścianę piekarnika. Aby poprawić wydajność grillowania, przesuń ruszt druciany do przedniej sekcji stelażu i ustal go przy pomocy drzwiczek. (Różnią się zależnie od modelu piekarnika.) Funktioner
Podana tutaj kolejność trybów pracy może różnić się od ich układu dla tego urządzenia.Øvre og nedre varmelegeme
 Grzałki góma i dolna działają. Żywność nagrzewana jest równocześnie od góry i od dołu. Na przykład, nadaje się do ciasta, ciasteczek oraz ciasta i zapiekanek w foremkach do pieczenia. Piecz w jednej tylko blasze.Nedre varmelegeme
 Pracuje tylko grzałka dolna. Nie nadaje się do pizzy ani do rumienienie potrawy od spodu po upieczeniu. Funkcja tej trzeba także używać do łatwego czyszczenia parą. Nedre/øvre varme med varmluft
 Działają grzałki górna i dolna plus wentylator (w ścianie tylnej). Wentylator szybko równomiernie rozprowadza gorące powietrze po całym piekarniku. Piecz w jednej tylko blasze.Drift med ventilator.
 Piekarnik nie jest nagrzewany. Pracuje tylko wentylator (w ścianie tylnej). Nadaje się od powolnego odtajania mrożonek ziarnistych w temperaturze pokojowej lub studzenia potraw gotowanych.Surfunktion
 Gorące powietrze nagrzane grzałką tylną jest bardzo szybko równomiernie rozprowadzane w całym piekarniku przez wentylator. Jest to przydatne do gotowania potraw na różnych poziomach półek i w większości przypadków nie potrzeba wstępnego podgrzewania. Nadaje się do pieczenia w kilku blachach na raz. Funkcja tej trzeba także używać do łatwego czyszczenia parą. 3D-funktion
 Działają grzałki górna i dolna i nagrzewanie z termoobiegiem (w ścianie tylnej). Potrawy pieką się równomiernie i szybko rumienia. Piecz w jednej tylko blasze.Fuld grill
 Działa duży grill w suficie piekarnika. Nadaje się do grillowania dużych ilości mięsa. - Do grillowania położ duże lub średnie porcje na odpowiednio ustawionej półce pod grzałką grilla. - Temperature nastaw na poziom maksymalny. - Obróć potrawę po upływie połowy czasu grillowania.Grill + varmluft
 Efekt grillowania nie jest tak mocny, jak przy Full Grill. - Do grillowania położ małe lub średnie porcje na odpowiednio ustawionej półce pod grzałką grilla. • Nastawianie wybranej temperatury - Obróć potrawę po upływie połowy czasu grillowania.Brug af ovnens ur
 1 Klawisz regulacji 2 Symbol blokady klawiszy 3 Symbol zegara 4 Symbol głośności alarmu (Może ona nie wchodząć w zakres wyposażenia zakupionego produktu). 5 Symbol trybu oszczędnego Eco 6 Klawisz plus 7 Klawisz minus 8 Symbol wykresu czasu 9 Symbol alarmu 10 Symbol końca gotowania 11 Symbol czasu gotowania 12 Klawisz programu  Najdłuższy czas, na który można nastawić koniec procesu gotowania, to 5 godziny, 59 minut. W razie przerwy w zasilaniu program kasuje się. Trzeba zaprogramować piekarnik od nowa.  Przy ustawianiu każdej wartości na wyświetlaczu migać będą odnośne symbole. Trzeba odczekać chwilę, aż ustawienia zaczną działać.  Jeśli nie nastawi się żadnych ustawień pieczenia, nie można ustawić godziny.  Jeśli na początku pieczenia ustawiono czas jego trwania, wyświetli się czas pozostały.Bagning med indstillet tid:
Nastawiając na czasomierzu czas trwania pieczenia można tak ustawić piekarnik, aby wyłączyć się po jego upływie. 1. Wybierz funkcję do pieczenia. 2. Dotykaj ⚙, aż na wyświetlaczu pojawi się symbol I→I, aby ustawić czas pieczenia. 3. Czas trwania pieczenia nastawia się przyciskami + / - » » Po nastawieniu czasu trwania pieczenia na wyświetlaczu na stałe pojawi się symbol |→| oraz wycinek czasu. 4. Wstaw naczynie do piekarnika i pokrętłem temperatury nastaw temperaturę. Rozpocznie się pieczenie. » Odliczenie czasu pieczenia na wyświetlaczu rozpoczyna się wraz z jego rozpoczęciem i zapalają się wszystkie części wycinka czasu Ustawiony czas pieczenia podzielony jest na cztery równe części, a po upływie czasu każdej części jej symbol gaśnie. Można więc łatwo śledzić upływ czasu pieczenia w stosunku do całkowitego czasu jego trwania.Indstilling af bagningens afslutning til et senere tidspunkt:
Po ustawieniu na czasomierzu czasu trwania pieczenia można ustawić poźniejszą godzinę zakończenia pieczenia. 1. Wybierz funkcję do pieczenia. 2. Dotykaj Ⓤ, aż na wyświetlaczu pojawi się symbol I→I, aby ustawić czas pieczenia. 3. Ustaw czas trwania pieczenia przyciskami + / =. » » Po ustawieniu czas trwania pieczenia na wyświetlaczu na stałe pojawi się symbol |→|. 4. Dotykaj ⓣ, aż na wyświetlaczu pojawi się symbol →l, oznaczający koniec czasu pieczenia. 5. Ustaw godzinę zakończenia pieczenia przyciskami + / - » Po nastawieniu godziny zakończenia pieczenia na wyświetlaczu na stałe pojawia się symbole |→| oraz →|, a także wycinek czasu. Gdy zacznie się pieczenie, zniknie symbol →|. 6. Wstaw naczynie do piekarnika i pokrętem temperatury nastaw temperaturę. Rozpocznie się pieczenie. » Czasomierz piekarnika oblicza godzinę rozpoczęcia pieczenia odejmując czas trwania pieczenia od nastawionej godziny jego zakończenia. Wybrany tryb pracy uruchamia się gdy nadejdzie godzina rozpoczęcia pieczenia i piekarnik nagrzewa się do nastawionej temperatury. Utrzymuje tę temperaturę przez cały czas pieczenia. » Odliczenie czasu pieczenia na wyświetlaczu rozpoczyna się wraz z jego rozpoczęciem i zapalają się wszystkie części wycinka czasu Ustawiony czas pieczenia podzielony jest na cztery równe części, a po upływie czasu każdej części jej symbol gaśnie. Można więc łatwo śledzić upływ czasu pieczenia w stosunku do całkowitego czasu jego trwania. 7. Po zakończeniu pieczenia na wyświetlaczu pojawia się "End", a czasomierz wydaje dźwiekowy sygnał ostrzegawczy. 8. Dźwięk alarmu rozlega się przez 2 minuty. Aby wyłączyć alarm, wystarczy nacisnąć dowolny przycisk. Alarm ucichnie i wyświetli się bieżąca godzina.  Po naciśnięciu dowolnego przycisku na końcu dźwiekowego sygnału ostrzegawczego, piekarnik ponownie się załączy. Obróć pokrętło temperatury i pokrętło funkcji w pozycję "0" (wył.), aby wyłączyć piekarnik zapobiegając jego ponownemu załączeniu na konierc sygnału ostrzegawczego.Aktivering af knapblokering
Uruchamiając funkcję blokady przycisków, można zapobiec zmianom w ustawieniach piekarnika. 1. Dotykaj ≡, aż na wyświetlaczu pojawi się symbol 🔒. » Na wyświetlaczu pojawi się „OFF” [WYŁ]. 2. Naciśnij +, aby aktywować blokadę przycisków. » Po włączeniu blokady przycisków na wyświetlaczu pojawi się „On” [Zał.], a symbol ⏻ będzie się nadal świecił.  Po załączeniu blokady przycisków przyciski piekarnika nie działają. W razie przerwy w zasilaniu blokada przycisków nie kasuje się.For at deaktivere blokeringen skal du trykke på knappen
1. Dotykaj ≡, aż na wyświetlaczu pojawi się symbol 🔒. » Na wyświetlaczu pojawi się „On” [Zał.]. 2. Wyłącz blokadę przycisków, naciskając klawisz ■. » Po wyłączeniu blokady wyświetl się "OFF" [WYŁ]. Ustawianie alarmu czasowego Poza programowaniem pieczenia zegara w piekarniku można użyć do nastawiania dowolnych ostrzeżeń lub przypomnień. Alarm czasowy nie wpływa na inne funkcje piekarnika. Używa sie go tylko do ostrzegania. Na przykład przydaje się, gdy chce się obrócić potrawę w piekarniku o określonej godzinie. Po upływie nastawionego czasu odezwie się alarm dźwiękowy. 1. Dotykaj Ⓤ, aż na wyświetlaczu pojawi się symbol △.  Najdłuższy czas alarmu to 23 godziny i 59 minut. 2. Ustaw alarm, korzystając z klawiszy + / -  Przyciski funkcyjne dźwięku alarmu, godziny dnia, jasności wyświetlacza i temperatury powinny być ustawione na 0 (OFF) (WYŁ.). » Symbol ⬆ będzie się nadal świecił, a gdy ustawi się godzinę alarmu, pojawi się na wyświetlaczu. 3. Po upływie czasu alarmu symbol △ zaczyna migać i odzywa się sygnał alarmowy.Slukning af alarmen
1. Dźwięk alarmu rozlega się przez 2 minuty. Aby wyłączyć alarm, wystarczy nacisnąć dowolny przycisk. » Alarm ucichnie i wyświetli się bieżąca godzina.Annullering af alarmen
1. Aby wyłączyć alarm, dotykaj Ⓤ, aż na wyświetlaczu pojawi się symbol △. 2. Naciśnij i przytrzymaj klawisz —, aż wyświetli się „00:00”.  Wyświetli się czas alarmu. Jeśli równocześnie nastawi się czas alarmu i czas pieczenia, wyświetli się krótszy z nich.Ændring af alarmlyden
1. Dotykaj ≡, aż na wyświetlaczu pojawi się symbol 📞. 2. Ustaw głośność aalarmu przyciskami + / - 3. Za krótką chwilę odezwie się dźwięk alarmu o nastawionej głośności. » Wybrane dźwięki alarmy wyświetłą się na ekranie jako b-01, b-02 lub b-03.Ændring af det aktuelle klokkeslæt
Aby zmienić poprzednie ustawienie godziny: 1. Dotykaj ≡, aż na wyświetlaczu pojawi się symbol ⓣ. 2. Godzinę nastawia się przyciskami + /—. 3. Za krótką chwilę wyświetl się nastawiona godzina.Økonomitilstand
W trybie ekonomicznym można oszczędzać energię przy pieczeniu przez czas ustawiony w piekarniku. W trybie tym pieczenie kończy się przy utrzymaniu temperatury wewnątrz piekarnika przez wyłączenie grzałek przed końcem pieczenia.Indstilling af økonomitilstand.
1. Dotykaj symbolu ≡, aż na wyświetlaczu pojawi się symbol eco. » Na wyświetlaczu pojawi się „OFF” [WYŁ]. 2. Załcz tryb ekonomiczny dotykając przycisku +. » Po załączeniu blokady przycisków na wyświetlaczu pojawi się "On", a symbol eco pali się nadal.Deaktivering af økonomitilstand.
1. Dotykaj symbolu:≡, aż na wyświetlaczu pojawi się symbol eco. » Na wyświetlaczu pojawi się „On” [Zał.]. 2. Tryb ekonomiczny wyłacza się dotknięciem przycisku ■. » Po wyłączeniu blokady przycisków wyświetl się "Off" [Wył.].Indstilling af skærmens lysstyrke
(Ta funkcja jest dostępna opcjonalnie. Może ona nie wchodzić w zakres wyposażenia zakupionego produktu). 1. Dotykaj ≡ aż na wyświetlaczu pojawi się d-01, d-02 lub d-03 jako miara jasności wyświetlacza. 2. Nastaw jasność przyciskami + /- » Po krótkiej chwili wyświetli się nastawiona godzina.Tabel over bagetider
 Podane w tabeli czasy są tylko orientacyjne. Mogą się różnic, zależnie od rodzaju żywności, grubości, rodzaju i preferencji kulinarnych. Pieczenie ciast i mięs  Pierwsza półka w piekarniku to półka dolna.| Potrawa | Liczba blach | Akcesoria do zastosowania | Symbole menu ustawień | Pozycja półki | Temperatura (°C) | Czas pieczenia (ok., w min.) |
| Ciasto w foremce | Jedna blacha | Standardowa tacka* | 3 | 180 | 25 ... 30 | |
| Ciasto w foremce | Jedna blacha | Formy do ciast na ruszt druciany** | 2 | 180 | 50 ... 60 | |
| Ciastka | Jedna blacha | Standardowa tacka* | 3 | 160 | 25 ... 35 | |
| Jedna blacha | Standardowa tacka* | 3 | 150 | 30 ... 40 | ||
| 2 blachy | 1-Foremka do ciasta*3-Standardowa tacka* | 1 - 3 | 150 | 35 ... 50 | ||
| 3 blachy | 1-Standardowa tacka*3-Foremka do ciasta*5-Foremka głęboka* | 1 - 3 - 5 | 150 | 35 ... 50 | ||
| Ciasto biszkoptowe | Jedna blacha | Okrągła tortownica o średnicy 26 cm na ruszt druciany** | 3 | 160 | 25 ... 35 | |
| Jedna blacha | Okrągła tortownica o średnicy 26 cm na ruszt druciany** | 2 | 150 | 30 ... 40 | ||
| 2 blachy | 1-Okrągła tortownica o średnicy 26 cm na ruszt druciany**4-Okrągła tortownica o średnicy 26 cm na foremkę do ciasta** | 1 - 4 | 150 | 35 ... 45 | ||
| Ciasteczka | Jedna blacha | Foremka do ciasta* | 3 | 180 | 25 ... 30 | |
| 2 blachy | 1-Foremka do ciasta*3-Standardowa tacka* | 1 - 3 | 180 | 30 ... 40 | ||
| 3 blachy | 1-Foremka do ciasta*3-Standardowa tacka*5-Foremka głęboka* | 1 - 3 - 5 | 180 | 35 ... 45 | ||
| Ciasto | Jedna blacha | Standardowa tacka* | 2 | 200 | 30 ... 40 | |
| 2 blachy | 1-Foremka do ciasta*3-Standardowa tacka* | 1 - 3 | 200 | 45 ... 55 | ||
| 3 blachy | 1-Foremka do ciasta*3-Standardowa tacka*5-Foremka głęboka* | 1 - 3 - 5 | 200 | 45 ... 55 | ||
| Ciasto zdobne | Jedna blacha | Standardowa tacka* | 2 | 200 | 25 ... 35 | |
| 2 blachy | 1-Foremka do ciasta*3-Standardowa tacka* | 1 - 3 | 200 | 35 ... 45 | ||
| 3 blachy | 1-Foremka do ciasta*3-Standardowa tacka*5-Foremka głęboka* | 1 - 3 - 5 | 200 | 35 ... 45 | ||
| Ciasto na zaczynie | Jedna blacha | Standardowa tacka* | 2 | 200 | 35 ... 45 | |
| Lazania | Jedna blacha | Szkłana/metalowa forma prostokątna na ruszt druciany** | 2 - 3 | 200 | 30 ... 40 | |
| Pizza | Jedna blacha | Standardowa tacka* | 2 | 200 ... 220 | 15 ... 20 | |
| Stek wolowy/ pieczen wolowa | Jedna blacha | Standardowa tacka* | 3 | 25 min. 250/max, następnie 180 ... 190 | 100 ... 120 | |
| Udziec jagnięcy (zapiekanka) | Jedna blacha | Standardowa tacka* | 3 | 25 min. 250/max, następnie 190 | 70 ... 90 | |
| Jedna blacha | Standardowa tacka* | 3 | 25 min. 250/max, następnie 190 | 60 ... 80 | ||
| Pieczone kurczęta (1,8-2 kg) | Jedna blacha | Standardowa tacka* | 2 | 15 min. 250/max, następnie 180 ... 190 | 60 ... 80 | |
| Jedna blacha | Standardowa tacka* | 2 | 15 min. 250/max, następnie 180 ... 190 | 60 ... 80 | ||
| Indyk (5.5 kg) | Jedna blacha | Standardowa tacka* | 1 | 25 min. 250/max, następnie 180 ... 190 | 150 ... 210 | |
| Jedna blacha | Standardowa tacka* | 1 | 25 min. 250/max, następnie 180 ... 190 | 150 ... 210 | ||
| Ryby | Jedna blacha | Standardowa tacka* | 3 | 200 | 20 ... 30 | |
| Jedna blacha | Standardowa tacka* | 3 | 200 | 20 ... 30 | ||
| Sugeruje się, aby wstępne nagrzewanie stosować przy wszystkich potrawach.* Te akcesoria mogą nie być dostarczane z produktem.** Te akcesoria nie są dostarczane z produktem. Są to akcesoria dostępne komercyjnie. | ||||||
Madlavningstabel til kontrol af måltider
Posiłki w tej tabeli gotowania są przygotowane według EN 60350-1, aby ułatwić instytucjom kontrolnym sprawdzanie produktu| Potrawa | Liczba blach | Akcesoria do zastosowania | Symbole menu ustawień | Pozycja półki | Temperatura (°C) | Czas pieczenia (ok., w min.) |
| Bułka maślana | Jedna blacha | Standardowa tacka* | 3 | 140 | 20 ... 30 | |
| Jedna blacha | Standardowa tacka* | 3 | 140 | 20 ... 30 | ||
| 2 blachy | 1-Standardowa tacka*3-Foremka do ciasta* | 1 - 3 | 140 | 20 ... 30 | ||
| 3 blachy | 1-Standardowa tacka*3-Foremka do ciasta*5-Foremka głęboka* | 1 - 3 - 5 | 140 | 25 ... 35 | ||
| Ciastka | Jedna blacha | Standardowa tacka* | 3 | 160 | 25 ... 35 | |
| Jedna blacha | Standardowa tacka* | 3 | 150 | 30 ... 40 | ||
| 2 blachy | 1-Foremka do ciasta*3-Standardowa tacka* | 1 - 3 | 150 | 35 ... 50 | ||
| 3 blachy | 1-Standardowa tacka*3-Foremka do ciasta*5-Foremka głęboka* | 1 - 3 - 5 | 150 | 35 ... 50 | ||
| Ciasto biszkoptowe | Jedna blacha | Okrągła tortownica o średnicy 26 cm na ruszt druciany** | 3 | 160 | 25 ... 35 | |
| Jedna blacha | Okrągła tortownica o średnicy 26 cm na ruszt druciany** | 2 | 150 | 30 ... 40 | ||
| 2 blachy | 1-Okraqla tortownica o srednicy 26 cm na ruszt druciany**4-Okraqla tortownica o srednicy 26 cm na foremke do ciasta** | 1 - 4 | 150 | 35 ... 45 | ||
| Placek z jabłkami | Jedna blacha | Okrągła czarna metalowa forma do pieczenia o srednicy 20 cm na ruszt grilla** | 2 | 180 | 50 ... 60 | |
| Jedna blacha | Okrągła czarna metalowa forma do pieczenia o srednicy 20 cm na ruszt grilla** | 2 | 170 | 50 ... 60 | ||
| 2 blachy | 1- Okrągła czarna metalowa forma do pieczenia o srednicy 20 cm na ruszt grilla**4- Okrągła czarna metalowa forma do pieczenia o srednicy 20 cm na blachę do pieczenia** | 1 - 4 | 170 | 50 ... 60 | ||
| Sugeruje się, aby wstępne nagrzewanie stosować przy wszystkich potrawach.• Te akcesoria mogą nie być dostarczane z produktem.** Te akcesoria nie są dostarczane z produktem. Są to akcesoria dostępne komercyjnie. | ||||||
Tips til bagning af kage
- Jeśli ciasto jest zbyt suche, zwiększ temperaturę o ok. 10 i skróć czas pieczenia. - Jeśli ciasto jest wilgotne, użyj mniej płynu lub obniż temperaturę o 10°C. - Jeśli ciasto jest zbyt ciemne z góry, umieść je na dolnej półce, obniż temperaturę i przedłuż czas pieczenia. - Jeśli jest dobrze wypieczone wewnątrz, ale klei się na zewnątrz, użyj mniej płynu, obniż temperaturę i przedłuż czas pieczenia.Tips ved bagning af kage
- Jeśli ciasto jest zbyt suche, zwiększ temperaturę o ok. 10 i skróć czas pieczenia. Nawilż warstwy ciasta sosem złożonym z mleka, oleju, jajka i jogurtu. - Jeśli pieczenie ciasta trwa zbyt długo, sprawdź czy grubość przygotowanego ciasta nie przekracza głębokości blachy. - Jeśli góra ciasta brązowieje, ale dolna część nie jest upieczona, sprawdź, czy na dnie ciasta nie ma zbyt wiele użytego dom pieczenia sosu. Aby ciasto brązowiało równomiernie postaraj się rozprowadzić sos równo pomiędzy warstwami i górą ciasta.  Piecz ciasto zgodnie z trybem i temperaturą podanymi w tabeli gotowania. Jeśli dół nadal nie dość się zabrazowił, następnym razem umieść ciasto na dolnej półce.Tips ved tilberedning af grøntsager
- Jeśli potrawa warzywna puszcza soki i zbytnio wysycha, gotuj ja w garnku z pokrywką zamiast blachy. Zamknięte naczynia zatrzymują sok z potrawy. - Jeśli potrawa warzywna nie udusiła się, najpierw ugotuj te warzywa lub przegotuj je jak potrawę z puszki i wsadź do piekarnika. - Dzięki uzyskiwanemu przy pomocy tej funkcji równomiernemu rozkładowi ciepła wypieki z gęstego ciasta, takie jak słodkie bułeczki, ciasto w papierze, ciasteczka lub herbatniki można piec równocześnie na 1, 2 lub 3 blachach. - Wypieki z ciasta wilgotnego, takie jak placek i tarta z jabłkami może piec równocześnie na 2 blachach. - Pieczenie dużych ilości potraw o znacznej zawartości ciasta wilgotnego lub drożdżowego na jednej blasze poprawi rezultat pieczenia. Dzięki funkcji tej, której nie maja piekarniki konwencjonalne, uzyskuje się bardziej jednorodne pieczenie dużych ilości potraw, które rosną, gdy gorące powietrze napływa także ze ścian bocznych. - Dzięki pieczeniu na wielu blachach, które umożliwia ta funkcja, oszczędza się czas i energię i uzyskuje znakomite rezultaty pieczenia.Sådan betjenes grillen
ADVARSEL
Zamykaj drzwiczki na czas grillowania. Można się poparzyć od gorących powierzchni!Tænding af grillen
1. Obróć pokrętło Function [Funkcja] wybranego do symbolu grilla. 2. Następnie nastaw wybraną temperaturę grillowania. 3. W razie potrzeby nagrzewaj grill przez ok. 5 minut. » Zapali się lampka temperatury.Slukning af grillen
1. Obróć pokrętło Function [Funkcja] do gómej pozycji "Off" ("wył.").  Żywność nie nadająca się do grillowania stwarza zagrożenie pożarowe. Do grillowania używaj wyłącznie żywności, która nadaje się do przyrządzania w wysokich temperaturach. Nie wkładaj żywności do grilla zbyt głęboko. Tam jest najgoręcej i tłusta żywność może się zapalić.Tabel over grilltider
Grillowanie na grillu elektrycznym| Potrawa | Akcesoria do zastosowania | Pozycja półki | Zalecana temperatura (°C)** | Czas grillowania |
| Ryby | Ruszt druciany | 4...5 | 250/max | 20...25 min. * |
| Szynycle z kurczaka | Ruszt druciany | 4...5 | 250/max | 25...35 min. |
| Kotlety jagniece | Ruszt druciany | 4...5 | 250/max | 20...25 min. |
| Pieczeń wolowa | Ruszt druciany | 4...5 | 250/max | 25...30 min. * |
| Kotlety cielece | Ruszt druciany | 4...5 | 250/max | 25...30 min. * |
| Opiekanie chleba * | Ruszt druciany | 4 | 250/max | 1...3 min. |
| * zależnie od grubości*Nagrzewać przez 5 minut**Jeśli Twój produkt nie oferuje możliwości regulowania temperatury grilla, będzie on działał przy maksymalnej temperaturze. | ||||
| Potrawa | Akcesoria do zastosowania | Pozycja półki | Temperatura (°C) | Czas pieczenia(ok., w min.) |
| Pieczywo tostowe | Ruszt druciany | 4 | 250/max | 1...3 min. |
| Klopsiki (wołowina) - 12 kawałki | Ruszt druciany | 4 | 250/max | 25..35 min. |
| Obrócić potrawę po upływie 2/3 całkowitego czasu grillowania.Zaleca się, aby wszystkie potrawy poddawać wstępnełu ogrzewaniu przez ok. 5-6 minut przed opiekaniem. | ||||
6 Rengøring og vedligeholdelse
Generelle oplysninger
Okres użytkowania tego wyrobu przedłuży się, a problemy stana się rzadsze, jeśli wyrób ten czyści się w regularnych odstępach czasu. FARE:
Przed konserwacją i czyszczeniem, odłącz piekarnik od sieci. Grozi to porażeniem elektrycznym! ADVARSEL:
Przed czyszczeniem piekarnika odczekaj, aż ostygnie. Można się poparzyć od gorących powierzchni! - Po każdym użyciu dokładnie oczyść ten wyrób. Dzięki temu łatwiej będzie usuwać pozostałości pieczenia, unikając tym samym ich zapalenia się na następnym użyciem piekarnika. - Do jego czyszczenia nie potrzeba żadnych specjalnych środków czyszczących. Wyrób ten czyści się miękką ściereczką lub gąbką i ciepłą wodą z mydłem w płynie, i wyciera suchą ściereczką. - Pamiętaj, aby zawsze starannie wycierać nadmiar płynu po czyszczeniu i natychmiast wycierać wszystko, co się rozleje. - Do czyszczenia powierzchni i klamki ze stali nierdzewnej nie używaj środków czyszczących zawierających kwas lub chlorek. Części te wyciera się do czysta miękką ściereczką z detergentem w płynie (nie w proszku), najlepiej ruchami w tym samym kierunku.  Pewne detergenty lub środki czyszczące mogą uszkodzić powierzchnię. Nie używaj agresywnych detergentów, proszku/mleczka do czyszczenia, ani żadnych ostrych przedmiotów.  Do czyszczenia tego urządzenia nie używaj urządzeń parowych, ponieważ może to spowodować porażenie prądem.Rengøring af kontrolpanelet
Panel sterowania i pokrętła czyści się wilgotną ściereczką i wyciera do sucha.  Jeśli na produkcie znajdują się przyciski/pokrętła, nie należy ich zdejmować do czyszczenia panelu sterowania. Możesz uszkodzić panel sterowania!Rengøring af ovnen
Aby oczyścić ścianę boczną(Różnią się zależnie od modelu piekarnika.) (Ta funkcja jest dostępna opcjonalnie. Może ona nie wchodzić w zakres wyposażenia zakupionego produktu). 1. Wyjmij przednią sekcję stelaża bocznego wyciągając go w przeciwnym kierunku do ściany bocznej. 2. Całkiem wyjmij stelaż ciągnąc go do siebie.  (W przypadku produktów wyposażonych w funkcję Surf) 1. Wyjmij kołek (1) stelażu bocznego wyciągając go w kierunku wskazanym strzałką razem ze ścianką boczną, w której jest zamontowany.  2. Całkiem wyjmij stelaż i ściankę boczną ciągnąc je do siebie. 3. Wyciągnąć boczne stelaże z otworów (2) w ściankach piekarnika.  Liczba otworów w bocznej ściance i wielkość stelaża drucianego zależą od modelu. 4. Stelaż boczny i ścianę boczną czyści się miękką ściereczką lub gąbką i ciepłą wodą z mydłem w płynie, i wyciera suchą ściereczką. 5. Włóż stelaż wciskając go do otworów (2) z tyłu ścianki bocznej.   Jeśli masz Flexi funkcji teleskopowej produktu; jest jeden otwór na tylnej ścianie bocznej surfowania. Umieścić stojak boczny pociągając do otworu. 6. Zablokuj stelaż w ściance bocznej ciągnąc za kołek (1) stelażu w kierunku wskazanym strzałką. 7. Włóż stelaż i zespół ścianki bocznej na miejsce wsadzając kołki (3) w otwory w ściance tylnej, jak pokazano na rysunku.  8. Włóż kolek (1) w stelażu na miejsce, jak pokazano na rysunku.  Sprawdź, czy stelaż i ścianka boczna zostały prawidłowo włożone.Katalytiske vægge
(Ta funkcja jest dostępna opcjonalnie. Może ona nie wchodzić w zakres wyposażenia zakupionego produktu). Wewnętrzna strona bocznych ścian (A) i tylnej ściany (B) urządzenia może być pokryta emalią katalityczną. Ściany pokryte emalią katalityczną mają jasny, matowy kolor i porowatą powierzchnię. Nie należy ich czyścić. Porowata powierzchnia takich ścian czyści się sama, pochłaniając i przekształcając odpryski tłuszczu w parę i dwutlenek węgla. Nem rengøring med damp
Zapewnia łatwe czyszczenie, ponieważ brud (który nie czekał zbyt długo) mięknie pod wpływem wytwarzanej wewnątrz piekarnika pary, a krople wody skraplają się na jego wewnętrznych powierzchniach. 1. Wyjmij z piekarnika wszystkie akcesoria. 2. Włać 500 ml do tacy piekarnika i umieścić tacę na drugim ruszcie piekarnika.  3. Nastaw temperaturę na 100°C i uruchom piekarnik na 25 minut w trybie łatwe czyszczenie para. 4. Otwórz drzwiczki i wilgotną gąbką lub ściereczką wytrzyj wewnętrzne powierzchnie piekamika. 5. Piekarnik czyści się z uporczywego zabrudzenia miękką ściereczką lub gąbką i ciepłą wodą z mydłem w płynie, i wyciera suchą ściereczką.  W trybie łatwego czyszczenia parowego woda znajdująca się na tacy w celu zwilżenia powstałych lekkich zabrudzeń lub resztek odparowuje i ulega skrapłaniu w komorze piekarnika i po wewnętrznej stronie szyby w drzwiach; w związku z tym gdy drzwi piekarnika zostaną otwarte, może z nich kapać woda. Po otwarciu drzwi piekarnika należy natychmiast wytrzeć skroploną wodę.Rengøring af ovnlågen
Drzwiczki piekarnia czyści się miękką ściereczką lub gąbką i ciepłą wodą z mydłem w płynie, i wyciera suchą ściereczką.  Do czyszczenia drzwiczek piekarnika nie używaj żadnych szorstkich środków czyszczących ani skrobaczek metalowych. Mogą porysować powierzchnię i zniszczyć szybę.Afmontering af ovnlågen.
1. Otwórz drzwiczki przednie (1). 2. Otwórz zacisk w obudowie zawiasu (2) po prawej i lewej stronach drzwiczek przednich przyciskając je ku dołowi, jak pokazano na rysunku.  1 Drzwiczki 2 Blokada zawiasu(pozycja zamknięta) 3 Piekarnik 4 Blokada zawiasu(otwarta pozycja)  3. Przesuń drzwiczki przednie w pół drogi.  4. Zdejmij drzwiczki przednie ciągnąc je ku górze aby uwolnić je z prawych i lewych zawiasów.  Kroki procesu wyjmowaniu drzwiczek powtarza się w odwrotnej kolejności przy ich zakładaniu. Przy zakładaniu drzwi z powrotem nie zapomnij zamknąć zacisk w obudowie zawiasu.Udtagning af glaspladen i lågen
(Ta funkcja jest dostępna opcjonalnie. Może ona nie wchodzić w zakres wyposażenia zakupionego produktu). Szklaną szybę z drzwiczek piekarnika można wyjąć do czyszczenia. Otwórz drzwiczki.  1 Rama 2 Część plastikowa Pociągnij ku sobie i wyjmij część plastikową założoną na górną sekcję przednich drzwiczek.   1 Szyba wewnętrzna 2 Szyba wewnętrzna 3 Szyba zewnętrzna 4 Plastikowa szczelina na szybę - Dolna Jak pokazano na ilustracji, podnieś lekko szybę wewnętrzną (1) w kierunku A i wyciągnij ją w kierunku B. Powtórz tę czynność, aby wyjąć szybę wewnętrzną (2).  Pierwszy krok do przegrupowania drzwiczek polega na ponownym założeniu szyby wewnętrznej (2). Jak pokazano na rysunku, włóż sfazowany narożnik szyby tak, aby spoczywała w fazowanym narożniku szczeliny plastikowej.  Druga szyba wewnętrzna (2) musi być założona w szczelinę plastikową blisko szyby wewnętrznej (1). Zakładając szybę wewnętrzną (1), upewnij się, że jej strona z nadrukiem zwrócona jest ku szybie drugiej. Ważne jest, aby wsadzić dolne narożniki wszystkich szyb wewnętrznych w dolne szczeliny plastikowe. Naciśnij część plastikową ku ramie, aż usłyszysz kliknięcie.Udskiftning af ovnpæren
ADVARSEL:
Aby uniknąć zagrożenia porażeniem elektrycznym, zanim wymienisz lampkę upewnij się, że piekarnik jest odłączony od sieci zasilającej i że ostygł. Można się poparzyć od gorących powierzchni!  W tym piekarniku stosuje się żarówkę o mocy mniejszej niż 40 W, wysokość mniejszą niż 60 mm, średnicę mniejszą niż 30 mm lub lampę halogenową z gniazdem typu G9, o mocy mniejszej niż 60 W. Lampy nadają się do pracy w temperaturach powyżej 300 °C. Lampy piekarnika można nabyć u autoryzowanych agentów serwisowych lub technika z licencją.  Lampka może być umieszczona gdzie indziej niż na rysunku.  Żarówka używana w tym urządzeniu nie jest odpowiednia do oświetlania pomieszczeń domowych. Zgodnie z przeznaczeniem żarówka ta służy do oświetlania żywności.  Żarówki używane w tym urządzeniu muszą wytrzymać ekstremalne warunki fizyczne, jak temperatury powyżej 50°C.Hvis ovnen har en rund pære:
1. Odłącz piekarnik od sieci zasilającej. 2. Odkręć szklaną pokrywę, przekręcając ją w lewo, aby ją zdjąć.  3. Jeżeli lampka w piekarniku to lampka typu (A) pokazana na poniższym rysunku, należy ją wykręcić zgodnie z oznaczeniem na rysunku, a następnie wymienić. Jeśli typ lampki to (B), należy ją pociągnąć i wyjąć w sposób pokazany na rysunku, a następnie wymienić.   4. Załóż szklaną pokrywę.7 Fejlfinding
Ovnen afgiver damp under drift.
• Ulatnianie sie pary w trakcie pracy jest normalnym zjawiskiem. >>> To nie jest awaria.Der høres metalliske lyde, når apparatet opvarmes og afkøles.
\- Podgrzewane części metalowe mogą się rozszerzać i wydawać dźwięki. >>> To nie jest awaria.Produktet virker ikke.
- Bezpiecznik uszkodzony lub zadział. >>> Sprawdź bezpieczniki w skrzynce bezpiecznikowej. W razie potrzeby wymień je lub załącz. - Piekarnik nie jest przyłączony do (uziemionego) gniazdka. >>> Sprawdź kontakt wtyczki.Ovnen lyser ikke i lampen.
- Lampka w piekarniku jest uszkodzona. >>> Wymień lampkę w piekarniku. - Brak zasilania. >>> Sprawdź, czy jest prąd Sprawdź bezpiecznik w skrzynce bezpiecznikowej. W razie potrzeby wymień je lub załącz.Ovnen varmer ikke.
- Piekarnik może nie być ustawiony na pewne funkcje gotowania i/lub temperatury. >>> Ustawić piekarnik na pewne funkcje gotowania i/lub temperatury. - W modelach z programatorem czasowym, nie nastawiono programatora >>> Nastaw zegar. (W produktach z piekarnikiem mikrofalowym, regulator czasowy steruje tylko piekarnikiem mikrofalowym.) - Brak zasilania. >>> Sprawdź, czy jest prąd Sprawdź bezpiecznik w skrzynce bezpiecznikowej. W razie potrzeby wymień je lub załącz.(I modeller med tidsur) Displayet blinker, eller ursymbolet lyser.
\- Poprzednio nastąpił zanik zasilania. >>> Nastaw zegar/ Wyłącz piekarnik i ponownie załącz go.  Jeśli pomimo postępowania według instrukcji z tego rozdziału problem pozostaje, skonsultuj się z autoryzowanym agentem serwisowym lub sprzedawcą piekarnika. Nie próbuj samemu naprawiać zepsutego piekarnika.Indbygningsovn
Brugsanvisning
 ETLæs venligst denne brugsanvisning først!
Lugupeetud klient! Aitäh, et otsustasite Bekou toote kasuks. Loodetavasti jääte selle kaasaegse tehnoloogia järgi valmistatud kvaliteetse toote tööga rahule. Selleks tutvuge enne toote kasutamist hoolikalt kasutusjuhendi ja köigi kaasasolevate dokumentidega ja hoidke need alles. Kui annate toote üle uuele omanikule, pange kaasa ka kasutusjuhend. Järgige köiki kasutusjuhendis toodud hoiatusi ja juhiseid. Pidage meeles, et kasutusjuhendis võib olla juttu mitmest mudelist. Mudelite erinevused on kasutusjuhendis välja toodud.Symbolernes betydning
Kasutusjuhendis kasutatakse järgmisi sümboleid:  Oluline teave või kasulikud nõuanded.  Hoiatus eluohtlike või vara kahjustavate olukordade kohta.  Hoiatus elektrilöögi kohta.  Hoiatus tulekahju kohta.  Hoiatus tuliste pindade kohta.1 Vigtige advarsler og sikkerheds- og miljøinstruktioner 4
Üldine ohutus 4 Elektriohutus 4 Toote ohutu kasutamine....5 Ettenähtud otstarve....7 Laste ohutuse tagamine....7 Toote kõrvaldamine kasutuselt....8 Pakkematerjali kõrvaldamine 82 Generelle oplysninger 9
Ülevaade 9 Pakendi sisu....10 Tehnilised andmed....113 Installation 12
Enne paigaldamist 12 Paigaldamine ja ühendamine....14 Toote körvaldamine kasutuselt....154 Forberedelser 16
Nõuandeid energia säästmiseks....16 Esimene kasutuskord....16 Kellaaja sisestamine....16 Seadme esmane puhastamine....16 Esmane kuumutamine....165 Sådan bruges ovnen 18
Üldine teave küpsetamise, röstimise ja grillimise kohta 18 Elektriahju kasutamine....18 Töörežiimid 19 Ahju kella kasutamine 20 Küpsetusaegade tabel 22 Kuidas grilli kasutada.... 24 Küpsetamisaegade tabel grillimiseks 256 Opbevaring og vedligeholdelse 26
Üldine teave....26 Juhtpaneeli puhastamine 26 Ahju puhastamine 26 Ahjuukse eemaldamine 28 Ukse siseklaasi eemaldamine.... 28 Ahjuvalgusti pirni vahetamine.... 297 Fejlfinding 30
1 Vigtige advarsler samt anvisninger for sikkerhed og miljøbeskyttelse
Käesolev peatükk sisaldab ohutusjuhiseid, mis aitavad teil vältida kehavigastusi ja varalist kahju. Nende juhiste eiramisel kaotab garantii kehtivuse.Generel sikkerhed
\- Üle 8-aastased lapsed ja füüsilise, meele- või vaimupuudega inimesed või isikud, kellel puuduvad vastavad kogemused või teadmised, võivad seadet kasutada juhul, kui nad teevad seda järelevalve all või on saanud seadme kasutamiseks vajalikud juhised ning mõistavad sellega kaasnevaid ohte. Lapsed ei tohi seadmega mängida. Lapsed ei tohi omapead seadet puhastada ja hooldada. \- Seadet ei tohi kasutada lapsed ega füüsilise, meele- või vaimse puudega isikud või kogemusteta ja vastavate teadmisteta isikud, kui nad ei tegutse nende ohutuse eest vastutava isiku järelevalve või juhendamise all. Lapsed ei tohi seadmega mängida, kui puudub järelevalve. \- Kui toode antakse kellelegi teisele isiklikuks kasutamiseks või uuele omanikule, tuleb anda kaasa ka kasutusjuhend, toote etiketid ja muud olulised dokumendid ja osad. - Paigaldus- ja remonttööd tuleb alati jätta volitatud teeninduse hooleks. Tootja ei vastuta kahjude eest, mis tulenevad volitamatute isikute tehtud protseduuridest ja võivad muuta garantii kehtetuks. Enne paigaldamist tutvuge hoolikalt juhistega. - Ärge kasutage toodet, kui see on rikkis või sellel on nähtavaid vigastusi. - Kontrollige pärast iga kasutuskorda, et toote funktsiooninupud on välja lülitatud.Elektrisk sikkerhed
- Rikkis toodet ei tohi kasutada, vaid see tuleb lasta volitatud teeninduses korda teha. Elektrilöögi oht! - Toote võib ühendada ainult maandatud elektrikontakti/-liiniga, mille pinge ja kaitse vastavad tabelile “Tehnilised andmed”. Laske maandus paigaldada kvalifitseeritud elektrikul olenemata sellest, kas kasutate toodet transformaatoriga või ilma. Meie ettevõte ei vastuta probleemide eest, mis on tingitud toote kasutamisest ilma kohalikele eeskirjadele vastava maanduseta. - Ärge kunagi peske toodet veega uhtudes või üle kallates! Elektrilöögi oht! - Ärge kunagi puudutage pistikut märgade kätega! Ärge kunagi eemaldage pistikut juhtmest tömmates, vaid hoidke pistikust. - Paigaldamise, hoolduse, puhastamise ja remondi ajaks tuleb toode vooluvõrgust lahutada. - Kui toote toitejuhe saab viga, peab tootja, hooldusfirma või vastava kvalifikatsiooniga elektrik ohu vältimiseks selle välja vahetama. - Seade tuleb paigaldada nii, et selle saab võrgust täielikult lahti ühendada. Lahtiühendamise võimalus tuleb tagada voolupistikuga või püsielektrisüsteemi paigaldatud lülitiga, mis vastab ehitusnõuetele. - Kasutamisel ahju tagakülg kuumeneb. Veenduge, et elektrijuhtmed ei puutu vastu ahju tagakülge, sest kuumus võib neid kahjustada. - Ärge muljuge toitejuhet ahjuukse ja korpuse vahele ja ärge asetage seda tuliste pindade peale. Juhtme isolatsioon võib sulada ning lühise tõttu võib tekkida tulekahju. - Elektriseadmetel ja -süsteemidel peaksid töid teostama ainult volitatud ja vastava kvalifikatsiooniga isikud. - Kahjustuste tekkimisel lülitage toode välja ning lahutage see vooluvõrgust. Selleks lülitage välja kaitsekork. - Veenduge, et kaitsme voolutugevus vastab toote niminäitajatele.Sikker brug af produktet
HOIATUS: Seade ja selle välispinnad muutuvad kasutamise käigus tuliseks. Kindlasti tuleb hoiduda kokkupuutest kuumutuselementidega. Alla 8-aastased lapsed tuleb seadmest eemal hoida, välja arvatud juhul, kui nad on täiskasvanu pideva jälgimise all. \- Ärge kasutage toodet, kui mötlemisvõime või koordinatsioon on alkoholi ja/või uimastite tarbimise tagajärjel halvenenud. \- Olge toitudesse alkohoolseid jooke lisades ettevaatlik. Kõrgel temperatuuril alkohol aurustub ning võib tuliste pindadega kokku puutudes põhjustada tulekahju. \- Ärge asetage toote lähedusse kergestisüttivaid materjale, kuna selle küljed võivad kasutamise ajal kuumeneda. \- Kasutamise käigus seade kuumeneb. Kindlasti tuleb hoiduda kokkupuutest ahju sees paiknevate kuumutuselementidega. - Ärge tõkestage ventilatsiooniavasid. - Ärge kuumutage ahjus suletud konservikarpe ja klaaspurke. Purgis tekkida võiva surve tagajärjel võib see lõhkeda. - Ärge asetage küpsetusplaate, nõusid või fooliumit ahju põhja. Kogunev kuumus võib ahju põhja kahjustada. - Ärge kasutage ahju ukseklaasi puhastamiseks tugevatoimelisi abrasiivseid puhastusvahendeid ega teravaid metallkraabitsaid, sest need võivad pinda kriimustada ning põhjustada klaasi purunemise. - Ärge kasutage puhastamiseks aurupuhasteid, muidu võite saada elektrilöögi. - (Varieerub olenevalt toote mudelist.) Traatresti ja ahjuplaadi asetamine siinidele Traatrest ja/või ahjuplaat tuleb kindlasti asetada siinidele õigesti. Lükake traatrest või küpsetusplaat kahe siini vahele ja enne sellele toidu asetamist veenduge, et see püsib kindlalt paigal (vt allolevat joonist). Bortskaffelse af produktet - overholdelse af WEEE-direktivet og bortskaffelse af udtjent udstyr:
 Seade vastab Euroopa Liidu WEEE direktiivile (2012/19/EL). Seadmel on elektri- ja elektroonikaseadmete jäätmete (WEEE) liigiti kogumise tähis. Seade on valmistatud kvaliteetsetest osadest ja materjalidest, mis sobivad ringlussevõtmiseks ja taaskasutamiseks. Ärge visake tarbetuks muutunud seadet tavalise olmeprügi ega muude jäätmete hulka. Viige see elektri- ja elektroonikajäätmete kogumispunkti. Kogumispunktide kohta saate täpsemat teavet kohalikust omavalitsusest.Overholdelse af RoHS-direktivet:
Seade vastab Euroopa Liidu RoHS-direktiivile (2011/65/EL). See ei sisalda direktiivis mainitud kahjulikke ja keelatud materjale.Bortskaffelse af emballagemateriale
\- Pakkematerjalid on lastele ohtlikud. Hoidke pakkematerjale ohutus kohas, kust lapsed neid kätte ei saa. Toote pakend on valmistatud taaskasutatavatest materjalidest. Körvaldage pakkematerjalid nõuetekohaselt ja sorteerige vastavalt taaskasutatavate jäätmete kogumise eeskirjadele. Ärge visake neid olmeprügi hulka.2 Generelle oplysninger
Ülevaade   1 Juhtpaneel 2 Traatrest 3 Kandik 4 Käepide 5 Uks 6 Ventilaatori mootor (terasplaadi taga) 7 Tuli 8 Ülemine kuumutuselement 9 Riiuli asendid  1 Funktsiooninupp 2 Digitaalne taimer 3 Termostaatnupp 4 TermostaadilampIndhold i pakken
 Lisavarustus võib sõltuvalt toote mudelist varieeruda. Kõiki kasutusjuhendis kirjeldatud lisasid ei pruugi teie tootel olla.1. Brugsanvisning
2. Almindelig plade
Kasutatakse küpsetiste, külmutatud toitude ning suurte praadide valmistamiseks. 3. Dyb ovnplade
Kasutatakse küpsetiste, suurte praadide, suure veesisaldusega roogade valmistamiseks ja grillimisrasva kogumiseks. 4. Trådrist
Kasutatakse praadide valmistamiseks või haudenõus valmistatavate roogade asetamiseks soovitud kõrgusega siinile.  5. Placering af trådrist og bageplade på teleskopskinner
(See funktsioon on valikuline. Teie tootel ei pruugi seda olla.) Teleskoopsiinid võimaldavad küpsetusplaat ja traatresti hõlpsasti ahju panna ja ahjust välja võtta. Kui kasutate küpsetusplaati ja traatresti teleskoopsiinidega, peavad tihvtid teleskoopsiinide tagaosas toetuma traatresti ja küpsetusplaadi servade vastu.   Tehnilised andmed| Pinge/sagedus | 220-240 V ~ 50 Hz |
| Energiatarve kokku | 2.5 kW |
| Juhtme tüüp/ristlöige | minH05W-FG 3 × 1,5 mm2 |
| Välismõõtmed (kõrgus/laius/sügavus) | 595 mm/594 mm/567 mm |
| Paigaldusmõõtmed (kõrgus/laius/sügavus) | **590 või 600 mm/560 mm/min 550 mm |
| Peamine ahi | Multifunktsionaalne ahi |
| Sisevalgusti | 15/25 W |
| Grilli energiatarve | 2.2 kW |
| i | Toote kvaliteedi parandamiseks võidakse tehnilisi andmeid etteteatamiseta muuta. |
| i | Kasutusjuhendis toodud joonised on skemaatilised ning ei pruugi teie tootega täpselt kokku langeda. |
| i | Tootel olevatel etikettidel või tootega kaasas olevas dokumentatsioonis toodud väärtused on saadud laboritingimustes vastavalt asjaomastele standarditele. Olenevalt toote töö- ja keskkonnatingimustest võivad tegelikud väärtused varieeruda. |
3 Installation
Toode tuleb lasta paigaldada pädeval spetsialistil vastavalt kehtivatele eeskirjadele. Muidu muutub garantii kehtetuks. Tootja ei vastuta kahjude eest, mis tulenevad volitamatute isikute tehtud protseduuridest ja võivad muuta garantii kehtetuks.| Toote paigalduskoha ning elektrisüsteemi ettevalmistamine on kliendi ülesanne. | |
| OHT:Toote paigaldamisel tuleb järgida köiki gaasi- ja elektrisüsteemidele kehtestatud kohalikke eeskirju. | |
| OHT:Enne paigaldamist vaadake üle, kas tootel ei ole defekte. Defektide esinemisel ärge laske toodet paigaldada.Kahjustatud toode võib kujutada ohtu. |
Før installation
Seade on mõeldud integreerimiseks kaubandusvõrgus müüdavate köögikappidega. Seadme ning köögiseinte ja -mööbli vahele tuleb jätta ohutuse tagamiseks piisav vahe. Vt joonist (väärtused millimeetrites). - Pinnad, sünteetilised laminaadid ja kasutatavad puhastusvahendid peavad olema kuumuskindlad (vähemalt 100 °C). - Köögikapid peavad olema horisontaalsed ja kinnitatud. - Kui ahju all on sahtel, tuleb ahju ja sahtli vahele paigaldada riiul. • Kandke seadet vähemalt kahe inimesega. - Ahju teisaldamisel hoidke ahju selleks ette nähtud avadest. - Enne toote paigaldamist eemaldage selle seest köik esemed ja dokumendid. - Köögimööbel peab vastama alloleval joonisel esitatud mõõtmetele. Köögimööbli tagaküljel peab piisava ventilatsiooni tagamiseks olema alloleval joonisel esitatud mõõtmetega ava.| iÄrge paigaldage toodet külmkappide ega sügavkülmikute kõrvale. Tootest eralduv soojus suurendab jahutusseadmete energiatarvet. |
| iÄrge kasutage toote tõstmiseks või liigutamiseks ust ega uksekäepidet. |
Installation og tilslutning
\- Toodet tohib paigaldada ja ühendada ainult vastavalt ametlikele paigalduseeskirjadele.Elektriske tilslutninger
Ühendage toode maandatud elektrikontakti/-liiniga, millel on sobivate näitajatega minikaitselüliti (vt tabelit "Tehnilised andmed"). Laske maandus paigaldada kvalifitseeritud elektrikul olenemata sellest, kas kasutate toodet transformaatoriga või ilma. Meie ettevõte ei vastuta kahjude eest, mis on tingitud toote kasutamisest ilma kohalikele eeskirjadele vastava maanduseta. FARE:
Toote võivad vooluvõrku ühendada ainult autoriseeritud ja kvalifitseeritud isikud. Toote garantiiaeg algab alles pärast nõuetekohast paigaldamist. Tootja ei vastuta kahjude eest, mis tulenevad volitamatute isikute tehtud protseduuridest. FARE:
Toitejuhet ei tohi kinnitada klambritega, väänata ega muljuda ning see ei tohi puutuda kokku toote kuumenevate osadega. Kahjustatud toitejuhtme peab välja vahetama kvalifitseeritud elektrik. Muul juhul tuleb arvestada elektrilöögi, lühise või tulekahju ohuga! - Ühendus peab vastama riiklikele eeskirjadele. - Vörgutoite näitajad peavad vastama seadme tüübisildile märgitud andmetele. Tüübisildi vaatamiseks avage eesuks. - Toote toitejuhe peab vastama tehniliste andmete tabelis toodud väärtustele. FARE:
Enne elektritööde tegemist ühendage toode vooluvörgust lahti. Elektrilöögi oht!  Toitejuhtme pistik peaks pärast seadme paigaldamist olema kergesti ligipääsetav (aga mitte paiknema pliidi kohal).  Juhtmestiku paigaldamisel tuleb järgida elektrisüsteemidele kehtestatud siseriiklikke/kohalikke eeskirju ning kasutada ahju jaoks sobivat elektrikontakti/-liini ja pistikut. Kui toote võimsus on suurem kui pistiku ja elektrikontakti/-liini (kestev) taluvusvool, tuleb toode ühendada püsielektrisüsteemi otse, kasutamata pistikut ja elektrikontakti/-liini. Ühendage toitejuhe pistikupesaga.Installation af produktet
1. Lükake ahi kappi, rihtige otseks ja kinnitage paika, vältides ühtlasi toitejuhtme vigastamist ja muljumist.  Kinnitage ahi joonisel näidatud viisil kahe kruviga. Pärast paigaldamist veenduge, et kruvid on kövasti kinni ja ahi ei liigu. Kui ahi pole paigaldatud juhiste järgi või kruvid pole piisavalt tugevasti kinni, võib ahi kasutamise ajal ümber kukkuda.For produkter med køleventilator (dit produkt har muligvis ikke en).
 1 Jahutusventilaator 2 Juhtpaneel 3 Uks Sisseehitatud jahutusventilaator jahutab nii toote esikülge kui ka kappi, kuhu toode on paigaldatud.  Jahutusventilaator töötab pärast ahju väljalülitamist veel umbes 20–30 minutit. Kui kasutasite küpsetamiseks ahju programmeeritud taimerit, lülitub küpsetusaja löppedes koos köigi teiste funktsioonidega välja ka jahutusventilaator.Slutkontrol
1. Toote kasutamine. 2. Kontrollige funktsioone.Bortskaffelse af produktet
- Hoidke toote originaalkarp alles ja kasutage seada toote transportimiseks. Järgige karbile märgitud juhiseid. Kui teil originaalkarpi pole, pakkige toode mullikillesse või paksu kargongi sisse ja kinnitage kindlalt teibiga. - Et traatrest ja ahjus asuv küpsetusplaat ei saaks kahjustada ahju ust, asetage ahju ukse siseküljele papiriba, mis oleks küpsetusplaatidega ühel joonel. Teipige ahju uks külgseinte külge. - Ärge kasutage toote tõstmiseks või liigutamiseks ust ega uksekäepidet.  Ärge asetage tootele esemeid ja hoidke seda teisaldamise ajal püstiasendis.  Kontrollige toote üldilmet, et avastada võimalikke transpordi käigus tekkinud defekte.4 Forberedelser
Råd om energibesparelse
Alljärgnevad nõuanded aitavad teil oma seadet kasutada ökoloogilisel viisil ja säästa energiat: - Kasutage ahjus tumedaid ja emailkattega küpsetusnõusid, kuna need juhivad paremini soojust. - Roogade valmistamisel eelkuumutage ahju, kui nii on soovitatud kasutusjuhendis või retseptis. - Küpsetamise ajal vältige ahjuukse sagedast avamist. - Kui vähegi võimalik, küpsetage ahjus korraga mitut rooga. Traatrestile võib asetada kaks hautamisanumat. - Samuti võib valmistada mitu rooga üksteise järel. Ahi on juba eelnevalt kuum. - Saate säästa energiat, kui lülitate ahju välja mõned minutid enne küpsetusaja lõppu. Ärge avage ahjuust. - Külmutatud road sulatage enne kuumutamist üles.Første brug Indstilling af klokkeslæt
 Muudatuste tegemise ajal vilguvad ekraanil vastavad tähised. Pärast ahju esmakordset sisselülitamist vajutage kellaaja sisestamiseks klahvi +/-.  Puutejuhtimisega mudelite puhul puudutage esmalt klahvi: ja seejärel kasutage kellaaja määramiseks klahvi + / - . Väärtuse kinnitamiseks puudutage tähist ja oodake kinnitamiseks 4 sekundit ilma ühtki klahvi puudutamata.  1 Seadistusklahv 2 Klahviluku sümbol 3 Kella tähis 4 Alarmi helitugevuse tähis (Teie tootel ei pruugi seda olla.) 5 Säästurežiimi tähis 6 Plussklahv 7 Miinusklahv 8 Ajasektori tähis 9 Märguande tähis 10 Küpsetusaja lõpu tähis 11 Küpsetusaja tähis 12 Programmiklahv  Kui algusaega pole määratud, hakkab kell tööle 12:00 ning kuvatakse tähis 📁. Kui kell on öigeks pandud, tähis kaob.  Voolukatkestuse korral kellaaja sätted kustuvad. Need tuleb uuesti paika seada.Første rengøring af apparatet
 Mõned puhastusained või -vahendid võivad pinda kahjustada. Ärge kasutage tugevatoimelisi puhastusaineid, puhastuspulbrit või -pastat ega teravaid esemeid. 1. Eemaldage köik pakkematerjalid. 2. Pühkige seadme pindu niiske lapi või käsnaga ja kuivatage lapiga.Første opvarmning
Kuumutage toodet umbes 30 minutit ning seejärel lülitage see välja. Selle käigus põlevad ära võimalikud tootmisjäägid või määrdekihid. ADVARSEL
Kuumad pinnad tekitavad põletusi! Toode võib kasutamisel olla kuum. Ärge kunagi puudutage kuumi põleteid, ahju sisekülgi, kütteelemente jne. Hoidke lapsed eemal! Toite kuuma ahju pannes või välja võttes kasutage alati kuumuskindlaid pajakindaid.Elektrisk ovn
1. Võtke kõik küpsetusplaadid ja traatrest ahjust välja. 2. Sulgege ahjuuks. 3. Valige staatiline asend. 4. Valige kõige võimsam grilli kuumutusaste, vt Elektriahju kasutamine, Ik 18. 5. Laske ahjul töötada umbes 30 minutit. 6. Lülitage ahi välja, vt Elektriahju kasutamine, Ik 18.Grillovn
1. Võtke kõik küpsetusplaadid ja traatrest ahjust välja. 2. Sulgege ahjuuks. 3. Valige kõige võimsam grilli kuumutusaste, vt Kuidas grilli kasutada, Ik 24. 4. Laske ahjul töötada umbes 30 minutit. 5. Lülitage grill välja, vt Kuidas grilli kasutada, Ik 24.  Seadme esimesel kasutuskorral võib paari tunni vältel esineda suitsu ja ebameeldivat lõhna. See on normaalne. Suitsu ja lõhna eemaldamiseks tuulutage ruumi. Vältige tekkiva suitsu ja lõhna sissehingamist.5 Sådan bruges ovnen
Generel information om bagning, stegning og grillning
ADVARSEL
Kuumad pinnad tekitavad põletusi! Toode võib kasutamisel olla kuum. Ärge kunagi puudutage kuumi põleteid, ahju sisekülgi, kütteelemente jne. Hoidke lapsed eemal! Toite kuuma ahju pannes või välja võttes kasutage alati kuumuskindlaid pajakindaid. FARE:
Ahjuukse avamisel olge ettevaatlik, sest ahjust võib välja paiskuda auru. Väljuv aur võib kõrvetada käsi, nägu ja/või silmi.Råd til bagning
- Kasutage külgevõtmatu kattega sobivaid metall-või alumiiniumnõusid või kuumuskindlaid silikoonvorme. • Kasutage raami pinda nutikalt. • Asetage küpsetusvorm resti keskele. - Enne ahju või grilli sisselülitamist valige õige riiulivahe. Ärge vahetage riiulivahet, kui ahi on kuum. • Hoidke ahjuuks suletuna.Råd til stegning
- Terve kana, kalkun ja suured lihatükid küpsevad paremini läbi, kui neid immutada kastmega, nt sidrunimahla ja musta pipraga. - Kontidega liha küpsetamiseks kulub samas mõõdus kontideta lihaga võrreldes umbes 15–30 minutit kauem aega. - Liha iga sentimeetri kohta (paksus) tuleb küpsemisaega arvestada umbes 4–5 minutit. - Laske lihal pärast küpsetusaja löppu umbes 10 minutit ahjus jahtuda. Mahl jaguneb paremini üle kogu liha ja ei jookse liha löikamisel välja. - Kala tuleb asetada kuumuskindla alusega keskmisele või alumisele siinile.Råd til grillning
Liha, kala ja linnuliha muutuvad grillimisel kiirelt pruuniks, saavad kena kooriku ja ei muutu kuivaks. Eriti hästi sobivad grillimiseks lapikud tükid, lihavardad ja vorstid, aga ka suure veesisaldusega köögiviljad (nt tomatid ja sibulad). \- Jaotage grillitavad tükid traatrestile või küpsetusplaadile nii, et nad ei jääks kuumuti välispiiridest välja. \- Lükake traatrest või restiga küpsetusplaat ahjus soovitud siinile. Kui kasutate grillimisel traatresti, lükake alumisele siinile küpsetusplaat, et rasv maha ei tilguks. Lisage küpsetusplaadile veidi vett, et seda oleks kergem puhastada.  Grillimiseks sobimatud toiduained võivad põhjustada tulekahju. Grillige ainult suurel kuumusel grillimiseks sobilikku toitu. Ärge paigutage grillitavat toitu liiga kaugele ahju tahaossa. See on kõige kuumem piirkond ning rasvane toit võib süttida.Brug af elektrisk ovn
Ahjul on nupud, mis vajutamisel välja kerkivad. 1. Nupu väljasaamiseks vajutage see sisse. Pärast seda saate nuppu keerates valida soovitud seadeid.  2. Kui küpsetamine on lõpetatud, vajutage nupp sisse. Valige temperatuur ja töörežiim  1 Funktsiooninupp 2 Termostaatnupp 1. Seadke funktsiooninupp soovitud töörežiimile. 2. Seadke temperatuurinupp soovitud temperatuurile. » Ahi kuumeneb eelseatud temperatuurini ja jääb sellele püsima. Kuumenemise ajal on temperatuurituli sees.Slukning af elektrisk ovn
Keerake funktsiooninupp ja temperatuurinupp väljalülitatud (ülemisse) asendisse. Oluline on asetada traatrest traatriiulile õigesti. Traatrest tuleb asetada traatriiulite vahele, nagu joonisel näidatud. Ärge lükake traatresti vastu ahju tagaseina. Et grill töötaks tõhusalt, lükake traatrest riiuli esiserva juurde ja fikseerige see ukse abil. (Varieerub olenevalt toote mudelist.) Töörežiimid
Siin näidatud töörežiimide järjekord vöib erineda teie toote süsteemist.Ülemine ja alumine kuumutus
 Töötavad nii ülemine kui ka alumine küttekeha. Toitu kuumutatakse korraga nii pealt kui ka alt. Sobib näiteks kookide ja taignatoodete või vormikookide ja -roogade valmistamiseks. Kasutage küpsetamiseks korraga ainult ühte panni.Alumine kuumutus
 Töötab ainult alumine küttekeha. Sobib pitsa valmistamiseks ja toidu pruunistamiseks altpoolt. Seda funktsiooni tuleb kasutada ka hölpsaks auruga puhastamiseks. Alumine/ülemine kuumutus koos ventilaatoriga
 Töötavad ülemine kuumutus, alumine kuumutus ja ventilaator (tagaseinas). Kuumutatud öhk kandub ventilaatori toimel kiiresti üle terve ahju. Kasutage küpsetamiseks korraga ainult ühte panni.Kasutamine ventilaatoriga
 Ahju ei kuumutata. Töötab ainult ventilaator (tagaseinas). Sobib külmutatud peenestatud toidu aeglaseks sulatamiseks toatemperatuurini ja küpsetatud toidu jahutamiseks.Surf-funktsioon
 Tagumise kuumuti poolt köetud öhk kandub ventilaatori toimel kiiresti ja ühtlaselt üle terve ahju. See sobib teie einete erinevatel riiulitasemetel küpsetamiseks ja enamasti pole eelsoojendus vajalik. Võimaldab küpsetada mitme panniga. Seda funktsiooni tuleb kasutada ka hõlpsaks auruga puhastamiseks. "3D" funktsioon
 Töötavad ülemine kuumutus, alumine kuumutus ja ventilaatorkuumutus (tagaseinas). Toit pruunistub ning küpseb ühtlaselt ja kiiresti läbi. Kasutage küpsetamiseks korraga ainult ühte panni.Täisgrill
 Töötab suur grill ahju laes. See sobib suure hulga liha grillimiseks. - Pange suured või keskmise suurusega portsjonid grillimiseks grilli all õigesse riiulivahesse. - Seadke temperatuur maksimumtasemele. - Pärast poolt grillimisaega pöörake toitu.Grill + ventilaator
 Grilliefekt on nõrgem kui täisgrilli kasutamisel - Pange väiksed või keskmise suurusega portsjonid grillimiseks õige riuli asendiga grilli alla. • Määrake soovitud temperatuur. - Pärast poolt grillimisaega pöörake toitu.Ahju kella kasutamine
 1 Seadistusklahv 2 Klahviluku sümbol 3 Kella tähis 4 Alarmi helitugevuse tähis (Teie tootel ei pruugi seda olla.) 5 Säästurežiimi tähis 6 Plussklahv 7 Miinusklahv 8 Ajasektori tähis 9 Märguande tähis 10 Küpsetusaja lõpu tähis 11 Küpsetusaja tähis 12 Programmiklahv  Maksimaalne küpsetamise löpetamiseks seatav aeg on 5 tundi ja 59 minutit. Voolukatkestuse korral programm tühistatakse. Ahi tuleb uuesti programmeerida.  Seadistamise ajal vilguvad ekraanil vastavad tähised. Sätete rakendumiseks peate mõne hetke ootama.  Kui küpsetamissätteid pole valitud, ei saa kellaaega määrata.  Kui on määratud küpsetusaeg, siis näidatakse küpsetamise ajal järelejäänud aega.Küpsetamine määratud küpsetusajaga
Ahju saab seadistada nii, et see löpetab etteantud aja möödumisel töö. Selleks määratakse taimeri abil küpsetusaeg. 1. Valige küpsetusfunktsioon. 2. Puudutage klahvi Ⓤ, kuni ekraanile ilmub küpsetusaja tähis |→l. 3. Määrake küpsetusaeg klahviga +/-. » » Kui küpsetusaeg on määratud, jääb tähis |→| koos aja sümboliga ekraanile. 4. Pange toit ahju ja seadke temperatuurinupu abil temperatuur. Küpsetamise algab. » Küpsetamise alguses, kui köik aja tähise osad on süttinud, algab küpsetusaja pöördarvestus. Määratud küpsetusaeg on jagatud neljaks vördseks osaks. Iga osa aja täitumisel lülitub selle osa tähis välja. Tänu sellele on teil hea ülevaade kui palju aega on jäänud küpsetamise löpuni vörreldes kogu küpsetusajaga.Küpsetusaja lõpu hilisemaks seadmine
Pärast küpsetusaja määramist taimeri abil saate seada küpsetusaja löpu hilisemaks. 1. Valige küpsetusfunktsioon. 2. Puudutage klahvi ⚙, kuni ekraanile ilmub küpsetusaja tähis |→|. 3. Määrake küpsetusaeg klahviga +/-. » » Kui küpsetusaeg on määratud, jäab küpsetamise tähis |→| põlema. 4. Puudutage klahvi ⚙, kuni ekraanile ilmub küpsetusaja löpu tähis →l. 5. Küpsetusaja löpu määramiseks vajutage klahvi + » Kui küpsetusaeg on määratud, jäävad tähised |→| ja →| koos aja sümboliga ekraanile. Pärast küpsetamise algust tähis →| kaob. 6. Pange toit ahju ja seadke temperatuurinupu abil temperatuur. Küpsetamise algab. » Ahju taimer arvutab välja küpsetamise algusaja, lahutades küpsetamise kestuse küpsetusaja lõpust. Küpsetamise algusaja saabudes aktiveeritakse valitud töörežiim ning ahi soojeneb määratud temperatuurini. Määratud temperatuur püsib küpsetusaja lõpuni. » Küpsetamise alguses, kui köik aja tähise osad on süttinud, algab küpsetusaja pöördarvestus. Määratud küpsetusaeg on jagatud neljaks vördseks osaks. Iga osa aja täitumisel lülitub selle osa tähis välja. Tänu sellele on teil hea ülevaade kui palju aega on jäänud küpsetamise löpuni vörreldes kogu küpsetusajaga. 7. Kui küpsetamine on lõppenud, ilmub ekraanile teade "End" (Lõpp) ning kölab taimeri märguandesignaal. 8. Märguandesignaal kestab 2 minutit. Märguandesignaali vaigistamiseks vajutage suvalist klahvi. Märguandesignaal vaigistatakse ning ekraanile ilmub jooksev kellaaeg.  Kui vajutate märguandesignaali löppedes suvalist klahvi, alustab ahi uuesti tööd. Keerake temperatuurinupp ja funktsiooninupp asendisse "0" (Väljalülitatud), et ahi lülituks välja ega hakkaks pärast märguande löppu uuesti tööle.Klahviluku sisselülitamine
Ahju kasutamist saab tökestada, aktiveerides klahviluku funktsiooni. 1. Puudutage klahvi:≡, kuni ekraanile ilmub tähis 🔒. » Ekraanile ilmub tähis "OFF" (Väljalülitatud). 2. Klahviluku sisselülitamiseks vajutage klahvi +. » Kui klahvilukk on aktiveeritud, ilmub ekraanile tähis "On" (Sisselülitatud) ja tähis jääb põlema.  Kuni klahviluku funktsioon on sisse lülitatud, ei saa ahju klahve kasutada. Voolukatkestuse korral klahvilukku ei tühistata.Klahviluku väljalülitamiseks puudutage
1. Puudutage klahvi: ≡, kuni ekraanile ilmub tähis 🔒. » Ekraanile ilmub tähis "On" (Sisselülitatud). 2. Klahviluku väljalülitamiseks vajutage klahvi ■. » Kui klahvilukk on välja lülitatud, ilmub ekraanile tähis "OFF" (Väljalülitatud).Märguandekella seadmine
Seadme kella saab kasutada märguande või meeldetuletuse funktsioonis küpsetusprogrammist sõltumatult. Märguandekella funktsioon ei mõjuta ahju tööd. Seda kasutatakse ainult hoiatusena. Näiteks võib seda kasutada, kui soovite küpsetist teatud aja möödudes ümber pöörata. Määratud aja möödumisel edastab taimer hoiatussignaali. 1. Puudutage klahvi ⓣ, kuni ekraanile ilmub tähis △.  Maksimaalne märguande aeg on 23 tundi ja 59 minutit. 2. Määrake märguande kestus klahviga   Märguandesignaali, kellaaja ja ekraani heleduse funktsiooniklahvid ning temperatuuri klahvid peavad olema väljalülitatud asendis 0 (OFF). » Pärast märguande aja sisestamist jääb tähis põlema ja ekraanile ilmub märguande aeg. 3. Kui märguande aeg on möödas, hakkab tähis vilkuma ning kölab märguandesignaal.Märguandesignaali väljalülitamine
1. Märguandesignaal kestab 2 minutit. Märguandesignaali vaigistamiseks vajutage suvalist klahvi. » Märguandesignaal vaigistatakse ning ekraanile ilmub jooksev kellaaeg.Märguande tühistamine
1. Märguande tühistamiseks puudutage klahvi ⓣ, kuni ekraanile ilmub tähis ♠. 2. Vajutage pikalt klahvi ■, kuni ekraanile ilmub "00:00".  Ekraanile ilmub märguande aeg. Kui korraga on seatud märguande aeg ning küpsetusaeg, näidatakse ekraanil lühemat ajavahemikku.Märguandesignaali muutmine
1. Puudutage klahvi ≡, kuni ekraanile ilmub tähis 📄). 2. Seadistage klahviga +/— soovitud märguandesignaal. 3. Määratud signaal aktiveeritakse veidi aja pärast. » Valitud märguandesignaali näidatakse ekraanil kujul "b-01", "b-02" või "b-03".Kellaaja muutmine
Varem sisestatud kellaaja muutmine 1. Puudutage klahvi: ≡, kuni ekraanile ilmub tähis 2. Määrake kellaaeg klahviga +/-. 3. Määratud aeg aktiveeritakse veidi aja pärast.Säästurežiim
Säästurežiimi abil saate energiat kokku hoida, määrates ahju küpsetusaja. Sellel režiimil lülitatakse küttekehad enne küpsetusaja löppu välja ning kasutatakse ahju jääksoojust.Säästurežiimi määramine
1. Puudutage tähist: ≡, kuni ekraanile ilmub säästurežiimi tähis eco. » Ekraanile ilmub tähis "OFF" (Väljalülitatud). 2. Säästurežiimi sisselülitamiseks puudutage klahvi +. » Kui klahvilukk on aktiveeritud, ilmub ekraanile tähis "On" (Sisselülitatud) ja säästurežiimi tähis jääb põlema.Säästurežiimi väljalülitamine
1. Puudutage tähist: ≡, kuni ekraanile ilmub säästurežiimi tähis eco. » Ekraanile ilmub tähis "On" (Sisselülitatud). 2. Säästurežiimi väljalülitamiseks puudutage klahvi » Kui klahvilukk on välja lülitatud, ilmub ekraanile tähis "Off" (Väljalülitatud).Ekraani heleduse määramine
(See funktsioon on valikuline. Teie tootel ei pruugi seda olla.)
1. Puudutage klahvi:≡, kuni ekraanile ilmub selle heledust näitav d-01, d-02 või d-03. 2. Määrake soovitud heledus klahviga +/-. » Määratud aeg aktiveeritakse veidi aja pärast.Küpsetusaegade tabel
 Tabelis esitatud ajad on möeldud orientiiriks. Tegelik aeg võib varieeruda olenevalt toidu temperatuurist, paksusest, tüübist ja teie enda toiduvalmistuseelistustest.Küpsetamine ja röstimine
 1. siiniks loetakse ahju alumist riiulivahet.| Roog | Plaatide arv | Kasutatavad lisatarvikud | Töörežlim | Silni asend | Temperatuur (°C) | Küpsetusaeg (ligikaudne, min) |
| Koogid küpsetusplaadil | Üks plaat | Harilik plaat* | 3 | 180 | 25 ... 30 | |
| Koogid vormis | Üks plaat | Koogivorm ja traatrest** | 2 | 180 | 50 ... 60 | |
| Väiksed koogid | Üks plaat | Harilik plaat* | 3 | 160 | 25 ... 35 | |
| Üks plaat | Harilik plaat* | 3 | 150 | 30 ... 40 | ||
| 2 plaati | 1-Küpsetusplaat*3-Harilik plaat* | 1 - 3 | 150 | 35 ... 50 | ||
| 3 plaati | 1-Harilik plaat*3-Küpsetusplaat*5-Sügav ahjuplaat* | 1 - 3 - 5 | 150 | 35 ... 50 | ||
| Biskviltkook | Üks plaat | 26 cm läbimööduga ümmargune tordivorm traatrestil** | 3 | 160 | 25 ... 35 | |
| Üks plaat | 26 cm läbimööduga ümmargune tordivorm traatrestil** | 2 | 150 | 30 ... 40 | ||
| 2 plaati | 1-26 cm läbimööduga ümmargune tordivorm traatrestil**4-26 cm läbimööduga ümmargune tordivorm küpsetusplaadil** | 1 - 4 | 150 | 35 ... 45 | ||
| Küpsised | Üks plaat | Küpsetusplaat* | 3 | 180 | 25 ... 30 | |
| 2 plaati | 1-Küpsetusplaat*3-Harilik plaat* | 1 - 3 | 180 | 30 ... 40 | ||
| 3 plaati | 1-Küpsetusplaat*3-Harilik plaat*5-Sügav ahjuplaat* | 1 - 3 - 5 | 180 | 35 ... 45 | ||
| Taignatooted | Üks plaat | Harilik plaat* | 2 | 200 | 30 ... 40 | |
| 2 plaati | 1-Küpsetusplaat*3-Harilik plaat* | 1 - 3 | 200 | 45 ... 55 | ||
| 3 plaati | 1-Küpsetusplaat*3-Harilik plaat*5-Sügav ahjuplaat* | 1 - 3 - 5 | 200 | 45 ... 55 | ||
| Muretaigen | Üks plaat | Harilik plaat* | 2 | 200 | 25 ... 35 | |
| 2 plaati | 1-Küpsetusplaat*3-Harilik plaat* | 1 - 3 | 200 | 35 ... 45 | ||
| 3 plaati | 1-Küpsetusplaat*3-Harilik plaat*5-Sügav ahjuplaat* | 1 - 3 - 5 | 200 | 35 ... 45 | ||
| Juuretis | Üks plaat | Harilik plaat* | 2 | 200 | 35 ... 45 | |
| Lasanje | Üks plaat | Klaasist/metallist kandiline vorm traatrestil** | 2 - 3 | 200 | 30 ... 40 | |
| Pitsa | Üks plaat | Harilik plaat* | 2 | 200 ... 220 | 15 ... 20 | |
| Biifsteek (suur tükk) / praad | Üks plaat | Harilik plaat* | 3 | 25 min250/max,seejärel 180 ... 190 | 100 ... 120 | |
| Lambakints (pajaroog) | Üks plaat | Harilik plaat* | 3 | 25 min250/max,seejärel 190 | 70 ... 90 | |
| Üks plaat | Harilik plaat* | 3 | 25 min250/max,seejärel 190 | 60 ... 80 | ||
| Kanapraad (1,8-2 kg) | Üks plaat | Harilik plaat* | 2 | 15 min250/max,seejärel 180 ... 190 | 60 ... 80 | |
| Üks plaat | Harilik plaat* | 2 | 15 min250/max,seejärel 180 ... 190 | 60 ... 80 | ||
| Kalkun (5.5 kg) | Üks plaat | Harilik plaat* | 1 | 25 min250/max,seejärel 180 ... 190 | 150 ... 210 | |
| Üks plaat | Harilik plaat* | 1 | 25 min250/max,seejärel 180 ... 190 | 150 ... 210 | ||
| Kala | Üks plaat | Harilik plaat* | 3 | 200 | 20 ... 30 | |
| Üks plaat | Harilik plaat* | 3 | 200 | 20 ... 30 | ||
| Kõigi toitude puhul on soovitatav eelkuumutamine.* Lisatarvikud ei pruugi kuuluda komplekti.** Lisatarvikud ei kuulu komplekti. Lisatarvikud on kaubanduses saadaval. | ||||||
Küpsetustabel testtoitudele
Selle küpsetustabeli toidud on valmistatud järgides standardit EN 60350-1, et riiklikel kontrollasutustel oleks tooteid lihtsam testida| Roog | Plaatide arv | Kasutatavad lisatarvikud | Töörežiim | Siini asend | Temperatuur (°C) | Küpsetusaeg (ligikaudne, min) |
| Murekook | Üks plaat | Harilik plaat* | 3 | 140 | 20 ... 30 | |
| Üks plaat | Harilik plaat* | 3 | 140 | 20 ... 30 | ||
| 2 plaati | 1-Harilik plaat*3-Küpsetusplaat* | 1 - 3 | 140 | 20 ... 30 | ||
| 3 plaati | 1-Harilik plaat*3-Küpsetusplaat*5-Sügav ahjuplaat* | 1 - 3 - 5 | 140 | 25 ... 35 | ||
| Väiksed koogid | Üks plaat | Harilik plaat* | 3 | 160 | 25 ... 35 | |
| Üks plaat | Harilik plaat* | 3 | 150 | 30 ... 40 | ||
| 2 plaati | 1-Küpsetusplaat*3-Harilik plaat* | 1 - 3 | 150 | 35 ... 50 | ||
| 3 plaati | 1-Harilik plaat*3-Küpsetusplaat*5-Sügav ahjuplaat* | 1 - 3 - 5 | 150 | 35 ... 50 | ||
| Biskviitkook | Üks plaat | 26 cm läbimõõduga ümmargune tordivorm traatrestil** | 3 | 160 | 25 ... 35 | |
| Üks plaat | 26 cm läbimõõduga ümmargune tordivorm traatrestil** | 2 | 150 | 30 ... 40 | ||
| 2 plaati | 1-26 cm läbimõõduga ümmargune tordivorm traatrestil**4-26 cm läbimõõduga ümmargune tordivorm küpsetusplaadil** | 1 - 4 | 150 | 35 ... 45 | ||
| Öunapirukas | Üks plaat | 20 cm läbimõõdugaümmargune mustmetallist nõu traatrestil** | 2 | 180 | 50 ... 60 | |
| Üks plaat | 20 cm läbimõõdugaümmargune mustmetallist nõu traatrestil** | 2 | 170 | 50 ... 60 | ||
| 2 plaati | 1-20 cm läbimõõdugaümmargune mustmetallist nõu traatrestil**4-20 cm läbimõõdugaümmargune mustmetallist nõuküpsetusplaadil** | 1 - 4 | 170 | 50 ... 60 | ||
| Kõigi toitude puhul on soovitatav eelkuumutamine.Lisatarvikud ei pruugi kuuluda komplekti.Lisatarvikud ei kuulu komplekti. Lisatarvikud on kaubanduses saadaval. | ||||||
Nõuandeid kookide küpsetamiseks
- Kui kook on liiga kuiv, suurendage temperatuuri umbes 10 °C võrra ja lühendage küpsetusaega. - Kui kook on liiga niiske, kasutage vähem vedelikku või vähendage temperatuuri 10 °C võrra. - Kui kook on pealt liiga pruun, asetage see madalamale siinile, vähendage temperatuuri ja pikendage küpsetusaega. - Kui kook on seest hästi läbi küpsenud, kuid pealt toores, kasutage vähem vedelikku, vähendage temperatuuri ja pikendage küpsetusaega.Nõuandeid küpsetiste tegemiseks
- Kui küpsetis on liiga kuiv, suurendage temperatuuri umbes 10 °C võrra ja lühendage küpsetusaega. Niisutage taignakihte piimast, õlist, munast ja jogurtist tehtud kastmega. - Kui küpsemine võtab liiga kaua aega, siis vaadake, et taigen ei ulatuks üle plaadi servade. - Kui küpsetise pealispind pruunistub, aga alumine osa ei küpse, siis veenduge, et te pole küpsetise alaosas liiga palju kastet kasutanud. Püüdke jaotada kastet taignakihtide vahele ja peale vördsetes kogustes, et need pruunistuks ühtlaselt.  Küpsetage vastavalt küpsetustabelis toodud režiimile ja temperatuurile. Kui alumine osa pole ikka piisavalt pruunistunud, asetage see järgmine kord madalamale siinile.Nõuandeid köögiviljade küpsetamiseks
- Kui köögiviljade küpsetusnõus saab mahl otsa ja need hakkavad kuivama, siis tasub köögivilju küpsetada ahjuplaadi asemel kaanega pannil. Kaanega suletud nõus jääb toit mahlaseks. - Kui köögiviljaroog jääb tooreks, keetke köögiviljad eelnevalt läbi või valmistage neid nagu purgitoitu ja asetage siis ahju.Optimaalse tulemuse saavutamiseks (abiventilaatoriga kuumutamine/ventilaatoriga kuumutamine/surf-funktsioon):
- Paksust taignast küpsetisi (nt saiad, keeksid, küpsised, biskviidid) saab korraga küpsetada 1, 2 või 3 ahjuplaadiga tänu kuumuse ühtlasele jaotumisele, mida see funktsioon võimaldab. - Vedelamast taignast küpsetisi (nt ōunakook või pirukas) saab korraga küpsetada 2 ahjuplaadiga. - Rohkelt vedelikku või pärmitaignat sisaldavad suuremahulised küpsetised tulevad paremad, kui kasutada korraga ainult ühte küpsetusplaati. Suuremahulised toidud küpsevad ühtlasemalt läbi ja kerkivad tänu külgseintest tulevale kuumale õhule – tavalistel ahjudel seda funktsiooni ei ole. - Kuna see funktsioon võimaldab kasutada küpsetamiseks korraga mitut plaati, säästate aega ja vaeva ning saate ideaalse tulemuse.Kuidas grilli kasutada
HOIATUS
Sulgege grillimise ajaks ahjuuks. Kuumad pinnad võivad tekitada põletusi!Grilli sisselülitamine
1. Keerake funktsiooninupp soovitud grillitähisele. 2. Seejärel valige soovitud grillimistemperatuur. 3. Vajadusel eelkuumutage ahju umbes 5 minutit. » Süttib temperatuuri märgutuli.Grilli väljalülitamine
1. Keerake funktsiooninupp väljalülitatud (ülemisse) asendisse.  Grillimiseks sobimatud toiduained võivad põhjustada tulekahju. Grillige ainult suurel kuumusel grillimiseks sobilikku toitu. Ärge paigutage grillitavat toitu liiga kaugele ahju tahaossa. See on köige kuumem piirkond ning rasvane toit vöib süttida.Küpsetamisaegade tabel grillimiseks
Grillimine elektrigrilliga| Toit | Kasutatavad lisatarvikud | Silni asend | Soovitatav temperatuur (°C)** | Grillimlsaeg (ligikaudu) |
| Kala | Traatrest | 4...5 | 250/max | 20...25 min. # |
| Viliutatud kana | Traatrest | 4...5 | 250/max | 25...35 min. |
| Lambakarbonaad | Traatrest | 4...5 | 250/max | 20...25 min. |
| Röstbiif | Traatrest | 4...5 | 250/max | 25...30 min. # |
| Vasikakarbonaad | Traatrest | 4...5 | 250/max | 25...30 min. # |
| Röstleib * | Traatrest | 4 | 250/max | 1...3 min. |
| * sõltuvalt paksusest*Eelsoojendage 5 minutit**Kui grilli temperatuuri ei saa teile toote puhul reguleerida, töötab grill maksimumtemperatuuril. | ||||
| Toit | Kasutatavad lisatarvikud | Silni asend | Temperatuur (°C) | Küpsetusaeg (ligikaudne, min) |
| Röstleib | Traatrest | 4 | 250/max | 1...3 min |
| Lihapallid (loomalina) - 12 tükid | Traatrest | 4 | 250/max | 25...35 min |
| Keerake toitu, kui möödunud on 2/3 kogu grillimisajast.Kõiki grillitavald toiduaineid on soovitatav 5–6 minutit eelkuumutada. | ||||
6 Hoidmine ja hooldus
Üldine teave
Toote kasutusiga pikeneb ja probleeme tekib harvem, kui toodet regulaarselt puhastada. OHT:
Enne hooldus- ja puhastustööde alustamist Fühendage toode vooluvörgust lahti. Elektrilöögi oht! OHT:
Enne toote puhastamist laske sellel maha jahtuda. Kuumad pinnad võivad tekitada põletusi! - Puhastage toodet põhjalikult pärast iga kasutuskorda. Sel viisil on lihtsam eemaldada toiduvalmistusjääke, vältides nende kõrbemist seadme järgmisel kasutuskorral. - Toote puhastamiseks pole vaja spetsiaalseid puhastusvahendeid. Kasutage toote puhastamiseks sooja vett koos vedela pesuvahendiga, pehmet lappi või käsna ning kuivatamiseks kuiva lappi. - Liigne vedelik tuleb pärast puhastamist alati ära pühkida ja pritsmed kohe kuivatada. - Ärge kasutage roostevabast terasest või inoxist pindade ja käepideme puhastamiseks puhastusvahendeid, mis sisaldavad hapet või kloriidi. Nende osade puhastamiseks kasutage pehmet lappi ja vedelat puhastusvahendit (mitteabrasiivset), tömmates lapiga ainult ühes suunas.  Mõned puhastusained või -vahendid võivad pinda kahjustada. Ärge kasutage tugevatoimelisi puhastusaineid, puhastuspulbrit või -pastat ega teravaid esemeid.  Ärge kasutage puhastamiseks aurupuhasteid, muidu võite saada elektrilöögi.Juhtpaneeli puhastamine
Puhastage juhtpaneeli ja nuppe niiske lapiga ning seejärel pühkige need kuivaks.  Ärge eemaldage juhtpaneeli puhastamiseks nuppe, kui teie tootel neid on. Muidu võite juhtpaneeli kahjustada!Ahju puhastamine
Külgseina puhastamine (varieerub olenevalt toote mudelist.)
(See funktsioon on valikuline. Teie tootel ei pruugi seda olla.) 1. Eemaldage küljeraami eesmine osa, tömmates seda külgseinast eemale. 2. Võtke küljeraam välja, tömmates seda enda suunas.  (kui tele toode on varustatud funktsiooniga „Surf“) 1. Eemaldage küljeraami varras (1), tömmates raami koos selle külge kinnitatud külgseinaga noole suunas.  2. Võtke küljeraam ja külgsein välja, tömmates neid enda suunas. 3. Tõmmake küljeraam ahju seinas olevatest avadest (2) välja.  Olenevalt tootemudelist võib külgseina taga olevate aukude arv ja traatresti suurus muutuda. 4. Kasutage küljeraami ja külgseina puhastamiseks sooja vett koos vedela pesuvahendiga, pehmet lappi või käsna ning kuivatamiseks kuiva lappi. 5. Asetage küljeraam kohale, tömmates selle külgseina tagaosas olevatesse avadesse (2).   Kui teil on flexi teleskoop funktsioon oma toodet; seal on üks auk tagaküljel surf pool seina. Aseta pool hammas tömmates, et auk. 6. Kinnitage küljeraam külgseina külge, tömmates küljeraami varrast (1) noole suunas. 7. Asetage külgsein koos selle külge kinnitatud küljeraamiga kohale, tömmates vardad (3) tagaseinas olevatesse avadesse, nagu joonisel näidatud.  8. Asetage küljeraami varras (1) kohale, nagu joonisel näidatud.  Veenduge, et küljeraam ja külgsein on paigaldatud õigesti.Katalüütilised seinad
(See funktsioon on valikuline. Teie tootel ei pruugi seda olla.) Teie toote külgseinad (A) ja/või tagasein (B) võivad seestpoolt olla kaetud katalüütilise emailiga. Katalüütilised seinad on heledat matti värvi ja poorse pinnnaga. Ahju katalüütilisi seinu ei tohiks puhastada. Katalüütiliste seinte poorne pind puhastub automaatselt, imedes pritsivat rasva sisse ning muundades seda (auruks ja süsihappegaasiks). Hõlbus auruga puhastamine
Muudab puhastamise hölpsaks, kuna mustus (mis ei ole liiga kauaks puhastamata jäänud) pehmeneb ahju sisemuses tekkiva auru ja sisepindadele kondenseeruvate veepiiskade toimel. 1. Võtke ahjust välja kõik lisad. 2. Valage ahjuplaadile 500 ml vett ja asetage plaat ahju teisele restile.  3. Seadke ahju lihtne puhastamine auru režiim ja käivitada 100 °C juures 25 minutit. 4. Avage uks ja pühkige ahju sisepindu niiske käsna või lapiga. 5. Kasutage törksa mustuse eemaldamiseks sooja vett koos vedela pesuvahendiga, pehmet lappi või käsna ning kuivatamiseks kuiva lappi.  Hölpsa auruga puhastamise režiimi kasutamisel aurustub ahju sisemusse kogunenud jääkide/mustuse pehmendamiseks plaadile paigutatud vesi ning ahju sisemusse ja ahjuukse klaasi siseküljele moodustub kondensatsioon, seepärast võib ahjuukse avamisel vett tilkuda. Pühkige kondensatsioon ära kohe, kui avate ahjuukse.Ahjuukse puhastamine
Kasutage ahjuukse puhastamiseks sooja vett koos vedela pesuvahendiga, pehmet lappi või käsna ning kuivatamiseks kuiva lappi.  Ärge kasutage ukse puhastamiseks karedaid abrasiivseid puhastusvahendeid või teravaid metallkraabitsaid. Need võivad pinda kriimustada ning klaasi lõhkuda.Ahjuukse eemaldamine
1. Avage eesuks (1). 2. Avage eesukse paremal ja vasakul küljel asuva hingede pesa (2) klambrid, vajutades neid alla joonisel kujutatud viisil.  1 Uks 2 Hinge lukk(suletud asend) 3 Ahi 4 Hinge lukk(avatud positsioon)  3. Liigutage eesust pooles ulatuses.  4. Eemaldage eesuks seda ülespoole tömmates ja paremast ning vasakust hingest vabastades.  Ukse tagasipanemisel tuleb eemaldamistoiminguid korrata vastupidises järjekorras. Ärge unustage ukse taaspaigaldamisel sulgeda hinge pesa juures olevaid klambreid.Ukse siseklaasi eemaldamine
(See funktsioon on valikuline. Teie tootel ei pruugi seda olla.) Ahjuukse sisemist klaaspaneeli saab puhastamiseks eemaldada. Avage ahjuuks.  1 Raam 2 Plastosa Eemaldage eesukse ülaossa paigaldatud plastosa, tömmates seda enda poole.  1 Köige seespoolsem klaaspaneel 2 Sisemine klaaspaneel 3 Välimine klaaspaneel 4 Klaaspaneeli plastist pesa – alumine Kergitage kõige seespoolsemat klaaspaneeli (1) veidi tähise A suunas ja tömmake see tähise B suunas välja, nagu joonisel näidatud. Eemaldage samamoodi ka teine sisemine klaaspaneel (2).  Ukse kokkumonteerimisel tuleb esimese asjana paigaldada sisemine klaaspaneel (2). Nagu joonisel näidatud, asetage klaaspaneeli kaldnurk nii, et see toetub plastpesa kaldnurgale.  Sisemine klaaspaneel (2) tuleb paigaldada plastist pesasse kõige seespoolsema klaaspaneeli (1) lähedale. Kõige seespoolsema klaaspaneeli (1) paigaldamisel jätke trükiga külg sisemise klaaspaneeli suunas. Sisemise klaaspaneeli alumine nurk peab asetuma alumisse plastpesasse. Suruge plastosa vastu raami, kuni kuulete klõpsatust.Ahjuvalgusti pirni vahetamine
OHT:
Et vältida elektrilöögi ohtu, vaadake enne ahju lambi vahetamist, et toode oleks vooluvõrgust lahti ühendatud ning maha jahtunud. Kuumad pinnad võivad tekitada põletusi!  Selles ahjus kasutatakse hõõglampi võimsusega alla 40 W, kõrgusega alla 60 mm, läbimõõduga alla 30 mm või halogeenlampi pistikupesaga G9, võimsusega alla 60 W. Lambid sobivad kasutamiseks temperatuuril üle 300 ° C. Ahjulampe saab hankida volitatud hooldusagentidelt või litsentsiga tehnikutelt.  Valgusti asukoht ei pruugi olla sama mis joonisel.  Sellel seadmel kasutatud lamp pole sobiv koduse majapidamise valgustamiseks. Selle lambi eesmärk on aidata kasutajal toiduaineid paremini näha.  Sellel seadmel kasutatud lambid peavad vastu pidama ekstreemsetele tingimustele, nt üle 50 °C temperatuurile.Kui ahjul on ümar valgusti:
1. Lahutage toode vooluvõrgust. 2. Keerake vastupäeva lahti klaaskate.  3. Kui teie ahjutuli on alloleval joonisel kujutatud (A) tüüpi, eemaldage see joonisel näidatud viisil keerates ja asendage uuega. Kui teie ahjutuli on (B) tüüpi, eemaldage see joonisel näidatud viisil tömmates ja asendage uuega.   4. Paigaldage klaaskate tagasi.7 Probleemide lahendamine
Kasutamise ajal tuleb ahjust auru.
\- Auru tekkimine töötamisel on tavaline. >>> Tegemist ei ole rikkega.Toote kuumenemisel ja jahtumisel on kuulda metalset heli.
\- Metallosade kuumenemisel võivad need paisuda ning tekitada hääli. >>> Tegemist ei ole rikkega.Toode ei tööta.
- Vörgukaitse on rakendunud või läbi põlenud. >>> Kontrollige elektrikilbi korke. Vajadusel vahetage või lähtestage need. • Toode ei ole ühendatud (maandatud) pistikupessa. >>> Kontrollige pistiku ühendust.Ahju tuli ei tööta.
• Ahju pirn on vigane. >>> Vahetage pirn välja. - Voolukatkestus. >>> Kontrollige, kas vool on olemas. Kontrollige elektrikilbi kaitsmeid. Vajadusel vahetage või lähtestage kaitsmed.Ahi ei lähe soojaks.
- Ei pruugi olla seatud konkreetse küpsetusfunktsiooni ja/või temperatuuri jaoks. >>> Määrake konkreetne küpsetusfunktsioon ja/või temperatuur. - Taimer on seadistamata (taimeriga mudelitel). >>> Sisestage kellaaeg. (Mikrolaineahjuga toodetel juhib taimer ainult mikrolaineahju.) - Voolukatkestus. >>> Kontrollige, kas vool on olemas. Kontrollige elektrikilbi kaitsmeid. Vajadusel vahetage või lähtestage kaitsmed.Kellaaeg vilgub või kella tähis põleb (taimeriga mudelitel).
\- Vahepeal on toimunud voolukatkestus. >>> Pange kell õigeks / lülitage toode välja ja seejärel uuesti sisse.  Kui teil ei önnestu probleemi käesolevas lõigus antud juhiste kohaselt lahendada, konsulteerige volitatud teenindusega või edasimüüjaga, kellelt te toote ostsite. Ärge kunagi üritage rikkis toodet ise parandada.

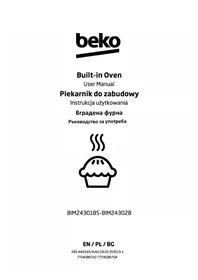
- BEKO
- INDBYGNINGSOVN
- PIEKARNIK DO ZABUDOWY
- SISSEEHITATAV AHI
- LÆS VENLIGST DENNE BRUGERVEJLEDNING FØRST
- SYMBOLFORKLARING
- ARÇELIK A.Ş
- CE
- VIGTIGE INSTRUKTIONER OG ADVARSLER FOR SIKKERHED OG MILJØ
- GENERELLE OPLYSNINGER
- INSTALLATION
- FORBEREDELSE
- SÅDAN BETJENES OVNEN
- VEDLIGEHOLDELSE OG PLEJE
- FEJLFINDING
- ELEKTRISK SIKKERHED
- PRODUKTSIKKERHED
- TILSIGTET BRUG
- SIKKERHED FOR BØRN
- BØRNESIKRING
- BORTSKAFFELSE AF DET GAMLE PRODUKT
- OVERHOLDELSE AF ROHS-DIREKTIVET
- PAKKEOPLYSNINGER
- INDHOLD I PAKKEN
- BRUGERVEJLEDNING
- STANDARDBAKKE
- DYB BAKKE
- TRÅDRIST
- PLACERING AF TRÅDRISTEN OG BAKKEN PÅ TELESKOPSKINNERNE KORREKT
- FØR INSTALLATION
- INSTALLATION OG TILSLUTNING
- ELEKTRISK TILSLUTNING
- FARE
- INSTALLATION AF PRODUKTET
- FOR PRODUKTER MED KØLEVENTILATOR (DETTE FINDES MULIGVIS IKKE PÅ DIT PRODUKT.)
- ENDELIG KONTROL
- FREMTIDIG TRANSPORT
- TIPS TIL AT SPARE ENERGI
- FØRSTE BRUG
- TIDSINDSTILLING
- FØRSTE RENGØRING AF APPARATET
- FØRSTE OPVARMNING
- ADVARSEL
- ELEKTRISK OVN
- GRILLOVN
- GENERELLE OPLYSNINGER OM BAGNING, STEGNING OG GRILNING
- TIPS TIL BAGNING
- TIPS TIL STEGNING
- TIPS TIL GRILNING
- SÅDAN BETJENES DEN ELEKTRISKE OVN
- VÆLG TEMPERATUR OG DRIFTSTILSTAND
- SLUKNING AF DEN ELEKTRISKE OVN
- RISTPOSITIONER (FOR MODELLER MED TRÅDRIST)
- DRIFTSTILSTANDE
- TOP- OG BUNDVARME
- BUNDVARME
- VARMLUFT MED BUND- OG TOPVARME
- DRIFT MED BLÆSER
- SURF-FUNKTION
- D"-FUNKTION
- FULD GRILL
- GRILL + BLÆSER
- BRUG AF OVNURET
- TILBEREDNING VED AT INDSTILLE TILBEREDNINGSTIDEN
- INDSTILLING AF SLUTNINGEN AF TILBEREDNINGSTIDEN TIL ET SENERE TIDSPUNKT
- AKTIVERING AF TASTELÅSEN
- DEAKTIVERING AF TASTELÅSEN
- INDSTILLING AF VÆKKEURET
- SLUKNING AF ALARMEN
- ANNULLERING AF ALARMEN
- ÆNDRING AF ALARMTONEN
- ÆNDRING AF TIDSPUNKTET PÅ DAGEN
- ØKONOMITILSTAND
- INDSTILLING AF ØKONOMITILSTANDEN
- DEAKTIVERING AF ØKONOMITILSTANDEN
- INDSTILLING AF SKÆRMENS LYSSTYRKE
- STEGETABEL FOR TESTMÅLTIDER
- TIPS TIL BAGNING AF KAGE
- TIPS TIL BAGNING AF WIENERBRØD
- TIPS TIL TILBEREDNING AF GRØNTSAGER
- FOR DET BEDSTE TILBEREDNINGSRESULTAT (VARMLUFT/OVER- OG UNDERVARME/SURFFUNKTION)
- SÅDAN BETJENES GRILLEN
- TÆNDING AF GRILLEN
- SLUKNING AF GRILLEN
- TILBEREDNINGSTIDER FOR GRILLSTEGNING
- RENGØRING AF BETJENINGSPANELET
- RENGØRING AF OVNEN
- RENGØRING AF SIDEVÆGGEN (VARIERER AFHÆNGIGT AF PRODUKTMODELLEN)
- KATALYTISKE VÆGGE
- (DENNE FUNKTION ER VALGFRI. DEN FINDES MULIGVIS IKKE PÅ DIT PRODUKT.)
- NEM DAMPRENGØRING
- RENGØRING AF OVNLÅGEN
- AFMONTERING AF OVNLÅGEN
- AFMONTERING AF DEN INDVENDIGE GLASPLADE I LÅGEN
- UDSKIFTNING AF OVNPÆREN
- HVIS DIT KOMFUR ER UDSTYRET MED EN RUND PÆRE
- OVNEN AFGIVER DAMP, NÅR DEN ER I BRUG
- PRODUKTET AFGIVER METALLISKE LYDE UNDER OPVARMNING OG AFKØLING
- PRODUKTET FUNGERER IKKE
- OVNEN LYS VIRKER IKKE
- OVNEN VARMER IKKE
- (I MODELLER MED TIMER) URDISPLAYET BLINKER, ELLER URSYMBOLET ER TÆNDT
- LÆS VENLIGST DENNE BRUGSANVISNING FØRST
- FORKLARING AF SYMBOLER
- VIGTIGE INSTRUKTIONER OG ADVARSLER VEDRØRENDE SIKKERHED OG MILJØ
- SÅDAN BRUGES OVNEN
- RENGØRING OG VEDLIGEHOLDELSE
- VIGTIGE INSTRUKTIONER OG ADVARSLER VEDRØRENDE SIKKERHED OG MILJØBESKYTTELSE
- GENERELLE SIKKERHEDSREGLER
- SIKKERHEDSREGLER VED BRUG AF DETTE PRODUKT
- TILSIGTET ANVENDELSE
- BØRNS SIKKERHED
- BØRNESIKRINGSLÅS
- GAMLE APPARATER
- OVERENSSTEMMELSE MED ROHS-DIREKTIVET
- BORTSKAFFELSE AF EMBALLAGEMATERIALER
- BRUGSANVISNING
- STANDARD BAGEPLADE
- DYB FORM
- KORREKT PLACERING AF TRÅDRIST OG FORM PÅ TELESKOPSKINNER (DENNE FUNKTION ER KUN TILGÆNGELIG SOM EKSTRAUDSTYR. DEN ER MULIGVIS IKKE INKLUDERET I DET KØBTE PRODUKT)
- GRUNDLÆGGENDE OPLYSNINGER: DATA PÅ ENERGIMÆRKER FOR ELEKTRISKE OVNE ER ANGIVET I HENHOLD TIL STANDARDEN PL-EN 60350-1 / IEC 60350-1. DISSE VÆRDIER BESTEMMES VED STANDARDBELASTNING MED AKTIVE FUNKTIONER FOR OVER- OG UNDERVARME OG VARMLUFTSTØTTE (HVIS SÅDANNE FUNKTIONER ER TILGÆNGELIGE)
- SÆT STRØMKABLETS STIK I STIKKONTAKTEN
- OVNE MED KØLEVENTILATOR (DEN ER MÅSKE IKKE EN DEL AF DET KØBTE PRODUKTS UDSTYR)
- SÅDAN SPARER DU ENERGI
- FØRSTE GANG
- INDSTILLING AF TIDEN
- FØRSTE RENGØRING
- FORVARMNING
- OVN MED GRILL
- SÅDAN BETJENER DU OVNEN
- GENERELLE OPLYSNINGER OM BAGNING AF KAGER OG KØD SAMT GRILLNING
- TIPS TIL BAGNING AF KAGER
- TIPS TIL BAGNING AF KØD
- TIPS TIL GRILLNING
- VALG AF TEMPERATUR OG FUNKTION
- RISTPOSITIONER (MODELLER MED TRÅDRIST)
- FUNKTIONER
- ØVRE OG NEDRE VARMELEGEME
- NEDRE VARMELEGEME
- NEDRE/ØVRE VARME MED VARMLUFT
- DRIFT MED VENTILATOR
- SURFUNKTION
- D-FUNKTION
- GRILL + VARMLUFT
- BRUG AF OVNENS UR
- BAGNING MED INDSTILLET TID
- INDSTILLING AF BAGNINGENS AFSLUTNING TIL ET SENERE TIDSPUNKT
- AKTIVERING AF KNAPBLOKERING
- FOR AT DEAKTIVERE BLOKERINGEN SKAL DU TRYKKE PÅ KNAPPEN
- ÆNDRING AF ALARMLYDEN
- ÆNDRING AF DET AKTUELLE KLOKKESLÆT
- INDSTILLING AF ØKONOMITILSTAND
- DEAKTIVERING AF ØKONOMITILSTAND
- TABEL OVER BAGETIDER
- MADLAVNINGSTABEL TIL KONTROL AF MÅLTIDER
- TIPS VED BAGNING AF KAGE
- TIPS VED TILBEREDNING AF GRØNTSAGER
- TABEL OVER GRILLTIDER
- RENGØRING AF KONTROLPANELET
- NEM RENGØRING MED DAMP
- UDTAGNING AF GLASPLADEN I LÅGEN
- HVIS OVNEN HAR EN RUND PÆRE
- OVNEN AFGIVER DAMP UNDER DRIFT
- DER HØRES METALLISKE LYDE, NÅR APPARATET OPVARMES OG AFKØLES
- PRODUKTET VIRKER IKKE
- OVNEN LYSER IKKE I LAMPEN
- (I MODELLER MED TIDSUR) DISPLAYET BLINKER, ELLER URSYMBOLET LYSER
- SYMBOLERNES BETYDNING
- VIGTIGE ADVARSLER OG SIKKERHEDS- OG MILJØINSTRUKTIONER
- FORBEREDELSER
- OPBEVARING OG VEDLIGEHOLDELSE
- VIGTIGE ADVARSLER SAMT ANVISNINGER FOR SIKKERHED OG MILJØBESKYTTELSE
- GENEREL SIKKERHED
- SIKKER BRUG AF PRODUKTET
- SIKRING AF BØRNS SIKKERHED
- BORTSKAFFELSE AF PRODUKTET - OVERHOLDELSE AF WEEE-DIREKTIVET OG BORTSKAFFELSE AF UDTJENT UDSTYR
- BORTSKAFFELSE AF EMBALLAGEMATERIALE
- ALMINDELIG PLADE
- DYB OVNPLADE
- PLACERING AF TRÅDRIST OG BAGEPLADE PÅ TELESKOPSKINNER
- ELEKTRISKE TILSLUTNINGER
- FOR PRODUKTER MED KØLEVENTILATOR (DIT PRODUKT HAR MULIGVIS IKKE EN)
- SLUTKONTROL
- BORTSKAFFELSE AF PRODUKTET
- RÅD OM ENERGIBESPARELSE
- FØRSTE BRUG INDSTILLING AF KLOKKESLÆT
- GENEREL INFORMATION OM BAGNING, STEGNING OG GRILLNING
- RÅD TIL BAGNING
- RÅD TIL STEGNING
- RÅD TIL GRILLNING
- BRUG AF ELEKTRISK OVN
- SLUKNING AF ELEKTRISK OVN
- TÖÖREŽIIMID
- ÜLEMINE JA ALUMINE KUUMUTUS
- ALUMINE KUUMUTUS
- ALUMINE/ÜLEMINE KUUMUTUS KOOS VENTILAATORIGA
- KASUTAMINE VENTILAATORIGA
- SURF-FUNKTSIOON
- D" FUNKTSIOON
- TÄISGRILL
- GRILL + VENTILAATOR
- AHJU KELLA KASUTAMINE
- KÜPSETAMINE MÄÄRATUD KÜPSETUSAJAGA
- KÜPSETUSAJA LÕPU HILISEMAKS SEADMINE
- KLAHVILUKU SISSELÜLITAMINE
- KLAHVILUKU VÄLJALÜLITAMISEKS PUUDUTAGE
- MÄRGUANDEKELLA SEADMINE
- MÄRGUANDESIGNAALI VÄLJALÜLITAMINE
- MÄRGUANDE TÜHISTAMINE
- MÄRGUANDESIGNAALI MUUTMINE
- KELLAAJA MUUTMINE
- SÄÄSTUREŽIIM
- SÄÄSTUREŽIIMI MÄÄRAMINE
- SÄÄSTUREŽIIMI VÄLJALÜLITAMINE
- EKRAANI HELEDUSE MÄÄRAMINE
- (SEE FUNKTSIOON ON VALIKULINE. TEIE TOOTEL EI PRUUGI SEDA OLLA.)
- KÜPSETUSAEGADE TABEL
- KÜPSETAMINE JA RÖSTIMINE
- KÜPSETUSTABEL TESTTOITUDELE
- NÕUANDEID KOOKIDE KÜPSETAMISEKS
- NÕUANDEID KÜPSETISTE TEGEMISEKS
- NÕUANDEID KÖÖGIVILJADE KÜPSETAMISEKS
- OPTIMAALSE TULEMUSE SAAVUTAMISEKS (ABIVENTILAATORIGA KUUMUTAMINE/VENTILAATORIGA KUUMUTAMINE/SURF-FUNKTSIOON)
- KUIDAS GRILLI KASUTADA
- HOIATUS
- GRILLI SISSELÜLITAMINE
- GRILLI VÄLJALÜLITAMINE
- KÜPSETAMISAEGADE TABEL GRILLIMISEKS
- HOIDMINE JA HOOLDUS
- ÜLDINE TEAVE
- OHT
- JUHTPANEELI PUHASTAMINE
- AHJU PUHASTAMINE
- KÜLGSEINA PUHASTAMINE (VARIEERUB OLENEVALT TOOTE MUDELIST.)
- KATALÜÜTILISED SEINAD
- HÕLBUS AURUGA PUHASTAMINE
- AHJUUKSE PUHASTAMINE
- AHJUUKSE EEMALDAMINE
- UKSE SISEKLAASI EEMALDAMINE
- AHJUVALGUSTI PIRNI VAHETAMINE
- KUI AHJUL ON ÜMAR VALGUSTI
- PROBLEEMIDE LAHENDAMINE
- KASUTAMISE AJAL TULEB AHJUST AURU
- TOOTE KUUMENEMISEL JA JAHTUMISEL ON KUULDA METALSET HELI
- TOODE EI TÖÖTA
- AHJU TULI EI TÖÖTA
- AHI EI LÄHE SOOJAKS
- KELLAAEG VILGUB VÕI KELLA TÄHIS PÕLEB (TAIMERIGA MUDELITEL)
Mærke : BEKO
Model : BIR24303BCS
Kategori : Ovn