Logik

LBFANX12 - 烤箱 Logik - 免费用户手册

免费查找设备手册 LBFANX12 Logik PDF格式.
📄 20 页 中文 ZH 下载 💬 AI提问 10 问题 ⚙️ 规格
Notice Logik LBFANX12 - page 18
查看手册 : English EN 中文 ZH
请选择您的语言并填写邮箱:我们将为您发送专门翻译的版本。
产品类型 电烤箱
型号 LBFANX12
品牌 Logik
安装类型 独立式
整体尺寸(高 x 宽 x 深) 59.5 x 59.5 x 56.0 cm
重量 约 30 公斤
电源 220-240 V ~ 50 Hz
总功率 2000 - 2400 W
能效等级 A+(预计)
容量 71 升
功能数量 8
主要功能 常规烘烤、风扇烘烤、烧烤、风扇烧烤、解冻、照明、底部加热、顶部加热
温度范围 50 - 250 °C
控制类型 旋转旋钮和定时器
显示 模拟定时器带铃声
内部照明
清洁系统 易清洁搪瓷内胆
安全特性 防烫门、自动关闭、儿童锁
可用备件 加热元件、门密封条、温控器、旋钮
保修 2年

常见问题 - LBFANX12 Logik

如何预热 Logik LBFANX12 烤箱?
将功能选择旋钮转到所需模式(例如常规烘烤),并使用温控旋钮设置温度。等待指示灯熄灭,表示烤箱已达到设定温度。
清洁内部的最佳方法是什么?
日常清洁使用湿布和温和清洁剂。对于顽固污渍,使用软百洁布。避免使用可能损坏搪瓷的研磨性清洁剂。易清洁涂层有助于减少残留物。
为什么我的烤箱不加热?
检查烤箱是否插好电源,断路器是否打开。确保定时器已设置(如适用)。如果仍然不加热,加热元件或温控器可能有故障,需要更换。
可以在烤箱中使用铝箔吗?
可以,但避免完全覆盖烤箱底部,否则会影响热循环。在烤盘上或覆盖菜肴时使用铝箔,但切勿让铝箔接触加热元件。
如何使用烧烤功能?
将食物放在最高层架位置。选择烧烤功能(或风扇烧烤用于较大食物),如有调节功能则设置烧烤功率。如果手册建议,可将烤箱门略微打开。
风扇辅助功能有什么作用?
风扇使热空气在烤箱内均匀循环,加快烹饪速度并使上色均匀。非常适合烘烤蛋糕、糕点以及干烤。
如何设置定时器?
顺时针旋转定时器旋钮到所需的分钟数(最多60分钟)。时间到后烤箱将自动关闭并发出铃声。确保定时器已设置以使烤箱运行。
为什么内部照明灯熄灭?
内部照明灯可能灯泡故障。更换时,断开烤箱电源,取下灯罩,更换为新的烤箱专用灯泡(通常为15-25W)。
如何激活儿童锁?
本型号具有儿童锁功能,可防止意外操作。具体操作请查阅手册,可能需要按组合按钮或按住旋钮。
在哪里可以购买 LBFANX12 的备件?
备件如加热元件、门密封条和旋钮可从授权的 Logik 服务中心或在线零售商处购买。订购时请务必提供型号。

用户关于以下问题的提问 LBFANX12 Logik

0 问题 关于此设备。回答您知道的问题或提出自己的问题。

提出关于此设备的新问题

电子邮件保持私密:仅用于在有人回复您的问题时通知您。

还没有问题。成为第一个提问的人。

下载您的设备说明 烤箱 免费PDF格式!查找您的手册 LBFANX12 - Logik 并重新掌握您的电子设备。本页发布了使用您的设备所需的所有文档。 LBFANX12 品牌 Logik.

用户手册 LBFANX12 Logik

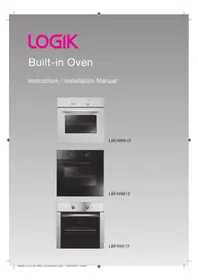
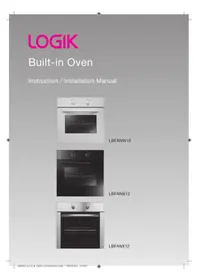
LOGIK

Built-in Oven

Instruction / Installation Manual

Logik LBFANX12 - Built-in Oven - 1

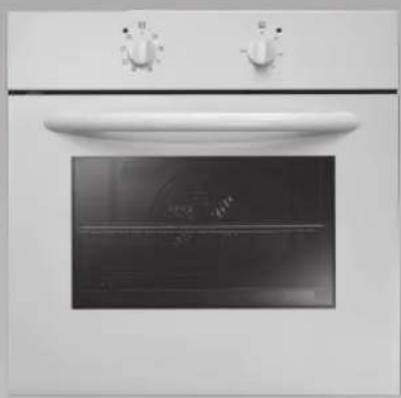
natural_image Front view of a white oven with two control knobs and a visible interior screen (no text or symbols)

LBFANW12

Logik LBFANX12 - Built-in Oven - 2

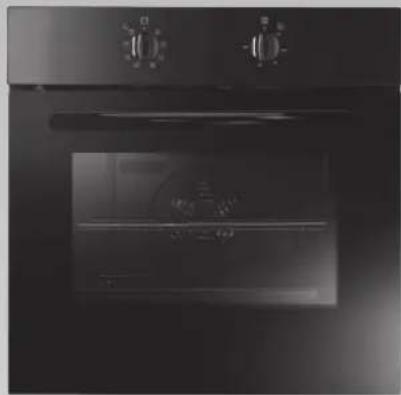
natural_image Interior view of a modern kitchen oven with two control knobs and a door (no visible text or symbols)

LBFANB12

Logik LBFANX12 - Built-in Oven - 3

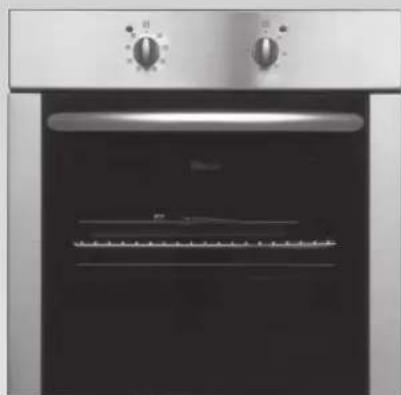
natural_image Front view of a stainless steel oven with two rotary switches (no visible text or labels)

LBFANX12

Logik LBFANX12 - Built-in Oven - 4

Contents

Unpacking....4

Product Overview....5

Front View ....5

Control Panel....5

First Time Use of the Oven 6

Function Selector Control....6

Thermostat Control 6

Using the Oven 7

Using the Functions....8

Baking Tips......8

Energy Saving 9

Cleaning Tips....9

Cleaning the Outside of the Oven 9

Cleaning the Oven Door Glass....9

Replacing the Oven Light....10

Removing the Door for Easier Cleaning....10

Taking Out the Glass from the Oven Door for Cleaning 10

Specifications....11

Installation 12

Use as Competent Person or Qualified Electrician.... 12

Installing the Built-in Oven....13

Making an Electrical Connection....14

Power Connection Box 14

Safety Warnings....15

Thank you for purchasing your new Logik Built-In Oven.

You must read this manual in order to fully understand how to install and operate it correctly.

Read all the safety warnings carefully before use and keep this manual for future reference.

Logik LBFANX12 - Contents - 1

Unpacking

Remove all packaging from the unit. Retain the packaging. If you dispose of it please do so according to local regulations.

The following items are included:

Logik LBFANX12 - Unpacking - 1

natural_image Interior view of a room with ceiling-mounted fixtures and a wall-mounted fan (no text or symbols visible)

The Main Unit

Logik LBFANX12 - Unpacking - 2

natural_image Illustration of a woven mat with a handle, no text or symbols present

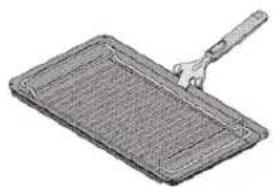
Grill Pan, Grid and Handle Set x 1
P.N.: 20627919

Logik LBFANX12 - Unpacking - 3
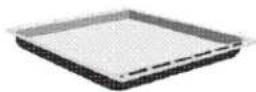
Tray x 1
P.N.: 20612977

Logik LBFANX12 - Unpacking - 4
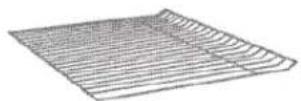
Wire Shelf x 1
P.N.: 37015286

Logik LBFANX12 - Unpacking - 5
Instruction / Installation Manual
P.N.: 52066900

Logik LBFANX12 - Unpacking - 6

If items are missing or damaged please contact Partmaster (UK only).

Tel: 0844 8003 456 for assistance.

Logik LBFANX12 - Unpacking - 7

Product Overview

Front View

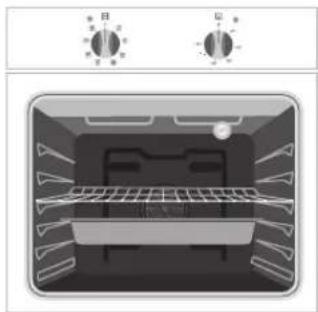
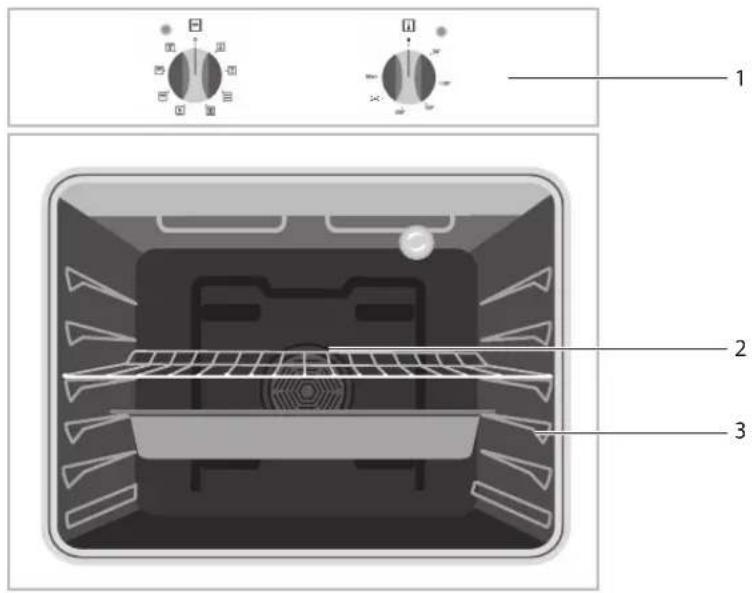
1 2 3

  1. Control Panel

  2. Fan

  3. Shelf guide slots

Control Panel

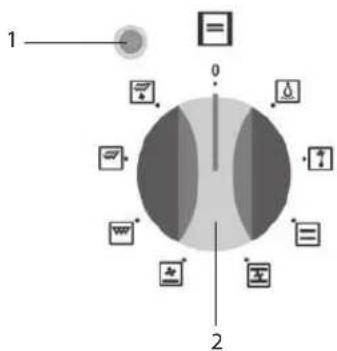
1 0 2

  1. Oven Indicator Lamp

  2. Function Selector Control

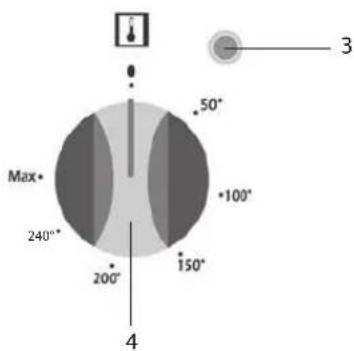
Max 240° 200° 150° 100° 50° 3 4

  1. Thermostat Lamp

  2. Thermostat Control

Logik LBFANX12 - Control Panel - 3

First Time Use of the Oven

Unpack the oven. Remove any insert cards or plastic bags. Use a damp cloth to carefully wipe the inner cavity wall and housing. Clean all the detachable parts in hot, soapy water before using.

Heat the oven on maximum for 45 minutes. There may be a little smoke and odour upon initial start up (for about 15 mins). This is normal. It is due to the protective substance on the heating elements which protects them from the effects of corrosion during shipping from the factory.

Logik LBFANX12 - First Time Use of the Oven - 1

Function Selector Control

This control is used to select the available cooking functions, which are:

Symbol Function Description
Logik LBFANX12 - Function Selector Control - 1The oven light will be turned on.
Logik LBFANX12 - Function Selector Control - 2The oven's light, the oven indicator and the fan will be turned on.This setting can be used to defrost frozen foods.
Logik LBFANX12 - Function Selector Control - 3The oven's thermostat, power lights and the lower and upper heating elements will be switched on.
Logik LBFANX12 - Function Selector Control - 4The oven's thermostat, power lights, lower and upper heating elements and the fan will be switched on.
Logik LBFANX12 - Function Selector Control - 5The oven's thermostat and power lights, the fan, and the lower heating element will be switched on.
Logik LBFANX12 - Function Selector Control - 6The oven's thermostat, power lights and the grill element will be switched on.
Logik LBFANX12 - Function Selector Control - 7The oven's thermostat, power lights and the upper and grill elements will be switched on.
Logik LBFANX12 - Function Selector Control - 8The oven's thermostat and power lights, the upper heating element, the grill element and the fan will be switched on.

Logik LBFANX12 - Function Selector Control - 9

flowchart
graph TD
    A["Input"] --> B{Decision}
    B -->|Yes| C["Process Step 1"]
    B -->|No| D["Process Step 2"]
    C --> E["Output"]
    D --> E
    E --> F["Feedback Loop"]
    F --> A

Logik LBFANX12 - Function Selector Control - 10

Thermostat Control

The temperature can be set from 50^ C - 240^ C. Select the desired temperature, as follows:

To keep food warm 50 - 100°C position
For traditional oven cooking 50 - 240°C position
For all types of grilling 190°C position

Logik LBFANX12 - Thermostat Control - 1

pie | Angle | Value | |---|---| | 50° | Peak | | 100° | High | | 150° | Medium | | 200° | Low | | 240° | Medium | | Max | Maximum |

Logik LBFANX12 - Thermostat Control - 2

Using the Oven

Logik LBFANX12 - Using the Oven - 1

  • Under no circumstances should the oven be lined with aluminium foil as overheating may occur.
  • Do not place dishes or baking trays directly onto the base of the oven as it becomes very hot and damage may occur.
  • Bread may catch fire if the toasting time is too long. Close supervision is necessary during toasting.
  • During use this appliance becomes hot. Care should be taken to avoid touching hot surfaces, e.g. oven door, heating elements.
  • Accessible parts may become hot when in use. Children should be kept away.
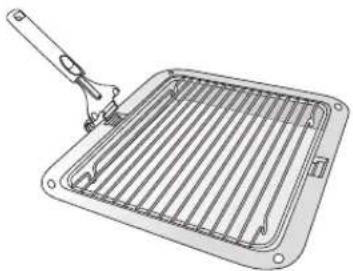
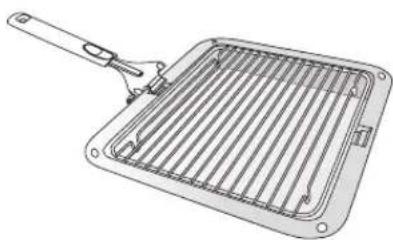
  • Do not leave the handle in position when grilling. If the handle is left in position when grilling, it will get very hot.

  • To get the best results, the smallest distance allowed between the food and the upper heating element is 30 mm.

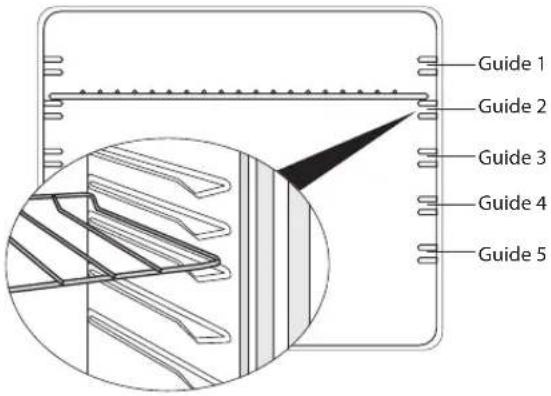
  • On the wall of inner cavity there are 5 different shelf guide slots. You can place the shelf at different heights to achieve the best cooking performance depending on the heat of the heating elements and the size of food. If only the upper heating element is on, we suggest that you place the shelf on guide 1 (make sure that there is a minimum distance of 30mm between the food and the upper heating element).

  • Always monitor the food during cooking to ensure that you are not overcooking it.

  • For heavy food, use the oven tray rather than the wire shelf.
  • Select the oven function you require. Select the temperature you require.
  • Before placing food in the oven you may need to pre-heat the oven for 10 minutes.
  • The temperature light will go out when the chosen temperature has been reached.
  • To switch the oven off turn the function control dial to the off position '0'.
  • The grill pan has a detachable handle. Ensure when using the grill pan handle that it is centralised and secure as shown below.

Logik LBFANX12 - Using the Oven - 2

natural_image Technical line drawing of a grating or rack device with a handle and mounting base (no text or symbols)

Logik LBFANX12 - Using the Oven - 3

natural_image Technical line drawing of a grater with handle and mounting base (no text or symbols)

Guide 1 Guide 2 Guide 3 Guide 4 Guide 5

Logik LBFANX12 - Using the Oven - 5

Using the Functions

Symbol Function Description
Logik LBFANX12 - Using the Functions - 1Defrost FunctionTo use the defrost function, take your frozen food and place it in the oven on a wire shelf on the third guide slot from the bottom. It is recommended that you place an oven tray under the defrosting food, to catch the water accumulated due to melting ice. This function will not cook or bake your food, it will only help to defrost it.
Logik LBFANX12 - Using the Functions - 2Static Cooking FunctionThe static cooking function emits heat, ensuring even cooking of the lower and upper food, this is an excellent function for making pastries, cakes, baked pasta, lasagne and pizza.
Logik LBFANX12 - Using the Functions - 3Fan FunctionThis function is very good for obtaining results in baking pastry. Cooking is carried out by the lower and upper heating element within the oven and by the air circulation device, which will give a slight grill effect to the food. The fan evenly disperses the heat of the oven.
Logik LBFANX12 - Using the Functions - 4Faster Lower Heating FunctionFan and lower heating function is ideal for baking food equally in a short time. While the fan evenly disperses the heat of the oven, the lower heating element ensures the baking of the food dough.
Logik LBFANX12 - Using the Functions - 5Grilling FunctionThis function is used for grilling foods such as cheese on toast, always use the highest rack. Lightly brush the grill rack with oil to stop foods sticking and place the foods in the centre. The grill pan and rack should be used together to catch the drips of oil.
Logik LBFANX12 - Using the Functions - 6Faster Grilling FunctionThis function is used for faster grilling and for covering a larger surface area, such as grilling meats, which tend to take up more room on a grilling rack. Use a lower shelf position for grilling thick foods.
Logik LBFANX12 - Using the Functions - 7Double Grill and Fan FunctionThis function is ideal for thicker foods when grilling. Both the upper heating elements and grill will be energised along with the fan to ensure even cooking. Use a lower shelf position for grilling thick foods.

Logik LBFANX12 - Using the Functions - 8

Baking Tips

  1. Always place baking tins in the centre of the wire shelf.
  2. Make sure you use bakeware that is oven proof.
  3. Do not place bakeware too close to the rear of the oven wall.
  4. You can influence the degree of browning by changing the temperature setting.

  5. If a cake collapses after removing it from the oven:

• Use less liquid on your next attempt.
- Consider using a longer baking time or use a slightly lower temperature setting.

Logik LBFANX12 - Baking Tips - 1

Energy Saving

To save energy and to help protect the environment, we recommend these hints:

• Preheat the oven only if expressly required by the recipe or guidelines.
• Dark baking tins have a higher degree of heat absorption.
- In the case of longer baking times, you can switch off the oven 5–10 minutes before the full baking time and use the residual heat. This will reduce energy usage.
• Use the oven efficiently, by cooking many trays of food at the same time.
• Cook 2 trays of scones, small cakes or sausage rolls at the same time.
- Select the correct shelf location for food being cooked.
- Do not open the oven door more than necessary.

Logik LBFANX12 - Energy Saving - 1

Cleaning Tips

Logik LBFANX12 - Cleaning Tips - 1

Ensure that the appliance is switched off and isolated before cleaning the oven to avoid the possibility of electric shock.

  1. Allow the oven to fully cool before cleaning. Remove the wire shelves, wash them separately in hot soapy water and dry thoroughly.
  2. Wash the interior of the oven with hot soapy water and wipe down with a damp cloth.
  3. Leave the door open until the interior has dried, before replacing the wire shelves.
  4. Clean the oven after each use, especially after roasting or grilling, this will prevent spilt or splattered food debris burning and becoming difficult to remove.
  5. Do not use abrasive pads to clean the interior of the oven as this may remove the enamel, which will affect the efficiency of your oven.
  6. Steam cleaners must never be used to clean this oven.

Logik LBFANX12 - Cleaning Tips - 2

Cleaning the Outside of the Oven

  1. You should regularly wipe over the control panel and oven door using a soft cloth and liquid detergent as spilt liquids may damage the finish.
  2. Wash enamelled or chrome plated parts of the oven with hot soapy water or with non-abrasive detergents.
  3. Never use abrasive pads to clean enamelled, chromed or stainless steel surfaces.
  4. When using commercially available stainless steel cleaning products, avoid cleaning any lettering or symbols, as they can become damaged.

Logik LBFANX12 - Cleaning the Outside of the Oven - 1

Cleaning the Oven Door Glass

Do not use harsh abrasive cleaners or sharp metal scrapers to clean the oven door glass since they scratch the surface, which may result in shattering of the glass.

Logik LBFANX12 - Cleaning the Oven Door Glass - 1

Take care when handling parts with glass, knocks, and chips; heavy handling and dropping could cause the glass to shatter.

Logik LBFANX12 - Cleaning the Oven Door Glass - 2

Replacing the Oven Light

Logik LBFANX12 - Replacing the Oven Light - 1

Ensure that the appliance is switched off before replacing the light to avoid the possibility of electric shock.

  1. Turn off the oven and make sure that it is cold. Switch off its isolation switch.
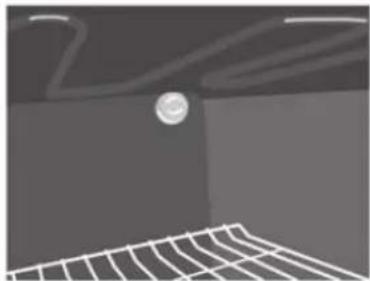
  2. After removing the cover in front of the light, take out the bulb.
  3. Insert the new bulb, which should be resistant to 300^ C. For replacement bulbs contact your local service centre or Partmaster Direct (details at the back of this guide).
  4. Re-fit the cover.
  5. If in any doubt, consult a qualified electrician for help.

Logik LBFANX12 - Replacing the Oven Light - 2

natural_image Abstract 3D rendering of a room with ceiling lights and a ball, no text or symbols present

Logik LBFANX12 - Replacing the Oven Light - 3

Removing the Door for Easier Cleaning

Logik LBFANX12 - Removing the Door for Easier Cleaning - 1

Take care when handling parts with glass, knocks and chips; heavy handling and dropping could cause the glass to shatter.

  1. We recommend you have someone to assist you during removal of the door.
  2. Open the door completely.
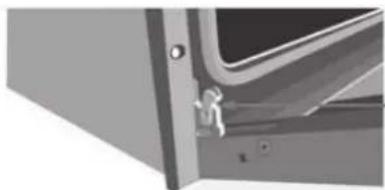
  3. The door hinge has a small latch. Lift the latch on both hinges.
  4. Lift the door slightly as if closing, and then with both hands supporting the door, pull it away from the oven.
  5. To replace the door, perform the above in reverse order. Ensure the slot on the bottom of the hinge is seated when refitting the door. Open and close the door to make sure that it has been fitted correctly.

Logik LBFANX12 - Removing the Door for Easier Cleaning - 2

natural_image Illustration of a person running inside a vehicle door (no text or symbols visible)

Logik LBFANX12 - Removing the Door for Easier Cleaning - 3

Taking Out the Glass from the Oven Door for Cleaning

  1. Remove the oven door.
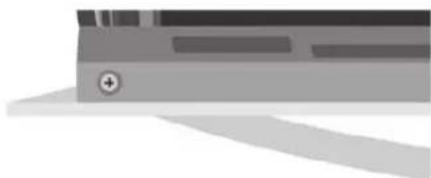
  2. Undo the screws from the metal panel that holds the glass in place.
  3. Lift the glass out of the frame. Clean it using appropriate glass cleaning products.

Logik LBFANX12 - Taking Out the Glass from the Oven Door for Cleaning - 1

natural_image Close-up of a mechanical component with a circular button and plus sign, no visible text or symbols

Logik LBFANX12 - Taking Out the Glass from the Oven Door for Cleaning - 2

It may require a little force due to the adhesive pads under glass.

  1. To replace the glass, place it back in, placing the securing caps over the top of the glass and screw it back into place.

  2. Ensure the glass is not damaged in any way.

Logik LBFANX12 - Taking Out the Glass from the Oven Door for Cleaning - 3
Specification

Model LBFANW12 / LBFANB12 / LBFANX12
Rated Voltage 230 – 240 V
Rated Frequency 50 Hz
Power 2600 – 2800 W
Current 11 – 12 A
Top Element 1200 W
Bottom Element 1100 W
Grill 1400/2600 W
Net Weight 31.2 kg
Product Dimensions 59.5 x 59 x 57 cm
Usable Oven Capacity 56 Litres
Energy Efficiency Class A

Features and Specification are subject to change without prior notice.

Logik LBFANX12 - Taking Out the Glass from the Oven Door for Cleaning - 4

Installation

Logik LBFANX12 - Installation - 1

  • The electrical connection of this oven should be carried out by a qualified electrician. Following the instructions in the installation section of this manual and in compliance with the current regulations.
    • The oven is intended for household use only.

Logik LBFANX12 - Installation - 2

Use as Competent Person or Qualified Electrician

• This oven must be installed in compliance with local safety standards.
- Wiring connections must be in accordance with Local Wiring Rules and any particular conditions of the local authority.
- Refer to the data plate for rating information. The data plate is positioned behind the bottom of the oven door. The electrical wiring diagram is positioned on the rear panel of the appliance.
- A means of disconnection with a contact separation of at least 3 mm must be supplied in the fixed wiring.
• This appliance must be properly earthed.
- Do not lift the appliance by the door handles.
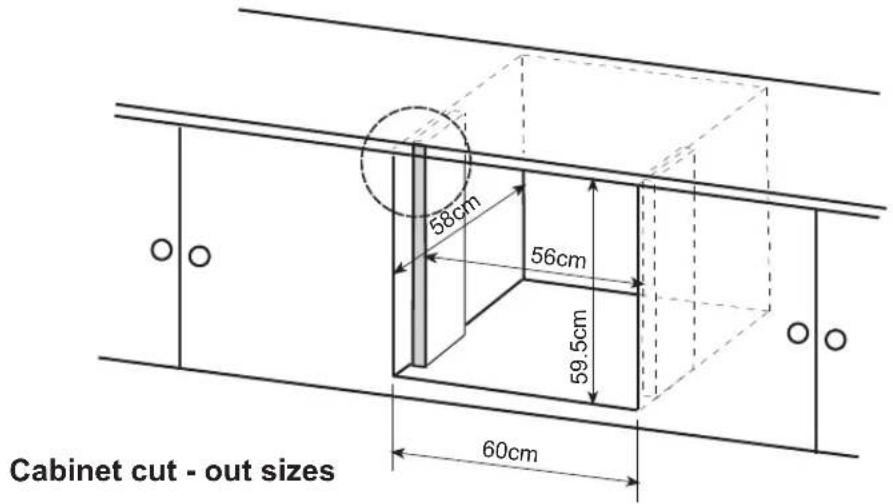
• Prepare the cupboard opening to match your appliance measurements. (See diagrams)
- Slide appliance into the cupboard, ensuring that the mains cable does not kink.
• To prevent tipping, secure your oven into the cupboard by fastening with the screws supplied.
- The cabinet must be suitable for use with built-in ovens and capable of withstanding 75°C. Installation into low temperature tolerant cabinetry (e.g. Vinyl coated) may result in deterioration of the low temperature coating by discolouring or bubbling.
• We cannot accept responsibility for damage caused by installation into low temperature tolerant cabinets.
• After installation, test and ensure that the appliance operates correctly.

Logik LBFANX12 - Use as Competent Person or Qualified Electrician - 1

To avoid any potential hazard, you must follow these instructions when you install your appliance.

Logik LBFANX12 - Use as Competent Person or Qualified Electrician - 2

Installing the Built-in Oven

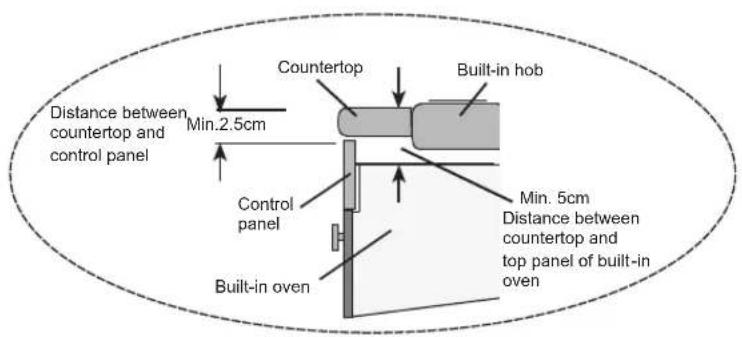
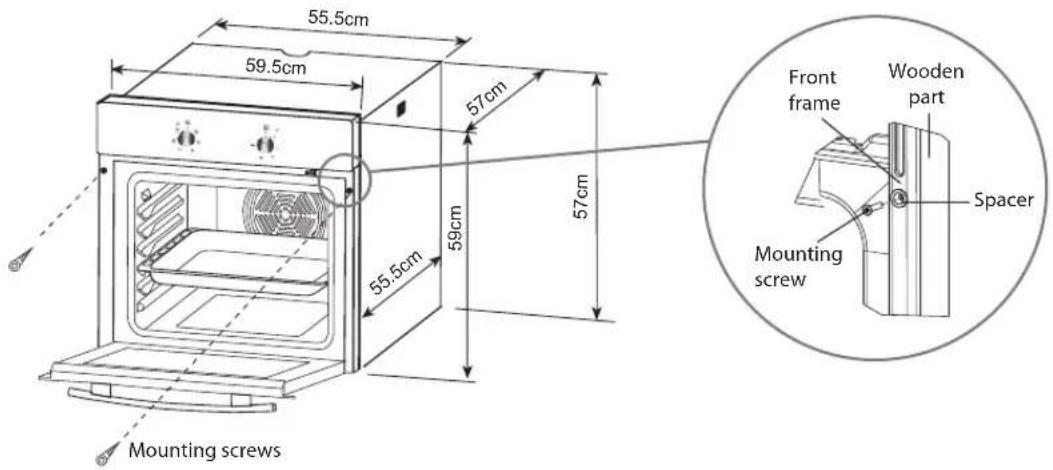
  1. The space where the oven will be placed needs to beat least 60 cm wide, 58 cm deep and 59.5 cm high. A minimum gap of 2.5 cm between the work surface and the control panel, and a distance of 5cm between the work surface and top of the oven is needed, in order to be able to get to the back of the oven if necessary and for easy access when sliding the oven out.

58cm 56cm 59.5cm 60cm Cabinet cut - out sizes

Distance between countertop and control panel Min.2.5cm Countertop Built-in hob Control panel Min. 5cm Distance between countertop and top panel of built-in oven Built-in oven

  1. Ensure the electrical connections have been made.
  2. Insert the oven into the cabinet by pushing it back into the space within the cabinet (Ensuring the electrical cable is not trapped or touching hot parts). Open the door carefully, and insert the fixing screws through the spacers into the fixing surface of the cabinet, ensure the front frame of the oven is touching the fixing surface of the cabinet and tighten the fixing screws to hold the oven in place securely.

55.5cm 59.5cm 57cm 57cm 59cm 55.5cm Mounting screws Front frame Wooden part Spacer Mounting screw

Logik LBFANX12 - Installing the Built-in Oven - 4

Making an Electrical Connection

An approved suitable cable must be connected from the Consumer Unit (main fuse box) and be protected by its own 30amp fuse or Micro Circuit Breaker (MCB).

The electrician must provide a fused double-pole isolation switch, which disconnects both the line (live) and neutral conductors, with a contact separation of at least 3 mm incorporated into the fixed wiring. The fused switch should be fitted to the kitchen wall, and must be placed in an easy accessible position in accordance with IEE regulations. Connect the fused switch to a junction box which should be fitted on the wall. The ovens power supply cable can then be connected. Connect one end to the junction box and connect the other end to the ovens power connection box which is located at the back of the oven. Remove the cover of the power connection box and install the cable, in accordance with the connection diagram. The power supply cable must be positioned away from direct heat sources. It should not be subjected to a temperature rise of more than 50°C above room temperature.

Logik LBFANX12 - Making an Electrical Connection - 1

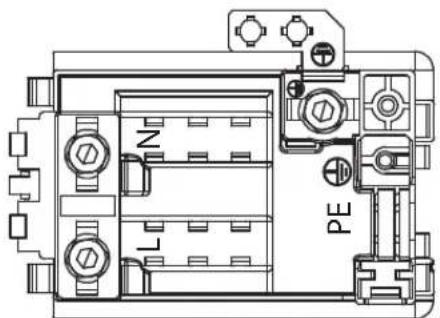
Terminal Box Connections

For this oven, the cable type must be a minimum of H05VV-F (PVC insulated and sheathed) 3 cores x 4 mm ^2 and the connection should be made as detailed below.

Green / Yellow (Earth) to the PE (⊕) terminal Brown (Live) wire to the terminal marked L Blue (Neutral) wire to the terminal marked N

Ensure the cable exits through the cable grip, clamping on the outer sheath of the cable, and fix in place by tightening the fixing screw.

Ensure all screws are adequately tightened. Do not over tighten as you may risk damaging the screw threads.

L L PE

This appliance must be earthed.

For this connection, 'Twin and Earth 6242Y' type cable can be used.

Logik LBFANX12 - Terminal Box Connections - 2

Safety Warnings

Installation

  • The appliance must be installed only by an authorized person in compliance with the instructions provided. Incorrect installation may cause harm to persons, animals or may damage property.
  • Before using the appliance, ensure that all packing materials are removed from the appliance.
  • In order to avoid any potential hazard, the enclosed installation instructions must be followed.
  • Ensure that all specified vents, openings and air spaces are not blocked.
  • Cabinets must be designed for the use of built in ovens and capable of resisting the temperatures from them without damage.
  • Keep combustible materials, such as: curtains, drapes, furniture, pillows, clothing, linens, bedding, paper, etc., at least 3 feet(0.9 meters) from the oven. Do not use this unit in areas where gasoline, paint or other flammable liquids or their associated vapors may be present.
  • To reduce the risk of fire, do not place or install this unit in areas where the ventilation or circulation ducts may become blocked. Make sure there is at least 10mm of space between the back of your oven and the wall.
  • The unit's mains cable must be connected to a properly grounded and protected, 220-240V electrical outlet. Always use ground fault protection where required by the local regulations.
  • Do not use an extension cord, which may overheat and cause a fire.
  • When transporting or storing the unit, keep it in a dry location, free from dust, excessive vibration or other factors, which may damage the unit.
  • Do not operate any oven with a damaged mains cable or after the unit malfunctions, has been dropped or damaged in any manner. Return the oven to an authorised service facility.
  • Only authorized personnel should carry out servicing.
    • This appliance must be earthed.
  • To maintain safe operation, it is recommended that the product be inspected every five years by an authorized service person.

Operation and Maintenance

General Warnings

  • If the supply mains cable is damaged, the cord must be replaced by a qualified electrician, manufacturer's service agent or similarly qualified persons in order to avoid a hazard.
    • This product is for household use only.
  • This product has not been designed for any uses other than those specified in this booklet.
  • This appliance is for cooking purposes only. It must not be used for other purposes, for example room heating.
  • In order to avoid fire, the appliance must be kept clean and vents kept unobstructed.
  • Do not spray aerosols within the vicinity of the appliance during operation.
  • Do not store flammable materials in or under the appliance, e.g. aerosols.
  • Do not line the bottom of the oven with foil or cookware.
    • Always use gloves when handling hot items inside the oven.
    • Always turn the grill off immediately after use as fat left behind may catch fire.
  • Do not leave the cooker unattended when grilling. Oils and fats may catch fire due to overheating.
  • Do not put pans or other cookware on the opened door of the oven.
  • Do not use the cooker in the event of a technical fault. Any faults must be repaired by an appropriately qualified and authorized person.
  • In the event of any incident caused by a technical fault, disconnect the mains power and report the fault a the service centre to be repaired.
  • The rules and provisions contained in this instruction manual should be strictly observed.
  • Do not allow anybody who is not familiar with the contents of this instruction manual to operate the cooker.
  • This appliance is not intended for use by persons (including children) with reduced physical, sensory or mental capabilities, or lack of experience and knowledge, unless they have been given supervision or instruction concerning the use of the appliance by a person responsible for their safety.

• Children should be supervised to ensure that they do not play with the appliance.
- During use this appliance becomes hot. Care should be taken to avoid touching hot surfaces, e.g. oven door, heating elements.
• To avoid burns and scalds children should be kept away.
- Accessible parts may become hot when in use. Children should be kept away.
• Take care when handling parts with glass, knocks, chips, heavy handling and dropping could cause the glass to shatter.
- The glass oven door uses toughened glass and is designed to break into many 'nugget' size pieces if it breaks. These pieces will still have sharp edges, please handle broken glass with care.

Oven

  • During use the appliance becomes hot. Care should be taken to avoid touching the hot surfaces inside the oven.
  • Switch the appliance off before removing the oven lamp cover for oven lamp replacement.
  • To avoid an accident, ensure that oven shelves and fittings are always inserted into the appliance in accordance with the instructions.
    • Do not use the door as a shelf.
  • Do not push down on the open oven door.

Grill

  • Do not cover the grill insert with foil, as fat left there may catch fire.
    • Always keep the grill pan clean as any fat there may catch fire.
    • Do not leave the grill on unattended.
  • To avoid fire, ensure that grill trays and fittings are always inserted into the appliance in accordance with the instructions.
  • Do not place thick portions of food on the grill, if using the top shelf position. Foods may curl, catch and ignite.
If you require a replacement for any of the items listed below, please quote their corresponding part numbers:
Replacement Part Part Number
Grill Pan, Grid and Handle Set 20627919
Tray 20612977
Wire Shelf 37015286

Logik LBFANX12 - Grill - 1

Visit Partmaster.co.uk today for the easiest way to buy electrical spares and accessories. With over 1 million spares and accessories available we can deliver direct to your door

the very next day. Visit www.partmaster.co.uk or call 0844 800 3456 (UK customers only). Calls charged at National Rate.

Logik LBFANX12 - Grill - 2

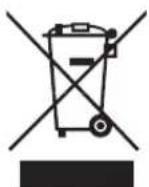
This symbol on the product or in the instructions means that your electrical and electronic equipment should be disposed at the end of its life separately from your household waste. There are separate collection systems for recycling in the EU.

For more information, please contact the local authority or your retailer where you purchased the product.

DSG Retail Ltd • Maylands Avenue • Hemel Hempstead

Herts • HP2 7TG • England

(P.N.: 52066900)

Logik LBFANX12 - Grill - 3

Logik LBFANX12 - Grill - 4

Logik LBFANX12 - Grill - 5

手册助手
由Anthropic提供支持
等待您的消息
产品信息

品牌 : Logik

型号 : LBFANX12

类别 : 烤箱