PHOTO DISPLAY 7 PDJL007 - Цифровой дисплей JOBO - Бесплатное руководство пользователя
Найдите руководство к устройству бесплатно PHOTO DISPLAY 7 PDJL007 JOBO в формате PDF.

| Тип продукта | Цифровая фоторамка |
| Бренд | JOBO |
| Модель | PHOTO DISPLAY 7 PDJL007 |
| Размер экрана | 7 дюймов (17,8 см) |
| Разрешение | 480 × 234 пикселей (RGB) |
| Яркость | 350 кд/м² |
| Контрастность | 300:1 |
| Углы обзора | 60°/60°/50°/40° (CR≥10) |
| Время отклика | 30 мс |
| Формат экрана | 16:9 |
| Поддерживаемые форматы файлов | JPEG |
| Максимальное разрешение фото | 48 миллионов пикселей |
| Совместимые карты памяти | SD, MMC, USB (USB-накопитель) |
| Питание | AC 100-240 В / DC 12 В |
| Потребляемая мощность | 6 Вт |
| Размеры (Д×В×Г) | 231 × 160 × 36 мм |
| Вес | 0,4 кг |
| Рабочая температура | -20 °C до 65 °C |
| Температура хранения | -30 °C до 75 °C |
| Основные функции | Слайд-шоу с регулируемым интервалом, поворот изображения (90°/180°/270°), увеличение/уменьшение (до 5×), альбомная/портретная ориентация, настенное крепление, смена загрузочного логотипа |
| Эффекты перехода | 14 эффектов (3D Flip, 3D Circle, Shutter, Fade и др.) |
| Языки меню | Английский, Французский, Испанский, Итальянский, Нидерландский, Немецкий, Русский, Португальский |
| Комплектация | Фоторамка, адаптер питания, подставка, инструкция |
Часто задаваемые вопросы - PHOTO DISPLAY 7 PDJL007 JOBO
Вопросы пользователей о PHOTO DISPLAY 7 PDJL007 JOBO
0 вопрос об этом устройстве. Ответьте на те, что знаете, или задайте свой.
Задать новый вопрос об этом устройстве
Скачайте инструкцию для вашего Цифровой дисплей в формате PDF бесплатно! Найдите своё руководство PHOTO DISPLAY 7 PDJL007 - JOBO и возьмите своё электронное устройство обратно в руки. На этой странице опубликованы все документы, необходимые для использования вашего устройства. PHOTO DISPLAY 7 PDJL007 бренда JOBO.
РУКОВОДСТВО ПОЛЬЗОВАТЕЛЯ PHOTO DISPLAY 7 PDJL007 JOBO
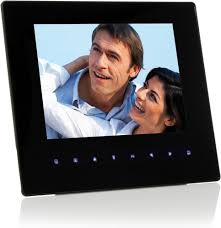
Photo Display 7"
PDJL007
Instruction Manual
Safety Instructions
Caution with Power Cord
Always pull the power cord out holding the plug. Never pull on the cord itself, and never pull out the power cord with wet hands as this may cause a short-circuit or electric shock. Do not place furniture, etc. on the power cord and take care that it does not become tangled. Never make a knot in the power cord and do not tie it together with other cables. The power cord should be positioned in such a way that nobody can stand on it. A damaged power cord can cause fire or electric shock. Check the power cord from time to time. If it is damaged, contact your nearest authorised customer service or dealer to replace it.
Devices using a power cord must only be connected to the type of power supply specified on its label.
Never apply brute force when inserting the power plug into the wall outlet. If you cannot connect the power adapter, the wall outlet may be obsolete. In this case, consult an electrician to replace the obsolete outlet.
Risk of electric shock by improper handling of electrical power.
Risk of electric shock: if the power cord has been visibly damaged, turn the device off immediately and unplug the power cord.
Never open the housing of the device, of the power adapter or the accessories as they contain no replaceable parts. By opening the housing you endanger your life through risk of electric shock.
Electrical Devices and Children
Do not allow children to use electrical devices when not under supervision. Children may not comprehend the presence of potential risks.
Batteries / rechargeable batteries can be lethal if swallowed. Keep batteries out of reach of children. If batteries are swallowed, seek medical advice immediately.
Keep the packaging away from children too. There is danger of suffocation.
The device should not be exposed to sprayed or dripping water. No objects filled with liquids such as vases or drinks should be placed on, above or near the device.
Setting the Device Up Safely
Position the device on a stable, flat surface. It has not been designed for
operation in very damp rooms (eg. bathrooms). Also, take care that
- Sufficient ventilation is always available (do not place the device on shelves or likewise.
The device is not set up on a thick carpet or bed; - Direct heat sources (eg. heating) do not affect the device;
The device is not exposed to direct sunlight; - Contact with sprayed and dripping water is avoided (place no objects filled with liquids, such as vases, on, above or near the device);
- The device is not placed in the immediate vicinity of magnetic fields (eg. loudspeakers);
- No open fire sources (eg. burning candles) are positioned on or near the device.
- Avoid also foreign bodies entering the device.
Before a storm and/or lightning disconnect the device from the power supply and pull out the antenna plug.
Disposal of Old Devices

If this symbol of a crossed out trash can appears on a product, it means that this product is subject to the European Directive 2002/96/EC.
All old electrical and electronic devices must be disposed of separately from household rubbish at designates places.
With the proper disposal of old devices you avoid damage to the environment and your personal health.
You can obtain more information on the disposal of old devices by contacting your municipal administration, the disposal office or the place where you bought the product.
CAUTION: Notices on Mains Disconnection
In order to disconnect the device fully from the mains power supply, the plug must be pulled out from the wall outlet. Therefore the equipment should be set up in such a way that unobstructed access to the wall outlet is always ensured, so that the plug can be immediately removed in an emergency situation. To avoid the danger of fire, the plug should always be removed when not being used for a long period of time from the wall outlet, such as during holidays.
Connect the product as described in the User's Manual.
Follow the instructions in the User's Manual of your computer.
Place the product away from humidity and avoid wet environments. Never use this device near water.
Any repair and maintenance of the devices must be performed by qualified service personnel only. Repair or maintenance is necessary when you observe any kind of damage (e.g. damaged power cord or plug, when liquids have entered the device, when objects have fallen onto the equipment, when the device has been dropped, when the device has been exposed to rain or moisture) or when you observe a reduced performance of the product.
To avoid the risk of electric shock, the case may only be opened by qualified service technicians.
Only use a soft, dry and fluff-free cloth or brush. Do not use any detergents, alcohol, benzene, furniture cleaner or any similar products.
Install all cables so that they cannot be tripped over.
1. Features:
- Large 3.5 × 6' TFT LCD
- Screen resolution: 480 × 234 (RGB)
- Supports popular memory cards: SD, MMC, USB
- JPEG file format reading
- Easy to use and operate
- Picture Auto Slide-showing and Auto-Circulation Function
- Picture rotation function
- Rotate the pictures in clockwise or counter-clockwise with different angles of 90degree/180degree/270degree
- Adjustable slideshow delay interval(3sec, 10sec, 1min, 2h)
- Zoom in and out the picture
- Landscape/Portrait positioning /wall mounting
- Power consumption: 6w
- Freely change starting logo
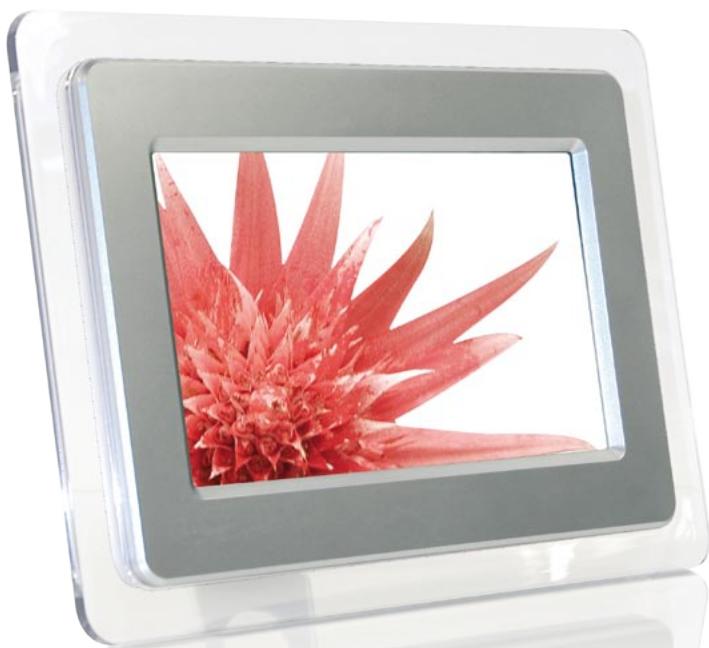
2. Installation
2.1 Install the support bracket
Take out the support bracket and fix it to the slot on the back of the photo frame, there are three kinds of different view positions:
Landscape positioning:
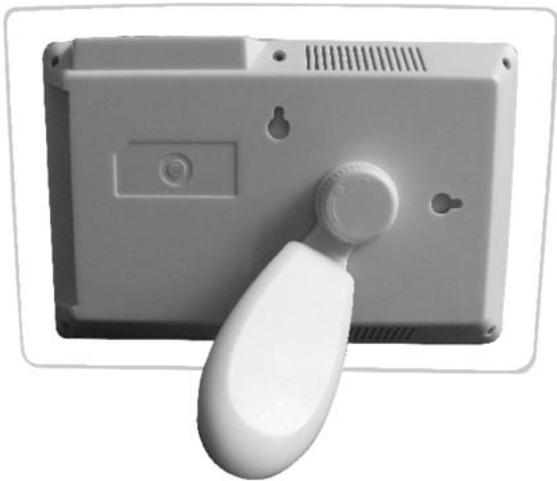
Portrait positioning:
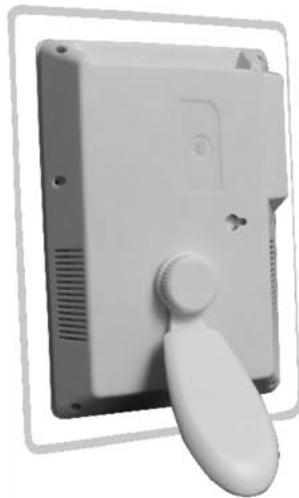
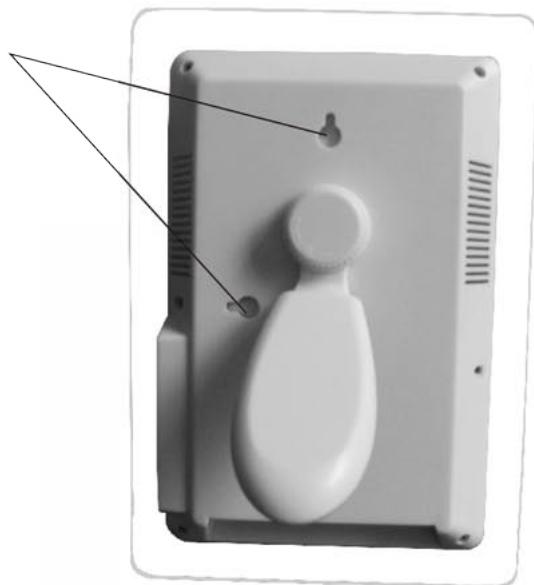
Wall mounting:
Wall mounting wholes
2.2 Install the SD/MMC card / USB
Take out the SD/MMC card from your digital camera, insert it into the SD/MMC card slot at the right side of photo frame following the correct direction.
2.3 Connect the power adapter
Connect the Power adaptor to the AC power (110v-240v), the photo frame will start with thumbnail view
3. Button Assignment
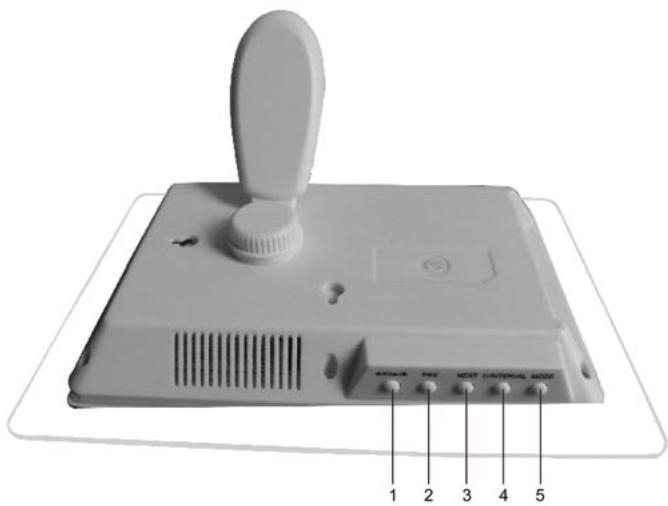
Button functions:
- Play / Pause Play/Pause or confirm button
2.Left Move left or up - Right Move right or down
- Exit Exit current mode
- Setup Enter Setup mode
Control function
In the PHOTO mode, six images will be showed one time on the screen for easy image selection
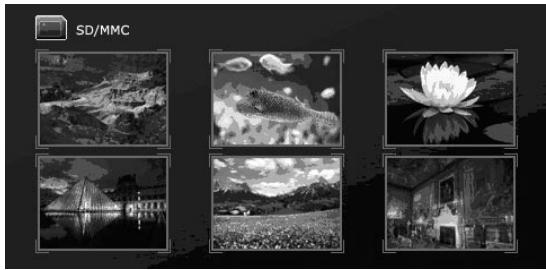
LEFT/RIGHT: Use the two button of the Control panel to select an image
PLAY/PAUSE: Press the PLAY/PAUSE button of the control panel to view the selected image at full screen size.
EXIT Press the EXIT button of the control panel to return to the previous image
SLIDE SHOW AND IMAGE CONTROL
When viewing an image:
LEFT: When viewing an image, press the left button on the control panel to return to the previous image.
RIGHT: When viewing an image, press the right button on the control panel to skip to the next image.
PLAY/PAUSE: Press PLAY/PAUSE button confirm to enter SLIDESHOW view.
EXIT: Press EXIT button on the control panel to return to the thumbnail state.
SETUP
To set viewing parameter:
SETUP: Press SETUP button to enter the setup menu.
LEFT/RIGHT: USE the LEFT and RIGHT button to scroll to selection function
PLAY/PAUSE: Press PLAY/PAUSE button to choose an item and confirm selection
EXIT: Press the EXIT button to exit the menu
SLIDE SHOW DISPLAY
it will enter the selection picture when you press PLAY/PAUSE button for the first time. Press again, there are "play" word on the photos, it will play pictures automatically. There are "pause" word when you Press the third time, the photos will stop play. Continuously to play automatically when you press once again.
There are seven items will be displayed on the screen press setup button when the Digital photo frame is in thum brail display mode.
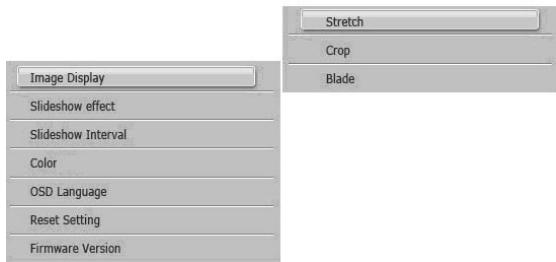
Image Dispaly
There are three image display mode:
1) stretch 2) crop 1) original
Slideshow Effect
1) ALL
2) 3D Filp
3) 3D Cirde
(4) 3D Flo
5) 3D Cube
6) Shutter
7) Boxing Shutter
8) Cross Comb
9) Insert
10) News
11) Plus Sign
12) Flabellate
13) Fade
14) Shrink
Slideshow interval
Set interval time of each image as follows:
3 seconds.
1 minute
10 seconds
2 hours
Color
color&contrast , Debugging picture and screen brightness
Use LEFT and RIGHT buttons to adjust Brightness: Brightness
Operation Ibid: Contrast
Operation Ibid: Saturation
Operation Ibid: Hue
OSD Language
Press LEFT or RIGHT buttons on the top panel to switch language
1 (English)
3 (Spanish)
5 (Dutch)
7 (Russia)
2 (French)
4 (Italian)
6 (German)
8 (Portuguese)
Reset Setting
Reset Setting: It will revert to the factory setting after pressing this buttom.
Software Version:
Enter this menu can see the Software Version
There are six items will be displayed on the screen press setup button when the Digital frame is in the playing a photo or the PAUSE mode.
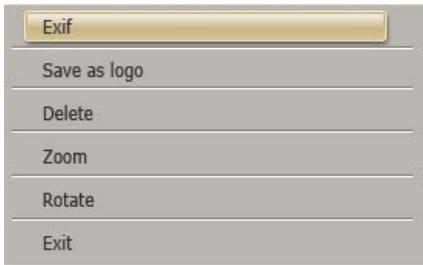
Exif
To see the camera model, aperture size, ISO value & date four functions
Save as logo
To press this setup to set your favorite picture as welcome LOGO
Delete
PAUSE button to confirm whether need delete or not/Press Pnot
ZOOM
The image can be enlarged up to 5 times by press PLAY/PAUSE button
Continuously, on the 6^th times it will revert to the original size.
Rotate
press the SETUP button to selection ROTATE item, screen image-When viewing a full 90 degrees rotate image, PAUSE button can select the rotation of the image/press PLAY per time, 90 degrees for a total of four rotating.
EXIT
Press this button exit from the current setup item
6 Technical Specification:
| Panel size | 7 inches |
| Screen resolution | 480*234 |
| Brightness | 350cd/m² |
| Contrast | 300 |
| View angles | 60/60/50/40(CR≥10) |
| Response time | 30ms |
| Screen size mode | 16:9 |
| Slideshow delay interval | 3sec, 10sec, 1min, 2h |
| File format Type | JPEG |
| Photo size | 48m Pixels |
| Power supply | AC100V-240V/DC12V |
| Power consumption | 6W |
| Operation temperature | -20 – 65°C |
| Storage temperature | -30 – 75°C |
| Dimensions | 231(L)*160(W)*36(H) mm |
| Weight: 0.4 kg | 0.4Kg |
7 Package content:
Digital Photo Frame
- Instruction Manual
- Power adapter
- Frame support bracket