V-794CAE - Odkurzacz LG - Bezpłatna instrukcja obsługi
Znajdź bezpłatnie instrukcję urządzenia V-794CAE LG w formacie PDF.

| Typ produktu | Odkurzacz workowy |
| Moc | 2000 W |
| Pojemność worka | 3,5 l |
| Filtracja | HEPA 13 |
| Długość kabla | 8 m |
| Promień działania | 10 m |
| Poziom hałasu | 78 dB |
| Rodzaj regulacji mocy | Elektroniczna na rączce |
| Wymiary (szer. x gł. x wys.) | 300 x 400 x 250 mm |
| Masa | 5,5 kg |
| Napięcie zasilania | 220-240 V 50/60 Hz |
| Akcesoria w zestawie | Szczotka do podłóg, dysza szczelinowa, szczotka do tapicerki |
| Czyszczenie filtra | Filtr HEPA można myć wodą |
| Wymiana worka | Worek jednorazowy, wymiana gdy pełny |
| Zabezpieczenie przed przegrzaniem | Automatyczne wyłączanie |
| Klasa energetyczna | A |
| Rok produkcji | 2015 (szacunkowo) |
| Kolor | Szary/czerwony |
Często zadawane pytania - V-794CAE LG
Pytania użytkowników dotyczące V-794CAE LG
0 pytanie dotyczące tego urządzenia. Odpowiedz na te, które znasz, lub zadaj własne.
Zadaj nowe pytanie dotyczące tego urządzenia
Pobierz instrukcję dla swojego Odkurzacz w formacie PDF za darmo! Znajdź swoją instrukcję V-794CAE - LG i weź swoje urządzenie elektroniczne z powrotem w ręce. Na tej stronie opublikowane są wszystkie dokumenty niezbędne do korzystania z urządzenia. V-794CAE marki LG.
INSTRUKCJA OBSŁUGI V-794CAE LG
| Model | CYKING | ||
| Language | Chinese + English | ||
| Page | 28 PAGE | Color(cover/body) | 2 / 2 |
| Material Size (Weight) | 100G | 190 * 260 | |
| Date | 2008.07.23 | Designer | Liyanjun |
| Part No. Description | 293084 | 1 | MANUAL, 0 |
W N
Chage Record
| No. | Date | Change content | ECO No. | Designer | Confirm | |
| 1 | Add Warranty Card | ACTT805052 | 08.09.25 | SUYAN | CUI.Y.T | |
| 2 | Add Dust Capacity | ACTT805539 | 08.10.31 | SUYAN | CUI.Y.T | |
| 3 | delete sentence on page 8 | ACTT903954 09.06.16 | ZXL C | UIYT | ||
| 4 | Change the web | ACTT003833 10.05.24 | Chao Z | xiang | ||
| 5 | ||||||
| 6 | ||||||
| 7 | ||||||
| 8 | ||||||
| 9 | ||||||
使用说明书

natural_image
Interior view of a hotel room with a person in white robe standing near a window overlooking a cityscape (no visible text or symbols)吸尘器
强劲吸力
V-794CAE
中文 1-13页
English → Page 14-25
售后服务电话

text_image
LG彩虹 服务 400-819-9999 售后热线 一号通使用前请仔细阅读说明书,阅读完后请妥善保管以备需要时查阅。
目录
产品规格 2
使用前注意事项 3-4
吸尘器的组装与吸力调节 5
部分名称与连接方法
附件
毛刷、尖吸嘴、鸭嘴、折叠管的使用 6
抹布刷头的使用方法 7
抹布刷头的使用方法
震动刷头使用方法与清洗方法 8
使用方法
清洗方法
集尘筒 9
取放方法
清洗方法
排气海绵的清洗更换 10
机器的正确保管方法 10
故障通告前需确认事项 11-12
装箱单 13
产品规格
text_image
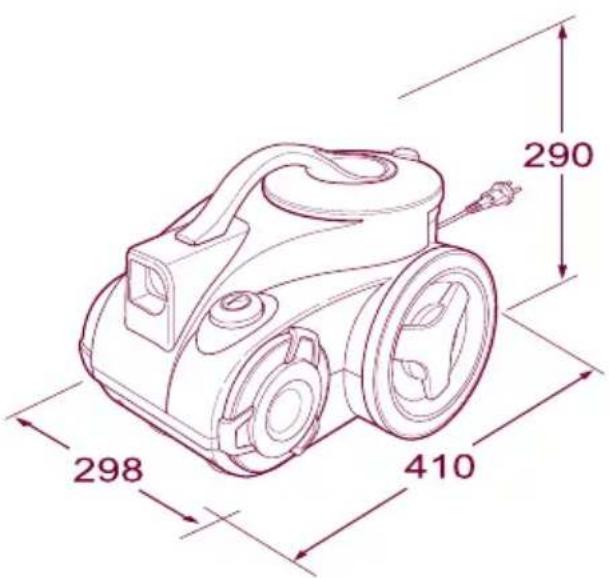
290 298 410型号:V-794CAE
额定电压: 220V-50Hz
额定功率: 1200W
最大功率: 1400W
吸率: 320W
净重: 5.4Kg
集尘容量:1.2L
外形尺寸: 298mmx410mmx290mm
本产品执行标准: GB4706.1-2005
GB4706.7-2004
GB17625.1-2003
GB4343-2003
※为了提高产品质量而进行的外观及规格上的变更将不再另行通知。
使用前注意事项
忽视说明而导致的错误操作将会对您造成不同程度的损害,请认真阅读以下提示说明。

危险 此标识表明违反标记事项时,会立刻发生严重伤害或死亡现象。

警告 此标识表明违反标记事项时,有可能发生严重伤害或死亡现象。

注意 此标识表明违反此标记事项时,有可能发生财产损失或轻微伤害。

危险
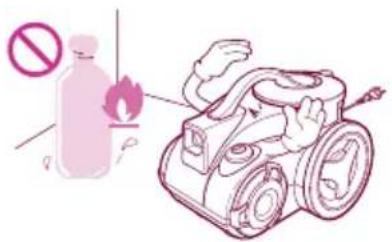
请不要在易燃液体附近使用吸尘器,以免发生火灾。
text_image
Illustration showing a plastic bottle with a flame symbol and a robot with warning signs, likely related to hazardous substances or safety measures.插拔电源插头时,请先关闭电源开关,以免发生火灾或触电的危险。请不要用湿手触摸电源插头,以防触电。(不要在220V以外的电源上使用产品)

natural_image
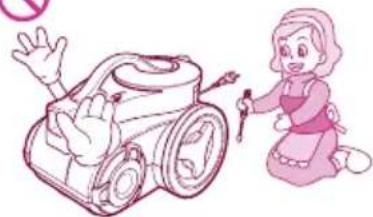
Illustration of a girl with a crossed-out pink shirt and a diagonal line, holding a small object near her mouth (no text or symbols)
警告
请不要让大头钉等金属物存留在软管、机体延长管内,否则会造成短路故障。 请不要吸入头发团、大纸团等物品,否则容易堵塞软管,如有堵管现象,请及时清理。


natural_image
Line drawing of a vacuum cleaner with hands reaching out (no text or symbols)15A以上的电流请单独使用插线板,在一个插线板上同时使用多种电器可能会引发火灾。建议不要使用电源线延长线,以免引起不必要的危险。


为避免发生火灾或触电的危险,在清扫时,注意不要让机体吸入液体、刀片、火种以及水泥、石膏粉等小微粒。


natural_image
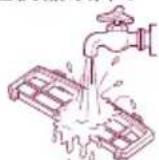
Illustration of a cartoon-style robot with a faucet spraying water (no text or symbols)长时间不使用电器时,请记住拔掉电源插头;正处于通电时,请您不要离开。


natural_image
Line drawing of a robotic device with tools and a handle (no text or symbols)使用前注意事项

警告
请不要让电源线与吸尘器接近电暖器等热源,以免使机体变形或发生火灾。请您不要使用破损的电源和插头,如有破损,必须由指定维修站更换。


natural_image
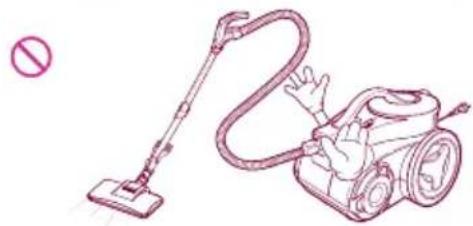
Illustration of a vacuum cleaner connected to a wall-mounted power strip (no text or symbols)请不要让儿童把吸尘器及组件,如延长管等当做玩具,以防止意外。


请不要在吸入口和排气口堵塞时,继续长时间运作,否则可能造成机体变形或损坏。

natural_image
Illustration of a hand operating a vacuum cleaner with a prohibition symbol (no text or labels)使用过程中,延长管和机体有产生静电的可能,请您使用时注意。

natural_image
Illustration of a robotic device emitting exhaust power lines (no text or symbols)
注意
非专业维修人员请勿开机修理。

natural_image
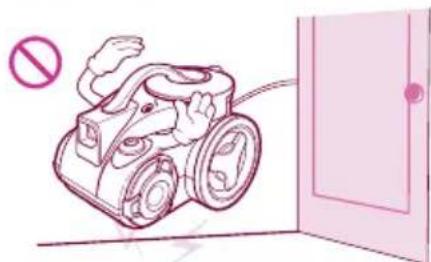
Illustration of a woman kneeling beside a car with a wrench, gesturing with her hand (no text or symbols present)注意不要使电源线夹在门缝里或用电源线提拉吸尘器,防止电源线受损。
natural_image
Illustration of a robotic device with a hand and no text or symbols on the device itself收卷电线时,请拿住电源插头后再按动卷线器按钮。
请不要将电源线拉至红色警告线以外,否则可能损坏电源线或不能回卷。
收线时请注意插头,以免损坏周围物品。

natural_image
Illustration of a camera connected to a pink vase with cables (no text or symbols)请不要弯曲、践踏、拉拽软管,如软管受损,请不要继续使用。
请不要用重物或尖刃物压线。

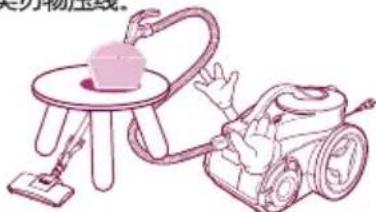
natural_image
Illustration of a vacuum cleaner next to a small table with a pink object, no text or symbols present.集尘筒集满时,请您正确开启集尘筒清理。请您注意不要在没安装集尘筒或过滤网时使用吸尘器。
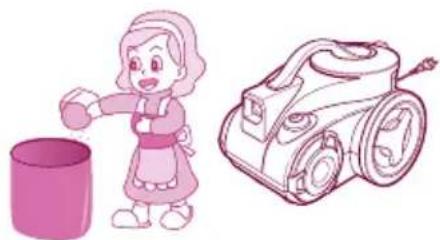
natural_image
Illustration of a girl pouring liquid into a bucket next to a sketch-style toy car (no text or symbols)请您注意保护自身安全,使身体各部位远离吸尘器吸口或活动部位。

natural_image
Illustration of a girl waving next to a vacuum cleaner (no text or symbols present)部分名称与连接方法

text_image
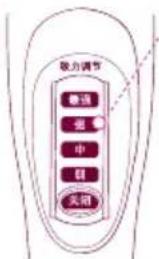
吸力调节 最强 强 中 弱 关闭最强 清扫极脏的环境
强 清扫织物,清扫床垫(被褥)
中 沙发、椅子、地板、合成革
- 弱 清扫门窗帘、桌子、较薄的床上用品
- 关闭 停止吸尘工作时,请将调节钮放于此位置
在不同环境下吸尘时,请按实际需要调节吸力。根据地面情况和吸入量可以自主调节吸力。
text_image
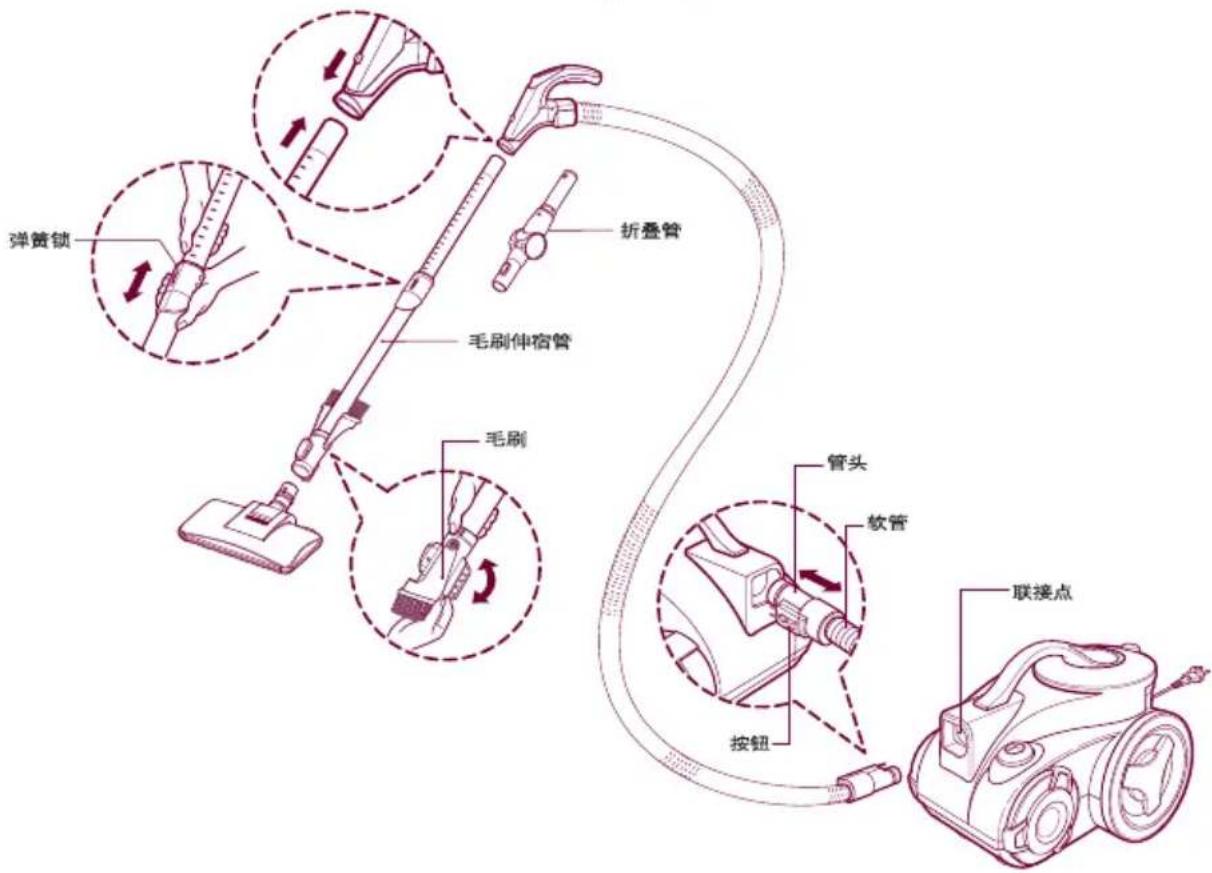
弹簧锁 折叠管 毛刷伸宿管 毛刷 管头 软管 按钮 联接点附件


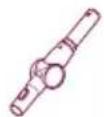

鸭嘴
毛刷尖吸嘴
- 抹布刷头
- 软管
毛刷伸缩管
- 震动刷头
- 折叠管
- 可折叠刷头
毛刷尖吸嘴与鸭嘴的使用
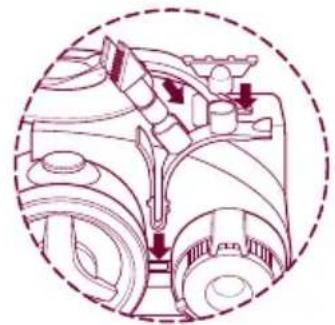
打开塑料袋拿出附件,将附件的固定架插入到吸尘器的侧孔中去。然后将毛刷及尖吸嘴、鸭嘴装到附件座上,将附件装到吸尘管的一头。
natural_image
Technical diagram of a mechanical assembly inside a dashed circular boundary, showing internal components and directional arrows (no text or labels)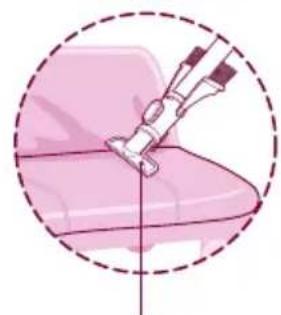
natural_image
Illustration of a medical procedure on a patient's seat, showing a syringe inserted into the seat (no text or symbols present)鸭嘴

text_image
毛刷及尖吸嘴 鸭嘴毛刷尖吸嘴
鸭嘴是用来对饰物、床垫等物品进行吸除的。
毛刷用于吸扫画框、家具边沿、书籍和其它不规则的表面。
尖吸嘴是用来吸扫一般不容易接触的地方,如有蜘蛛网的地方或沙发垫子之间的缝隙等。
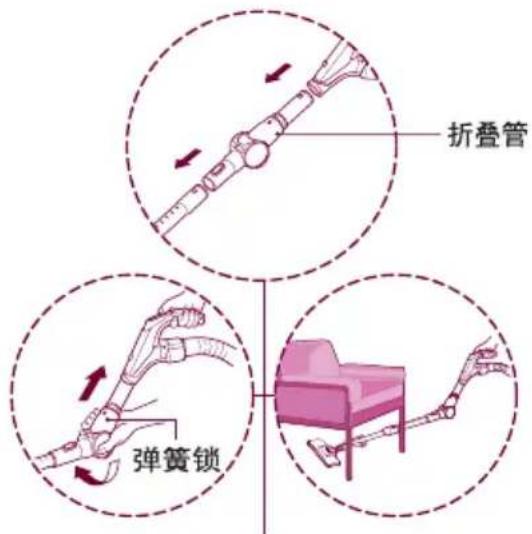
折叠管的使用
折叠管可用来容易地清扫沙发、桌子和床铺的下面。
text_image
折叠管 弹簧锁折叠管
- 将折叠管连接到软管并将伸缩连接到折叠管上(也可以不用折叠管而直接将伸缩管接到软管上)。
- 拉出弹簧锁,使折叠管弯曲。
- 如果伸直折叠管则其回到原来的位置。
▶ 使用抹布时,请拧干抹布。
▶ 请使用LG专用抹布。
请把抹布的白色表面朝上,安装在吸嘴上使用。
用洗衣机甩干抹布时,请用最低档。

text_image
结合 分离
注意:
- 使用抹布刷头时,若不拧干抹布,可能因为通电而导致机体损伤。
· 抹布脱离了粘贴部,则无法固定。
· 安装抹布时,请注意不要堵住吸入口。
抹布刷头的使用方法
请根据清扫用途,结合/分离抹布。
安装位置
吸嘴的后面对上抹布。
natural_image
Illustration of a device with directional arrows indicating motion (no text or symbols)
natural_image
Illustration of a pink plastic tray with a handle and circular arrow indicating rotation (no text or symbols)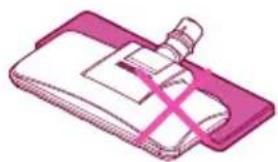
natural_image
Illustration of a pink and white object resembling a device or tool, with no visible text or symbols.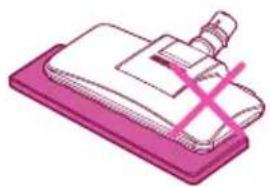
natural_image
Illustration of a pink notebook with a white object and a black cross mark (no text or symbols)洗涤方法
清扫完了以后,吸嘴底面可用毛刷清洁后,用柔软的棉质抹布擦拭。
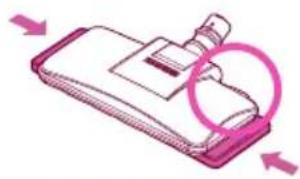
震动刷头使用方法
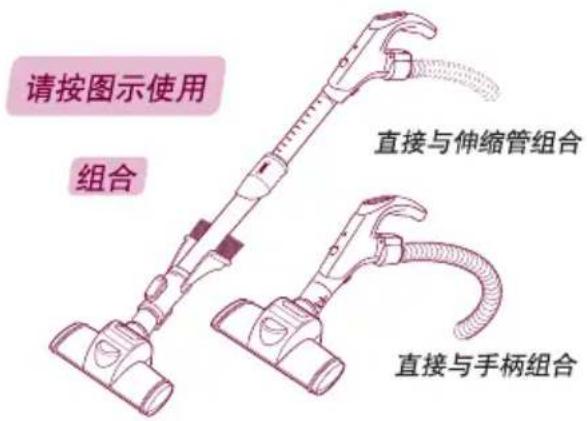
text_image
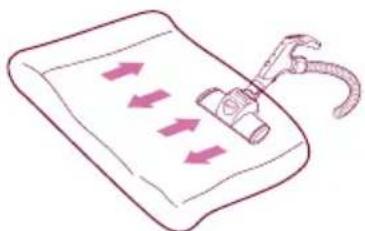
请按图示使用 组合 直接与伸缩管组合 直接与手柄组合最佳效果清扫方法
使用
text_image
脉力调节 静血 更 中 科 关阳强
手柄调节至“强”档。根据织物种类不同,吸力大小要有所改变,应视情况不同来调节控制键。
- 床、床褥、厚棉被
natural_image
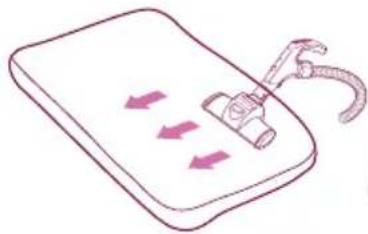
Illustration of a hand holding a tool with directional arrows, no text or symbols present- 薄被、毛毯
natural_image
Illustration of a medical device with arrows indicating fluid flow or movement (no text or symbols)清扫薄被时,下面垫一个厚被,效果更理想!
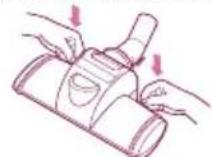
- 若震动拍不运作,可轻轻向地面敲打刷头后再使用。
- 如还不震动,检查一下振动拍是否被棉絮卡住或需要调大吸力。
- 集尘筒集满灰尘或吸力减小,震动幅度相应减小时,应注意及时清理滤芯。
震动刷头清洗方法
用毛刷尖吸嘴上的毛刷简单清理震动刷头

内外部都需要清理(吸入口不可用水冲洗,否则有可能产生机器故障)
① 分离刷头底盘


② 擦拭刷头缝隙脏物

③用水冲洗底盘


④ 将底盘嵌入卡槽将刷头重新装好
- 内部震动结构具有严格的尺寸要求,请勿自行拆开本产品,否则会影响震动性能。注意不要让异物进入振动活塞行腔。
- 请勿拆开震动活塞行腔,否则会对拍打性能产生影响。
- 底盘应很好地与刷头结合后再使用,在重新装好震动刷头前,请确认震动拍是否已放到正确的位置上。如没有底盘震动拍,有可能不运作。
- 请只在清扫床上用品时使用震动刷头。(在普通地面或其他部位使用,会弄脏底盘或出现其他损坏)
集尘筒取放方法
集尘筒开关

text_image
集尘筒盖 集尘筒开关 集尘筒- 灰尘集到MAX线时,请清理集尘筒后再使用。
- 按住集尘筒开关,拉出集尘筒。
- 安装集尘筒时,握住手柄,推至发出“咔嚓”声为止。
集尘筒清洗方法
当灰尘集到MAX线时,需清理集尘筒。
集尘筒被堵塞时显示灯亮,此时提醒您该清理集尘筒。
请每月冲洗一次集尘筒。
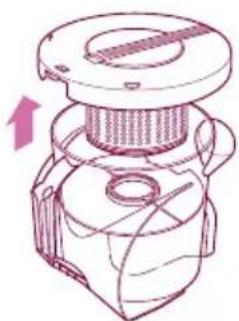
① 打开集尘筒盖
natural_image
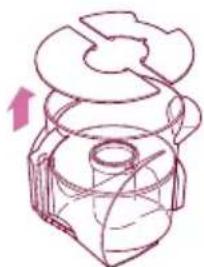
Technical line drawing of a mechanical component with no visible text or symbols② 拿出集尘筒内挡板(清洁后请按示意图重新插入)
natural_image
Pure technical line drawing of a mechanical component without any text, numbers, or symbols③ 用水冲洗

natural_image
Illustration of hands using a tool to lift a bottle, creating steam (no text or symbols)集尘筒内若有螺丝、儿童玩具等小物件进入时,开机运作会使集尘筒瞬间被损坏。
集尘筒内若有长筒丝袜、塑料袋等较大的垃圾物时,请清除后再开机使用。
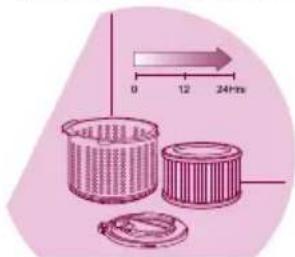
① 用水清洗集尘筒的过滤器,

natural_image
Illustration of a kitchen utensil with a handle, lid, and bulb (no text or symbols)② 放置在阴凉处自然风干,请不要使用湿的过滤器避免堵塞。
text_image
0 12 24mm集尘筒过滤器堵塞后,显示灯亮,此时应将手柄上的调节钮置于停止位置,清理集尘筒内的过滤网,然后重新调节到所需的吸力的位置。
排气海绵清洗方法
请至少半年清洗一次,放置在阴凉处风干,或根据使用频率酌情处理。

flowchart
graph TD
    A["Raw Material Inspection"] --> B["Acturing"]
    B --> C["Assembly"]
    C --> D["Final Assembly with 240mm scale indicator"]
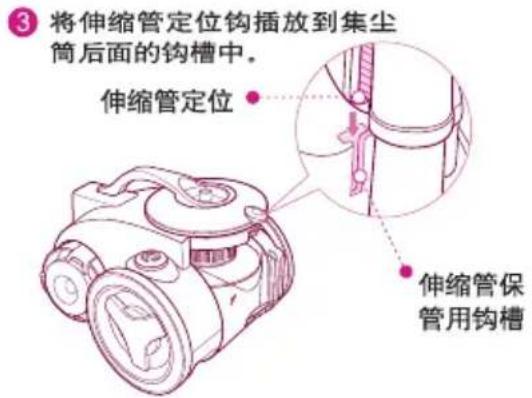
机器的正确保管方法
① 拔掉插头,按下卷线器按钮,收起电源线。

natural_image
Line drawing of a mechanical device with a cable and directional arrows indicating motion (no text or symbols)* 如电源线不能完全收回机体内时,请按下卷线器按钮,拉出一部分线后再重新收回。
text_image
③ 将伸缩管定位钩插放到集尘筒后面的钩槽中。 伸缩管定位 伸缩管保管用钩槽② 一只手握住伸缩管弹簧锁,另一只手握住手柄,将伸缩管收起。

text_image
长度调节滑钮
text_image
④ 将吸尘器放置于适当处。故障通告前请先确认
如果您怀疑产品发生故障,请先确认故障发生原因,再与售后服务中心或代理商联系,以确保检修的效率。
现象:
吸力突然
下降,并
发出报警声!
噪音加大软管收缩
吸力忽然下降
吸尘器求助:

请检查集尘筒和吸入口
处理要领
① 查看集尘筒灰尘是否集至MAX线处,如果是,请及时清理集尘筒。
② 请确认集尘筒滤芯是否堵塞
滤芯堵塞时会发出报警声,请用软毛刷轻轻刷掉滤芯上的灰尘。
③ 检查吸入口时,需将吸力调节到最大。
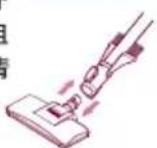
第一步
将伸缩管与刷头分离后,检查有无阻塞,如发现问题请立即清理。
如果还有问题,请进行第二步。


已经满了吗?请及时清理集尘筒哦!

滤芯有问题吗?那么检查一下吸入口。
第二步
分离手柄与伸缩管, 检查有无阻塞,如有 阻塞,请将伸缩管收 短,清除异物。
如果还有问题,请进行第三步。

text_image
管, 如有 管收第三步
检查软管是否阻塞,将吸力调至最强,用手堵放管口,反复几次。

如果还有问题,请清理一下滤芯。

故障通告前需确认事项
故障通告前请先确认
如果您怀疑产品发生故障,请先确认故障发生原因,再与售后服务中心或代理商联系,以确保检修的效率。
故障
吸尘器为何不能工作?
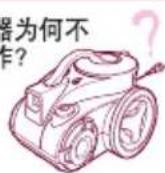
检查
- 电源插头是否插上?
- 电源插座有电吗?
- 软管是否插上?
- 电机热保护处于开启期间。
措施
- 请将电源插牢(本产品适用于220V电压)。
- 确认插座是否有电。
- 将软管插牢。
- 2小时后重新启动。
机体内有噪音。
- 吸尘器吸力过大或电机高速运转时所发出的声音,不属于异常情况,请正常使用。
- 如果不是正常的电机响声,而是异常的噪音,请打电话与维修中心联系。
机体发出报警声。
- 集尘筒已满。
- 集尘筒滤芯堵塞。
- 吸入口阻塞。
- 伸缩管阻塞。
-
软管阻塞。
-
清理集尘筒。
- 用软毛刷轻刷滤芯,用水冲洗后放置于阴凉处风干一天。
- 将吸入的异物取出再使用。
- 将伸缩管内异物取出后再使用。
- 将软管内异物取出后再使用。
机体出现异味。

- 电机运作时,用于固定电机的橡胶圈会受热而产生少量气味,不会影响运作或使机器发生损坏。
- 机器不小心吸入一些水或集尘筒长期不清理时,会有一些异味排出,此时应及时清理集尘筒。
电源线不能全部卷入机体,电源线不能全部拉出。

- 将电源线拉出一部分后重新卷入。
- 请用力将电源线拉出,不会损坏电源线。
- 由于线在内部互相缠绕或夏季周围温度过高所致。
- 由于线在内部折曲或未缠在卷线器上,启动卷线器后,能正常运作。
机体或排出的气体过热。

- 吸力是否正常?
- 从机体内排出的热气,是由电机导热产生的热量所致,属正常温度,请继续使用。
软管内壁过脏。
- 透明软管可以很容易发现阻塞物,便于清理。
- 请勿将水吸入,水与灰尘混合吸入后,有可能弄脏管壁。
装箱单
吸尘器 一台
说明书 一本
鸭嘴 一个
毛刷尖吸嘴 一个
抹布刷头 一个
震动刷头 一个
折叠管 一根
软管 一根
伸缩管 一根
可折叠刷头 一个
保修卡 一份
Table of contents
Product specifications 13
Attention before using the appliance 14-15
Assembling and adjusting the Cleaner 16
Parts description and assembly
Accessories
Using the Accessories and Elbow Tube 17
Using the Mop Nozzle 18
Using the Mop Nozzle
Using and cleaning the sani punch 19
Using the Sani Punch
Cleaning the Sani Punch
Dust Tank 20
Removing and replacing the Dust Tank
Cleaning the Dust Tank
Cleaning the Exhaust Filter / Storage 21
If you have a problem 22-23
Packing list 24
Product specifications

text_image
290 298 410Model: V-794CAE
220V\~50Hz
IEC: 1200W
MAX: 1400W
Suction Power: 320W
Net Weight: 5.4Kg
Dust Capacity: 1.2L
Dimension: 298mmx410mmx290mm
This appliance complies with the
following GB Directives:
GB4706.1-2005
GB4706.7-2004
GB17625.1-2003
GB4343-2003
※ You will not be informed otherwise of any changes in appearance and standard deriving for improvement of product quality.
Attention before using the appliance
Please read all the following information, which contains important instructions for the safety, the use of the appliance.

DANGER
May immediately cause serious injury or death.

WARNING
May possibly cause serious injury or death.

ATTENTION
May possibly cause losses of property or light injury.

DANGER
Do not pick up anything that is burning or smoking, such as cigarettes, matches or hot ashes.

text_image
Safety warning illustration showing a bottle emitting a flame next to a robot with a hand gesture, accompanied by a no-smoking symbol.Please turn off the power before pulling out the plug to prevent fire or electric shock. Never handle plug or appliance with wet hands. (Do not use the appliance on the power above 220V.)

natural_image
Illustration of a smiling woman holding a small object with a diagonal line, no text or symbols present
WARNING
Avoid picking up hard, sharp objects with the cleaner. They may damage the cleaner and the tank.
Do not vacuum the objects like hair ball or big paper ball, otherwise the hose is possibly blocked up. Please clear the hose in time when it is blocked.


text_image
is blocked.Independently use a socket when the current is ≥ 15A. It may cause fire when many electric appliances share one socket.
In order to avoid the needless danger, you had better not use the prolonged thread of power cord.


To avoid the danger of fire or electric shock, do not vacuum liquid, blade, flammable substances, or small particles like cement and gesso in cleaning.


natural_image
Illustration of a hand washing a car with a faucet above (no text or symbols)Unplug cleaner when not in use. Turn off all controls before unplugging.


natural_image
Line drawing of a handheld device with a tool, no text or symbols presentAttention before using the appliance

WARNING
Do not let the power cord near the electric heater or other heat source, lest that the cleaner should be deformed or it should cause fire. Do not use the appliance when the power cord or plug is damaged. The damaged power cord or plug must be replaced in the approved service station.


natural_image
Illustration of a handheld device connected to a wall-mounted power outlet (no text or symbols)Close supervision is necessary when any appliance is used by or near children. Do not allow vacuum cleaner to be used as a toy or to run unattended at any time.


Do not operate the appliance for long when the nozzle inlet or nozzle outlet is blocked, which may have it deformed or damaged.
natural_image
Illustration of a vacuum cleaner and a hand gesture (no text or symbols)In using the appliance, pay attention to the electrostatic effect generated on the telescopic tube and cleaner body.

natural_image
Illustration of a robotic device emitting exhaust smoke, with no text or symbols present.
ATTENTION
Do not allow the non-professional maintenance people to repair.

natural_image
Illustration of a child interacting with a car and a prohibition symbol (no text or symbols present)Do not pull or carry by cord, use cord as a handle, close door on cord or pull cord around sharp edges or corners. Do not run appliance over cord. Keep cord away from heated surfaces.

natural_image
Illustration of a robotic device with a handle and no visible text or symbolsIn winding the power cord, hold the plug before pressing the button of the cord reel. Do not pull the power cord beyond the red warning line, other wise the power cord may be damaged or unable to be wound up. Pay attention to the plug in winding the cord to avoid damaging the surrounding objects.

natural_image
Illustration of a digital camera connected to a pink vase (no text or symbols)Do not bend, stamp on, or drag the hose. Do not continue to use the hose if it is damaged.
Do not use any heavy or sharp object to press the power cord.


natural_image
Illustration of a vacuum cleaner next to a small table with a pink object (no text or symbols)Do not use without dust tank or filters in place. Change tank frequently when picking up very fine materials such as powder.

natural_image
Illustration of a girl pouring liquid from a bucket next to a cartoon-style toy car (no text or symbols)Keep hair, loose clothing, fingers, feet and all parts of body away from the nozzle or movable portion.

natural_image
Illustration of a girl in pink dress and a vacuum cleaner (no text or symbols)Parts description and assembly

text_image
吸力调节 最强 强 中 弱 关闭• Strongest cleaning the dirtiest environment.
• Strongest cleaning fabrics and mattress (bedding).
• Medium cleaning sofa, chair, floor.
- Weak cleaning door and window curtain, table, and light blanket.
Off Adjusting to “关闭” when you stop operating the appliance.
When cleaning under different environment, adjust the suction level according to practical need.

text_image
Spring latch Elbow Tube Telescopic tube Pushing brush Head Flexible Hose Button Attachment pointAccessories


• Upholstery Nozzle
• Dusting brush & Crevice tool
- Mop nozzle
Hose
• Telescopic tube
Sani Punch
- Elbow tube
Corner Nozzle
Using the Accessories and Elbow Tube
Using the Dusting Bush & Crevice Tool and Upholstery Nozzle
▶ Tear the vinyl bag and pull out accessories.
Attach the accessory holder into the side hole of body.
And then, fit the Dusting Brush & Crevice Tool and Upholstery Nozzle onto the accessory holder.
Fit the accessory onto the end of the tube.

natural_image
Technical diagram of a mechanical assembly with arrows indicating motion or force directions (no text or labels)
natural_image
Illustration of a medical or surgical procedure on a pink object, enclosed in a dashed circle (no text or symbols)Upholstery Nozzle

text_image
Dusting Brush & Crevice tool Upholstery NozzleDusting Brush & Crevice tool
Upholstery Nozzle is for vacuuming upholstery, mattresses, etc.
Dusting Brush is for vacuuming picture frames, furniture frames, books and other irregular surfaces.
▶ Crevice Tool is for vacuuming in those normally hard-to-reach places such as reaching cobwebs, or between the cushions of a sofa.
Using the Elbow Tube
▶ Elbow tube is for cleaning under the sofa, table and bed easily.

text_image
Elbow Tube Spring latch Elbow Tube- Connect the elbow tube to the flexible hose and, connect the telescopic tube to the elbow tube. (You can also connect the telescopic tube to the flexible hose without the elbow tube.)
- If you pull the spring latch, the elbow tube is bended.
- If you stretch the elbow tube, it is returned to its position.
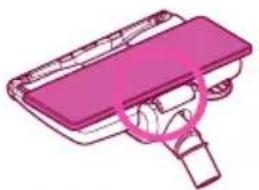
Using the Mop Nozzle
When using the mop nozzle, please dry it first.
▶ Always using special mop of LG.
▶ Attach the mop to the bottom of the nozzle with the white surface upturned.
When drying the mop in washing machine, set it to the weakest mode.

text_image
Attached Separated
NOTE: It will be electrical danger when using the mop with excess moisture, and will be harmful to the cleaner.
The mop can not be fixed when it deviates from the fixing place. Mind that do not block the dust suction inlet when fixing the mop
Using the Mop Nozzle
▶ Depending on different condition, connect or disconnect the mop.
Attaching location

natural_image
Illustration of a device with directional arrows indicating movement (no text or symbols)- Set the mop on the back of the nozzle.
natural_image
Illustration of a pink handheld device with a circular highlight on its side (no text or symbols)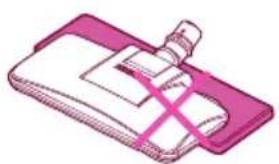
natural_image
Illustration of a pink plastic device with a handle and internal components (no text or symbols)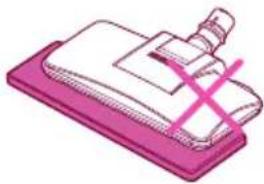
natural_image
Illustration of a pink notebook with a black X mark on its cover (no text or symbols)Cleaning method
After cleaning work, nozzle inlet can be cleaned by brush first and then wiped with a soft cotton mop.
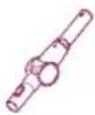
Using and cleaning the Sani Punch
Using the Sani Punch

text_image
Use it as shown in the diagram Assembling Connect to Tube Connect to Hose Effective cleaning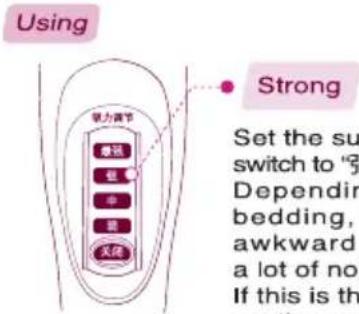
text_image
Using Strong Set the su switch to "引 Depending in bedding, awkward a lot of no If this is thSet the suction power control switch to "强" before vacuuming. Depending on the type of bedding, handing may be awkward or it may cause a lot of noise.
If this is the case, adjust the suction power control switch to a lower setting.
• bed, bedding, heavy blanket

natural_image
Illustration of a hammer pressing down on a rolled document with arrows indicating flow (no text or symbols)• Light blanket & sheet

natural_image
Illustration of a medical device with arrows indicating fluid flow or movement (no text or symbols)To increase cleaning efficiency for light blankets, lay on top of a bulky blanket and then clean.
- If the punch bar does not move, lift the nozzle slightly off the surface.
- If it does not move, even after doing this, check if the suction power is too low or if the nozzle base is clogged with a foreign object.
• This Sani Punch nozzle is for effective cleaning of beds and blankets to remove mites and dust.
Cleaning the Sani Punch
For simple cleaning of the vacuum nozzle, detach the Sani Punch nozzle from the telescopic tube and attach the crevice tool to vacuum dust.
▶ Follow the instruction below for through washing.
(Do not soak the entire body of the vacuum nozzle in water, it may cause the vibrator to malfunction)
▶▶
▶▶

▶▶
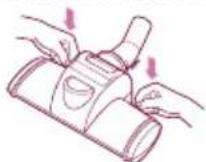
1 Press the button on the rear side of the vacuum nozzle to separate the bottom plate.
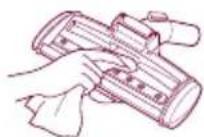
② Wipe all the soiled parts of the vacuum nozzle body with a cloth.
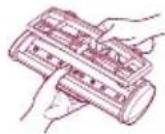
3 Wash the removed bottom plate with water and dry it..
4 Insert the attachment projections on bottom plate to the vacuum nozzle grooves.
- Since the vibrator inside is composed of precision parts, never disassemble the body. Be careful not to let foreign objects clog the air suction part on top of the vacuum nozzle.
- Since removal of the punch bar may cause performance problems, do not warp or remove it.
- Attach the bottom plate properly before using. Without this bottom plate, it may not function.
- Since this vacuum nozzle has been made exclusively for cleaning beds, blankets and upholstery, use it only for these cleaning purposes. (Using it to clean the floor may result soiling it or a drop in performance, do not use it for such purposes.)
Removing and replacing the Dust Tank
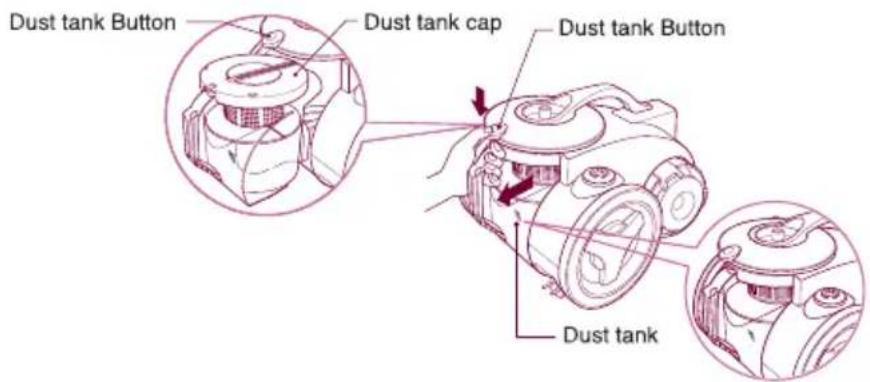
text_image
Dust tank Button Dust tank cap Dust tank Button Dust tank• Make the dust tank empty if dusts are filled to the "MAX".
- Press the button of cover and pull the dust tank forward.
- To reinstall the dust tank, replace the dust tank cap and push the dust tank into the tank mount as far as it will go.
Cleaning the Dust Tank
Make the dust tank empty if dusts are filled to the "MAX".
When the dust tank is blocked up, it automatically emits an alarm to remind you that the dust tank should be emptied.
The Dust tank should be cleaned at least once a month.
1 Open the dust tank cap.

natural_image
Technical line drawing of a mechanical component with no visible text or symbols② Remove two plates from the dust tank.

natural_image
Diagram of a mechanical device with internal components and a directional arrow (no text or symbols)3 Wash both parts with softcloth. Gently rinse both parts under cold running water.

natural_image
Illustration of hands washing a bottle with steam rising (no text or symbols)Avoid picking up hard, sharp objects with the cleaner. They may damage the cleaner and the tank.
Do not vacuum the big objects like plastic or big paper ball. Please clear the dust tank in time.
1 Clean the motor filter with the brush under cold running water.
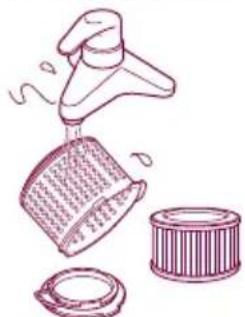
natural_image
Illustration of a kitchen utensil with a lid, showing a drop from a handle to a bowl (no text or symbols)2 Allow the motor filter to dry in a shaded location for a day. Do not use the wet filter to avoid clogging.
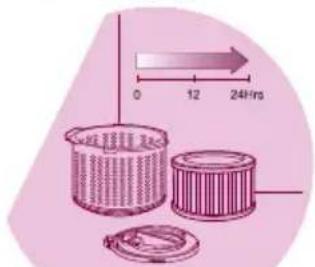
natural_image
Illustration of three cylindrical containers with different internal patterns, no text or symbols presentWhen the motor filter is blocked up, a 30-second alarm is automatically given and then stops. In this case, clean the motor filter, adjust the suction control switch to “关闭”, and then readjust it to the suction level as needed.
Cleaning the Exhaust Filter/ Storage
Cleaning the Exhaust Filter
The exhaust filter should be cleaned at least once half a year. Allow exhaust filter to dry in a shaded location for a dry.

flowchart
graph TD
    A["Device with hand icon"] --> B["Step 1: Hand turning, motion arrow"]
    B --> C["Step 2: Hand turning, motion arrow"]
    C --> D["Step 3: Hand turning, motion arrow"]
    D --> E["Step 4: Hand turning, motion arrow"]
    E --> F["Step 5: Hand turning, motion arrow"]
    F --> G["End: 240mm scale indicator"]
Storage
When you have switched off and unplugged the appliance, press on the button to automatically rewind the cord.
② Push spring latch forward. Pull out tube to required length, and release spring latch to lock.

natural_image
Line drawing of a handheld device with two arrows indicating direction of movement (no text or symbols)
text_image
Spring latch* If the power cord cannot be completely rewound, pull out part of the cord and rewind it again.
3 You can move or store your appliance in a horizontal position by sliding the hook on the telescopic tube into the clip on the rear of the appliance.
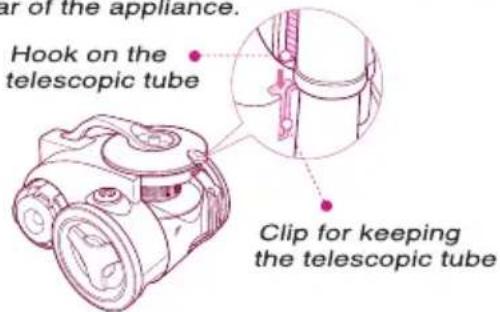
text_image
ar of the appliance. Hook on the telescopic tube Clip for keeping the telescopic tube4 Keep the vacuum cleaner in a proper place.

natural_image
Line drawing of a vacuum cleaner with handle and wheels (no text or symbols)If you have a problem
If a minor problem occurs, it usually can be solved quite easily when the cause is found by using the check list below.
Problem:
Suction is
weakened and alarm.
The noise
increases and the hose shrin
Suction power
is abruptly weakened.
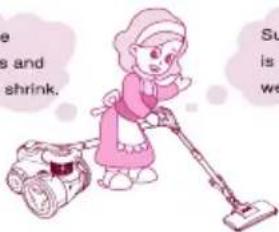
text_image
e is and shrink. Su is: weHelp:

Check the dust tank and suction inlet.
Solution
① Dust tank full.
Empty dust tank.

Is it full? Empty the dust tank in time!
② Motor filter dirty.
Clean the motor filter with brush and water, allow to dry and replace in cleaner.

Is the filter OK? Then check the suction inlet.
3 When checking the suction inlet, adjust the suction level to the maximum.
First step
Turn cleaner off and disconnect from electrical outlet, then disconnect nozzle from telescopic tube. Check if it is blocked, and remove any blockages.
If there is still a problem, proceed the second step.
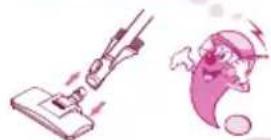
Second step
Disconnect the telescopic tube from hose. Check if it is blocked, and remove any blockages.
If there is still a problem, proceed the third step.

natural_image
Illustration of a cartoon character using a handheld tool to interact with a syringe (no text or symbols present)Third step
Plug cleaner in, turn on, and check hose end for suction. Remove any obstructions.

If there is also a problem, clean the filter.

If you have a problem
If you have a problem
If a minor problem occurs, it usually can be solved quite easily when the cause is found by using the check list below.
PROBLEM
Cleaner won't run.

CHECK
- Not "ON" at hand grip.
• Not firmly plugged in.
• No voltage in wall plug. - Blown fuse or tripped breaker.
SOLUTION
- Turn "ON" at hand grip.
Plug unit in firmly. - Check fuse or breaker.
- Replace fuse/reset breaker.
Noise from cleaner.

- The noise is given out when the suction power is too strong or the motor is operating at high speed, which does not belong to abnormal condition. Please use it normally.
- If it is not the normal motor sound, please contact the service center.
Alarm from cleaner.

• Dust tank is full.
- Motor filter dirty.
- Obstruction in suction inlet, telescopic tube or hose.
• Empty dust tank.
- Clean filter with water, allow to dry and replace in cleaner.
- Remove obstruction.
Strange smell in the appliance body.

- A strange smell is produced from the motor mount packing, when the motor is operating. It does not affect the operation or damage the appliance.
- When some water is sucked casually into the appliance or the cleaner has not been used for a long time, some strange smell may be exhausted. In this case, timely empty and clean the dust tank.
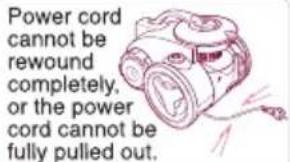
text_image
Power cord cannot be rewound completely, or the power cord cannot be fully pulled out.• Pull out part of the cord and rewind it.
- Pull out the power cord forceful, which will not damage the cord.
- Because of inter-winding cord inside or high temperature in summer.
- It can be normal operated after starting cord reel, when it is due to the cord being twisted or not wound up on the reel.
Appliance or the exhausted air is overheated.

- If the suction power is normal.
- The exhausted hot air is caused by motor, and belongs to the normal temperature. You can continue to use it.
Inner wall of the hose is too dirty.
- The substances blocked inside the transparent hose are easily visible, or clean.
- Do not suck in water. The combination of water and dusts can possibly dirty the inner wall of the hose.
Packing List
Vacuum Cleaner 1
Owner's Manual 1
Upholstery Nozzle 1
Dusting Brush & Crevice Tool 1
Mop Nozzle 1
Sani Punch 1
Elbow Tube 1
Hose 1
Telescopic tube 1
Corner Nozzle 1
Warranty Card 1
如有问题
请拨打 LG 服务一号通
LG彩虹 服务
400-819-9999
售后热线

LG 电子 (天津)电器有限公司
地址: 中国·天津市北辰区兴淀公路
邮编: 300402
电话: 022-26903019
传真: 022-26903476

LG 电子
http://www.lg.com/cn
因为本公司产品在不断改进,设计与规格如有变更恕不另行通知。
P/No.:MFL32930841