
ONDIO SP - ARCHOS - Notice d'utilisation et mode d'emploi gratuit
Retrouvez gratuitement la notice de l'appareil ONDIO SP ARCHOS au format PDF.

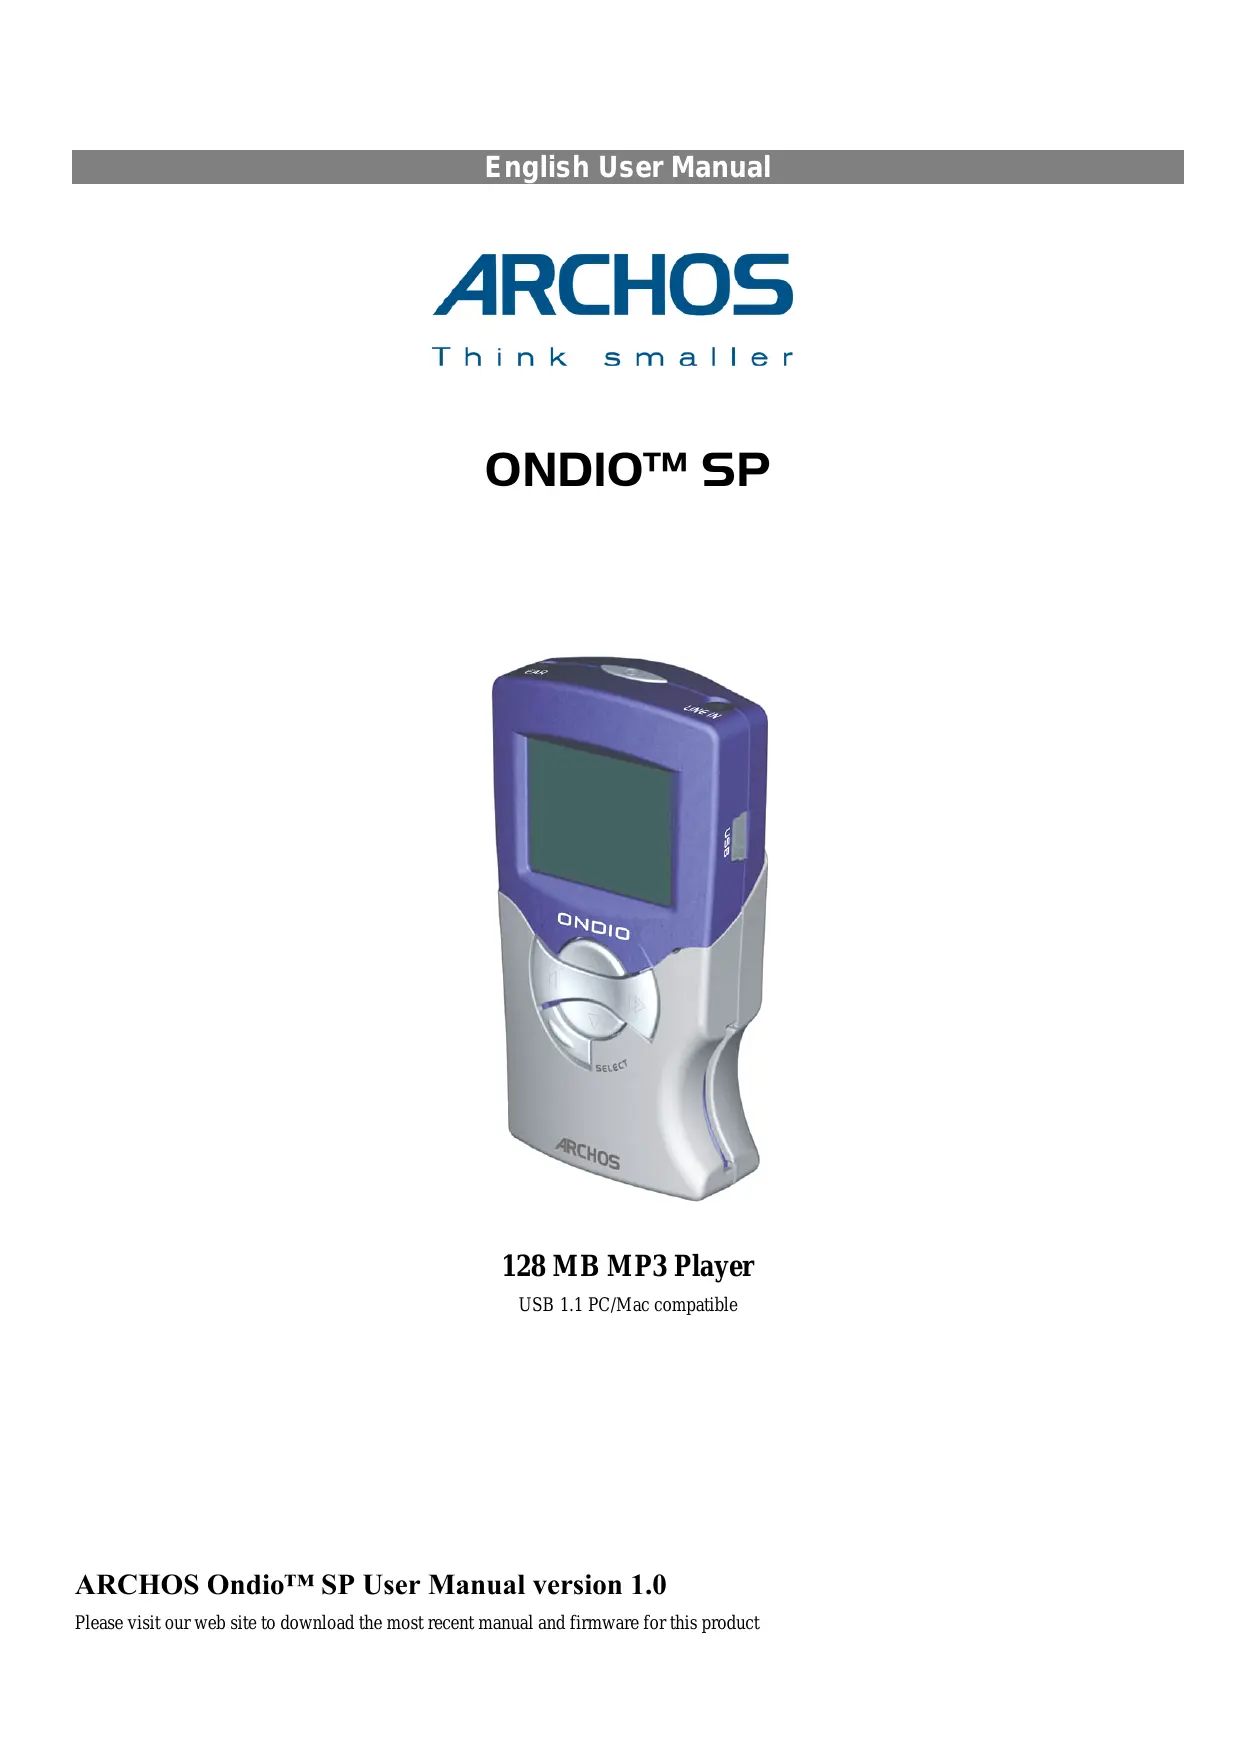

| Type de produit | Lecteur MP3 |
| Capacité de stockage | 4 Go |
| Formats audio supportés | MP3, WMA, WAV, FLAC |
| Écran | Écran LCD de 1,8 pouces |
| Connectivité | USB 2.0 |
| Alimentation électrique | Batterie lithium-ion rechargeable |
| Autonomie de la batterie | Jusqu'à 15 heures |
| Dimensions approximatives | 90 x 40 x 10 mm |
| Poids | 60 g |
| Fonctions principales | Lecture audio, radio FM, enregistrement vocal |
| Entretien et nettoyage | Essuyer avec un chiffon doux, éviter l'humidité |
| Pièces détachées et réparabilité | Réparabilité limitée, pièces non facilement disponibles |
| Sécurité | Ne pas exposer à l'eau, éviter les températures extrêmes |
| Compatibilités | Compatible avec Windows et Mac OS |
| Informations générales | Produit idéal pour les amateurs de musique en déplacement |
FOIRE AUX QUESTIONS - ONDIO SP ARCHOS
Questions des utilisateurs sur ONDIO SP ARCHOS
0 question sur cet appareil. Repondez a celles que vous connaissez ou posez la votre.
Poser une nouvelle question sur cet appareil
Téléchargez la notice de votre au format PDF gratuitement ! Retrouvez votre notice ONDIO SP - ARCHOS et reprennez votre appareil électronique en main. Sur cette page sont publiés tous les documents nécessaires à l'utilisation de votre appareil ONDIO SP de la marque ARCHOS.
MODE D'EMPLOI ONDIO SP ARCHOS
ARCHOS
Think smaller
ONDIO™ SP
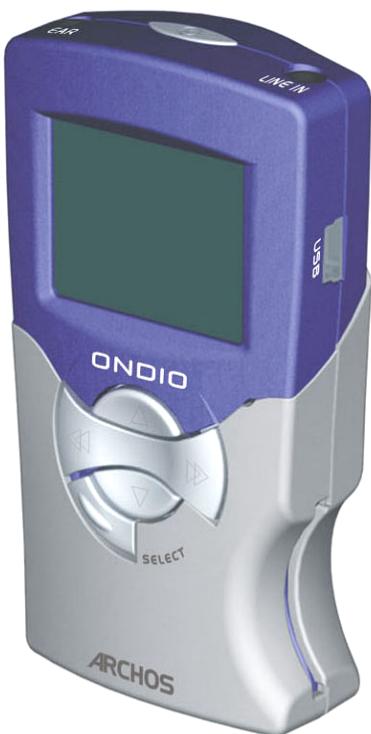
128 MB MP3 Player
USB 1.1 PC/Mac compatible
Warranty and Limited Liability
This product is sold with a limited warranty and specific remedies are available to the original purchaser in the event the product fails to conform to the limited warranty. Manufacturer's liability may be further limited in accordance with its sales contract.
In general, the manufacturer shall not be responsible for product damages caused by natural disasters, fire, static discharge, misuse, abuse, neglect, improper handling or installation, unauthorized repair, alteration or accident. In no event shall the manufacturer be liable for loss of data stored on disk media.
MANUFACTURER SHALL NOT BE LIABLE FOR ANY SPECIAL, INCIDENTAL OR CONSEQUENTIAL DAMAGES. EVEN IF INFORMED OF THE POSSIBILITY THEREOF IN ADVANCE.
Archos licensor(s) makes no warranties, express or implied, including, without limitation, the implied warranties of merchantability and fitness for a particular purpose, regarding the licensed materials. Archos's licensor(s) does not warrant, guarantee or make any representations regarding the use or the results of the use of the licensed materials in terms of its correctness, accuracy, reliability, correctness or otherwise. The entire risk as to the results and performance of the licensed materials is assumed by you. The exclusion of implied warranties is not permitted by some jurisdictions. The above exclusion may not apply to you.
In no event will Archos' licensor(s), and their directors, officers, employees or agents (collectively Archos' licensor) be liable to you for any consequential, incidental or indirect damages (including damages for loss of business profits, business interruption, loss of business information, and the like) arising out of the use of inability to use the licensed materials even if Archos' licensor has been advised of the possibility of such damages. Because some jurisdiction do not allow the exclusion or limitation of liability for consequential or incidental damages, the above limitations may not apply to you.
Please see your sales contract for a complete statement of warranty rights, remedies and limitation of liability.
Furthermore, warranty does not apply to:
- Damages or problems resulting from misuse, abuse, accident, alteration or incorrect electrical current or voltage.
Any product tampered-with or damaged warranty seal or serial number label.
Any product without a warranty or serial number label. - Batteries and any consumable items delivered with or in the equipment.
Warnings and Safety Instructions
CAUTION
To prevent risks of electric shock, this unit must only be opened by qualified service personnel.
Power off and disconnect the power supply cable before opening the unit.
WARNING
To prevent fire or shock hazard, do not expose the unit to rain or moisture.
Use of this product is for personal use only. Copying CDs or loading music, video, or picture files for sale or other business purposes is or may be a violation of copyright law. Copyrighted materials, works of art, and/or presentations may require authorization to be fully or partially recorded. Please be aware of all such applicable laws concerning the recording and use of such for your country and jurisdiction.
FCC Warning Statement
FCC Compliance
This equipment has been tested and found to comply with limits for a Class B digital device, pursuant to Part 15 of the FCC Rules. These limits are designed to provide reasonable protection against harmful interference in a residential installation. This equipment generates, uses and can radiate radio frequency energy and, if not installed and used in accordance with instructions, may cause harmful interference to radio communications. However, there is no guarantee that interference will not occur in a particular installation. If this equipment does cause harmful interference to radio or television reception, which can be determined by turning the equipment off and on, the user is encouraged to try to correct the interference by one or more of the following measures:
Reorient or relocate the receiving antenna.
- Increase the separation between the equipment and receiver.
- Connect the equipment into an outlet on a circuit different from that to which the receiver is connected.
- Consult the dealer or an experienced radio/TV technician for help.
Note: During file transfer or in the PC mode, if the EUT or computer suddenly freezes or does not respond, it may be due to the electrostatic phenomenon. Please follow the procedures below to recover the operation:
Unplug the USB cable from the EUT
Close the software application in the computer (or re-boot the computer if necessary)
Re-connect the USB cable to the EUT.
CAUTION: Modifications not authorized by the manufacturer may void users authority to operate this device.
FCC Part 15 - Operation is subject to the following two conditions:
- This device may not cause harmful interference;
- This device must accept any interference received including interference that may cause undesired operation.
Copyright Notice
Copyright ARCHOS © 2003 All rights reserved.
This document may not, in whole or part, be copied, photocopied, reproduced, translated or reduced to any electronic medium or machine-readable form without prior consent, in writing, from ARCHOS. All brands and products names are registered trademarks and the property of their respective owners. Specifications are subject to change without notification. Errors and omissions accepted. Images and illustrations may not always match contents. Copyright © ARCHOS. All rights reserved.
Disclaimer of warranty: to the extent allowed by applicable law, representations and warranties of non-infringement of copyrights or other intellectual property rights resulting from the use of the product under conditions other than as here above specified, are hereby excluded.
Table of Contents
1 Technical Specifications 4
2 Product Introduction 5
2.1 Buttons and Controls.. 5
2.2 Starting up the Ondio 6
3 Browser Mode (file system) 7
3.1 How to Navigate the file structure 7
3.2 How to Recognize file types 7
3.3 How to Display file information 7
3.4 How to Delete a file or folder 7
3.5 How to Create a new folder 8
3.6 How to use the Text Input mode 8
3.7 How to Read Text files 8
4 Playing MP3 Music files. 9
4.1 How to Play an MP3 file 9
4.2 How to Play a Playlist 9
4.3 How to Create a Playlist 10
4.4 How to Adjust the Sound Settings 11
5 Settings and MultiMediaCard (MMC) Expansion 12
5.1 How to Adjust the Settings 12
5.2 How to Expand the capacity of the Ondio with a MultiMediaCard 12
6 Connecting the ONDIO to a PC or Mac 13
6.1 Connecting Ondio to a PC 13
6.2 Disconnecting the Ondio from a PC 14
6.3 Use the Ondio file format 14
6.4 Connecting the Ondio to your Macintosh 14
7 MusicMatchTM Software 15
8 Technical Support 16
9 Appendix A - Settings Table. 17
10 Appendix B - Screen & Button Descriptions 18
1 Technical Specifications
| Capacity* | 128 MB Flash memory (2 hours of MP3 music at 128 kbps). * Memory capacity can be enhanced by adding MultimediaCards (MMC). |
| Interface and transfer to computer | USB 1.1 (PC and Mac) |
| Supported formats | MP3 playback (30 to 320 kbps - VBR). |
| Display | LCD, 112x64 pixels |
| Audio specifications | Stereo Analog Line-In, Stereo Analog Line-Out & Earphone Jack. Signal to noise ratio >90 dB. Max. output power: 100mW, Frequency. response 20 HZ – 20 kHz. Harmonic distortion: <0.1%. Built-in microphone. |
| Sound settings and play mode | Volume, bass, treble, loudness, balance and bass boost. Normal, Single, Repeat all, shuffle, Queue, Scan |
| Playback autonomy | Up to 8 hours. |
| Software scalability | Downloadable firmware updates from Archos website www.archos.com. |
| Power source | Internal: 3 AAA batteries |
| Dimensions | 81 x 47 x 25mm (3,1" x 1,8" x 0,9") |
| Weight | 60 g (2.1 oz) |
| System Requirements: | PC: Windows 98 SE, ME, 2000, XP (USB mass-storage). 32 MB RAM (64 MB recommended). CD-ROM drive with digital audio extraction support. Mac: OS version 9: 9.2 and greater; OS version 10: 10.2.4 or greater. |
2 Product Introduction
Dear Customer,
Thank you for purchasing the new Ondio™ SP 128MB MP3 player. Please take the time to read through this user manual in order to get the fullest use of this product. Our engineers packed this product with many functions and capabilities. The better you know how to use it, the more enjoyment you will get from it. Remember, with the Ondio™ SP, you can...
- Listen to MP3 files
- Store MP3, text, or any data file
Create music Playlists - Read text files
- Extend the capacity by adding MultiMediaCards (MMC) cards (64mb, 128mb, 256mb, etc.)
We hope you receive years of enjoyment from your Ondio™ SP. Thanks again for purchasing our product.
Wishing you the best music listening experience, The team at ARCHOS
2.1 Buttons and Controls
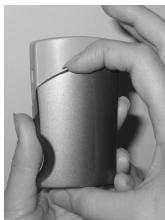
Opening the battery cover
First install the three included AAA batteries. As shown in the photo, press downward on the top of the battery cover and pull outward. The bottom will hinge outward and then snap out. Be sure to install the batteries with the + positive and - negative as indicated.
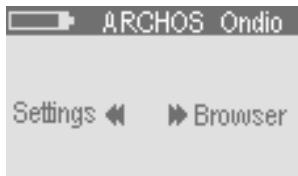
Main Menu
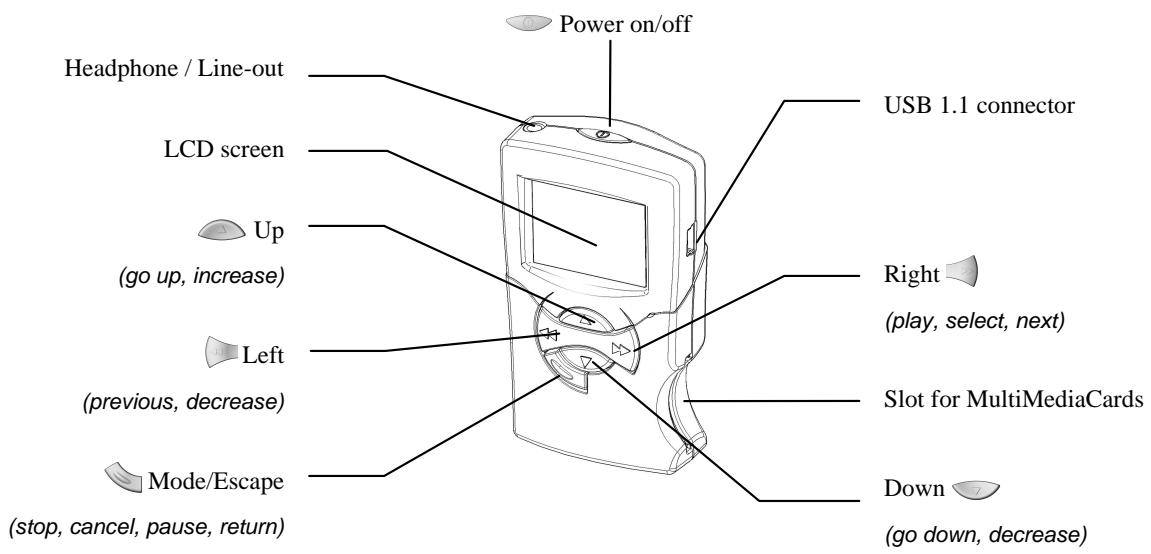
To start the Ondio, hold the ON/OFF button for 3 seconds. The main menu screen will appear. To shut off the Ondio, press and hold the ON/OFF button for three seconds, and it will shut off. Click once on the right button to enter the Browser mode and view your MP3 files and folders.
Master Reset: If for some reason the Ondio SP freezes operation (Electrostatic phenomenon) or does not seem to shut off, you can hold the ON/OFF button for 12 seconds which will force the Ondio SP to execute a master reset. It will NOT erase the Ondio SP files.
3 Browser Mode (file system)
This section explains
How to...
3.1 Navigate the file structure
3.2 Recognize file types
3.3 Display file information
3.4 Delete a file or folder
3.5 Create a new folder
3.6 Use the Text Input mode
3.7 Read Text files
Typical Browser Mode Screen
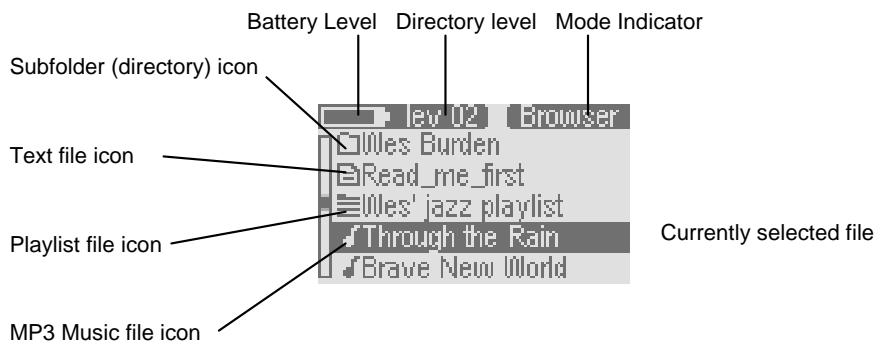
Notice the vertical scroll bar on the left of the screen. This indicates that there are more files at this level. Use the Up and Down buttons to see the files.
**Although the Ondio will store any type of file, only the files with extensions.mp3,.m3u,.txt and folders will be displayed on the screen.
3.1 How to Navigate the file structure
Notice carefully the directory level lev02 on the top of the screen in the example above. This tells you at what depth you are in the file system. When you turn on the Ondio, you are at the root level, level 0. From there, each time you enter a folder (Click Right button to enter a folder), you go down one level. This indicator gives you a sense of how deep in the file system hierarchy you are. To go back up one level, you will click on the left button. If, for example, you are at level 02, then you should click on the Left button two times to return to the root level of the file system.
3.2 How to Recognize file types
The Browser mode allows you to view all your MP3 files. The Ondio will store any type of file (think of it as a 128MB hard drive). However, when you go into the Browser Mode, you will only see the files with the extensions.mp3 (music), .m3u ( Playlist), and .txt ( text file). As shown in the screen above, each of these recognized file types has its specific icon type.
3.3 How to Display file information
If you would like to view information about an MP3 file, you must first play it. While it is playing or is paused, you can hold down the Mode button which will bring you to a Question screen. Scroll down using the Down button to the option File info. When you execute this option, you will see information about the file such as bit rate, sample resolution, size, and file name.
3.4 How to Delete a file or folder
While in the browser mode, navigate to the file you want to delete. Once highlighted, hold down on the Mode button until the question screen appears. You can then scroll down (using the down button) to the delete option. Click on the right button to make the delete happen. You will then be asked to validate your response.
3.5 How to Create a new folder
Go to the folder (directory) where you would like to create a new folder. Hold down the Mode button until the questions screen appears. You can then scroll down (using the down button) to the Make directory option. Click on the right button to select this option. You will then be sent directly to the Text input screen where you can enter a name for the newly created directory. See the next section on how to enter text.
3.6 How to use the Text Input mode
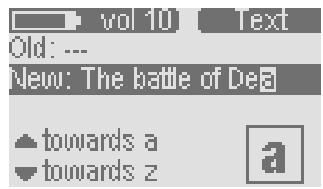
Text Input Screen
When you create a folder or change the name of a file, you are sent to the Text input screen in order to enter your text. We highly recommend that you use your computer's file management system to rename files and create new folders. The Ondio's text entering screen can become very tedious to use if you have to enter more than one or two text items.
To enter text, you will use the Up button to scroll the alphabet towards the letter a. Using the Down button will scroll toward the end of the alphabet. After the letter z, you will go through the Upper case characters A - Z, after these, through the numbers 0-9 and then finally through special characters. By holding down on the Up or Down button, it will scroll through the alphabet faster and faster.
Click on the Right button to accept the current letter and advance one place forward. Click on the Left button as a backspace, to delete the previous letter. Hold down on the Left button to delete the entire line and start anew. To validate your text, click on the Mode button. You will see a question screen asking you to accept the text you have input, or to escape from the text input mode leaving the original text unchanged. Note that if you are making a new folder and you escape from the text mode, no new folder will be created.
3.7 How to Read Text files
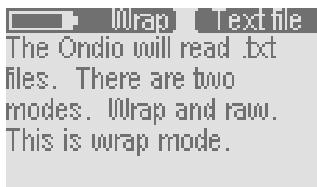
Text Reading Mode (Wrap)
In the Browser mode, the Ondio will display file names which have the.txt extension. Because of Ondio's small screen, we recommend you read.txt files from your computer. However, there are times when you'd like to be able to read a .txt document without having to connect the Ondio to your computer. Click the Right button on a highlighted.txt file to open it. The top right of the screen will display Text to indicate that you are in the text file reading screen. The top left will display the reading mode.
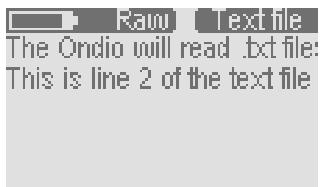
Same text file in Raw mode
Hold down on the Mode button to toggle between Wrap and Raw reading modes. Reading a text file in Raw mode will not introduce the automatic wrapping that allows you to read it line after line. A text line may have 200 or more characters, and thus you must use the Left and Right buttons to shift the text display to the right and left in order to read all the words.
In Wrap mode, the Ondio will wrap the sentences around to the next line. You will then use the Up and Down buttons to scroll up and down through the text file. In this mode, the Left and Right buttons will bring you to the beginning and end of the text file respectively.
This section explains
How to...
4.1 Play an MP3 file
4.2 Play a Playlist
4.3 Create a Playlist
4.4 Adjust the Sound Quality
Typical MP3 File Playing Screen
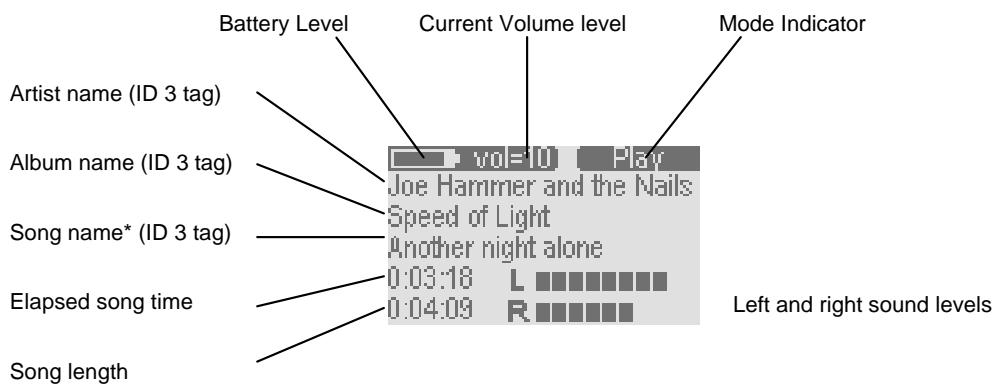
* If there is no ID3 tag information in the MP3 file, the file name will be displayed
4.1 How to Play an MP3 file
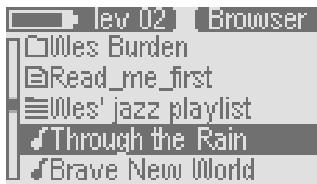
View of files and folders
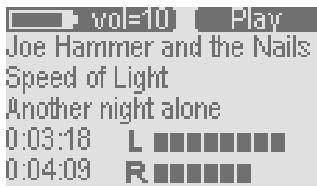
Typical playing Screen
From the Main menu, go to the Browser mode (Right button) to see the files and folders on your Ondio. As shown on the left, once in the Browser mode, (Browser displayed in the top right of the screen), you will see MP3 files with a music note icon in front of them.
Use the Up or Down button to locate the file you would like to play. Once the desired MP3 file is highlighted, click on the Right button to play it. The second image on the left shows you the typical playing screen.
If you want to pause the music, click on the mode button once. To recommence from a pause, click on the Right button. If you want to stop the music and go back to the Browser, click twice on the Mode button, once to go to pause, and the second time to stop.
If you are listening to a song and would like to listen to the next song in the current folder, just click on the right button. If you would like to fast forward or fast reverse through the song, hold down on either the Left or Right button.
4.2 How to Play a Playlist
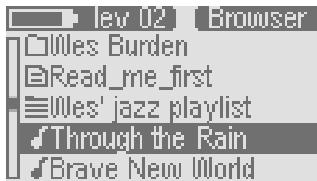
Browser showing all viewable file types
A Playlist is a file that contains a list of music tracks to play. This feature allows you to compile a list of your favorite songs and store them in a file for playback later. Playlists can support up to 999 songs and can contain songs from multiple folders. A play list is really nothing more than a text file with the list of files to be played. When you first turn on your Ondio, your current default Playlist is empty and needs to be populated with songs before you can play or save it. If you delete a song from a Playlist, you are not deleting the song, but just its entry in that particular list.
From the Main menu, go to the Browser mode (Right button) to see the files and folders on your Ondio. As shown on the left, once in the Browser mode, (Browser displayed in the top right of the screen), you will see a Playlist file such as 'Wes' jazz playlist'. Playlist files have a list icon in front of them.
Use the Up or Down button to locate the Playlist you would like to play. Once the desired Playlist file is highlighted, click on the Right button to play it. There is a setting in the Music Settings Submenu which will allow you to have the music tracks in the Playlist played in random order (shuffle).
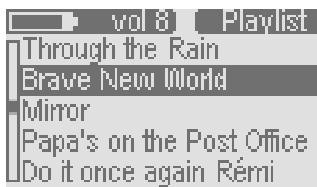
View of the Playlist
The Playlist exists in the Ondio's internal memory first, then it is saved for later use. If you create a Playlist without saving it, it will be lost the next time you turn on the Ondio. To put a song into the Playlist, first you will highlight it in the Browser mode. Now, hold down on the Mode button until you see the Question screen appear. The first option will be to add the song to the Playlist. Since this option is highlighted already, just click on the Right button to accept this choice. This song is now in the Playlist. Navigate through your folders, and add in this same way, all the songs you would like for the current Playlist.
When you're done adding all your songs to the Playlist, you should save it. To do so, go to the Settings mode (Main menu then Left button). Once in the Settings mode, you will scroll down (Down button) to the option Open Playlist. Click on the Right button to open it. You will now see the Ondio's Playlist. In the Playlist screen you can do all your Playlist manipulations. To delete a song from the Playlist, click on the Left button. Click on the Right button to go to the Question screen to see your options.
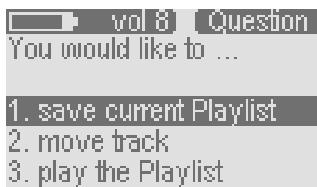
[ \text{Playlist Question screen} ]
- Save Playlist: Your first option will be to Save current Playlist. Since it is already highlighted, simply click on the Right button to accept it. You will then be sent automatically to the Text Input screen in order to name your file.
- Move Track: You will notice also that in the question screen, you can move track. After selecting this option, you can move the current song up or down in the Playlist order. Use the Up and Down buttons to change the song's position. Click on the Right button to set it into place.
- Preview: You can also listen to a preview of the current song if you have forgotten what it sounds like. Clicking on this option plays the song and then goes back to the Playlist screen when you click on Mode.
- Play Playlist: You can simply just play the Playlist without saving it. Remember though that it will be lost when you shut off the Ondio if you do not save it.
- Clear Playlist: You can clear the entire Playlist with this option.
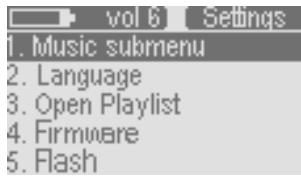
Go to music submenu via the Settings Menu
As shown to the left, the sound settings can be reached by going to the Settings mode. Typically however, you will want to change your sound settings while you are listening to your music.
While listening to an MP3 file, press and hold the Mode button until the Question Screen appears. You can then scroll down through the various sound settings such as Bass and Treble. Use the Left and Right buttons to increase or decrease the value. The changes will take effect immediately and you will be able to hear the difference. Click on Mode when finished to return to the play screen.
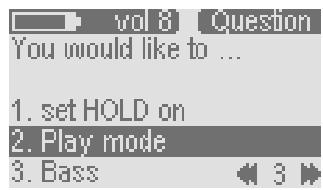
Hold to go to settings directly from playing music
MP3 Question screen options
| You would like to set... | |
| 1. | HOLD on |
| 2. | File info |
| 3. | Play Mode |
| 4. | Bass |
| 5. | Treble |
| 6. | Loudness |
| 7. | Balance |
| 8. | Bass Boost |
| 9. | Flat |
| 10. | Edit |
This section explains
How to...
5.1 Adjust the Settings
5.2 Expand the capacity of the Ondio with a MultiMediaCard
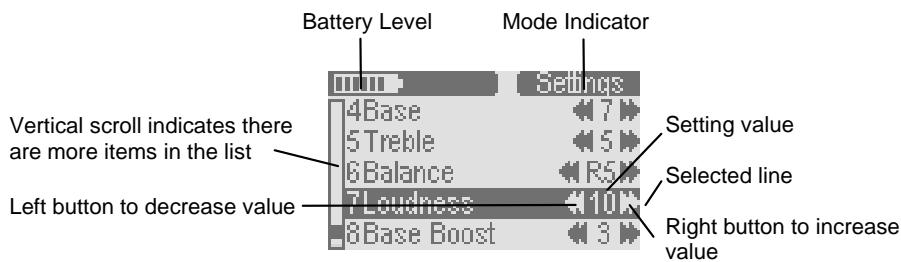
Typical Settings Screen
5.1 How to Adjust the Settings
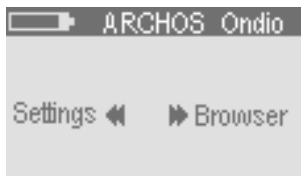
Main menu
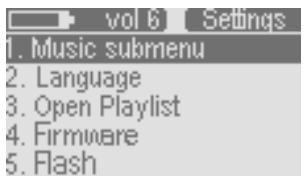
Settings Screen
Click on the Left button from the Main menu to go to the SETTINGS screen. If you are not at the main menu, click once or twice on the Mode button and you will return to this main screen. Click on the Left button to enter into the Settings screen.
You will use the Up and Down buttons to select the parameter you would like to change. If the parameter's value is a number, such as the Treble parameter, use your Left and Right button to adjust the value. The change takes place immediately. If it is a text item to adjust, such as Language, you will be taken to another screen where the options are displayed. Use the Up and Down button to highlight the option you would like and then click on the Right button select it. The round indicator will then move to that option indicating that this is the currently validated option.
You can also enter the Music Submenu for Music settings and change those parameters in the same way. Click on Mode to return to the previous screen. See appendix A for a complete list of parameters and their default values.
5.2 How to Expand the capacity of the Ondio with a MultiMediaCard
Your Ondio has a built-in capacity of 128 Megabytes (Flash memory). If you would like to expand that capacity, you can purchase a MultiMediaCard (MMC) which slides right into the side of the Ondio. These can usually be purchased at the same store you bought your Ondio from. These cards will have capacities of 64 Megabytes, 128 Megabytes, 256 Megabytes, and perhaps more. They will all work with your Ondio. Do not confuse these with the similar looking SD cards. SD cards are not compatible with the Ondio.
You can insert the card into the Ondio while the Ondio is on or off. The MultiMediaCard (MMC) takes the place of the built-in Flash memory. This means that you either listen to files from the built-in memory OR the expansion MMC memory. When you insert a new (and blank) Multimedia Memory Card, you will not see any of your MP3 files or folder because the Ondio will be looking only at what is on the inserted memory card. If you want to listen to your music files from the main memory of the Ondio™ SP, just pull out the MMC card and your Ondio will revert to the contents of its internal flash memory.
This section explains
How to...
6.1 Connecting the Ondio to a PC
6.2 Disconnecting the Ondio from a PC
6.3 Use the Ondio file format
6.4 Connect the Ondio to a Macintosh®
Data is being
transferred
between the
Ondio and your
computer.
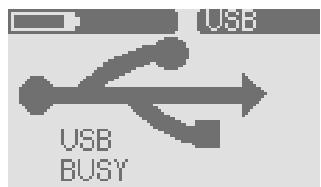
Ondio is connected
to your computer
Ondio connected screen
NOTE The Ondio can only be used as an external storage device when it is connected to a computer. You cannot use the buttons on the front to play music from it.
6.1 Connecting Ondio to a PC
The Ondio connects to your computer via the USB 1.1 standard. Thus either a 1.1 or 2.0 USB port on your computer will work. Start up your computer and make sure it has completely booted up the Windows operating system. Connect the included USB cable to your computer's USB port (larger end of cable) and then the other side (mini USB connector) to the Ondio's mini USB port (right side). You should connect the cable to the Ondio while it is on. For Windows® ME, 2000, and XP, no special software driver needs to be installed. These operating systems will recognize the Ondio as a mass storage device and simply assign a new drive letter, (e: for example) to the Ondio. See the next section below on how to safely disconnect the Ondio from a PC.
When you connect the Ondio to a computer running Windows® 98 SE (Second Edition), it will recognize that a new USB device has been connected to the computer and start up its Add New Hardware Wizard as shown below.
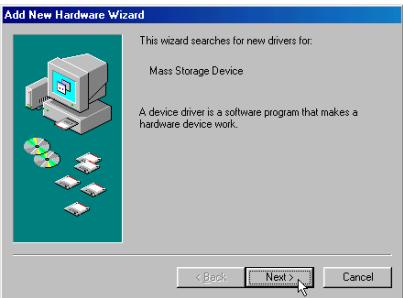
- Windows has recognized a new piece of hardware (the Ondio) and starts its wizard. Click on Next.
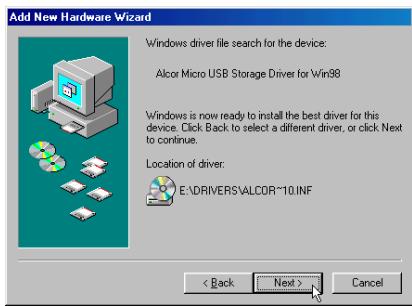
- Windows will now go and copy from the CD to your hard drive, all the files it needs to make the USB connection operational. Click on Next to tell Windows to install the driver.
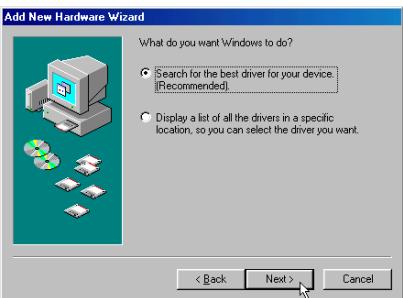
- Click on the button Search for the best driver. Open up the CD tray on your computer and insert the included Archos CD-ROM and then close the tray. Now click on Next.
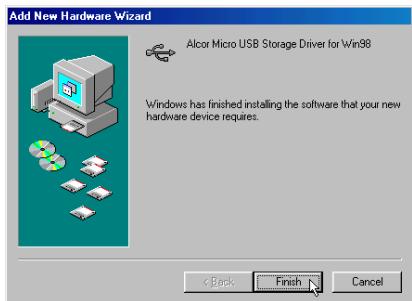
- Windows will indicate when it has finished copying the drivers. Click on Finish.
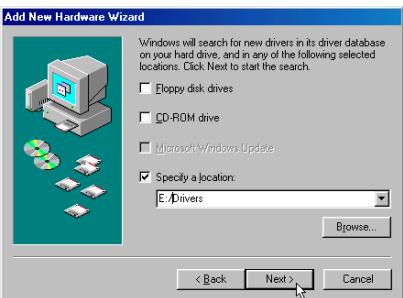
- Uncheck the box Floppy disk drives if it is checked, and then check the box Specify a location. Type in the drive letter of your CD player (usually D) followed by:Drivers. Click on Next and Windows will then load the correct drivers.
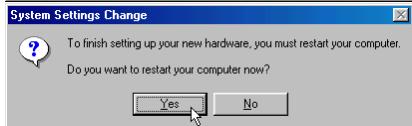
- You will be asked to restart the computer. Upon restarting your computer, it may again ask to find the correct drivers to load. Go through the exact same process again, directing Windows to the drivers on the CD-ROM. Ondio will now be seen as another drive in your file management system.
Seen here as a removable disk. Just copy files to and from the Ondio.
1. Safe remove icon here
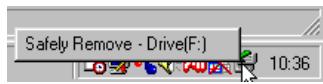
2. Safe remove button
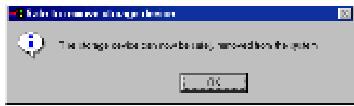
3. Safe remove message
If you are running Windows 98 SE, you can simply disconnect the USB cable from the Ondio and then use the Ondio as normal. Attention: Make sure you do not disconnect the Ondio while data is being transferred to or from it. Ondio displays the message BUSY under the USB graphic when it is transferring data. You should close all programs that are accessing the Ondio while it is connected.
For Windows ME, 2000, and XP, you must remove the Ondio in a special 'safe' manner. You will see a small card icon with a green arrow in the system tray (bottom right of screen [1]). Click on this icon and then click again on the "Remove Safely" message [2]. Wait a few seconds and a message will appear on the center of the screen [3] saying that you can remove the storage device. You can now safely unplug the Ondio's USB cable.
Warning: Failure to safely disconnect the Ondio as explained above may cause the operating system or Ondio to freeze and/or lose data.
6.3 Use the Ondio file format
The format of the data structure inside the Ondio's flash memory is the same as that of a small hard drive (FAT). Using the Windows defragmenting tool will not corrupt the data on the Ondio. However, because there is only 128 megabytes of memory on the Ondio, doing this is really not necessary. If you think there may be problems with the memory, you can reformat the Ondio's Flash memory. Make sure that you format it in FAT format (same as FAT16), NOT FAT32. The Windows® XP and 2000 version defaults to an NTFS format. Do not format it with this type either. Always make sure you are formatting it to FAT or FAT16. You will, of course, lose all of your data if you do not back it up on your computer's hard drive beforehand.
6.4 Connecting the Ondio to your Macintosh
The Ondio connects to your Macintosh via the USB 1.1 standard. Thus either a 1.1 or 2.0 USB port on your computer will work. Start up your computer and make sure it has completely booted up the Mac operating system (Either OS 9.2 and greater or OS 10.2.4 and greater). Connect the included USB cable to your computer's USB port (larger end of cable) and then the other side (mini USB connector) to the Ondio's mini USB port (right side). You should connect the cable to the Ondio while it is on. After a short wait, the Mac will automatically recognize the Ondio as a mass storage device and place an icon on your desktop representing the Ondio. You can now drag and drop files as if it were another hard drive.
Warning: Before disconnecting the Ondio from your Macintosh, drag the Ondio icon to the trash in order to unmount it from the operating system. Failure to do so could lead to unpredictable results including data loss.
7 MusicMatch™ Software
The best way to use your Ondio is by employing the included MusicMatch™ software. This software will help you to create Playlists, rename files, change ID 3 tag information (Artist, Album, Song title), and execute other useful MP3 related functions such as transforming your personal CDs into MP3 files for playing on the Ondio. Using MusicMatch™ is easier than managing and naming your files via the text input function of the Ondio. Furthermore, you can download additional MP3 tracks from MusicMatch at http://www.musicmatch.com/get_music/
Installing MusicMatch™ software on your PC is quite simple. Just slip the included CD into your CD-ROM drive and the autorun system will present you with a list of installation options. You can then choose MusicMatch™ in the language of your choice. When installing MusicMatch™, it will ask you to enter a serial number. You will find the serial number printed on the paper pouch that the CD was packaged in. If for some reason the autorun does not present the menu when you place the CD into your computer, you can run the installation via the executable program in the folder MUSICMATCH. You will see a number of languages offered.
QUESTIONS ABOUT MUSICMATCH™?
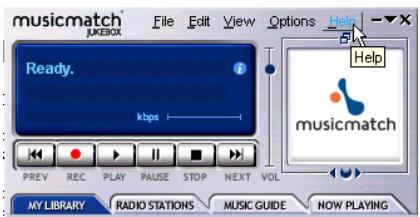
There is an extensive help section in MusicMatch™ to show you how to use it. Just click on the help button as show below once you have installed it.
8 Technical Support
- If technical support determines that your product needs to be returned, please contact the place of purchase to have your product repaired or replaced (depending on problem type). Customers who purchased directly from the Archos web site should fill out the form on the web site under Support : Product Returns : RMA Request form.
- There is both an FAQ and a 24 hour Instant Support intelligent agent at the ARCHOS website which can help you solve your problems (www.archos.com)
- If you need live technical help, you may contact ARCHOS directly in your country's language via the below phone numbers. For other countries, please use e-mail technical support.
DO NOT USE PHONE OR EMAIL SUPPORT FOR MARKETING AND SALES QUESTIONS. These numbers are to aid those who have technical difficulties / malfunctions.
- - - - Telephone Support
949-609-1400
(USA, Canada)
09-1745-6224
(Spain)
0170200030
(France)
02-4827-1143
(Italy)
0207-949-0115
(UK)
02-050-405-10
(Netherlands)
069-6698-4714
(Germany)
E-mail Support
tech-support.us@archos.com English (United States and Canada customers)
tech-support.eu@archos.com English or French (Europe and the rest of the planet)
tech-support.de@archos.com German (Germany)
tech-support.jp@archos.com Japanese (Japan)
To respond to your e-mails efficiently, when sending one, please indicate the product name and question type in the Subject of the e-mail. For example:
To: tech-support.us@archos.com
Subject: Ondio - Playing a Playlist
Worldwide Offices
| United States & Canada | Europe & Asia | United Kingdom | Germany |
| ARCHOS Technology | ARCHOS S.A. | ARCHOS (UK) Limited | ARCHOS Deutschland |
| 3, Goodyear – Unit A | 12, rue Ampère | 3 Galileo Park | GmbH |
| Irvine, CA 92618 USA | 91430 Igny | Mitchell Close | Bredelaerstrasse 63 |
| Phone: 1 949-609-1483 | France | West Portway | 40474 Düsseldorf |
| Fax: 1 949-609-1414 | Phone: +33 (0) 169 33 169 0 | Andover | Germany |
| Fax: +33 (0) 169 33 169 9 | Hampshire SP10 3XQ | Phone: +49 211 1520 384 | |
| United Kingdom | Fax: +49 211 1520 349 | ||
| Phone: +44 (0) 1264 36 60 22 | |||
| Fax: +44 (0) 1264 36 66 26 |
9 Appendix A - Settings Table
Numeric values can be changed with Left and Right buttons
| Settings (in order) | Multiple Choice Values | Default Value |
| 1. Music Submenu | Goes to Music settings submenu | |
| 2. Language | English, Français, Deutsche | English |
| 3. Open Playlist | Opens playlist | |
| 4. Firmware | current value | |
| 5. Flash | Diagnostic & memory available to write | Space |
| 6. Auto-off | 0 (never),1,2,3,4,5,6,7,8,9,10 minutes | 3 |
| 7. Contrast | LCD screen contrast | 5 |
| Music settings submenu | Values | Default Value |
| 1. Play mode | Normal, Single, Repeat All, Shuffle, Queue, Scan | Normal |
| 2. Bass | -5,-4,-3,-2,-1,0,1,2,3,4,5 | 3 |
| 3. Treble | -5,-4,-3,-2,-1,0,1,2,3,4,5 | 3 |
| 4. Loudness | L5,L4,L3,L2,L1,0,R1,R2,R3,R4,R5 | 0 |
| 5. Balance | 0,1,2,3,4,5,6,7,8,9,10 | 3 |
| 6. Bass boost | 0,1,2,3,4,5,6,7,8,9,10 | 3 |
| 7. Default | Reset Music Setting parameters to default | |
10 Appendix B - Screen & Button Descriptions
| Reading Text Files Screen | Raw Textile The Ondio will read .txt file: This is line 2 of the text file | Δ | Scroll down one line of text Hold: scroll down high speed |
| You arrive here via the browser mode with the user having clicked on a text file. Ondio will default to RAW mode. RAW = Ondio does not add carriage returns. WRAP= Ondio does auto return so that text is visible without scrolling to the right. | Scroll up one line of text Hold: scroll up high speed | ||
| Wrap mode: Go to beginning of text file. Raw mode: move to the right | |||
| Wrap Textile The Ondio will read .txt files. There are two modes, Wrap and raw. This is wrap mode. This is line 2 of the text file | Wrap mode: Go to end of text file. Raw mode: move to the left | ||
| Single click: Return to Browser mode Long press: changes between Wrap and Raw modes. |
| Text Input Screen | → vol 10 Text Old: → New: The battle of De#t → towards a → towards z | Scrolls alphabet towards a Hold for high speed scrolling | |
| User arrives at this screen when he needs to enter some text. | Scroll alphabet towards z Hold for high speed scrolling | ||
| VARIABLE RAPID SCROLLING: The longer the user holds down on a button, the faster the scrolling goes. | Destructive back space Hold: erase entire line and restart | ||
| Accept current letter and advance one space | |||
| Click or Long press: go to Question screen. “Would you like to ...” 1. accept name 2. escape |
| Question Screen | bat=10 vol=10 Question Change folder name to: 90's pop Music ? 1. Yes 2. No. | Δ | Scroll up one response line |
| Scroll down one scroll line. Lines are numbered so that user has sense of where he is. | |||
| Does nothing | |||
| Accept the response which is highlighted. | |||
| Escape/cancel, go back to the previous screen. |
| Browser Mode | lev U2 browser □Wles Burden □Read_me_first □Wles' jazz playlist Through the Rain □Brave New World | Move highlight up vertically. | ||
| The currently selected file or folder is the one in reverse video (white with black background) to which actions are applied. Actions possible: 1. play a song 2. open a folder 3. traverse the directory structure 4. start playing a playlist 5. display a text file 6. add song to play list 7. add all.MP3 in folder to playlist lev = directory level; 00=root | Move highlight down vertically. Go back one level in the directory structure. (go to parent folder) 1 click: enter highlighted folder, play Playlist, display text file, play song. Long press: go to Question screen. “Would you like to ... 1. add song to Playlist 2. delete 3. make directory 4. rename Long press: go to Question screen. “Would you like to ... 1. add song to Playlist 2. delete 3. Rename 4. Make directory | |||
| Settings Mode | vol 6 Settings | Δ | Move the highlight up | |
| On settings with numeric values, adjust the values directly. Changes take effect immediately. | 1. Music submenu2. Language3. Open Playlist4. Firmware5. Flash | 7 | Move the highlight down | |
| 4Base R5 | If the setting is a value, then decrease value | |||
| 7Loudness 10 | If the setting is a value, then increase value. If a non-value setting, go to list of choices. | |||
| 8Base Boost 3 | Exit settings mode and go to previous screen. | |||
| Play Screen | xxx v0E10 Play Joe Hammer and the Nails Speed of Light Another night alone 0:03:18 L 0:04:09 R | Δ | Increase sound volume |
| One comes to this screen from Browser mode when RIGHT is clicked for a music track. Top right will display the status: Play, Pause, FF, Rew. Depending on what the user is doing. Bottom right shows elapsed time and total time. During hold, the top right mode indicator will flash “HOLD”. | Decrease sound volume | ||
| Play previous song in folder or play list if playing from a play list. Long press: review (with sound) going backward | |||
| Click: Play next song in folder or play list if playing from a play list (or play after being paused). Long press: fast forward (with sound) | |||
| First click: pause the song. Second click, stop and display the browser. Long press: Question mode: “You would like to …” 1. set HOLD on* 2. File info 3. Play mode 4. Bass 5. Treble 6. Balance 7. Loudness 8. Bass boost 9. Default | |||
| * automatically activates in 10 seconds if no other choice is made. Hold the Mode button for 4 seconds to deactivate the Hold mode. | |||
| Playlist Screen | → vol 8 ➔ Playlist Through the Rain Brave New World Mirror Papa's on the Post Office Do it once again Remy | Δ | Move the cursor up the list |
| Move the cursor down the list | |||
| Click to delete current song. Hold to clear the entire Playlist. | |||
| → vol 8 ➔ Question You would like to ... 1. save current Playlist 2. move track 3. play the Playlist | 1 click: go to question screen "You would like to..." 1. Save current Playlist 2. Move track* 3. 5 second song preview 4. Start playing the Playlist * a circle will indicate this item to be moved with the up/down buttons. Right button to cement item into new position. | ||
| 1 click: Return to previous screen. Long press: go to question screen "You would like to..." 1. Save current Playlist 2. Move track* 3. Hear preview 4. Start playing the Playlist 5. Clear Playlist * dual arrows will indicate this item to be moved with the up/down buttons. Mode button to cement item into new position | |||